
Have you ever needed a small piece of mirror for a picture frame, a shelf, or a DIY project, but didn’t want to spend extra money getting it custom-cut at a store? You’re not alone.
Buying pre-cut mirror glass can be expensive, especially if the size you need isn’t standard.
The good news is, you can cut mirror glass yourself at home – and it’s easier than you might think.
You don’t need fancy tools or special skills. With just a few simple items like a glass cutter, a ruler, some oil, and basic safety gear, you can get the job done.
Once you learn how to do it, you’ll save money and get the perfect fit for your project.
In this guide, I’ll walk you through the steps to cut mirror glass safely and neatly. It’s a great skill to have, whether you’re into crafts, home repairs, or just like working on little projects.
Let’s learn how to do it the easy way!
Is It Safe to Cut Mirror Glass?
It’s totally normal to wonder if cutting mirror glass is safe. The good news is – yes, it can be safe if you take a few simple steps.
Like with any glass, the edges can be sharp, so it’s important to be careful and wear gloves and safety glasses. These protect your hands and eyes just in case something chips or breaks.
You should also work on a flat, soft surface, like cardboard or a thick towel. That helps prevent cracks.
Go slow, follow each step, and don’t rush. If a piece breaks, wrap it up in paper before throwing it away. As long as you’re being smart about it, cutting mirror glass isn’t as scary as it sounds.
With the right tools and a little patience, you’ll be just fine-and maybe even surprised at how easy it really is.
What You’ll Need
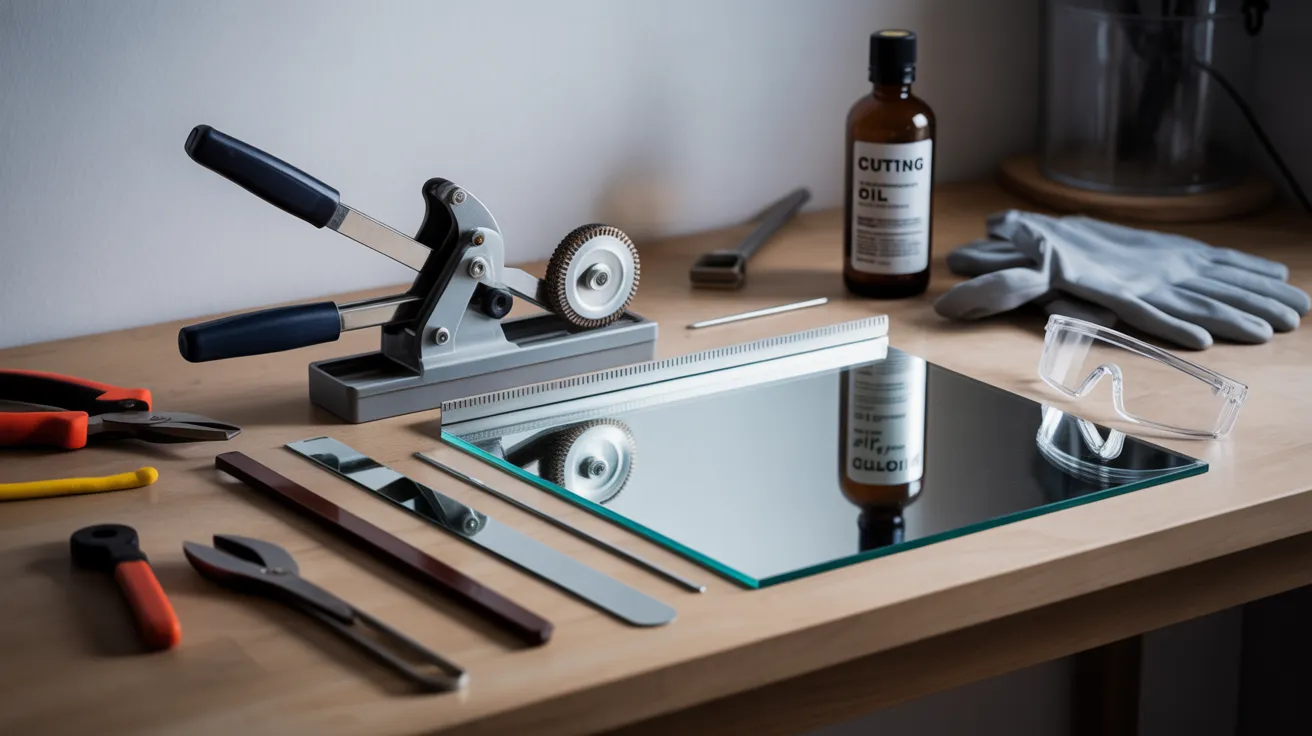
Here are the tools and supplies you need before you start:
- A glass cutter (with a small round wheel-carbide works best)
- A straightedge like a ruler
- A few drops of cutting oil (or olive oil works too)
- Safety gloves and safety glasses
- Pliers
- A metal file or sandpaper (for smoothing sharp edges)
How to Cut a Mirror Glass: Step-by-Step Process
Ready to cut your mirror? Just follow these simple steps. Take your time, go slow, and be careful.
Step 1: Get the Mirror and Tools Ready

Before you start cutting, it’s important to prepare everything. Clean your mirror to remove any dirt or dust.
A clean surface helps your cutter move smoothly and makes the score line more accurate. Then, put a few drops of cutting oil where you plan to cut.
This oil helps the cutter glide better and prevents chipping. Also, add a little oil to the small wheel on your glass cutter.
This keeps it moving easily. Taking a few minutes to prep will make the cutting process much smoother and give you better results.
Step 2: Score the Mirror
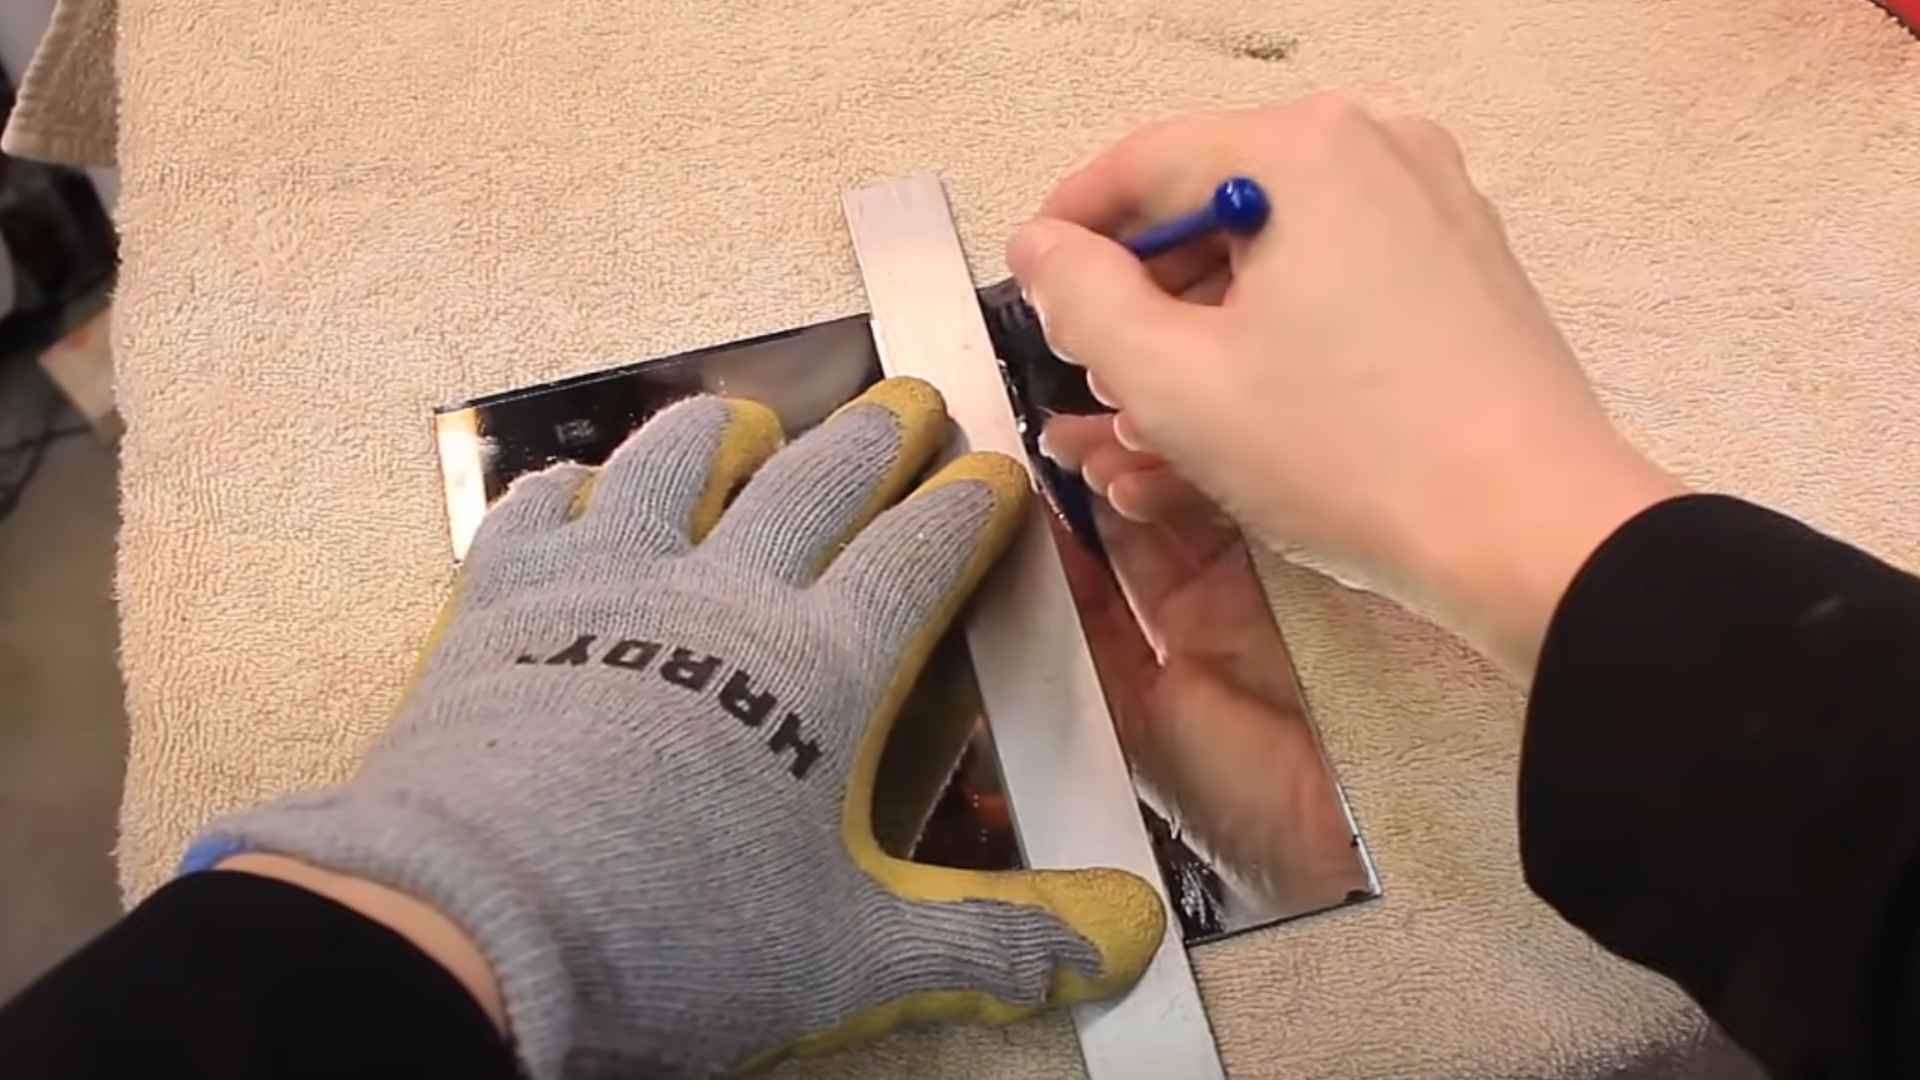
Now that your mirror is clean and oiled, it’s time to score. Place a straightedge (like a metal ruler) where you want to make the cut.
Hold it firmly in place so it doesn’t move. With your other hand, press the glass cutter down firmly and slide it across the mirror in one smooth motion.
You should hear a light “zip” sound as the blade rolls. That means it’s working. Be sure to score the line just once.
Going over the same line again can cause cracks or uneven breaks. One clean score is all you need!
Step 3: Check Your Score Line
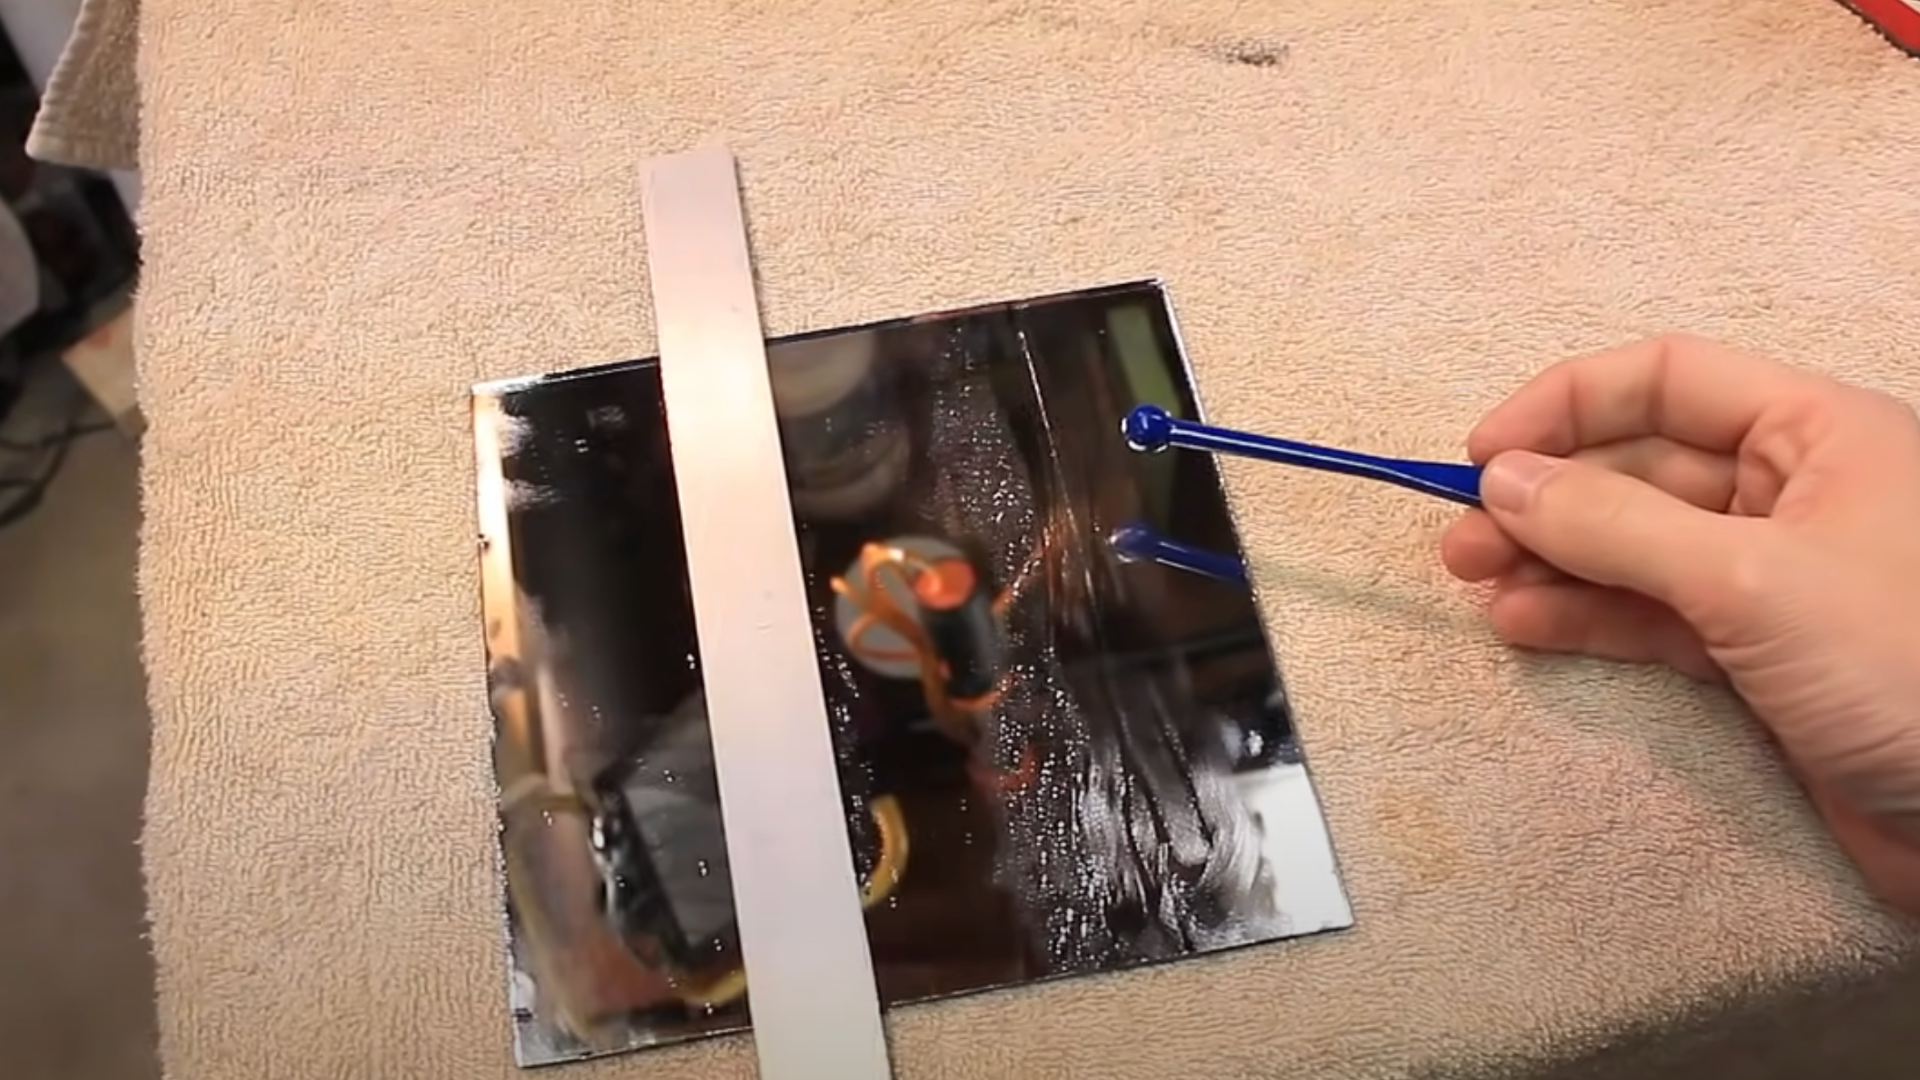
After scoring, take a close look at the line. It should be light but easy to see.
The score should run all the way from one edge to the other. If you missed a little spot at the start or end, it’s okay to go back and gently finish just that section.
But don’t go over the whole line again. You want the score to stay clean and even. A good score line tells the mirror exactly where to break when you apply pressure.
Double-check it before moving on to the next step.
Step 4: Tap the Back of the Mirror
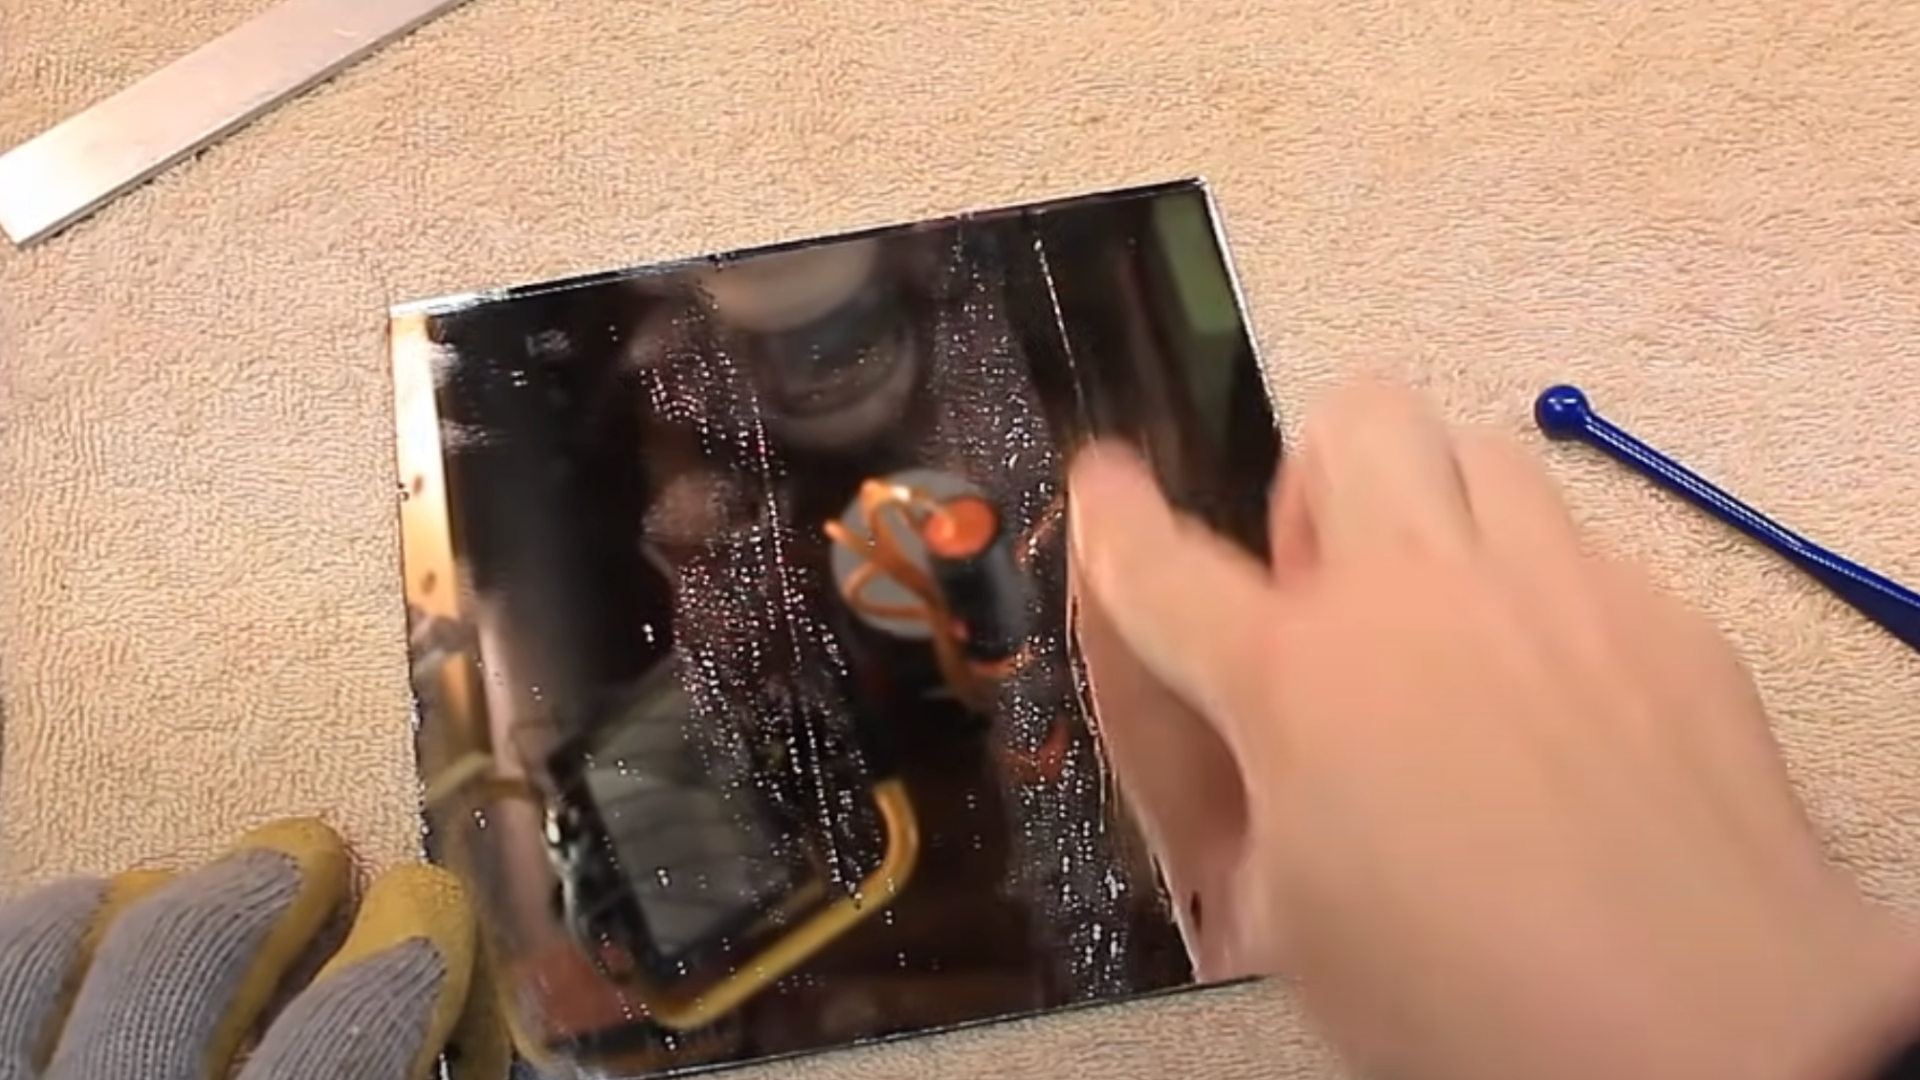
Next, flip the mirror over so the back side is facing up. Gently tap along the back of the score line using the handle of your cutter or another small tool.
This helps “tell” the mirror where to split. You don’t need to hit it hard- just light taps are enough.
Start near one end of the line and work your way across. This makes the break cleaner and helps prevent little chips or cracks from forming in the wrong place.
It’s a simple trick that makes a big difference in the final result.
Step 5: Snap the Mirror
Now it’s time to snap the mirror. Carefully line up the scored line with the edge of a table or workbench.
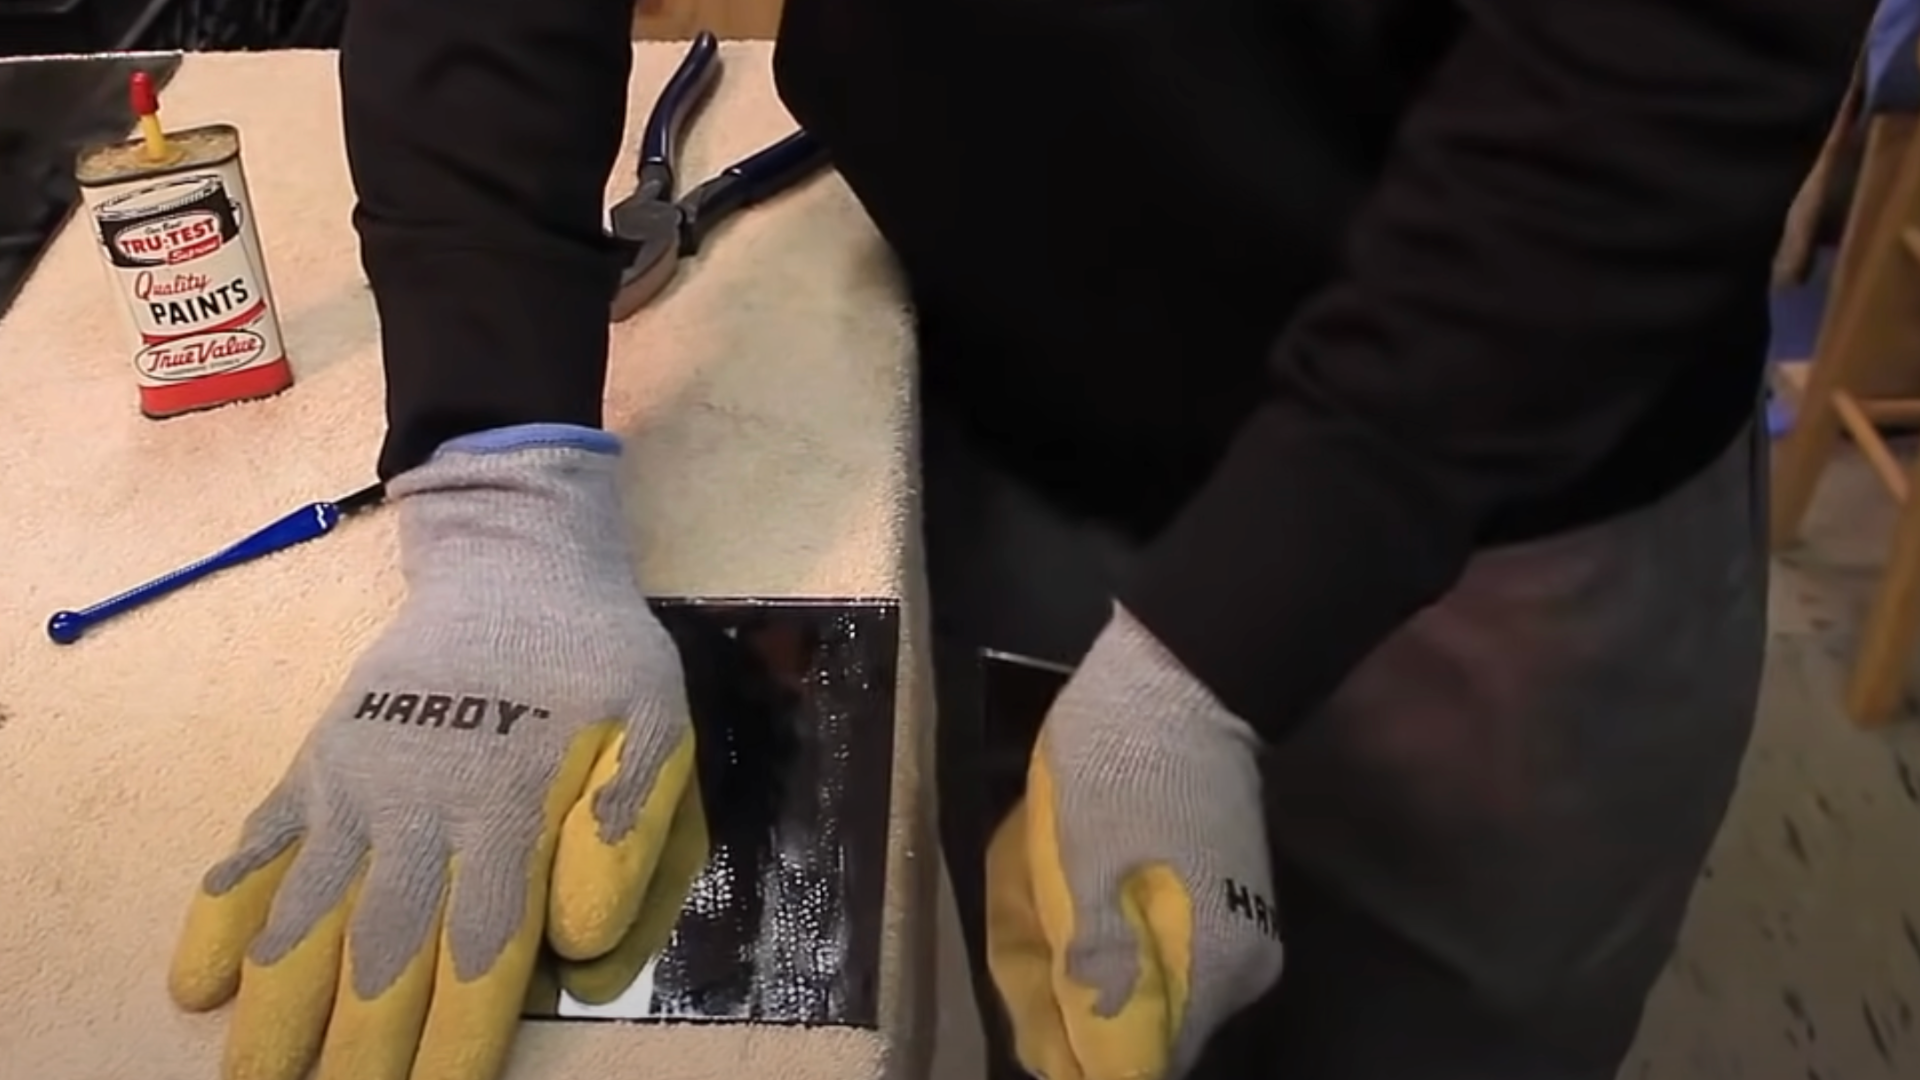
Put on your gloves and safety glasses to protect your hands and eyes. Hold the mirror with both hands-one on each side of the line.
Press down gently and evenly on the part you want to break off. Add a little pressure at a time.
If everything was done right, the mirror should break cleanly along the score line. Don’t rush- take it slow, and it should snap just like you planned.
Step 6: Smooth the Sharp Edges
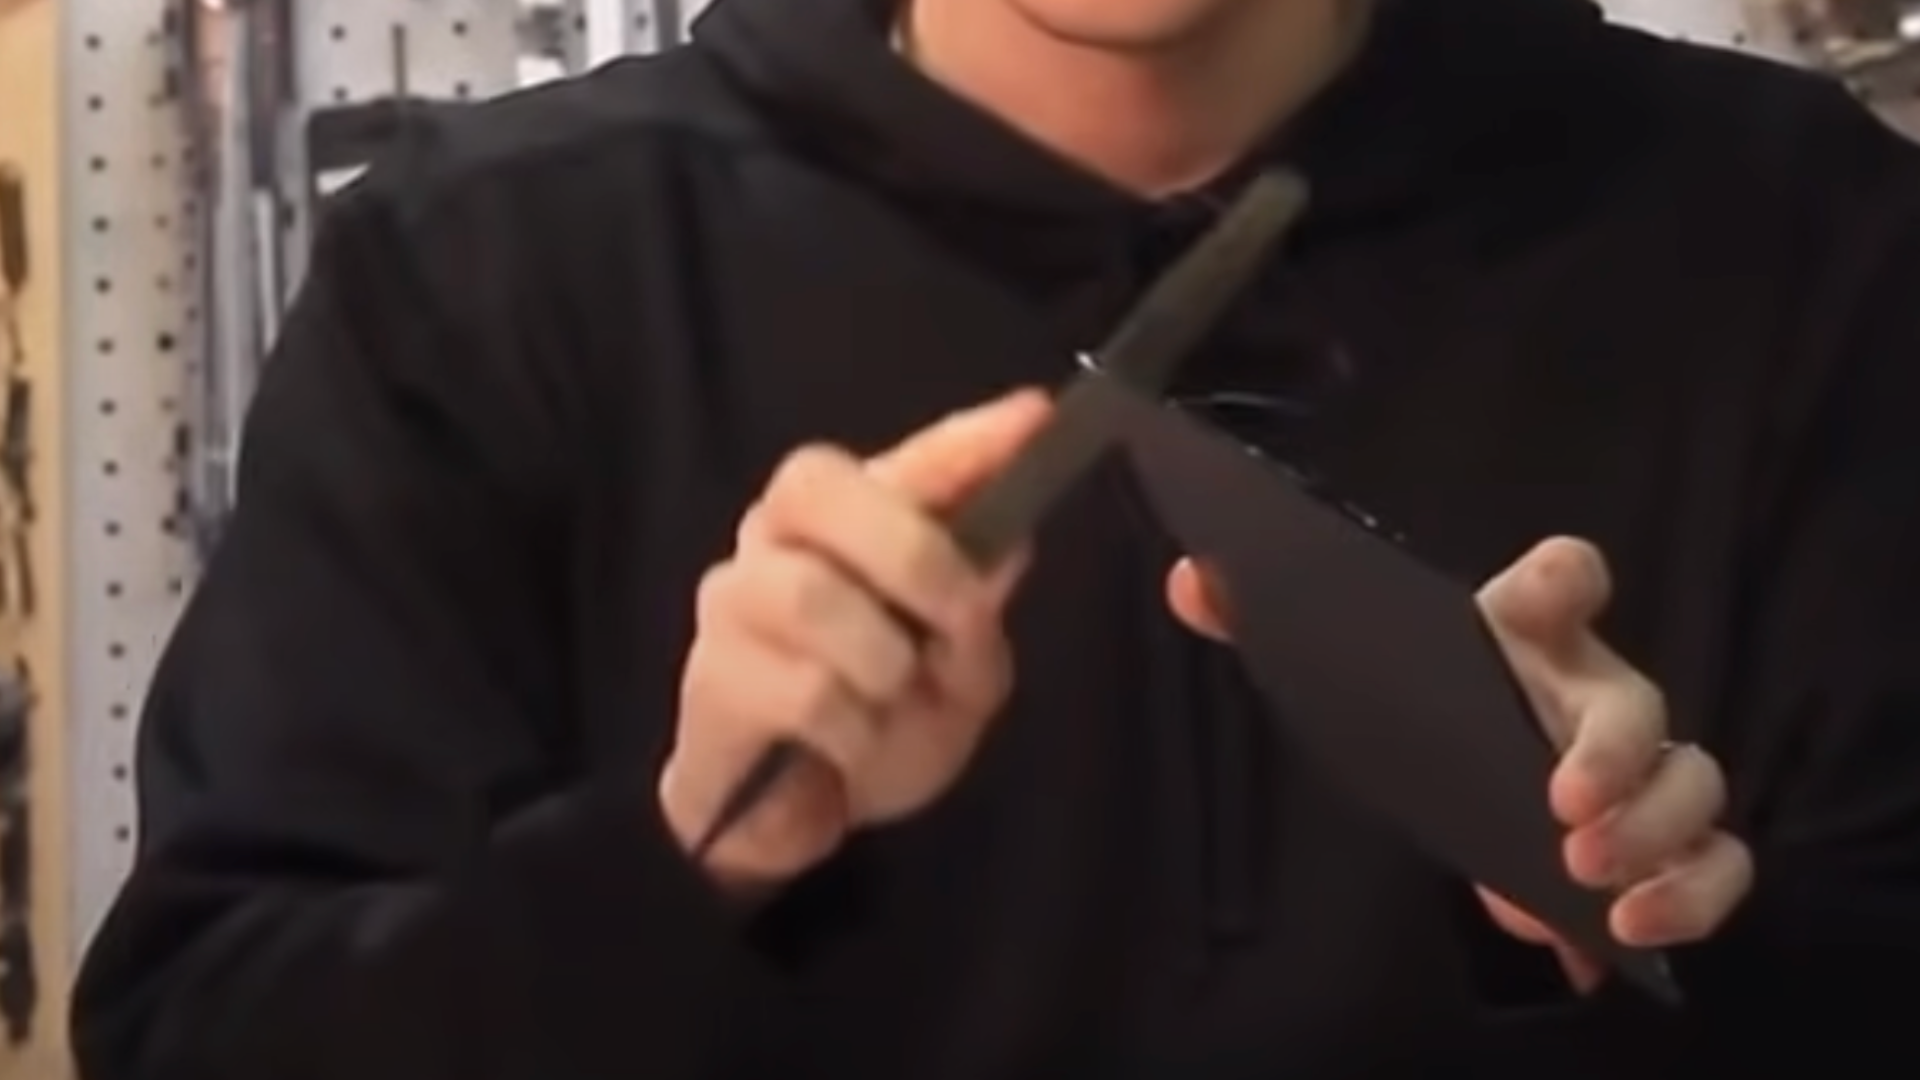
After you’ve snapped your mirror, the edges will be sharp. To make it safe to handle, smooth the edges with sandpaper, a nail file, or a metal file.
Lightly rub along each edge until it feels smooth. You don’t need to press hard- just a gentle motion works.
Also, don’t forget to round the corners if they feel pointy. This step keeps you and others safe from accidental cuts.
Plus, it gives your mirror a nice, clean finish. Once it feels smooth to the touch, you’re done and ready to use your new piece of mirror!
Want to see how it’s done in real time? Watch this helpful video by @DaveWirth on YouTube to follow along with the steps and get a better idea of what each part looks like.
Safety Tips for Cutting Mirror Glass
Before you begin, safety should always come first. A few things to keep in mind so you stay safe while working:
- Wear safety glasses to protect your eyes from tiny glass pieces.
- Use gloves to keep your hands safe from sharp edges.
- Work on a flat, soft surface like a cutting mat or thick cardboard to avoid cracks.
- Score only once. Going over the line again can cause the glass to shatter unevenly.
- Keep kids and pets away from the workspace-just in case something breaks.
- Throw away scraps carefully. Wrap leftover pieces in newspaper or cardboard so no one gets cut.
- Go slow. Rushing can lead to mistakes and accidents.
Conclusion
Cutting mirror glass at home might sound scary at first, but as you’ve seen, it’s really not that hard.
With a few simple tools, a clean surface, and a little patience, you can do it yourself and save money too.
The steps are easy to follow-just prep your tools, score the mirror once, tap gently, and snap it carefully. Don’t forget to smooth the edges at the end so it’s safe to handle.
This is a great skill to learn, especially if you enjoy DIY projects, home repairs, or crafts. It gives you more freedom to work with mirrors in any size you need.
I didn’t expect it to be so doable the first time, but it was. Plus, it feels good being able to say, “I did that myself!”
Just remember to go slow, stay safe, and double-check your work as you go. Once you try it once, you’ll feel more confident doing it again in the future.