
Standing in an empty booth space—heart racing a bit—can feel both thrilling and nerve-wracking. Whether it’s your first time or your fiftieth, that blank canvas holds so much possibility. But here’s the truth: creating a booth that actually sells doesn’t require huge budgets or fancy fixtures. It’s about smart setup choices, clear pricing, and making shoppers feel welcome.
In this guide, you’ll find practical setup ideas that real sellers use to boost their sales. We’ll cover must-have display items and simple tweaks that can turn browsers into buyers.
I’ve tested these methods in my own booths and watched others use them successfully for years. These tips work because they focus on what matters most—helping customers find treasures they’ll love while making your business more profitable.
Creative Antique Booth Setup Ideas You’ll Love
Finding the right display style for your antique booth can transform your sales. These creative setup ideas blend practicality with visual appeal to help your items catch shoppers’ eyes. Try one or combine elements from several to create a booth that showcases your unique finds:
1. Vintage Market Stall Vibes
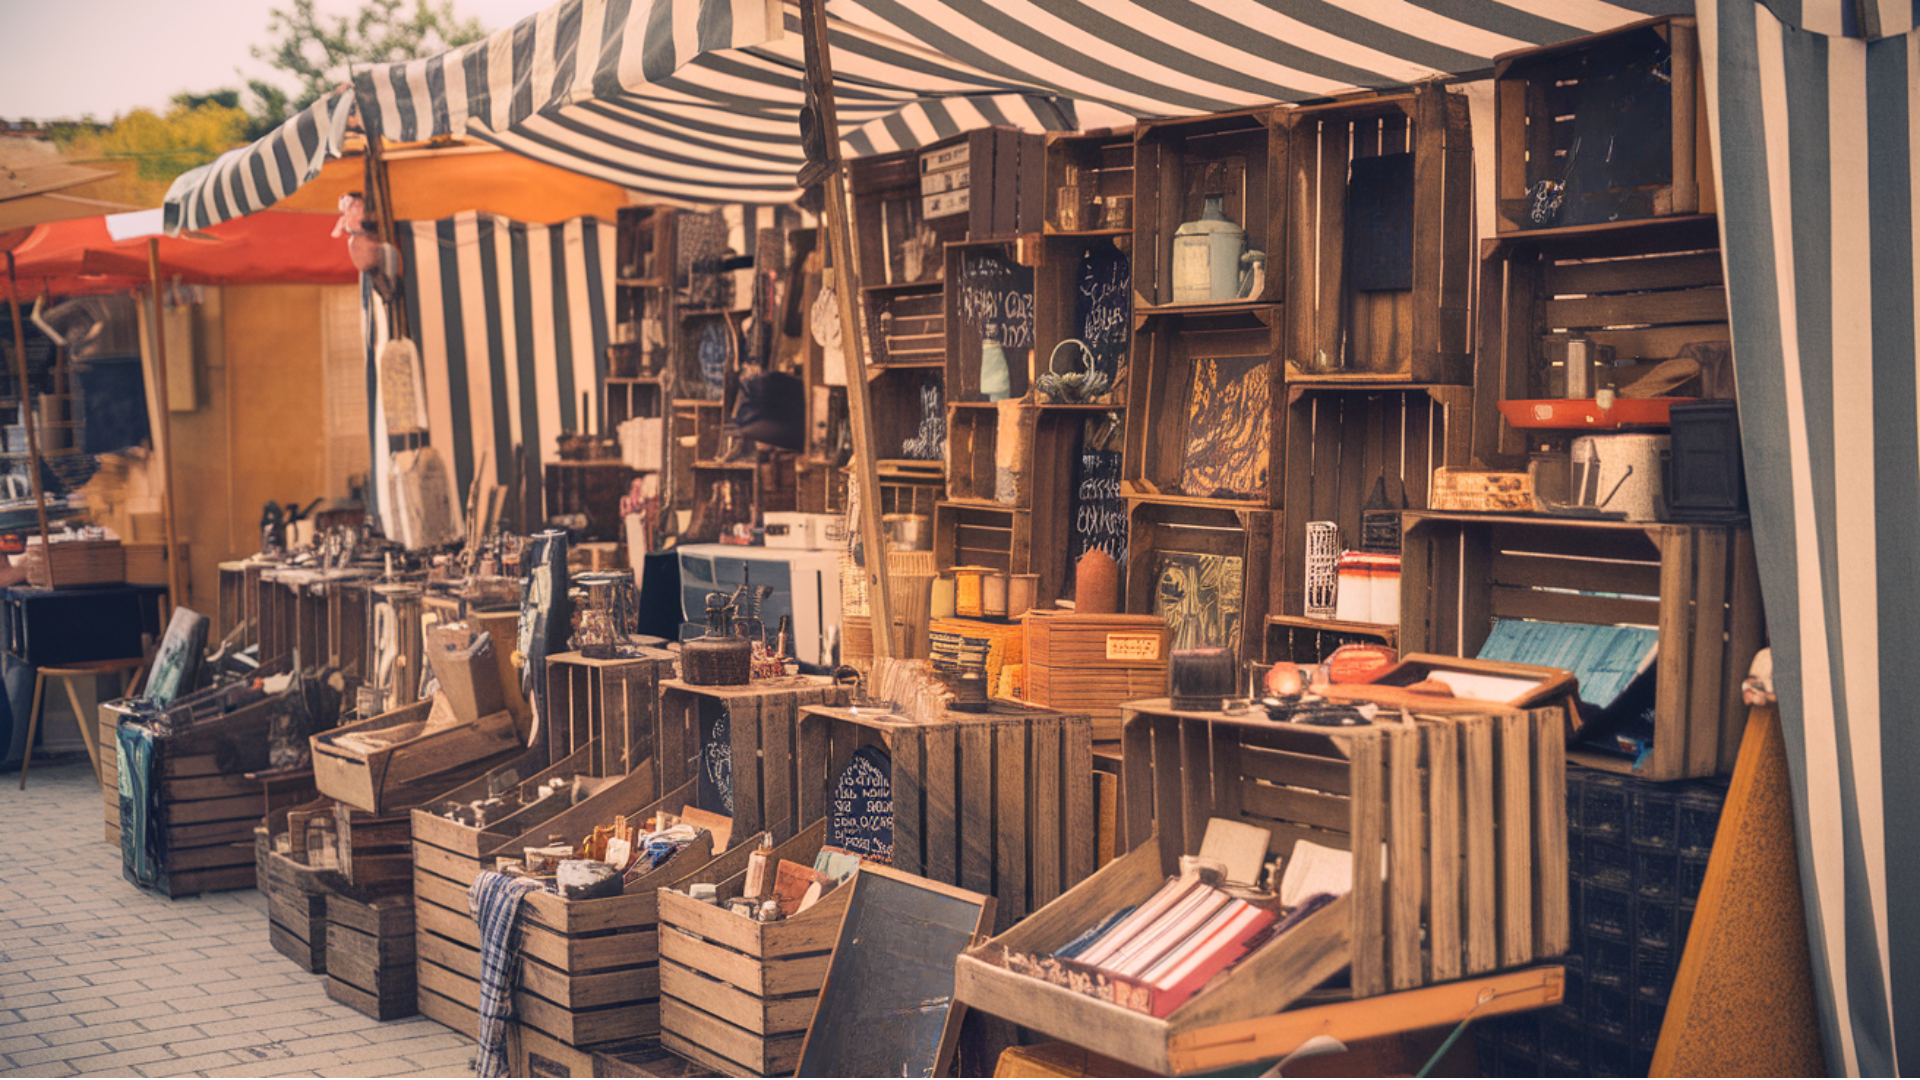
I love setting up booths that feel like old-time market stalls. This style uses wooden crates stacked at different heights, chalkboard signs with hand-lettered prices, and items grouped by type rather than era. The casual, slightly uneven look makes shoppers feel like they’re hunting for treasures at a street market.
Unique features: Awning or canopy top, wooden produce crates as shelving, items spilling slightly out of containers, casual but clean layout, and handwritten signs with simple frames.
2. Rustic Barnwood Backdrop
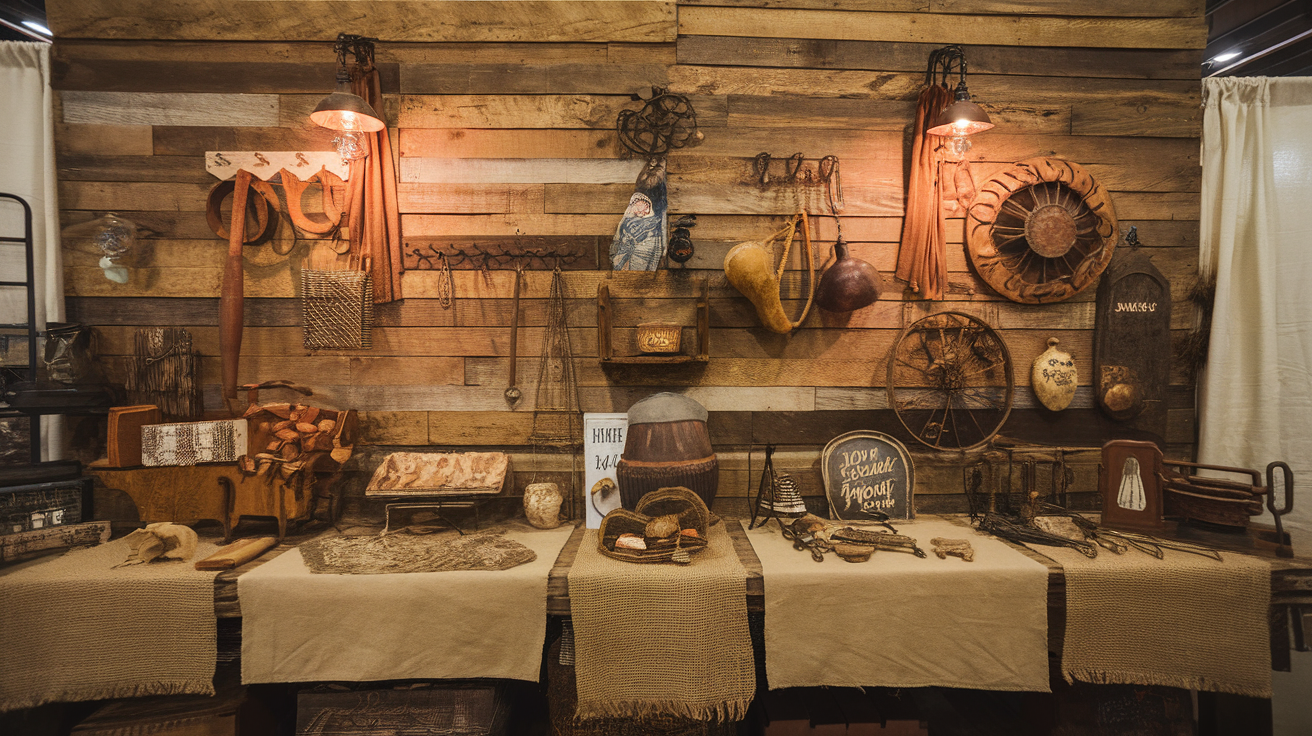
One of my most successful booth designs uses weathered barn wood as wall backing. This country-style setup works wonderfully for displaying anything with a rural or worn feel. The natural textures of the wood make even simple items look more authentic and valuable.
Unique features: Reclaimed wood wall panels, iron hooks for hanging items, burlap accents, warm lighting, and a neutral earth-tone color scheme that makes colorful items pop.
3. French Flea Market Theme
This booth style focuses on a lighter, brighter feel with white furniture and hints of soft blue and gold. I’ve found this works perfectly for displaying linens, china, and smaller collectibles. The clean look helps fancy items appear more valuable.
Unique features: Distressed white furniture pieces, blue and cream color palette, toile fabric accents, wire baskets, bistro-style signage, and subtle gold touches.
4. Industrial Chic Display
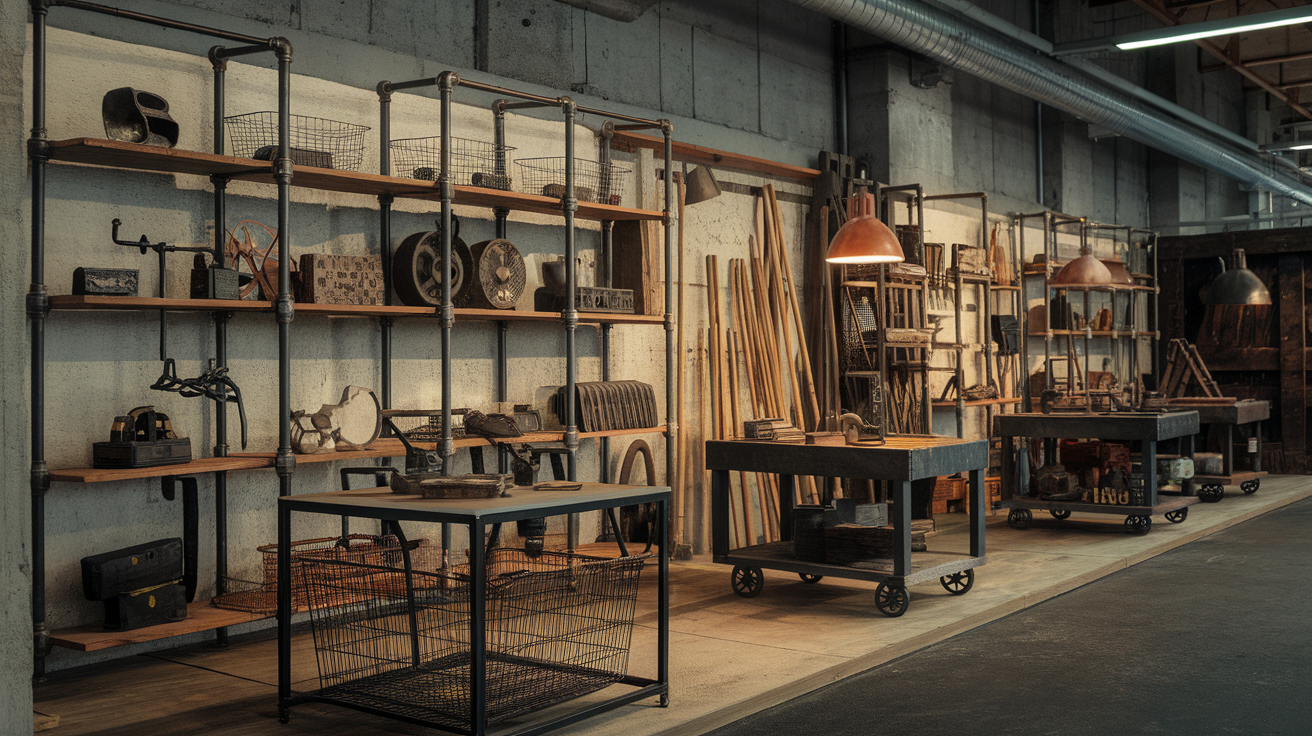
Metal shelving, pipe fittings, and raw materials create a workshop feel that’s perfect for tools, mechanical items, and sturdy furniture. My industrial booth gets lots of male shoppers who normally walk past other styles. The strong lines and no-nonsense layout appeal to folks looking for functional pieces.
Unique features: Metal pipe shelving, factory carts as display tables, exposed hardware, wire baskets, concrete or metal accents, and task lighting.
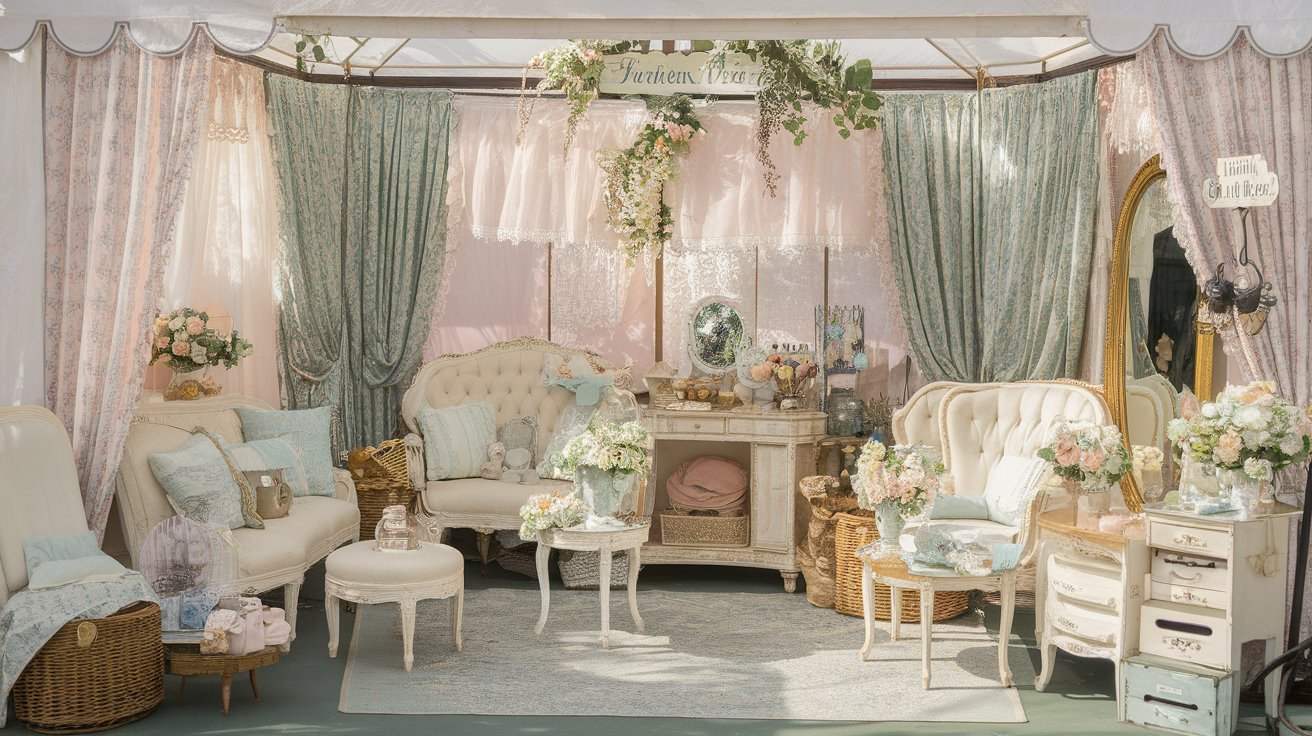
5. Romantic Shabby Chic Booth
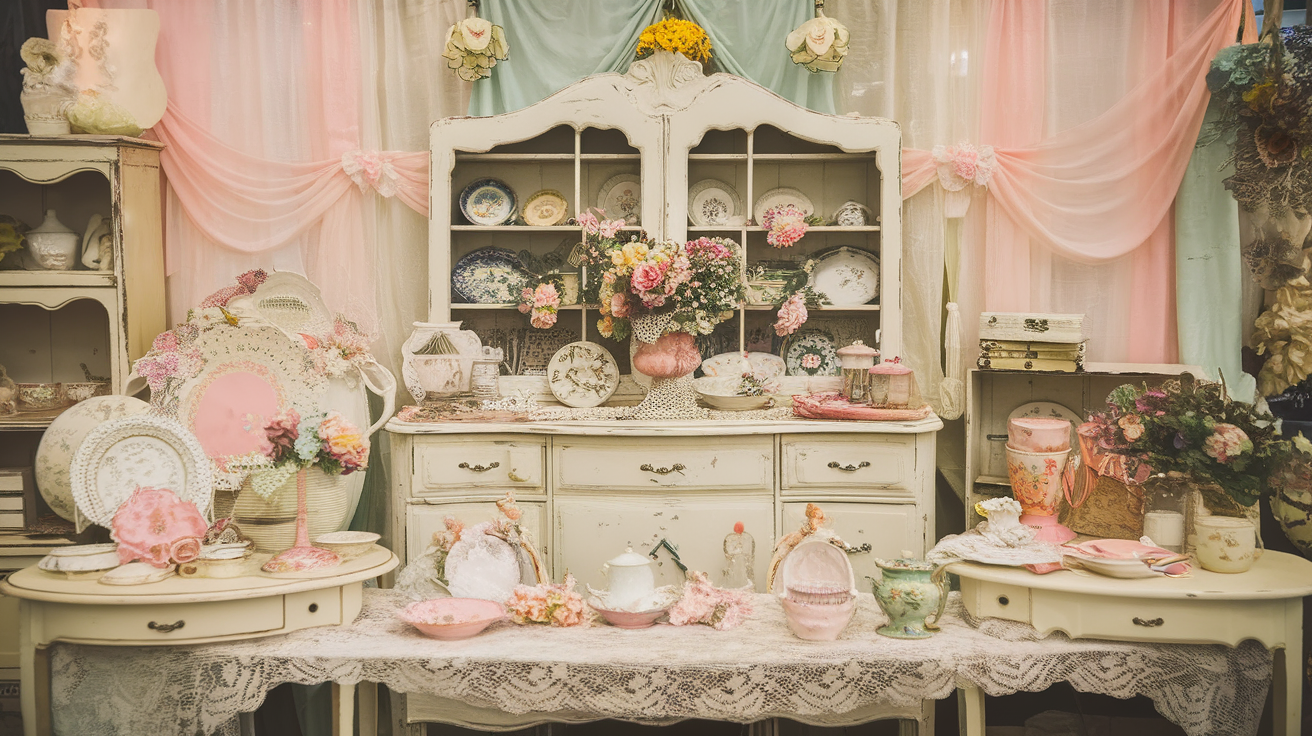
Soft colors, lace touches, and painted furniture pieces create a feminine, cottage-style booth. This style sells well for bedroom items, china, and decorative pieces. I use lots of white with touches of pink, mint, and light blue to create a dreamy feel.
Unique features: Painted white furniture, chippy painted finishes, floral fabrics, lace details, crystal or glass knobs as accents, and pastel color scheme.
6. Eclectic Color-Pop Corner
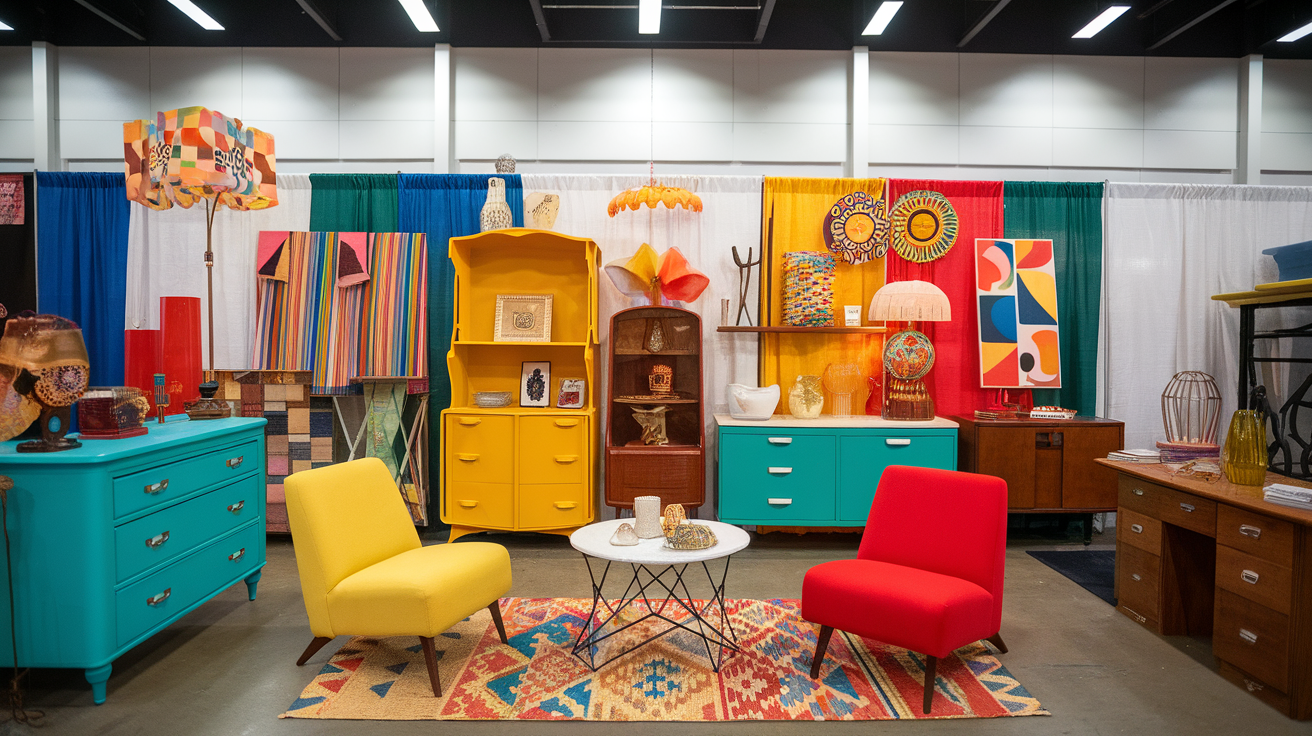
This bold setup uses strong colors like turquoise, yellow, and red to attract attention. I’ve found this style works best for mid-century items, folk art, and anything with strong graphic appeal. The bright colors pull shoppers in from across the room.
Unique features: Bold painted furniture pieces, colorful cloth backdrops, grouped items by color rather than type, geometric patterns, and statement lighting.
7. Minimalist Neutral-Tone Setup
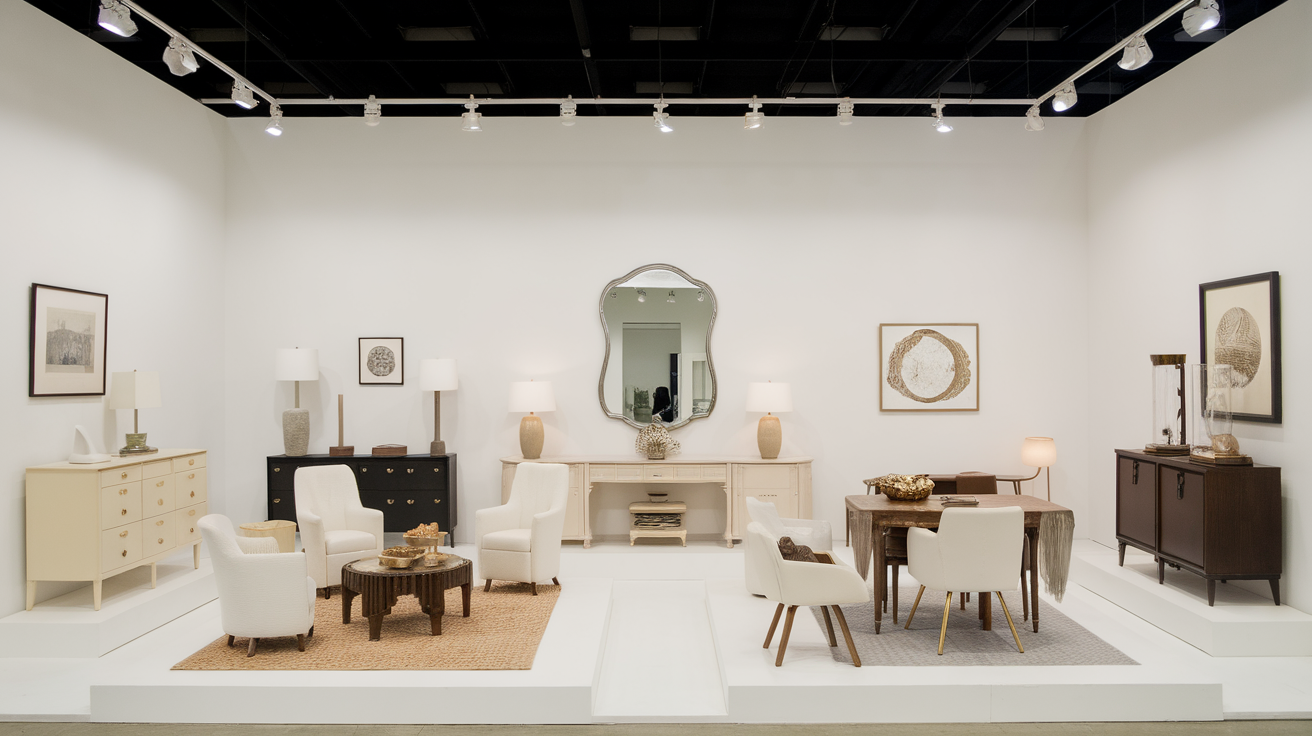
Clean lines, lots of white space, and a strict neutral palette make each item stand out as special. This style works wonderfully for higher-end items that need breathing room. I limit this booth to fewer pieces but make sure each one is top quality.
Unique features: Limited color palette of white, cream, black, and natural wood, plenty of empty space between items, simple block-style shelving, gallery-style item arrangement, and spotlighting on special pieces.
8. Garden-Inspired Booth with Florals
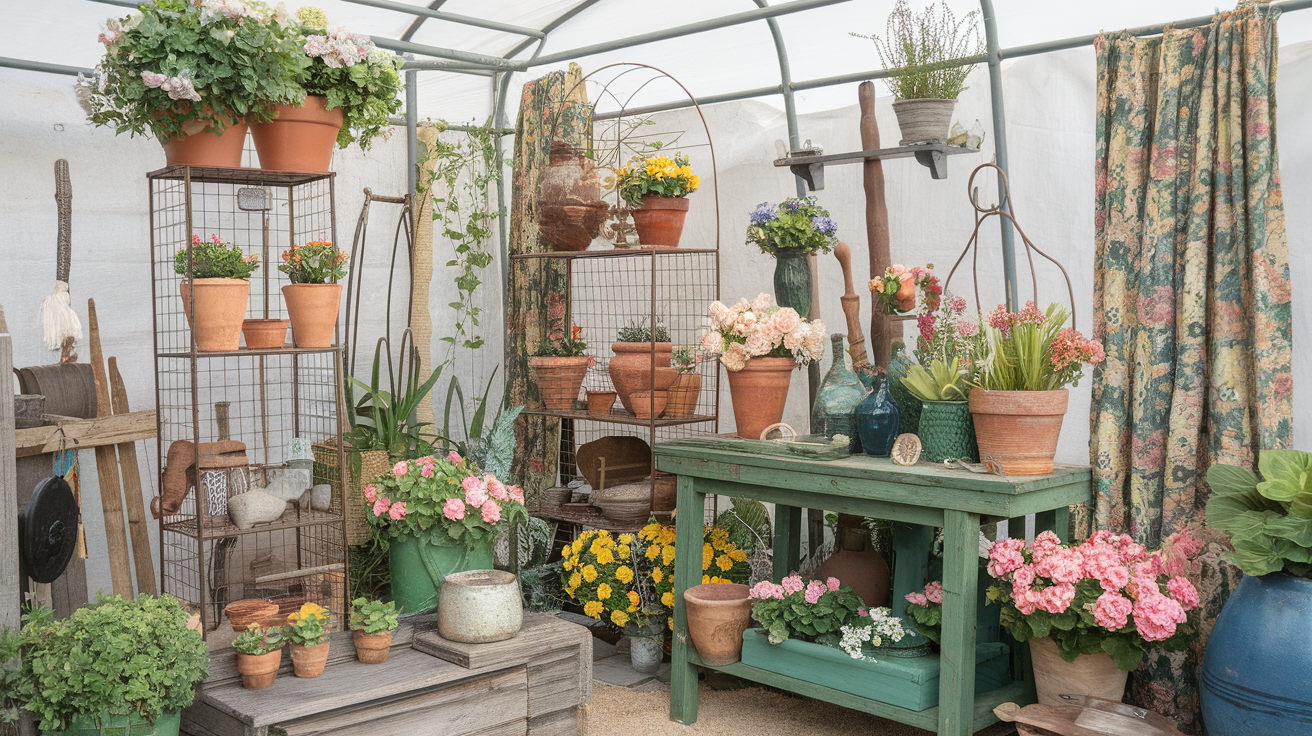
Outdoor and garden items get a boost when displayed in a booth that feels like a potting shed or garden room. I use actual plants (real or good fakes) to bring life to the space. This setup sells well in spring and summer.
Unique features: Terra cotta pots, plant stands used as display pieces, green accents, outdoor furniture, wire garden tables, and small touches of floral fabrics.
9. Seasonal Holiday-Themed Setup
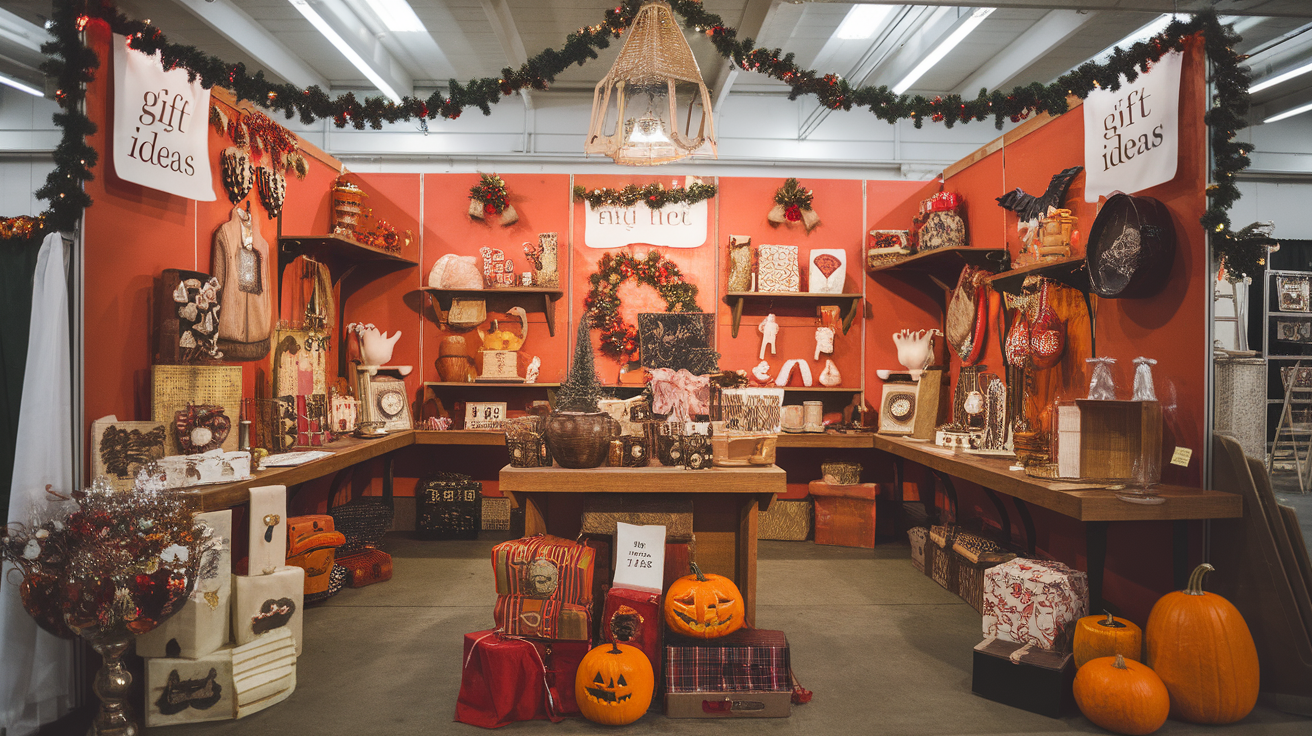
Changing part of your booth to match upcoming holidays keeps regular customers coming back to see what’s new. I switch out about 30% of my booth for each major holiday, bringing in related items and using themed display pieces.
Unique features: Holiday-specific color schemes, themed groupings of items, special signage for gift ideas, nostalgic holiday decorations as display props, and tiered pricing for different gift budgets.
10. Boutique-Style Layered Vignettes
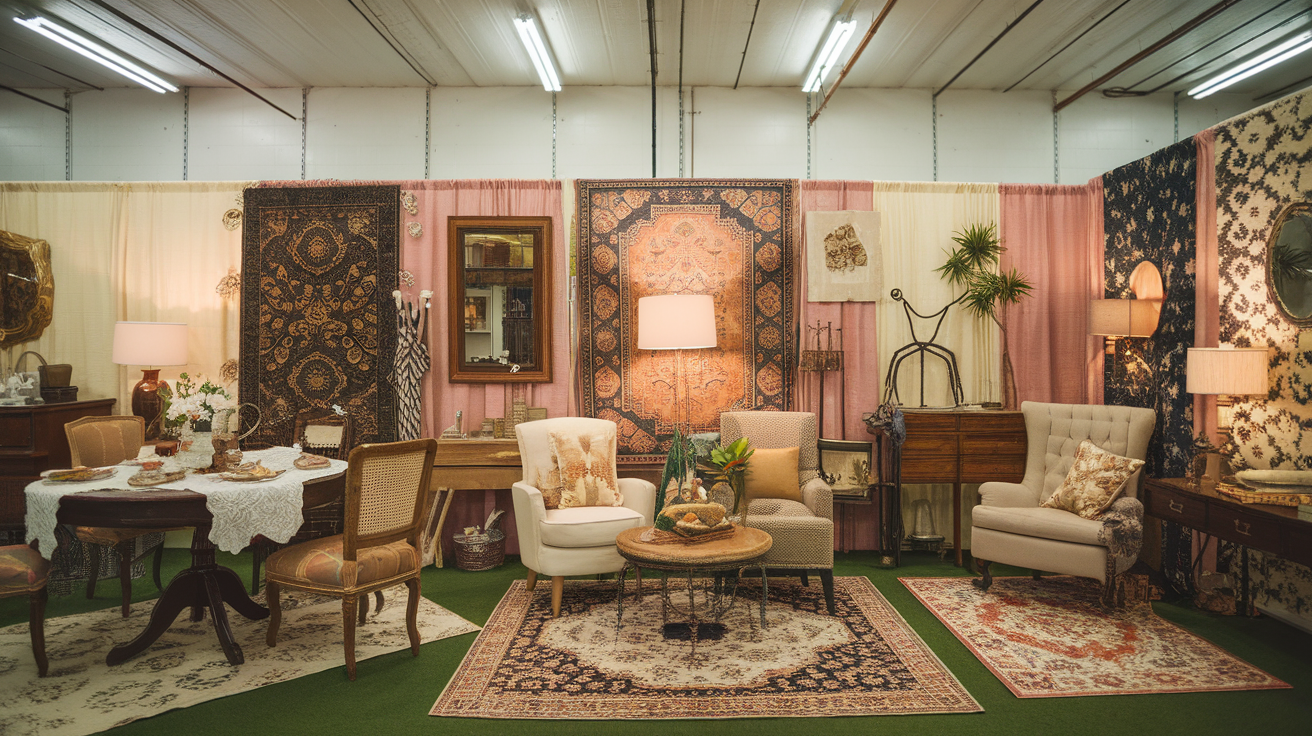
Setting up small “rooms” or vignettes shows shoppers how items might look in their homes. I create little scenes—a dining table set for tea, a reading nook, or a vanity setup. This style helps people picture the items in their own spaces.
Unique features: Room-like setups, layered items (background, middle, and foreground), items grouped by use rather than type, small rugs to define spaces, and wall sections to create room-like backdrops.
Must-Have Items for Your Antique Booth Setup
Setting up an antique booth requires careful planning and the right equipment to showcase your items effectively. These essential tools will help create an inviting space that turns browsers into buyers. These are the must-have items every booth owner should consider:
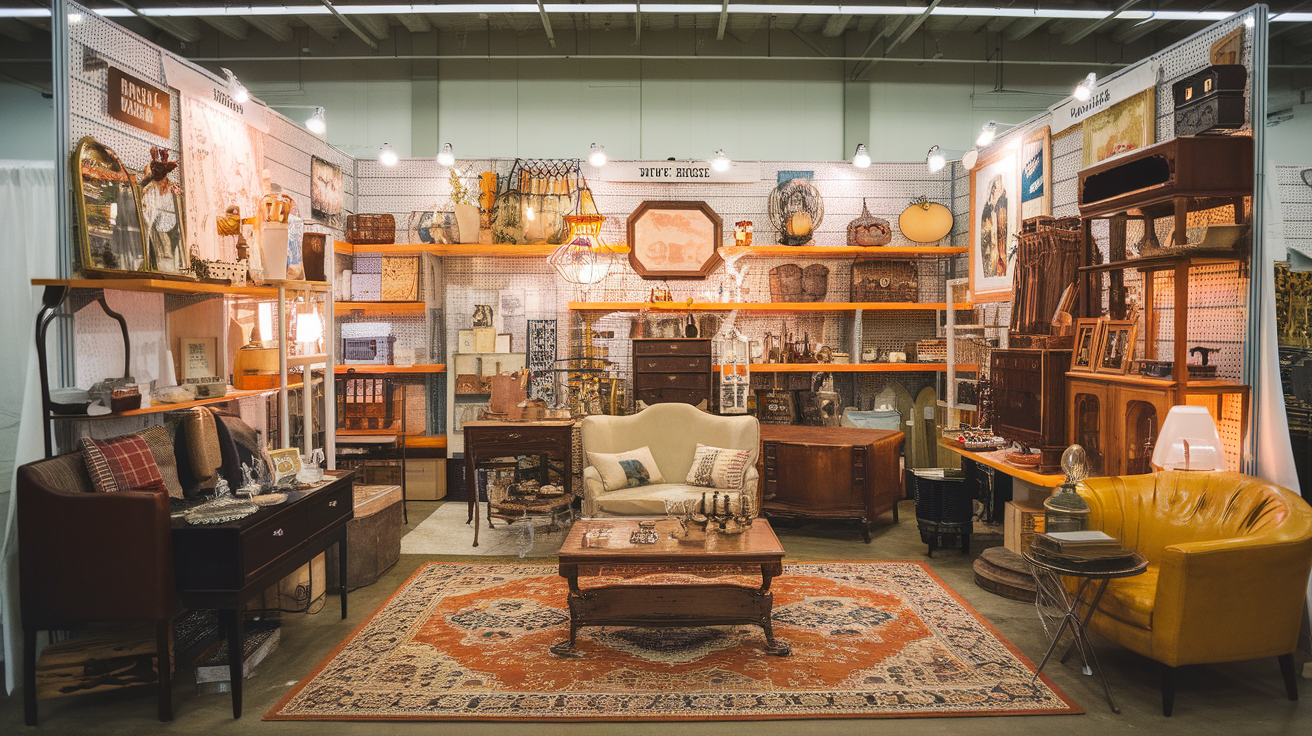
1. Shelving and Risers
I never set up a booth without proper shelving and risers. You need these basics to use every inch of your space wisely. Short items get lost on flat tables, but risers help them stand out. Wooden crates, small boxes, and actual shelving units all work well.
Notice how items at different heights catch your eye more easily? This simple trick makes shoppers slow down and look at everything. When your items sit at the same level, people tend to scan quickly and miss the good stuff.
Try placing your most profitable items at eye level where they’ll get the most attention. Lower shelves work well for bigger, heavier pieces that customers don’t mind bending to see.
2. Reliable Lighting
Poor lighting kills sales faster than high prices. I learned this the hard way when customers walked right past my darkest corner. You need good lighting that shows true colors and details.
Battery-powered spotlights work well in spots without electricity. Clamp lights can highlight special pieces. String lights add a warm feel that makes folks stay longer.
The right lighting can make even basic items look valuable. It helps shoppers see details like signatures, marks, and true condition. Never rely only on the venue’s overhead lights—they’re rarely enough.
3. Price Tags and Labels
Clear, easy-to-read price tags save you time and make more sales. When customers have to ask about prices, many just move on instead. I use white tags with black writing that’s big enough to read from a few feet away.
Waterproof tags prevent smudging if your space gets damp. Consider small details like using string instead of tape for delicate items.
Make sure your tags include any important details that help sell the item—age, maker, or unique features. Shoppers appreciate not having to guess what makes something special.
4. Table Coverings
Plain, clean tablecloths in neutral colors let your items be the stars. I stick with cream, tan, black, or navy coverings that reach the floor. Floor-length cloths give you hidden storage space underneath.
Wrinkled or stained coverings make your whole booth look uncared for. Take time to press them or use fabrics that resist wrinkling.
The background you choose affects how your items look. Light coverings make dark items pop, while darker clothes help bright or white pieces stand out.
5. Basic Tools and Extra Supplies
You’ll need a small toolkit for unexpected fixes and changes. Mine includes scissors, tape, zip ties, a small hammer, picture hanging wire, and safety pins.
When a display breaks or a tag falls off, having supplies on hand means quick solutions instead of lost sales. I keep everything in a small bag tucked under a table.
Being prepared saves you stress during busy times. Nothing’s worse than watching customers walk away because you couldn’t make a simple fix.
6. Storage Bins or Drawers
Keep extra stock, supplies, and empty containers hidden but handy. Clear plastic bins stack neatly and let you see what’s inside. I use mine for backup stock and seasonal items; I rotate in and out.
Having storage space means you can quickly replace sold items with fresh ones. Empty spaces look sad and can make customers think you’re going out of business.
Drawers work well for small parts, extra price tags, and tools you need to access quickly. A well-stocked booth that stays full all month will outperform one that looks picked over after the first weekend.
What Are the Best Tips for Setting up An Antique Booth?
Looking to make your antique booth stand out and boost your sales? The right setup can make all the difference between items that sit and items that sell. Here are proven tips that successful vendors use to create profitable displays:
1. Know Your Audience
I’ve set up booths in small rural towns and big city markets, and the difference in what sells is striking. You need to study who shops at your specific market. Watch what they pick up, what they buy, and what they ignore.
If you’re in a farm town, rustic items and practical vintage tools might sell quickly. In a college town, mid-century furniture and quirky decor could be your best sellers. Match your stock to what local people actually want to buy.
This doesn’t mean you can’t stock what you love—just be smart about how much space you give to different types of items. I track my sales carefully and adjust what I bring based on what’s moving in that location.
2. Don’t Overcrowd
When I first started selling, I packed my booth with everything I could fit. Big mistake! Shoppers got overwhelmed and walked away. Now I leave breathing room around special pieces.
Empty space isn’t wasted—it’s necessary. It helps important items stand out and makes your booth feel more like a carefully curated shop than a jumbled storage unit.
Try this test: stand at the entrance of your booth and see what catches your eye first. If nothing stands out because it’s too packed, you need to remove some items. Quality beats quantity when it comes to making sales.
3. Make It Personal
A simple handwritten note can turn a basic item into something special. I include little cards with quick stories about interesting pieces—where I found them, what they were used for, or who might have owned them.
Personal touches help shoppers connect with items. They’re not just buying stuff; they’re buying stories and feelings.
Your unique voice is what makes your booth different from big-box stores. Don’t be afraid to show some personality in your signage and displays. Customers remember booths that make them smile or teach them something new.
4. Watch and Learn from Others
Some of my best ideas came from other sellers. I keep a photo album on my phone of display ideas that caught my eye. When I need fresh setup ideas, I flip through these pictures for inspiration.
Pay attention to booths that always have customers. What are they doing right? It might be their lighting, their layout, or how they group similar items together.
You don’t need to copy exactly—just borrow concepts that work. I’ve learned clever ways to hang items, create eye-catching groupings, and use color to draw attention, all from watching successful sellers.
5. Be Present but Not Pushy
Finding the right balance with customers takes practice. I greet everyone who enters my booth with a quick hello, then step back and let them look around. Nobody likes feeling watched or pressured while shopping.
If someone picks up an item or looks interested, that’s when I might offer a bit of information or mention a special deal. Otherwise, I stay busy straightening displays or restocking.
Your attitude affects sales more than you might think. Shoppers stay longer in booths where they feel comfortable. Being helpful but not hovering is a skill worth developing if you want repeat customers.
Conclusion
Setting up your antique booth doesn’t need to be perfect from day one. I’ve changed my displays dozens of times and still find new ways to make them better. Start small, try new things, and adjust as you go.
The most profitable booths combine good looks with practical thinking. Think of your space as both a tiny store and a stage for your treasures. When items are easy to see, priced clearly, and displayed with care, they sell much faster.
Remember that your booth reflects your own style and eye for finds. The warmth and thought you put into your setup will show in your sales.
What works in your booth might surprise you! I’d love to hear which of these ideas helped you most or what clever display tricks you’ve found on your own. Share your thoughts in the comments below or tag us in photos of your booth on social media.
Your next great selling day might be just one small change away!