
When I moved into my first apartment, I didn’t have much wall art, but I did have a gorgeous Moroccan rug that felt too beautiful to walk on.
That’s when I realized rugs can do more than cover floors; they can become beautiful wall features.
Whether it’s a bold kilim, vintage Navajo piece, or a cozy wool rug, hanging it adds instant texture and personality.
You don’t need fancy tools or professional help, just the right method for your rug’s weight and value.
From no-sew hacks to secure, preservation-friendly styles, I’ll walk you through what works.
Want to give your rug the spotlight it deserves? Continue reading to find the method that best suits your rug and style.
Why Hang a Rug on the Wall?
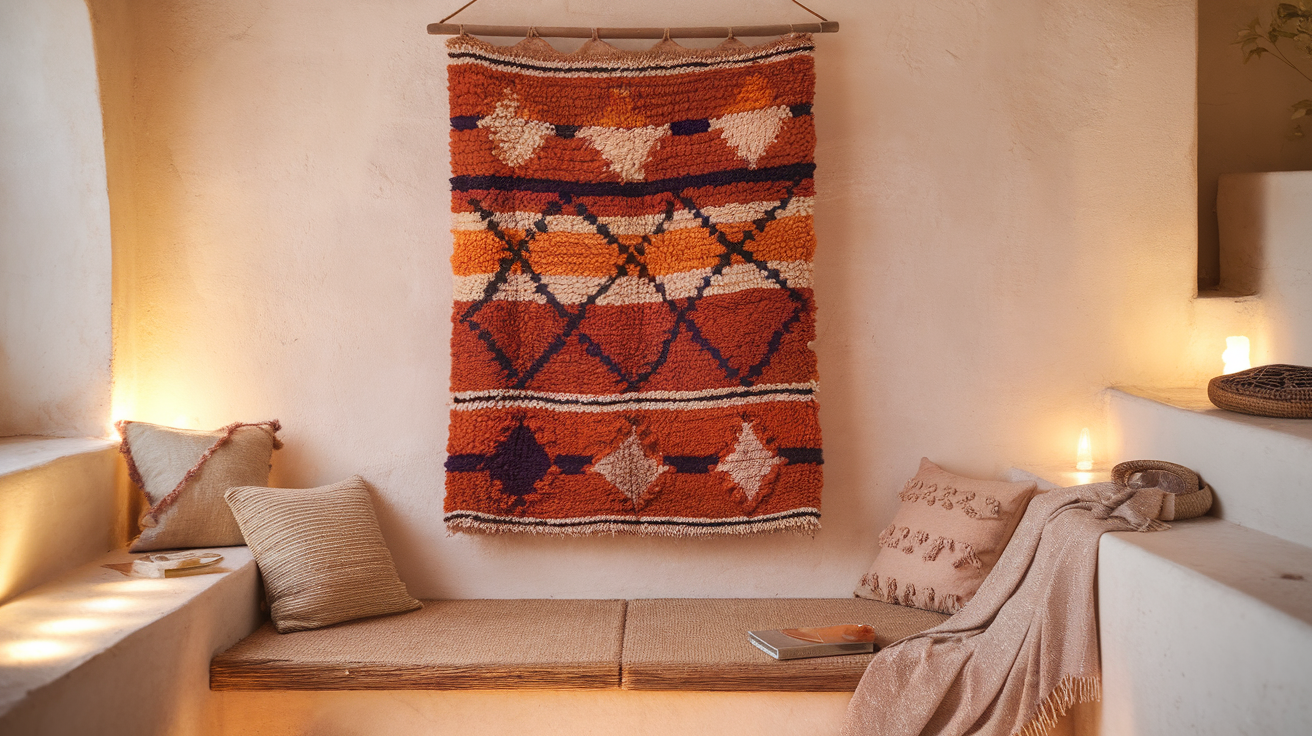
Hanging a rug on the wall isn’t just about filling empty space; it’s about changing your room with warmth, texture, and cultural beauty.
Rugs, especially handcrafted ones like Navajo weavings or Moroccan kilims, offer compelling patterns and rich colors.
And this instantly draws the eye and gives your walls more depth than paint or framed prints alone. They also serve a practical purpose.
In rooms with hard surfaces or high ceilings, a wall-mounted rug helps reduce echo and softens acoustics, making your space feel quieter and more comfortable.
In colder homes, a wool or thick-textured rug can even add a bit of insulation to exterior walls.
Most importantly, wall-hanging allows you to showcase rugs that are too delicate, vintage, or meaningful to be walked on.
It’s a respectful and stylish way to preserve craftsmanship while adding a cozy, collected, global touch to your home.
Prep Your Rug First
Before you hang any rug, a bit of prep work can make all the difference. These early steps protect your rug’s condition and ensure it hangs beautifully and safely for years to come.
1. Check the Weight and Fragility
Not all rugs are created equal. A dense wool Moroccan rug will require stronger hanging support than a lightweight flat-weave kilim.
If your rug is antique, loosely woven, or has delicate fringe, then consider using methods that evenly distribute weight.
I suggest you use materials like a sleeve or Velcro strip to prevent warping or tearing.
2. Clean the Rug Before Hanging
Rugs can trap dust, pet hair, and even smells, especially if they’ve been stored or used on the floor.
Vacuum gently using a low-suction attachment, or consider professional dry cleaning for vintage or delicate textiles.
Clean rugs not only look better but also help protect your walls and indoor air quality.
3. Avoid Direct Sunlight
Sun exposure is a silent rug killer. Even strong, colorfast dyes can fade with time under UV light.
Hang your rug on a wall that doesn’t get direct sun, or install UV-protective film on nearby windows.
For priceless or very old textiles, consider backing the rug with a sheer curtain or museum-grade acrylic panel.
4. Consider the Room Conditions
Moisture and fabric don’t mix, and dampness can lead to mold, mildew, and bad odors.
Avoid hanging rugs in bathrooms, damp basements, or anywhere with high humidity, as this can lead to mildew, fabric weakening, or dye bleeding.
Ideal rooms are dry, well-ventilated, and temperature-controlled, like living rooms, bedrooms, or hallways.
How to Display a Rug on the Wall?
Want to showcase a special rug as wall art?
These steps will walk you through the exact process to hang a rug securely and stylishly, using fabric sleeves, a dowel, and minimal tools.
It’s beginner-friendly and ideal for preserving both the look and longevity of your rug.
Materials You’ll Need
Before you start hanging your rug, gather all the right tools. Having the right materials on hand ensures a secure and damage-free display.
- Cotton fabric (strong, non-adhesive)
- Heavy-duty needle
- Durable thread
- Sharp scissors
- Wooden dowel (square or round, wood or metal)
- Wall hooks (adhesive or screw-based)
- Measuring tape
Step 1: Cut and Prep Fabric Strips
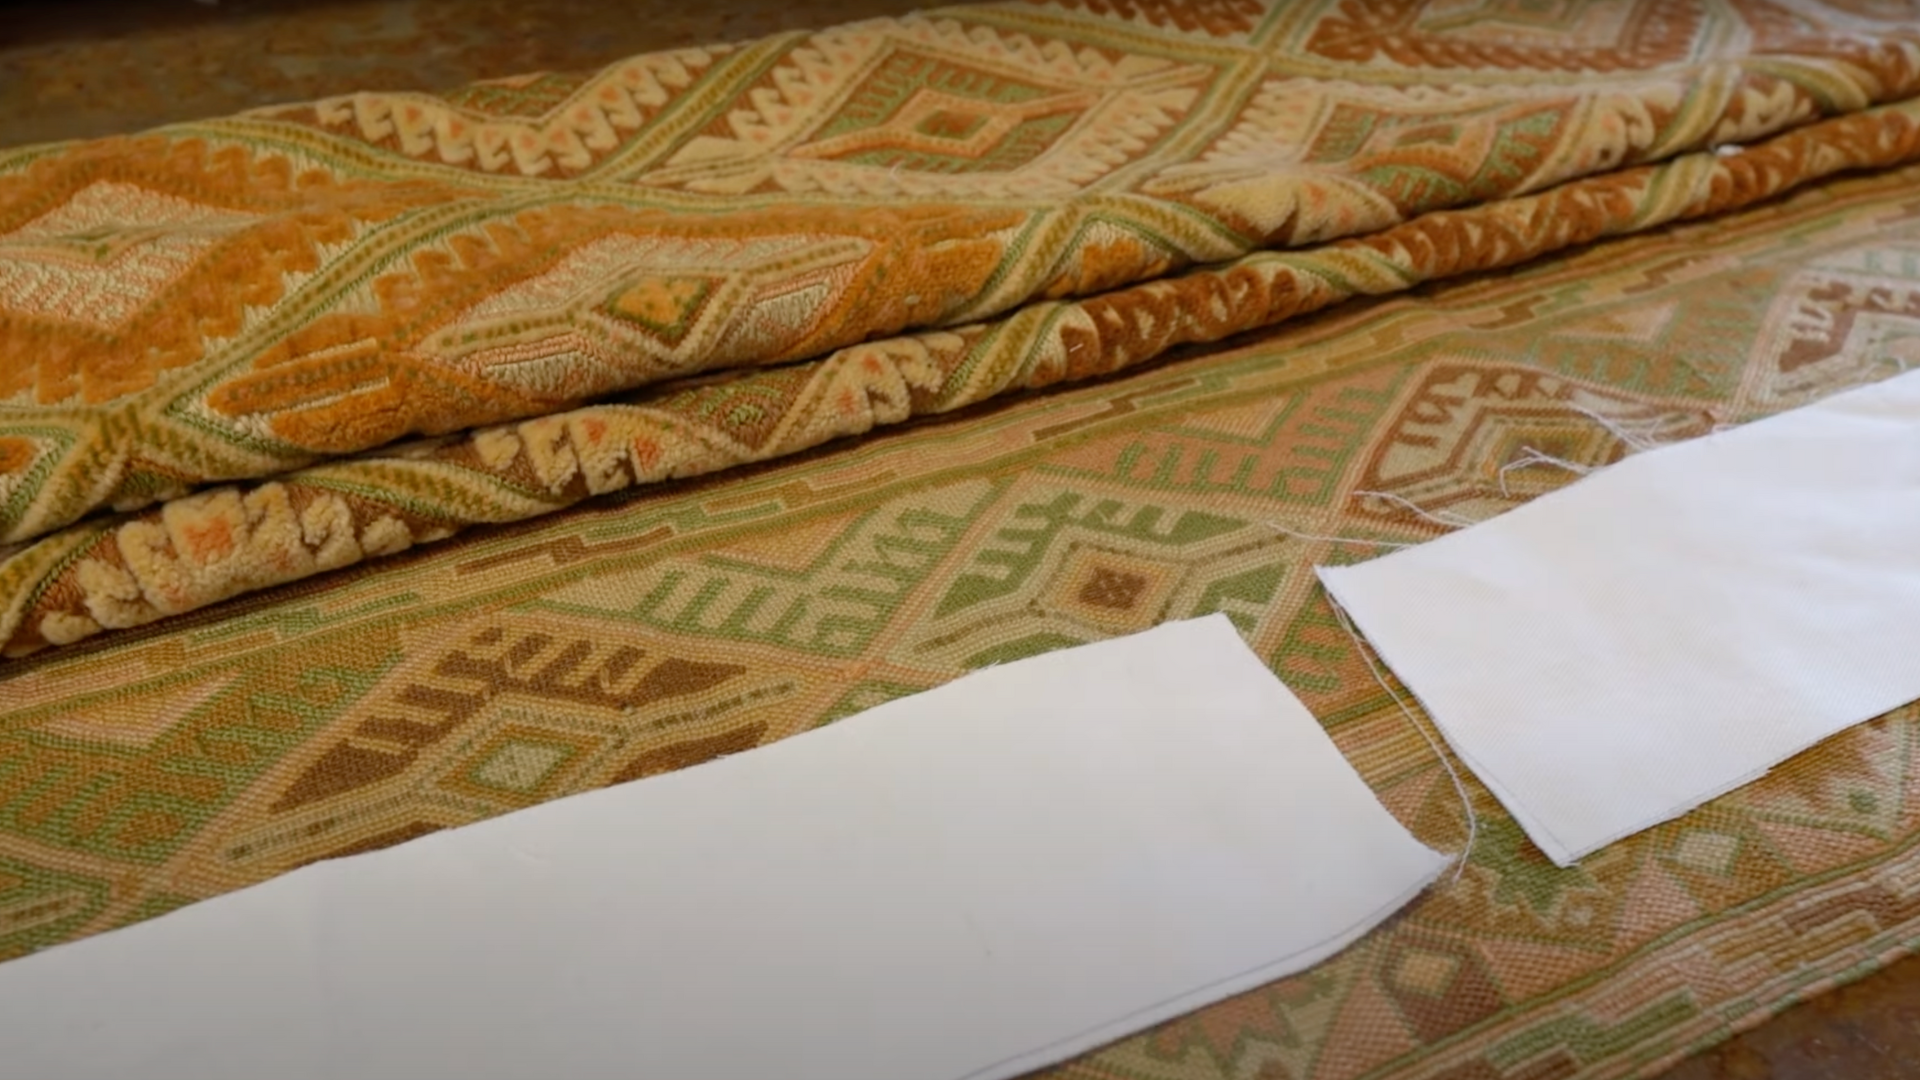
Cut 1 to 3 cotton fabric strips, each measuring 4 inches wide and 24 inches long, depending on the width of your rug.
For smaller rugs, a single strip should suffice.
These strips will create a pocket to hold the dowel rod in place, helping to stabilize the rug when hung.
Be sure to cut clean, even edges and keep measurements consistent for a polished and secure final look.
Step 2: Stitch the Bottom Edge to the Rug
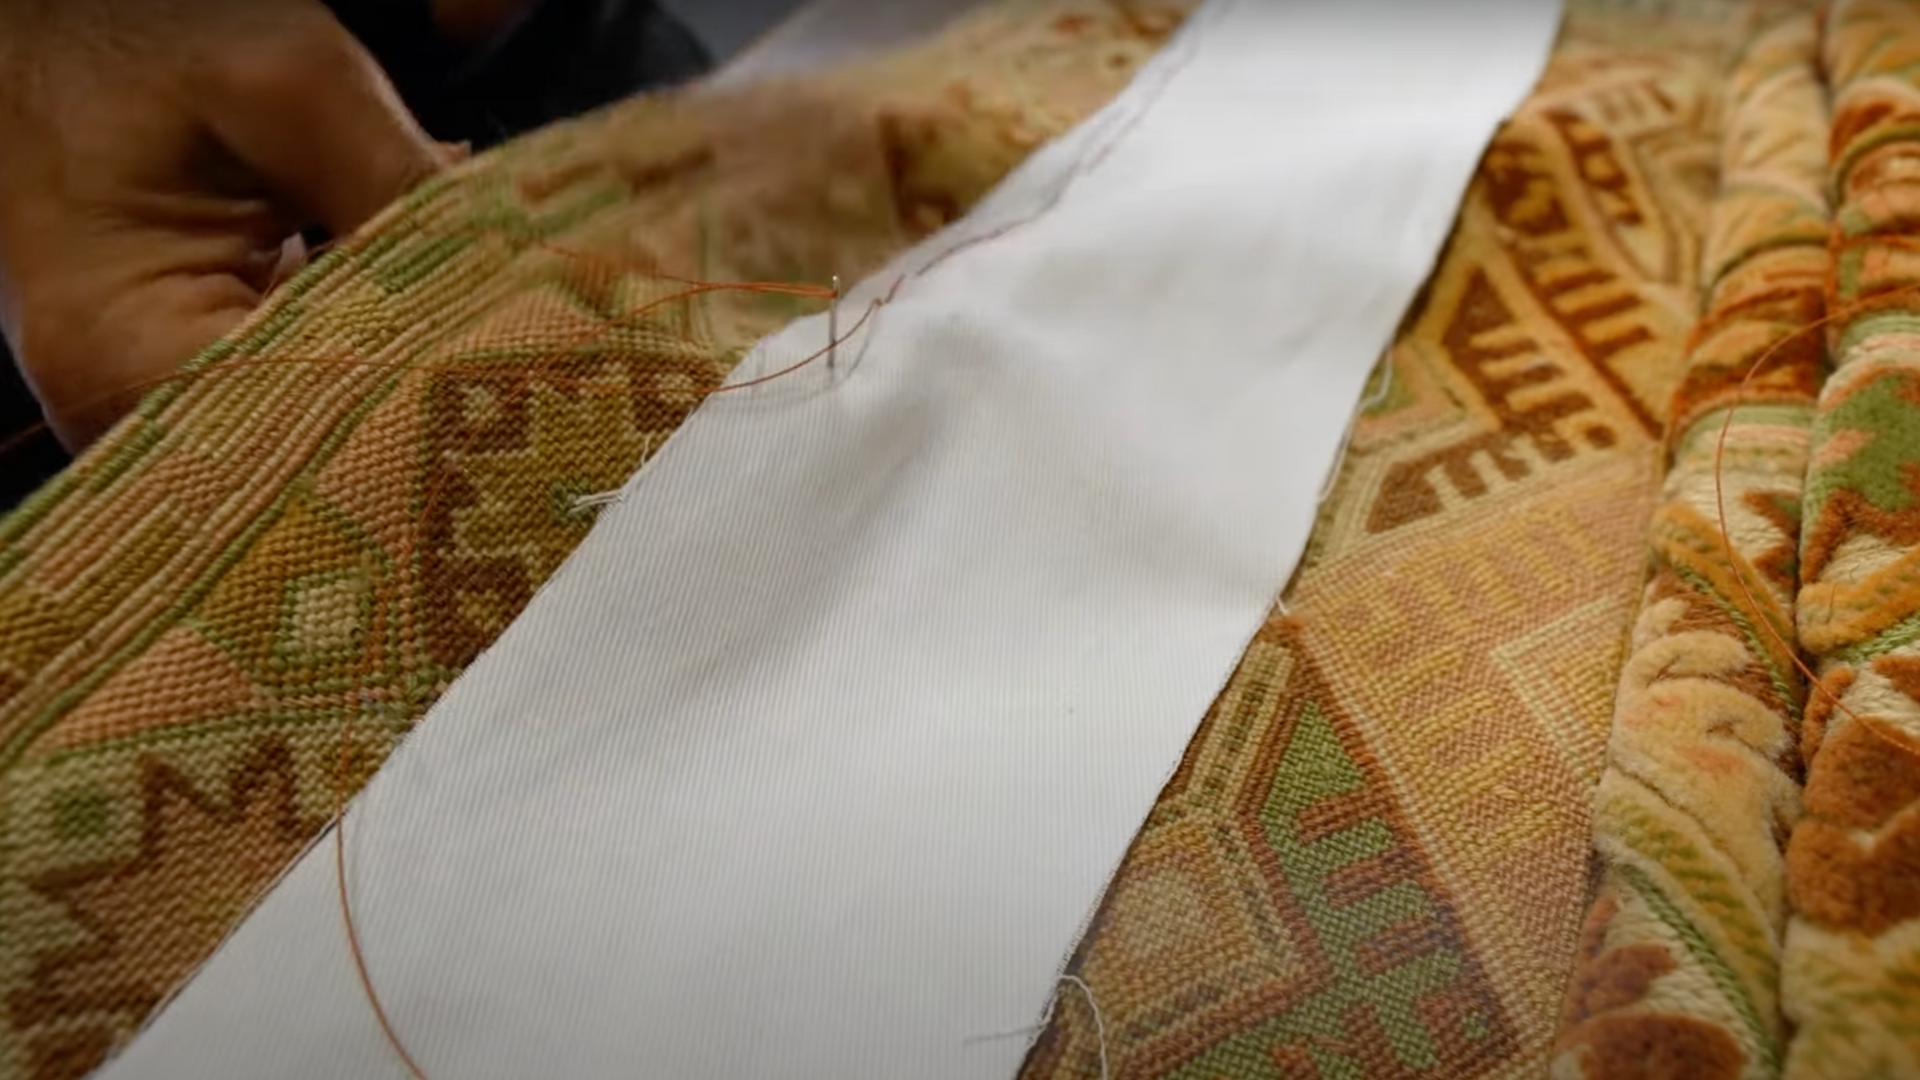
Place each fabric strip on the back of the rug, positioning them about 2 inches below the top edge.
This placement allows room for the rug to hang cleanly without bunching.
Using strong, durable thread, stitch along the bottom edge of each strip with even ½-inch spacing between stitches.
This lower seam anchors the pocket securely and helps distribute the rug’s weight evenly when it’s hung, preventing sagging or distortion.
Step 3: Fold and Sew the Top Edge
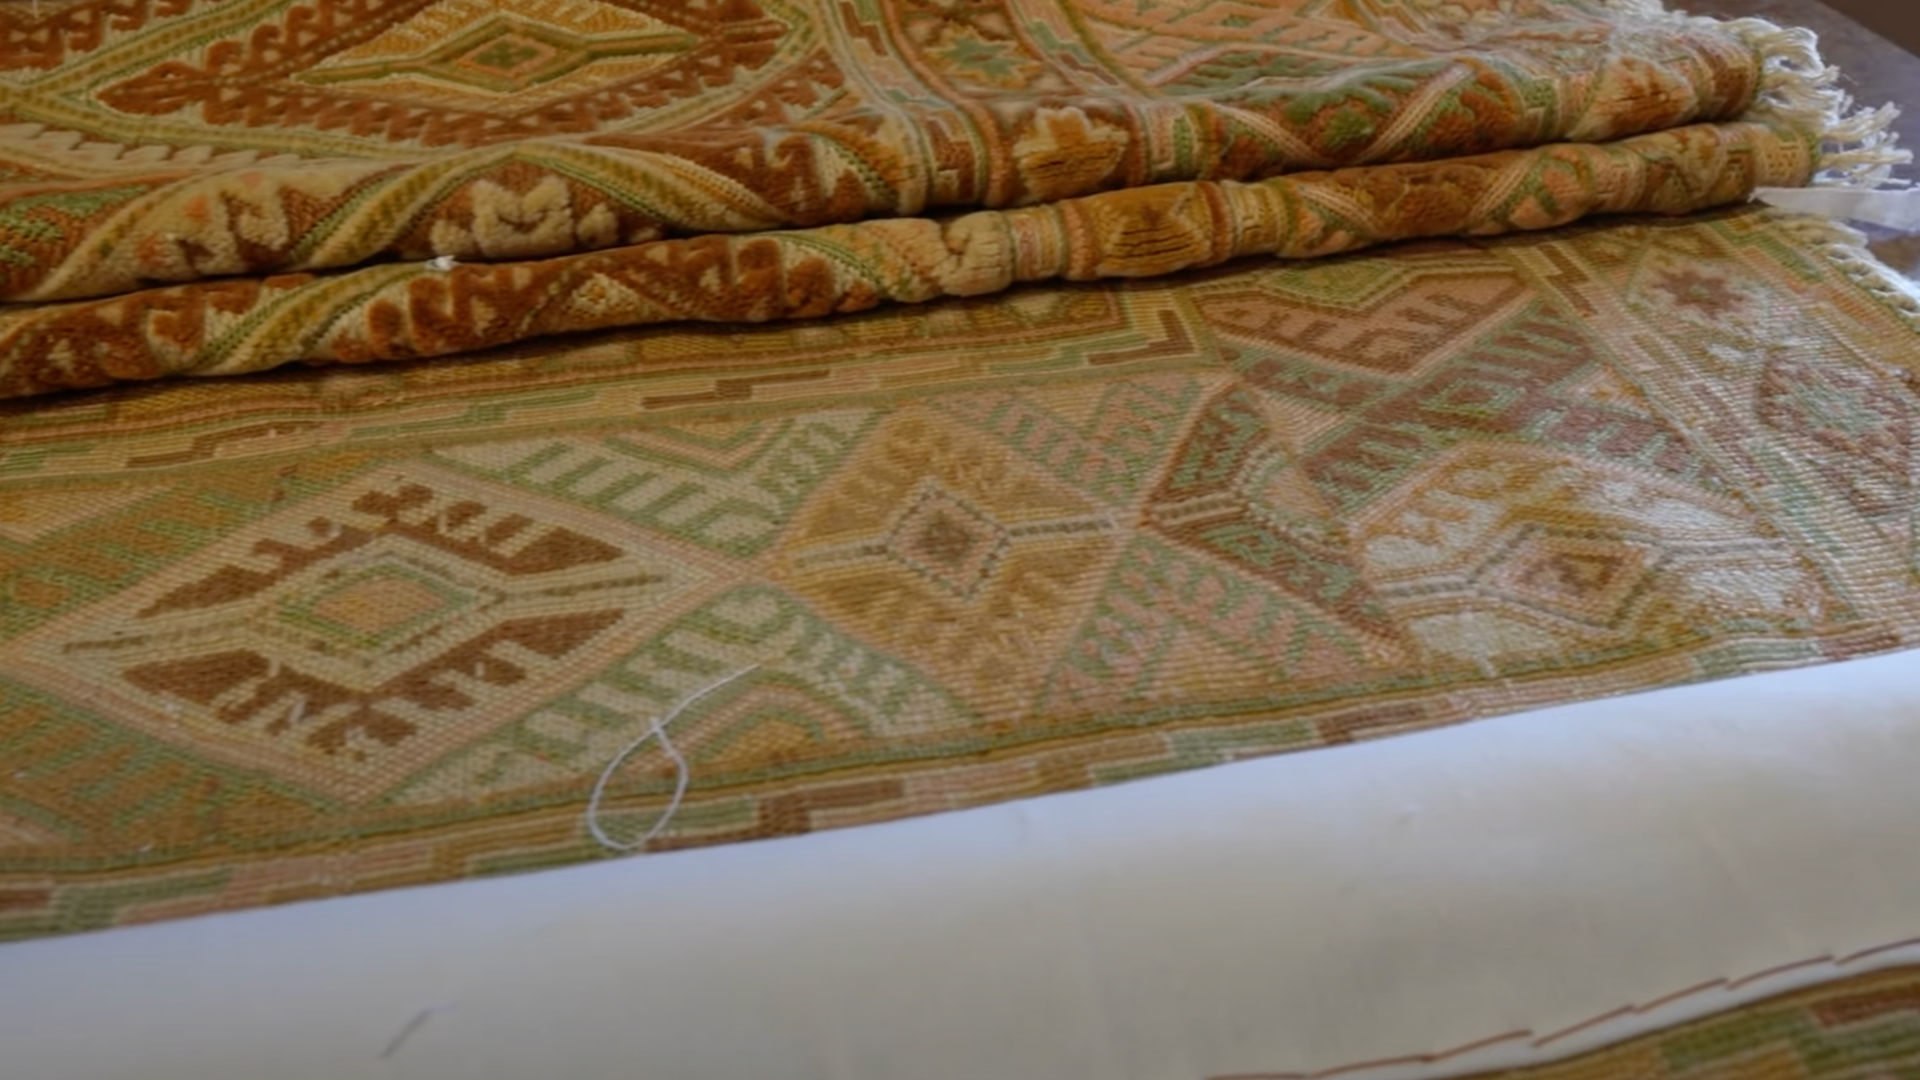
Fold each fabric strip upward to form a sleeve that will hold the dowel.
Make sure to leave enough room inside the fold so the dowel can slide in easily without resistance.
Once folded, sew the top edge of the strip to the rug using tight, evenly spaced stitches.
This final seam secures the pocket firmly while allowing the dowel to glide smoothly through the sleeve.
Step 4: Insert the Dowel and Prepare the Wall
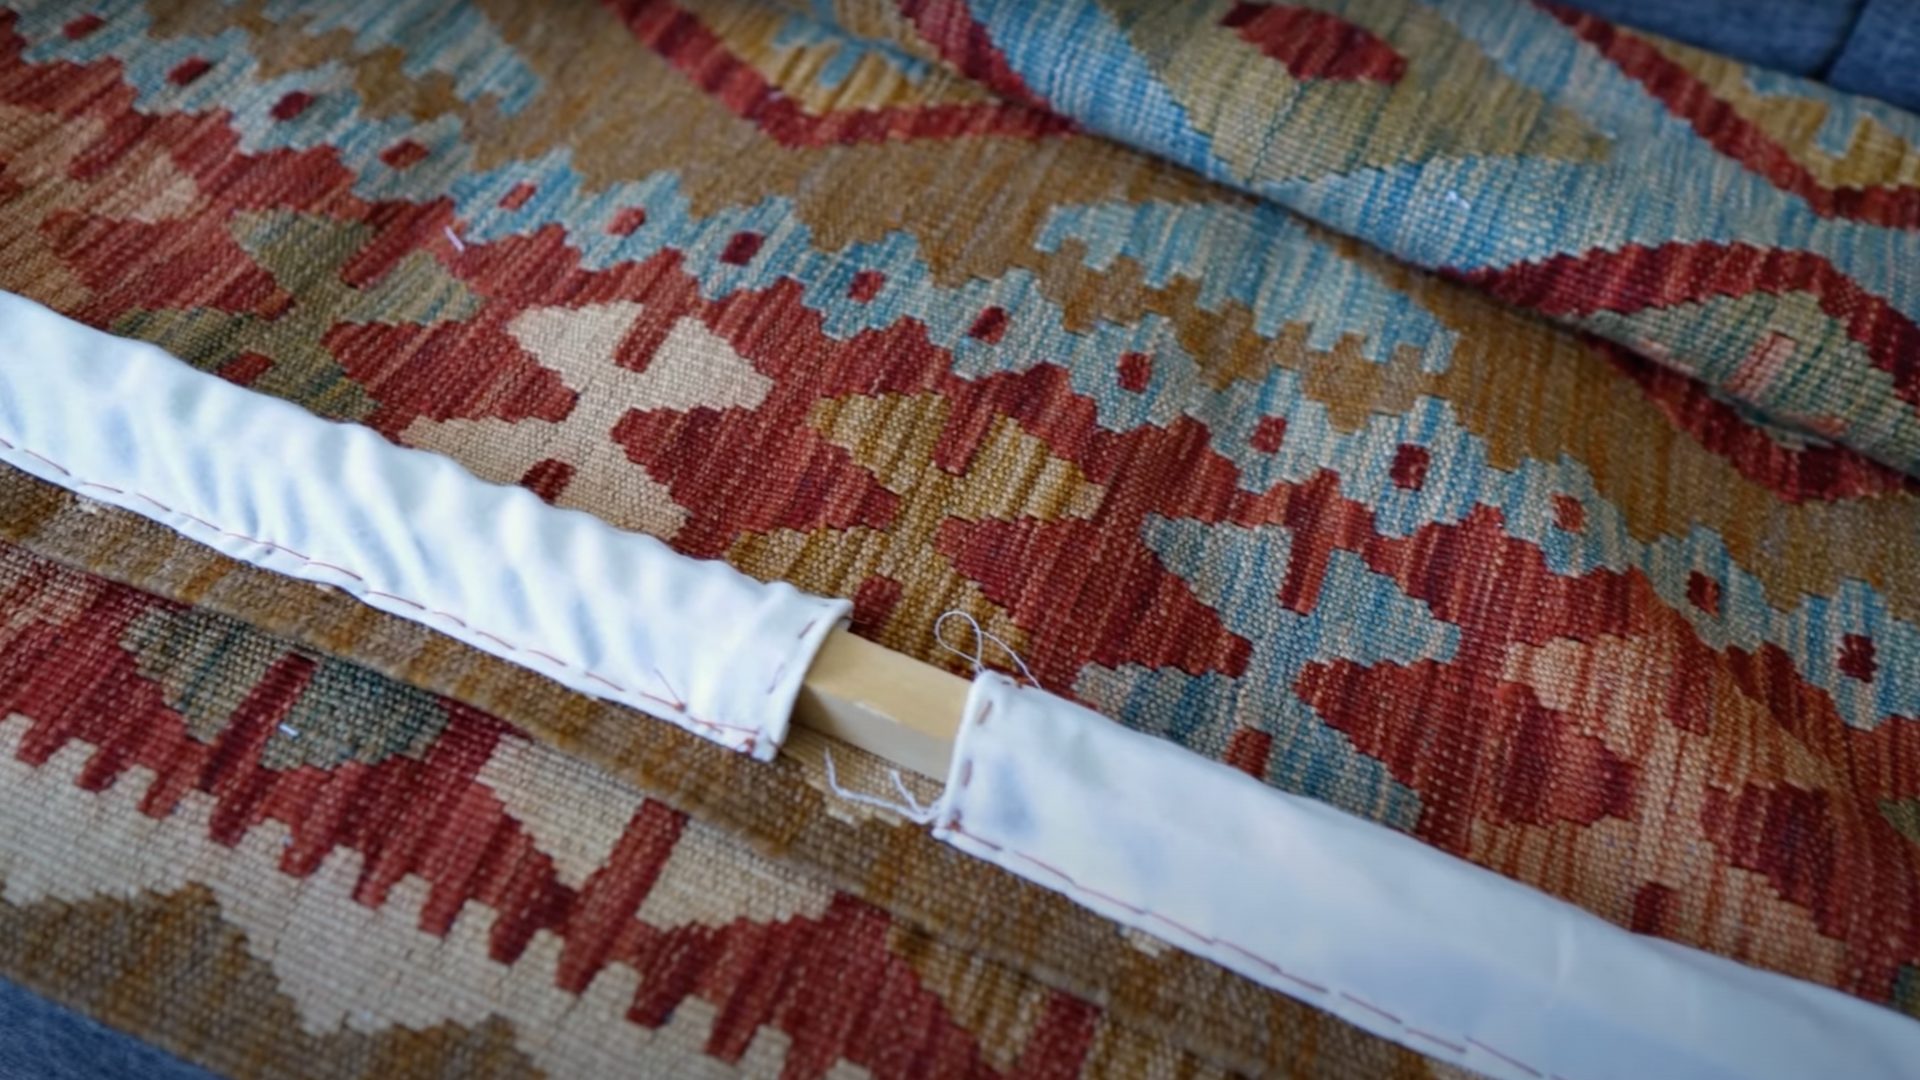
Slide the dowel through the fabric pocket you’ve created on the back of the rug.
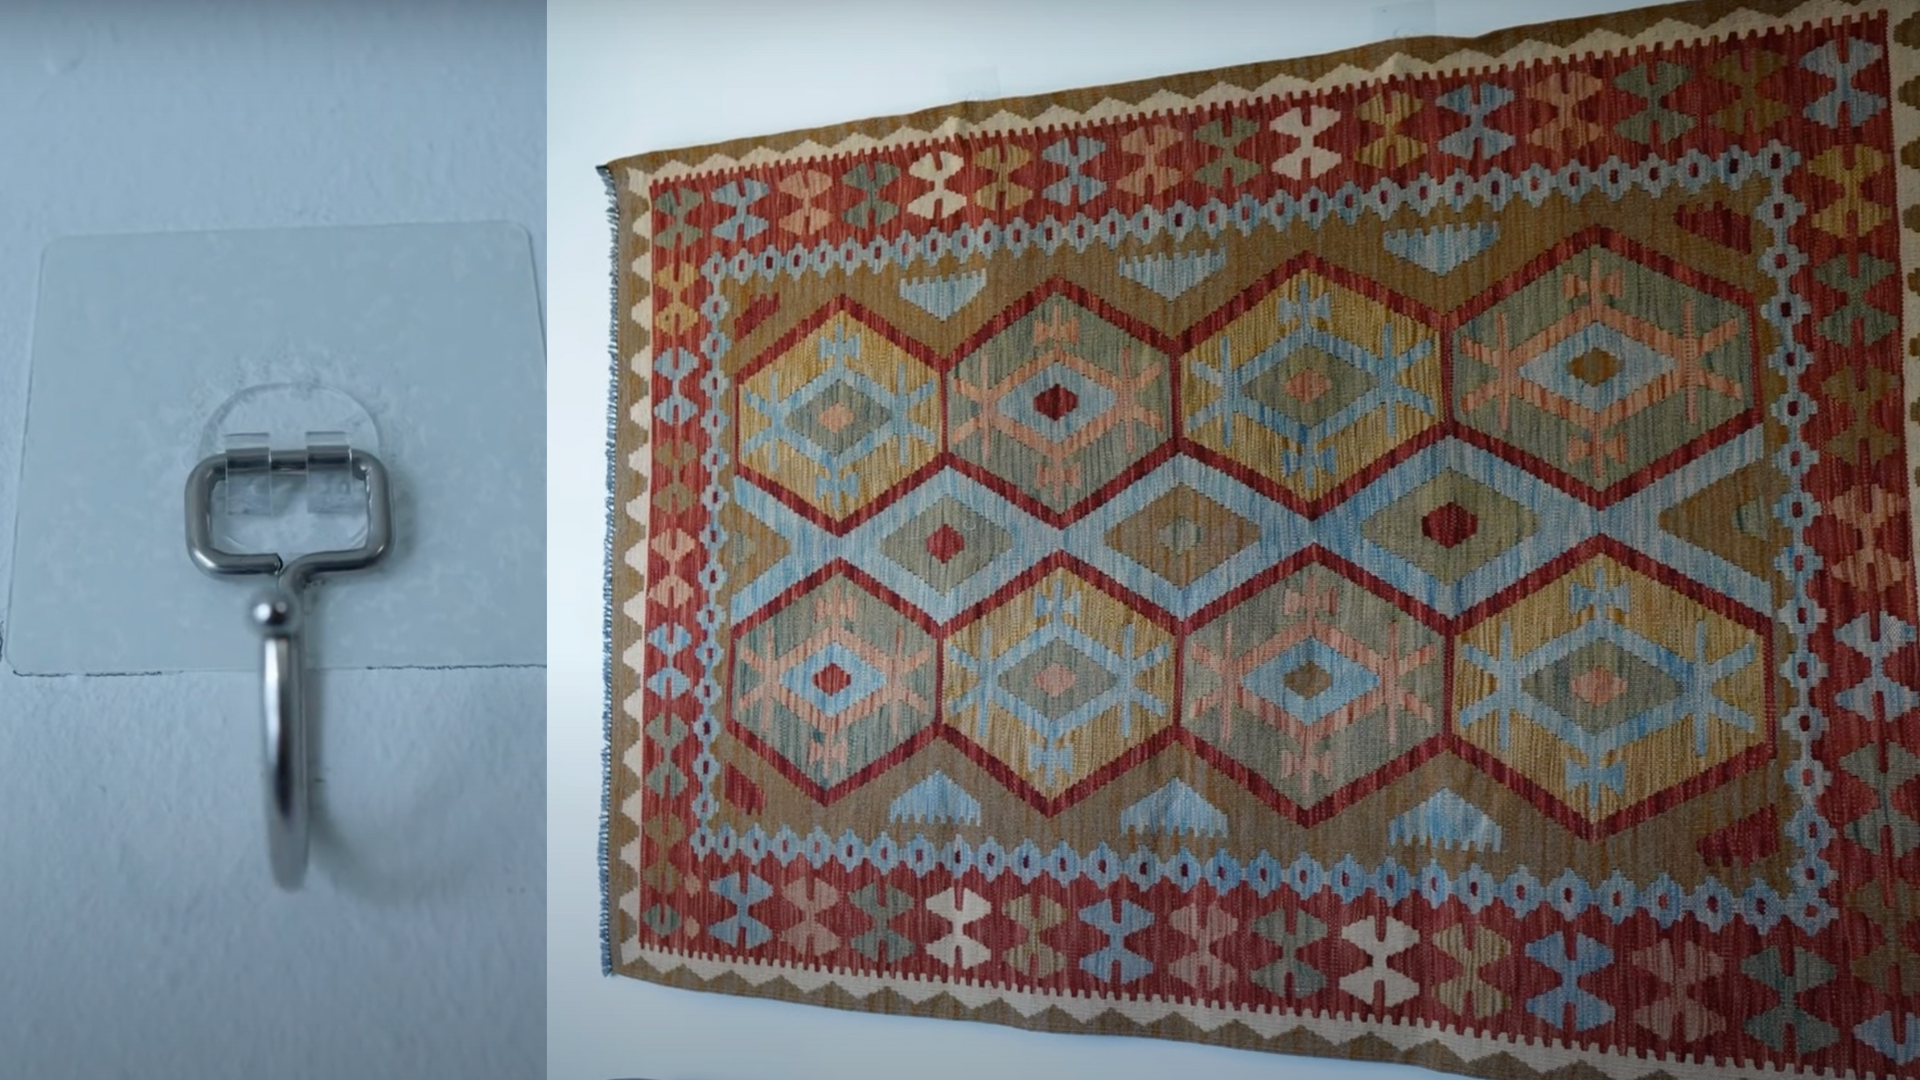
Hold the rug against the wall at your desired height and use a level to mark where the hooks should be placed.
Install sturdy adhesive hooks or screw-in wall hooks, making sure they’re rated to support the rug’s weight.
Once mounted, rest the dowel securely on the hooks so the rug hangs flat and evenly.
Step 5: Mount and Adjust Your Rug
Hang the rug by carefully setting the dowel ends onto the installed hooks.
Take a moment to adjust the rug so it hangs straight, flat, and evenly across the wall.
Look for any signs of sagging or twisting. If you notice any, gently reposition the dowel or rug as needed.
Once everything looks balanced and centered, step back and enjoy your newly displayed textile wall art.
Watch the full video tutorial below for a visual walkthrough of the process by @CatalinaRug on YouTube.
Displaying Navajo and Flat-Weave Rugs
Navajo and flat-weave rugs are delicate, detailed, and often handmade.
This section explains methods to hang them safely using museum-style techniques that preserve their beauty and prevent damage.
- Use Stitch-On Velcro: Stitch-on Velcro is a museum-safe method that secures the rug without piercing it. It provides even support and allows for easy removal or repositioning without damaging delicate fibers.
- Avoid Pins or Staples: Pins, tacks, and staples may seem convenient, but they can tear, fray, or permanently damage the weave. Over time, these small punctures can expand and ruin valuable textiles.
- Support the Whole Width: Supporting the entire top edge of the rug helps distribute weight evenly. This prevents sagging, warping, or stress on specific threads, keeping the rug’s shape and structure intact.
- Keep Out of Direct Sun: Natural dyes in these rugs fade easily under UV rays. Hang your rug in a shaded spot or use protective window film to preserve its colors and craftsmanship over time.
Tips for Moroccan, Tufted, and Chunky Rugs
Hanging bold or plush rugs isn’t the same as displaying a flat-weave.
Follow the tips below for secure mounting, weight distribution, and styling that highlights their texture without overwhelming your space.
- Heavy rugs must be mounted with sturdy anchors or studs to ensure safety and prevent sagging or falling over time.
- Discreetly secure rug corners with Velcro patches to keep edges flat and prevent curling, especially in tufted or thick pieces.
- Hang the rug high enough so the fringe can fall naturally without curling, keeping it neat and visually appealing.
- Bold rugs add weight to a room; balance them with simple, neutral furnishings to avoid overwhelming the space visually.
Conclusion
When I finally hung that Moroccan rug on my wall, everything changed; it instantly warmed up the room and made it feel like me.
Whether it’s a vintage Navajo piece, a colorful kilim, or a plush modern find, putting one on your wall turns it into art.
It’s not just decor, it’s identity, history, and style all in one.
The secret? Choose a method that supports your rug’s weight, protects the fibers, and fits your space. Don’t be afraid to experiment.
Use clips for a quick change, or Velcro for a clean, safe finish. Still feeling stuck or need help with layout ideas?
I’d love to help you make a bold, beautiful statement. Just send me a message or leave a comment below.
Let’s turn that rug into your room’s proudest feature!