
When I first thought about building a deck on a slope, I felt overwhelmed. How do you build something flat on land that’s anything but?
But after learning the benefits of a multi-level deck, I saw that a sloped yard isn’t a problem, it’s an opportunity.
With the right approach, an awkward hillside can become a beautiful, functional space.
If you’re staring at a sloped backyard and wondering how to make it work, this guide is for you.
I’ll walk you through how to build a deck on a slope, key safety tips, material choices, and maintenance advice.
If you’re taking on the project yourself or simply want to understand the process before bringing in help, this guide will help you turn a tricky slope into something truly special.
What Is a Multi-Level Deck?
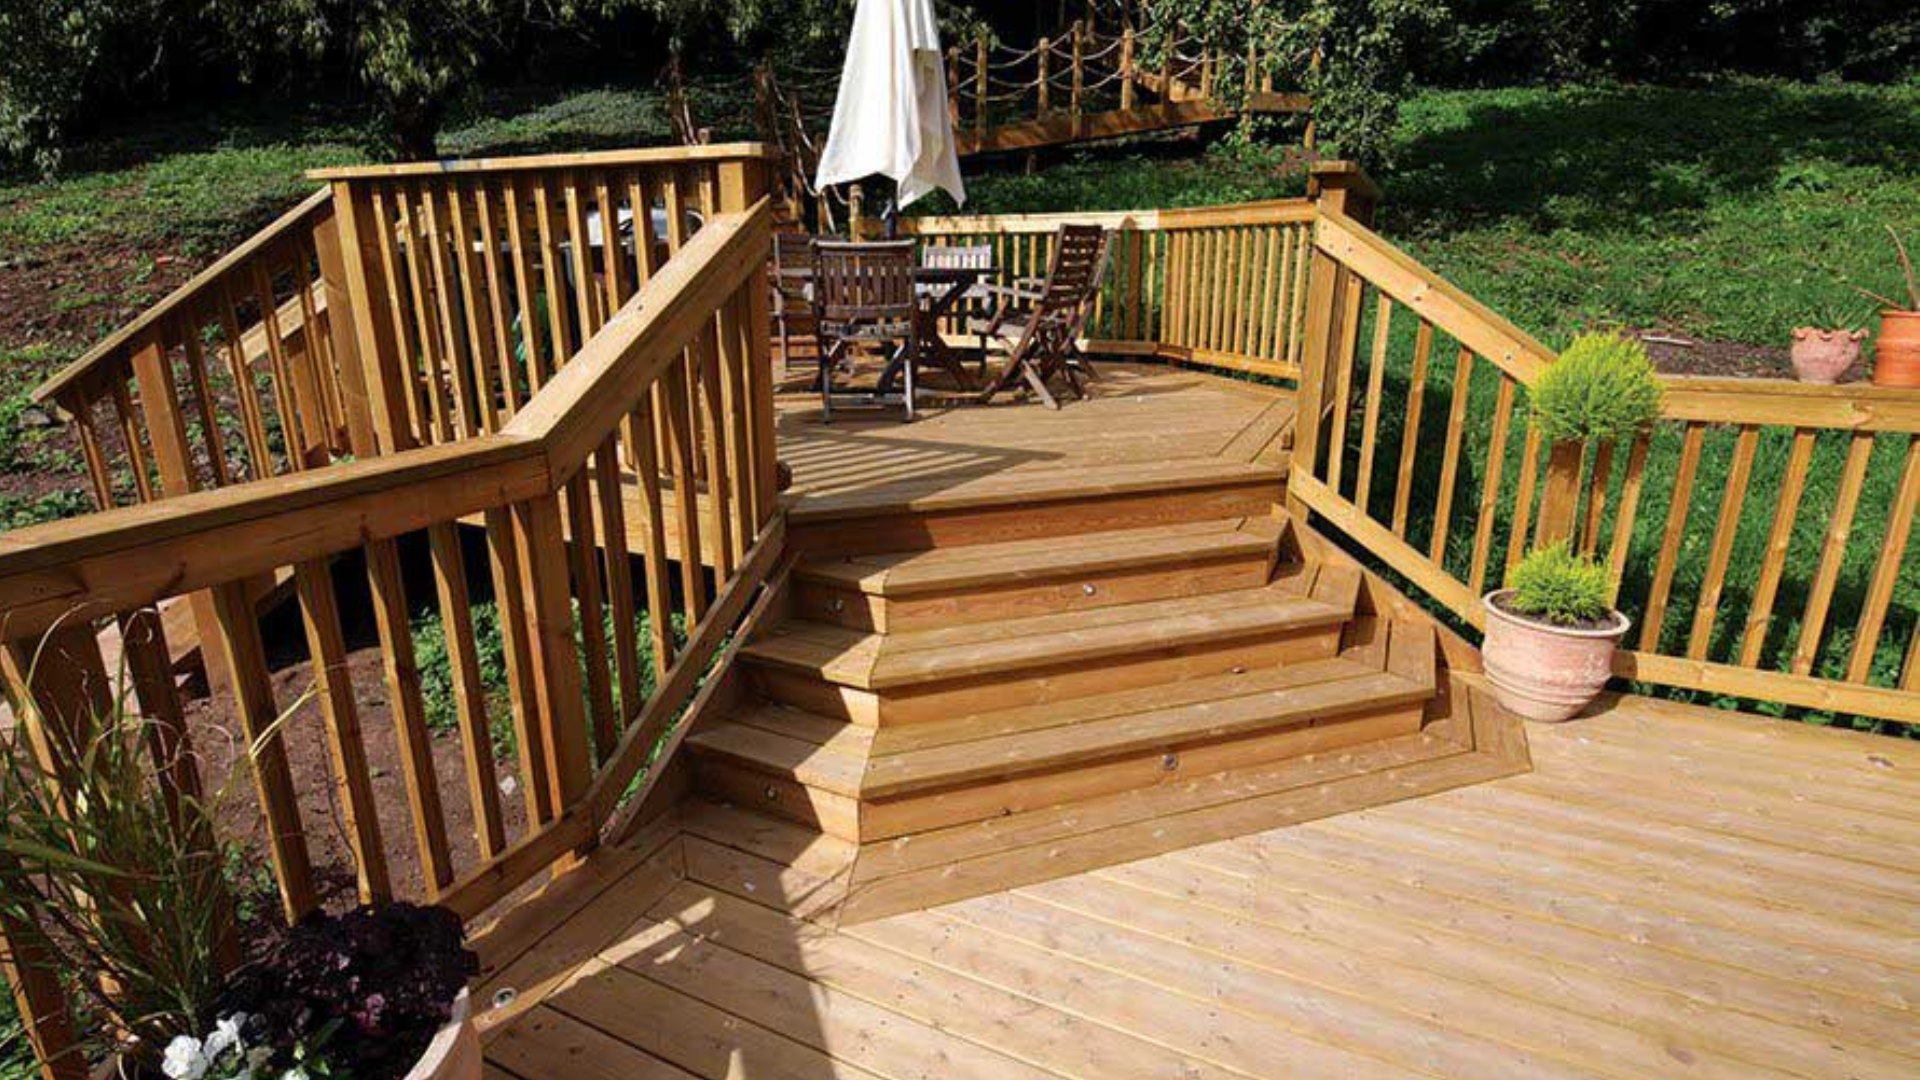
A multi-level deck is a deck design that features two or more connected platforms built at different heights.
Instead of creating one large, flat surface, a multi-level deck follows the natural shape of the landscape, especially helpful in sloped or uneven yards.
Each level is usually connected by short staircases or steps and can serve different functions, such as a dining area, a lounge space, or a spot for a hot tub or fire pit.
This type of deck design not only makes better use of space but also adds visual interest and style.
It’s especially useful on sloped terrain where a single-level deck may not be practical.
By breaking up the structure into sections, a multi-level deck offers more flexibility in layout and creates a more dynamic, inviting outdoor living area.
Why Build a Multi-Level Deck on a Slope?
Building a multi-level deck on a slope is a smart way to turn an unused, uneven backyard into a beautiful and functional outdoor space.
Sloped yards often go to waste because they’re hard to landscape or build on, but a multi-level deck creates flat, usable areas at different heights that are perfect for relaxing, dining, or entertaining guests.
Instead of battling against the slope, this design works with the natural grade of the land, which can save time and money on excavation or leveling.
It also boosts the visual appeal of your property, transforming a tricky hillside into a stunning, tiered feature that adds value and charm.
On top of that, a well-designed sloped deck helps manage water flow and reduces erosion, protecting both your home and your yard.
With the right layout and structure, a sloped backyard can become one of the most enjoyable parts of your home.
How to Construct a Deck on Sloped Terrain
Building a deck on a slope requires deep footings, level framing, and smart design to create a safe structure that fits the landscape.
Materials and Tools
Below is a list of essential supplies and equipment you’ll need to ensure your deck is safe, stable, and built to last.
- Pressure-treated 4×4 or 6×6 posts: For strong vertical supports
- Double 2×10 or 2×12 beams: To carry the weight between posts
- Joists (2×8, 2×10): For the deck surface framing
- Decking boards: Composite or treated wood, depending on preference
- Cross bracing and blocking lumber: For mid-span support and stability
- Concrete mix or pre-cast footings: To anchor posts into the ground
- Sonotubes (8″ or 10″): For forming deep concrete footings
- Post bases and brackets: To anchor posts securely to footings
- Joist hangers: For connecting joists to beams
- Hurricane ties: Required by code to prevent uplift in freestanding decks
- Galvanized or stainless-steel screws and bolts: To resist rust and corrosion
- Laser level or builder’s level: For aligning posts and beams accurately
- Measuring tape and string line: For layout and marking straight lines
- Circular saw or miter saw: For cutting framing and decking boards
- Drill and impact driver: For fastening screws and bolts
- Shovel and post-hole digger: For digging footing holes on the slope
- Wheelbarrow and plywood: For moving concrete or protecting the ground
- Safety gear: Gloves, safety glasses, and hearing protection
Step 1: Dig and Install Deep Footings
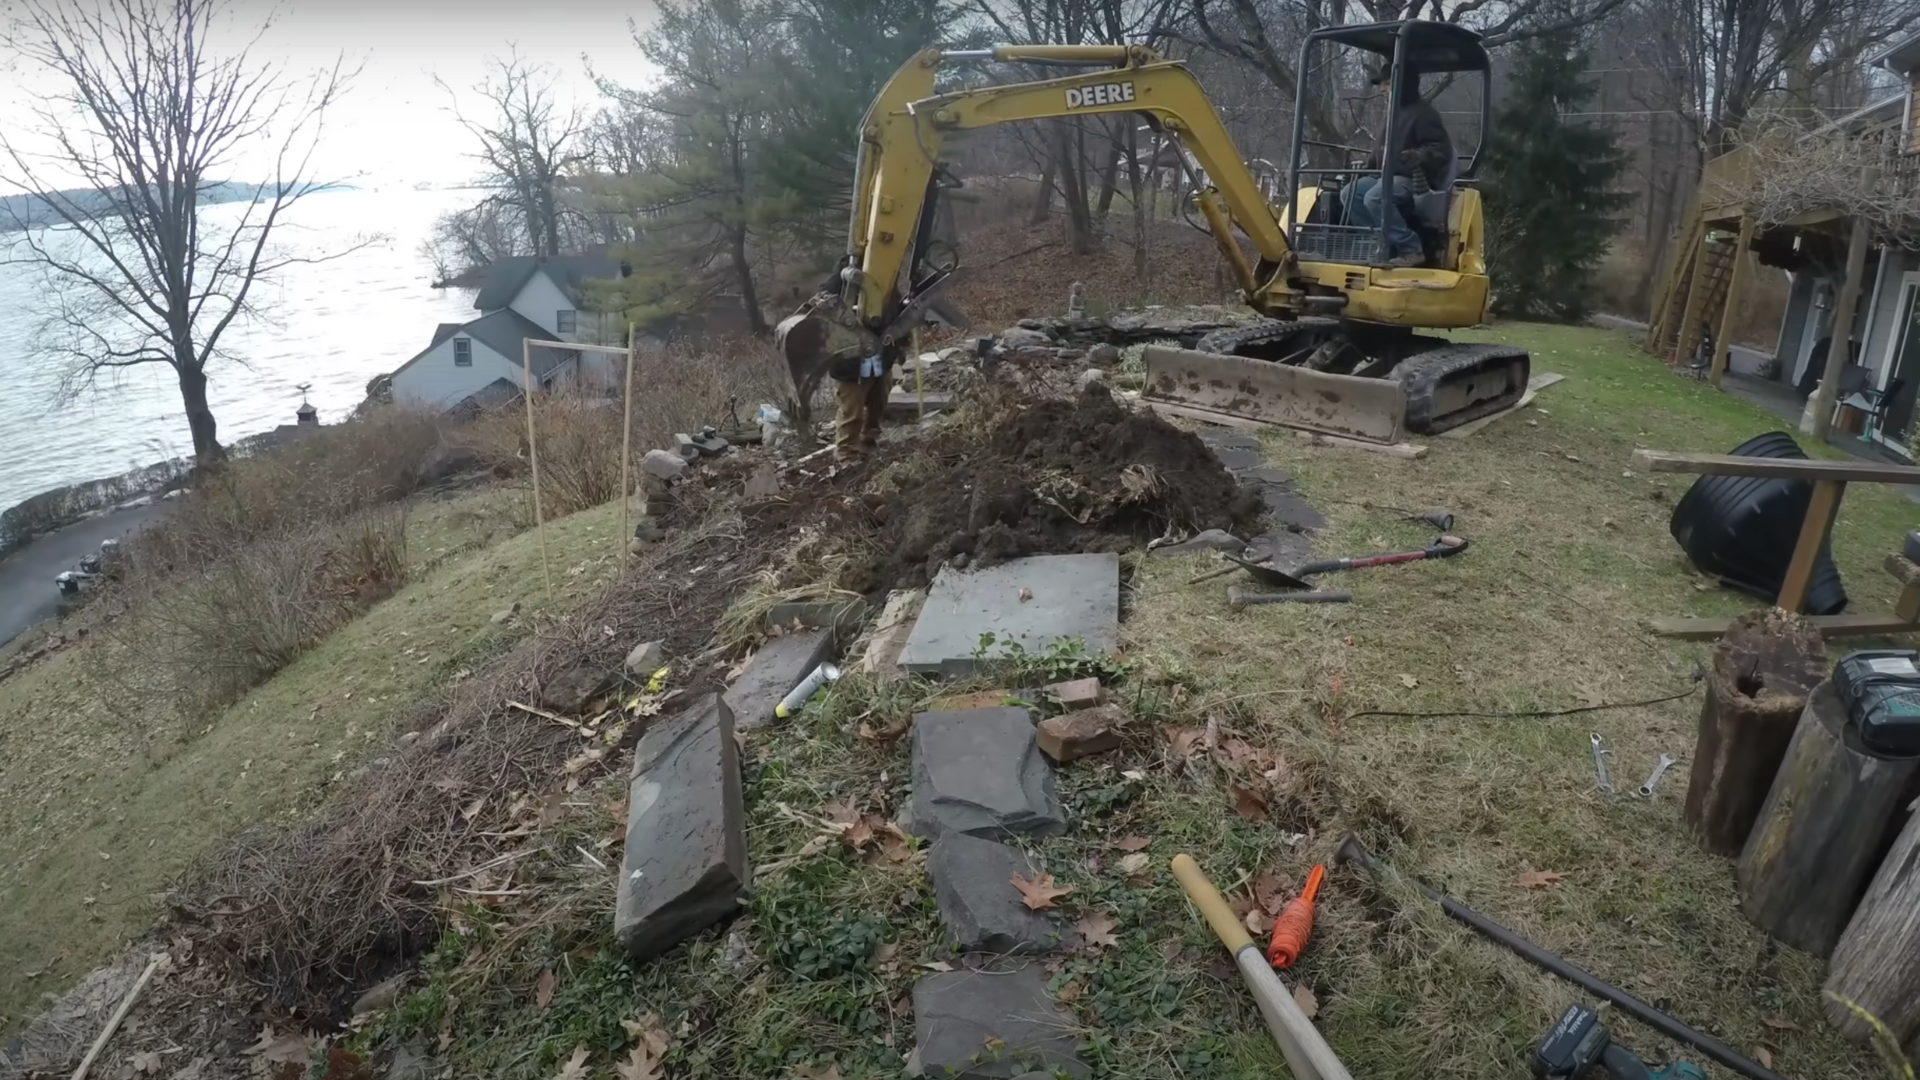
When building a multi-level deck on a slope, your footings are the most important part of the foundation.
You want them to be wide and deep enough to prevent movement over time, especially if you live in a colder climate where frost can shift the ground.
A good approach is to use 24-inch-wide footings set about 4 feet deep. This depth helps protect the structure from frost heave, which happens when frozen ground pushes up on your deck supports.
In some spots, you may need to dig around obstacles like rocks or even adjust part of your landscape (like a stone wall) to get the footing in the right place.
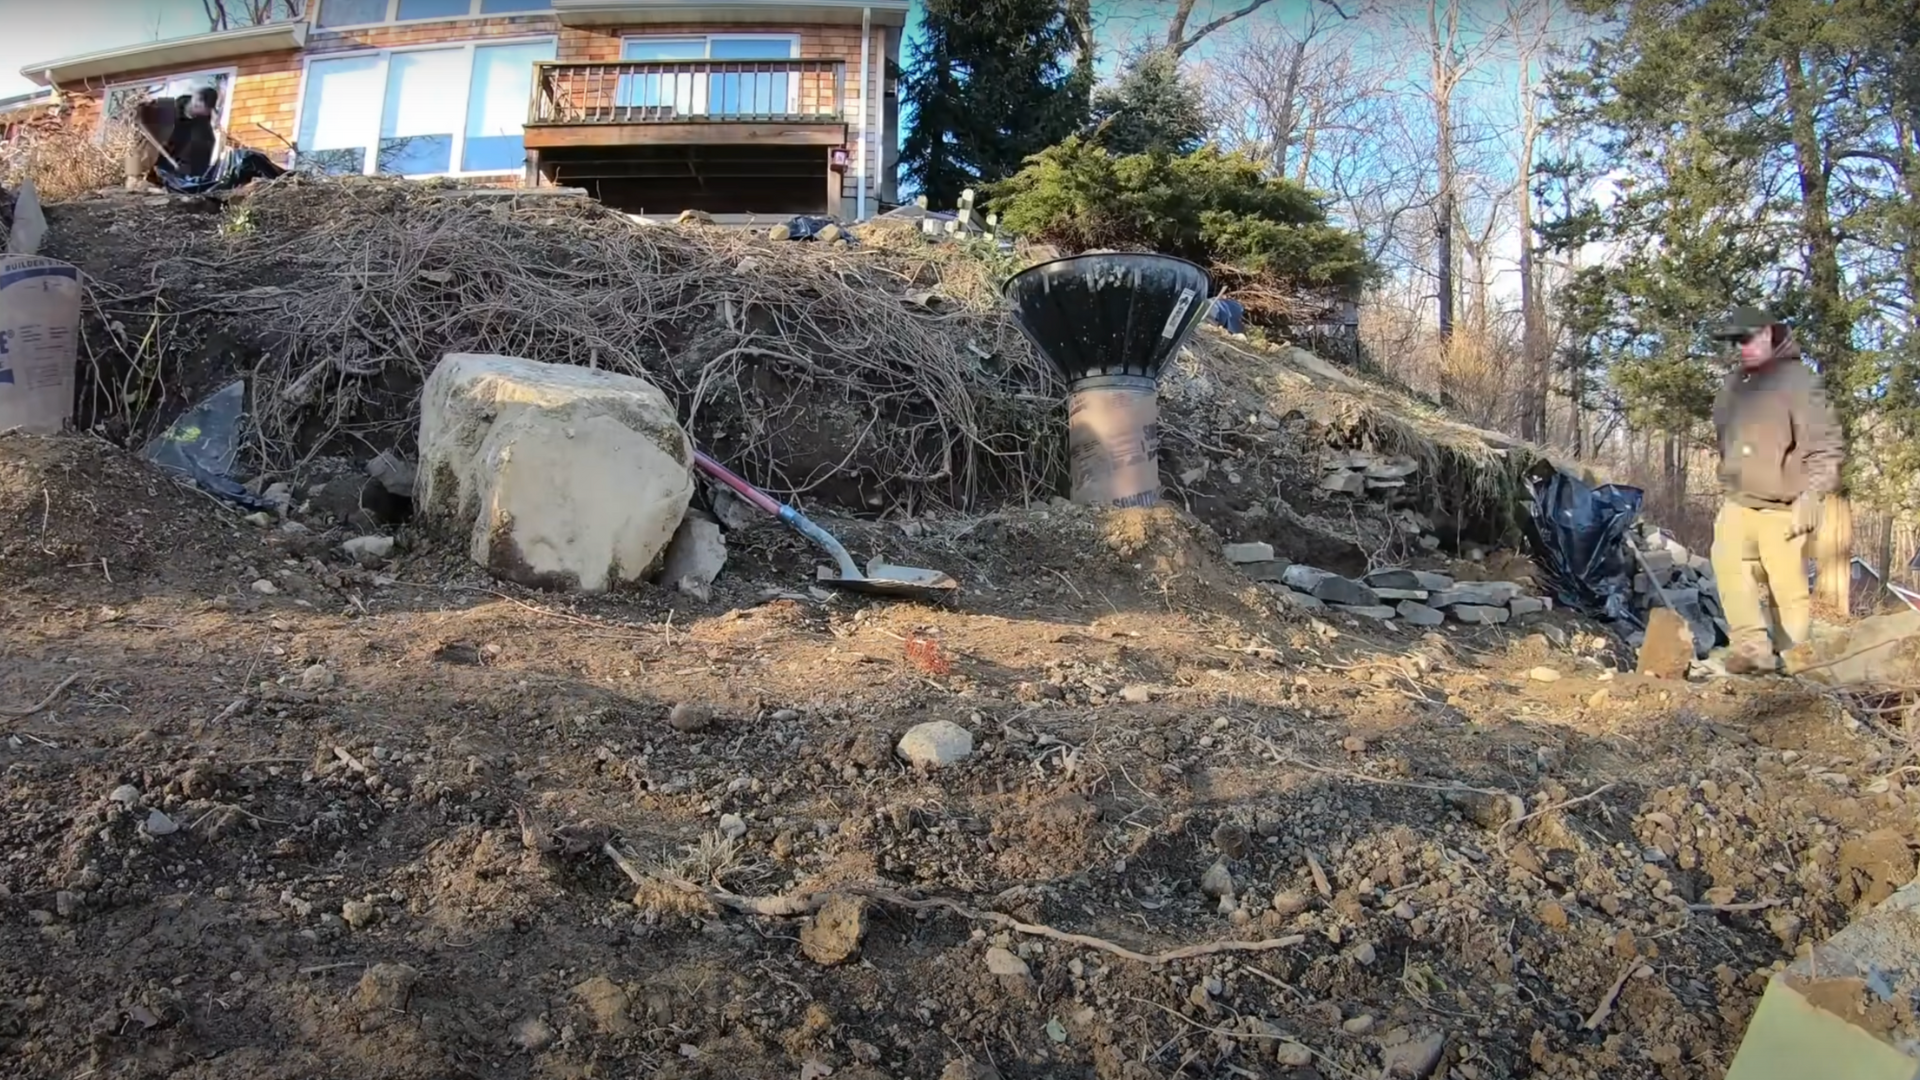
Step 2: Choose the Right Sonotube Size

Once your holes are ready, you’ll be using sonotubes (round cardboard forms) to shape and pour the concrete footings.
These come in different sizes. For areas supporting smaller beams or 4×4 posts, 8-inch sonotubes work well.
But if you’re using larger 6×6 posts, common on lower levels or where there’s more load, you’ll want to go with 10-inch sonotubes.
Some people think you need even larger ones, like 12 or 16 inches, but that’s usually only necessary if you’re skipping a footing pad underneath.
Step 3: Square the Layout Using a Laser and Level
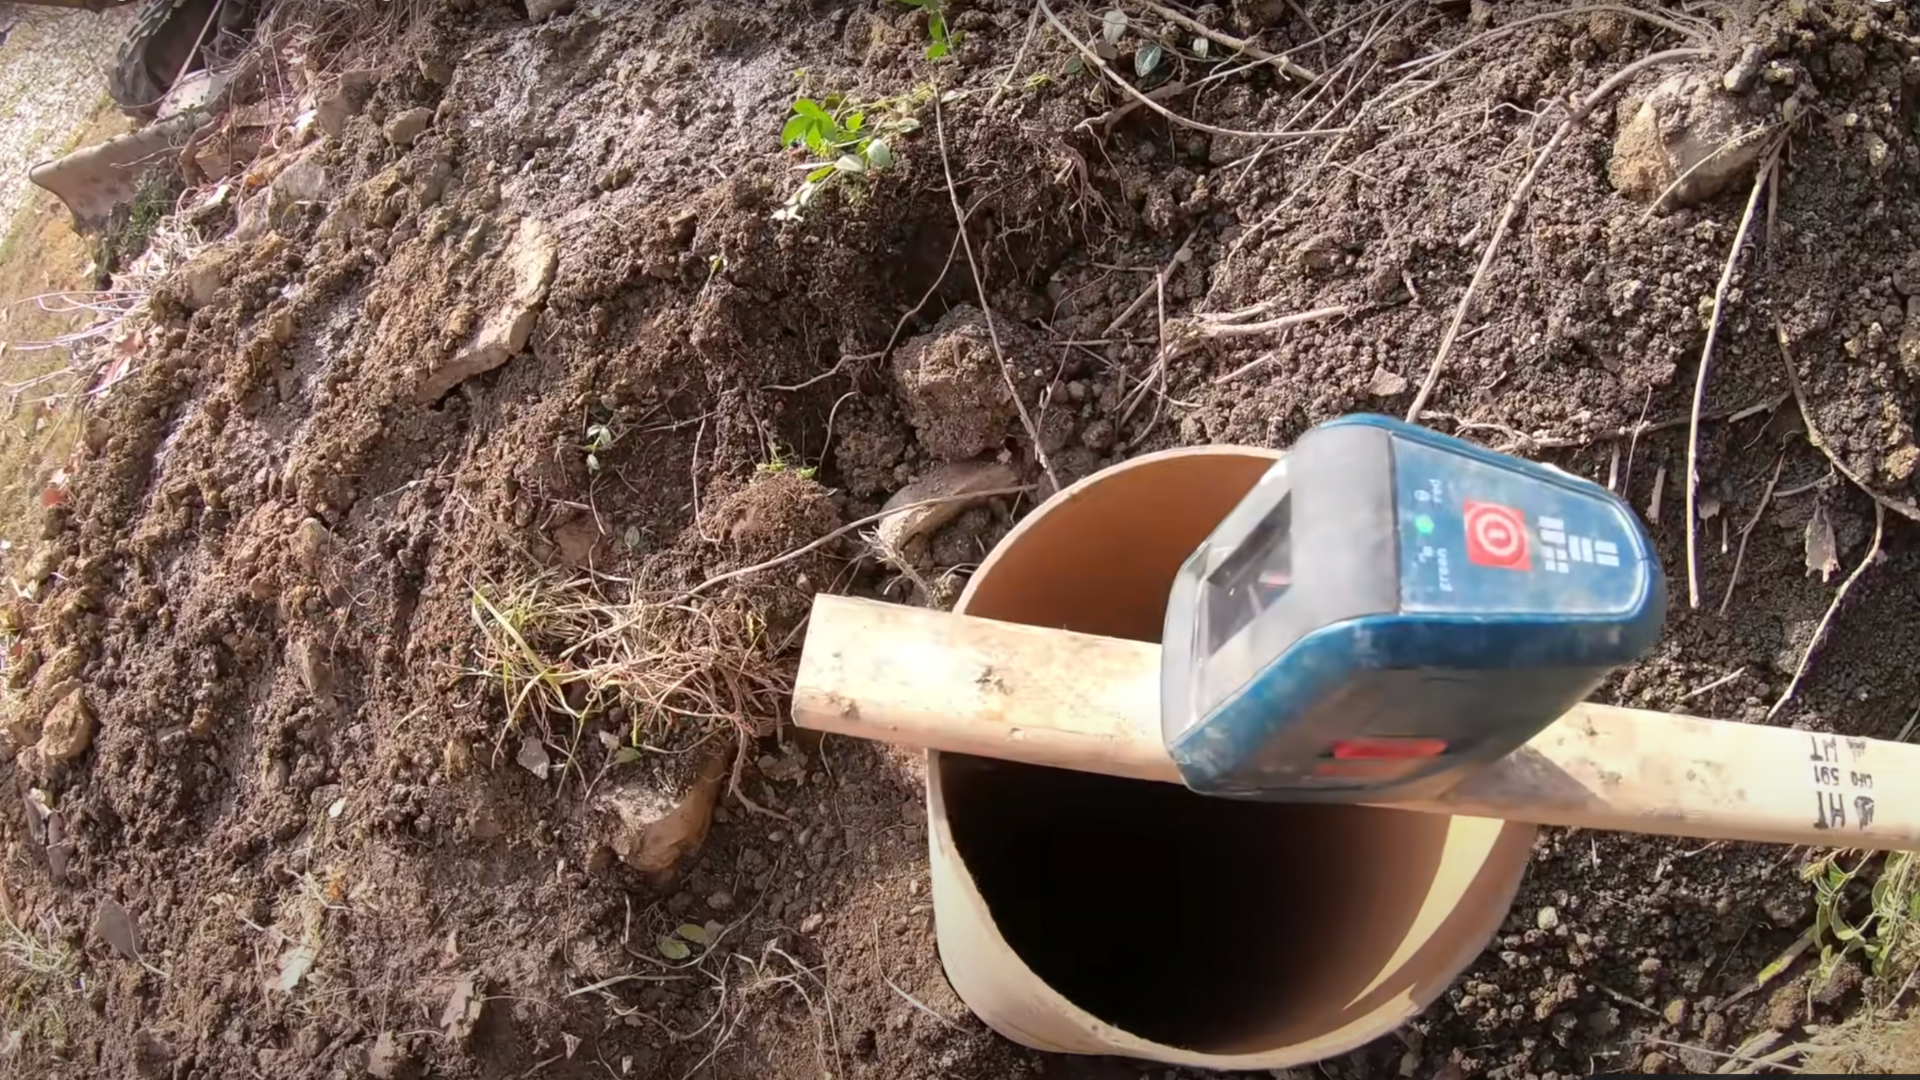
Getting your deck layout square is essential, especially when you’re dealing with multiple levels. A laser level makes this part easier and more precise.
The tool projects a straight beam of light in both forward and side directions. You can use this beam to line up the centers of your footings and ensure everything is aligned.
To double-check, use a 6-foot level to make sure everything is flat and balanced.
This method helps you skip the old-school batter boards and saves time while still keeping your lines accurate.
Step 4: Blend the Deck
You don’t need to be a pro landscaper to make your deck look like it belongs in its environment.
Once your structure is up, take some time to shape the area around it using stone, gravel, and sand.
This not only helps the deck blend into the scenery, but it also improves drainage.
If you plan to add topsoil, wait until the weather is warm and the ground is workable, especially if you’re in a region where topsoil freezes solid in winter.
Keep in mind that gravel can be tricky near lawns, as it can interfere with mowing, so use it strategically.
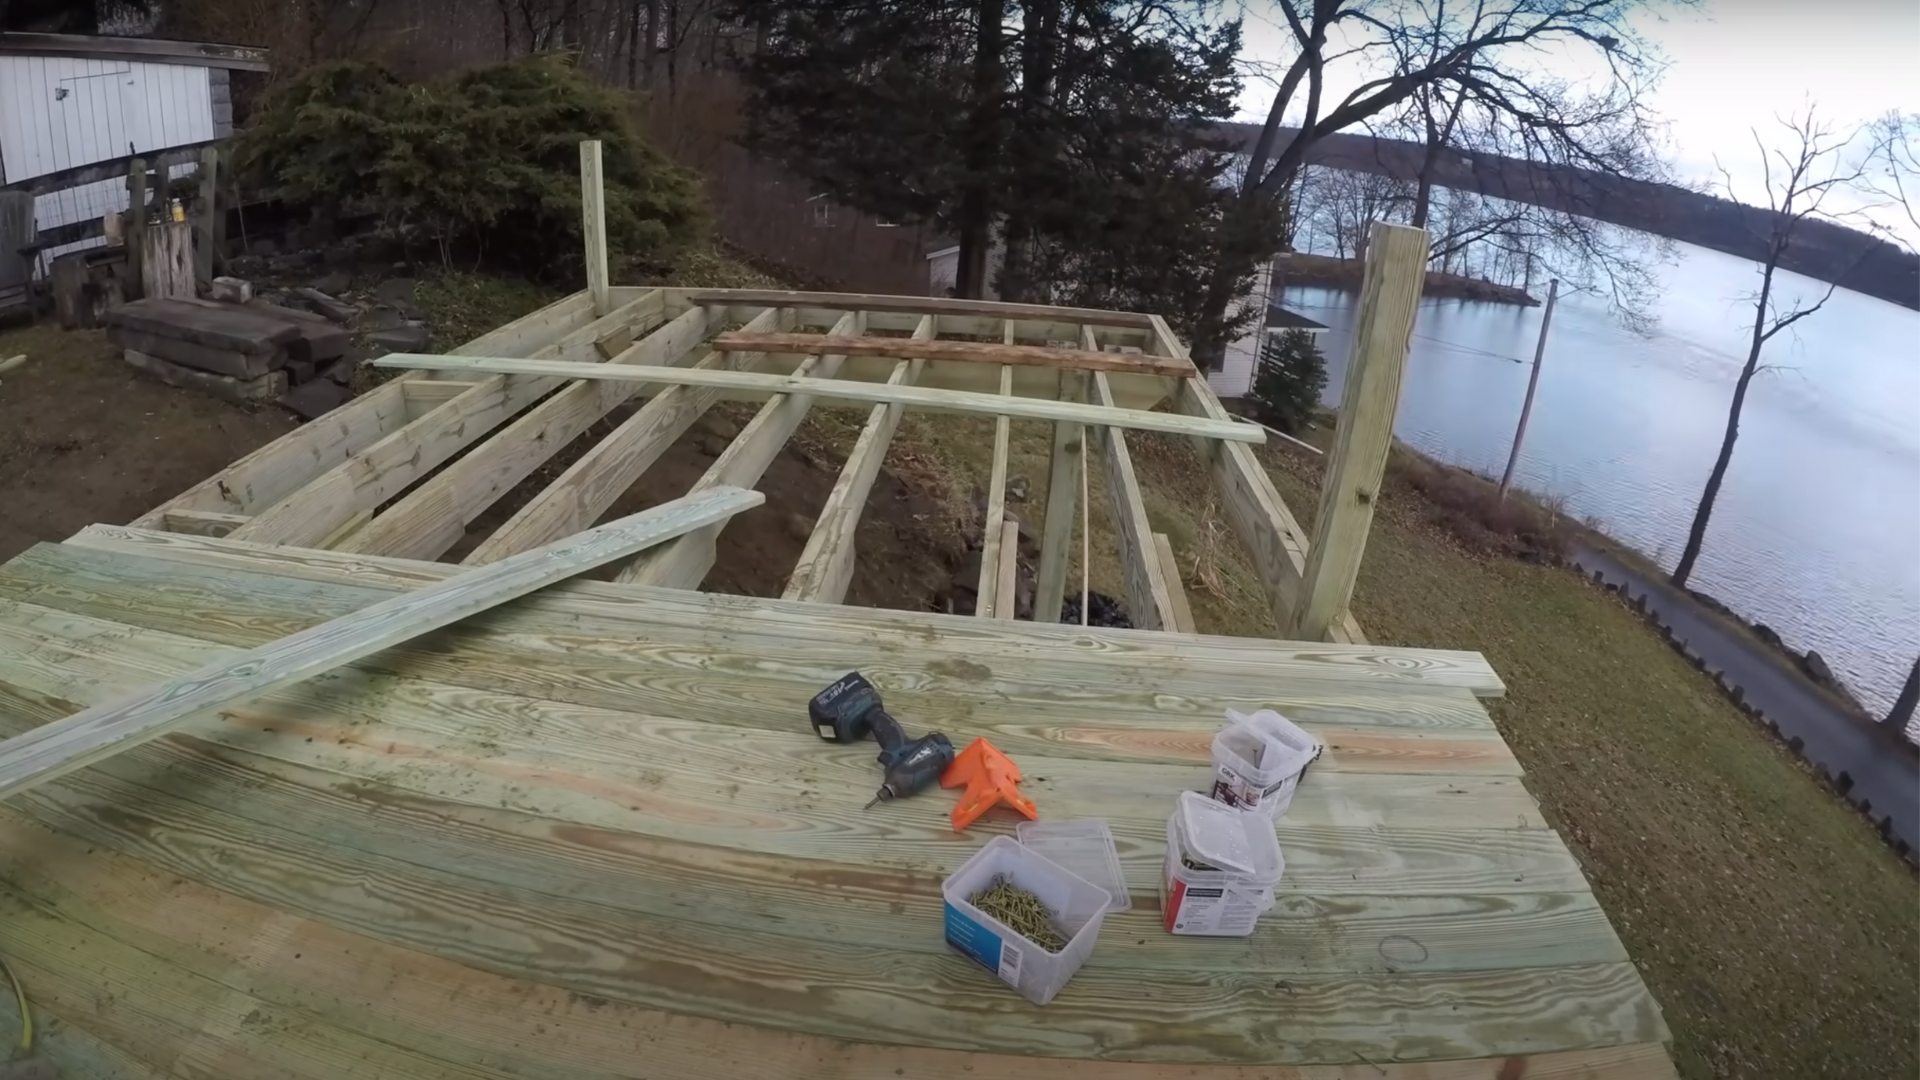
Step 5: Frame the Deck
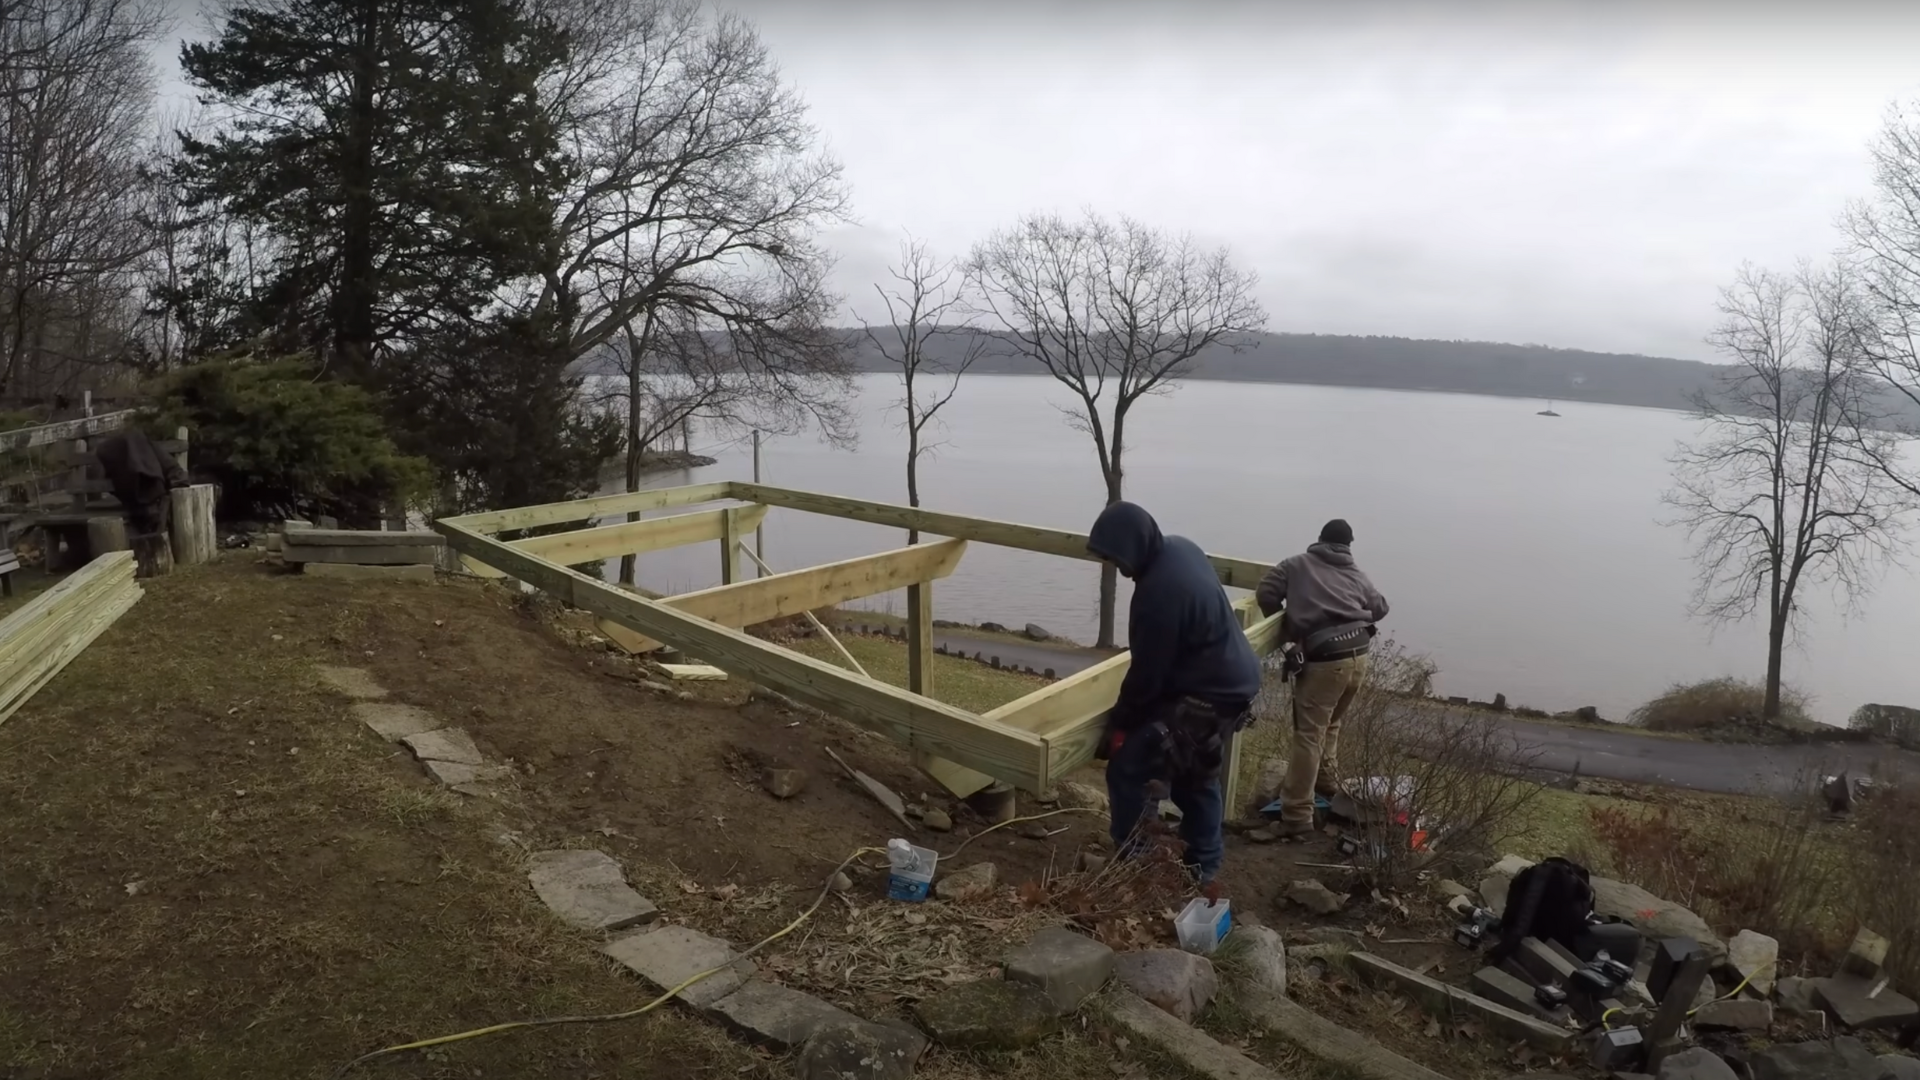
Once your footings and posts are in place, it’s time to frame the deck.
Start with beams and joists, and don’t forget the important extras that keep your deck strong: cross bracing (in X shapes) and diagonal supports.
These elements prevent the structure from swaying or shifting over time. In between the joists, install mid-span blocking, also called bridging, to stop the boards from flexing too much.
This adds a solid feel underfoot and extends the lifespan of your deck.
These reinforcements are especially important for free-standing decks, which don’t get extra support from being attached to a house.
Step 6: Use Hurricane Ties
If your deck is free-standing, it’s more exposed to the wind. That means it can actually lift or shift if strong gusts get under it, especially on a slope.
To prevent this, add hurricane ties (metal connectors) between the joists and beams. These small brackets create a strong link that keeps everything in place during heavy wind or storms.
They’re often required by building code and are one of those details that take only minutes to install but make a huge difference in safety.
Step 7: Design for Snow and Dead Load
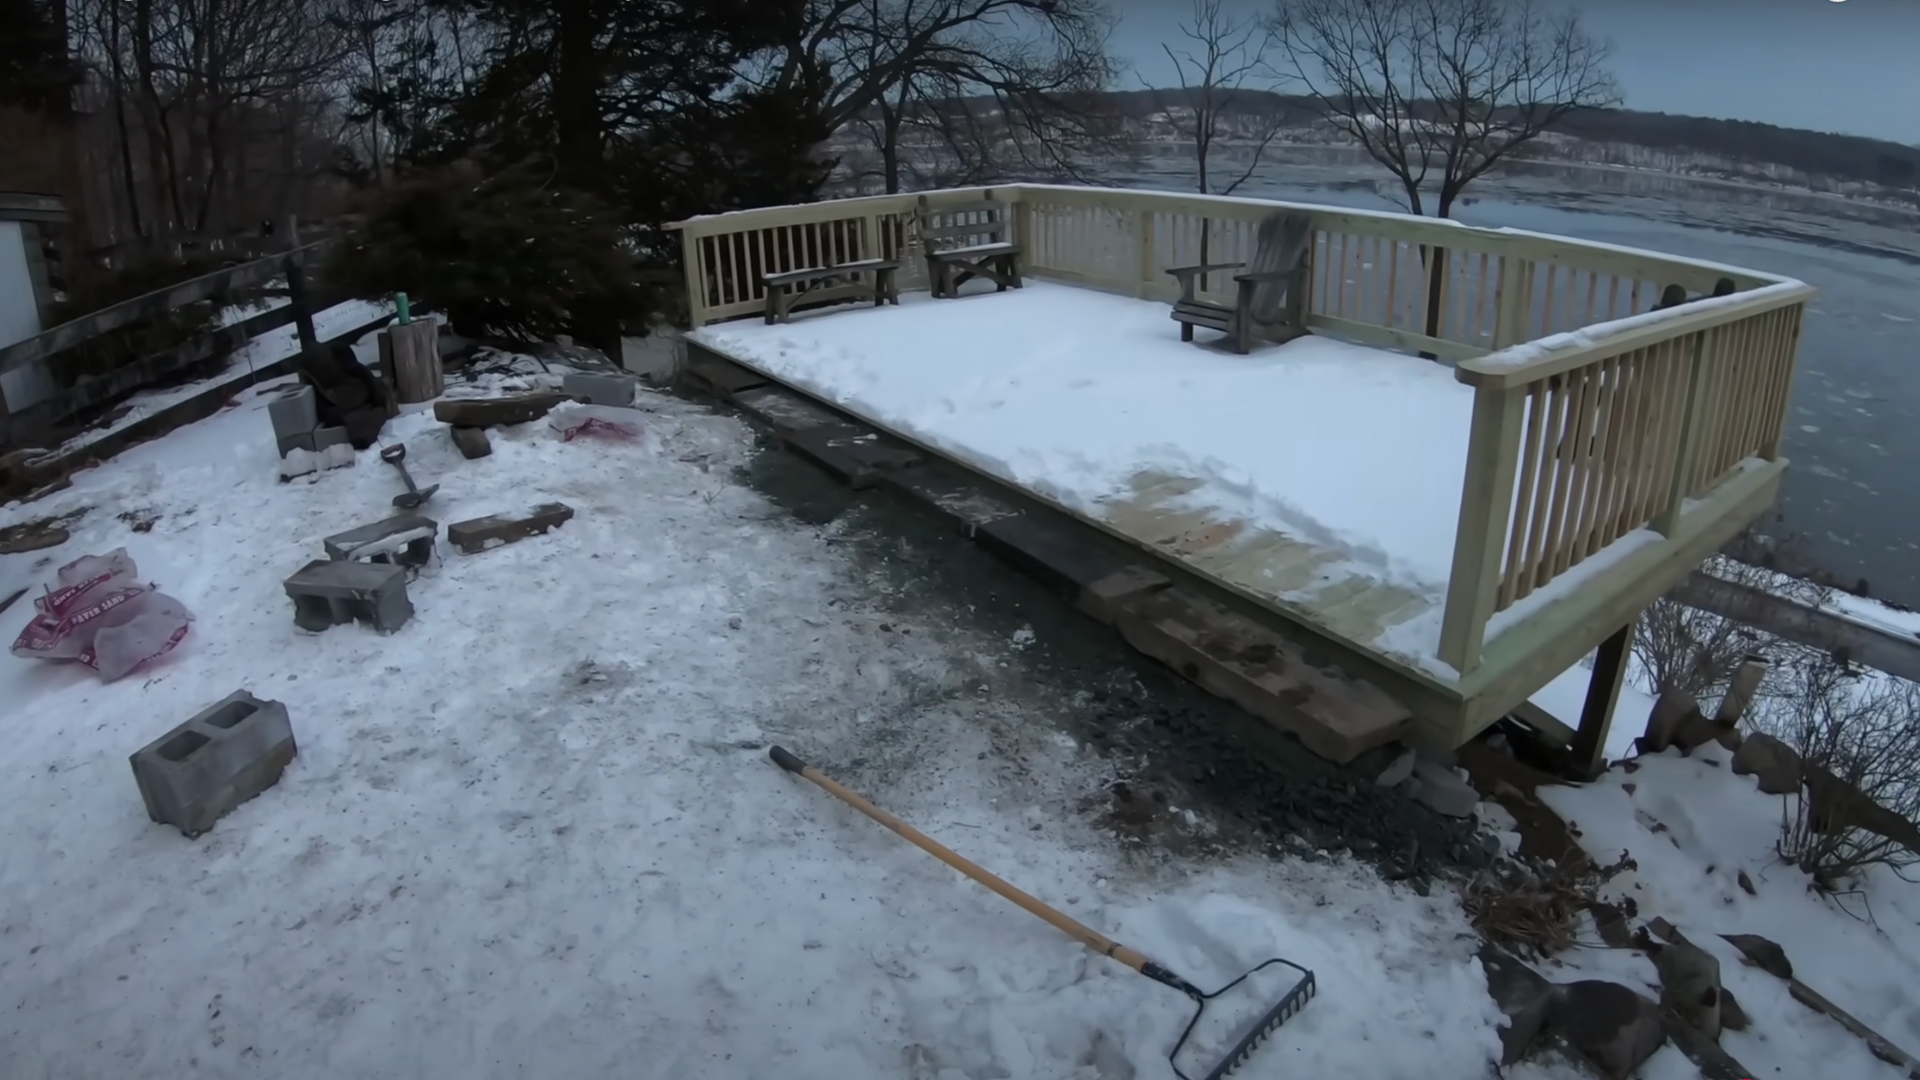
In areas that get snow, you need to design your deck to hold the extra weight. A good rule is to plan for a live snow load of about 50 pounds per square foot.
But that’s not the only weight your deck carries; there’s also the dead load, which includes the weight of the decking boards, framing, railings, and anything else built into the structure.
That’s usually another 10 pounds per square foot. All of this needs to be considered when choosing your lumber, spacing your joists, and setting your footings.
For a visual guide, refer to this video on how to build a deck on the slope by @jessemuller on YouTube.
Framing and Layout Techniques For Multi-Level Deck
Proper framing and layout are the foundation of a safe, sturdy multi-level deck on a slope. Using the right techniques ensures your deck is level, secure, and built to handle the challenges of uneven ground.
| Framing/Layout Task | Purpose/Benefit |
|---|---|
| Use a Laser or String Line | Define the deck footprint and maintain level lines across slopes. |
| Start Framing at Upper Level | Allows easier access and avoids building under finished decks. |
| Install Deep Footings or Piers | Ensures strong support, prevents movement or frost heave. |
| Use Pressure-Treated Beams/Joists | Provides durability and strength for long-lasting performance. |
| Space Joists Evenly | Supports even load distribution and decking alignment. |
| Add Blocking or Bridging | Reduces joist bounce and increases structural stability. |
| Include Diagonal Cross Bracing | Prevents swaying and movement on sloped terrain. |
| Plan Stair and Landing Locations | Ensures smooth transitions and safe access between levels. |
Drainage and Erosion Control Tips
Proper drainage and erosion control are essential when building a multi-level deck on a slope. These strategies help protect your structure from water damage and maintain soil stability around the footings and posts.
- Grade the ground: Ensure the soil slopes away from the deck so water doesn’t pool near the structure.
- Use gravel around footings: Place gravel at the base of each footing to improve drainage and prevent soil erosion.
- Install gutter or drainage systems: Use under-deck drainage, downspouts, or landscape fabric to manage heavy runoff in wet climates.
- Add a French drain: If your yard tends to collect water, a French drain can guide moisture away from the deck foundation.
- Use retaining walls if needed: On steeper slopes, small retaining walls can reduce erosion and support soil around your deck.
- Plant ground cover: Use erosion-control plants or mulch around the deck to stabilize soil and reduce water runoff.
- Inspect regularly: After heavy rain, check for puddles, soft spots, or washed-out soil and make repairs as needed.
Installing Safe and Functional Stairs for a Sloped Deck
From choosing the right location to adding railings and lighting, each step helps create a secure and easy-to-use connection between deck levels.
| Task | Description |
|---|---|
| Plan the Stair Location | Follow the natural flow of the yard; choose a straight, turning, or wrapping path. |
| Calculate Rise and Run | Measure total height and divide by 7″ for risers. Multiply by 10″ for stair length. |
| Build the Stringers | Use treated 2x12s or pre-cut stringers. Anchor securely at both ends. |
| Add Guardrails and Handrails | Required for decks over 30″ high. Install 36–42″ railings and handrails on stairs. |
| Consider Lighting | Add stair and rail lighting for safety. Use solar or low-voltage LED lights. |
| Make It Accessible | Consider ramps or wide stairs with handrails for improved accessibility. |
Maintenance Tips for a Sloped Deck
Sloped terrain can lead to more water runoff and shifting soil, so it’s important to inspect and care for your deck to ensure safety and durability over time.
- Inspect yearly for loose fasteners, cracked boards, and signs of rot.
- Clear leaves and debris to prevent water buildup and insect nests.
- Reseal wood decks every 2–3 years, or follow maintenance guidelines for composite materials.
- Check footings and posts for shifting after heavy rains or snowmelt.
- Tighten loose railings or stairs to ensure stability and prevent accidents.
- Sweep regularly to remove dirt and prevent staining or mildew.
- Clean between deck boards with a plastic putty knife to maintain proper drainage.
- Watch for signs of erosion around the deck’s base and make adjustments as needed.
- Trim back nearby plants or trees to prevent moisture buildup and keep pests away.
Conclusion
When I started my sloped backyard project, I wasn’t sure what was possible. But building a multi-level deck on a slope turned out to be the best decision for both beauty and function.
It gave me the space I wanted without leveling the yard, and added so much more than just square footage.
If you’re looking at your sloped yard and feeling unsure, take heart. With good planning, the right materials, and solid construction, you can create a deck that looks amazing and lasts for decades.
Don’t let hills or uneven terrain stop you; let them inspire your design. Ready to build your perfect outdoor retreat? If you need help figuring out a layout or picking materials, I’m here to help.