
I used to think skim coating was something only the pros needed to know, but I quickly learned it’s actually a super handy DIY trick for smoother, cleaner walls.
If your drywall or plaster feels rough, looks patchy, or has a texture you dislike, a skim coat can completely refresh the surface.
It creates a smooth, paint-ready finish that makes a huge difference, especially in older homes or after removing wallpaper or texture.
I’ve used it on everything from hallway walls to a ceiling that had seen better days, and the results always impress me.
In this post, I’ll break down what skim coating is, why it matters, and how you can tackle it yourself with the right tools and a little patience.
Thinking about updating your walls? Let’s get started!
What Is Skim Coat?
A skim coat is a thin layer of joint compound, often called drywall mud, applied to walls or ceilings to create a smooth, even surface.
It’s commonly used to repair drywall damage, cover up old textures like popcorn or orange peel, or prepare a surface for a new coat of paint or wallpaper.
The primary purpose of skim coating is to conceal imperfections, including dents, cracks, and uneven patches.
Once dry and lightly sanded, it creates a seamless, professional-looking surface.
Skim coating can be applied to entire walls or spot-treated in damaged areas. While often done by contractors, it’s also a popular DIY project.
With the right tools and some practice, many homeowners can achieve smooth, paint-ready walls on their own. It’s an affordable, effective way to refresh tired or textured surfaces without major renovation.
When Should You Use a Skim Coat?
Skim coating isn’t always necessary, but it can make a massive difference in the right situations.
If your walls have a knockdown, orange peel, or popcorn texture, a skim coat smooths everything out, creating a clean slate for a modern, flat finish.
Another time to consider skim coating is to fix damaged drywall or plaster. Dents, cracks, patched holes, or uneven surfaces can show through paint, especially in natural light.
A skim coat helps conceal these imperfections and creates a fresh, uniform surface. It’s also helpful after wallpaper removal when adhesive residue and surface tears are left behind.
If you’re aiming for a sleek, high-end look or simply want walls that feel new again, a skim coat is often the most effective prep step.
It provides a clean, professional result, especially when applied before bold or glossy paint finishes.
Skim Coating Walls: Step-by-Step Guide
Learn how to skim coat walls using a paint roller with this beginner-friendly method.
Materials Used
This is a list of all the tools and materials you’ll need to skim coat walls using the paint roller method successfully.
- USG All-Purpose Joint Compound
- DeWalt 20V Cordless Drill
- Paint Mixer Attachment
- 3/4-Inch Lambskin Roller Cover
- Roller Handle
- 5-Gallon Paint Grid
- 14-Inch Mud Pan
- 12-Inch Drywall Taping Knife
- 6-Inch Drywall Taping Knife
Step 1: Prepare the Joint Compound
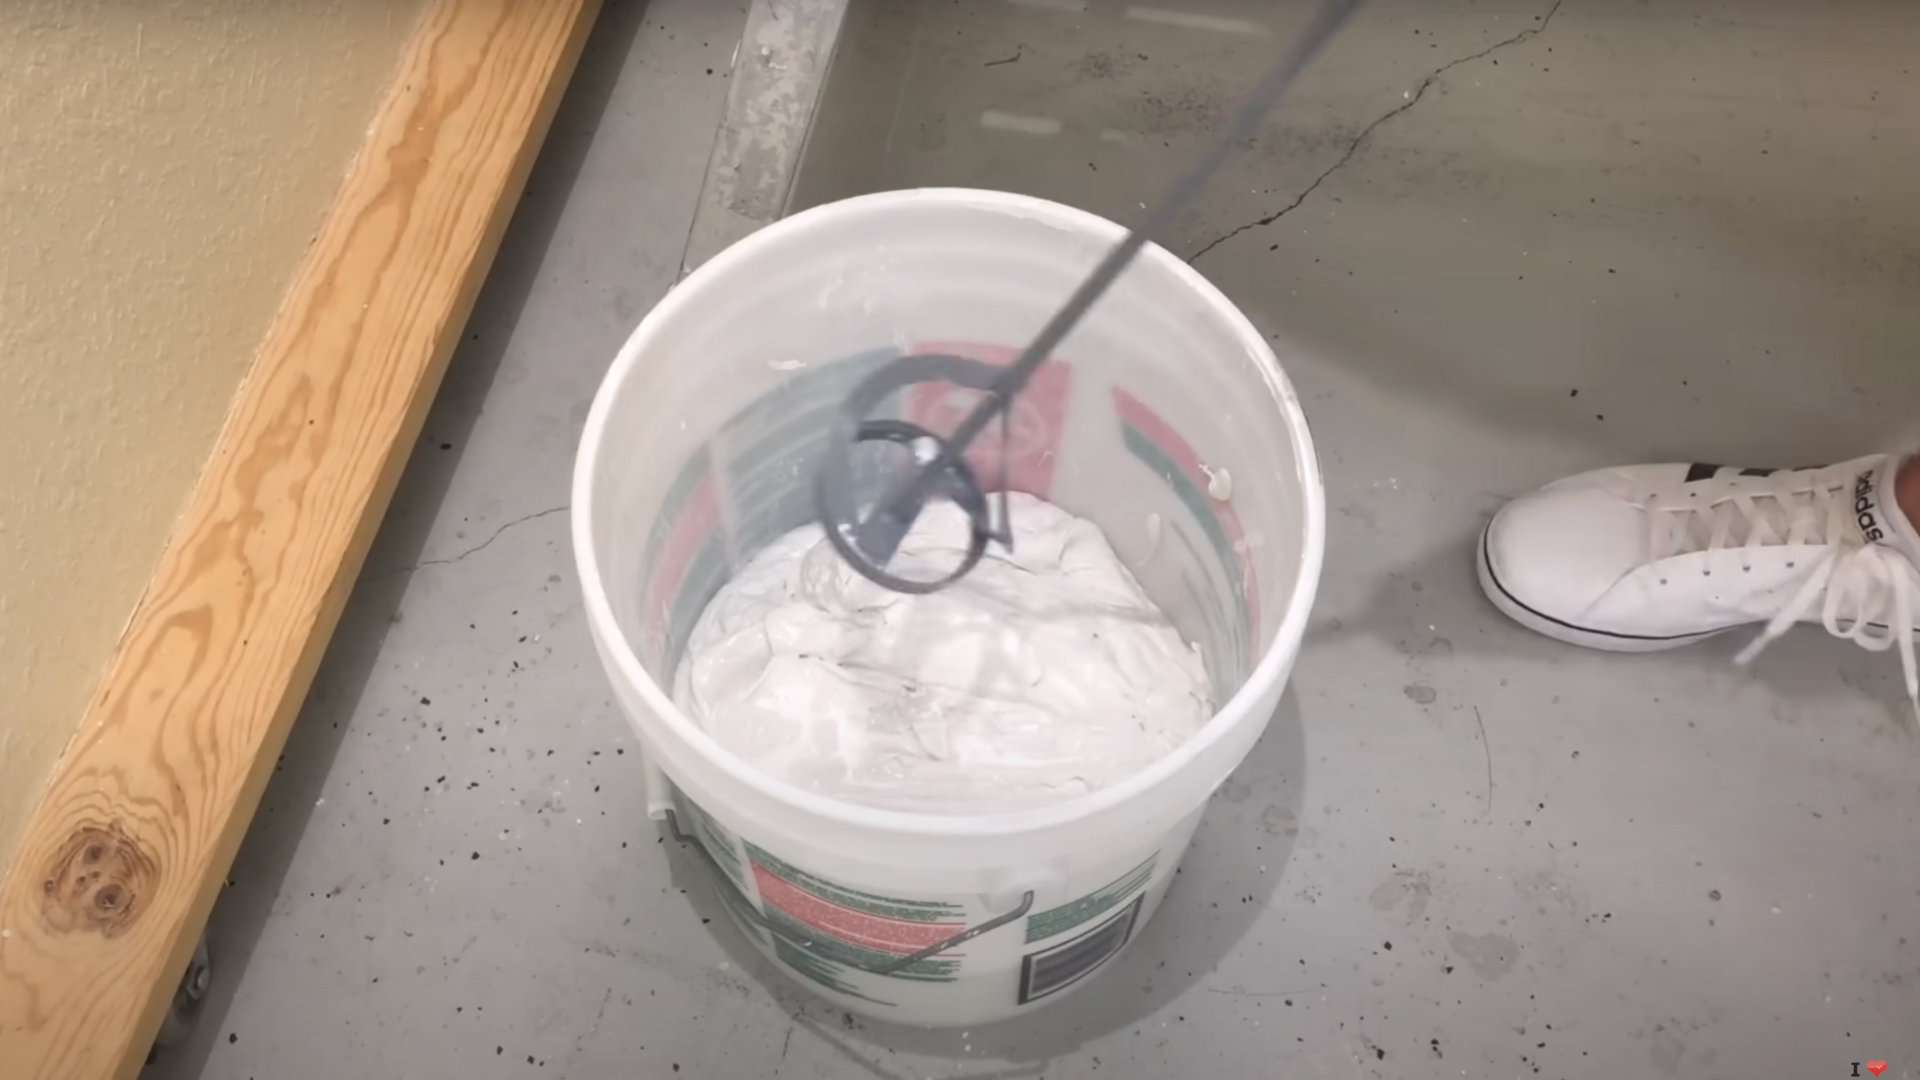
Begin by splitting the 5-gallon bucket of joint compound in half. This makes it easier to mix thoroughly.
Use a cordless drill with a paint mixer attachment to stir the compound, adding water a little at a time. Aim for a yogurt-like consistency, not too thick, not too soupy.
Mix from the bottom up to ensure the water distributes evenly throughout the compound for a smooth, workable texture.
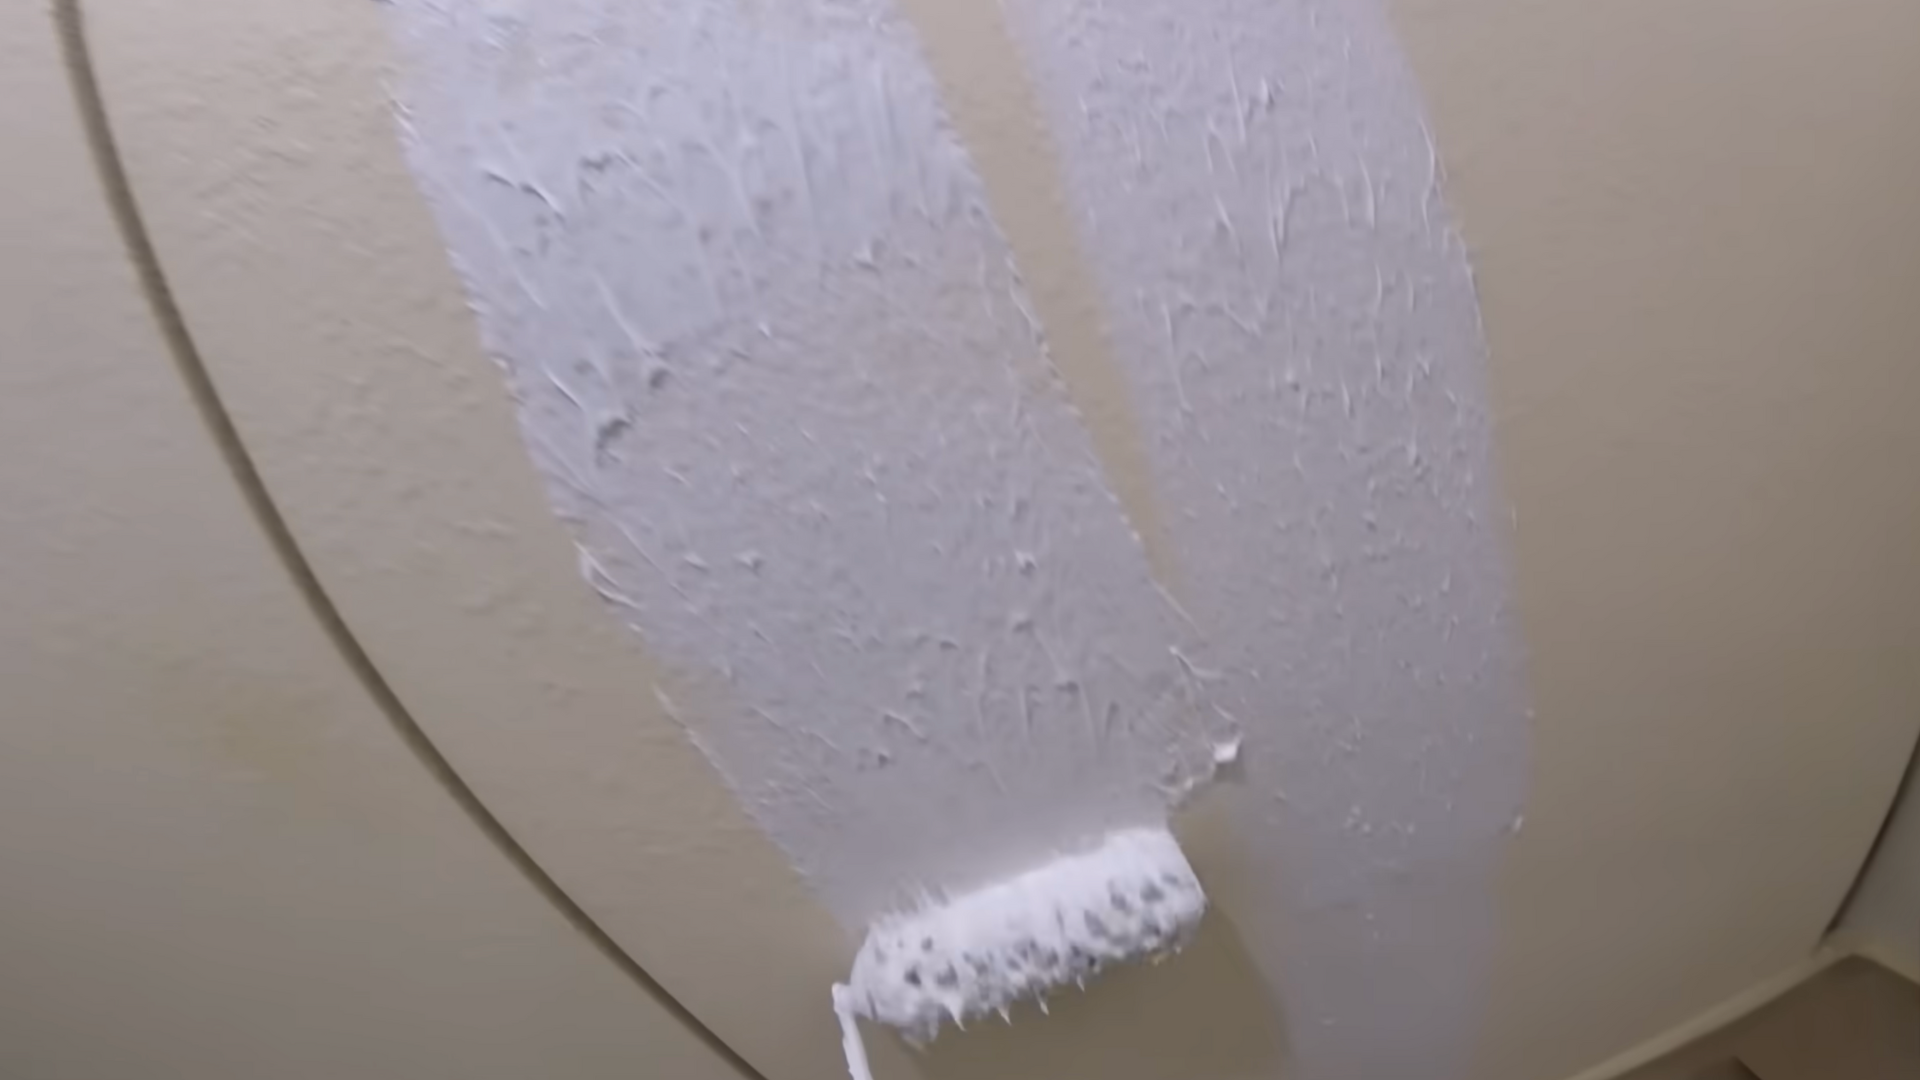
Step 2: Load the Roller with Mud
Dip a 3/4-inch lambskin roller directly into the thinned joint compound. Fully submerge the roller to ensure even saturation.
Use a 5-gallon paint grid to roll off the excess compound, which helps prevent drips and ensures a consistent application.
This roller method is ideal for beginners, as it delivers a smooth and even coat without the hand fatigue of using only a knife or trowel.
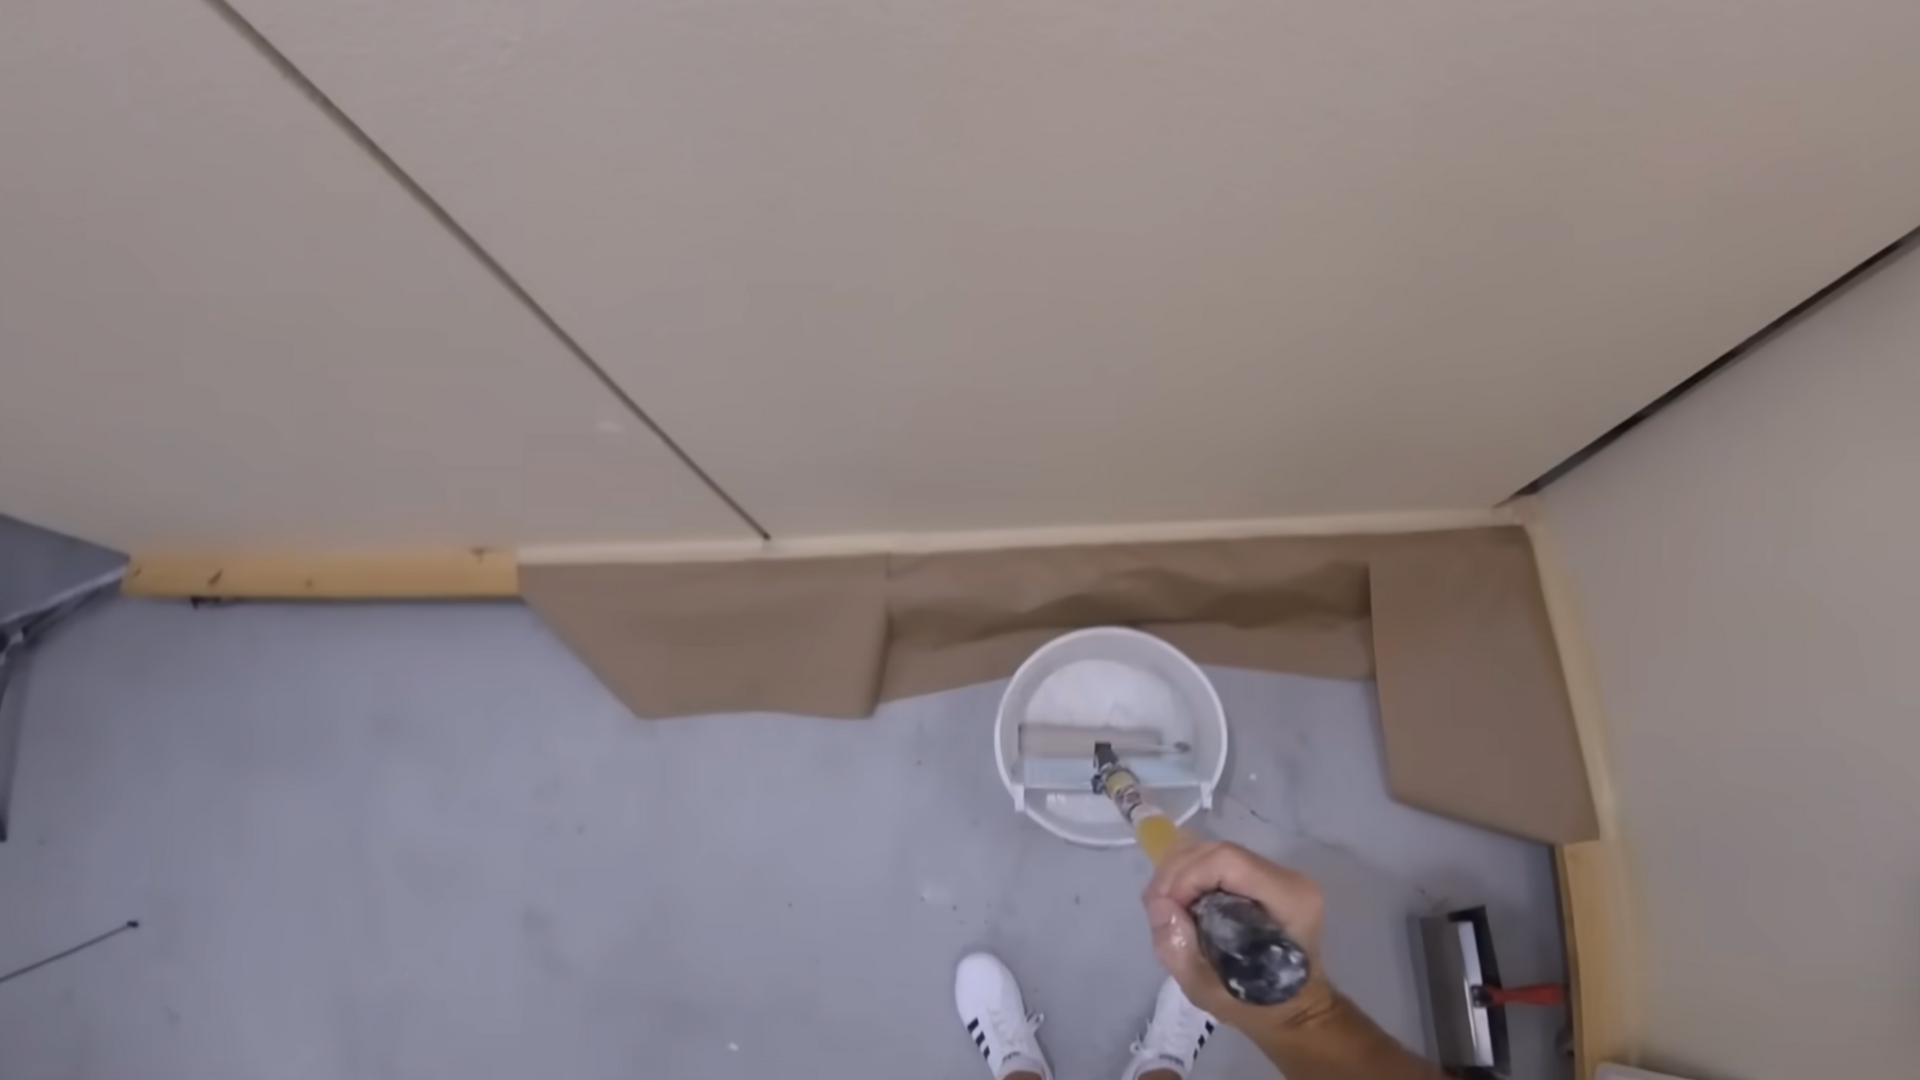
Step 3: Roll the Mud onto the Wall
Start rolling the joint compound onto the wall. Use light pressure and focus on covering the surface evenly.
For small walls, like in a bathroom, you can roll out the entire area at once. For larger walls, work in sections.
Keep the mud layer consistent; unlike paint, you want to leave the material on the wall rather than spreading it thin. Aim for full coverage.
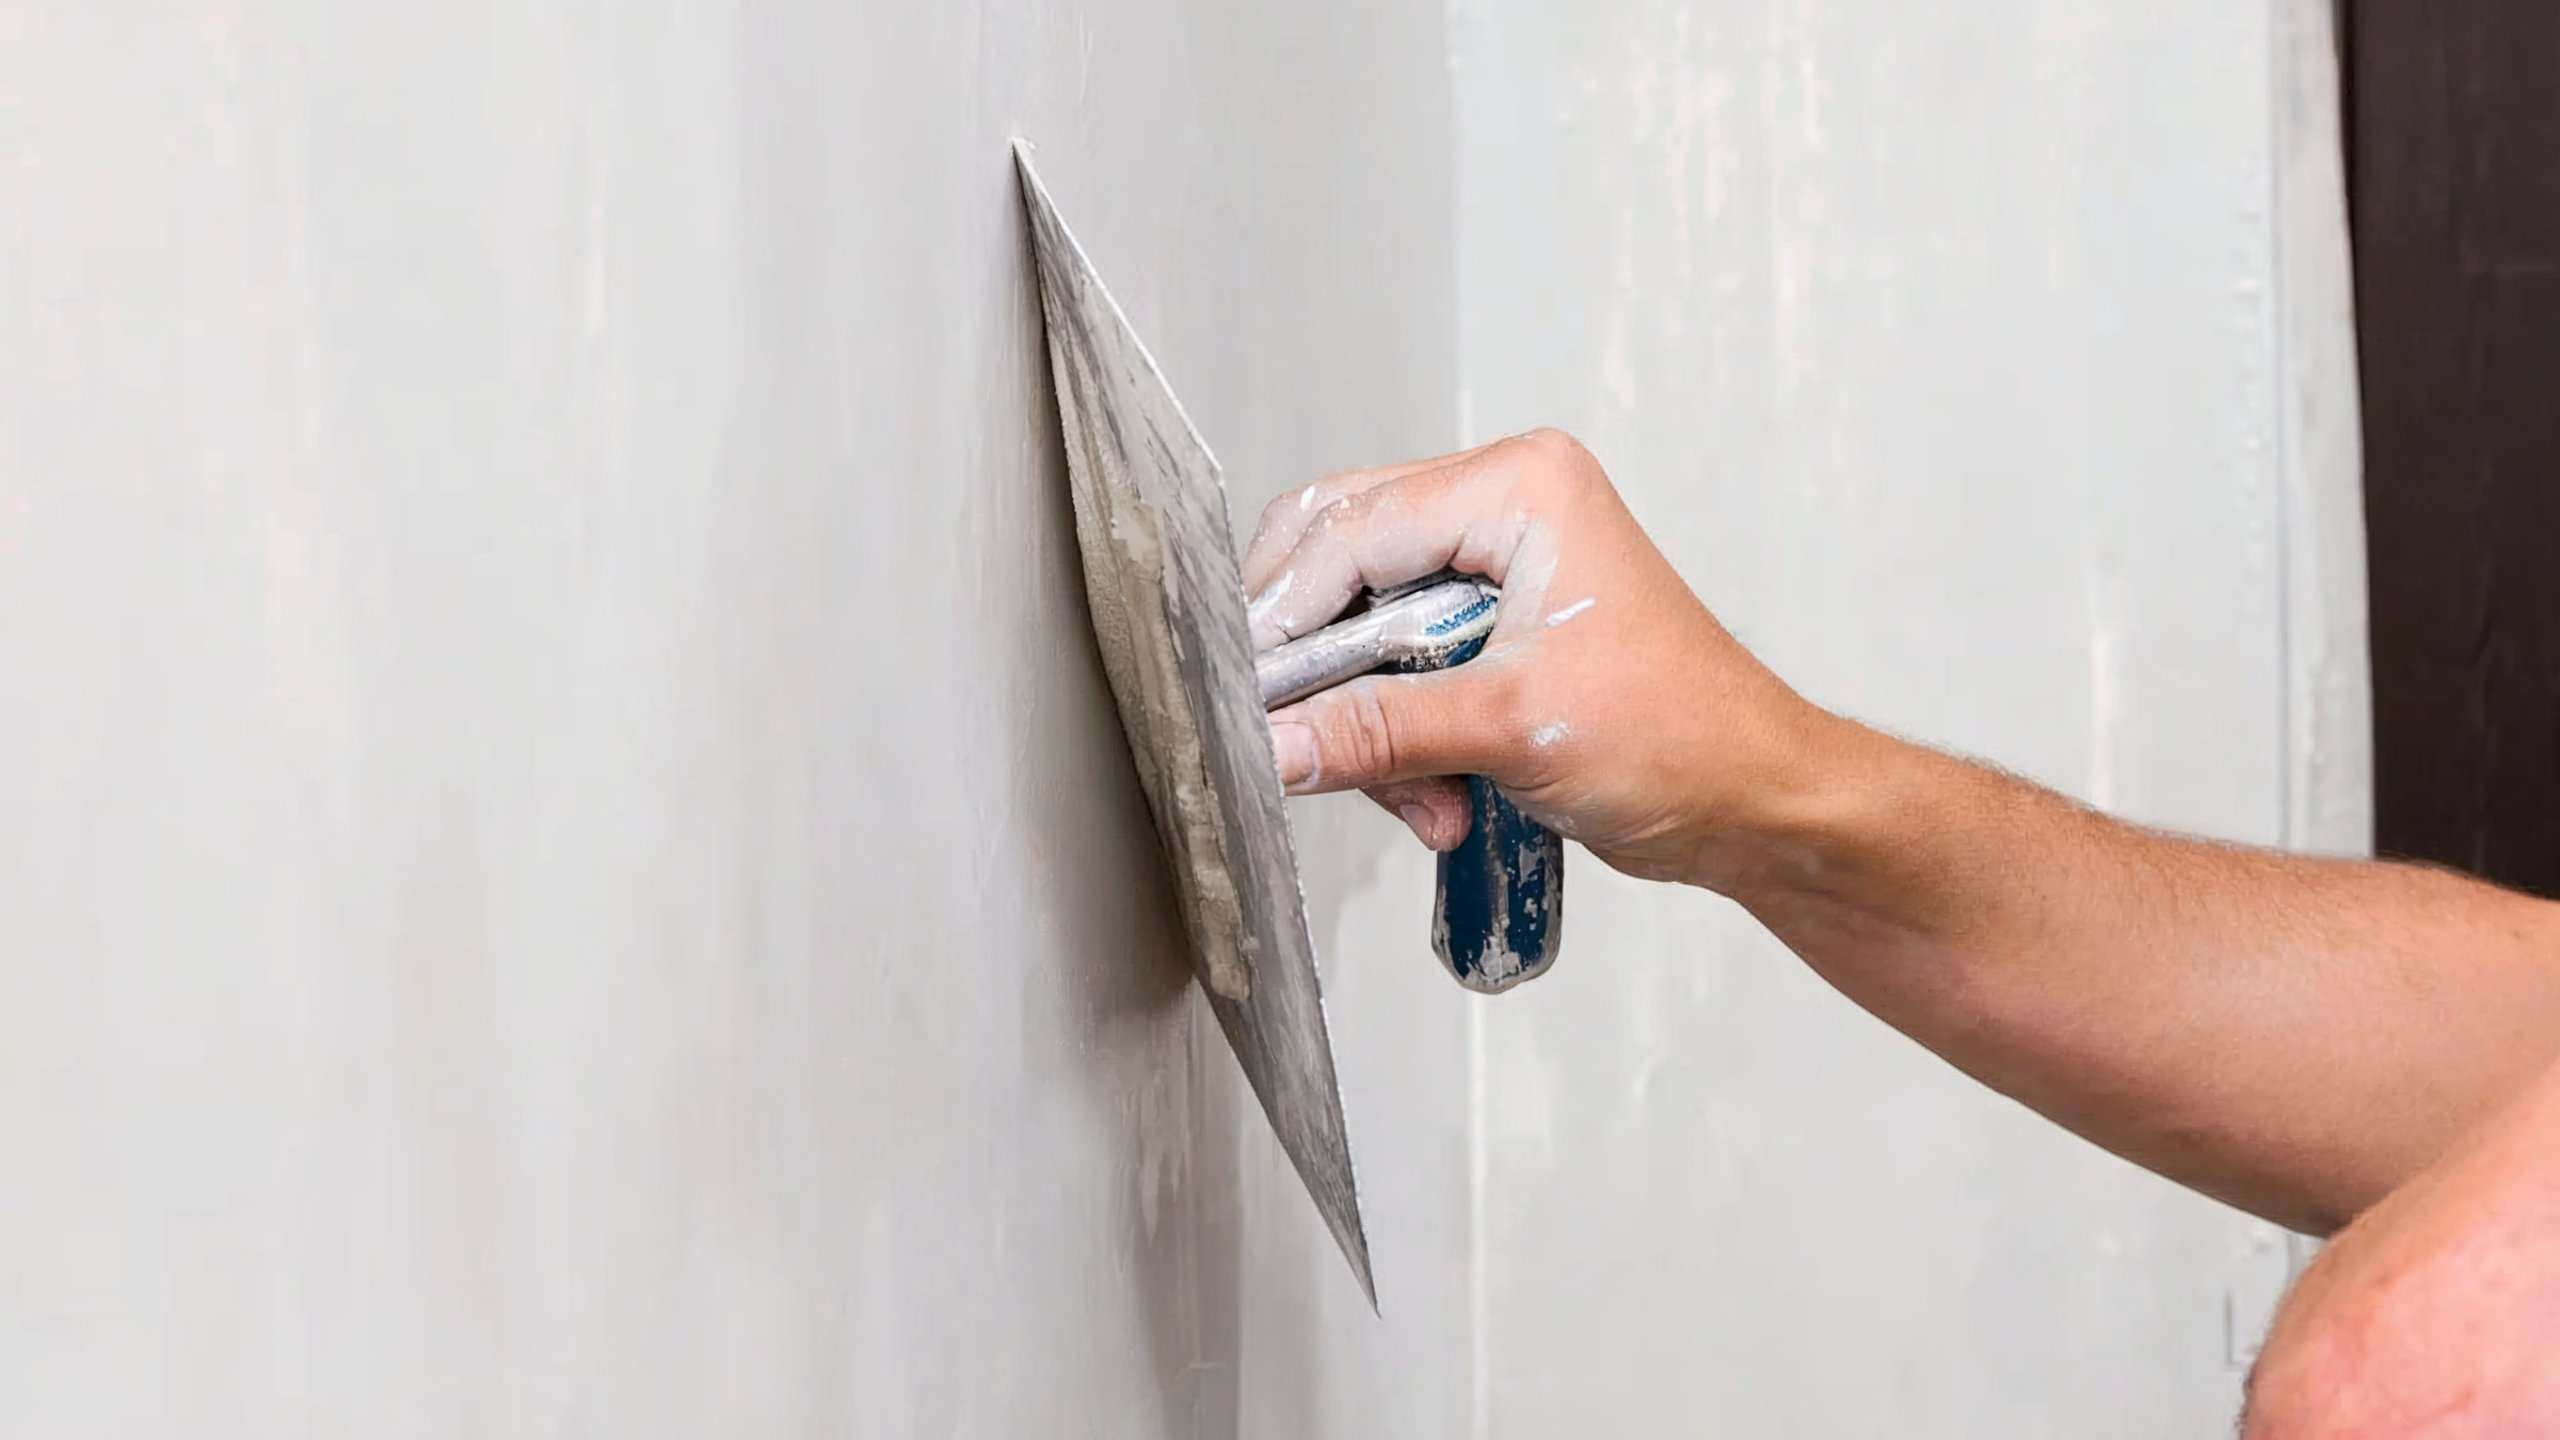
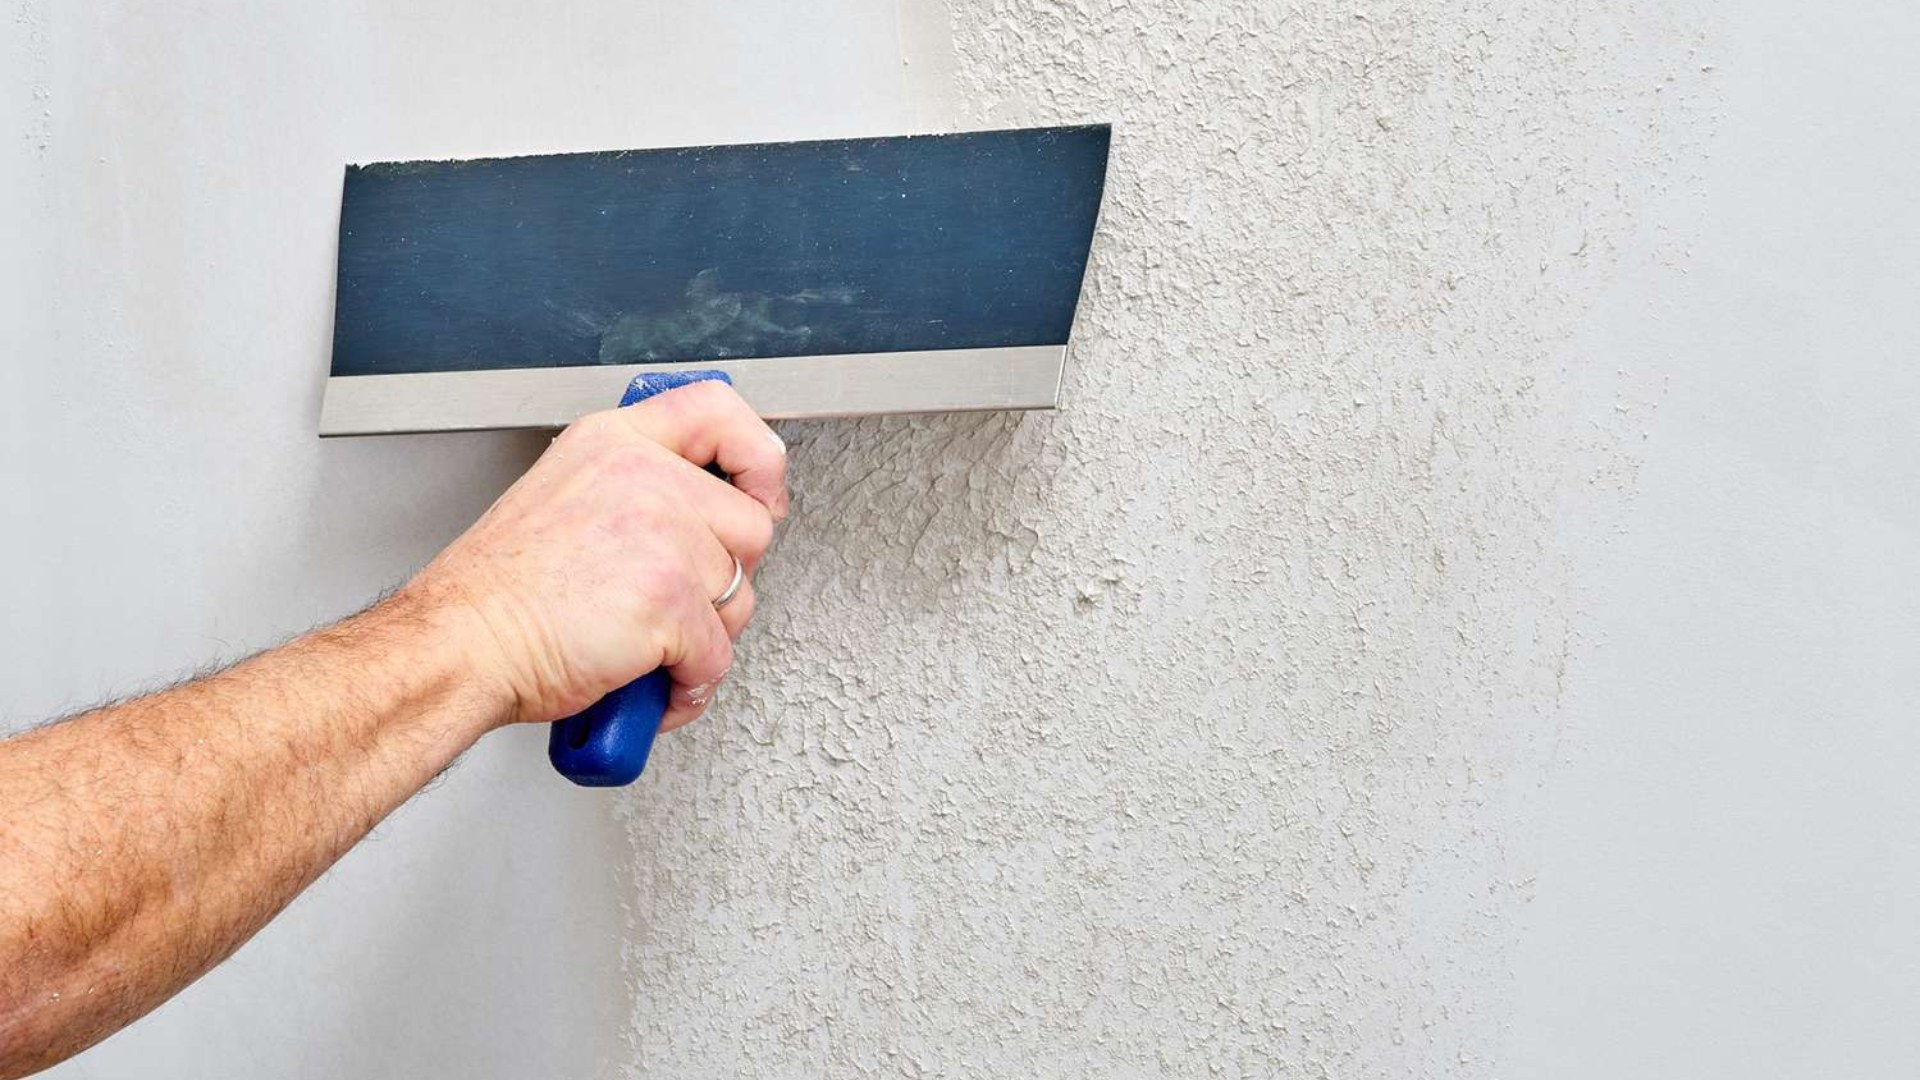
Step 4: Smooth the Surface with a Taping Knife
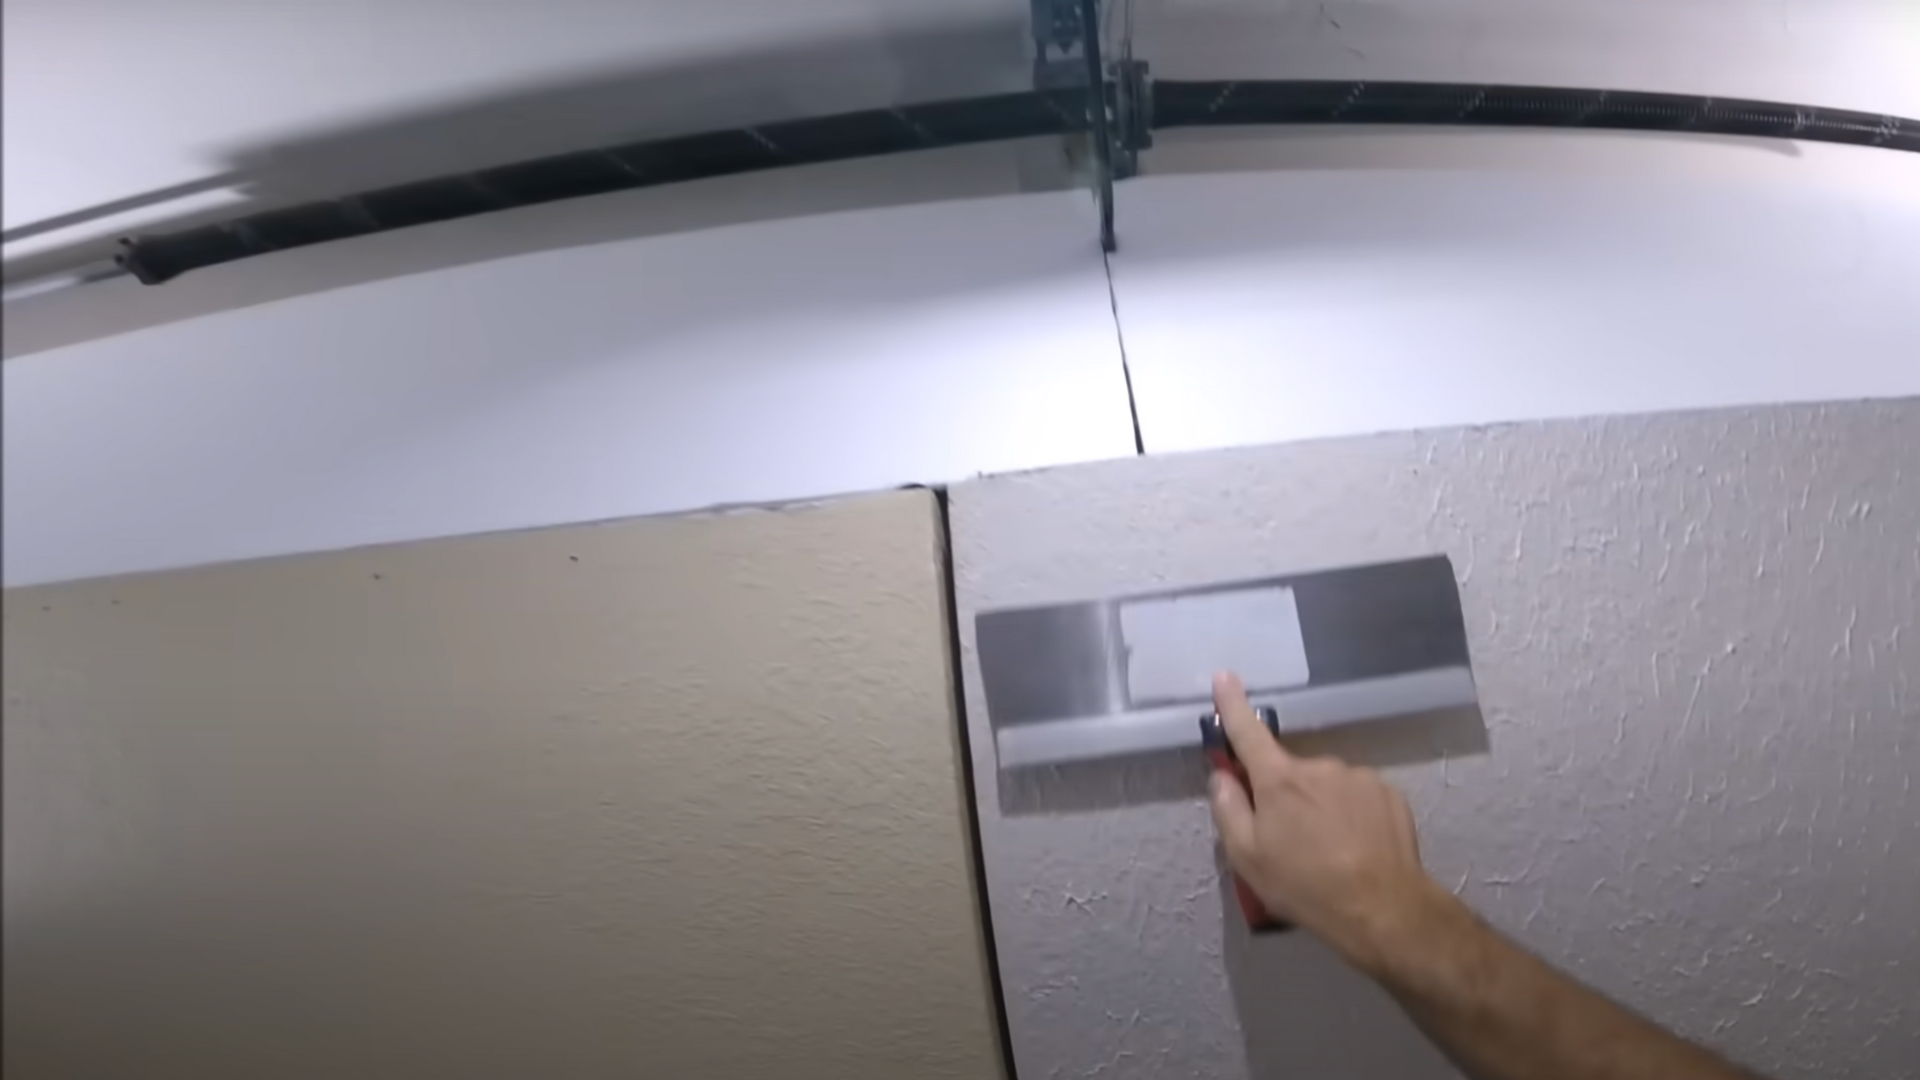
After the compound is rolled on, use a 12-inch taping knife to smooth it out. Hold the knife at an angle and apply pressure to one side to avoid leaving lines.
Work in long strokes, starting from the bottom or top and moving across each section.
The goal is to even out the surface while leaving enough mud to cover the texture or flaws underneath.
Step 5: Let It Dry and Inspect the Surface
Allow the first skim coat to dry completely. Dry time can vary based on humidity and temperature. Once dry, inspect the wall.
Some texture or tool marks may still be visible after the first coat; this is normal.
You can gently scrape any raised lines or ridges with a 6-inch knife to prepare the surface for the second skim coat.
Step 6: Apply a Second Skim Coat

Repeat the roller and knife process for a second coat. This coat fills in the remaining ridges, chatter marks, or missed areas from the first pass.
Use the same technique to apply joint compound with the roller and smooth it out with a knife using consistent pressure.
After drying, this coat should provide a near-flawless finish suitable for painting or further texturing.
Recommended: Want to see the process in action? Watch the full step-by-step video by @PaulPeck below and follow along to get smooth, professional-looking walls!
Different Types of Skim Coating
Skim coating can be applied full, spot-based, or rolled on, depending on the surface condition and the desired finish. Each method offers different coverage and results.
1. Full Skim Coat
A full skim coat involves applying a thin layer of joint compound over the entire surface of a wall or ceiling.
This method is ideal for heavily textured surfaces or large areas that require complete smoothing.
It creates a consistent, uniform finish that is paint-ready after drying and sanding.
A full skim coat typically requires two or more coats to conceal imperfections and achieve a smooth, flawless surface.
2. Spot Patching
Spot patching is used to repair localized areas of damage rather than coating the entire surface.
It’s effective for fixing cracks, holes, dents, or previous repairs that have left visible marks.
Joint compound is applied only to problem areas, then smoothed and feathered out to blend with the surrounding surface.
This method is quicker than a full skim coat and is often used for touch-ups or on otherwise smooth walls with minor flaws.
3. Level 5 Finish
A Level 5 finish is the highest standard of drywall finishing and includes a full skim coat over the entire surface after the standard taping and sanding process.
It’s commonly used in spaces with bright lighting or glossy paints, where even minor imperfections become visible.
The skim coat ensures an entirely smooth and uniform surface.
Achieving a Level 5 finish requires precision, making it common in high-end residential and commercial projects.
4. Roll-On Method
The roll-on method uses a thick-nap paint roller to apply joint compound evenly across the wall, which is then smoothed out with a drywall knife or trowel.
This technique is faster than traditional skim coating with a knife alone and helps maintain an even distribution.
It is ideal for large areas and is often used by professionals and DIYers alike to save time while still achieving a consistent, smooth finish.
How Long Does Skim Coating Take?
Skim coating timelines depend on the project size, number of coats, and drying conditions. Typically, a single coat of joint compound takes 12 to 24 hours to dry.
If multiple coats are needed, each must dry fully before the next is applied, extending the total time.
For an average-sized room, the full process, including surface prep, application, drying, sanding, and cleanup, can take 2 to 3 days.
Spot patching may only require a day, while larger jobs, such as ceilings or full walls, could take longer.
Can You Paint Directly Over a Skim Coat?
Painting directly over a skim coat without priming is not recommended.
The joint compound used in skim coating is porous and will absorb paint unevenly, leading to a patchy or dull finish.
To avoid this, it’s essential to apply a coat of drywall primer or PVA primer after the skim coat is completely dry and lightly sanded.
Priming seals the surface, allowing the paint to adhere evenly and smoothly. It also helps prevent peeling, streaks, and uneven color absorption.
Taking the time to prime ensures your final coat of paint looks clean, consistent, and long-lasting.
Skim Coat vs. Other Wall Fixes
Skim coating is just one way to repair or refresh wall surfaces, but it’s often confused with other techniques like spackling, applying joint compound, or texture removal.
| Feature/Use Case | Skim Coat | Spackle | Joint Compound | Texture Removal |
|---|---|---|---|---|
| Purpose | Smooth the entire surface or large areas | Fill small holes, dents, or cracks | Tape seams, embed drywall tape, and patch larger areas | Remove old wall texture |
| Coverage Area | Full walls, ceilings, or large sections | Small spots and minor imperfections | Small to medium patches or seams | Entire textured walls or ceilings |
| Finish Result | Smooth, paint-ready surface | Blended repair is usually sanded flush | Requires sanding; often covered with a skim coat afterward | Leaves a rough surface, often followed by skim coating |
| Best Tool Used | Wide taping knife or trowel | Putty knife | Taping knife | Scraper, sprayer, or sander |
| DIY-Friendly | Moderate difficulty; requires practice | Very easy | Easy to moderate | Moderate to hard, depending on the method |
Is Skim Coating a DIY or Pro Job?
Skim coating can be a DIY project, but it depends on the scope of the job and your comfort level with wall repairs.
For small areas like spot patches or a single wall, many homeowners can handle it with the right tools, a bit of practice, and patience. It’s a great way to improve surface quality without major renovation costs.
However, larger jobs like full rooms, ceilings, or achieving a flawless Level 5 finish may be better left to professionals.
Pros have the experience to work faster, apply compound evenly, and avoid common issues like ridges or bubbles.
If your walls are in rough shape or you’re short on time, hiring a contractor ensures high-quality results.
For simpler fixes or learning a new skill, DIY skim coating is definitely doable and rewarding. Evaluate the size, condition of the surface, and your skill level before deciding.
Conclusion
Now that you know what a skim coat is and when to use it, you’re one step closer to transforming rough or outdated walls into smooth, clean surfaces.
I’ve found skim coating to be a simple yet powerful way to refresh a room, especially when patchy drywall or stubborn textures get in the way of a good paint job.
Start small, maybe with a closet or low-traffic wall, and see how it goes. Once you get the hang of it, it becomes surprisingly satisfying and well worth the effort.
If you’ve got a wall that’s been bugging you, now might be the perfect time to give skim coating a try.
Have questions or want to share your results? Drop a comment, I’d love to hear how your project turns out!