
Have you ever looked at a painted piece of wood and thought, “Hmm… I wish this had more of a natural wood look?” I&ve been there too.
Many DIY enthusiasts face this exact challenge. In this guide, I’ll break down everything you need to know about applying stain over painted surfaces.
You might be wondering:
- Can you really stain over paint?
- What tools do you need?
- What mistakes should you avoid?
I&ve personally tried this method on a painted bookshelf, and I&ll share what worked (and what didn&t). We&ll also look at tips from DIY experts and stories from real people who&ve tried staining over paint.
Can You Put Stain Over Paint?
Yes, you can put stain over paint, but it&s not the easiest or most effective method without proper preparation.
Stain is designed to soak into bare wood, highlighting its natural grain and texture. However, paint acts as a barrier, preventing the stain from penetrating the surface.
If you try to apply stain directly over paint without any prep work, it will simply sit on top, leading to an uneven, blotchy, and often sticky finish that won&t last.
The good news is that with the right approach, like sanding or using a special stain product designed for painted surfaces, you can achieve a stained effect even over paint.
It takes a bit of time and effort, but the results can change an old painted piece into something that looks rich and natural.
No matter if you&re aiming for a weathered wood look or a subtle color shift, preparing the surface is the key to success.
Step-By-Step Guide for Staining Over Painted Furniture
Follow this clear and easy step-by-step process to paint your furniture by applying wood stain. If you&re aiming for a subtle wood-toned accent or a bold, stained makeover, my guide will walk you through every stage to achieve a smooth and stylish result.
Materials and Tools You&ll Need
- Fusion Stain and Finishing Oil (e.g., Cappuccino)
- Pre-painted wooden surface (e.g., dresser)
- Foam brush
- White lint-free rags (or any clean, lint-free cloth)
- Optional: painter&s tape and drop cloth (for prep)
Step 1: Choose the Right Product
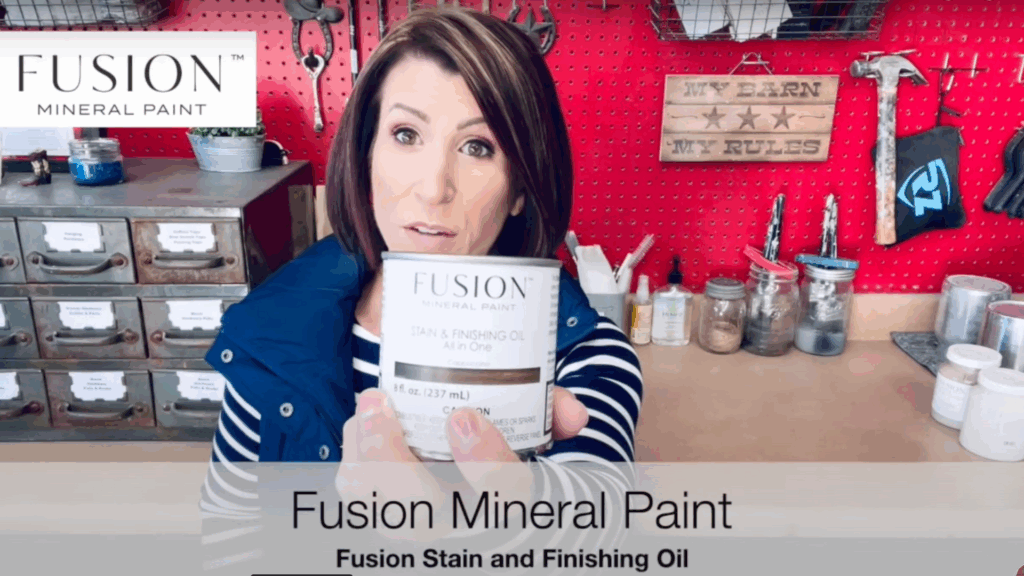
You can use Fusion Stain and Finishing Oil, which is a stain and topcoat in one. This product is highly durable and works well on both bare wood and painted surfaces.
It comes in several colors like Cappuccino, Ebony, Driftwood, and Natural. Choose the color that suits your project.
Pro Tip:These stains can be blended for a custom look.
Step 2: Prepare Your Painted Surface
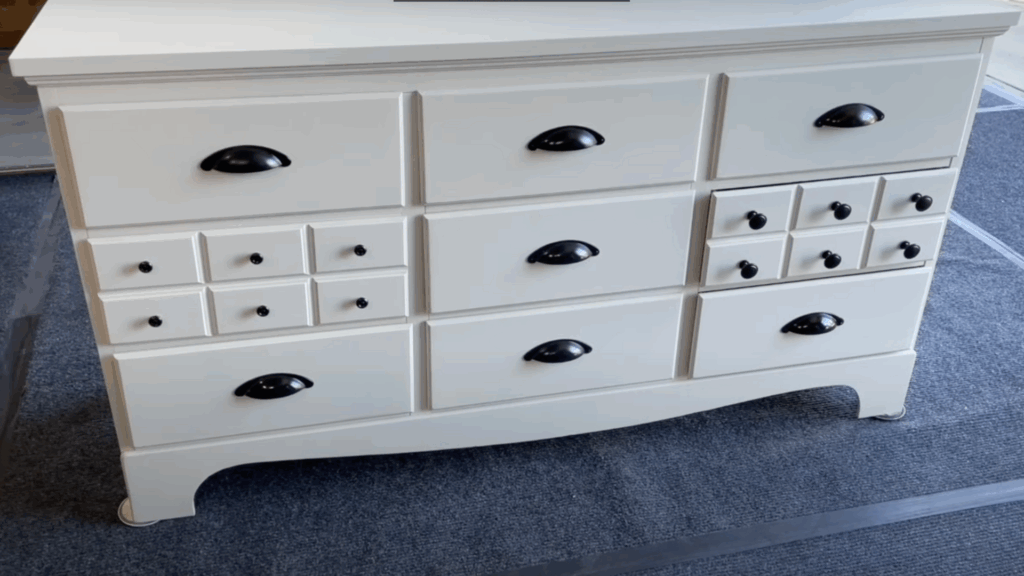
Start with a fully dried painted surface to ensure the best results. Begin by painting your piece with Fusion’s Raw Silk, a creamy off-white shade, and allow it to dry thoroughly for at least 24 hours before applying any stain.
This drying time helps the paint cure properly and prevents issues during staining. It&s important not to rush this step, as applying stain too soon can result in smearing, blotching, or a patchy finish.
Make sure the surface is clean, dry, and free from dust, grease, or any loose particles that could affect the final look. A little extra time spent here will lead to a much smoother and more professional outcome.
Step 3: Apply the Stain with a Foam Brush
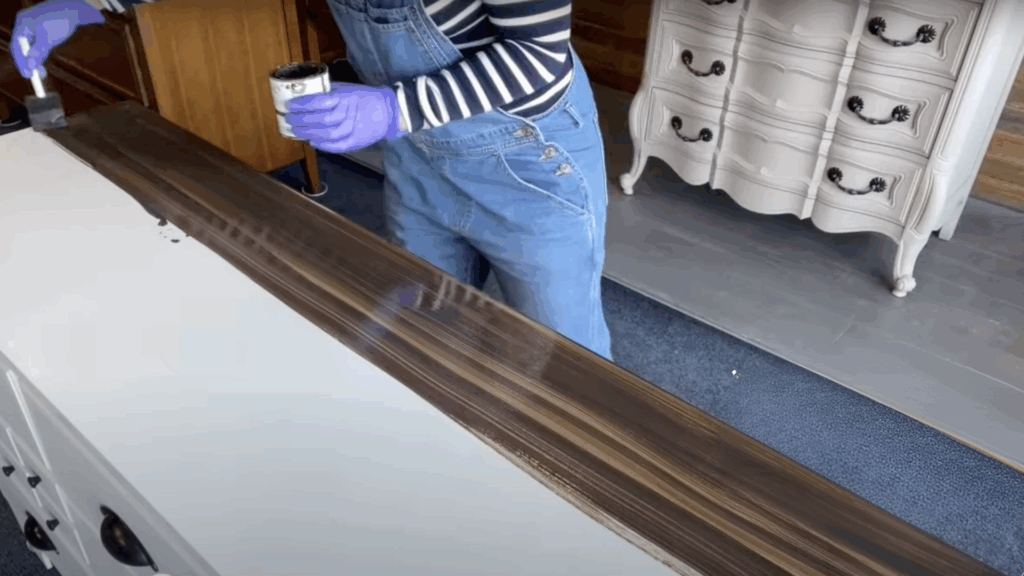
Dip your foam brush into the Fusion Stain and Finishing Oil and apply it over the painted surface. Work in long, even strokes, covering one section at a time.
Since this product has a 10-minute open time, you have a short window to apply and adjust it before it starts to set. Focus on smooth application, but don&t stress too much; most of the look comes from the wipe-back process.
Step 4: Let the Stain Sit for a Few Minutes
After brushing the stain on, let it sit for a short while to begin working. This pause allows the stain to lightly soak into the painted surface and start settling into any details or texture.
Giving it a moment helps achieve a more even and rich finish. While it sits, take a minute to prepare your lint-free rags – you&ll need them for the next step.
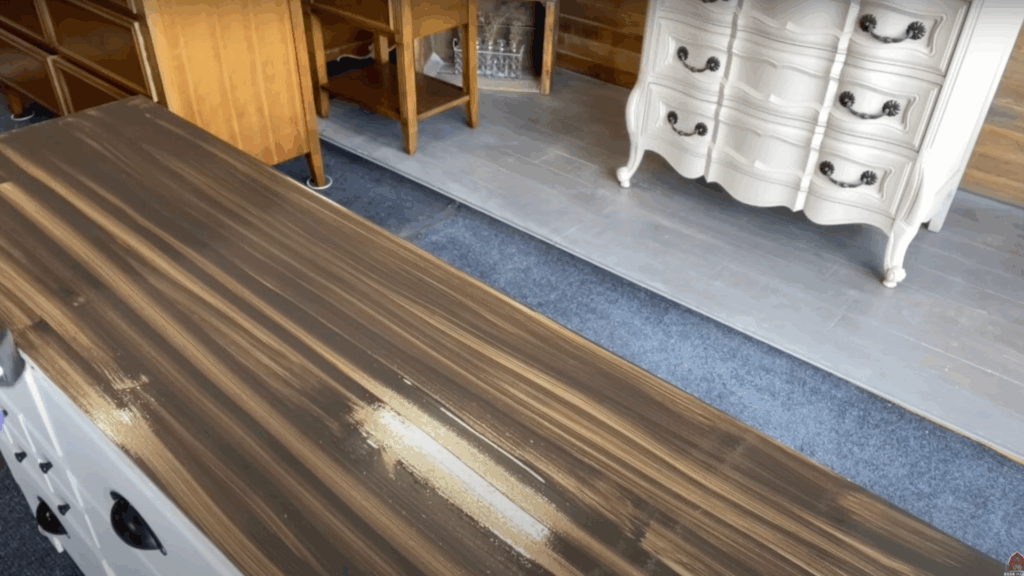
Step 5: Wipe Off the Excess Stain
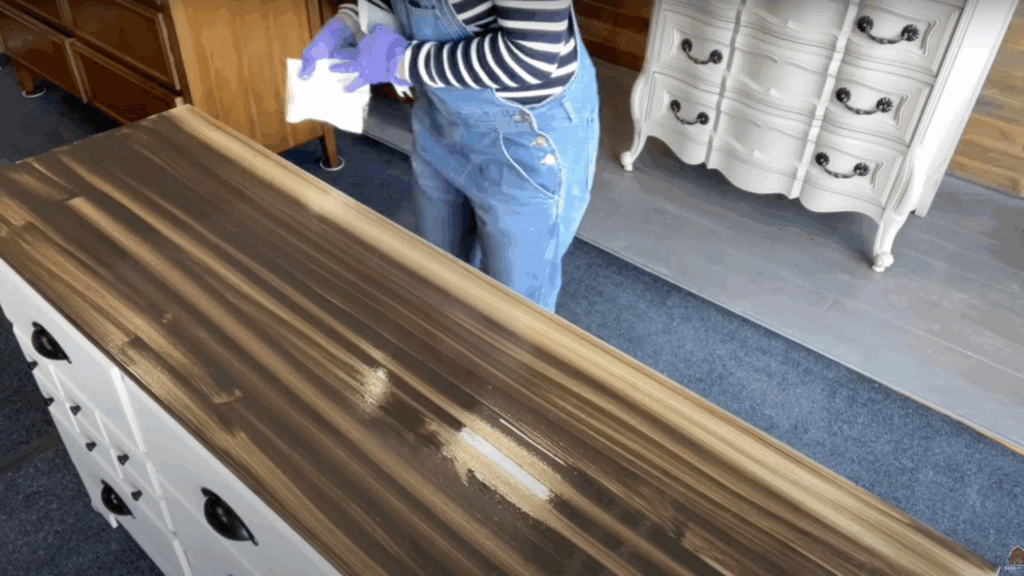
Use white rags (or any lint-free cloth) to wipe back the stain. The key here is to wipe in straight, consistent lines, following the grain or length of your furniture piece.
First, hold a rag in each hand and wipe from one end to the other, then flip the rag as it becomes saturated. Use clean parts of the rag as needed to avoid smearing.
The final look depends on how much you wipe off. Wipe more for a lighter effect, less for a deeper color.
Step 6: Adjust the Color by Wiping More or Less
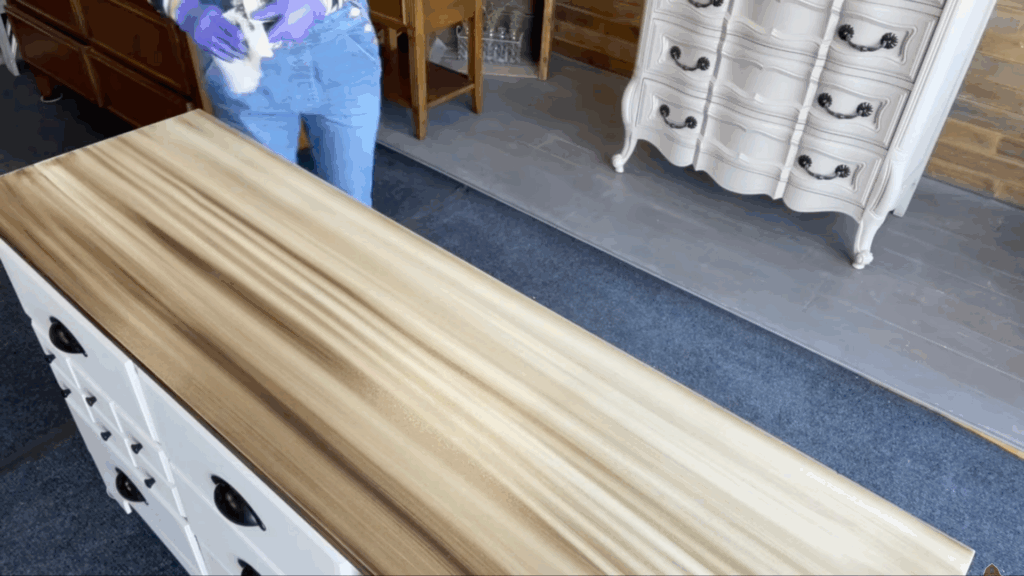
Keep wiping the stain until you achieve the shade you&re going for. If you&re after a lighter, more washed-out look, continue wiping to lift off more of the stain.
For a deeper, richer tone, wipe less and let more stain remain on the surface. This product blends beautifully, creating a soft, layered effect that enhances the painted base.
Best of all, there&s no need for an additional topcoat – it seals itself for a smooth, durable finish.
Step 7: Let It Dry and Enjoy the Results
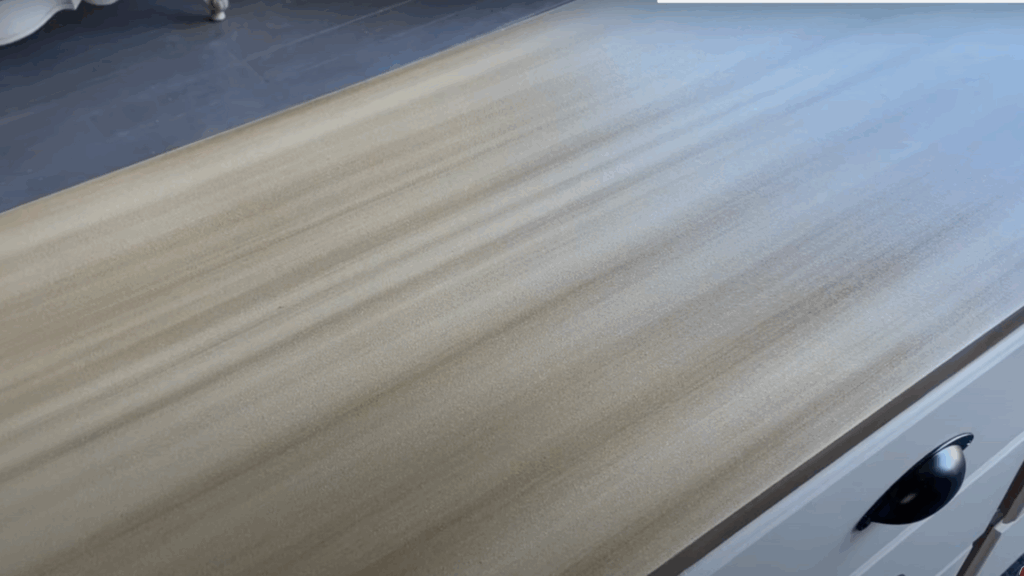
Once you&re happy with the look, set the piece aside and let it dry completely. The surface will be touch-dry within hours but may need a full 24 hours to fully cure, depending on temperature and humidity.
What Is Stain and What Does It Do?
Stain is a colored liquid that sinks into the wood and brings out its natural grain, giving it an earthy look. It comes in many shades, such as dark walnut, golden oak, and gray wash, allowing you to choose a tone that fits your style.
Unlike paint, which sits on top and covers the surface, stain penetrates the wood and changes the color of the wood fibers themselves. This makes it perfect for showing off the wood&s texture.
There are two main types of stain: oil-based, which takes longer to dry but goes deeper into the wood, and water-based, which dries faster and is easier to clean up.
But what happens if the wood is already painted? That&s where it gets a bit tricky, because paint blocks the stain from soaking in.
Still, with the right method, you can stain over painted surfaces and create a beautiful finish.
When to Stain Over Paint when You Shouldn&t
Staining over paint can be a creative and cost-effective way to refresh furniture or decor, especially when you&re going for a rustic or layered look. But it&s not always the best method for every project.
I&ve learned that understanding when it works and when it doesn&t can save time, effort, and disappointment. Below is a quick guide to help you decide whether staining over paint is right for your situation.
| When to Stain Over Paint | When Not to Stain Over Paint |
|---|---|
| The painted surface is fully dry, clean, and in good shape | The wood underneath is rotted, damaged, or unstable |
| You want a layered, rustic, or vintage look | The surface has lead-based paint (older furniture) |
| The paint is matte or chalk-style (helps stain grip) | The item is made of laminate or fake wood |
| You&re okay with a soft, blended finish | You want a smooth, flawless wood finish with minimal effort |
| The surface has been lightly sanded to accept stain better | You&re not planning to prep or clean the surface properly |
| You&re using a stain designed to go over paint | You want full absorption like on raw wood |
Knowing the difference between these situations has helped me make better choices for each project. If staining isn&t a good fit, don&t worry – sometimes repainting or fully stripping the surface gives much cleaner, longer-lasting results.
Just choose the method that works best for your goals, and you&ll love the outcome either way.
Personal Experiences and Experts& Advice
Both professionals and DIYers agree that staining over paint can work well, but only with the right prep and techniques. These general tips highlight what matters most for a successful project.
- Preparation makes all the difference: Properly sanding or stripping the surface improves stain absorption and leads to a smoother finish.
- Gel stains offer a quicker method: These are ideal for lightly painted surfaces and require less prep, though the result may be less natural.
- Different woods behave differently: Stain reacts in unique ways depending on the wood type, so testing first avoids surprises.
- Effort often equals better results: Taking the time to sand thoroughly usually leads to more attractive and lasting outcomes.
- Results vary by technique and product: Adjusting how much stain is wiped back or layered helps fine-tune the final look.
- Blending stain colors is possible: Mixing shades can add richness and help match existing wood tones in your home.
- One coat is often enough: A single application is usually effective, especially when the stain is high-quality and properly applied.
Tips for Better Results when Staining Over Paint
Simple habits and smart prep steps can make your staining project smoother and more successful.
- Test first: Try the stain on a small, hidden area to check how it reacts with the surface and paint.
- Work in a well-ventilated area: Good airflow reduces fumes and helps the stain dry properly.
- Read and follow label directions: Every stain product has its own rules, and following them ensures a better outcome.
- Use a clean cloth for wiping: A fresh, lint-free rag helps you control the finish without leaving fibers behind.
- Keep tools simple: A foam brush, soft cloth, and stain are often all you need; no need to overcomplicate it.
- Avoid humid or rainy days: Moisture in the air can slow drying time and affect how the stain sets.
- Start with small projects: If you&re new to staining, try a side table or drawer before moving on to larger furniture.
- Store leftover stain properly: Keep the lid tightly sealed and store the can in a cool, dry place to reuse it later.
Conclusion
These simple steps have helped me avoid common mistakes and get more consistent results. With a little patience, this will give your piece a beautiful, customized finish.
But remember, staining over paint does require some preparation beforehand, but only if you&re ready to do a bit of prep work.
If you sand the surface or use gel stain, you can turn a plain painted item into something full of warmth and beauty. In my own experience, sanding was the key to a great finish.
I once saved a garage sale bookshelf with some elbow grease and a deep brown stain, and it&s now one of my favorite pieces in my home!
Even if you’re redoing an old cabinet, table, or fence, just take your time, test things out, and enjoy the process. You don&t need to be a pro; just be patient and careful.
Ready to try staining over paint? Pick a small project, grab some sandpaper, and go for it. And when you’re done, send me a picture! I&d love to see what you create.