
Are you tired of boring kitchen walls? In this article, I’ll show you 11 creative ways to transform cutting boards into stunning wall displays. From rustic farmhouse charm to modern minimalist designs, there’s an idea here for every style and space.
Kitchen walls can be challenging to decorate, especially when you need both function and beauty. I’ve tested dozens of approaches in my own home and with clients, and cutting board displays consistently deliver impressive results.
These ideas will:
- Save valuable drawer and cabinet space
- Add warmth and texture to your kitchen
- Create a unique focal point visitors will notice
- Keep useful tools within easy reach
The best part? You can start with just a few boards you already own and build your collection over time.
You deserve a kitchen that reflects your personality while still working hard for you every day. Let’s make those walls work smarter, not harder!
Best Cutting Board Wall Ideas
These ideas range from super simple to more involved projects. I’ve organized them from most traditional to most creative. Pick the one that matches your style and kitchen vibe! Most can be completed in a single afternoon.
1. The Classic Rustic Cutting Board Display
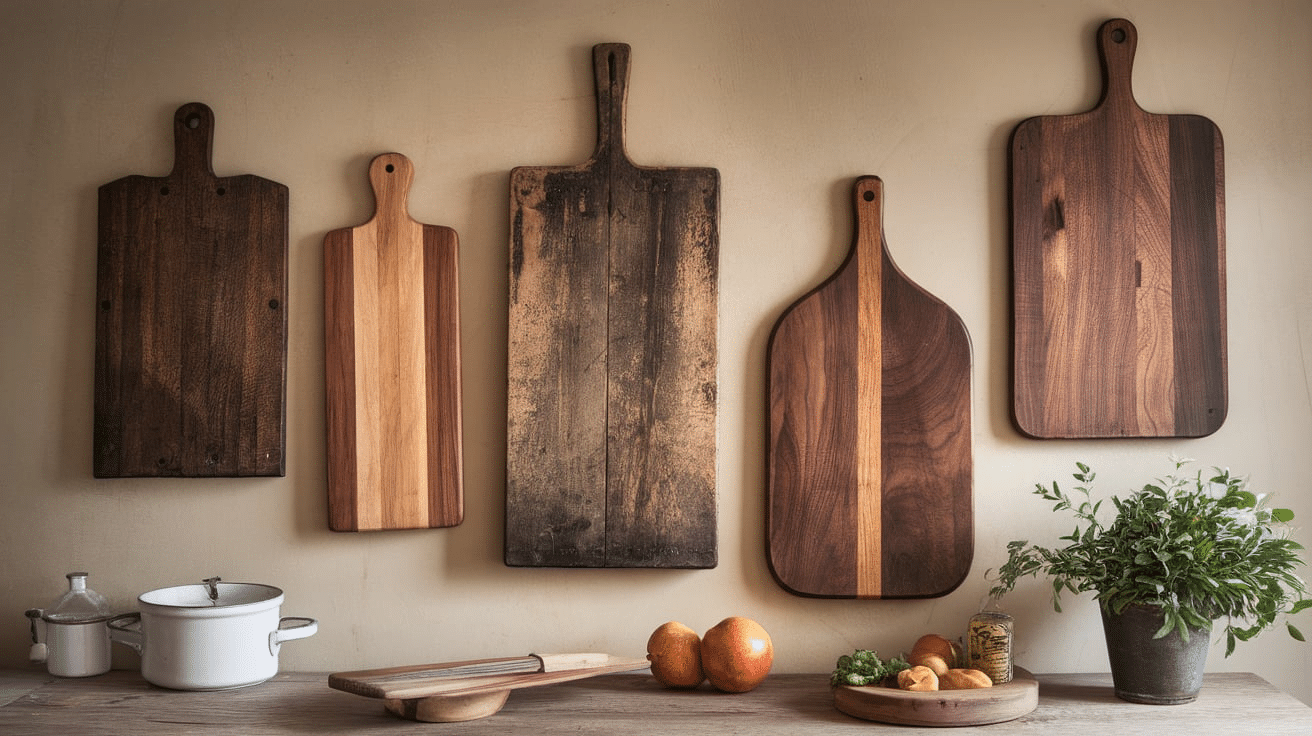
Nothing beats the charm of weathered wooden boards with history. I found my favorite pieces at flea markets and thrift stores.
- Mix different wood tones and sizes for visual interest
- Look for boards with natural imperfections and character
- Arrange in an organic, slightly asymmetrical pattern
Ideal for: Rustic, country, and traditional kitchens where warmth is key.
2. Hanging Cutting Boards on Hooks or Pegs
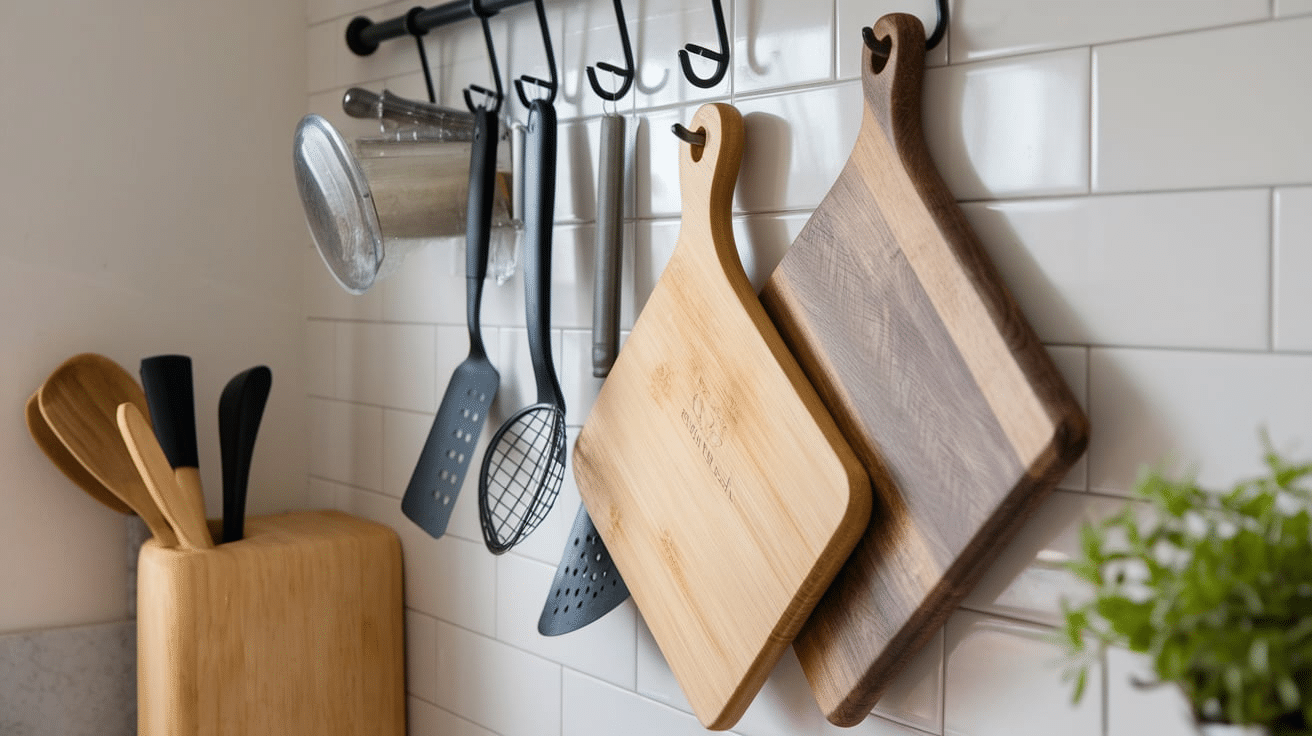
My tiny kitchen needed accessible storage. Simple wall hooks solved two problems at once.
- Install hooks at varying heights for an interesting layout
- Space them far enough apart to grab boards easily
- Choose hooks that complement your kitchen hardware
Ideal for: Small kitchens that need practical yet stylish storage solutions.
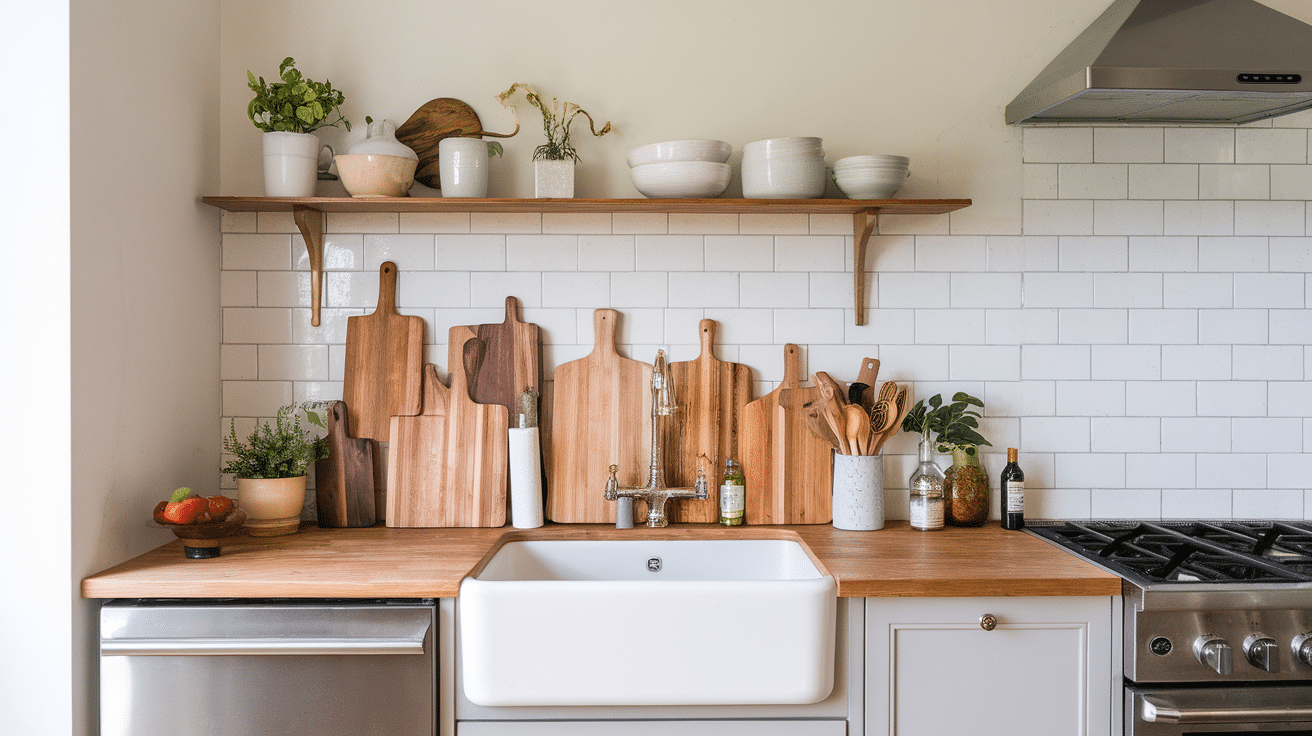
3. Floating Shelf Cutting Board Arrangement
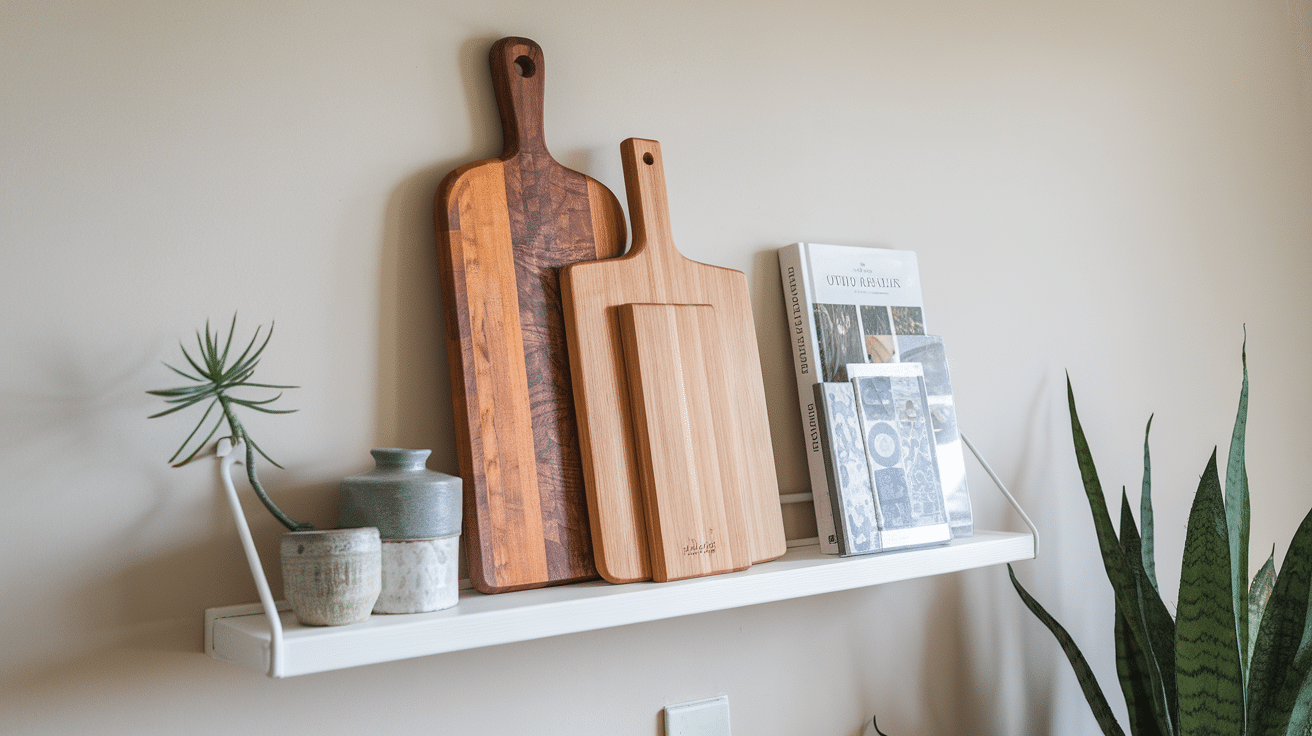
This option gives you the flexibility to change your display. I love rearranging mine seasonally.
- Place boards upright, leaning against the wall
- Mix in plants, cookbooks, or pottery for dimension
- Use shelf depth that accommodates your largest board
Ideal for: Open shelving lovers and modern kitchen designs.
4. Leather Strap Hanging Cutting Boards
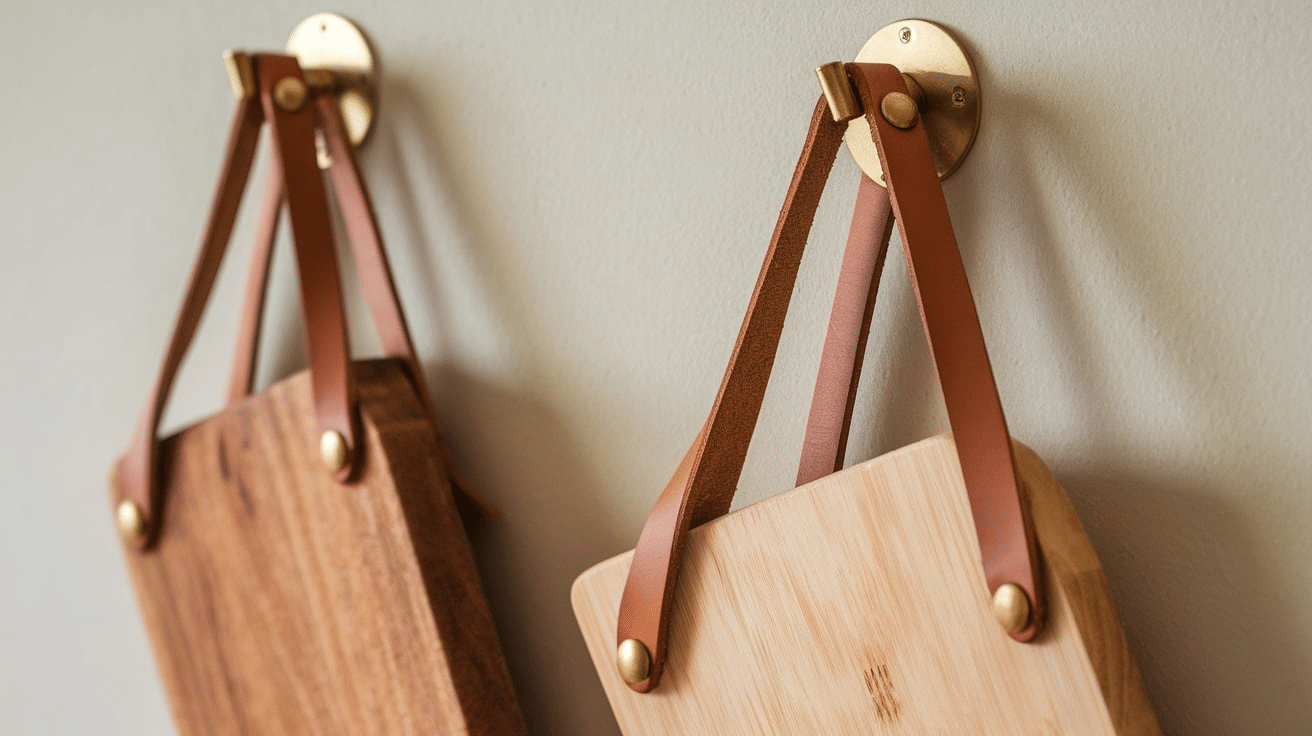
This might be my favorite look! The contrast between wood and leather creates an instant style.
- Use real leather straps for durability and aging appeal
- Secure with brass screws for a finished look
- Vary the strap lengths to create a visual rhythm
Ideal for: Scandinavian, boho, or industrial kitchens that need softening.
5. Pegboard Cutting Board Organization
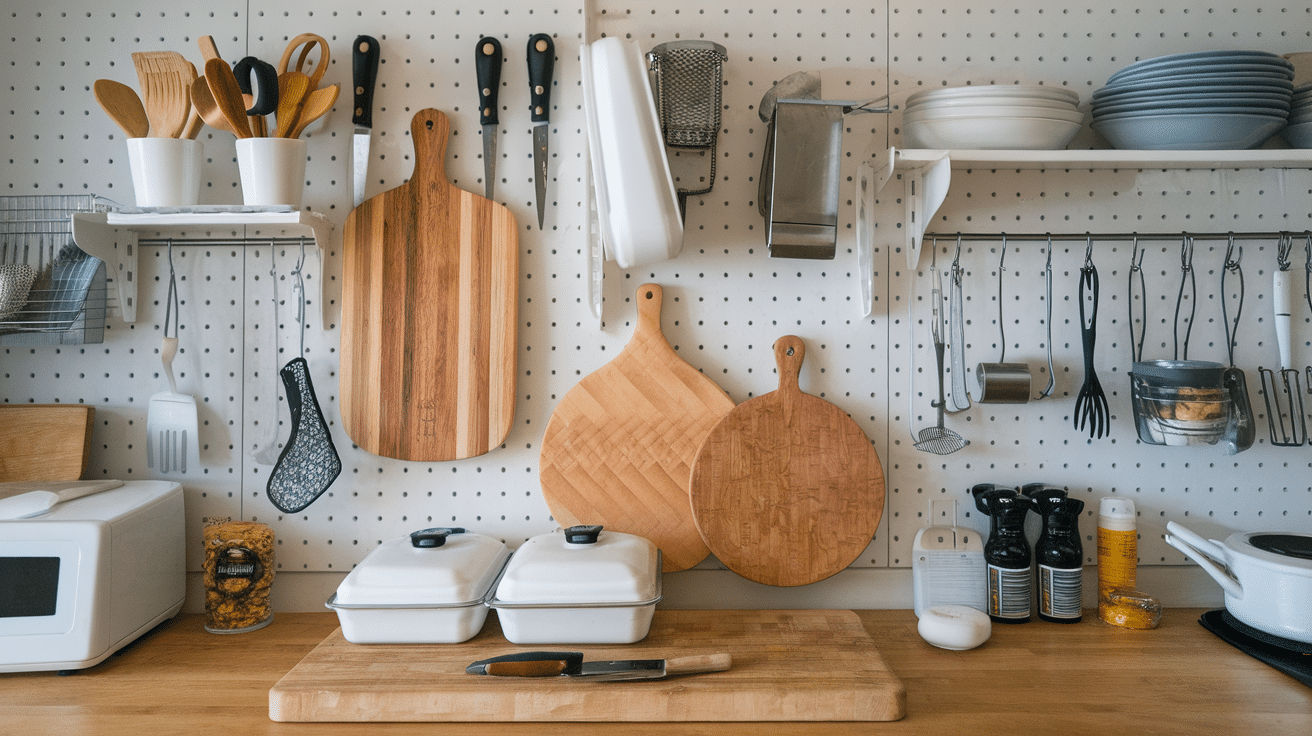
Talk about versatility! My pegboard lets me rearrange whenever inspiration strikes.
- Paint the pegboard in a color that complements your boards
- Add hooks for utensils alongside your boards
- Create zones for different board types and functions
Ideal for: DIY enthusiasts and creative kitchen layouts that change often.
6. Grid-Style Cutting Board Wall Art
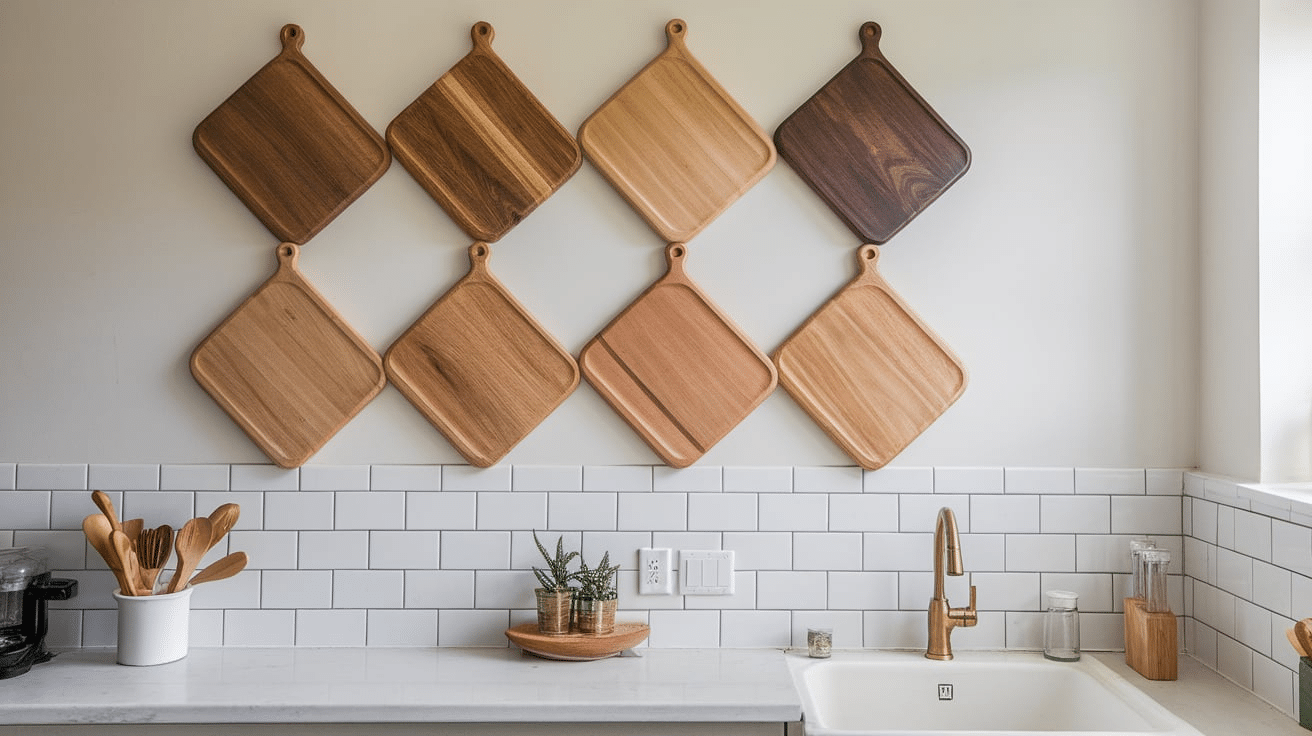
For the minimalist in me, this clean look brings order to kitchen chaos.
- Select boards with similar thicknesses for alignment
- Space precisely for a gallery-like effect
- Consider uniform coloring for maximum impact
Ideal for: Minimalist kitchens with a clean aesthetic.
7. Antique Cutting Board Collection Wall
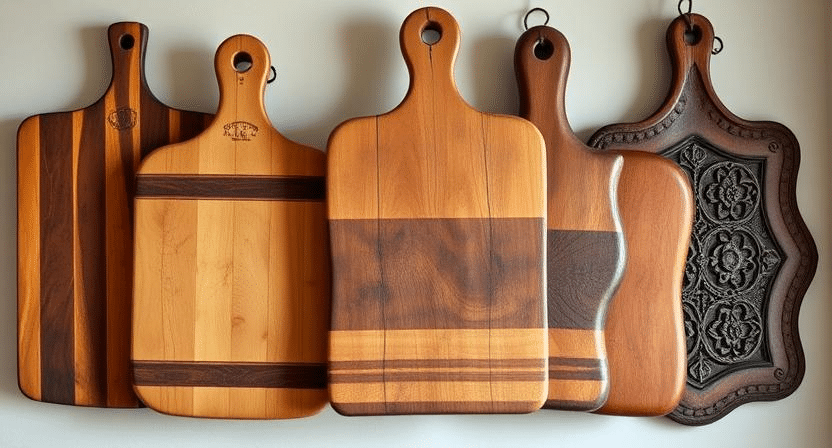
Each board tells a story in this heritage-focused display.
- Mix breadboards, meat boards, and specialty shapes
- Look for unique details like hand carvings or handles
- Group by era or wood type for coherence
Ideal for: Vintage-style or eclectic kitchens that celebrate history.
8. Chalkboard Wall + Cutting Board Display
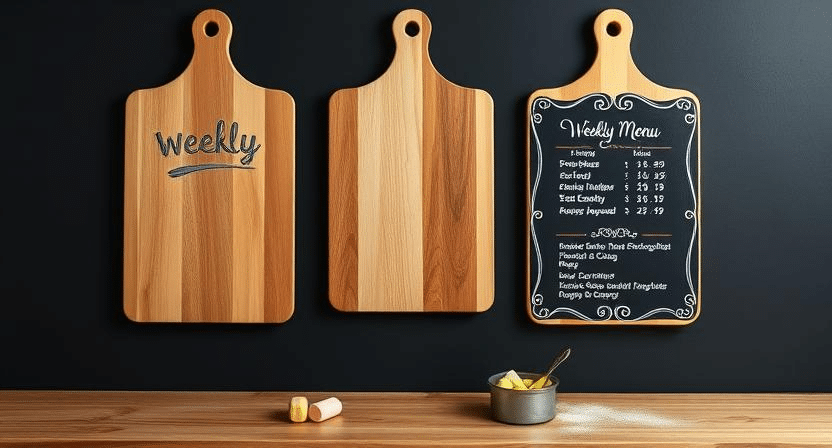
Why not make your wall functional in two ways? I write my weekly menu behind my boards.
- Paint a section of wall with chalkboard paint
- Hang boards so you can still access writing space
- Use the visible chalkboard for recipes or shopping lists
Ideal for: Family kitchens or creative cooking spaces that need organization.
9. Multi-Material Cutting Board Display
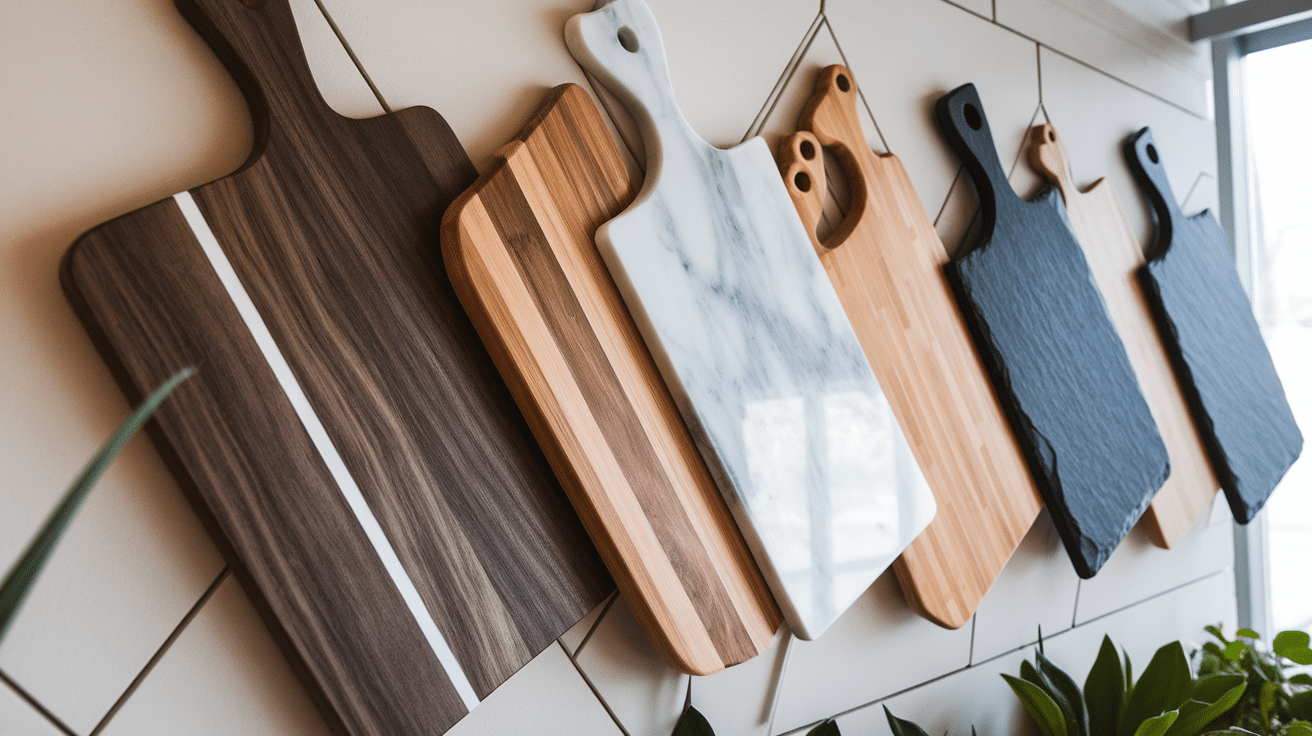
Wood, marble, slate—the texture mix creates depth and interest in my kitchen.
- Contrast light wood with dark marble for drama
- Group similar materials in clusters
- Consider the weight of heavier boards when mounting
Ideal for: Mix-and-match kitchens with layered textures and materials.
10. Personalized & Engraved Cutting Board Wall
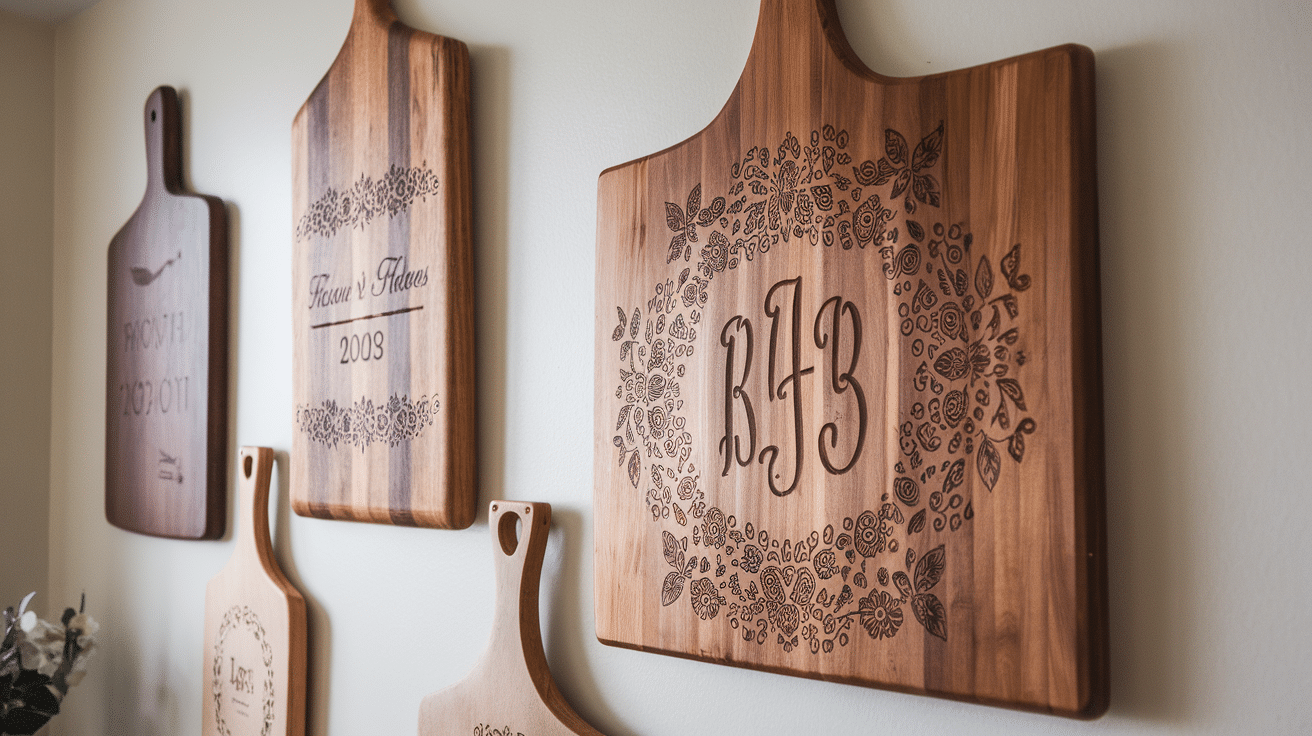
My anniversary board started this collection, and it grew from there.
- Display special occasion boards prominently
- Mix monogrammed pieces with plain boards for balance
- Create a focal point with your most meaningful piece
Ideal for: Gift displays, custom home decor, or meaningful kitchen accents.
11. Cutting Board Backsplash Alternative
When I couldn’t afford a new tile, this clever hack saved the day.
- Seal boards thoroughly for kitchen splash protection
- Install with removable mounting solutions
- Choose uniform thickness for a cohesive look
Ideal for: Renters or those who want a temporary, creative kitchen update.
How to Choose the Right Cutting Boards for Your Wall
Not all boards deserve wall space. I learned this the hard way after hanging a warped monster that kept falling!
Look for these qualities:
- Stability: No cracks or warps that might worsen over time
- Visual appeal: Interesting grain patterns or unique shapes
- Proper weight: Not too heavy for your mounting method
- Complementary colors: Tones that work with your kitchen palette
Avoid boards with deep cuts or stains unless you’re going for a very lived-in look.
DIY Tips for Installing a Cutting Board Wall
You don’t need fancy tools for this project. I completed mine in the afternoon.
- Arrange boards on the floor first to test your layout
- Take a photo of your final arrangement for reference
- Use appropriate anchors based on board weight
- Consider security – ensure boards won’t fall during cooking activity
- Leave some breathing room between pieces for a curated look
Pro tip: Install one central anchor board first, then build your display outward.
Conclusion
I started my cutting board wall with just three boards from a yard sale. Now it’s my kitchen’s best feature.
Cutting boards on walls solves two problems at once—they free up drawer space while adding warmth and texture to boring walls.
The beauty of this project is its flexibility. You can start small and build over time, and each board brings its own character to your display.
I love how my wall changes with the seasons. In summer, I add colorful boards. In winter, darker woods create cozy vibes.
Your kitchen deserves personality beyond standard cabinets and appliances. A cutting board wall adds that custom touch that makes a house feel like home.
Why not try it this weekend?
Frequently Asked Questions
How High Should I Hang My Cutting Boards?
Position the center of your display at eye level, typically 57-60 inches from the floor. This height creates visual impact while keeping boards within easy reach for actual use.
Can I Hang Antique Cutting Boards Safely?
Yes, but avoid direct sunlight and high-humidity areas. Use gentle mounting methods like leather straps rather than drilling into valuable antiques.
Do I Need to Seal Decorative Cutting Boards for Wall Display?
A light mineral oil finish is sufficient for purely decorative boards. If you plan to use them occasionally, apply food-safe beeswax or board butter every few months.
What’s the Easiest Way to Create a Cohesive Cutting Board Wall?
Choose boards with one unifying element—similar wood types, comparable shapes, or consistent thickness. This creates harmony while still allowing for variety in other aspects.
How Do I Prevent Dust Collection on Wall-Mounted Boards?
Position boards at a slight angle rather than flat against the wall. Regularly dust with a soft cloth or use a quick blast from a hair dryer in a cool setting.