
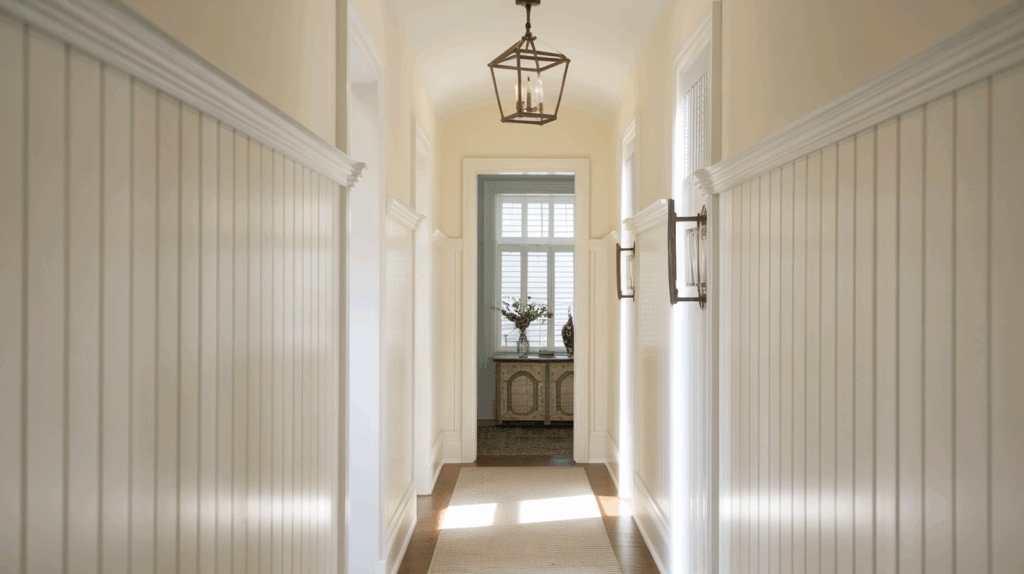
I wanted to give my hallway a fresh new look without spending too much. It felt plain and boring, so I tried adding board and batten – and it changed everything.
The walls now have texture and style, and it makes the space feel more finished.
The best part? It was easy to do on my own. I didn’t need fancy tools or a big budget. Just a little time, some patience, and a simple plan.
In this blog, I’ll walk you through the whole process step by step. I’ll share what tools I used, how I planned the layout, and the tips that helped me get clean lines.
You can take it slow and still get great results. If you’ve been thinking about doing something new in your hallway, this is a fun and simple way to start. Let’s begin!
What Is Board and Batten?
Board and batten is a simple wall design that uses wide boards and narrow wooden strips called battens.
The boards cover the wall first, and the battens are placed on top of the seams where the boards meet.
This creates a pattern of raised lines running up and down the wall.
Some people skip the boards and attach the battens right to the drywall to save time and money. Board and batten give the wall texture and a clean, neat look.
It can make a hallway feel taller and more stylish without being too fancy. You can paint it white for a classic feel or try colors like gray, green, or navy for a bold look.
This style works well in both modern and traditional homes and is easy to do as a DIY project.
Why I Chose Board and Batten for My Hallway?
My hallway felt plain and empty. The walls had no charm, and the space didn’t feel warm or welcoming. I wanted something that would add style but still be simple to do on my own.
That’s when I came across board and batten. I liked that it looked clean and neat without being too fancy. It gave the wall a nice texture and made the hallway feel taller and more finished.
I also liked that I didn’t need special skills or a big budget to make it happen. With a few tools, some wood, and a little time, I could totally change the look of the space.
I picked a soft white paint to keep it bright and open, but I knew I could always paint it another color later. It was the perfect way to update my hallway without spending a lot.
Tools and Materials
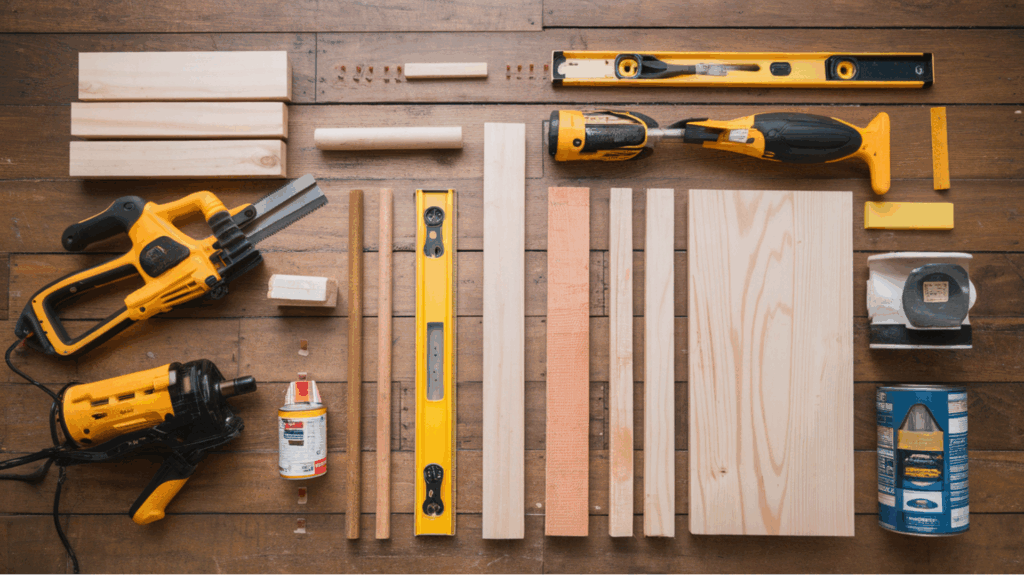
Before I started, I gathered all the tools and materials I would need. Here’s what I used:
- Measuring tape
- Level
- Pencil
- Stud finder
- Nail gun (or hammer and nails)
- Caulk gun
- Paintbrush and roller
- Miter saw or hand saw
- Sandpaper
- 1×3 or 1×4 boards for battens
- 1×6 board for top rail
- Paint (primer and wall color)
- Wood filler
- Caulk
- Painter’s tape
- Liquid nails (optional)
You can buy everything at a hardware store. Some stores will even cut the wood for you.
Step-by-Step Guide to Add Board and Batten to Hallway
Adding board and batten to my hallway was easier than I thought. I took it one step at a time, and the results were worth it.
1. Planning the Layout
This part took some time, but it was worth it. I didn’t want crooked or uneven boards. First, I measured the length and height of my hallway walls.
I used a pencil to mark where each batten would go lightly. I made sure the spacing between each batten was the same, about 16 inches worked best for me.
Tips:
- Use painter’s tape to test the look before nailing anything.
- Make sure the battens don’t land over outlets or light switches.
- Always double-check your marks with a level.
2. Prepping the Walls
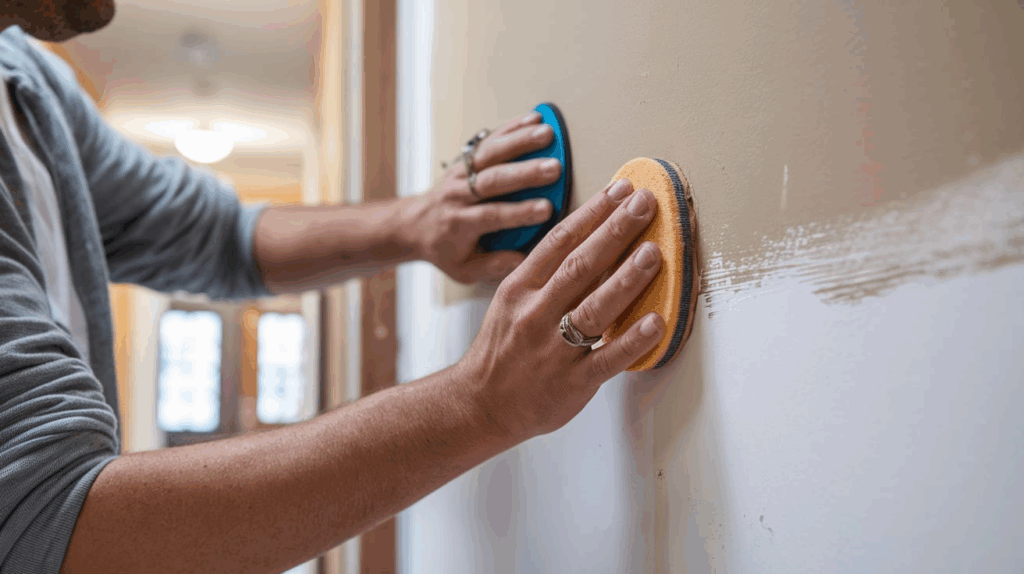
Before starting, I wanted a smooth, clean wall. I removed any nails or hooks and filled old holes with spackle. I then gave the wall a light sanding to help the paint stick better later.
If your walls have a heavy texture, you might want to smooth them out or use a backboard. I skipped this step because my walls were already fairly smooth.
3. Cutting the Boards
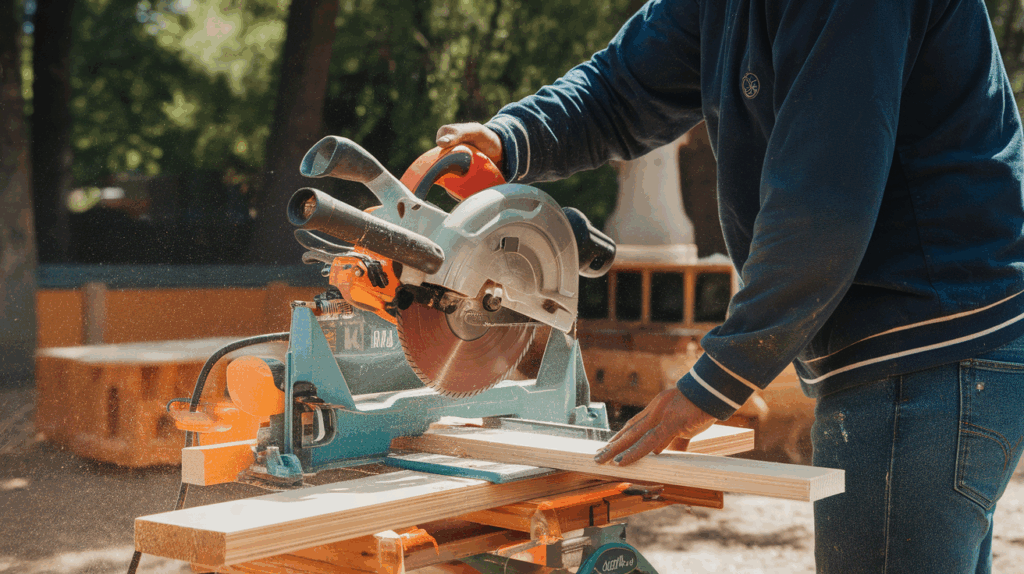
I measured the height from the floor to where I wanted the top rail. Then, I cut all the vertical battens to that length.
I also cut one long top rail for each wall. A miter saw made this fast, but you can also use a hand saw.
Tip: Label your boards with pencil marks so you know where each one goes. This helped me stay organized.
4. Installing the Battens and Top Rail
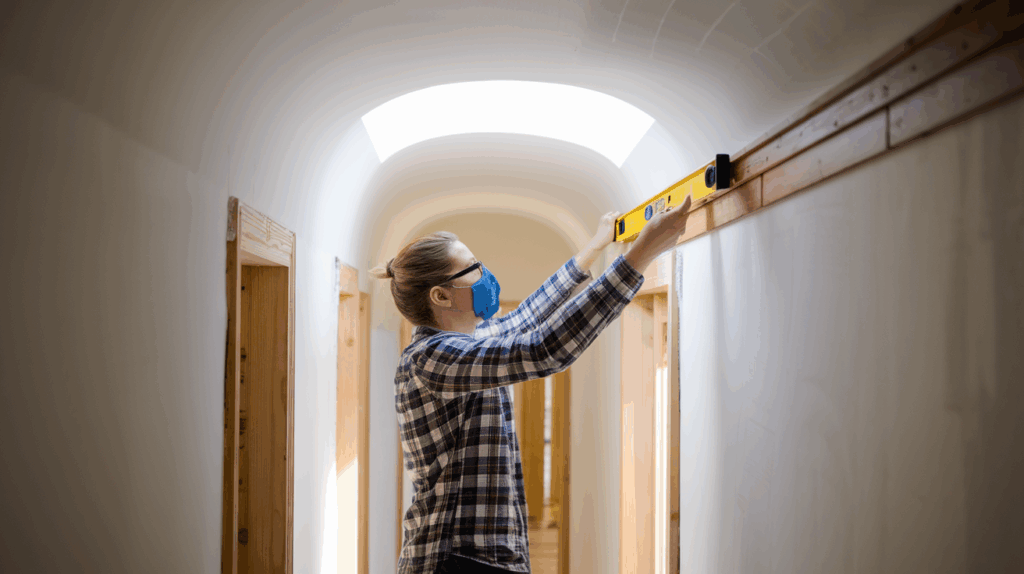
Now for the fun part, putting the boards on the wall! I started with the top rail. I used a level to make sure it was straight.
Then, I nailed it into the studs. You can use a stud finder to find the best spots to nail.
Next, I added the vertical battens. I started at one end of the wall and worked my way across, using a spacer to keep the gaps even.
If I ran into an outlet, I would cut a notch in the batten to fit around it.
Optional: You can use liquid nails along with real nails for extra hold, especially if you’re not hitting studs.
5. Filling Gaps and Seams
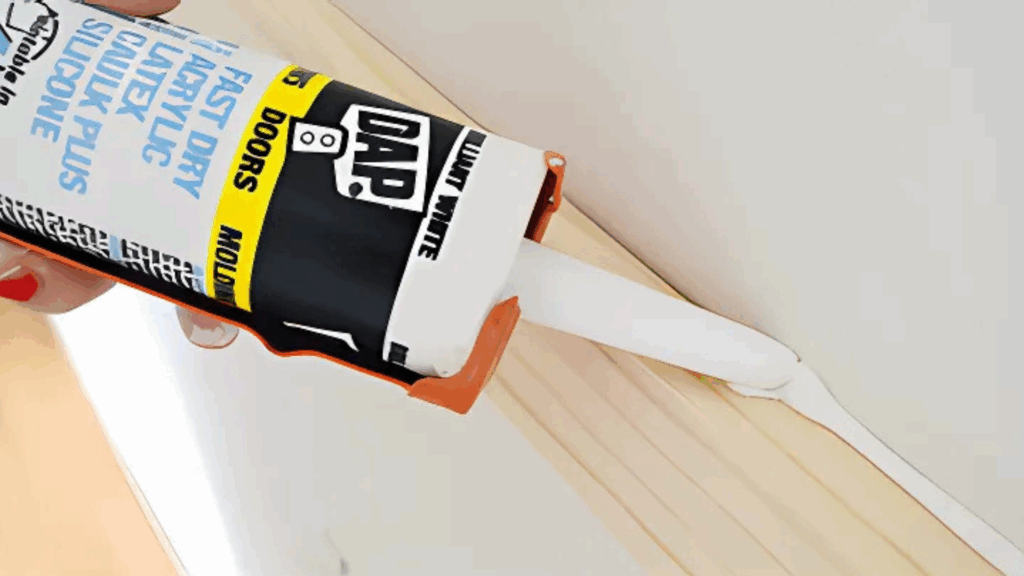
Once all the battens were up, I looked for small gaps and nail holes. I filled the nail holes with wood filler, let it dry, and then sanded it smooth.
Then, I used caulk to seal the edges of the battens, giving them a clean, built-in look. I used my finger to smooth out the caulk. It was messy at first, but I got the hang of it.
6. Time to Paint

This part made a huge difference. Since I was painting over wood and drywall, I used a primer first. Once that dried, I used a satin-finish wall paint in a soft white color.
Painting Tips:
- Use a small brush to cut in around the battens.
- A roller works well for the flat parts.
- Paint two coats for full coverage.
If you want a bolder look, you could paint the board and batten a dark color or even a soft green or gray.
Budget Breakdown
I wanted to keep this project affordable, so I tracked all my costs. The good news is that board and batten is a great DIY project for a small budget.
You don’t need fancy tools or expensive materials. Most of what I used came from a local hardware store, and some items I already had at home.
What I spent:
-
Wood boards: Approx $60
I bought 1×4 boards for the vertical battens and a 1×6 board for the top rail. I needed enough to cover the length of my hallway, and I picked pine because it’s cheap and easy to work with. -
Paint and primer: Approx $40
I used a basic white primer and satin wall paint. I chose a good-quality brand that would last, but didn’t go for the most expensive one. -
Caulk and wood filler: Approx $10
I used caulk to fill the seams and wood filler for nail holes. A little goes a long way. -
Nails and painter’s tape: Approx $10
I had a nail gun, but you can use a hammer and nails. I also used painter’s tape to test the layout and keep paint lines clean. -
Sandpaper and cleaning cloths: Approx $5
These helped me smooth out the walls and clean up after painting. I bought a small pack.
Total cost: About $125
If you already have tools like a saw or nail gun, you’ll save even more. I also had a roller, brushes, and a level at home, so I didn’t need to buy those again.
This project gave my hallway a whole new look for less than the cost of a fancy wall mirror or a small piece of furniture. It’s one of the best upgrades I’ve done on a budget.
Board and Batten Hallway Design Ideas
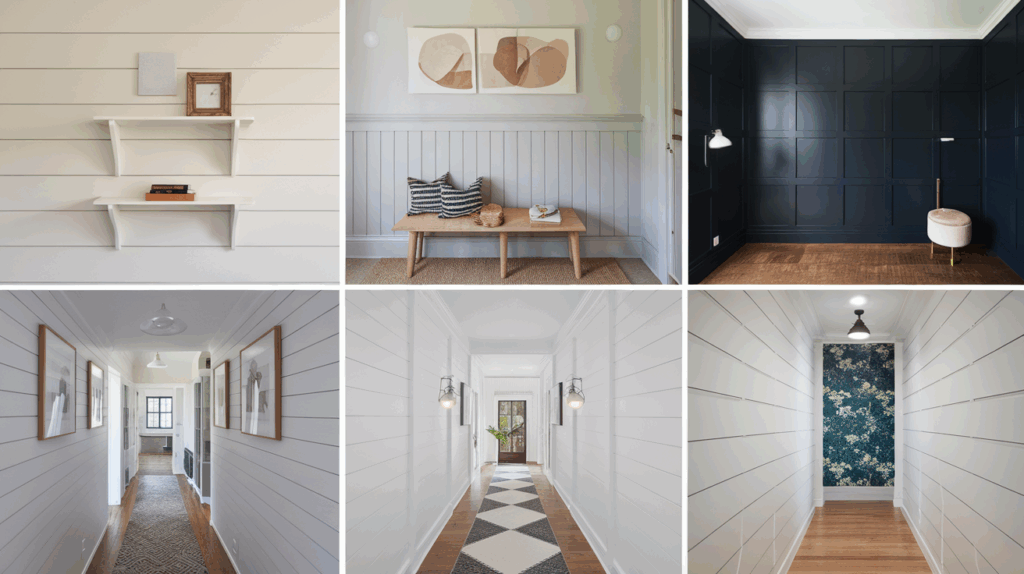
One of the best things about board and batten is its flexibility. You can change the look by adjusting the height, color, or layout.
1. Half-Wall Board and Batten
This design stops the battens halfway up the wall, usually around 4 feet high. It’s great if you want a clean look without covering the full wall. It leaves room for wall art or shelves above the trim.
It also works well in narrow hallways because it doesn’t feel too heavy. Add a shelf or coat hooks on top for a functional twist.
2. Three-Quarter Height Board and Batten
This version goes a bit higher, usually about 5 feet up the wall. It gives a more bold and dramatic look, but still leaves space for frames or décor above.
If your hallway has taller ceilings, this can help balance the space. I really liked this look, but decided to go with the half-wall style for a lighter feel.
3. Full Wall Board and Batten
This style runs from the baseboard all the way up to the ceiling. It gives a clean, sleek, modern look and adds lots of texture.
It works best in wide hallways or ones with high ceilings. If your hallway gets a lot of traffic, the full-wall look can also help protect your walls from scuffs.
4. Colored Board and Batten
Most people go with white, but don’t be afraid to try color. Soft gray, navy blue, sage green, or even black can create a big impact.
Dark colors add drama and work well in bright hallways with good lighting. Lighter tones keep the space feeling airy and open.
5. Add a Ledge or Hook Rail
You can add a thin ledge or rail above the board and batten to make it more useful, creating a simple yet functional feature.
It’s great for small hallways or entryways where you need a convenient spot for keys, bags, or hats, helping to keep things organized.
This idea combines style and storage in one, blending visual interest with everyday practicality.
6. Grid or Box Style Board and Batten
Instead of just vertical lines, some designs use both vertical and horizontal boards to create box shapes. This style is more like a modern panel wall.
It looks fancy, but is still easy to build. You can paint the boxes and the wall the same color for a smooth look.
7. Mix with Wallpaper or Paint Above
If you go with a half-wall or three-quarter board and batten, you can do something fun above it to add character to the space.
Try wallpaper with a soft pattern or a bold paint color to contrast with the clean lines of the paneling.
This mix of textures and colors makes the hallway feel more lively and personal, turning a simple wall into a creative feature.
It’s also an easy way to refresh the space without a full makeover.
Mistakes to Avoid
Even though this was an easy project, I did run into a few small problems. Looking back, these are the things I would do differently. If you’re starting, these tips can help you save time and get a better result:
1. Skipping the Stud Finder: At first, I didn’t check for wall studs. I just nailed the battens where I wanted them. Some didn’t hold well, and I had to redo them. Use a stud finder before nailing. It helps keep the boards tight and secure.
2. Not Using a Level for Every Board: I used a level at the start, but I got lazy halfway through. A few battens ended up slightly crooked. Even a small tilt can look off once everything is painted. Use your level for each board to keep lines straight.
3. Forgetting to Caulk Every Edge: I skipped caulking on one side because it looked “good enough.” Later, small gaps showed up. Caulk hides seams and makes the project look neat. Don’t skip it, even if it seems okay at first.
4. Using the Wrong Paint Finish: I initially used flat paint, thinking it would hide flaws. But it showed every scuff and fingerprint. For a hallway, use satin or semi-gloss. It’s easier to wipe clean and lasts longer.
5. Not Sanding Before Painting: I didn’t sand all the boards well, and some spots looked rough after painting. A quick sanding makes a big difference in how smooth and professional it looks.
Conclusion
Doing a board and batten wall in my hallway was one of the best DIY projects I’ve tried. It made a plain space feel more finished, warm, and stylish.
The materials were simple, and the steps were easy to follow. I didn’t need special tools or a big budget. I just planned each part, took my time, and worked one step at a time.
This project taught me how small changes can make a big difference. My hallway now feels like part of the home, not just a path between rooms. I smile every time I walk by it.
If your hallway feels boring or empty, this is a fun and low-cost way to bring it to life. You can adjust the height, color, and spacing to fit your style.
Just remember to plan, measure carefully, and enjoy the process. It’s not about making it perfect, it’s about making it yours.