
Your kitchen cabinets might look worn out, with a laminate finish that feels outdated and dull. Maybe you’re thinking about a full remodel, but before you spend thousands, there’s a better option.
You can paint your laminate cabinets and give them a brand-new look, without replacing anything. In this guide, I’ll show you exactly how to do it yourself. Laminate is tricky because its smooth surface doesn’t hold paint easily.
Many DIY projects fail because people skip the prep work. But don’t worry, I’ll walk you through each step.
You’ll learn why laminate requires special preparation, what tools you really need, and how to achieve a smooth finish that lasts.
If you follow this guide carefully, your cabinets will turn out great, and your friends might even think you hired a pro. Let’s get started and make your kitchen look brand new!
Can You Paint Over Laminate Cabinets?
Yes, you can absolutely paint laminate cabinets. But here’s the thing, it’s not as easy as painting regular wood.
Laminate is more like plastic. It’s a smooth layer glued onto particleboard, and that surface doesn’t let paint stick well on its own. If you skip the preparation, your paint may peel off in large sheets after just a few months.
That’s why sanding lightly and using the right primer are essential. These steps help roughen the surface, allowing the paint to have something to grab onto.
The good news? If you do it right, your painted laminate cabinets will last for years. They’ll look clean, smooth, and just as nice as pricey wood ones, maybe even better.
Tools and Materials You’ll Need
Don’t cheap out on supplies. Quality materials make all the difference. The following is your shopping list:
- Degreasing cleaner
- Microfiber cloths
- Scrub brush
- 220-grit sandpaper
- Sanding block
- Tack cloth
- Painter’s tape
- Plastic sheeting
- Bonding primer (this is crucial)
- High-quality cabinet paint
- 2-inch angled brush
- Small foam roller
- Paint tray
- Screwdriver
- Small containers for screws
How to Paint Over Laminate Cabinets?
Patience is everything with this project. Rushing leads to poor results. Plan for a weekend project, minimum. Clean, sand, prime, paint, it sounds simple, right? The devil is in the details. Let me walk you through each step:
1. Preparation Is Key

Before you do anything, empty your cabinets. Take out dishes, pots, and pantry items so you can reach every surface.
Using a screwdriver, remove the cabinet doors and drawers, and label each one with painter’s tape so you remember where they belong. Store screws in small, labeled containers to keep things organized.
Lay plastic sheeting on your counters and floors to catch drips, dust, and mess. Set up a painting area in a garage or basement with good lighting and airflow.
A pair of sawhorses with plywood makes a perfect surface for painting cabinet doors safely.
2. Thoroughly Clean the Surfaces
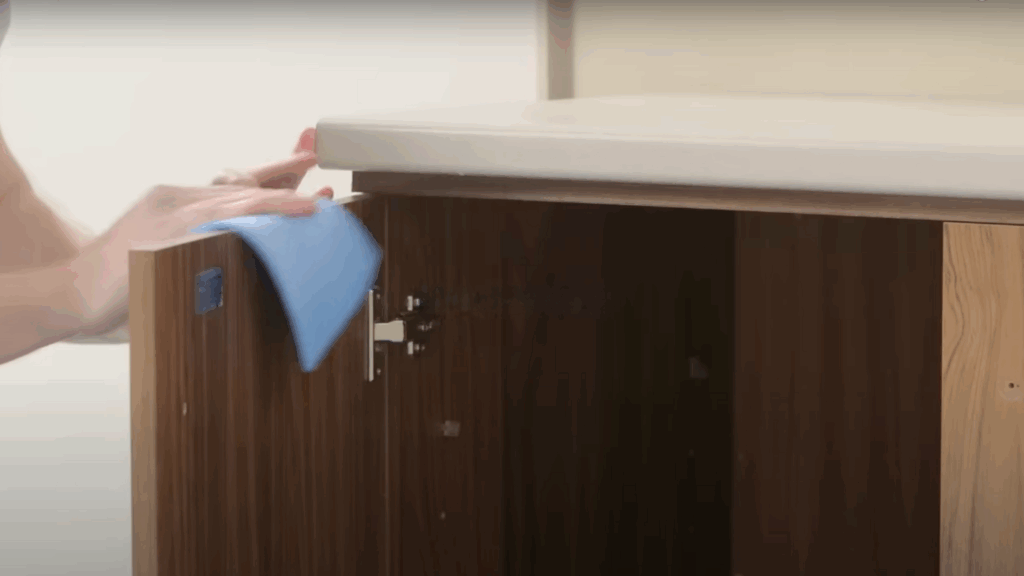
Paint won’t stick to greasy cabinets, and kitchen grease builds up over time, even if it’s hard to see. Use a strong degreasing cleaner and spray every cabinet surface.
Let the cleaner sit for about five minutes, then scrub with a stiff brush, especially near handles. Rinse the cabinets well with clean water and dry them with microfiber cloths. Let everything air dry for at least an hour.
Hidden moisture can cause paint to bubble or peel later, so be patient and don’t rush through this step. A clean surface gives your paint the best chance to stick.
3. Sanding for Adhesion

Sanding helps your paint stick better, but don’t worry, you’re not sanding off the laminate. You need to dull the shiny finish. Use 220-grit sandpaper with a sanding block. Light, even strokes are all you need.
Suppose your laminate has a wood grain pattern; sand in the direction of the grain. On smooth surfaces, keep your strokes even and cover the whole area.
You want a matte finish with light, visible scratches. Don’t sand too hard. Once it looks dull, stop and wipe away all the dust with a tack cloth. Clean surfaces help avoid bumpy, uneven paint.
4. Masking Off Areas

Clean paint lines make a big difference, so take your time with masking. Use high-quality painter’s tape, not the cheap stuff that leaves sticky marks or bleeds paint underneath. Press the tape edges down firmly using your fingernail to seal them.
Cover your countertops, backsplash, and nearby appliances to protect them from splatters. Remove the tape while the paint is still slightly wet to avoid peeling or cracking.
Good masking takes time, but it gives your project that neat, professional finish that really stands out when you’re done.
5. Priming for Success
Primer is the most important step in painting laminate cabinets, so don’t skip it. Use a bonding primer made specifically for slick surfaces like laminate. Stir it well before using to mix everything evenly.
Start by brushing the details and edges with a high-quality brush. Then switch to a foam roller for the flat areas; it gives a smooth finish without texture. Apply two thin coats instead of one thick one.
Thick coats take too long to dry and can drip or sag. Let each coat dry fully and fix drips right away before they dry and become hard to fix.
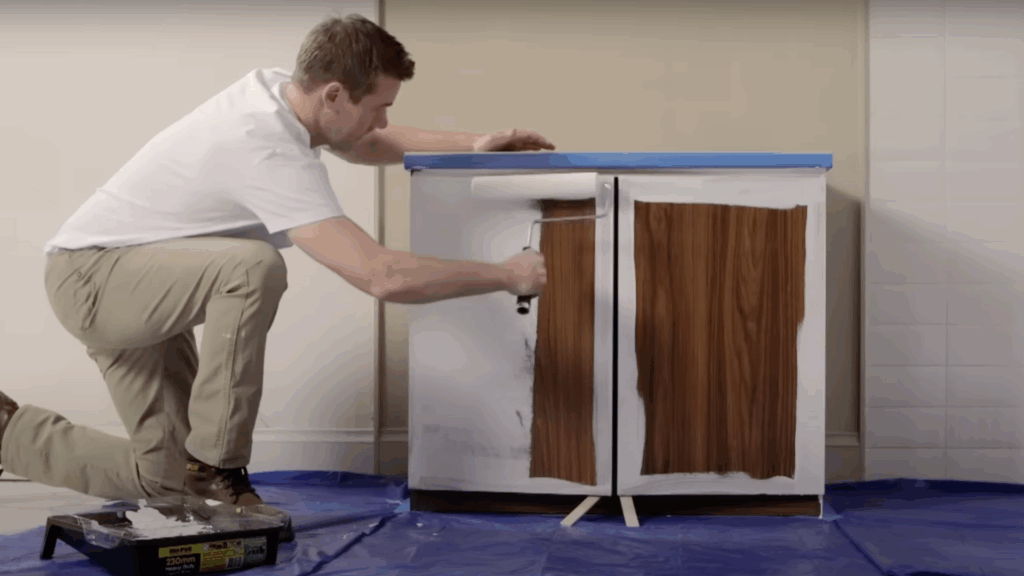
6. Applying Top Coat of Paint

Now comes the fun part, adding color! Use the same brush and roller setup from your primer step. Start by brushing around the edges and corners first. Then roll the flat areas right after brushing so the textures blend.
Apply thin coats for better coverage and smoother drying. Most cabinet paints need two coats, so don’t try to finish in one go. Sand lightly between coats with 320-grit sandpaper to smooth out brush marks or dust.
Wipe away the dust before the next coat. Check your work in good lighting so you can fix any missed spots right away.
7. Finishing Touches

Let the paint cure fully before putting your cabinets back together. Even if it feels dry, the paint might still be soft underneath. Follow the cure time listed on the paint can. Carefully reattach your doors and drawers.
The new paint can chip if you’re not gentle. Adjust the hinges if the doors feel tight; paint can alter how they fit. Take a step back and examine what you’ve done.
You’ve just given your kitchen a whole new look and saved a lot of money by doing it yourself. Be proud, it’s a job well done!
Want to see the steps in action? Watch this helpful video by @BritishPaints to better understand how to paint over laminate cabinets.
Tips for a Professional Finish
Getting a smooth, professional-looking finish takes more than just following the steps. It’s about paying attention to the little things and using smart habits throughout the project.
A few simple tips to help your cabinets look their absolute best:
- Use high-quality brushes and rollers
- Work on one section or door at a time
- Keep a damp rag nearby for quick cleanups
- Use consistent, bright lighting while painting
- Take breaks to avoid tired mistakes
- Practice on a hidden area before starting visible surfaces
Conclusion
Painting laminate cabinets is a smart way to upgrade your kitchen without spending a lot. Most projects cost approximately under $200, but the results can look like you spent thousands.
The real secret lies in the preparation, which involves cleaning thoroughly, sanding lightly, and applying a bonding primer. These steps help your paint stick and last longer.
Take your time and follow each step carefully. Rushing leads to mistakes that are harder and more expensive to fix. Use high-quality primer and paint; it’s worth the extra cost for a finish that lasts.
When it’s done, you’ll be proud of the results. Your kitchen will feel brand new, and you’ll know you did it yourself.
Ready to get started? Grab your supplies and get to work. When you’re finished, post your before-and-after photos in the comments. I’d love to see what you created!
Frequently Asked Questions
What Type of Paint Works Best on Laminate Cabinets?
Use high-quality acrylic latex cabinet paint. Semi-gloss or satin finishes are durable and easy to clean. Avoid flat paint, especially in kitchens where moisture and grease are common.
Can I Paint Over Cabinet Hardware?
It’s best to replace hardware. Painted handles often chip and look worn fast. New knobs and pulls are affordable and make your cabinets look fresh and professionally updated.
What if My Laminate Is Peeling Already?
Fix peeling areas first using contact cement. Let it dry, then sand smooth. Never paint over loose laminate, as the paint won’t stick and the finish will fail quickly.
Can I Paint the Inside of Cabinets Too?
You can, but it’s optional. The inside doesn’t face the same wear. Most people focus on doors and frames to save time, money, and effort while still getting great results.