
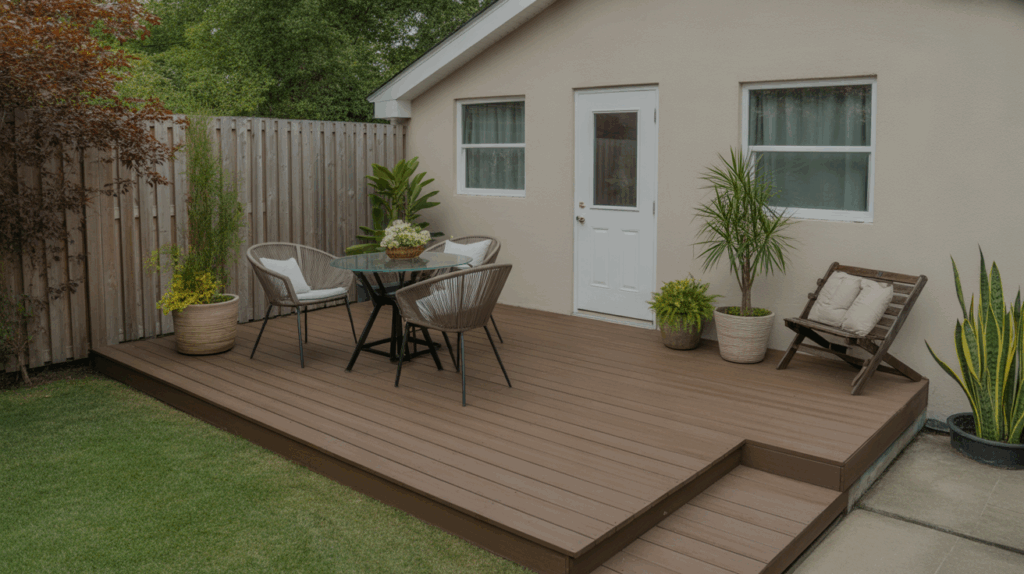
Repainting your deck is a great way to make it look fresh and clean again. Over time, weather, foot traffic, and sunlight can cause the paint to fade, peel, or crack. A new coat of paint can protect the wood, improve your home’s outdoor space, and even boost its value.
The best part? You don’t need to hire a pro because you can do it yourself with a little time and effort. This blog will walk you through each step of the process in a simple, easy way. We’ll cover everything from checking the deck’s condition to picking the right tools and applying the paint.
Whether your deck just needs a touch-up or a full makeover, this guide will help you get great results. If you’re ready to give your deck a fresh new look, let’s get started!
Why Repaint Your Deck?
Repainting your deck is one of the easiest ways to make your outdoor space look nice again. Over time, the paint on your deck can wear off from rain, sun, and lots of foot traffic.
When this happens, the wood underneath can get damaged, and your deck may start to look old or messy. A fresh coat of paint helps protect the wood and makes the whole area feel clean and cared for.
Painting your deck also gives you a chance to change the color if you want a new look. You can match it to your house, your furniture, or your personal style. It’s a simple project that can make a big difference. Whether your deck is peeling, faded, or just boring, repainting it can bring it back to life and make it a great spot to relax and enjoy.
What to Look for Before Repainting Your Deck?
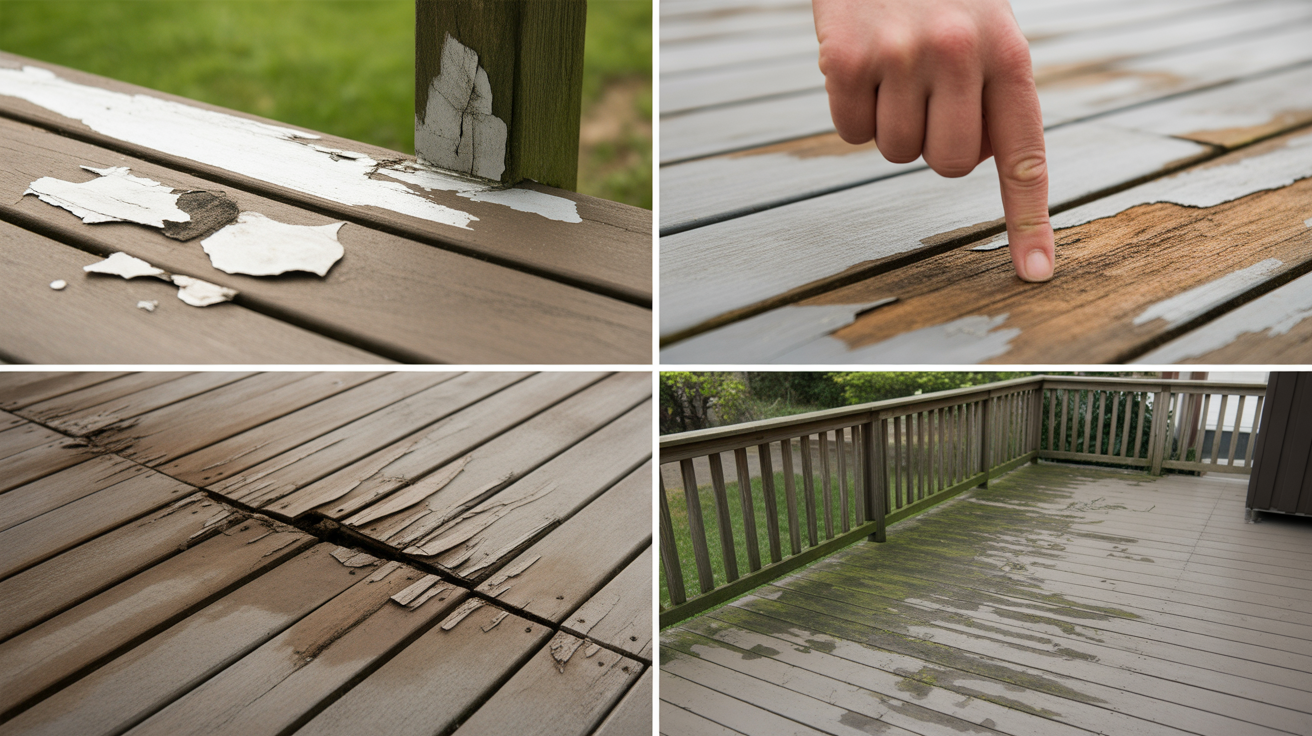
Before you repaint your deck, it’s important to check its condition. A quick inspection can help you decide what kind of work your deck really needs. Maybe it just needs a new coat of paint—or maybe there are repairs to do first. Taking the time to look things over can save you time, money, and frustration later on.
- Peeling or Cracked Paint: If the paint is chipping, flaking, or peeling, it’s time to repaint. Paint that doesn’t stick well may also mean the wood underneath needs help.
- Soft or Rotted Wood: Press down on boards with your hand or foot. If they feel soft or spongy, they might be rotting and should be replaced.
- Cracks and Splinters: Small cracks can be fixed with filler. Bigger damage may need sanding or board replacement.
- Loose Nails or Boards: If boards or nails are sticking up, hammer them down or replace them to keep your deck safe.
- Mildew or Mold: Look for dark or greenish spots. These can be cleaned, but you don’t want to paint over them.
- Structural Issues: Check the support beams and railings. If anything feels wobbly, it may need repair before painting.
Taking time to check your deck now means fewer surprises later. Once you know what you’re working with, you can plan your project with confidence and end up with a deck that looks great and lasts longer.
Step-By-Step Guide to Repainting Your Deck
Repainting your deck can feel like a big job, but when you break it down into simple steps, it’s totally doable—even for beginners. A fresh coat of paint not only makes your deck look great, but also protects it from rain, sun, and everyday wear. Just take your time and follow this guide, step by step.
Tools and Materials You’ll Need
Before you begin, gather everything you need. Having the right tools on hand will make the job easier and faster.
Tools
- Pressure washer or hose with scrub brush
- Paint scraper or putty knife
- Orbital sander or sanding block
- Paint roller with extension pole
- Paint brushes (for corners and edges)
- Drop cloths or plastic sheets
- Painter’s tape
- Broom or vacuum
Materials
- Deck cleaner or mild detergent
- Wood filler (if needed)
- Exterior primer (optional, depending on paint)
- Exterior deck paint or stain
- Safety gloves, goggles, and a dust mask
Step 1: Clear and Clean the Deck
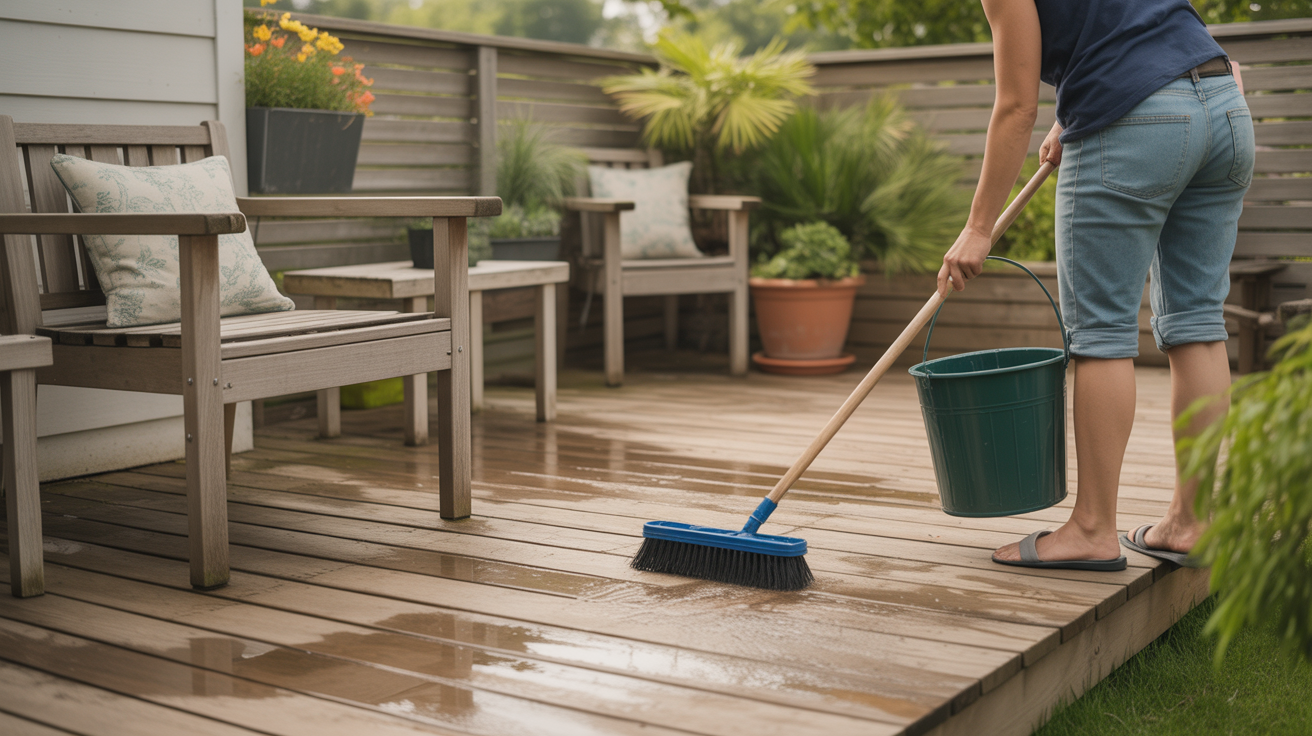
Start by removing all furniture, planters, and decorations from your deck. Sweep away leaves, dirt, and other debris. Then, use a deck cleaner or a mix of soap and water to scrub the surface.
If you have a pressure washer, it works great for deep cleaning, but don’t use too much pressure, or you might damage the wood. Let the deck dry completely. This can take 24–48 hours, depending on the weather.
Step 2: Scrape Away Old Paint
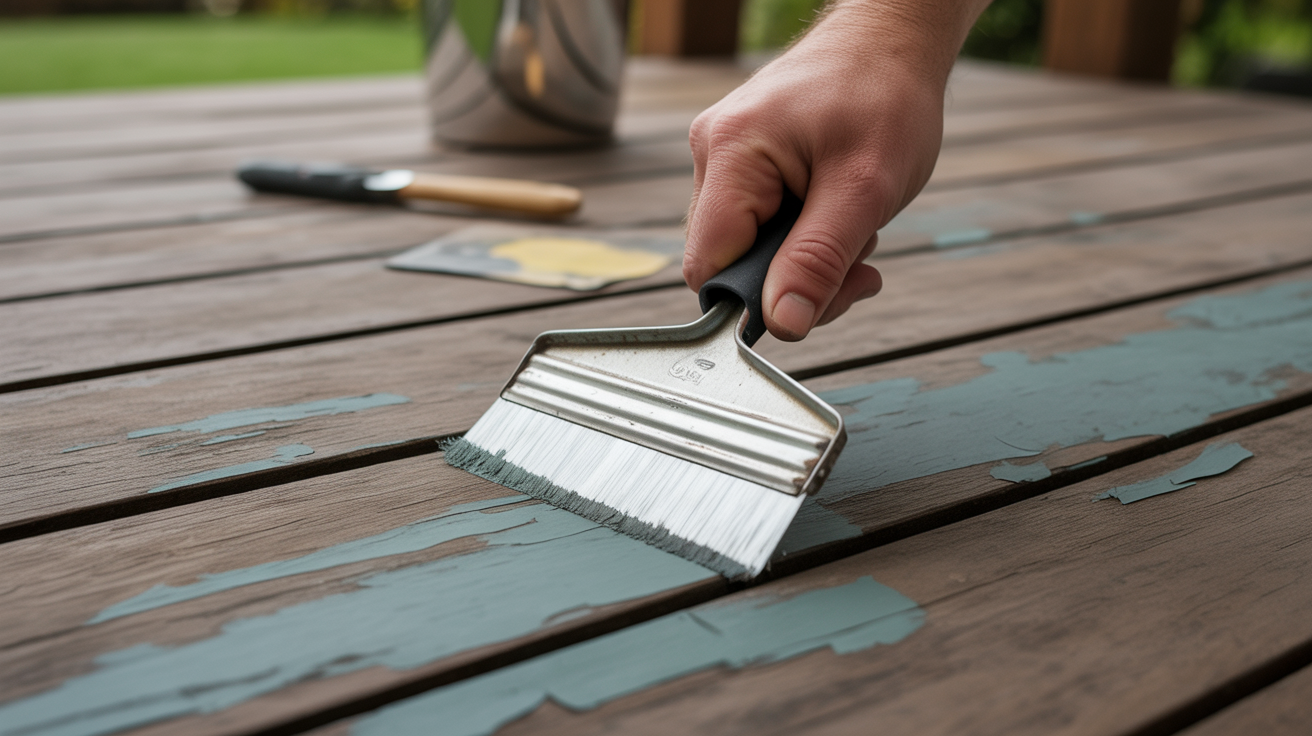
Look for any spots where the old paint is peeling or flaking. Use a paint scraper or putty knife to remove loose paint gently. Be sure to get into corners, around railings, and between boards. If paint is peeling in large areas, you may need to sand more deeply in those spots.
Step 3: Sand the Surface
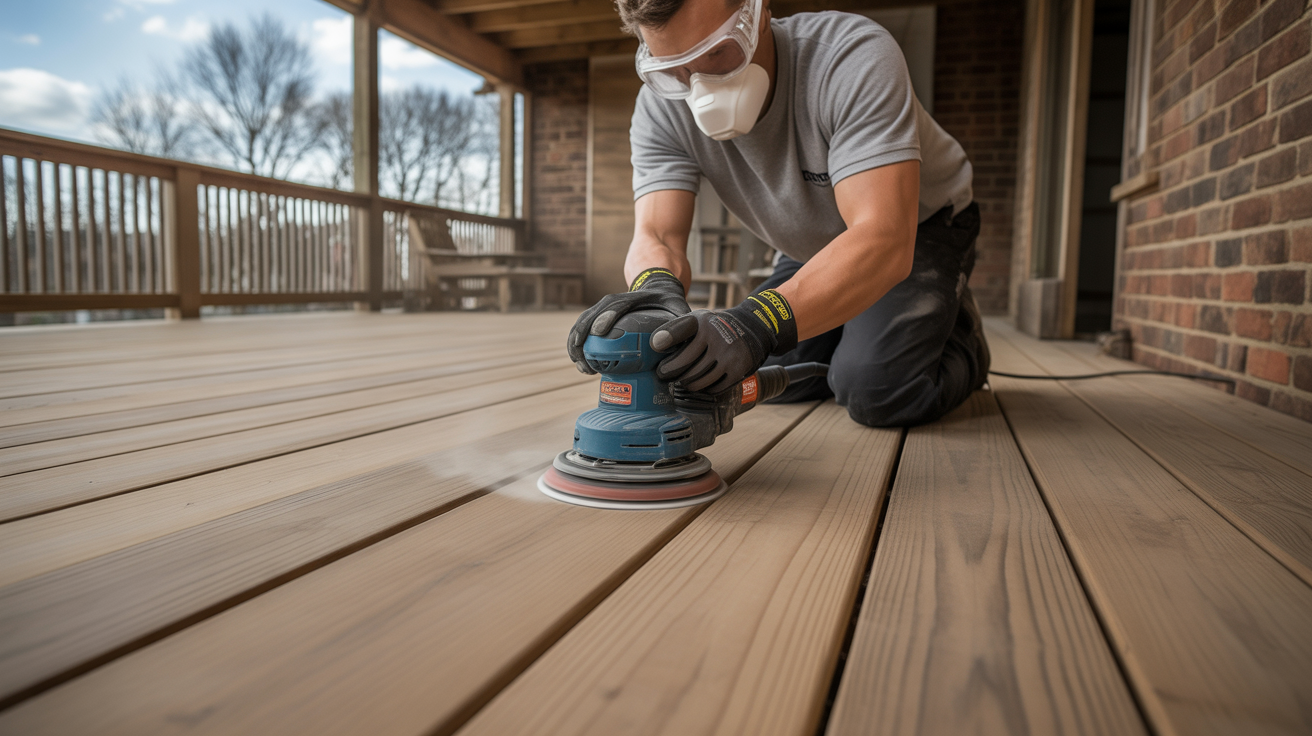
Sanding helps smooth out rough spots and gives the new paint something to stick to. Use an orbital sander for larger areas and a sanding block for edges and tight spots. Focus on places where you scraped paint or where the wood feels rough. After sanding, sweep or vacuum the deck to remove dust. You want a clean, smooth surface before you paint.
Step 4: Make Repairs
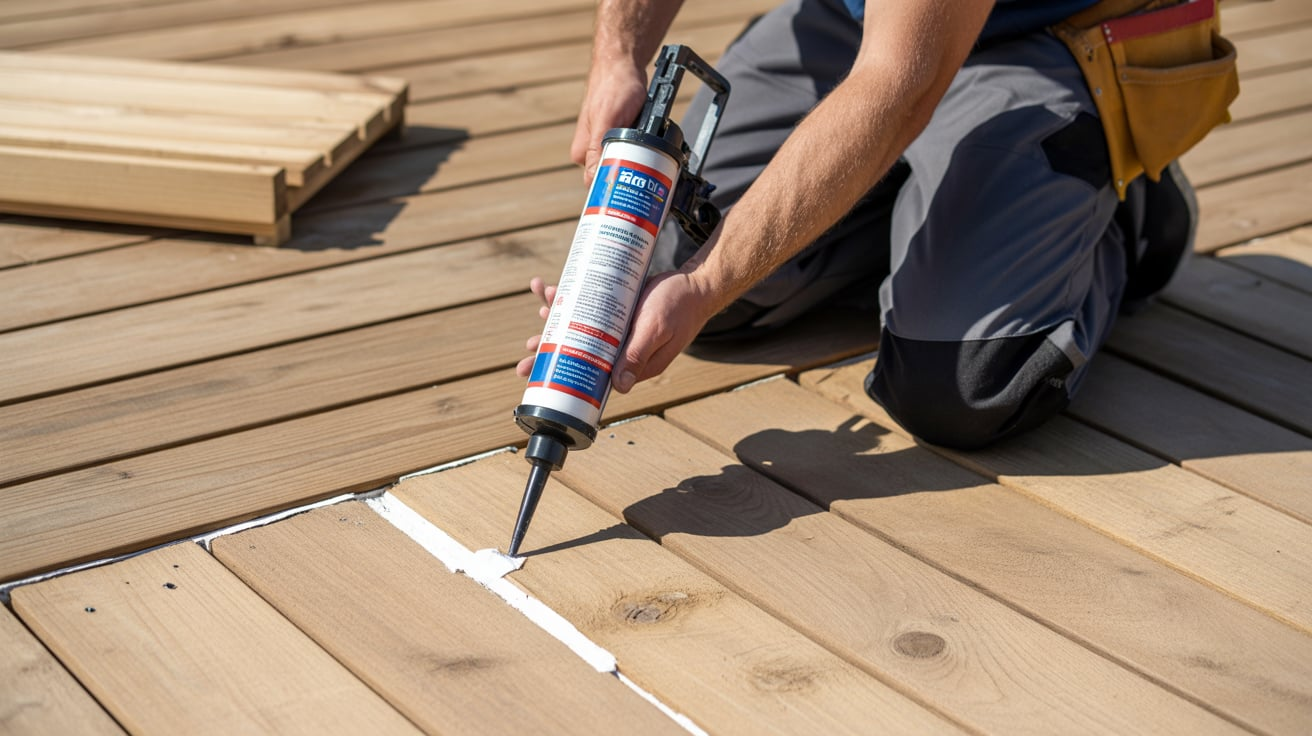
Now is a good time to fix any issues. Use wood filler to patch small cracks or holes. Tighten loose screws or nails and replace any damaged boards. This step helps make your deck safer and keeps the paint looking good for longer. Let wood filler dry and lightly sand the patched spots for a smooth finish.
Step 5: Apply Primer (If Needed)

If you’re painting over bare wood or switching from stain to paint, a primer helps the paint stick and last longer. Use a roller for large areas and a brush for corners and railings. Let the primer dry fully before you move on to painting—follow the label for exact drying times.
Step 6: Start Painting

Now comes the fun part—painting your deck! Start with the railings, stairs, and corners using a brush. Then use a roller for the larger flat surfaces like deck boards. Paint in the direction of the wood grain for a smooth, even look.
Let the first coat dry completely. Then decide if a second coat is needed. Most decks look better and last longer with two coats.
Step 7: Let It Dry and Cure
Don’t rush to move your furniture back. Let the paint dry for at least 24–48 hours. Some paints may need a full week to cure before heavy use. Check the paint can for exact instructions based on weather and humidity.
Once everything is dry, remove the painter’s tape, fold up your drop cloths, and gently place your furniture back in place. Now it’s time to enjoy your fresh, clean deck!
Repainting your deck takes a little work, but the results are totally worth it. With this simple guide, you’ll have a beautiful outdoor space you can be proud of—all without hiring a pro.
Choosing the Right Paint for Your Deck
Picking the right paint is one of the most important parts of repainting your deck. Not all paints are made the same, and using the wrong one can lead to peeling, cracking, or fading. The right paint will protect your deck from sun, rain, and heavy foot traffic—plus, it’ll make your outdoor space look great.
1. Look for Exterior Paint Made for Decks: Always choose paint that is labeled for exterior use and deck surfaces. These paints are made to handle tough weather and daily wear. Interior paints won’t last outside.
2. Water-Based vs. Oil-Based Paint: Water-based paints dry faster, are easy to clean with water, and have less odor. At the same time, oil-based paints provide a thicker coat and may last longer in harsh weather. However, they take longer to dry and require paint thinner for cleanup.
3. Check for Mold and UV Protection: Look for paints with mildew resistance and UV protection. These features help keep the deck from fading in the sun or growing mold in damp areas.
4. Choose a Color You’ll Love: Go with a color that matches your home and style. Dark colors look rich but may show dirt and heat up in the sun. Light colors stay cooler and show fewer scuffs. Earth tones like gray, brown, and tan are always a safe choice.
Choosing the right deck paint helps your hard work last longer and gives your space a fresh, finished look. Take your time, read labels carefully, and you’ll find the perfect paint to bring your deck back to life.
Maintenance Tips for A Long-Lasting Finish
Once you’ve repainted your deck, the job isn’t completely done. Keeping your deck in good shape helps the paint last longer and saves you from having to repaint too soon. A little bit of regular care can go a long way. These easy tips will help you keep your deck looking fresh and clean for years to come.
- Sweep Regularly: Use a broom to clear off leaves, dirt, and debris. This stops grime from building up and wearing down the paint.
- Clean Spills Quickly: If you spill food, drinks, or anything else, clean it right away to avoid stains and sticky spots.
- Wash It Once a Season: Use a mild deck cleaner or soapy water with a soft brush to give it a good scrub in spring or summer.
- Check for Peeling Paint: Every few months, look for signs of peeling or chipping. Touch up small areas before they get worse.
- Move Furniture Around: Change the position of furniture and planters every now and then to avoid paint wearing down in one spot.
- Use Furniture Pads: Put soft pads under chair and table legs to prevent scratches when things are moved.
- Keep Plants Off the Deck Surface: Place potted plants on risers or trays so water doesn’t get trapped underneath and damage the paint.
Taking care of your freshly painted deck doesn’t have to be hard. Just a few small habits can make a big difference. With regular cleaning and quick fixes, your deck will stay looking great season after season.
Conclusion
Repainting your deck is a simple project that can make a big difference. It helps protect the wood from weather damage, gives your outdoor space a fresh look, and makes your deck safer to use. With the right tools, paint, and a little time, you can do it yourself and save money.
From cleaning and sanding to choosing the best paint, each step matters in getting a smooth and lasting finish. Don’t forget to check your deck’s condition and make small repairs before painting. Once your deck is painted, regular cleaning and care will keep it looking great for years.
Whether you’re refreshing an old deck or giving a newer one a fresh coat, repainting is a smart way to boost your home’s appearance. Take your time, follow the steps, and enjoy your beautiful, updated deck all season long.