
Have you ever looked at your kitchen island and felt like something was missing? I did too.
That’s when I decided to try adding shiplap, and it completely changed the look of my kitchen.
Shiplap is one of those easy upgrades that brings charm, texture, and a cozy farmhouse feel without a huge remodel.
No matter if your kitchen is big or small, a little bit of shiplap can make your island stand out.
The best part? You don’t need to be a pro to do it. With a few tools, some planning, and a free weekend, you can create a stunning centerpiece right in the heart of your kitchen.
In this blog, I’ll walk you through the step-by-step process and share some ideas to inspire your design. Let’s get started and bring your kitchen island to life!
Why Choose a Shiplap Kitchen Island?
A shiplap kitchen island is a great way to add style without spending a lot of money.
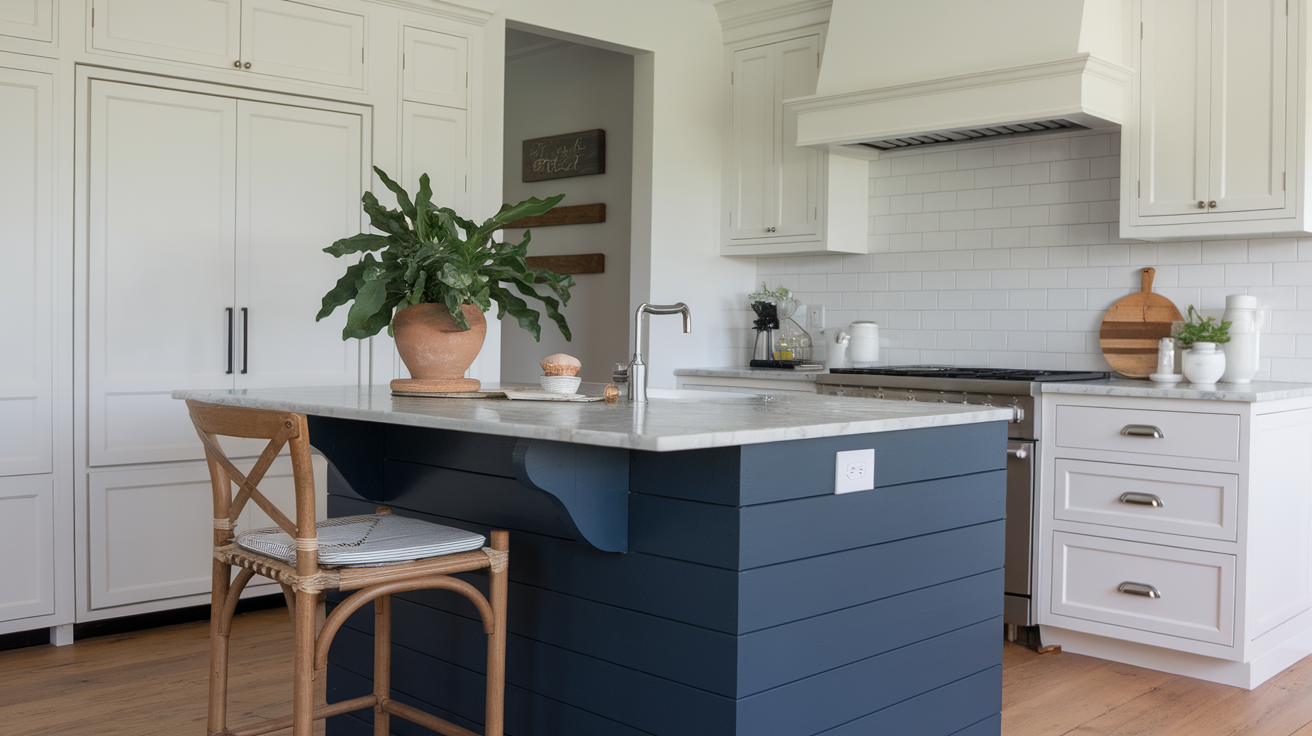
Shiplap has a clean, simple look that complements many design styles, such as farmhouse, coastal, or modern.
It adds texture and makes your island feel more like a centerpiece instead of just a plain box in the middle of the room.
Another reason to love shiplap is how easily it works with. You can paint it any color you like, such as white for a fresh, bright look or a dark color for something bold and dramatic.
It’s also a fun DIY project, even for beginners. If you want to update your kitchen without a full remodel, adding shiplap is a smart and stylish choice. It’s a small change with a big impact.
How to Add Shiplap to a Kitchen Island
A shiplap island can bring charm and texture to any kitchen, and it’s a project that can be completed in a weekend with just a few tools and supplies.
Materials and Tools Needed
- Shiplap boards (8 ft long for fewer seams)
- 18-gauge brad nails and a brad nailer
- Stud finder (or pre-marked studs)
- Measuring tape
- Miter saw or circular saw
- Scrap wood (for outlet marking templates)
- Liquid Nails or similar construction adhesive
- 2×4 boards (for creating side spacers)
- Trim pieces (for corner covers and framing)
- Wood glue
- Nail set or spring-loaded nail tapper
- Drywall filler (pink or color-change variety recommended)
- 220-grit sandpaper
- Foam roller or paint sprayer
- High-gloss enamel paint
- Long screws (for resetting outlets flush)
Step 1: Measure and Prepare the Island
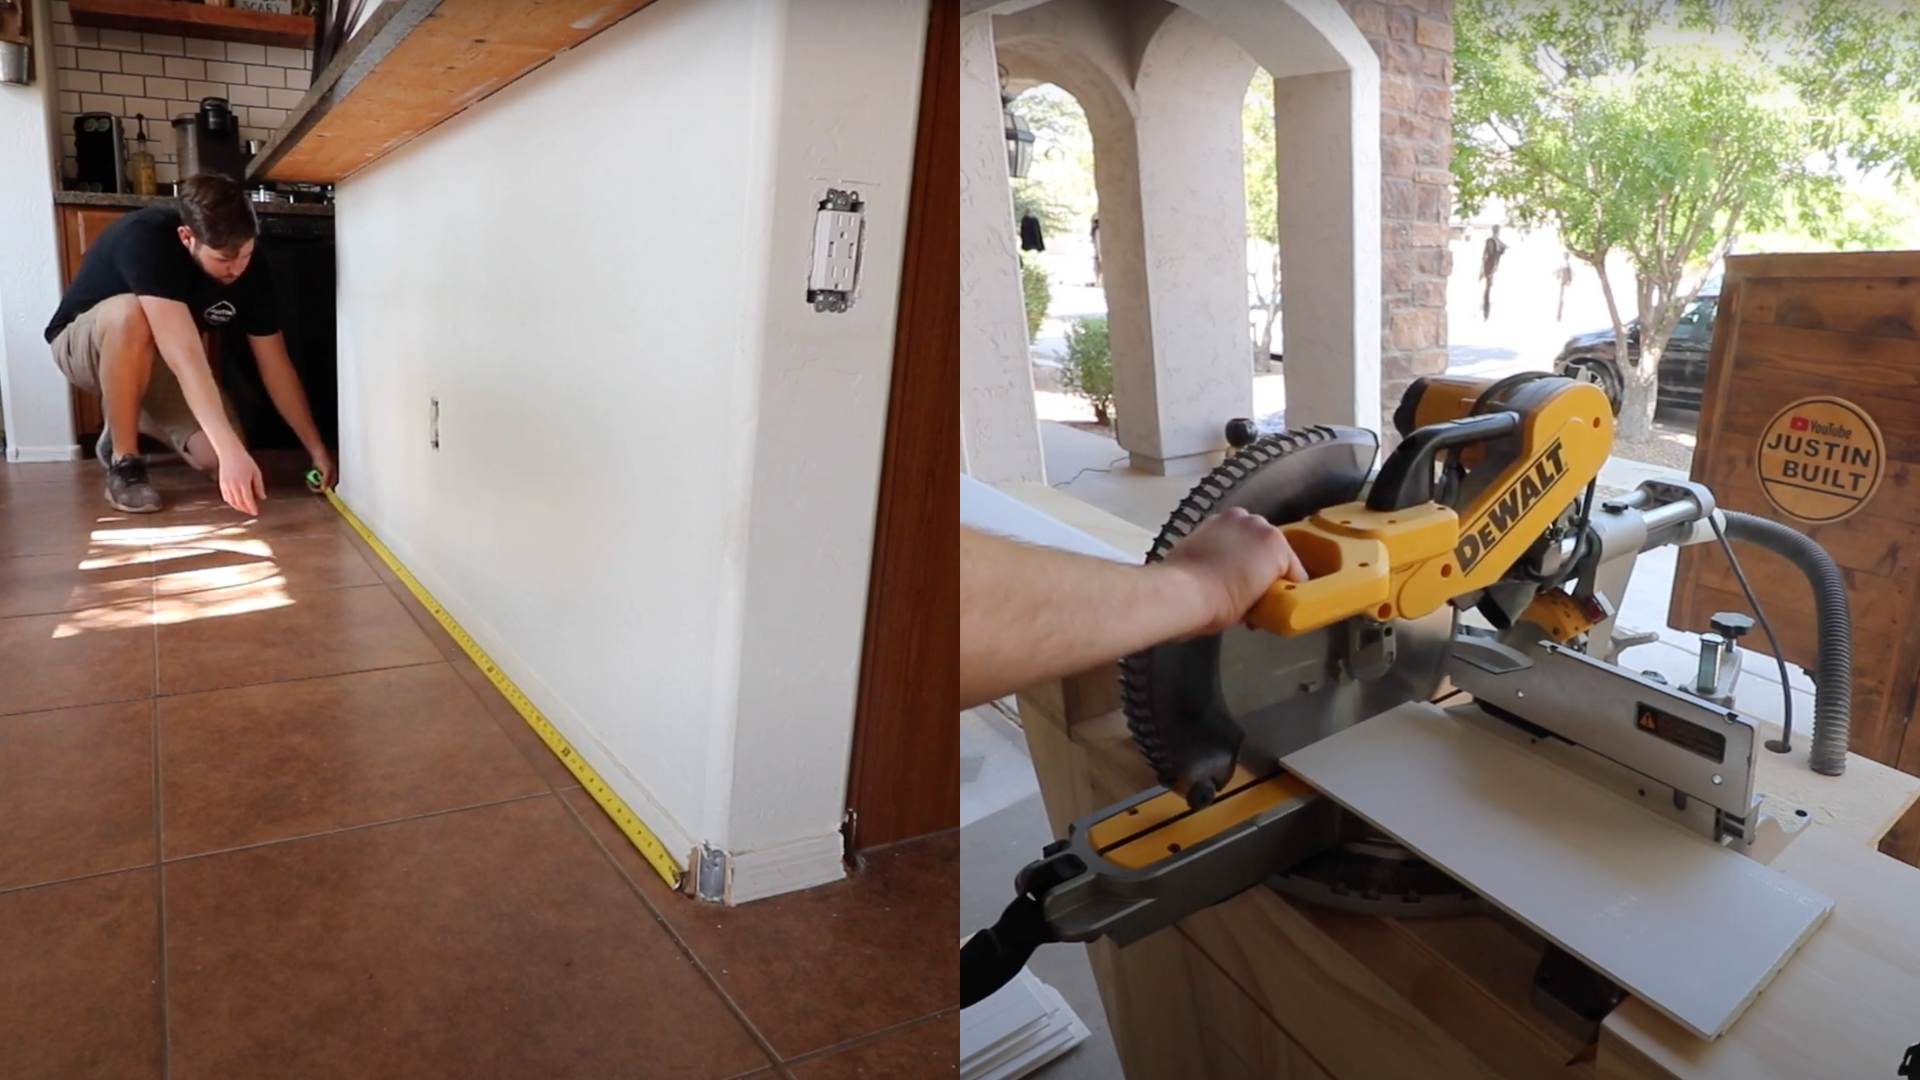
First, measure your kitchen island to determine the amount of shiplap needed.
If your island is shorter than 8 feet, 8-foot boards can be cut to size. Cut the shiplap boards to the appropriate length for each section of the island.
If there are existing baseboards, remove the corner pieces but leave the main long sections; these can act as a temporary ledge for the first shiplap board and will be covered by trim later.
Step 2: Install Shiplap on the Front
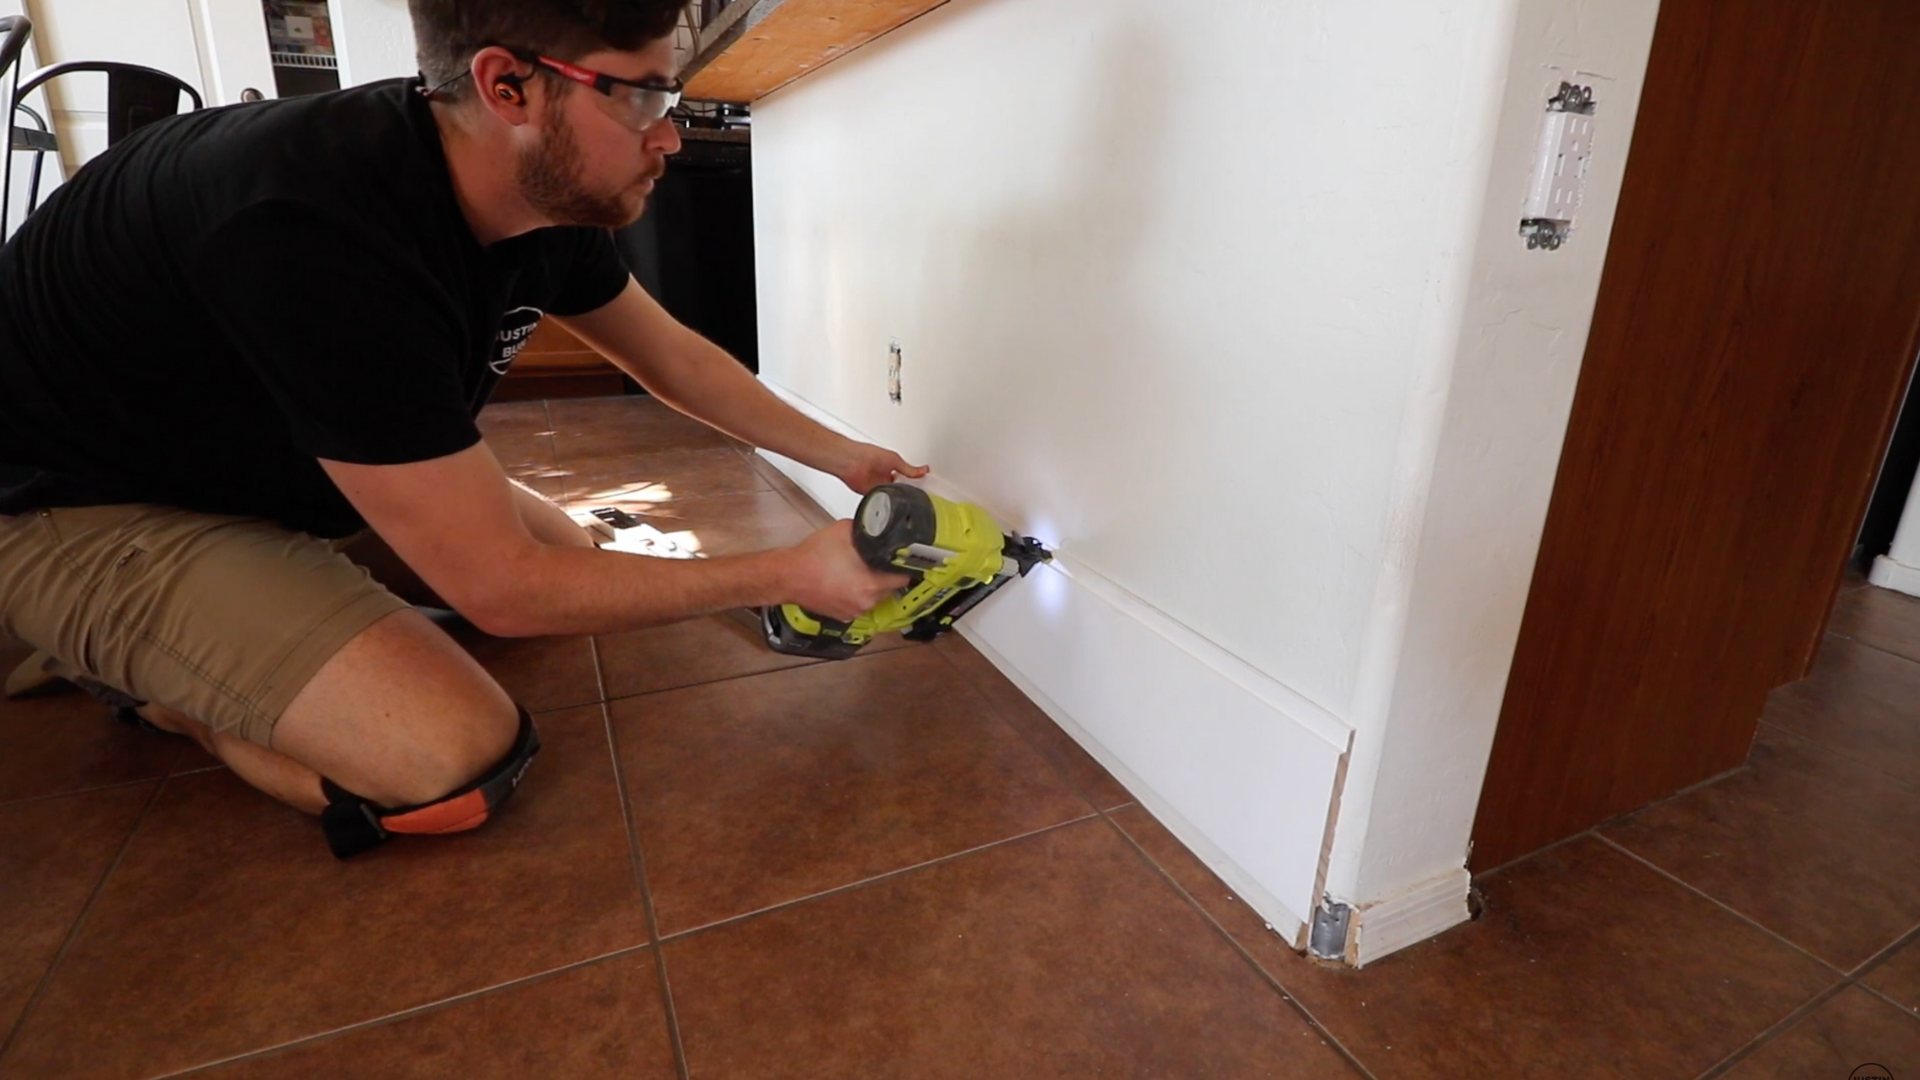
Begin installing shiplap on the front of the island, starting from the bottom. Use an 18-gauge brad nailer, driving nails into the tongue of the board and into any marked studs.
When encountering outlets, use a scrap piece of wood to mark and cut out the opening on the shiplap board before nailing it in place.
Continue working your way up, nailing into the tongue to minimize visible holes.
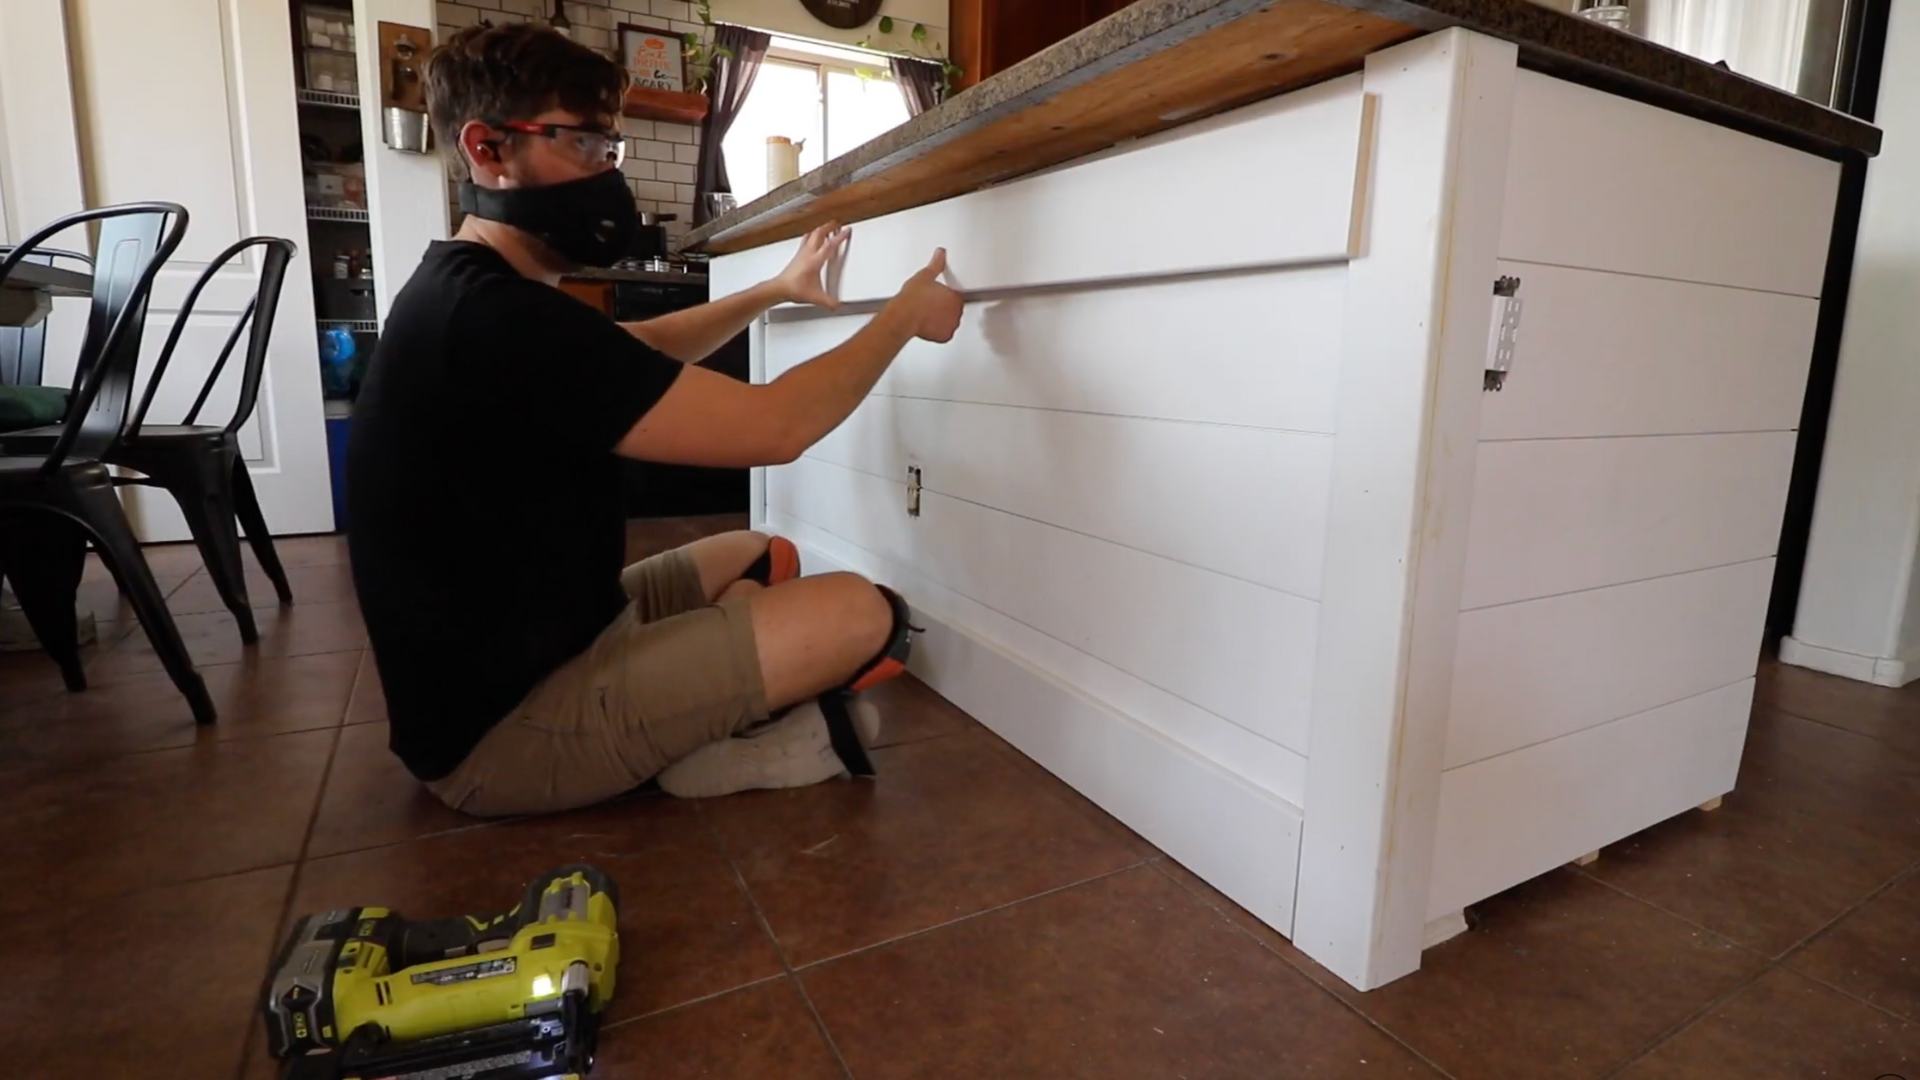
Step 3: Trim the Top Shiplap Board
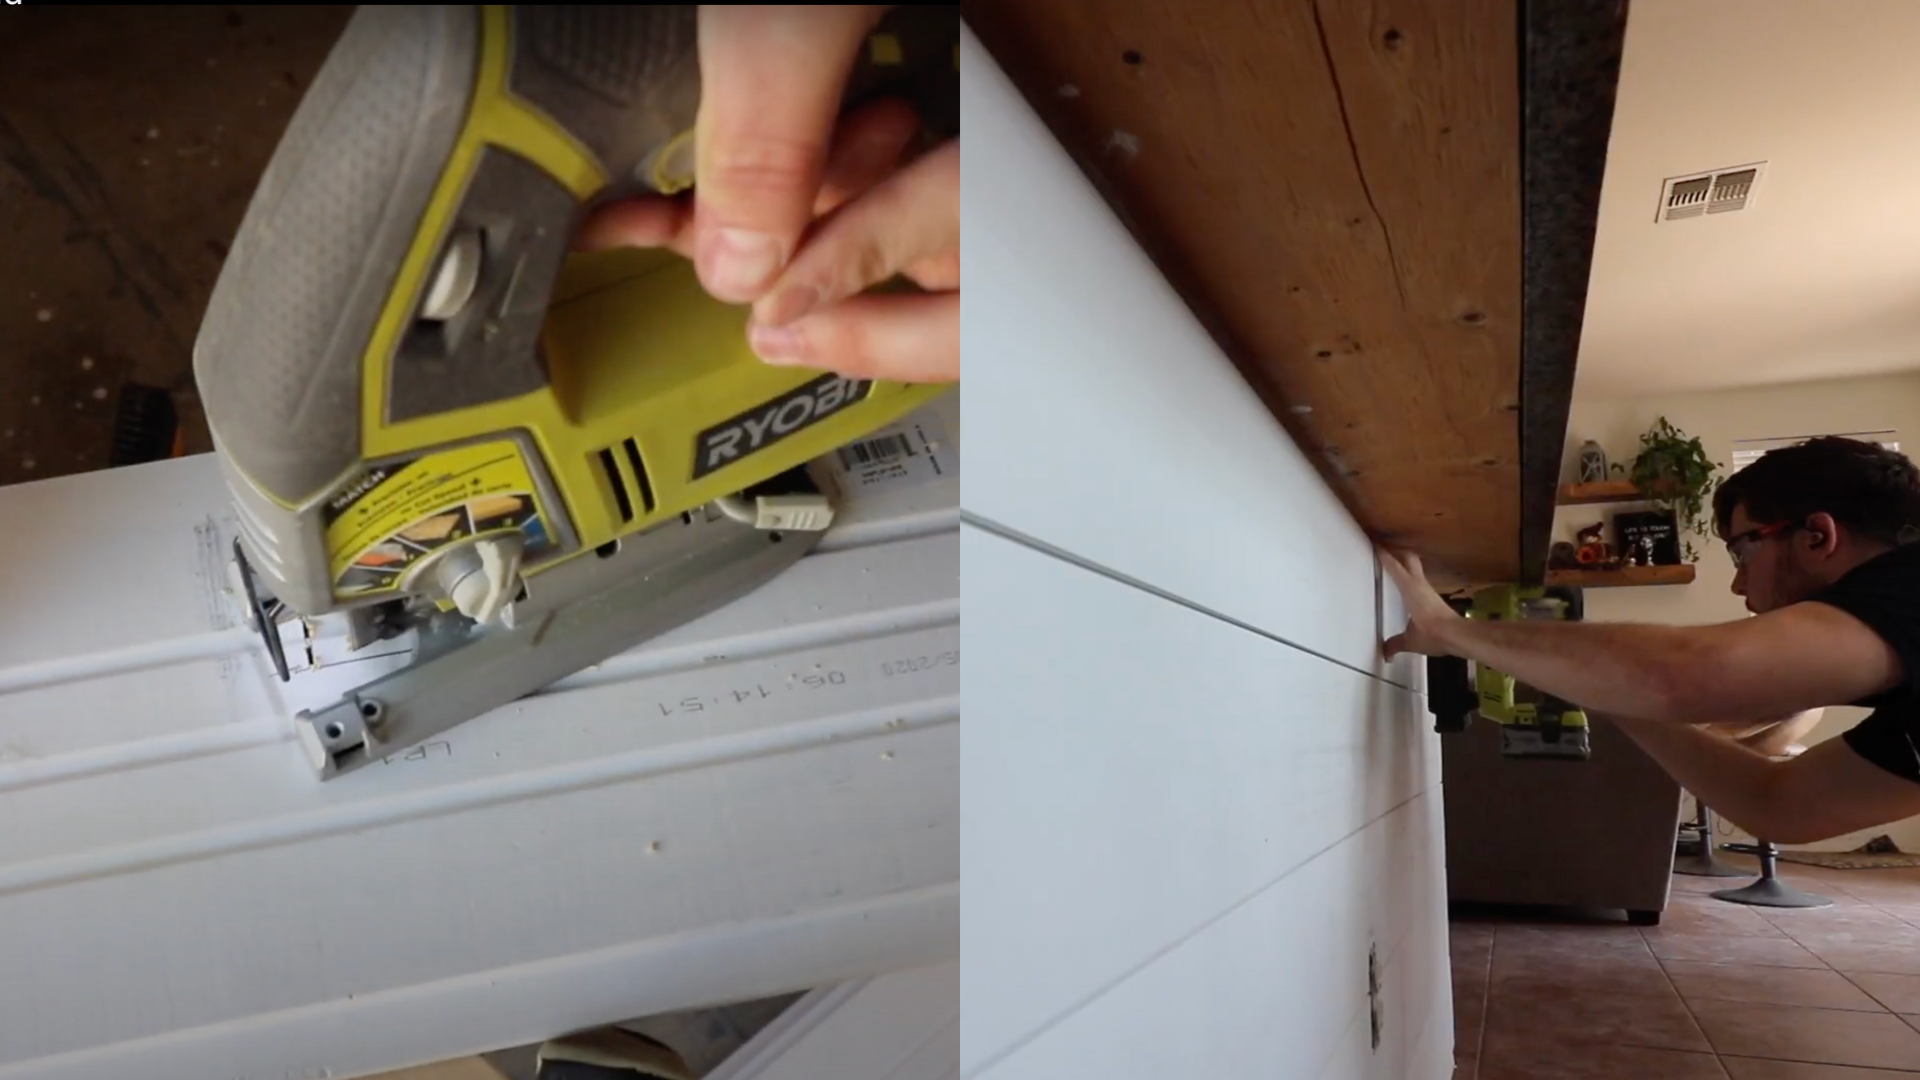
Once you reach the top of the island, the final shiplap board will need to be precisely trimmed to fit the remaining space.
Carefully measure the distance between the last installed shiplap board and the underside of the countertop.
Then, using a saw, cut off the tongue end of this final board, ensuring it will sit perfectly flush and neatly against the counter, creating a clean and seamless finish for the top edge of the shiplap.
Step 4: Prepare and Install Side Edge Spacers
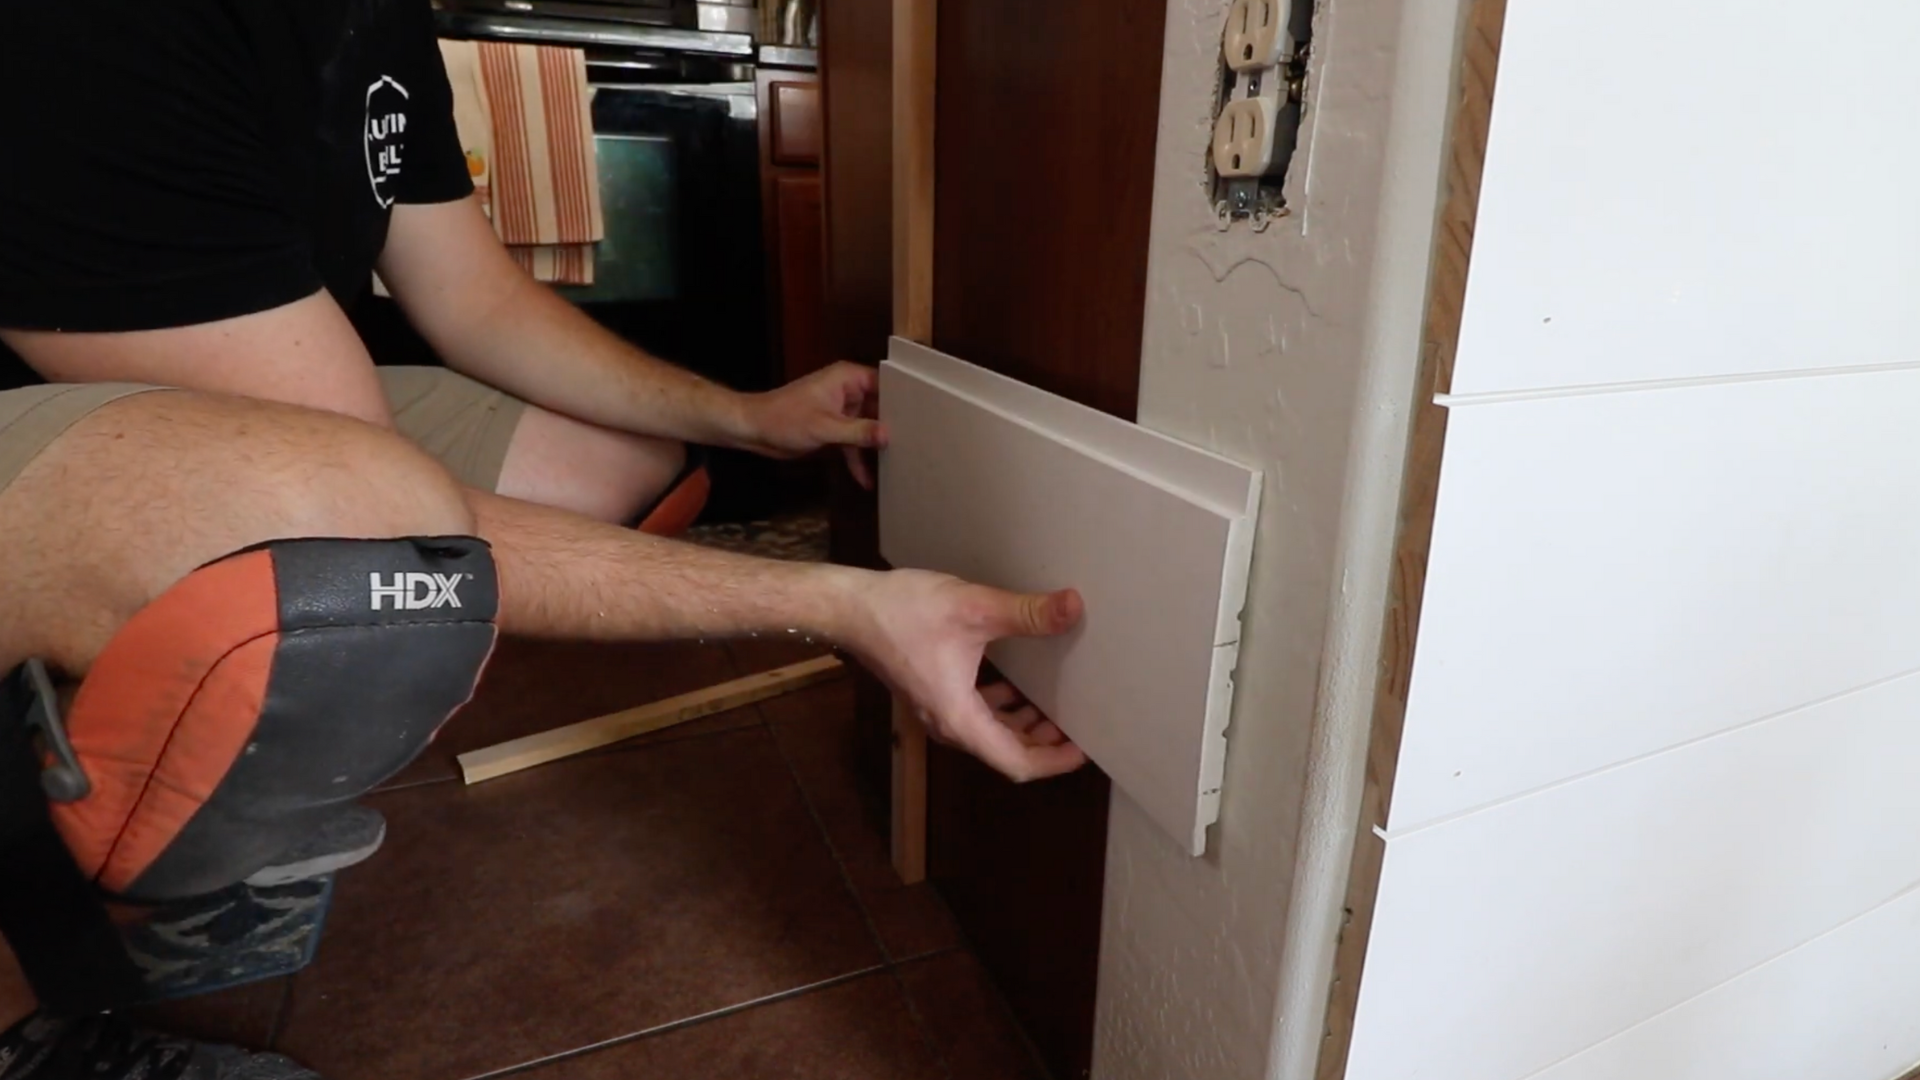
After the front is complete, address the side edges.
If your cabinets are recessed from the drywall corners, measure this gap. Cut two spacers from a spare 2×4 for each side based on this measurement.
Apply liquid nails to the spacers and attach them to the cabinet frame at the end and in the middle, securing them with short brad nails, being careful not to go through the cabinet.
Step 5: Install Shiplap on the Sides
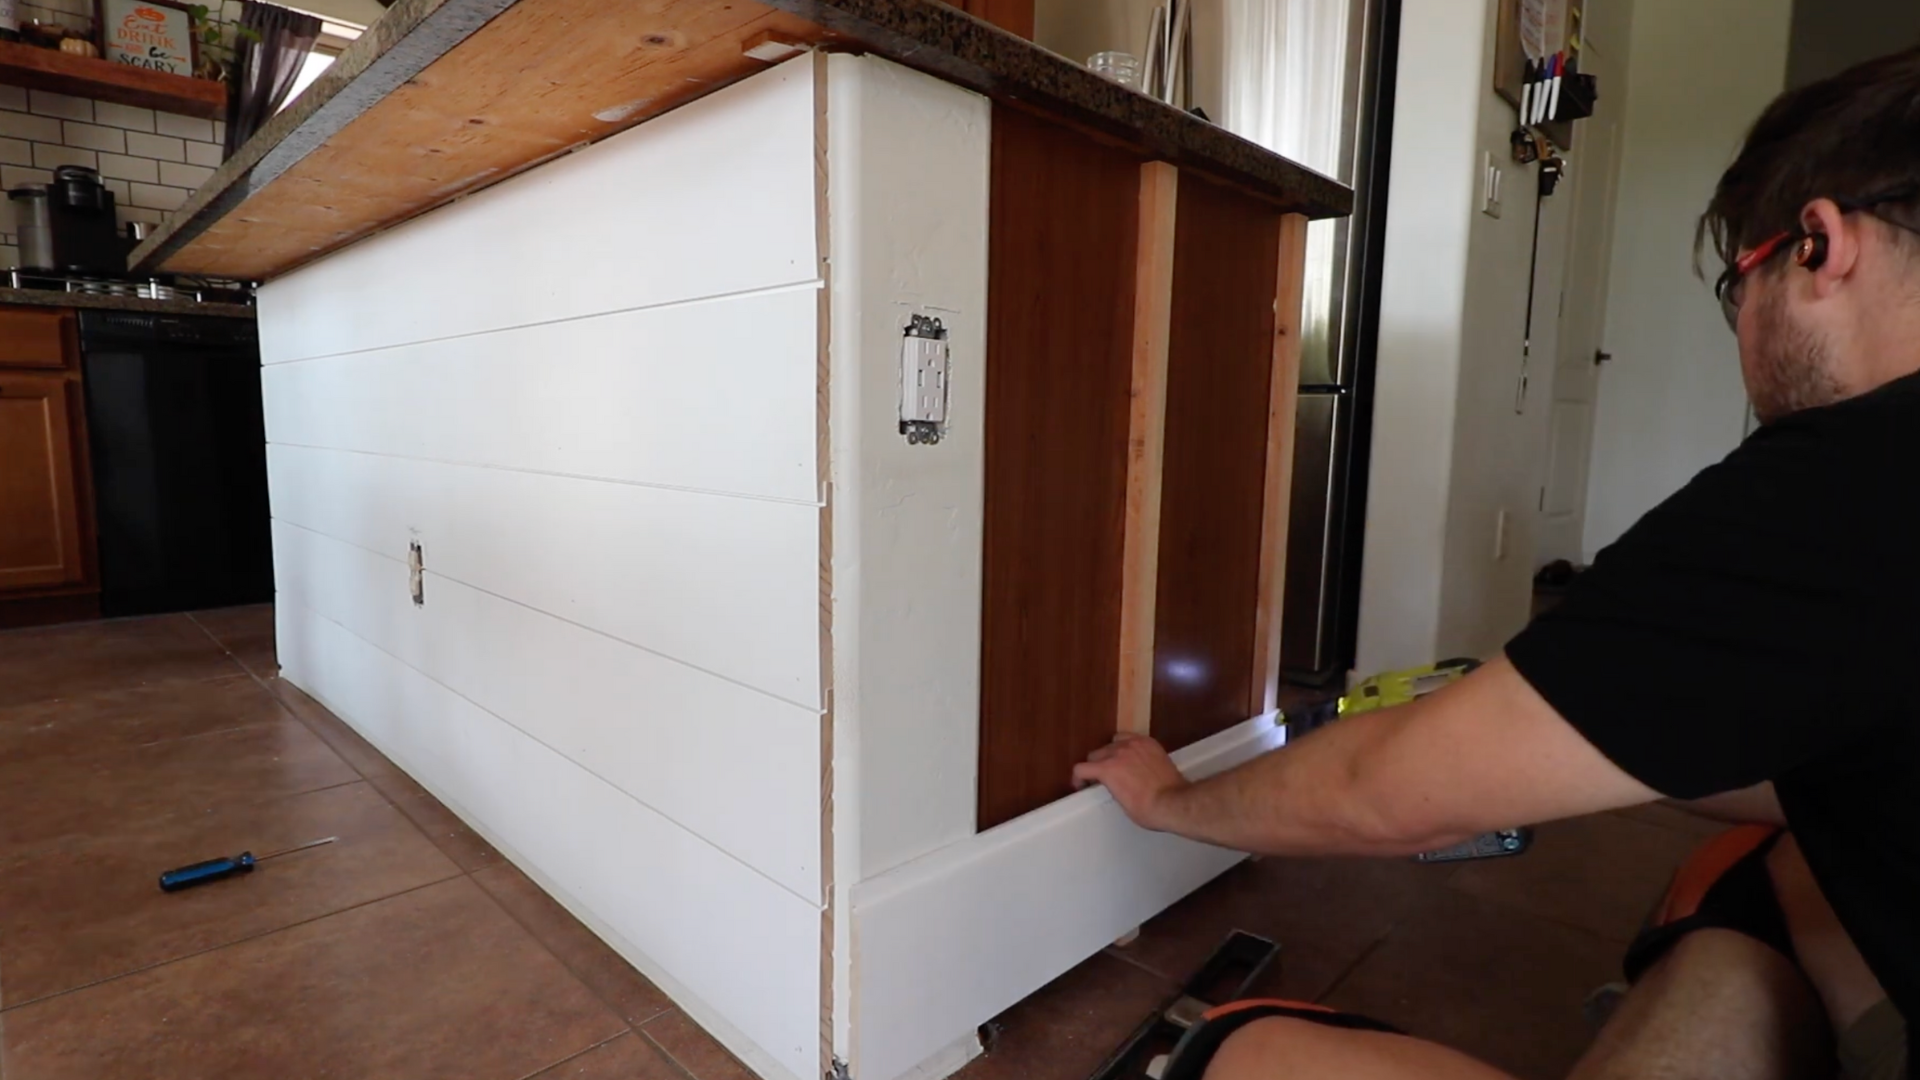
With the spacers in place, you can now start installing the shiplap boards on the island’s side edges.
Make sure each board reaches the outer edge, even if the corners aren’t perfectly neat. Any small imperfections will be covered by trim later.
Step 6: Cut and Install Corner Trim Pieces
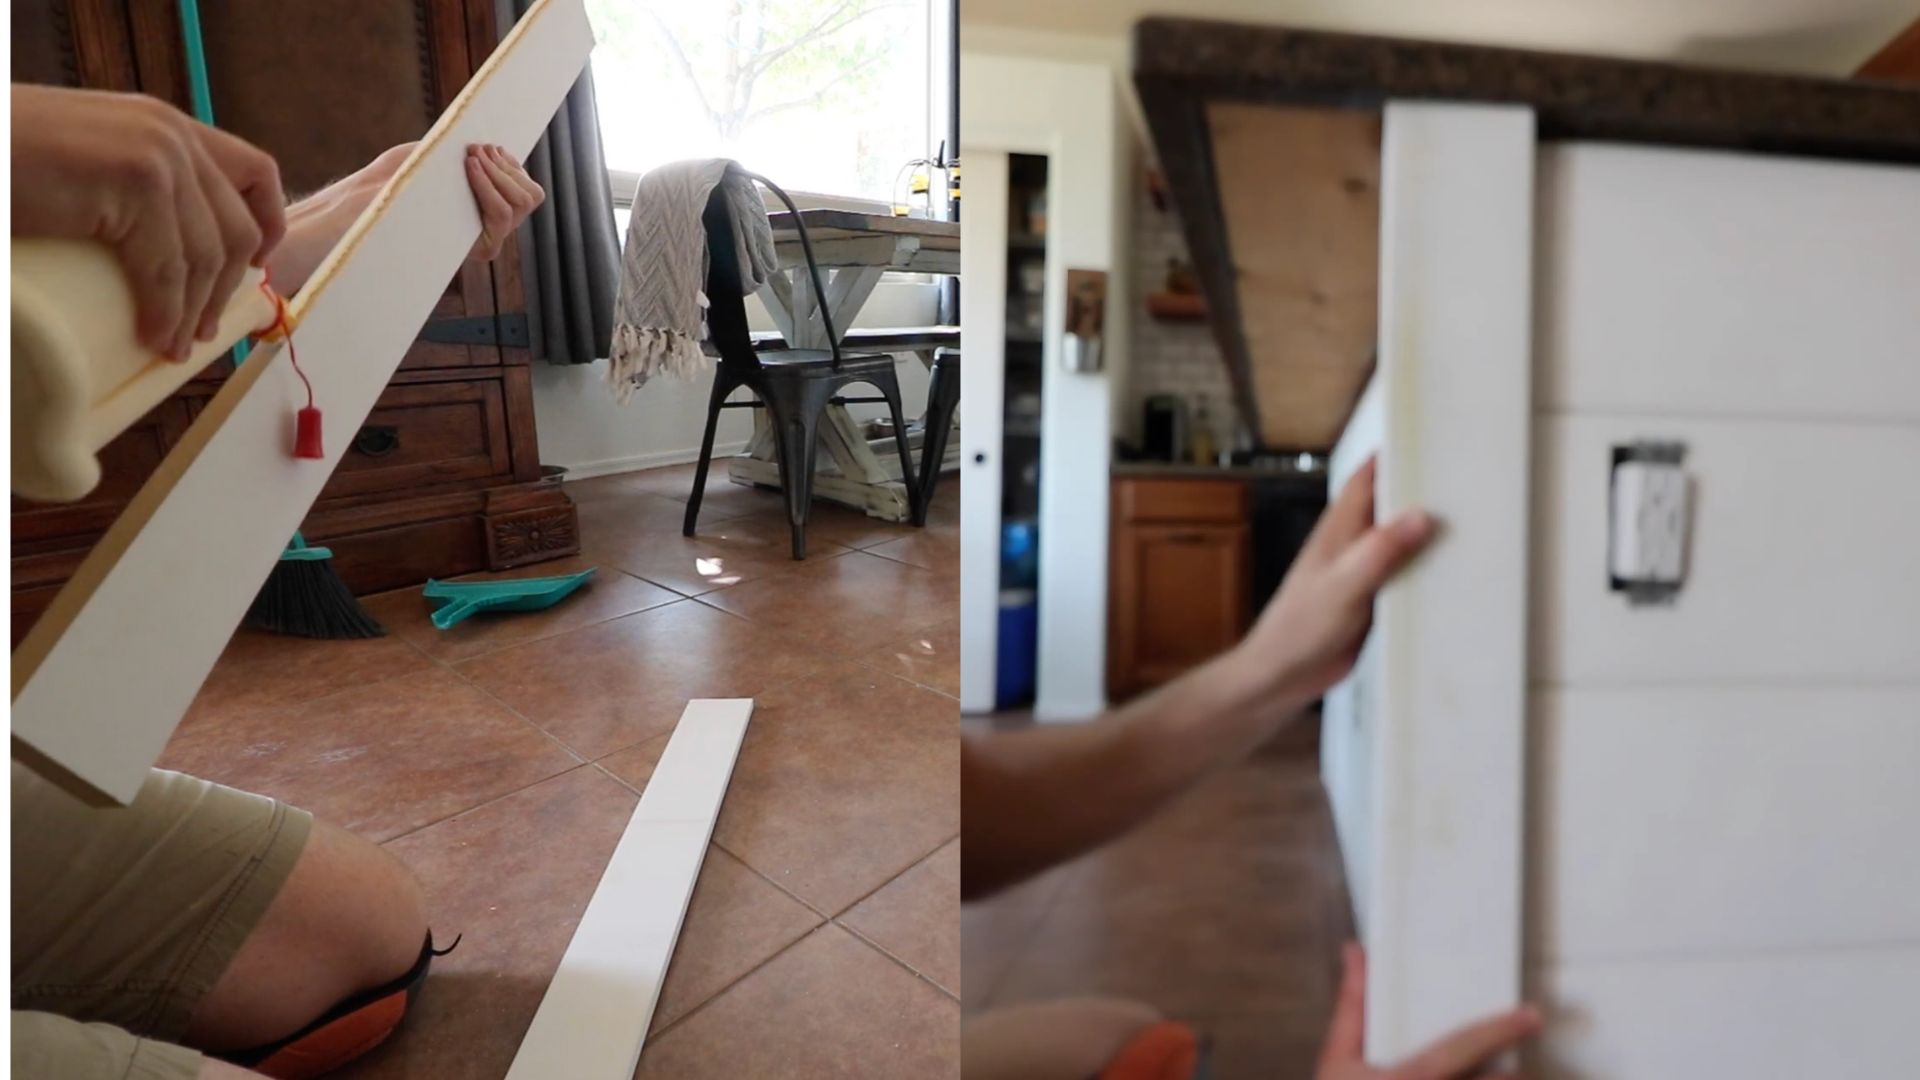
Begin adding trim by addressing the corners first.
Measure the corner height and cut trim pieces, subtracting three-quarters of an inch from one piece to account for the thickness of the other.
Apply wood glue and install these pieces to form an “L” shape, covering the rough shiplap edges. Brad nails can hold them while the glue dries.
Step 7: Install Top and Bottom Trim Pieces
After the corner trim is in place, install the longer trim pieces horizontally along the top and bottom edges of the shiplap.
Apply wood glue and secure these with brad nails to complete the trim work and visually tie everything together.
Go over all the installed shiplap and trim with a spring-loaded nail tapper.
This tool ensures that all brad nail heads are slightly recessed below the surface of the wood, preparing the surface for the next steps.
Step 8: Fill, Sand, and Caulk
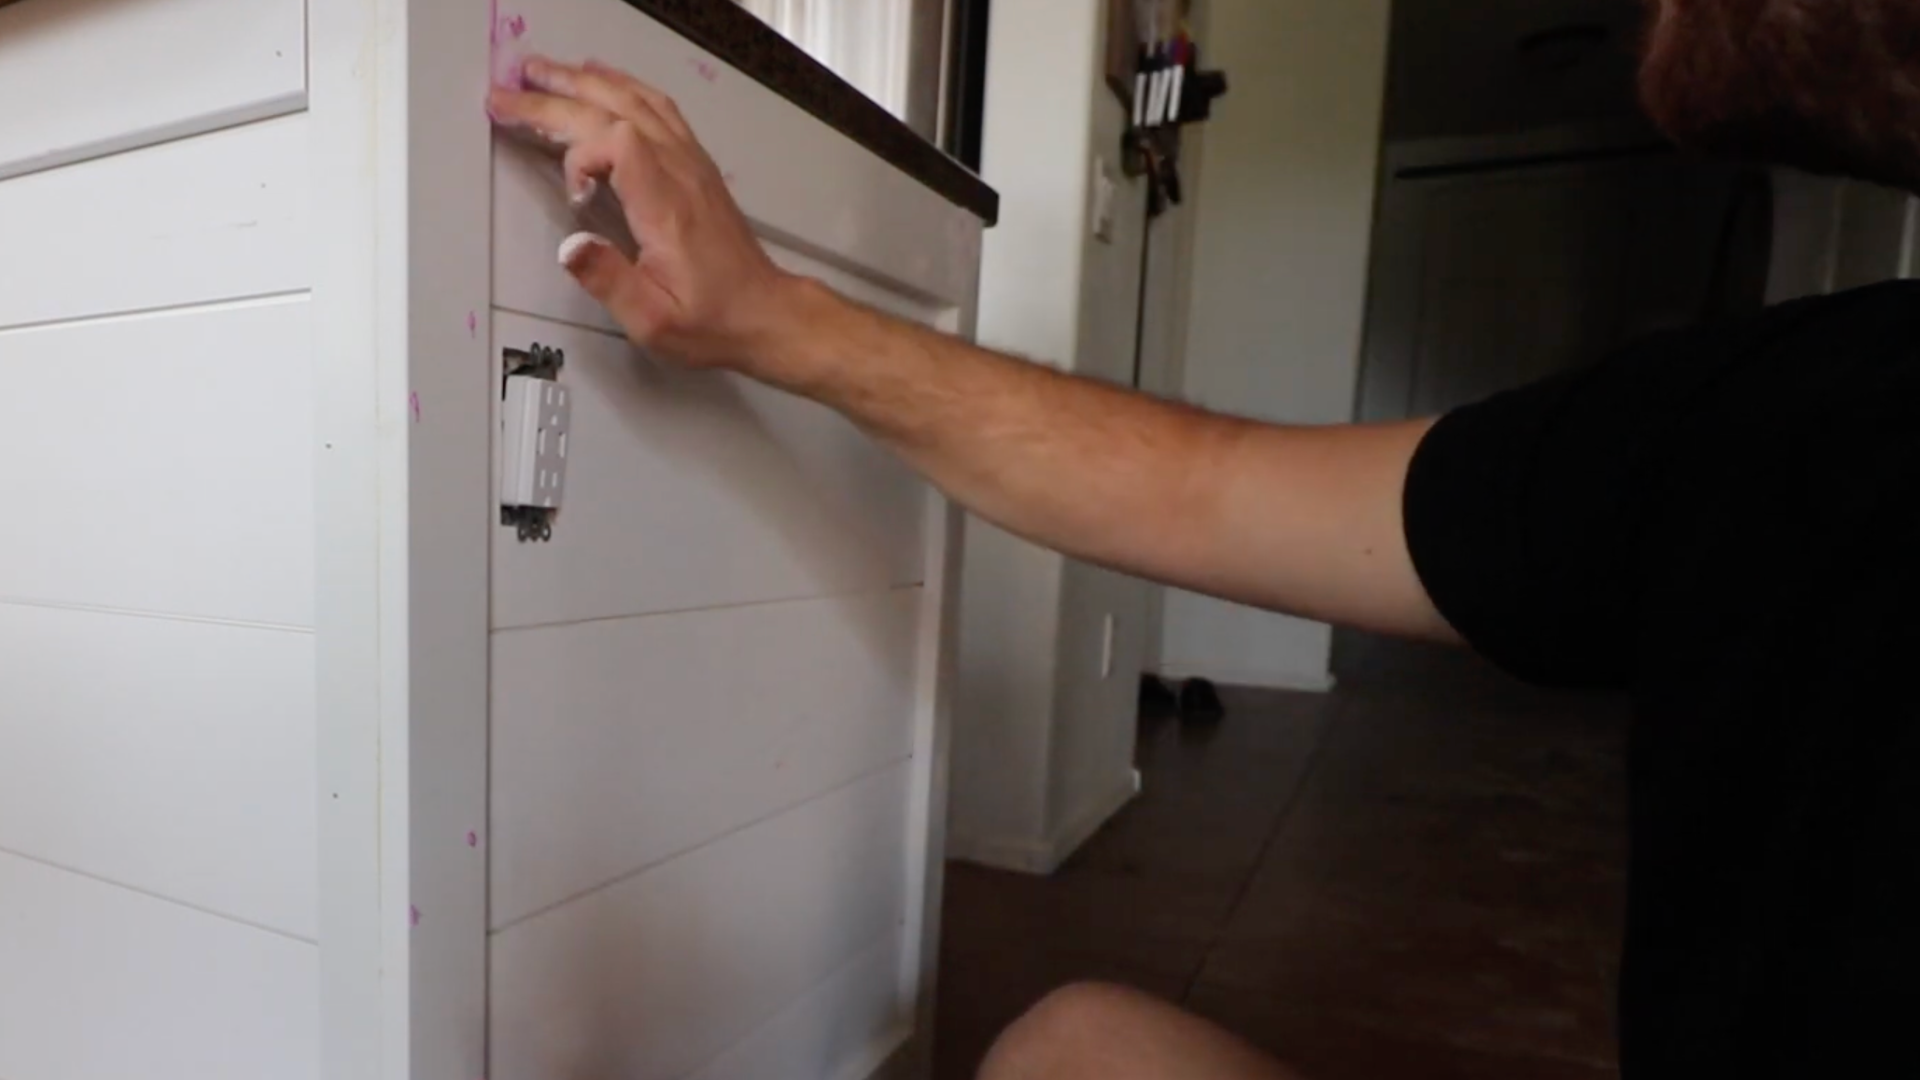
Fill all nail holes with wood filler, pressing it firmly into each hole and mounding slightly. Once the filler is dry, sand it smooth with light-grit sandpaper (around 220 grit).
For a professional look, apply caulk to all the seams where the trim meets the shiplap, smoothing it for a clean, crisp line.
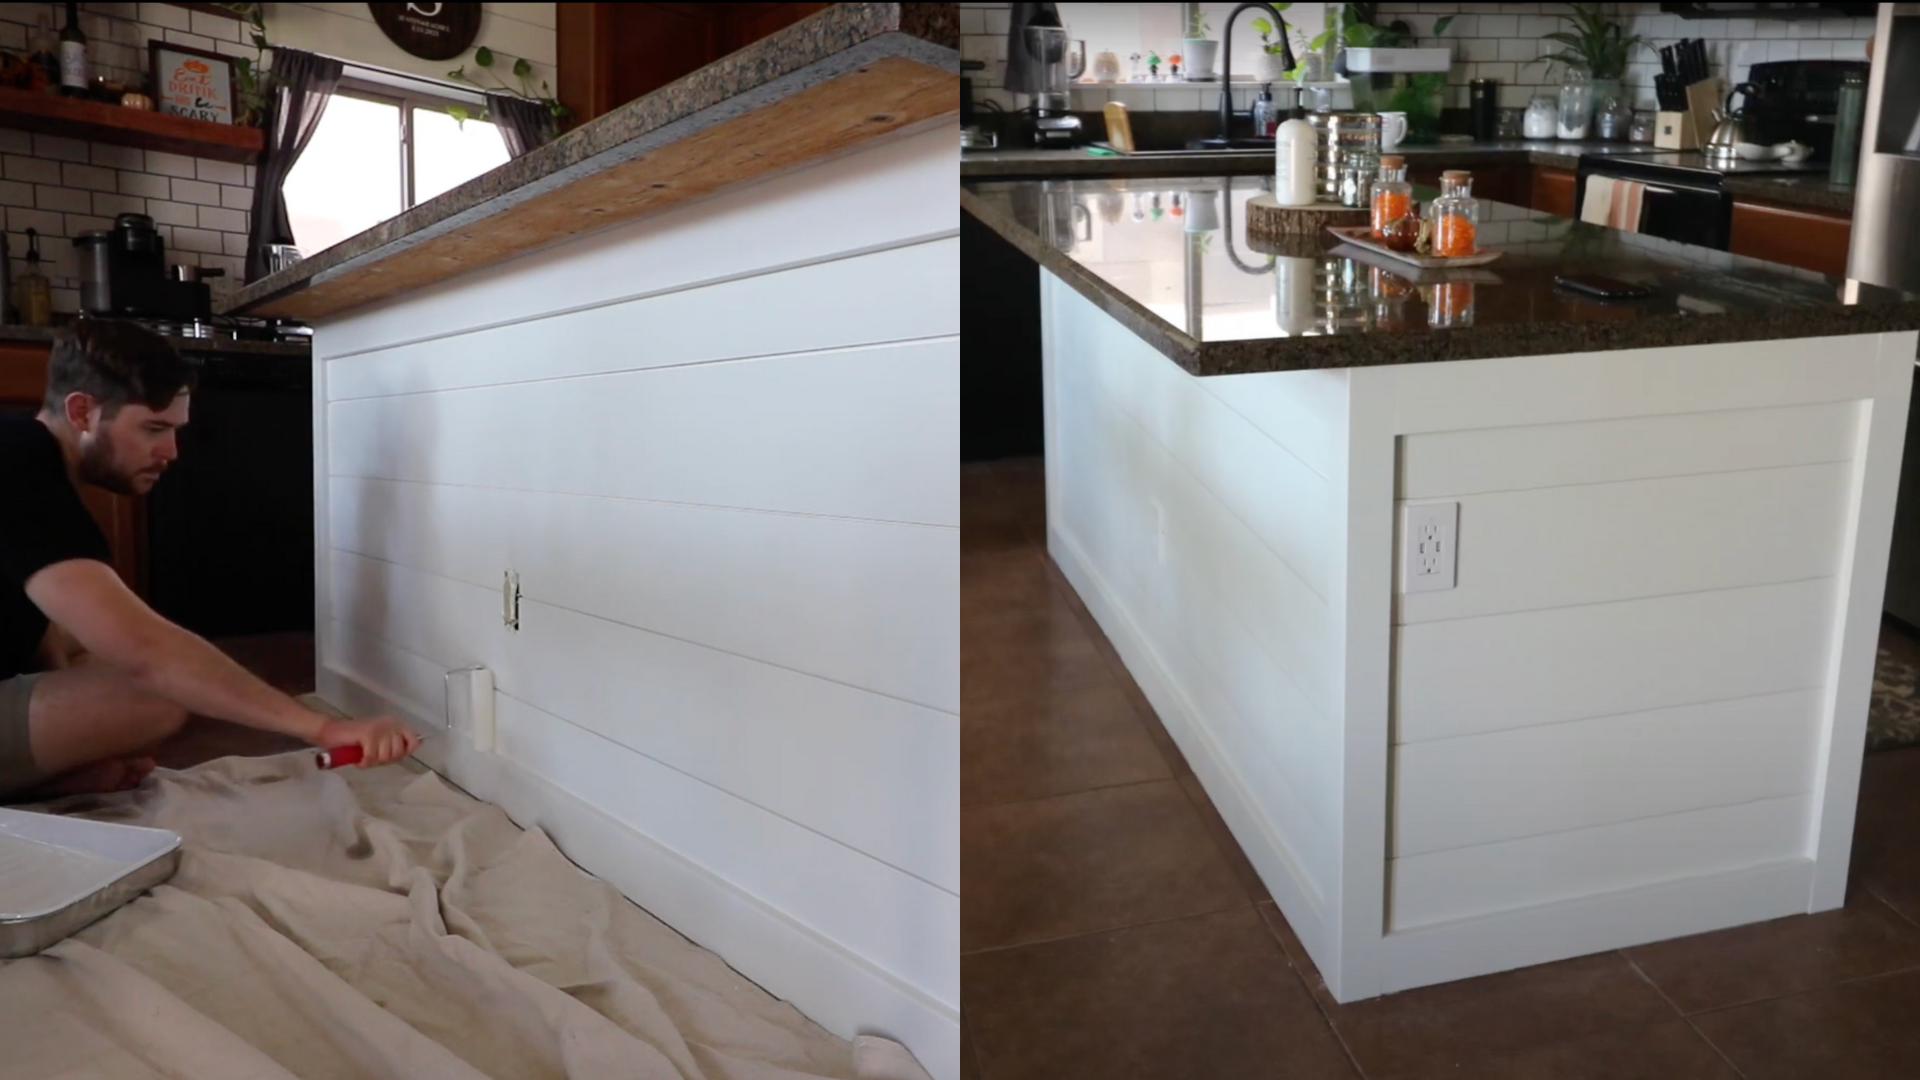
Step 9: Paint the Shiplap Island

Finally, paint your shiplap island. A paint sprayer offers the smoothest finish, but a foam roller can also provide an excellent, even texture.
Use a high-gloss enamel paint, as this type of paint is very durable and easy to clean, which is ideal for a kitchen island that sees a lot of activity.
Adding shiplap to a kitchen island is a simple project that can transform the space with warmth and character.
Check out this quick video tutorial by @JustinStanley to see how a shiplap kitchen island comes together step by step.
Customization Ideas for Your Shiplap Kitchen Island
Every kitchen is different, so why not make your island match your style? I love how easy it is to play around with paint, hardware, and finishes to get the exact vibe I want.
Try a Fun Paint Color
Paint is one of the easiest ways to give your island personality. White is always a favorite – it’s clean, bright, and gives off a classic farmhouse vibe.
If you’re looking for something moodier, navy blue or dark gray can make a bold statement. Soft pastels like mint or blush create a calm, cozy feeling.
You can even match your island color to your kitchen cabinets or walls for a seamless look.
Add Open Shelving or Cabinets
Open shelves or cabinets on the island aren’t just practical, they also add charm.
You can use them to display cookbooks, bowls, or woven baskets. It’s a simple way to keep things organized while also making your island more stylish.
Open shelving can also make a small kitchen feel more open and airy.
Use Unique Countertops
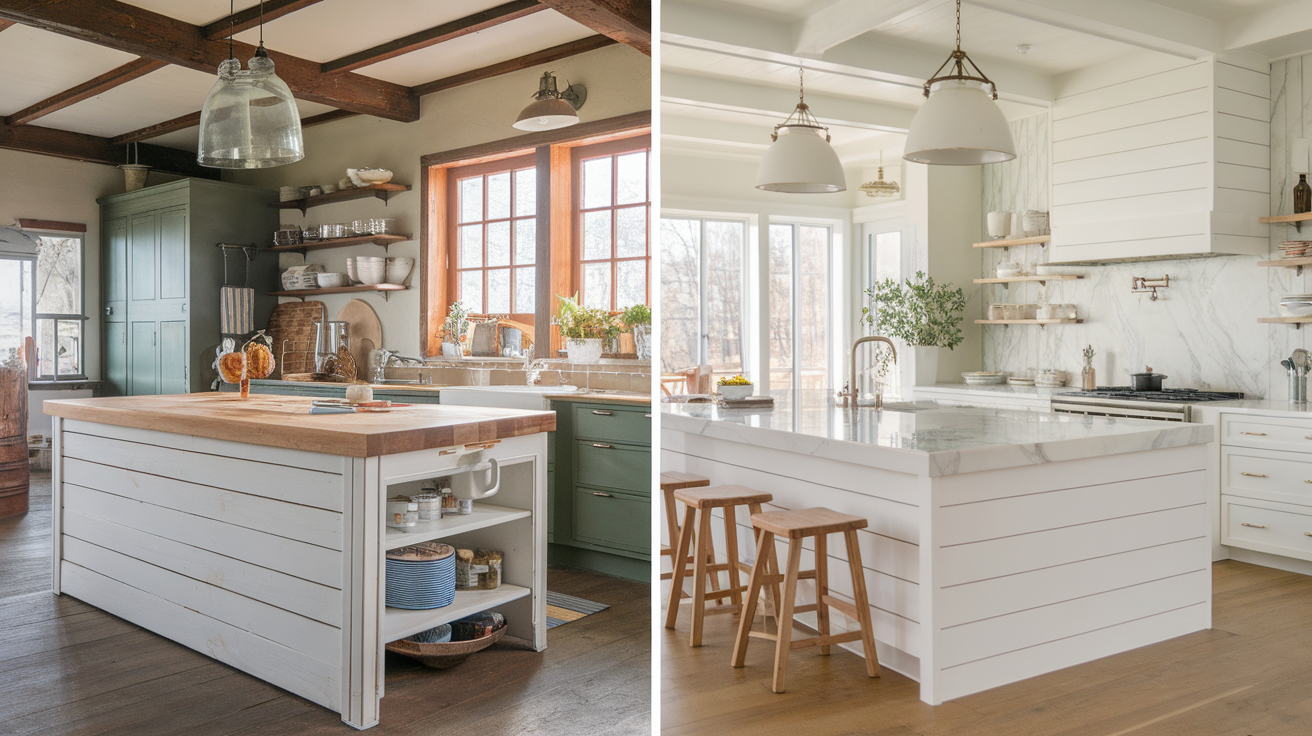
The countertop you choose plays a big role in your island’s overall look. Butcher block brings warmth and a natural texture, while marble or quartz can add a touch of elegance.
If you like mixing styles, try pairing a rustic shiplap base with a sleek countertop for the perfect contrast.
Choose Cool Hardware or Trim
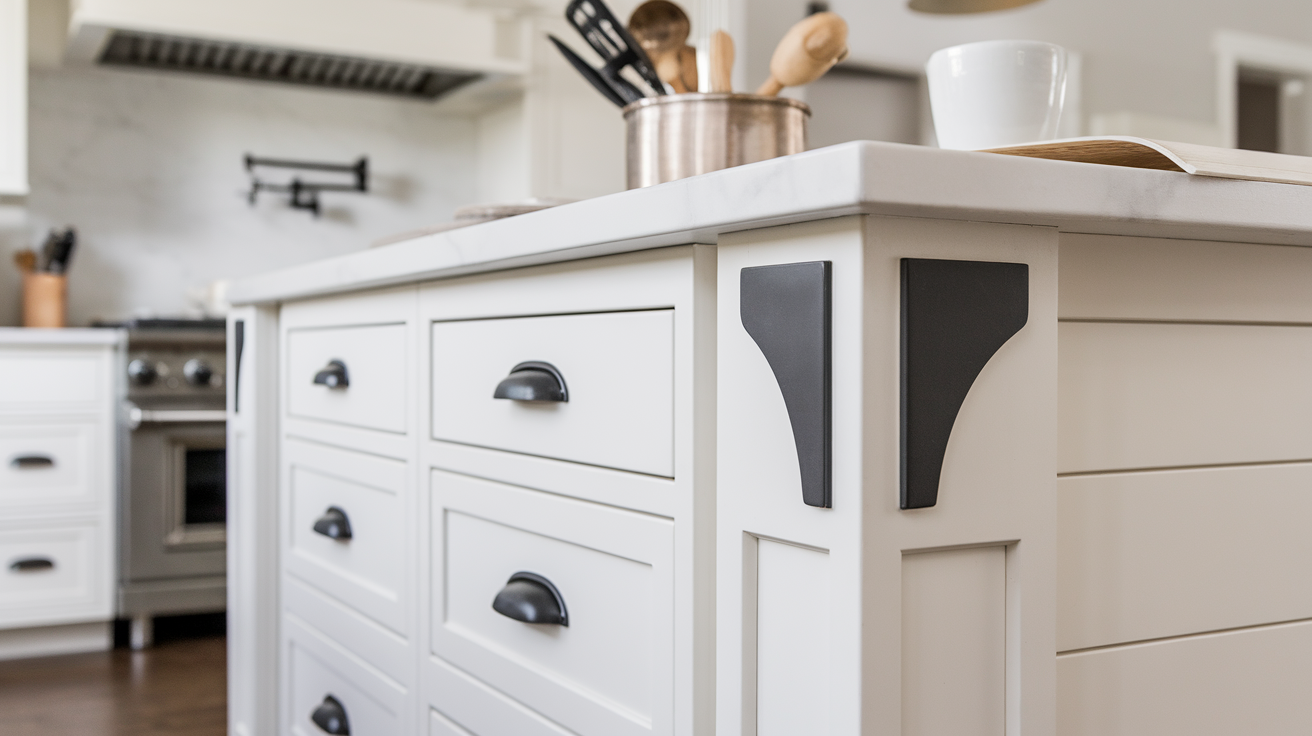
Little details make a big impact. Black metal handles or gold knobs can give your island personality, and wood trim or corner accents add extra texture.
I once added vintage hooks on the side of my island, and not only did they look cute, but they also gave me a spot to hang towels or bags.
Mix Up the Shiplap Style
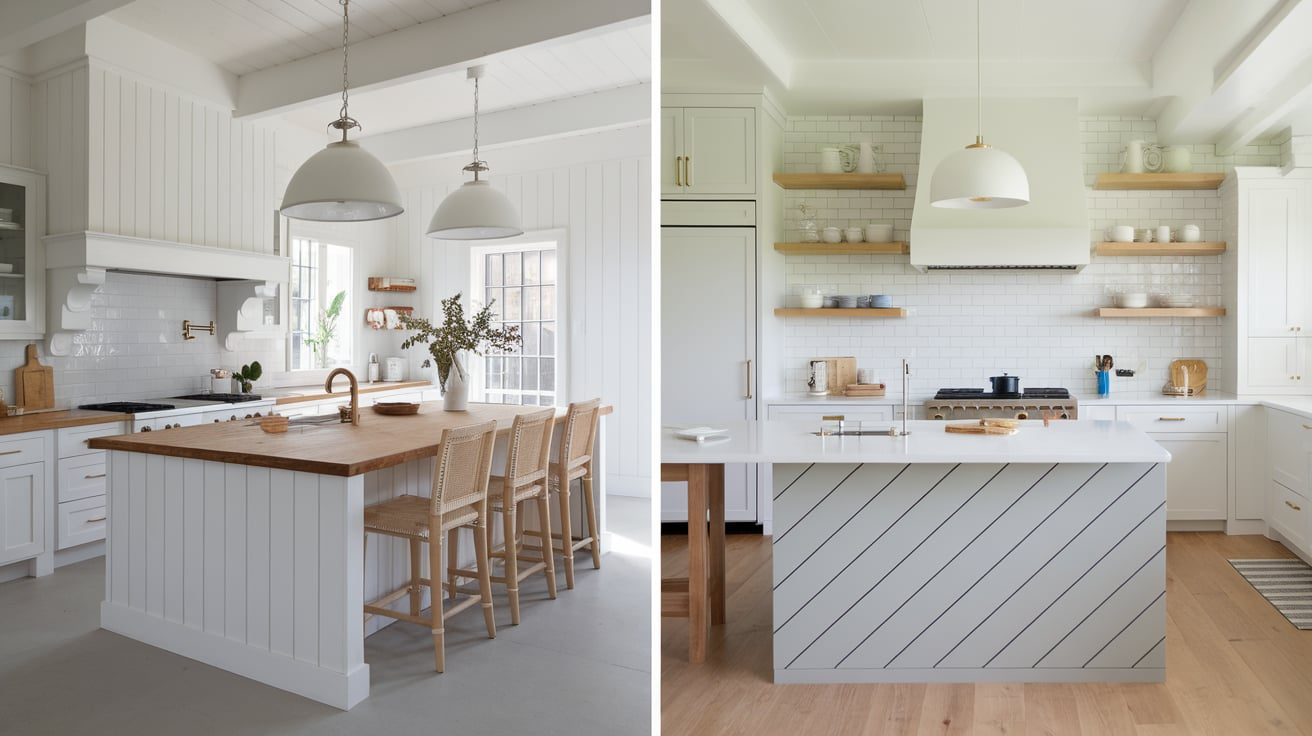
Most people go for horizontal shiplap, but you don’t have to stick with that.
Vertical boards can make your island look taller and more refined. If you want something eye-catching, diagonal lines offer a fun twist that adds movement and interest.
Customizing your shiplap kitchen island is a great way to show off your style without spending too much. Small changes can make a big difference.
Maintenance and Care Tips for a Shiplap Kitchen Island
Once your shiplap kitchen island is looking great, it’s important to keep it that way. These tips are easy to follow and don’t take much time at all.
- Clean gently but often: Dust or wipe down your shiplap boards with a soft cloth at least once a week. This keeps dirt from building up in the grooves.
- Use mild cleaners: Stick to warm water and gentle soap. Harsh chemicals can damage the paint or finish on your shiplap.
- Watch for water damage: If your island is near a sink or gets splashed, dry it quickly to stop water from soaking into the wood.
- Touch up when needed: If you notice chips or scratches, lightly sand the spot and add a fresh coat of paint.
- Avoid heavy scrubbing: Too much pressure can wear down the finish or leave marks on the wood.
- Seal it for protection: If your shiplap is raw wood or stained, a clear sealant can help protect it from spills and stains.
A little regular care goes a long way when it comes to your shiplap kitchen island. By cleaning it gently, touching it up now and then, and protecting it from damage, you’ll keep your island looking fresh and stylish every day.
Conclusion
Adding shiplap to your kitchen island is one of those small projects that can make a big difference. It brings charm, texture, and a fresh new look without the cost of a full remodel.
If you like a classic farmhouse feel or something more modern, shiplap fits just about any style.
Plus, it’s a DIY project that you can actually do – even if you’re new to building or decorating.
I found that working on my own island gave me a real sense of pride, and now it’s one of my favorite features in the kitchen.
With the right tools, a little patience, and your own personal touch, you can create something truly special.
So don’t be afraid to try it. Use the steps, ideas, and tips covered in this blog to bring your own shiplap kitchen island to life!