
I’ve always believed a charming walkway doesn’t have to cost a fortune. When I wanted to refresh my yard, I started researching DIY walkway ideas that wouldn’t drain my wallet.
What surprised me was how many creative and budget-friendly solutions are out there. From natural stone paths to upcycled brick trails, you can change your outdoor space on your own.
These ideas aren’t just easy to pull off; they add character and curb appeal. If you’re someone like me who enjoys weekend projects and saving money, this blog is for you.
Below, I’ve listed DIY walkway and walkway landscaping ideas that are affordable, practical, and fun to build. Each one includes helpful details like time requirements and tools, so you know what to expect before getting started.
Let’s create a walkway that feels custom, without the custom price.
Why Build a DIY Walkway in Your Outdoor Space?
A DIY walkway does more than guide people from one area to another; it adds structure, purpose, and style to your yard.
Even if you’re breaking up a large lawn, defining garden zones, or simply adding a visual feature, a walkway can instantly improve flow and function.
The best part? You control every detail. From the materials you use to the shape you create, it’s all in your hands. You don’t need to hire a pro or pour concrete to get a walkway that looks great.
Many designs are beginner-friendly and budget-conscious, especially when using reclaimed or natural materials. It’s also a satisfying weekend project that leaves a visible, lasting impact.
With the proper planning, your walkway becomes more than a path; it becomes part of your home’s personality.
Affordable DIY Walkway Landscaping Ideas You Can Try
Walkways connect points and add charm to yards. These designs combine simple materials with style, creating paths that soften edges, link spaces, or frame flower beds. From rustic to modern, there’s a DIY walkway for every yard.
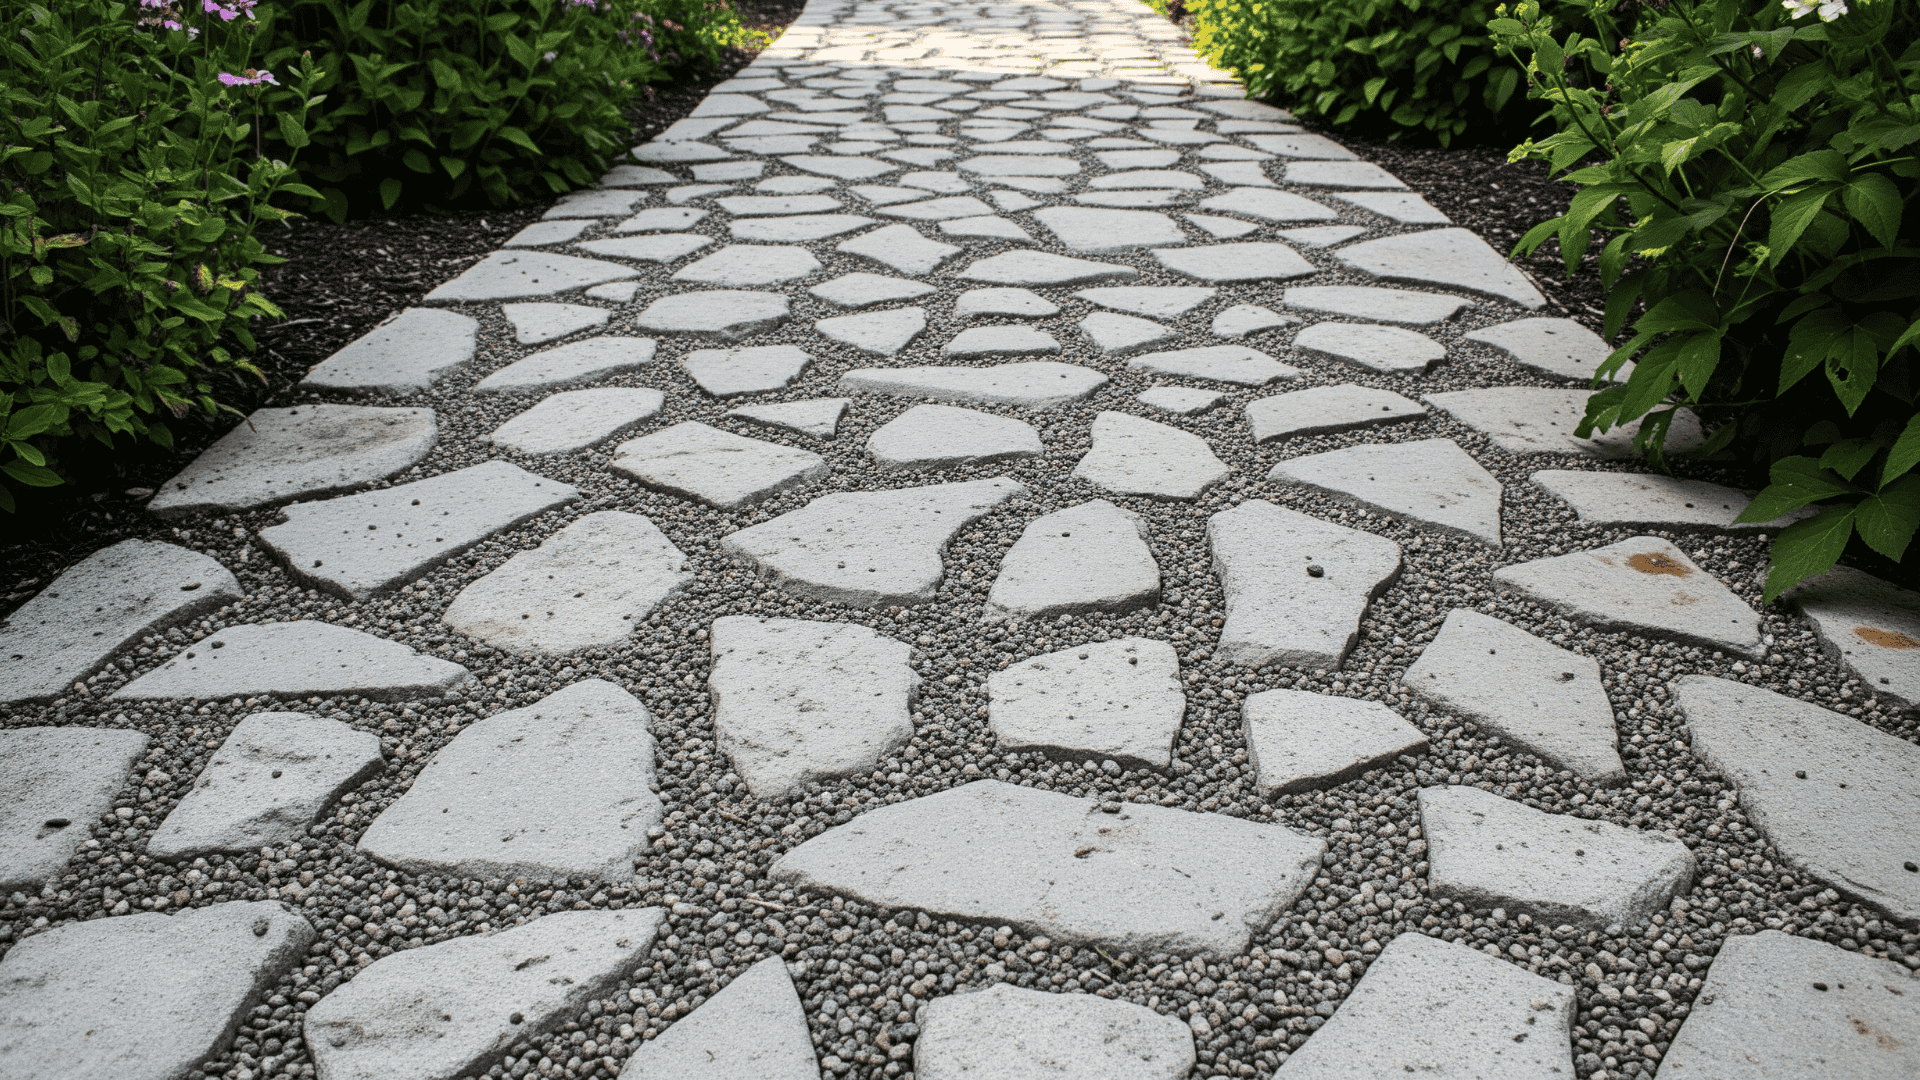
1. Gravel and Stepping Stone Mix
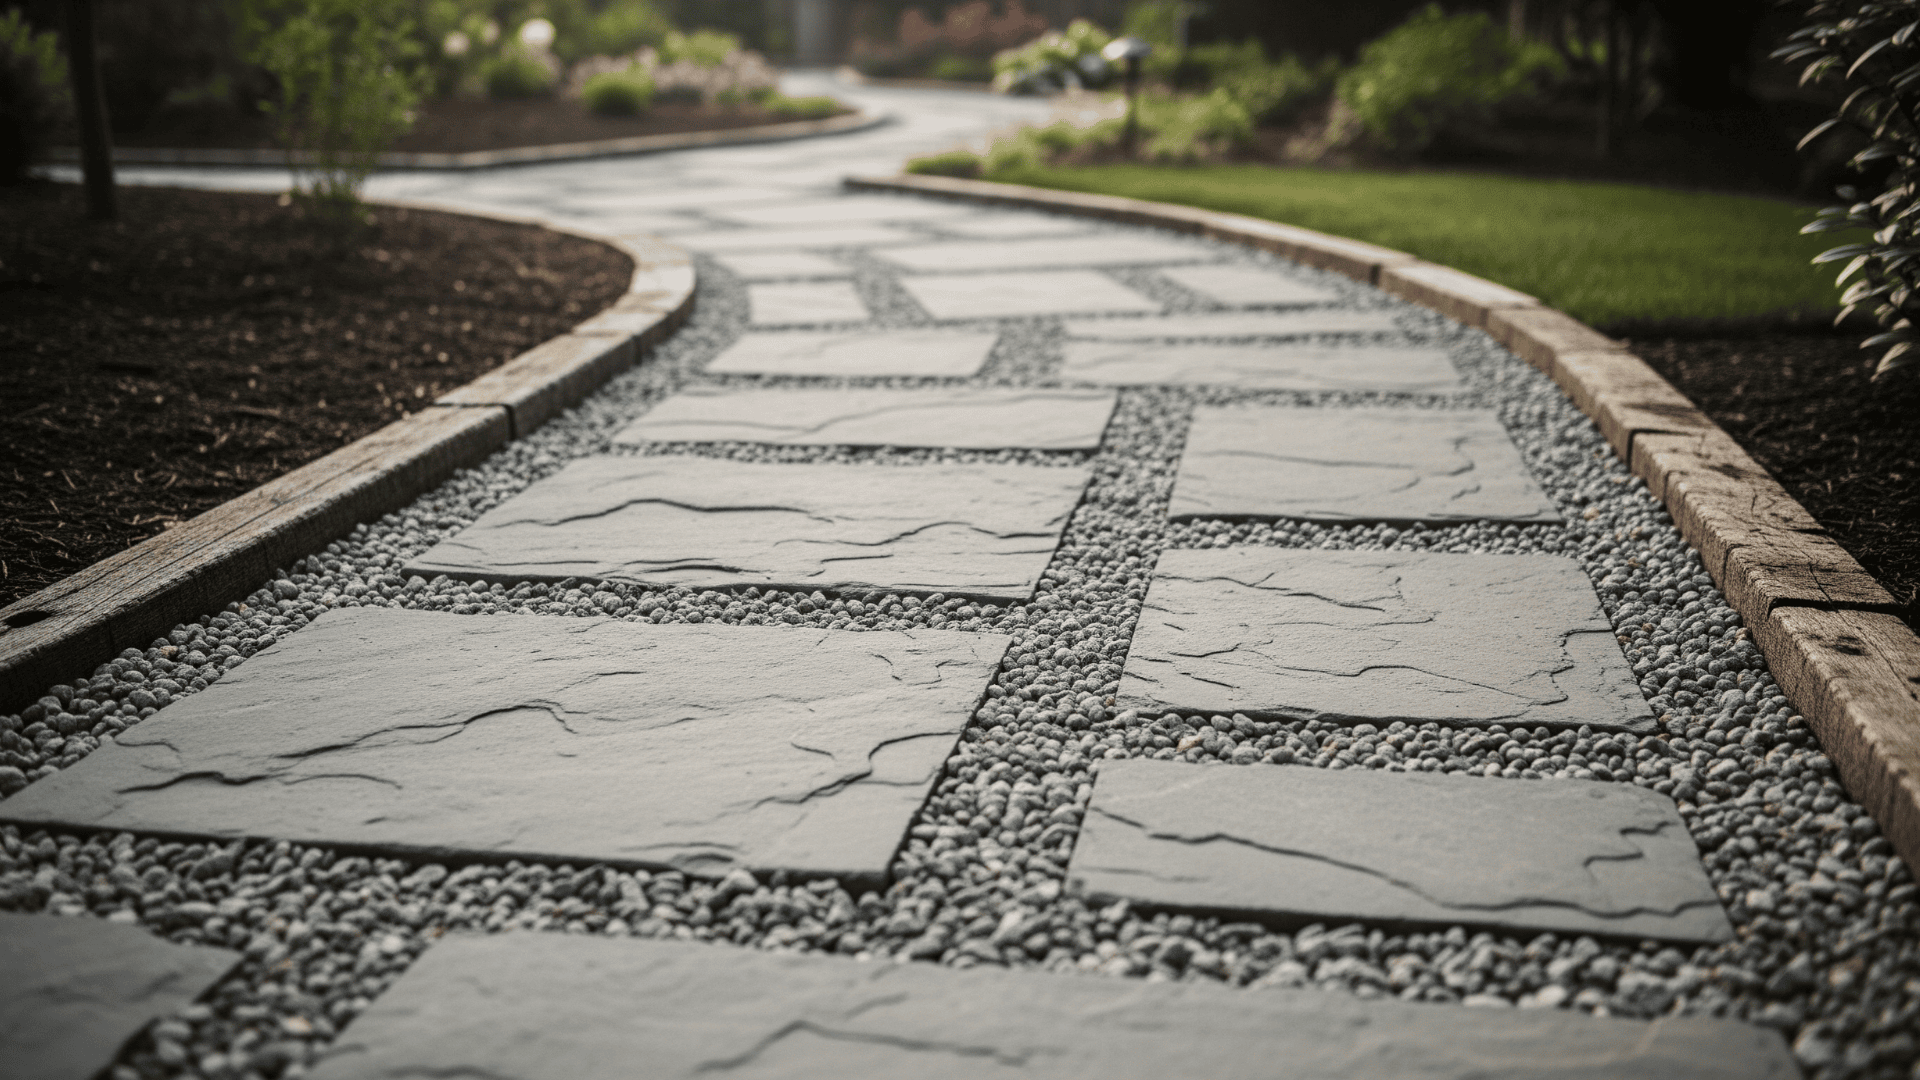
Lay large stepping stones, then fill the gaps with pea gravel for a casual, low-maintenance path. This mix provides drainage, traction, and visual appeal, all while staying budget-friendly.
Use weed barrier fabric underneath to prevent growth, and add edging to keep gravel from spreading. This style fits most garden or backyard setups and can be customized with stone shape and gravel color.
- Materials: Pavers, pea gravel, weed barrier
- Tools: Shovel, rake, tamper
- Time: 1 day
2. Brick-Edged Garden Walkway

Frame a gravel path with reclaimed bricks for a vintage, tidy garden look. The bricks hold gravel in place and create clean lines, ideal alongside flower beds or vegetable patches where structure and charm matter.
You can lay the bricks flat for a simple edge or tilt them slightly for a more decorative flair. It’s a straightforward, budget-conscious project that adds long-term curb appeal with very little maintenance once installed.
- Materials: Reclaimed bricks, gravel, landscape fabric
- Tools: Level, mallet, shovel
- Time: 1–2 days
3. Wood Slice Stepping Path
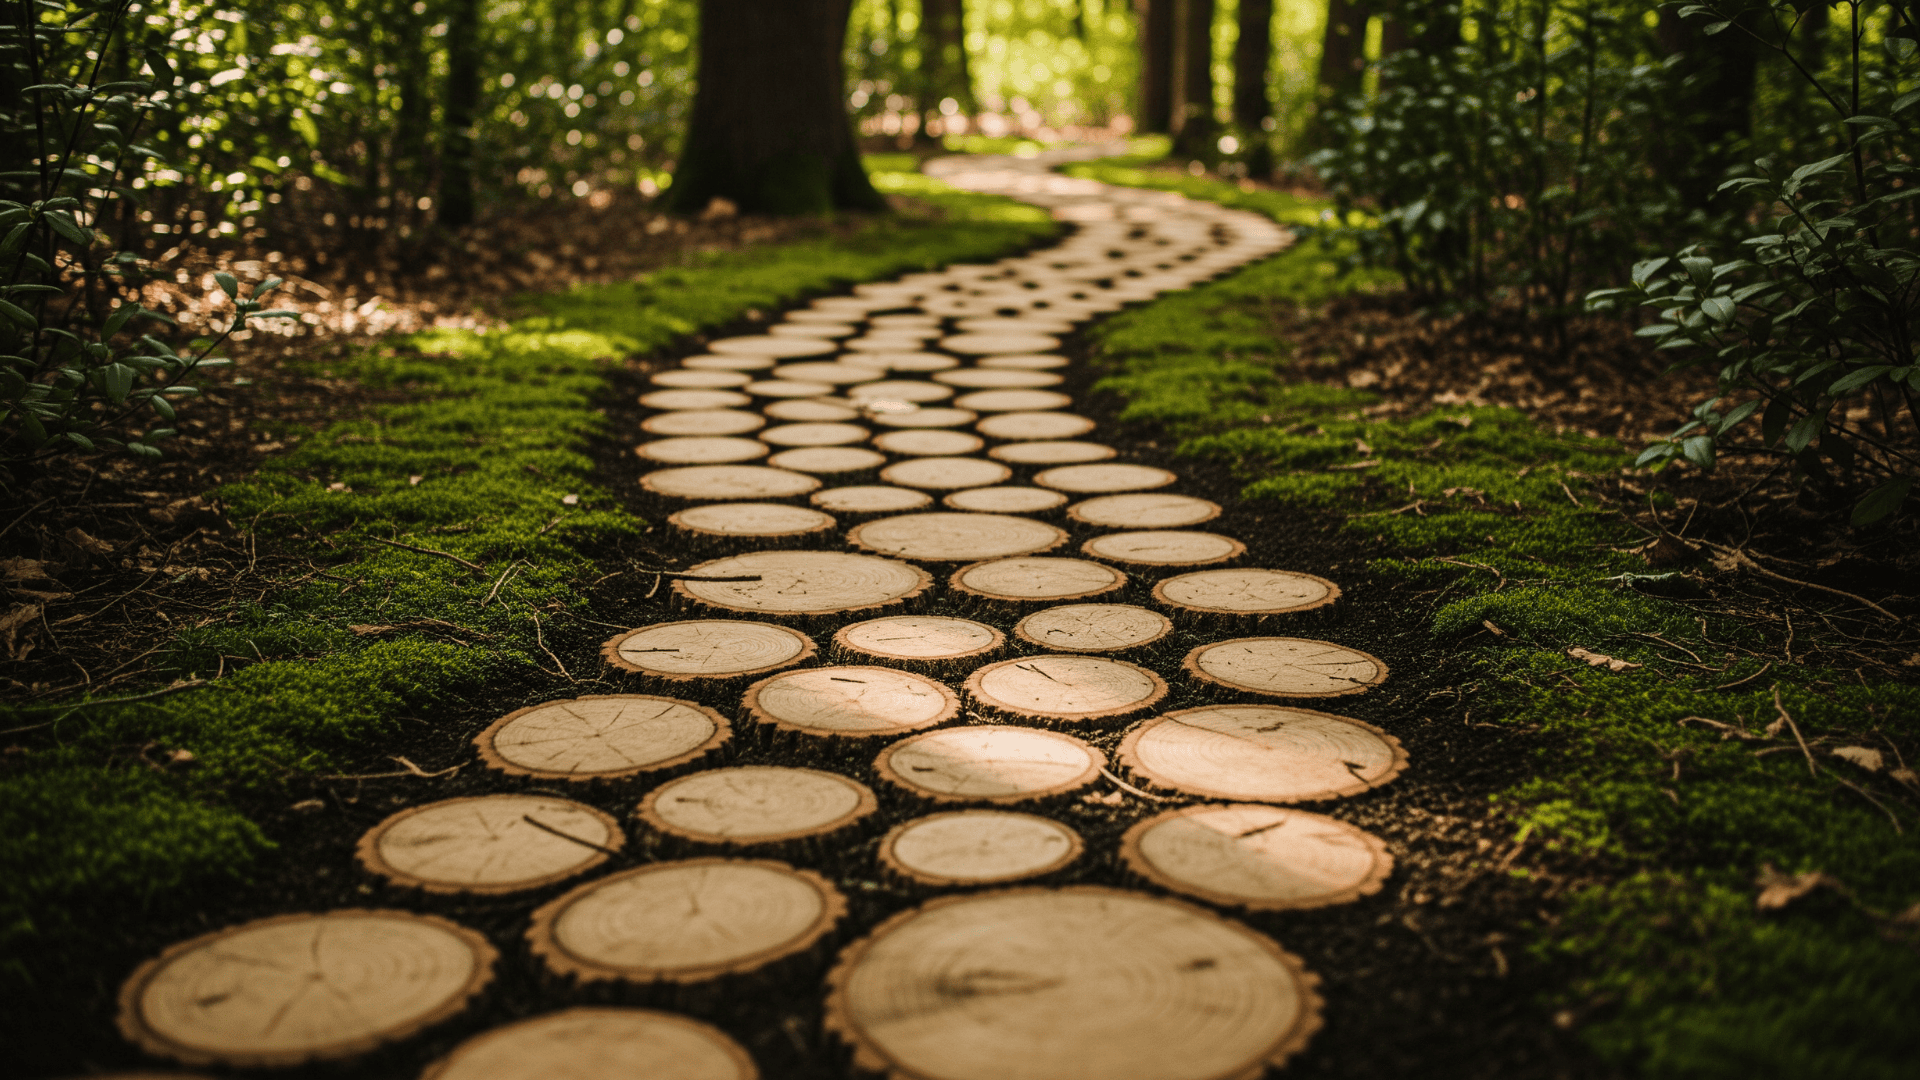
Cutting thick rounds from tree logs creates a path that feels natural and rustic. These wood slices work best in shaded areas and woodland gardens, where they blend beautifully into the surroundings.
Seal after placing on dirt or mulch to reduce moisture damage and extend lifespan. Allow moss or grass around edges to soften the appearance and fill gaps. It’s an affordable, beginner-friendly project that adds charm with minimal effort or precise cutting.
- Materials: Log slices, sealant
- Tools: Chainsaw, shovel
- Time: 1 day
4. Mulch and Stone Garden Path
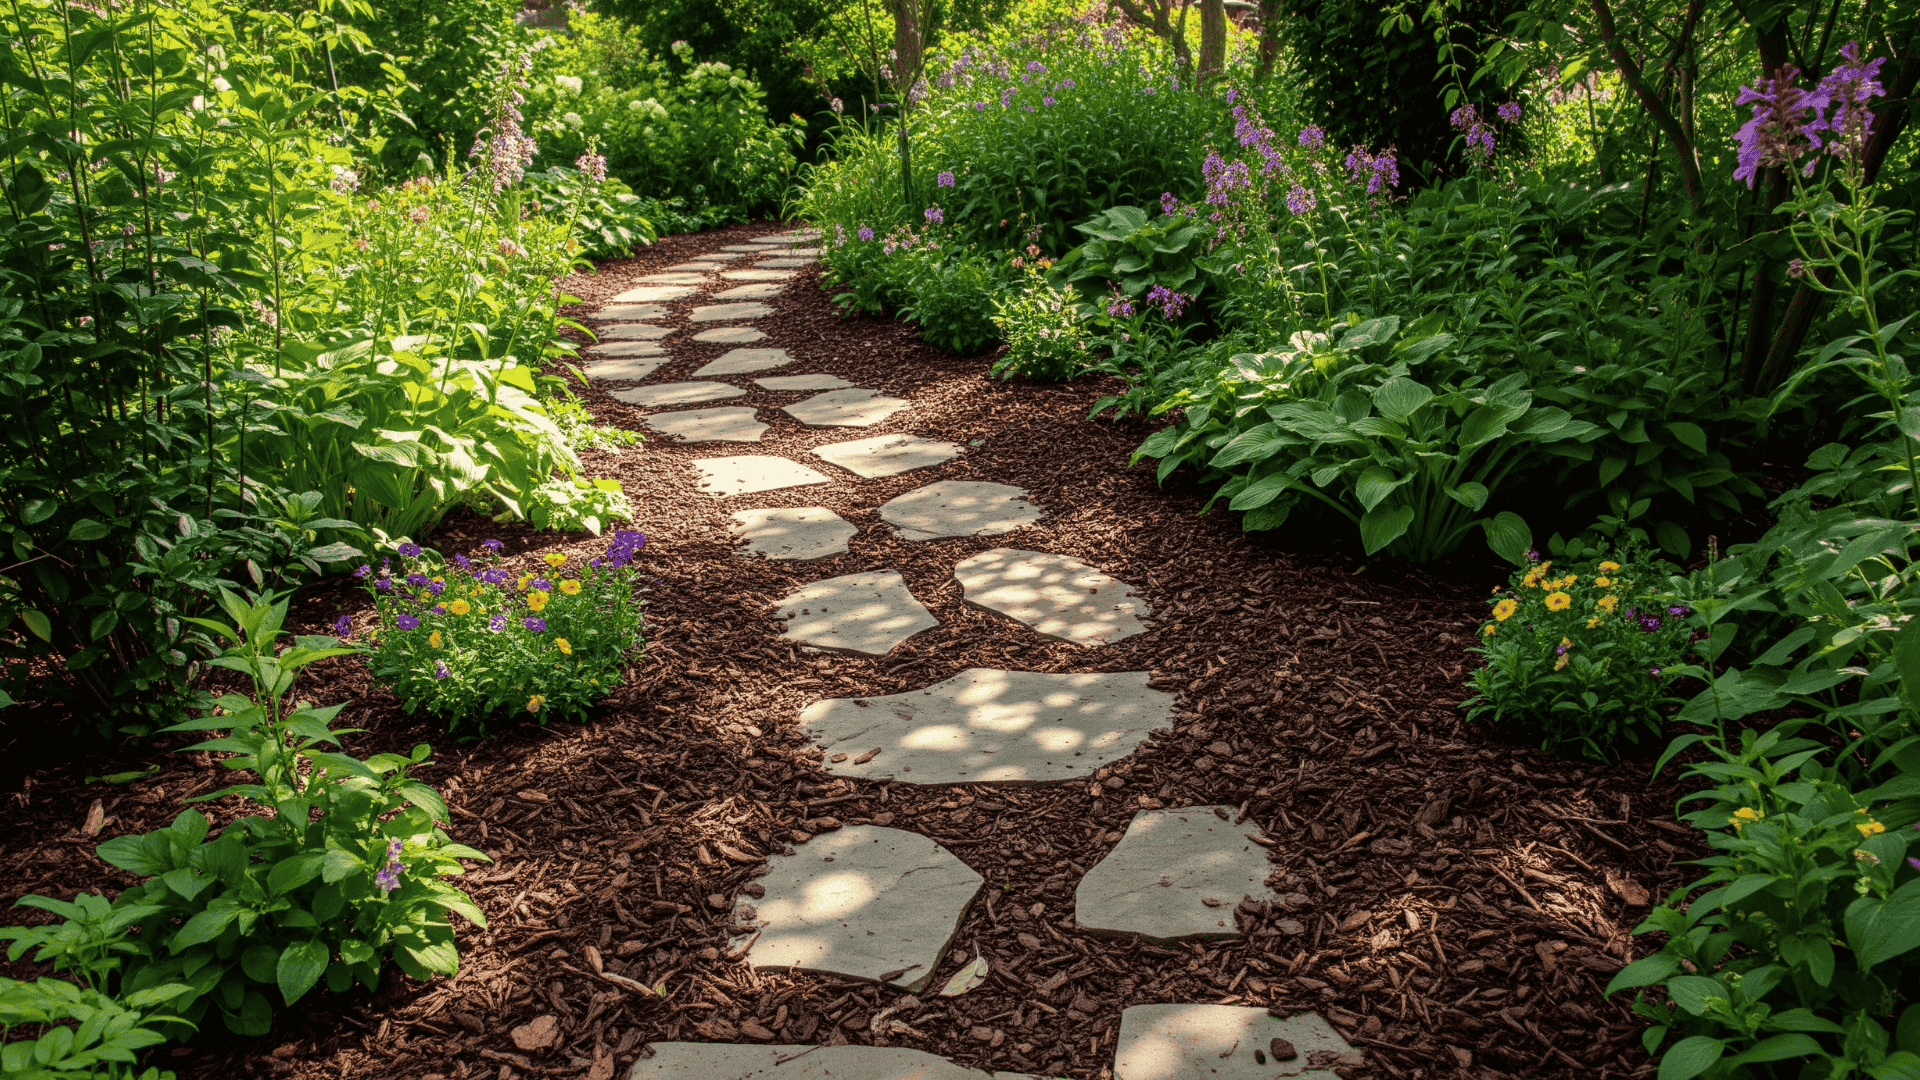
This walkway uses flat stones on mulch, ideal for gardens needing drainage and softness. Mulch absorbs moisture and weeds, and stones provide stable steps.
Bark mulch is affordable, easy to spread, and soft underfoot. Flagstones or stepping stones can be laid over it, which is renewed yearly for easy maintenance. It’s perfect for informal yards, herb gardens, or around raised beds where simplicity counts.
- Materials: Mulch, flagstones, landscape fabric
- Tools: Rake, shovel
- Time: Half-day
5. Paver Walkway with Grass In-Between

This path balances hardscape and greenery by laying pavers with wide, even gaps between them. Fill the gaps with grass or moss to create a soft, modern look. It’s ideal for open lawns, entryways, or patio borders.
Choose a quick-growing, low-maintenance ground cover for easy care. The stone and green textures are visually appealing and promote natural drainage. Level the ground and let the grass establish before regular use of the walkway.
- Materials: Pavers, grass seed, or sod
- Tools: Level, spade
- Time: 2–3 days
6. Pallet Wood Path
Repurpose old pallet boards into a charming DIY walkway by laying the planks across a dirt or gravel base. Pallets are often free or inexpensive and give you rustic, weathered wood full of character.
Sand rough edges and seal boards for outdoor durability. Arrange planks horizontally, vertically, or in a chevron pattern based on your space. An affordable project for beginners to analyze patterns and textures without high costs.
- Materials: Pallets, nails, sealant
- Tools: Crowbar, hammer, saw
- Time: 1 day
7. Stenciled Concrete Slabs
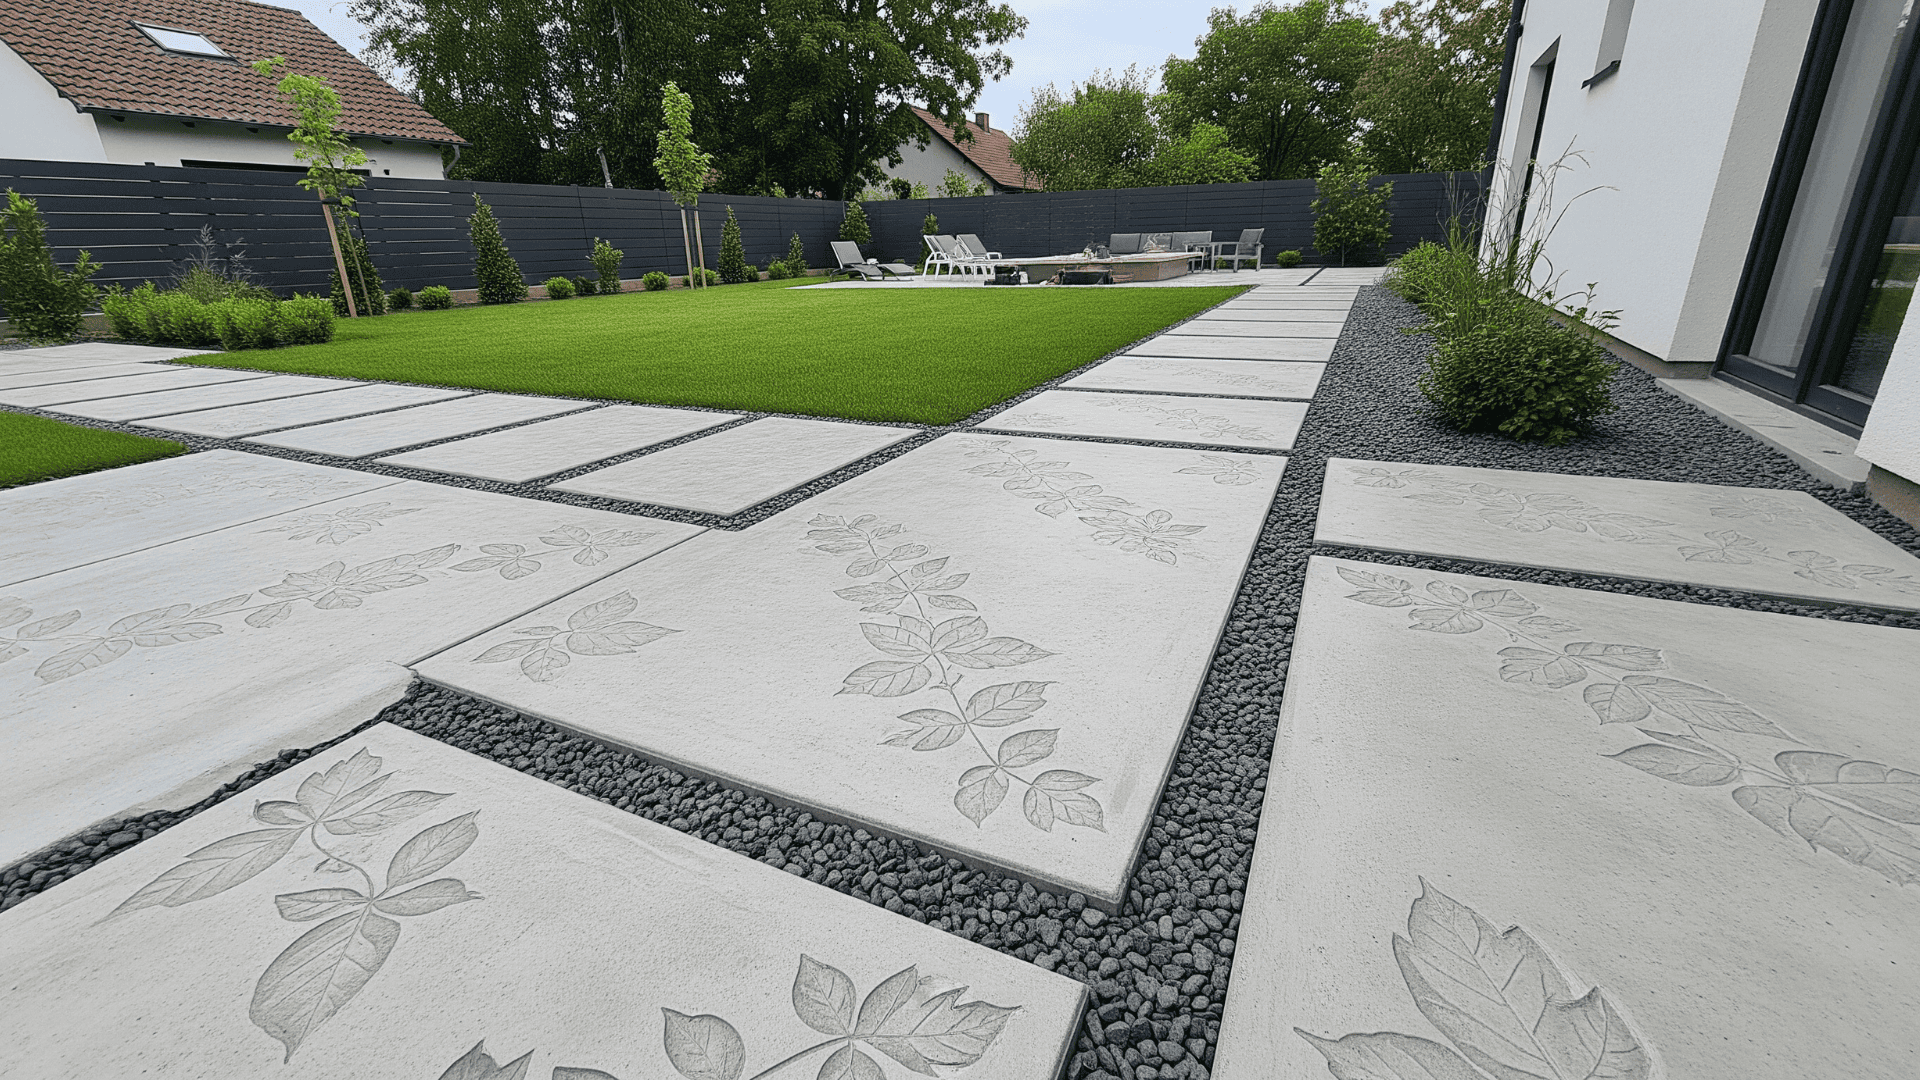
This idea allows the creation of personalized concrete slabs with molds and stencils. Pour concrete into frames, press leaf shapes, patterns, or stamps before it sets. Tint the concrete for flair.
These slabs are sturdy and work well in modern gardens or alongside patios. Once dry, seal them to resist weather and staining. Arrange them with consistent spacing or combine with gravel for a finished look that’s both durable and decorative.
- Materials: Concrete mix, stencils, molds
- Tools: Trowel, gloves
- Time: 2 days
8. Crushed Shell Path
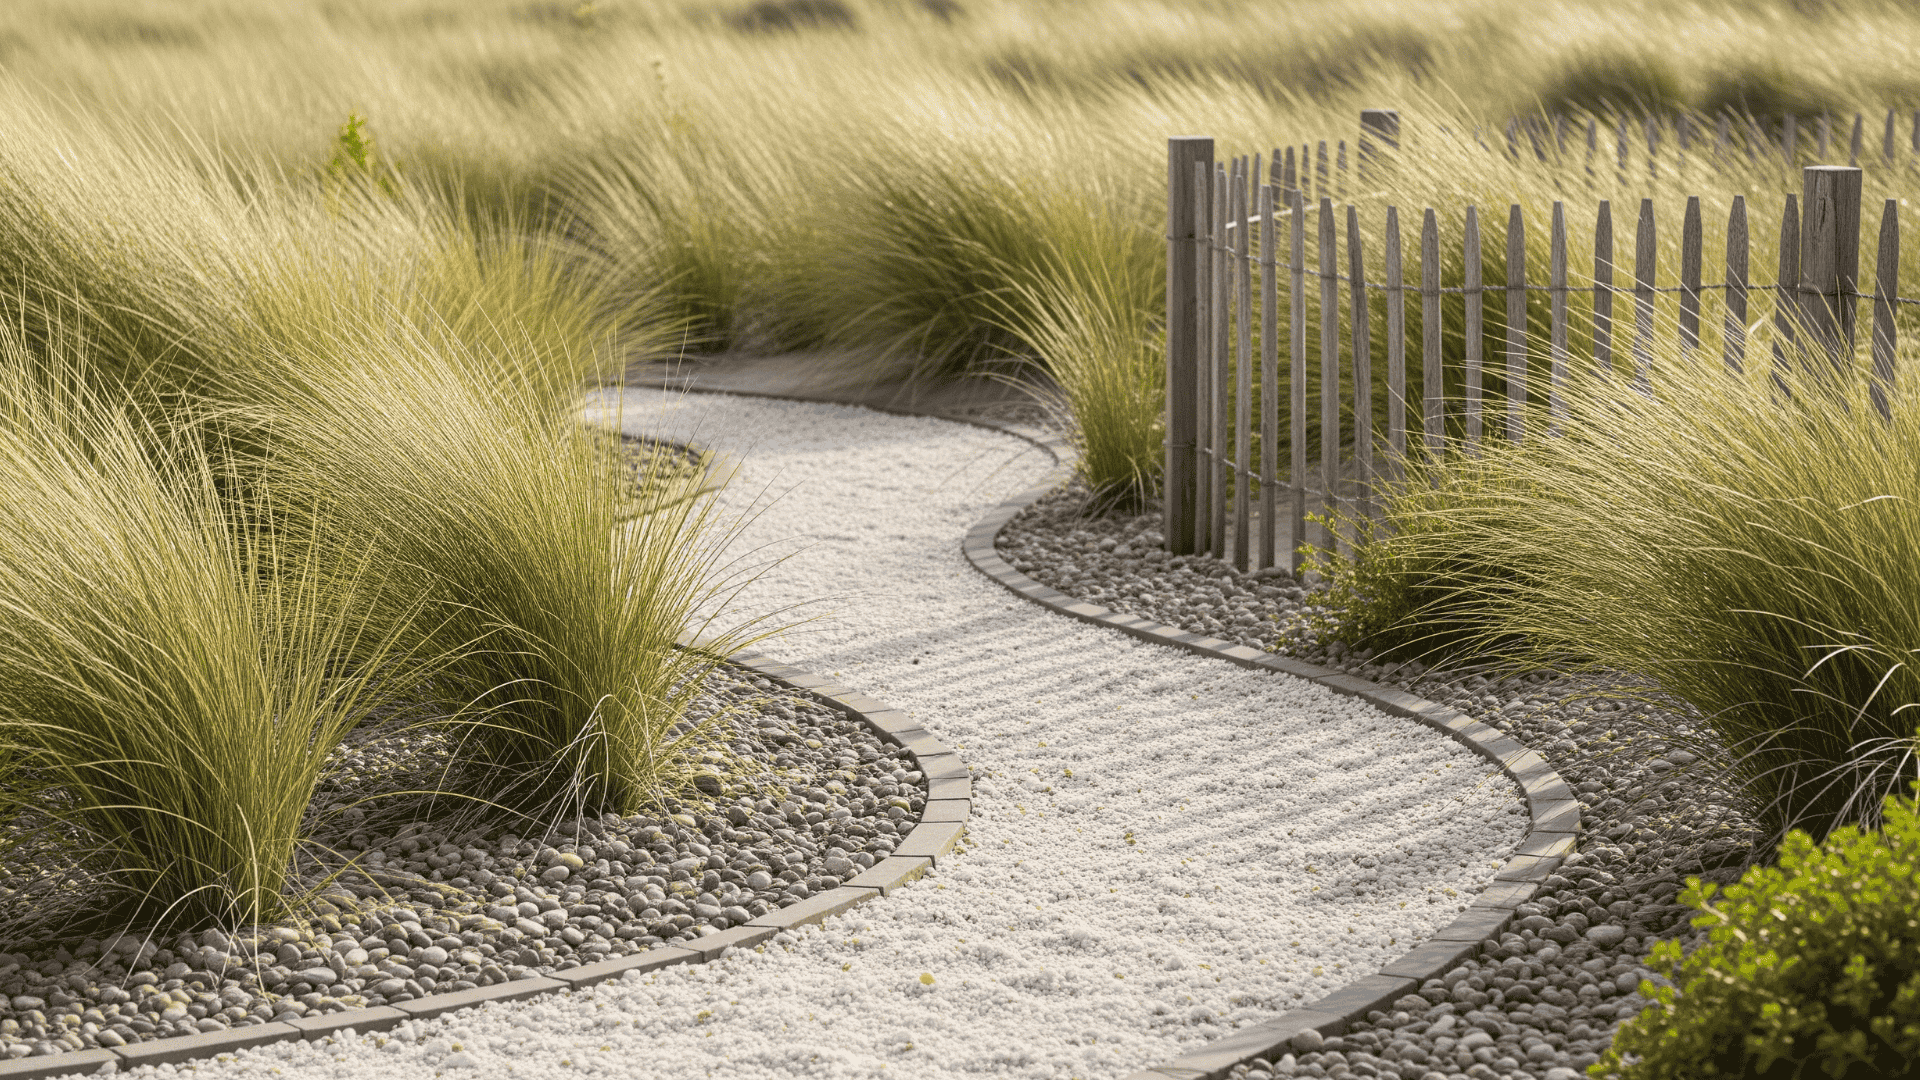
Crushed shells are a unique alternative to gravel, offering a clean, beachy look. They compact well, drain effectively, and are ideal for coastal gardens or sandy soil. The light color reflects sunlight, brightening shaded areas.
Lay shells over a weed barrier to minimize maintenance. Although they feel soft underfoot, avoid placing them on steep slopes where they may shift. This path is low-maintenance and looks beautiful near water features or white-trimmed houses.
- Materials: Crushed shells, weed barrier
- Tools: Rake, shovel
- Time: 1 day
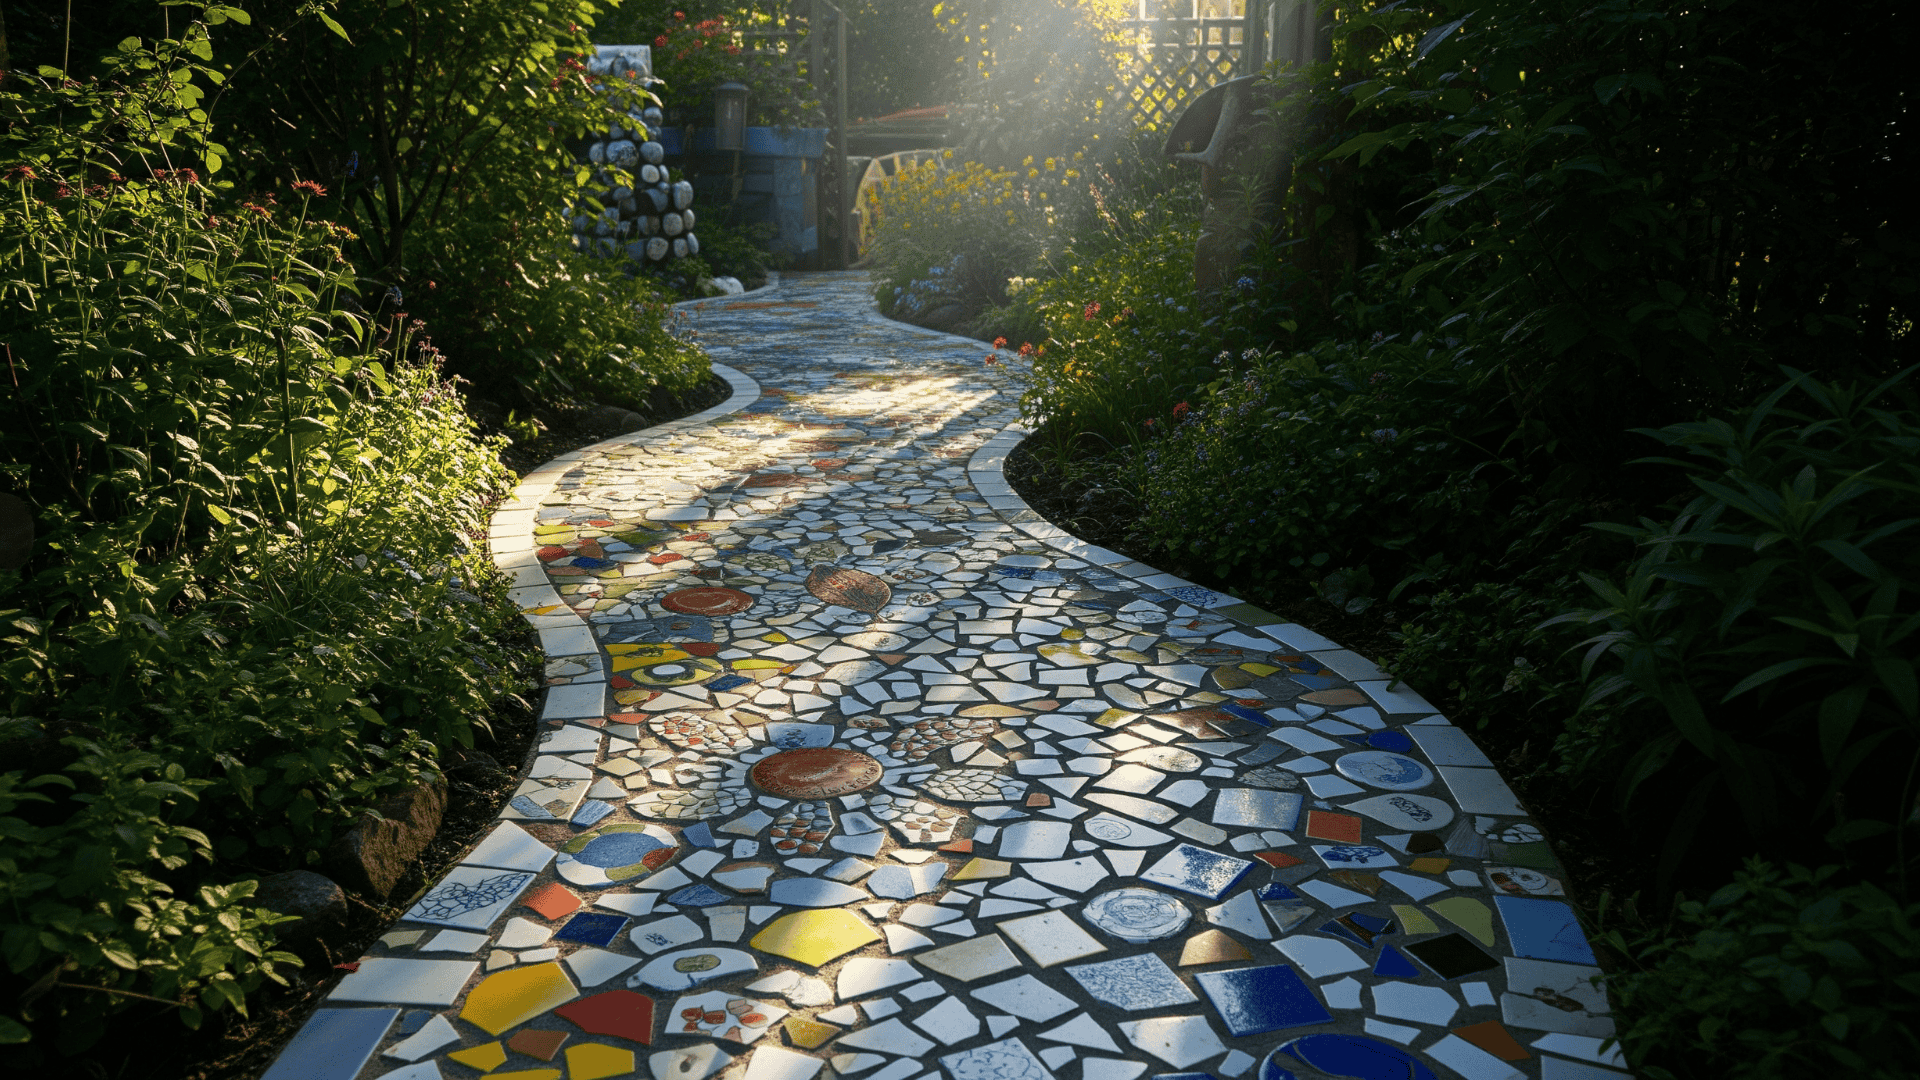
9. Stone Mosaic Walkway
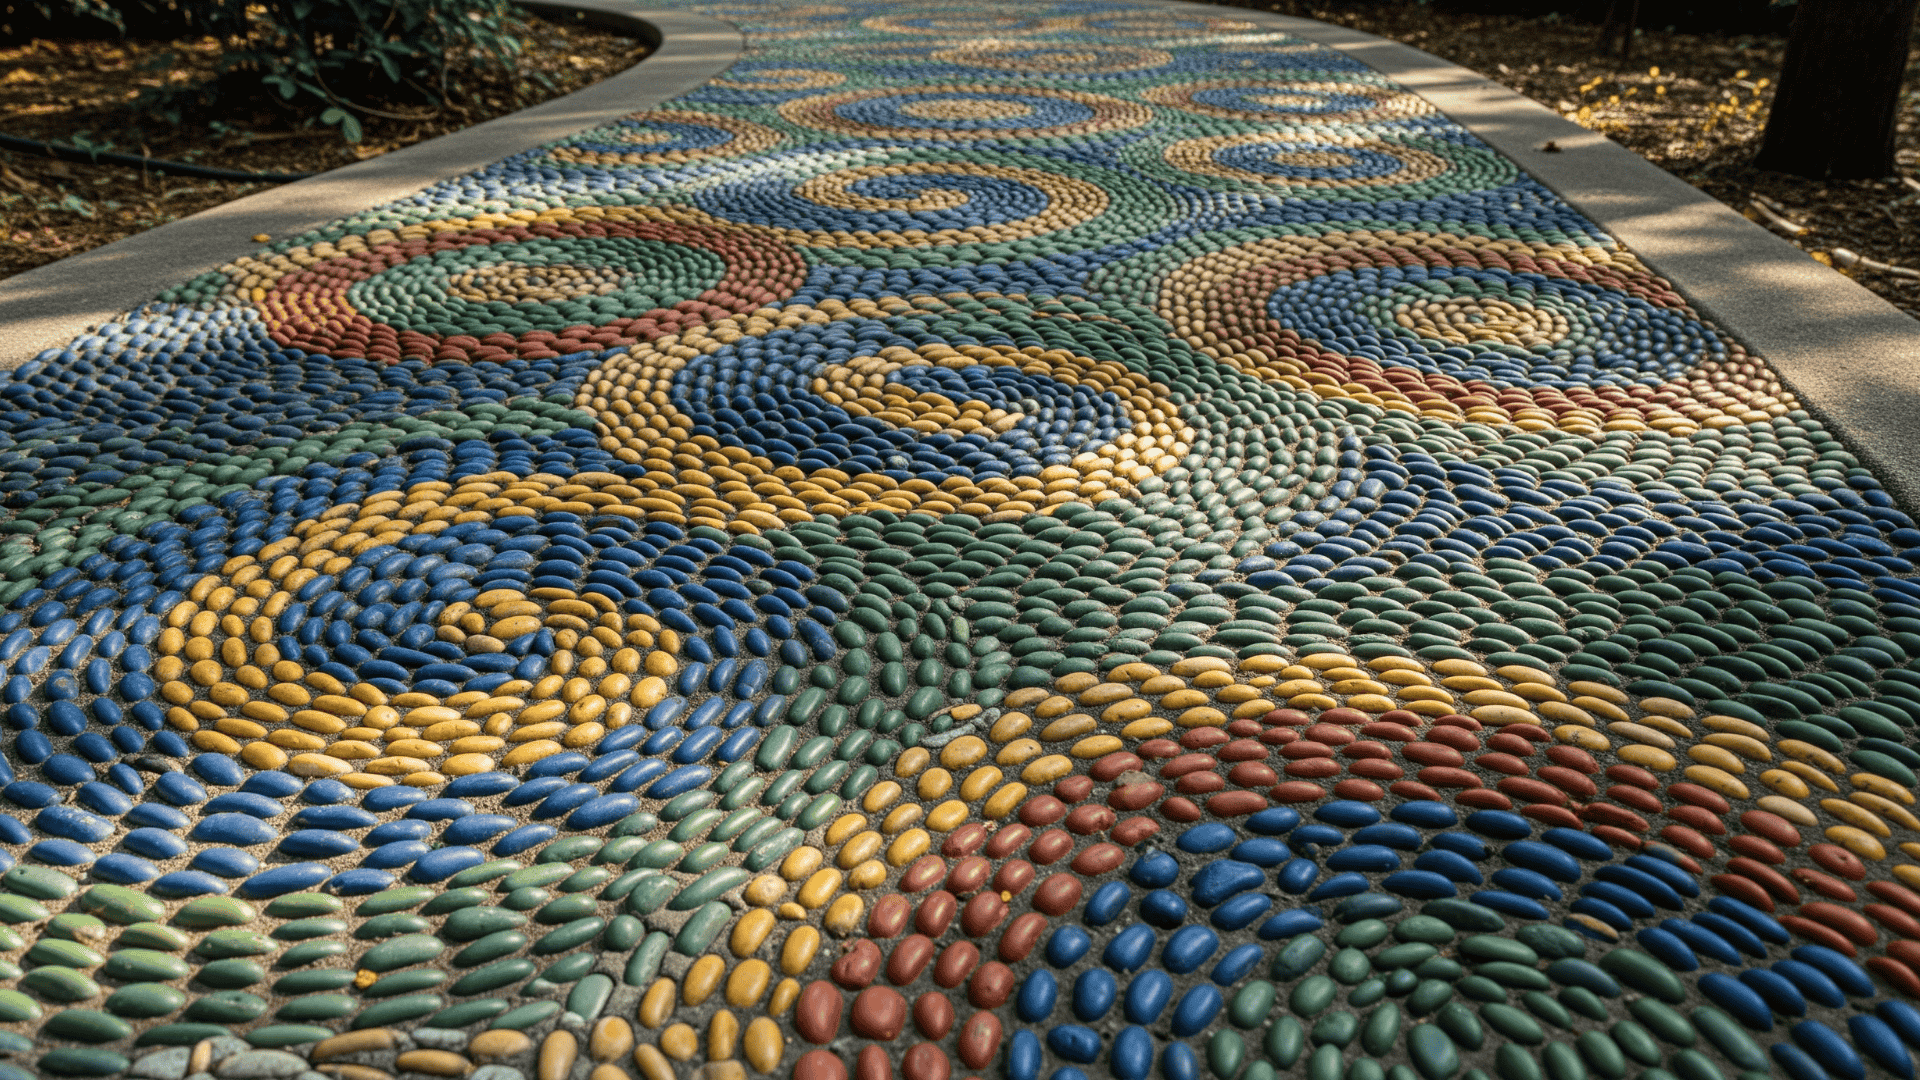
A stone mosaic walkway lets you turn your path into a work of art. Use small pebbles or river rocks to create patterns like spirals, waves, or geometric designs embedded into mortar or concrete.
This design suits patios, small gardens, or zen paths. It requires more time and planning but offers a dramatic, unique result. Use colored stones for impact. Work in sections with drying time between stages.
- Materials: Mortar, pebbles
- Tools: Trowel, gloves
- Time: 2–3 days
10. Sandstone Slabs in Lawn
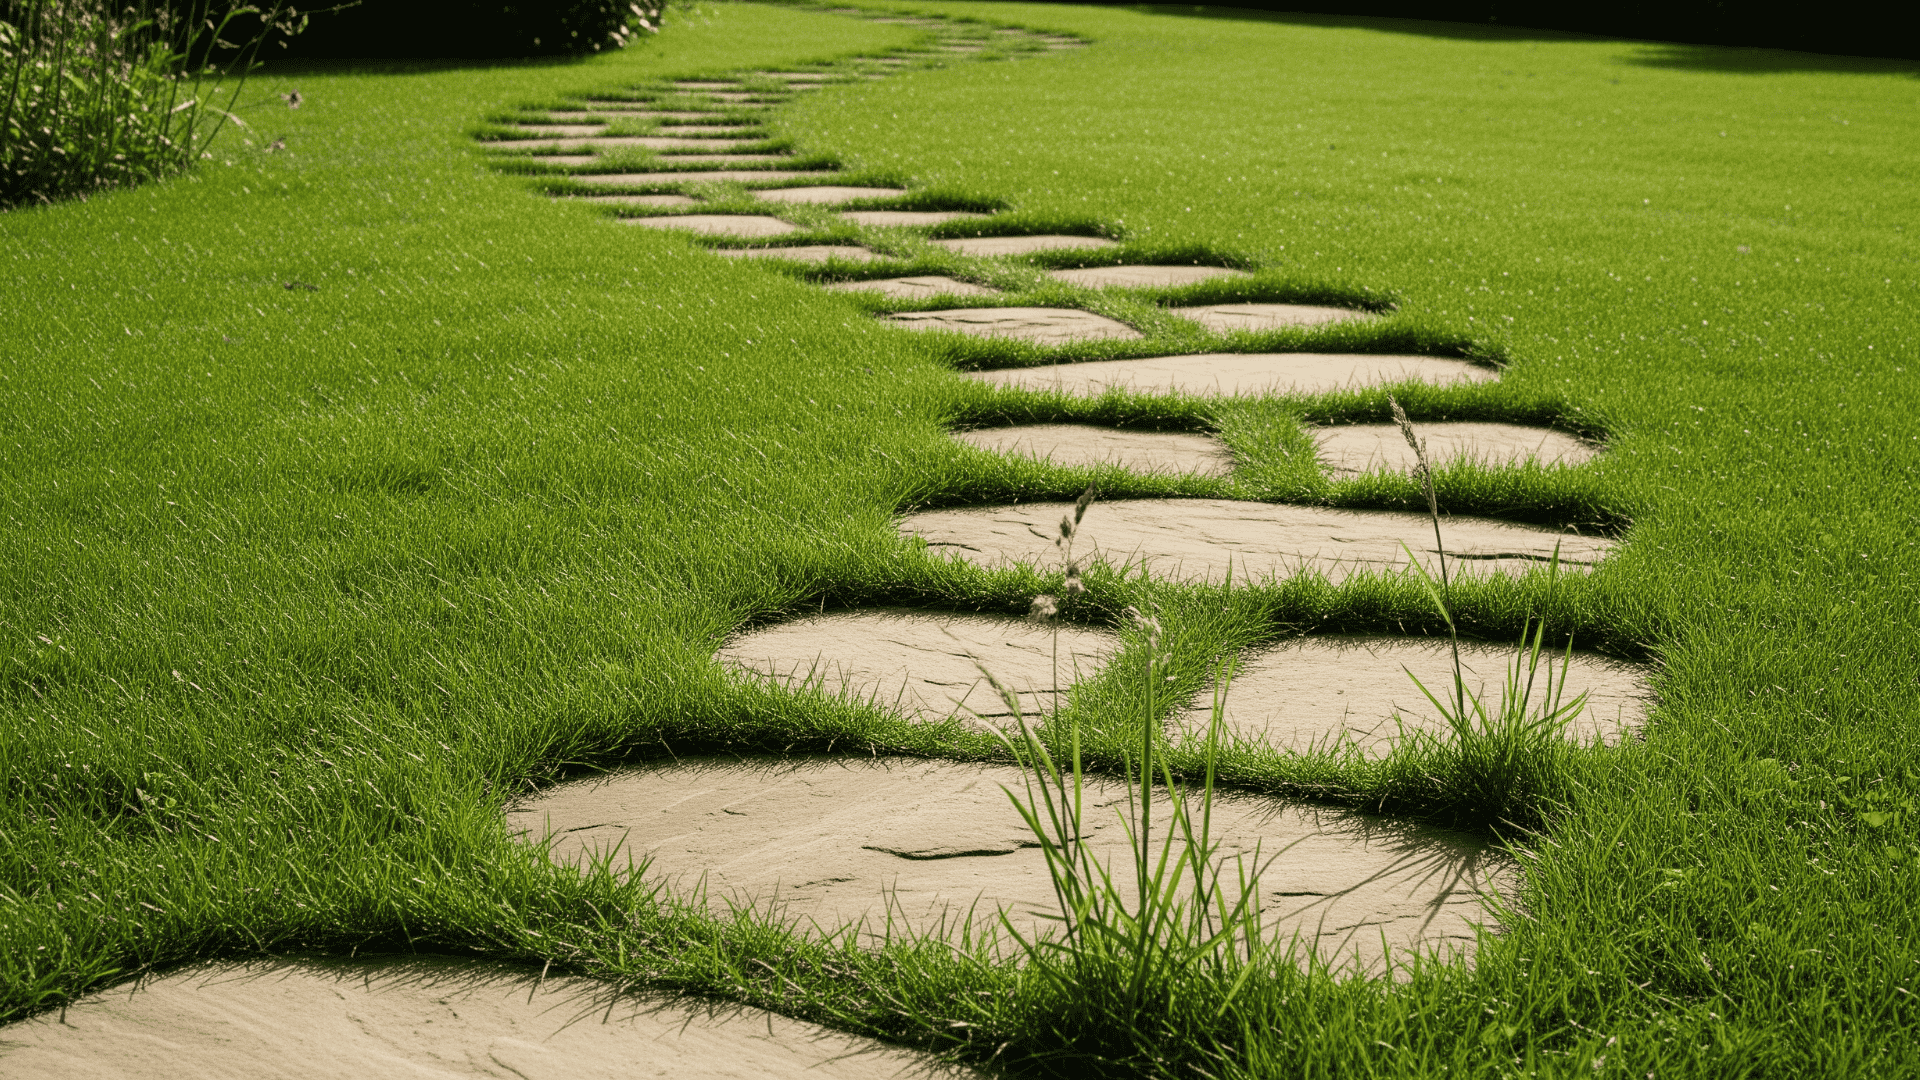
This simple design involves laying flat sandstone pieces directly into your lawn to form a stepping path. The stones should sit flush or slightly below the grass line, allowing you to mow over them without damage.
It’s a great solution for crossing wide lawns or connecting garden spaces. Sandstone is a durable, natural stone that weathers well and adds an organic touch. You can space the stones evenly or irregularly, depending on the style of your yard.
- Materials: Sandstone, topsoil
- Tools: Spade, level
- Time: 1 day
11. Recycled Tile Pathway
Put broken or leftover ceramic tiles to good use by turning them into a colorful walkway. Set the tiles in mortar to create a fun, mosaic-style design that feels personalized and unique.
You can create patterns or opt for an abstract approach with random pieces, adding charm to small garden paths or side yard trails and pops of color in neutral spaces. Grout and seal the final layout to protect it from the elements.
- Materials: Broken tiles, mortar, grout
- Tools: Hammer, gloves, trowel
- Time: 1–2 days
12. Railroad Tie Walkway
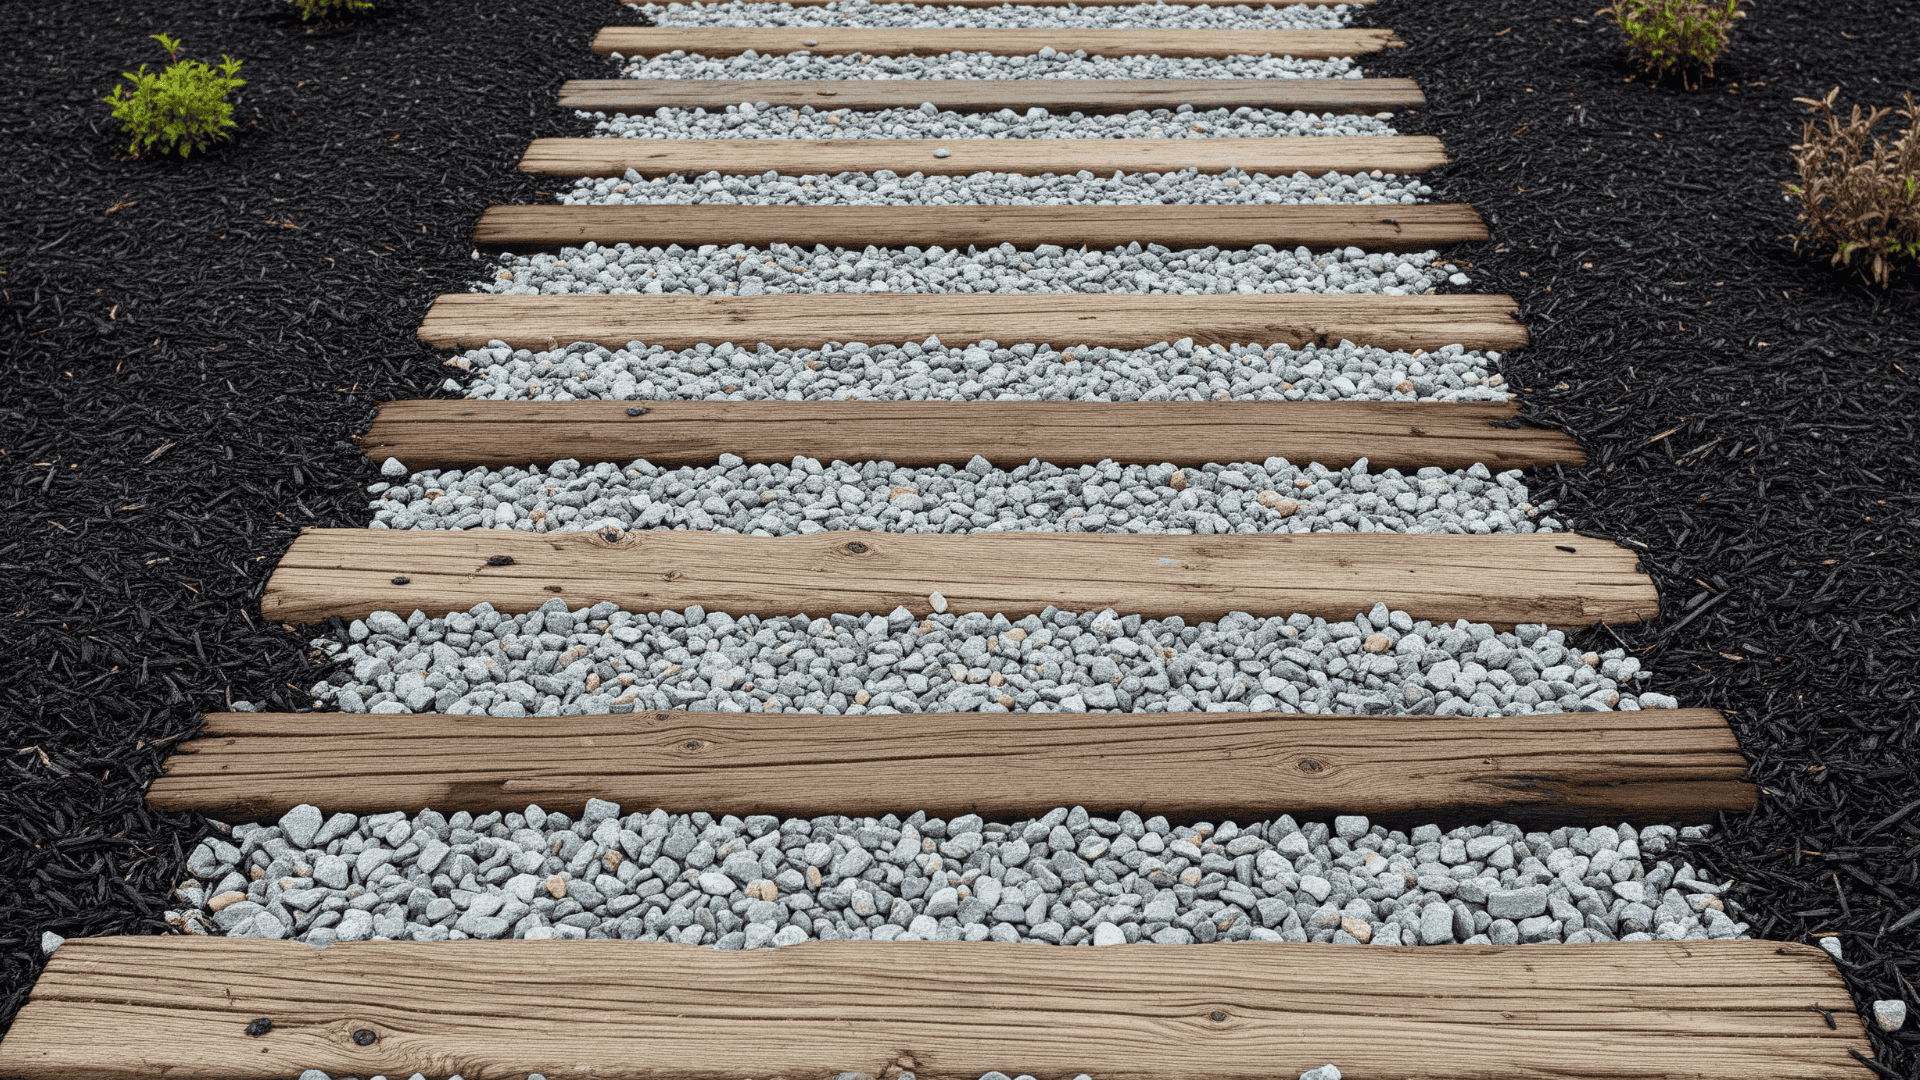
Railroad ties offer a sturdy and rustic way to build a raised or leveled walkway. Cut them into sections and set them into a dirt base with gravel between each piece for drainage. Their heavy, thick form makes them ideal for areas with loose soil or slopes.
They bring a bold, structured look to outdoor spaces. While reclaimed ties are affordable, check that they haven’t been treated with chemicals if using near edible plants, pets, or kids.
- Materials: Railroad ties, gravel
- Tools: Saw, drill
- Time: 2 days
13. Grass and Concrete Checkerboard
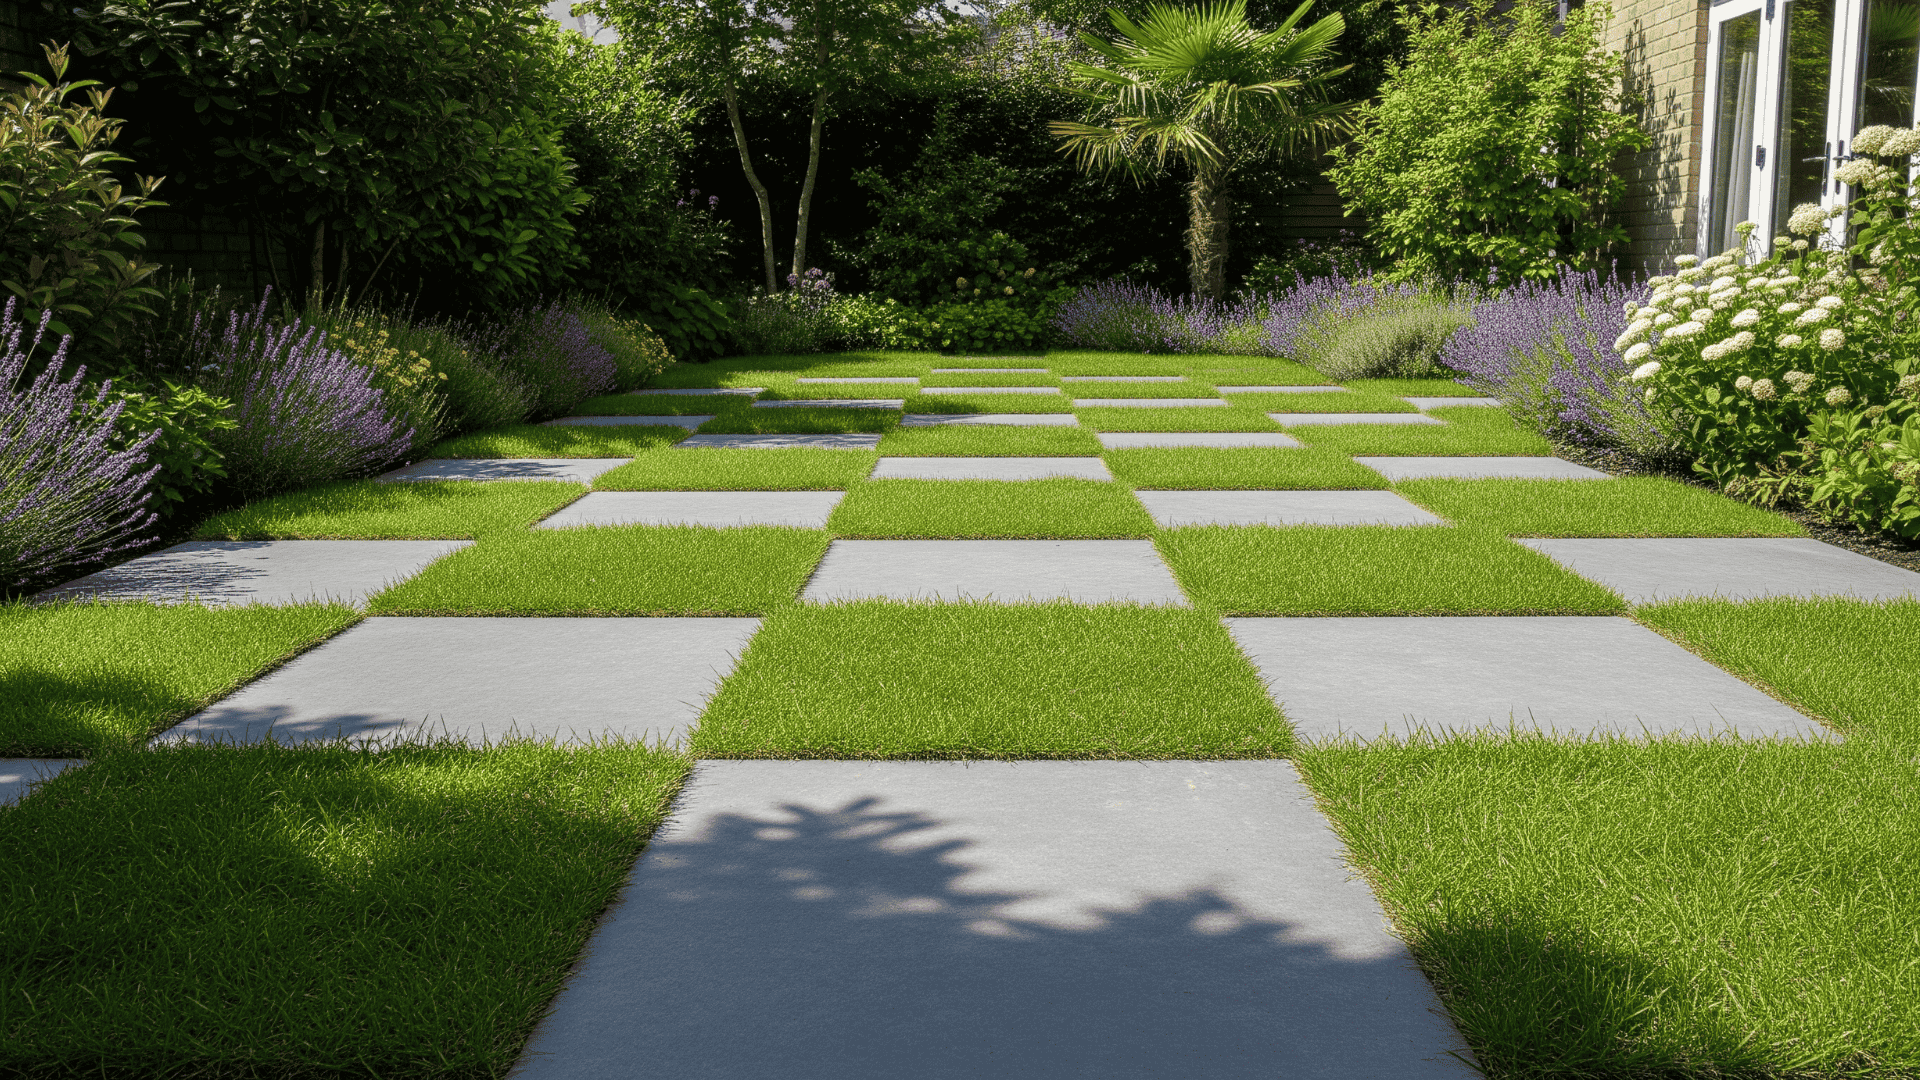
For a playful and polished look, alternate squares of concrete pavers and turf to create a checkerboard path. This modern design requires precise spacing and level surfaces, but looks fantastic in sunny yards.
The alternating textures attract attention and define spaces. This walkway is ideal as a patio feature or between raised beds. Let the grass root fully before heavy use and trim regularly to maintain its neat appearance.
- Materials: Concrete pavers, grass seed, or sod
- Tools: Shovel, level
- Time: 2 days
14. Gabion Stone Steps
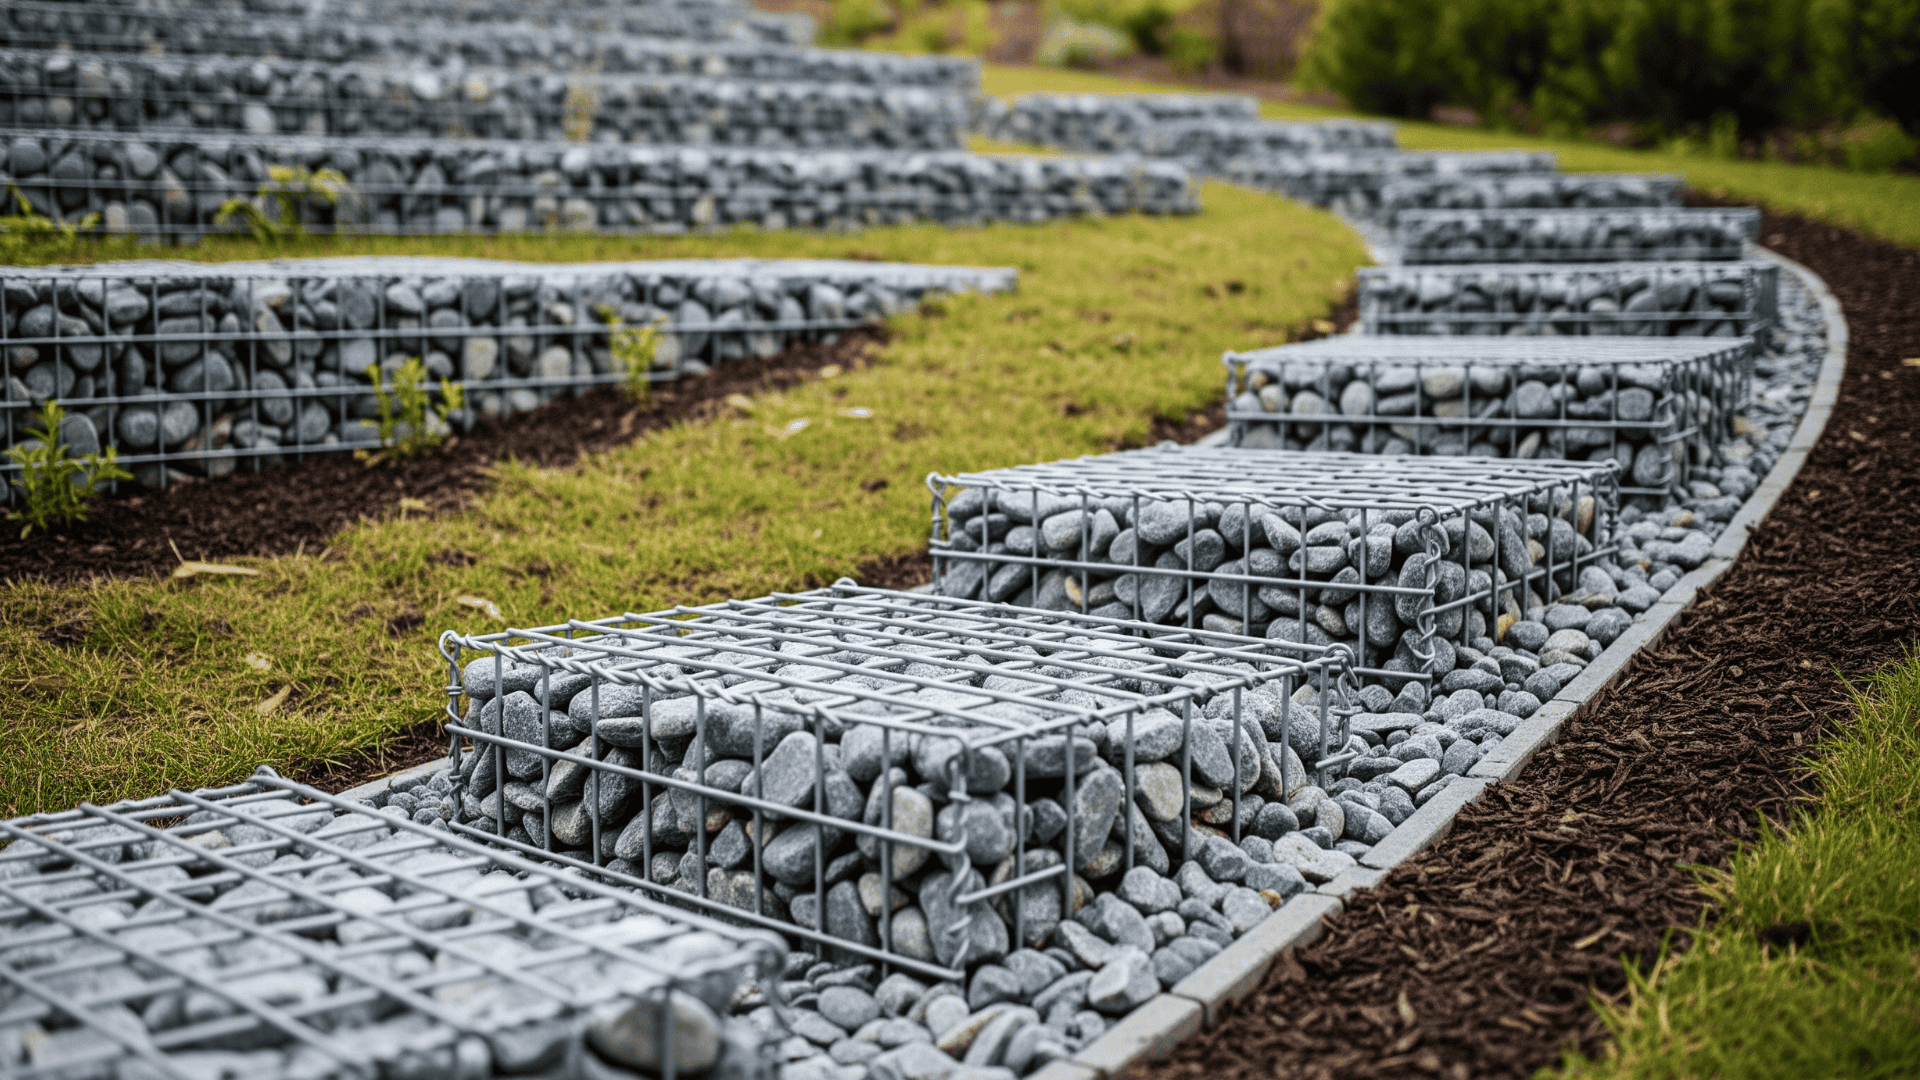
Gabion steps are sturdy and visually striking. Use wire mesh cages filled with stones to build strong steps or level paths. Great on slopes where erosion occurs, they can be customized with different rock colors or textures.
Top each cage with flat stones to create a stable walking surface. This project requires more planning but lasts for years with minimal upkeep. It works especially well in modern or industrial-themed landscapes.
- Materials: Gabion cages, stones
- Tools: Wire cutters, pliers
- Time: 2 days
15. Slate Chips with Timber Border
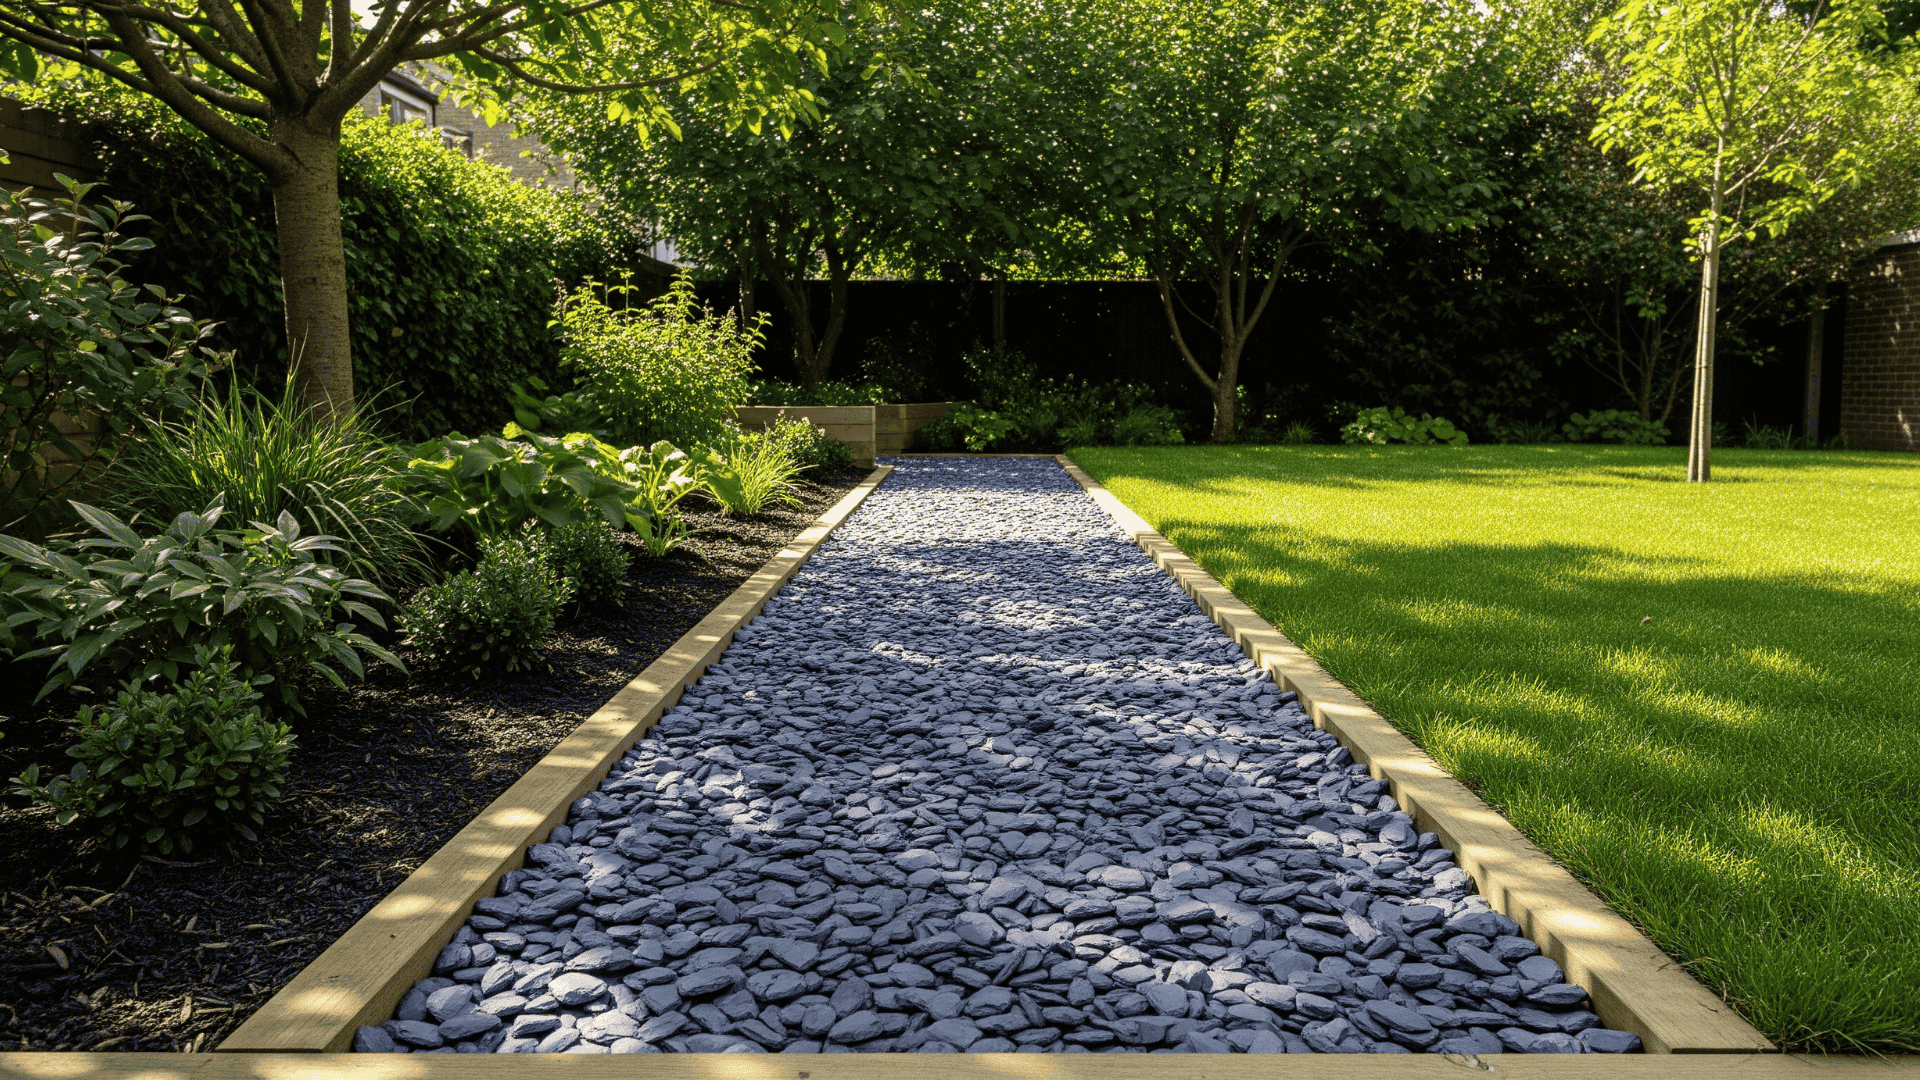
This simple walkway frames crushed slate chips with timber to create a clean, defined path that resists weeds and erosion. Slate stays in place better than lighter gravel, making it ideal for long-term use.
The timber creates a warm, structured border and prevents the chips from moving out of place. This design works well in both modern and rustic settings, especially when combined with raised beds or decorative plantings.
- Materials: Slate chips, wood planks, edging stakes
- Tools: Rake, mallet, level
- Time: 1 day
16. Flagstone in Sand Bed
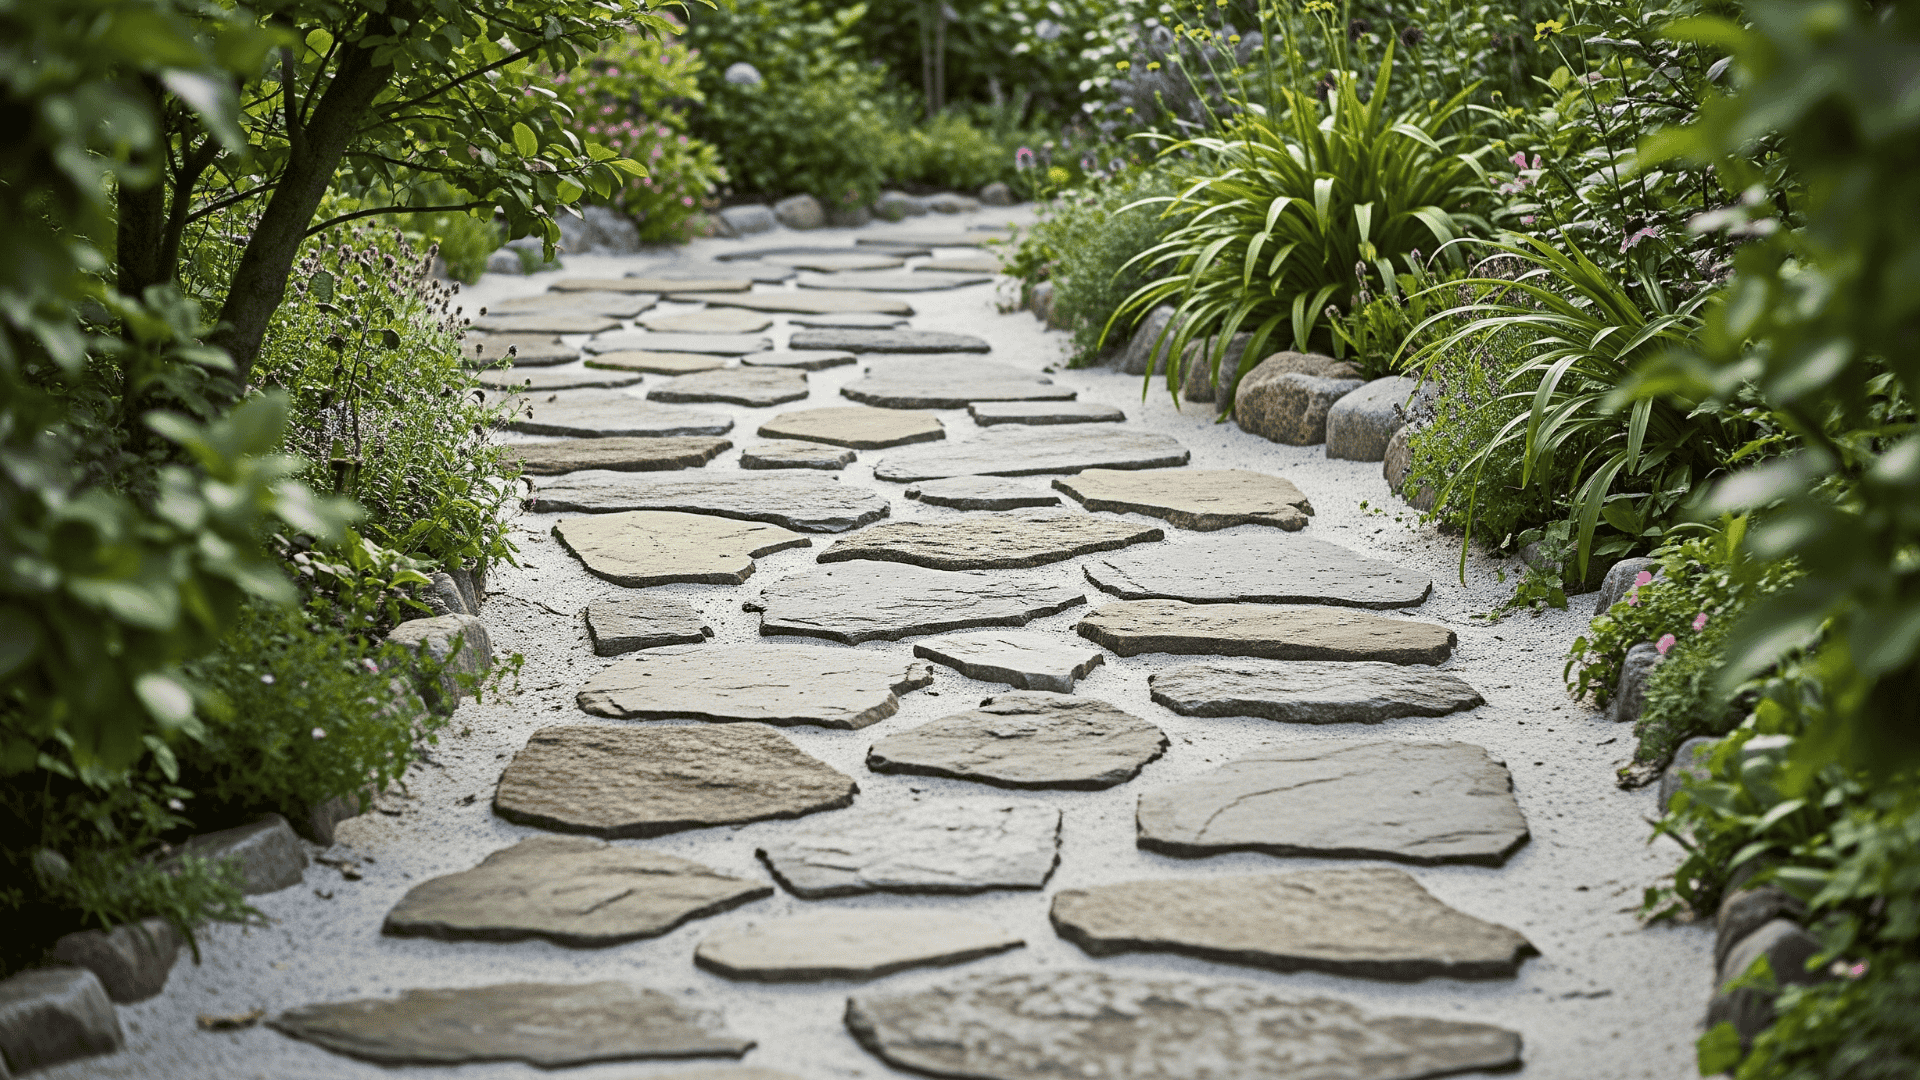
Lay flagstones into a compacted sand bed for a natural look without cement, allowing stones to settle yet stay movable for adjustments. Ideal for curved or freeform garden paths.
The irregular stone shapes add visual interest and blend into outdoor settings while polymeric sand locks stones and prevents weeds. It’s an easy, durable path to build and maintain.
- Materials: Flagstones, sand, weed fabric
- Tools: Shovel, tamper, level
- Time: 1–2 days
17. Round Concrete Steppers
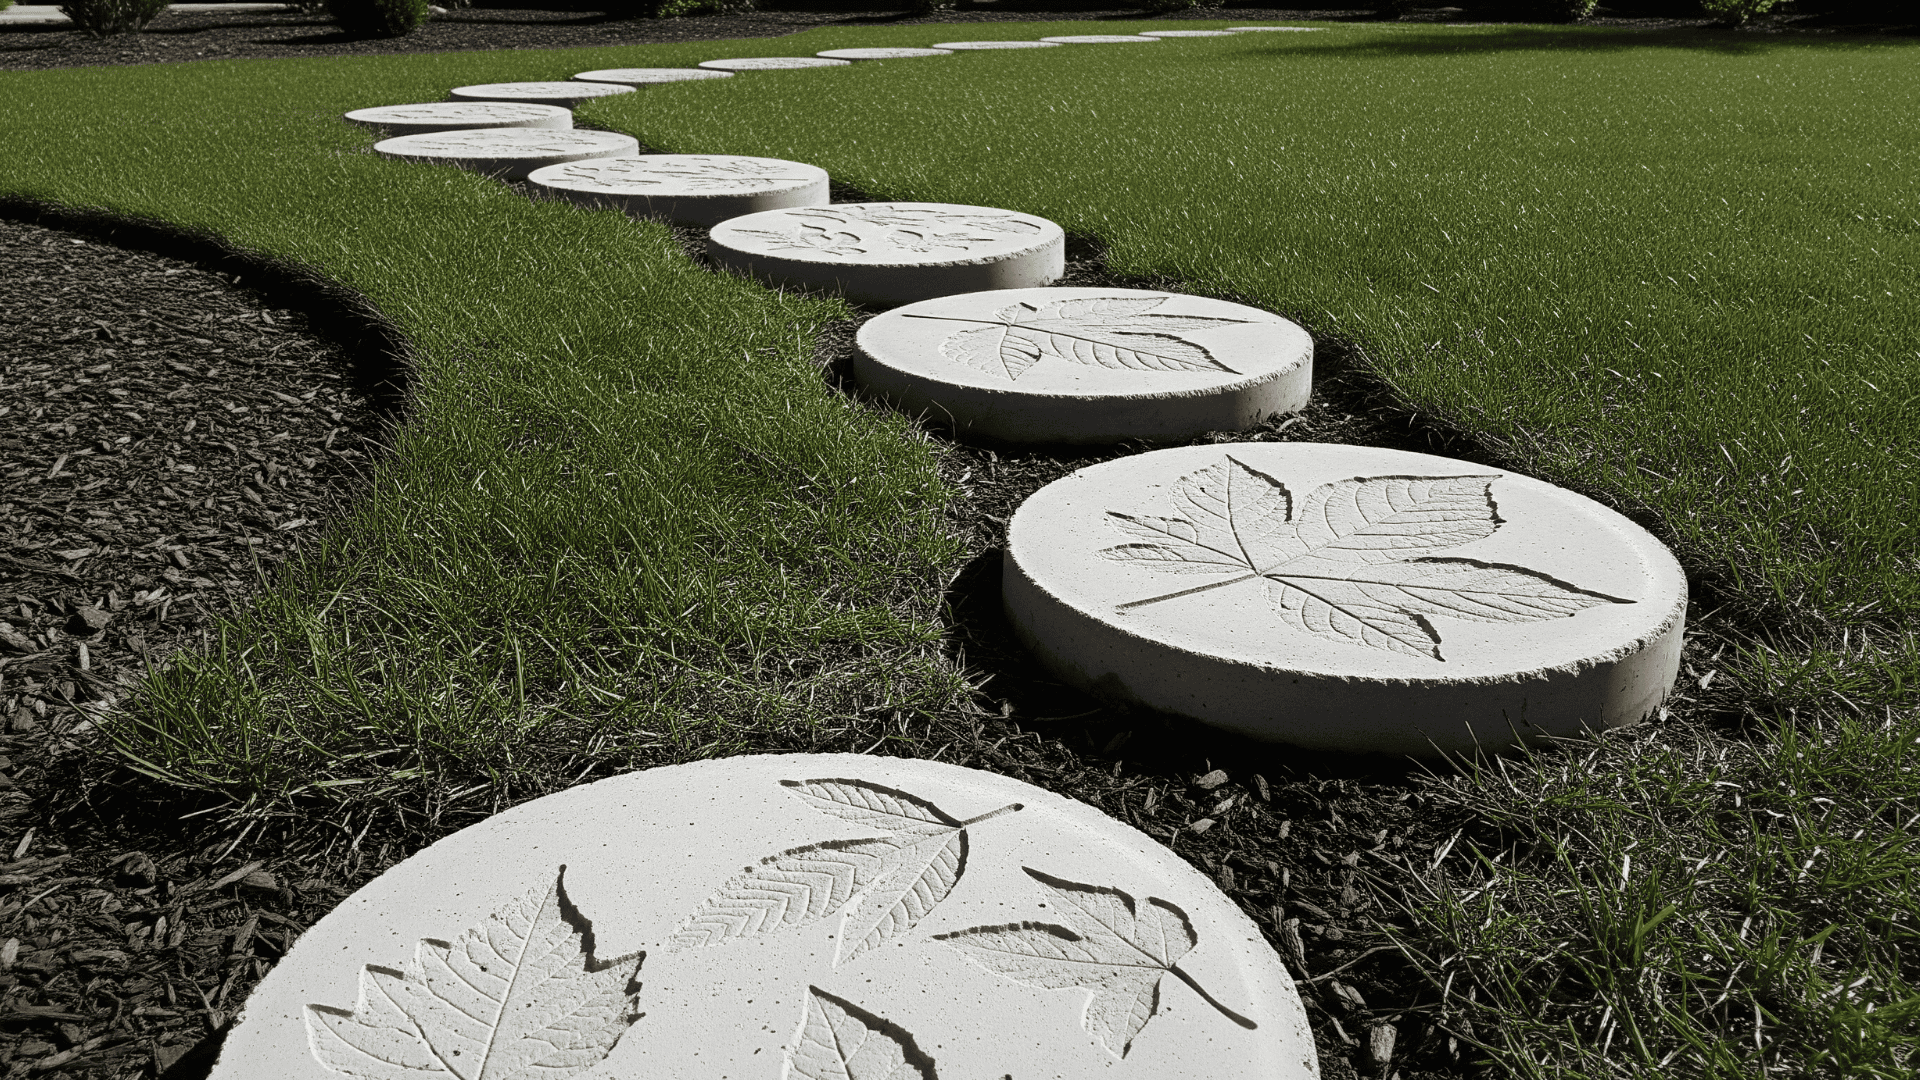
Pour concrete into molds to make personalized stepping stones, ideal for lawns, mulch beds, or play areas. Add textures, leaves, shells, or glass before it dries for customization.
Arrange them in straight lines or staggered curves, depending on your landscape. They’re easy to install and even easier to replace if needed. This project is fun to do with kids and adds a personal touch to your yard.
- Materials: Concrete mix, molds, decorations
- Tools: Trowel, gloves
- Time: 2 days
18. Bark Chip Forest Path
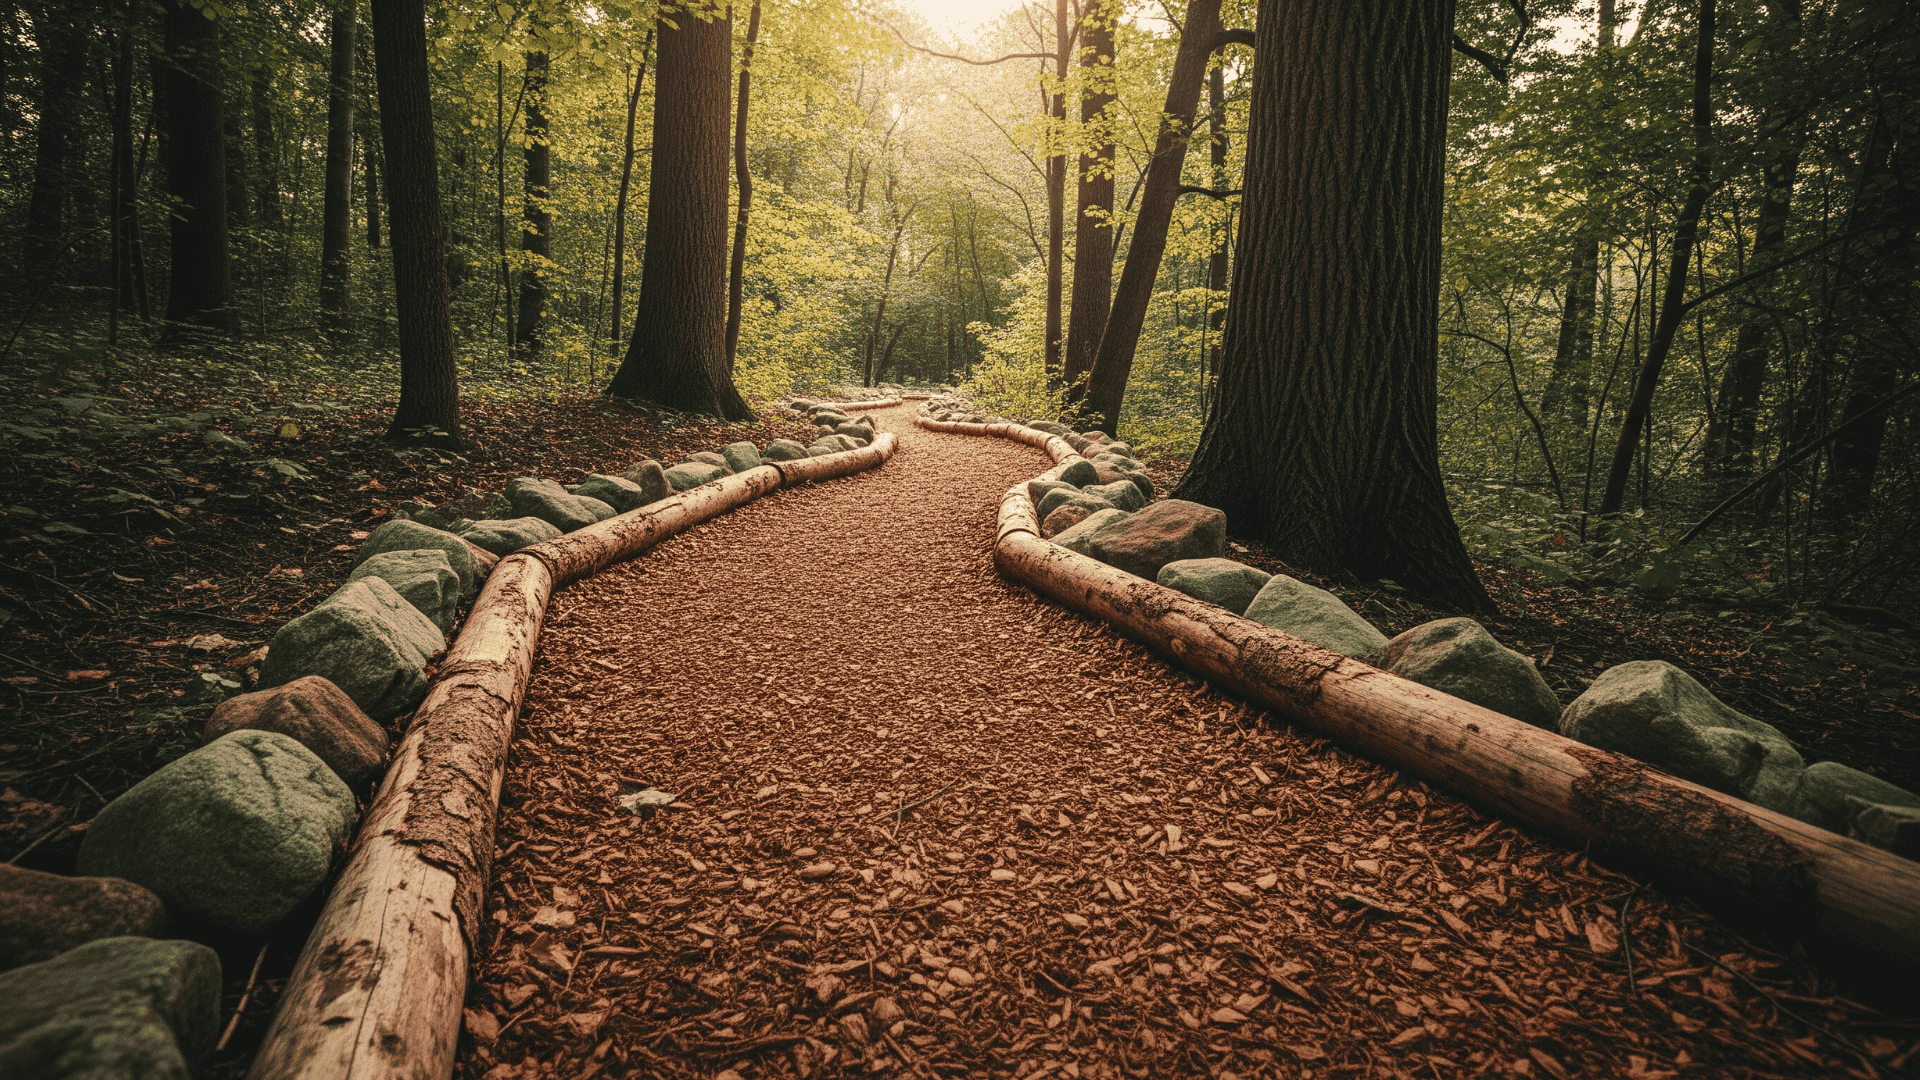
A bark chip path blends right into wooded or shaded areas, making it great for gardens that don’t need formal borders. It cushions each step and absorbs rainwater naturally.
Lay thick bark mulch over landscape fabric, edging with logs or bricks to contain it. It’s quick to install, easy to refresh, and forgiving. Ideal for informal gardens or natural woodland vibes that require minimal preparation.
- Materials: Bark mulch, optional edging
- Tools: Wheelbarrow, rake
- Time: Half-day
19. Broken Concrete Slab Walkway
Change broken concrete into an eco-friendly walkway by arranging pieces like puzzle tiles. Fill gaps with gravel, soil, or moss for a finished look. A resourceful way to reuse materials and add character without new purchases.
This style is excellent for creating an urban, slightly rugged path that still looks well-designed. It’s easy to make and even easier to repair or rearrange later, depending on how your layout evolves over time.
- Materials: Concrete chunks, sand, or gravel
- Tools: Shovel, sledgehammer
- Time: 1–2 days
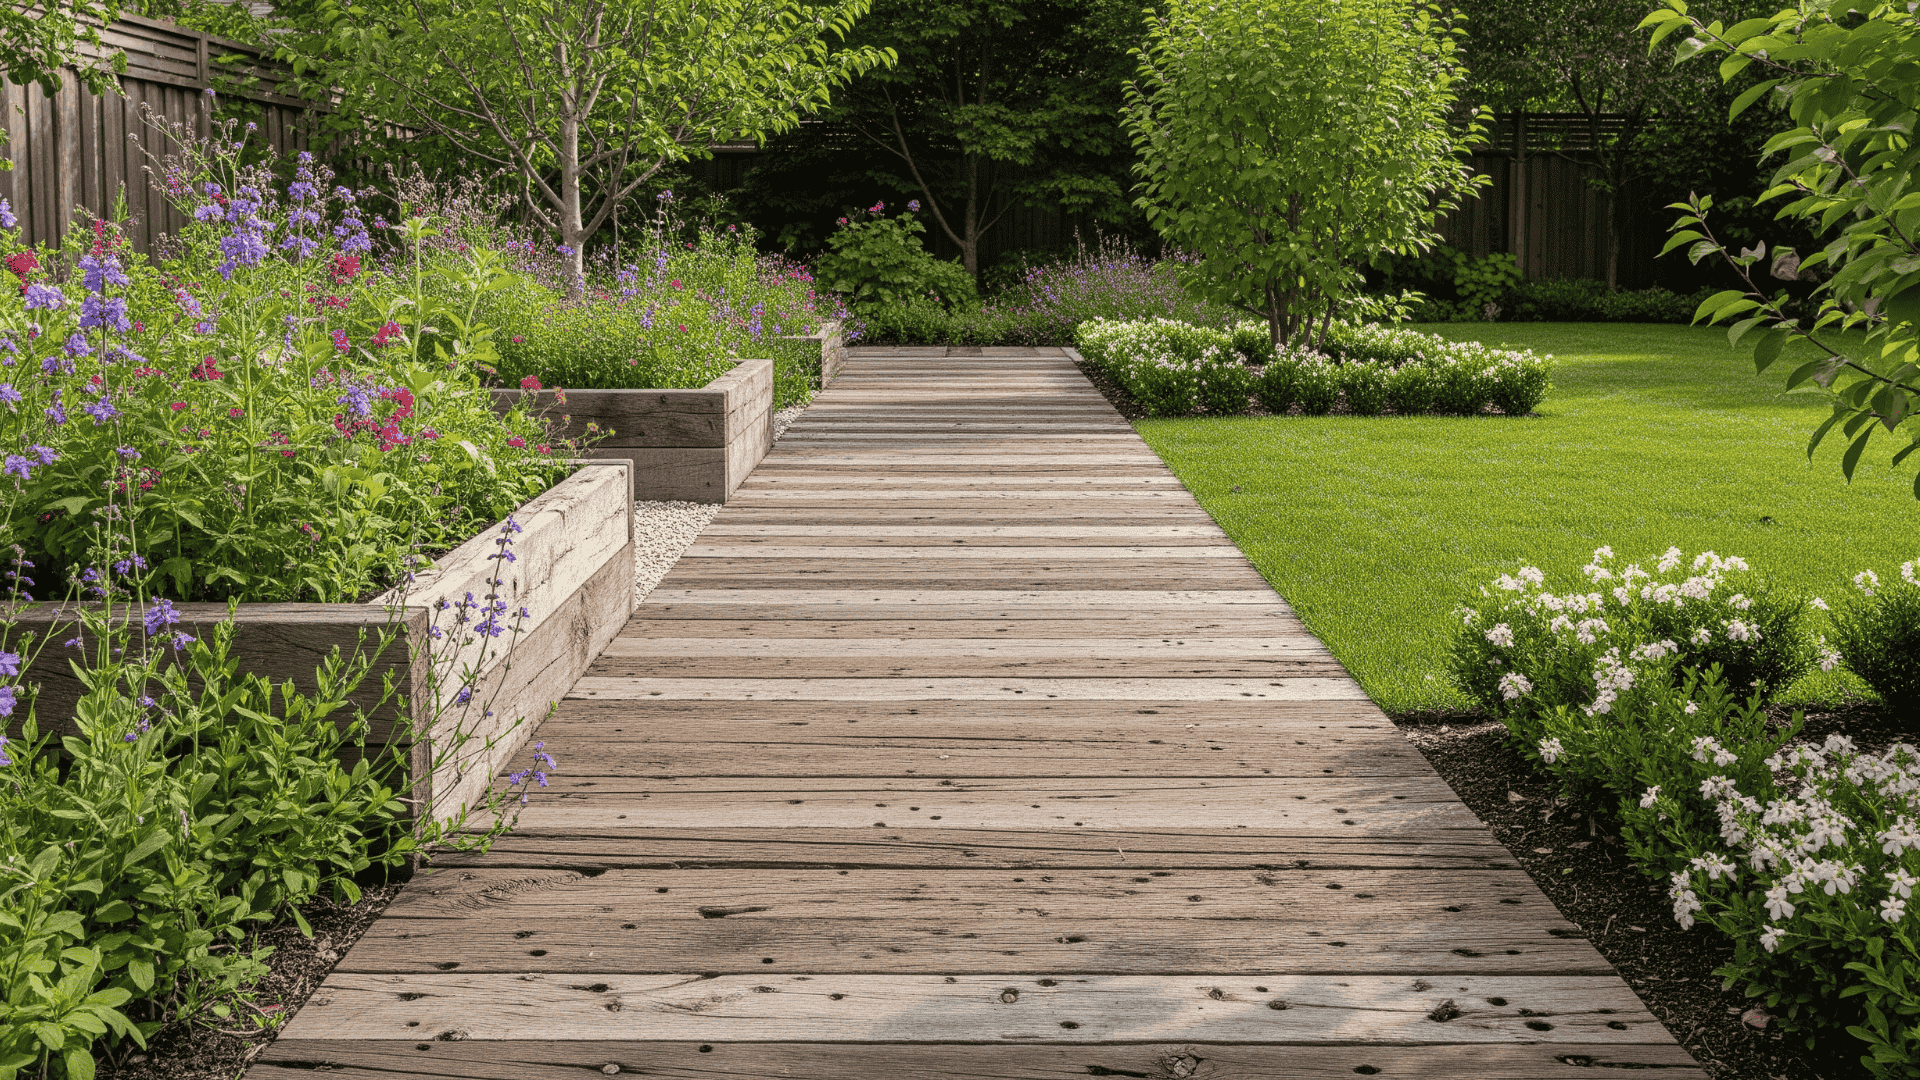
20. DIY Concrete Boardwalk
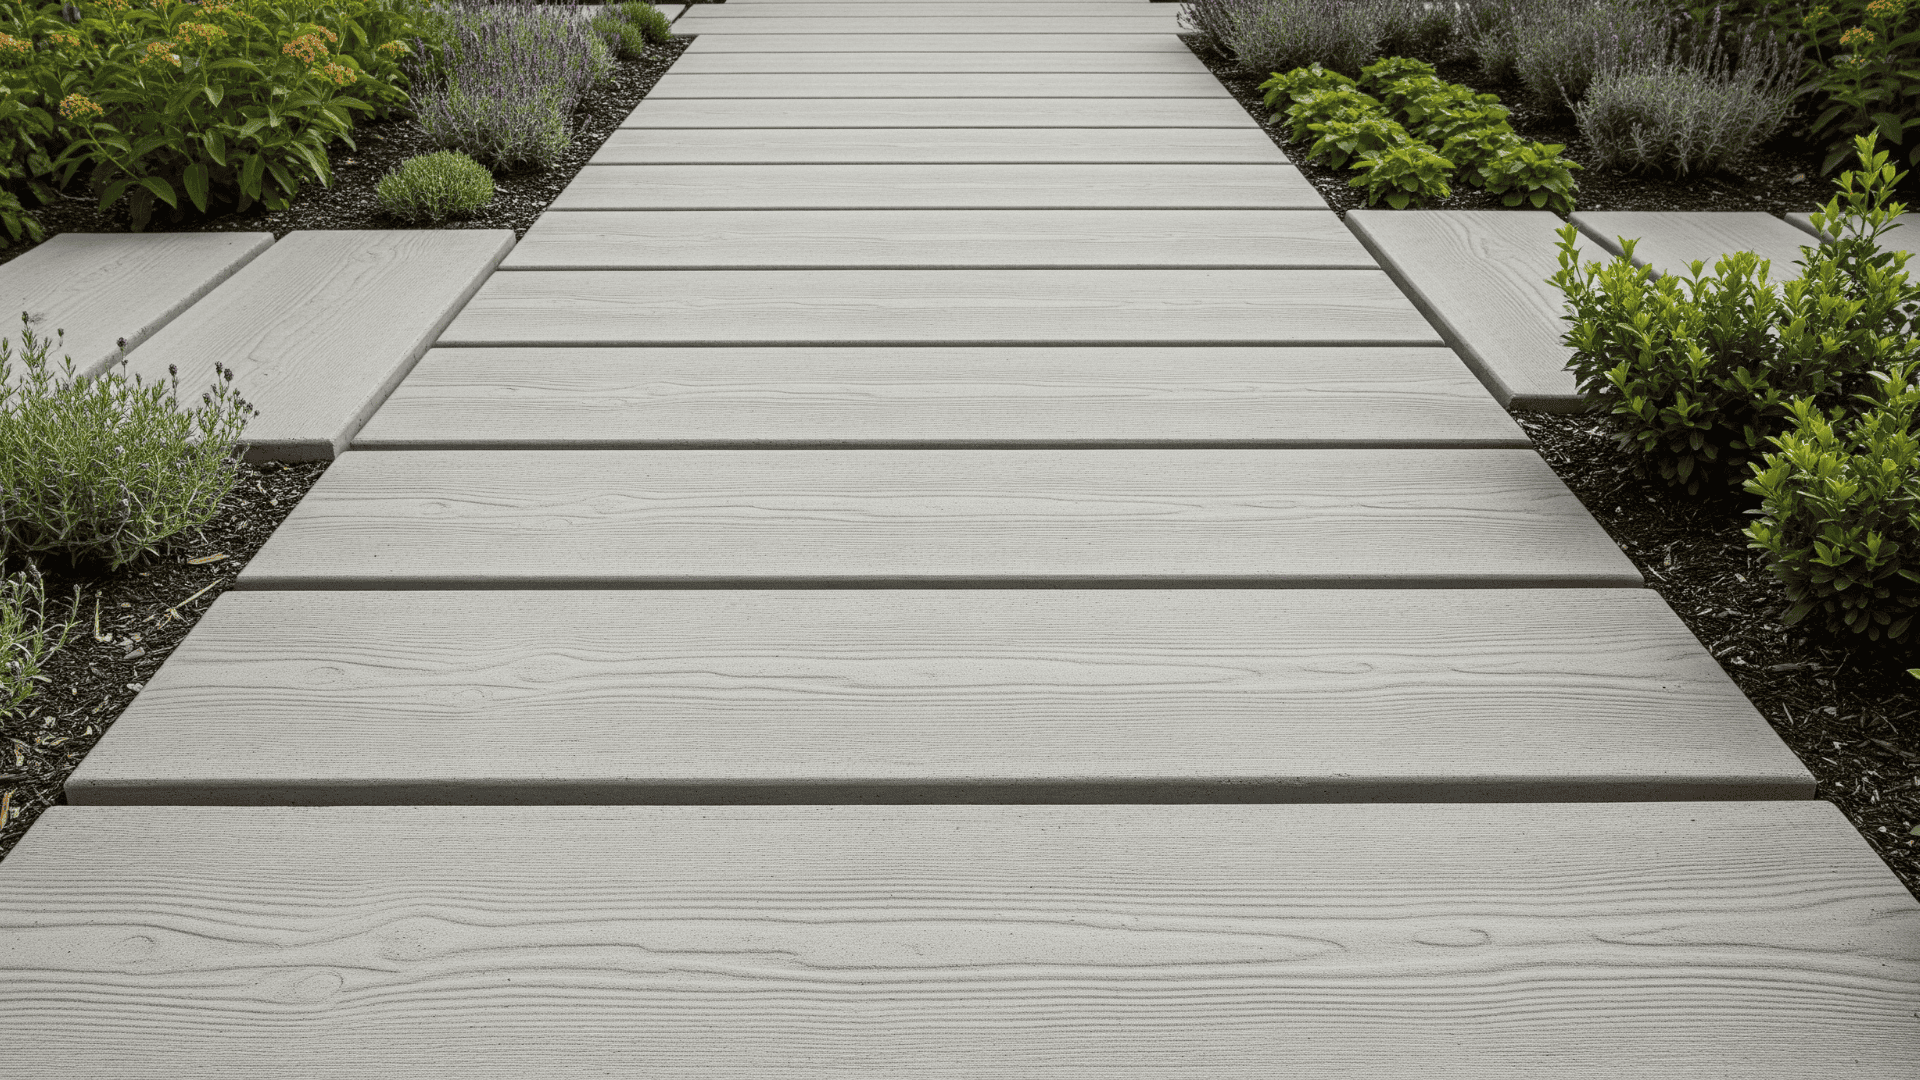
Pour concrete into long, narrow molds to create slabs that look like wooden planks but last far longer. Once cured, seal the surface to protect against water and weather.
This project offers the visual appeal of a boardwalk without rotting wood. Ideal for wet areas, flower bed borders, or modern gardens, it is sleek, durable, and low-maintenance. You can texture the molds for grip and style.
- Materials: Concrete mix, molds, sealant
- Tools: Saw, level, drill
- Time: 2–3 days
21. River Rock Strip Walkway
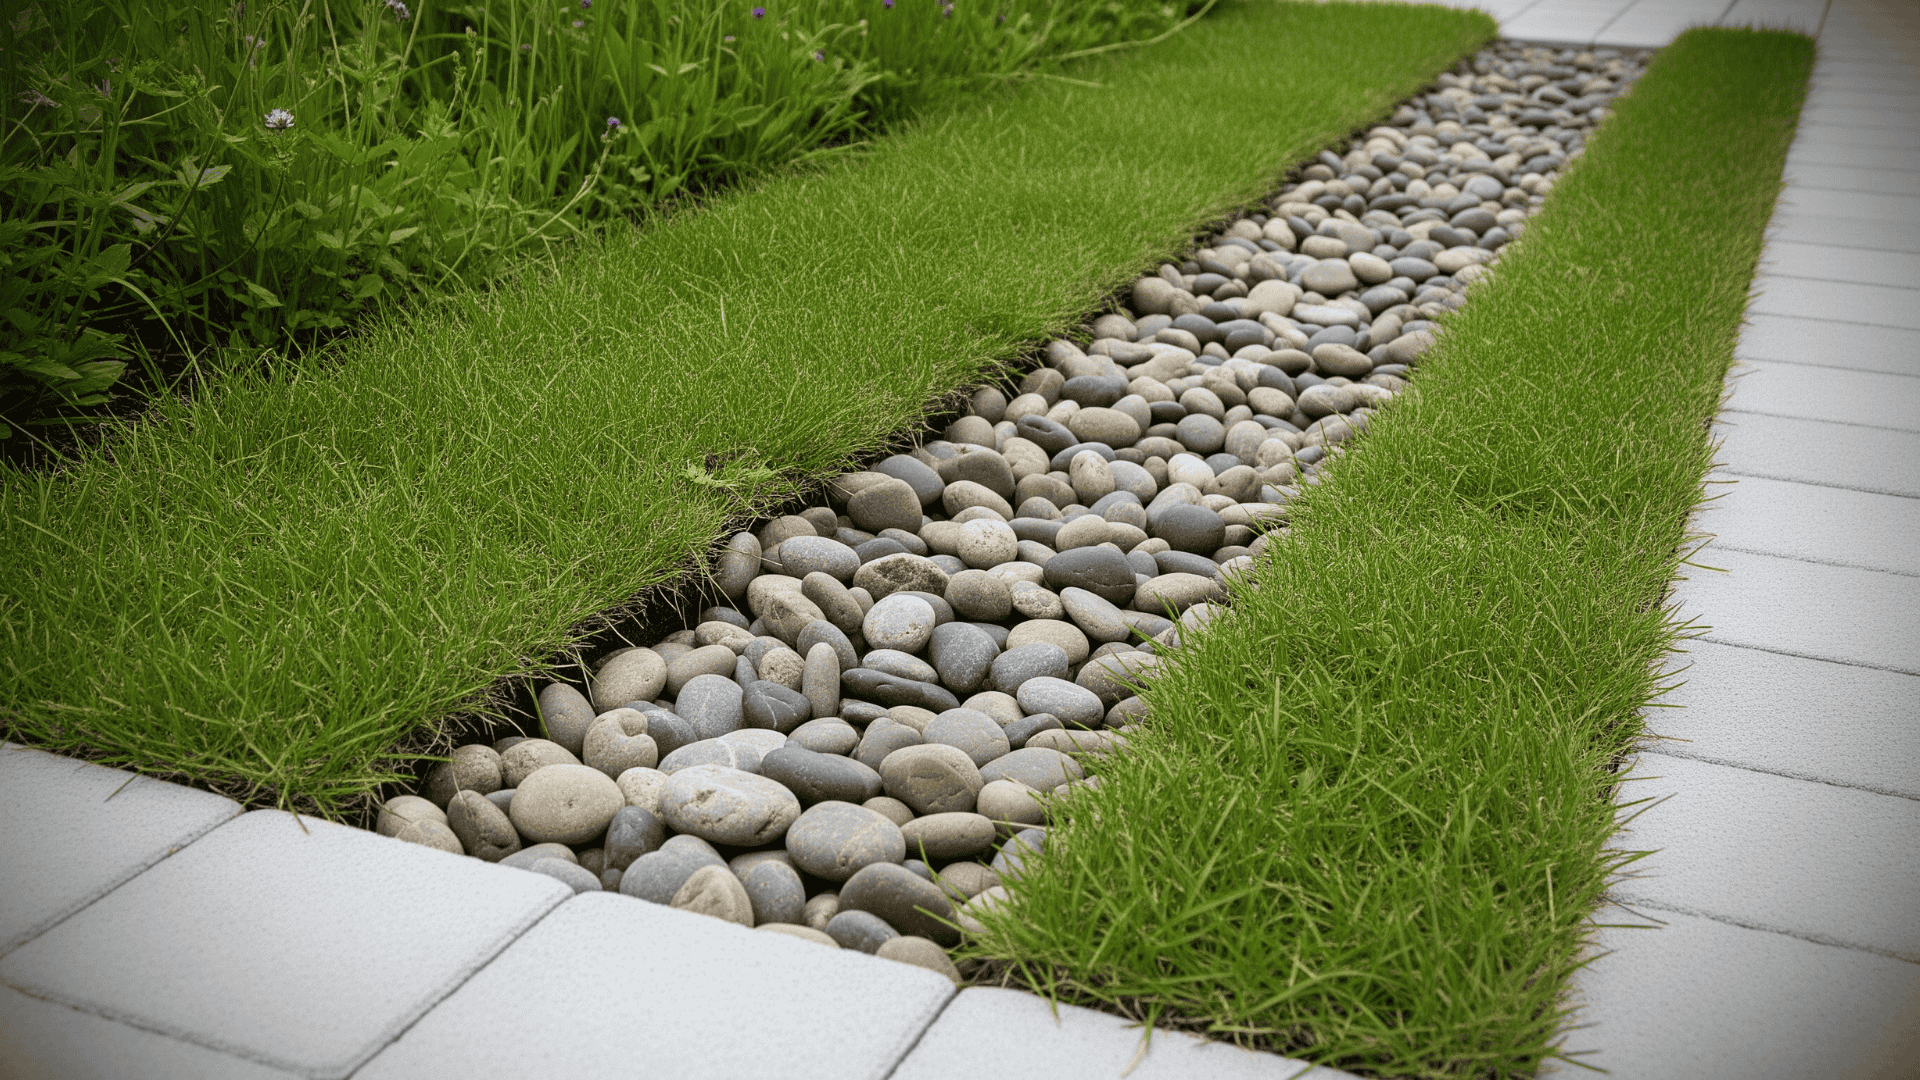
Create a decorative walkway by filling a shallow trench with river rocks in natural colors that blend into any landscape. Use weed fabric underneath to reduce maintenance and keep rocks in place.
This path works well between pavers, as a garden border, or in small side yards. It’s a simple yet beautiful way to break up planting areas and improve drainage without committing to heavy materials or complicated builds.
- Materials: River rocks, weed barrier
- Tools: Rake, shovel, spade
- Time: 1 day
22. DIY Rope and Log Path
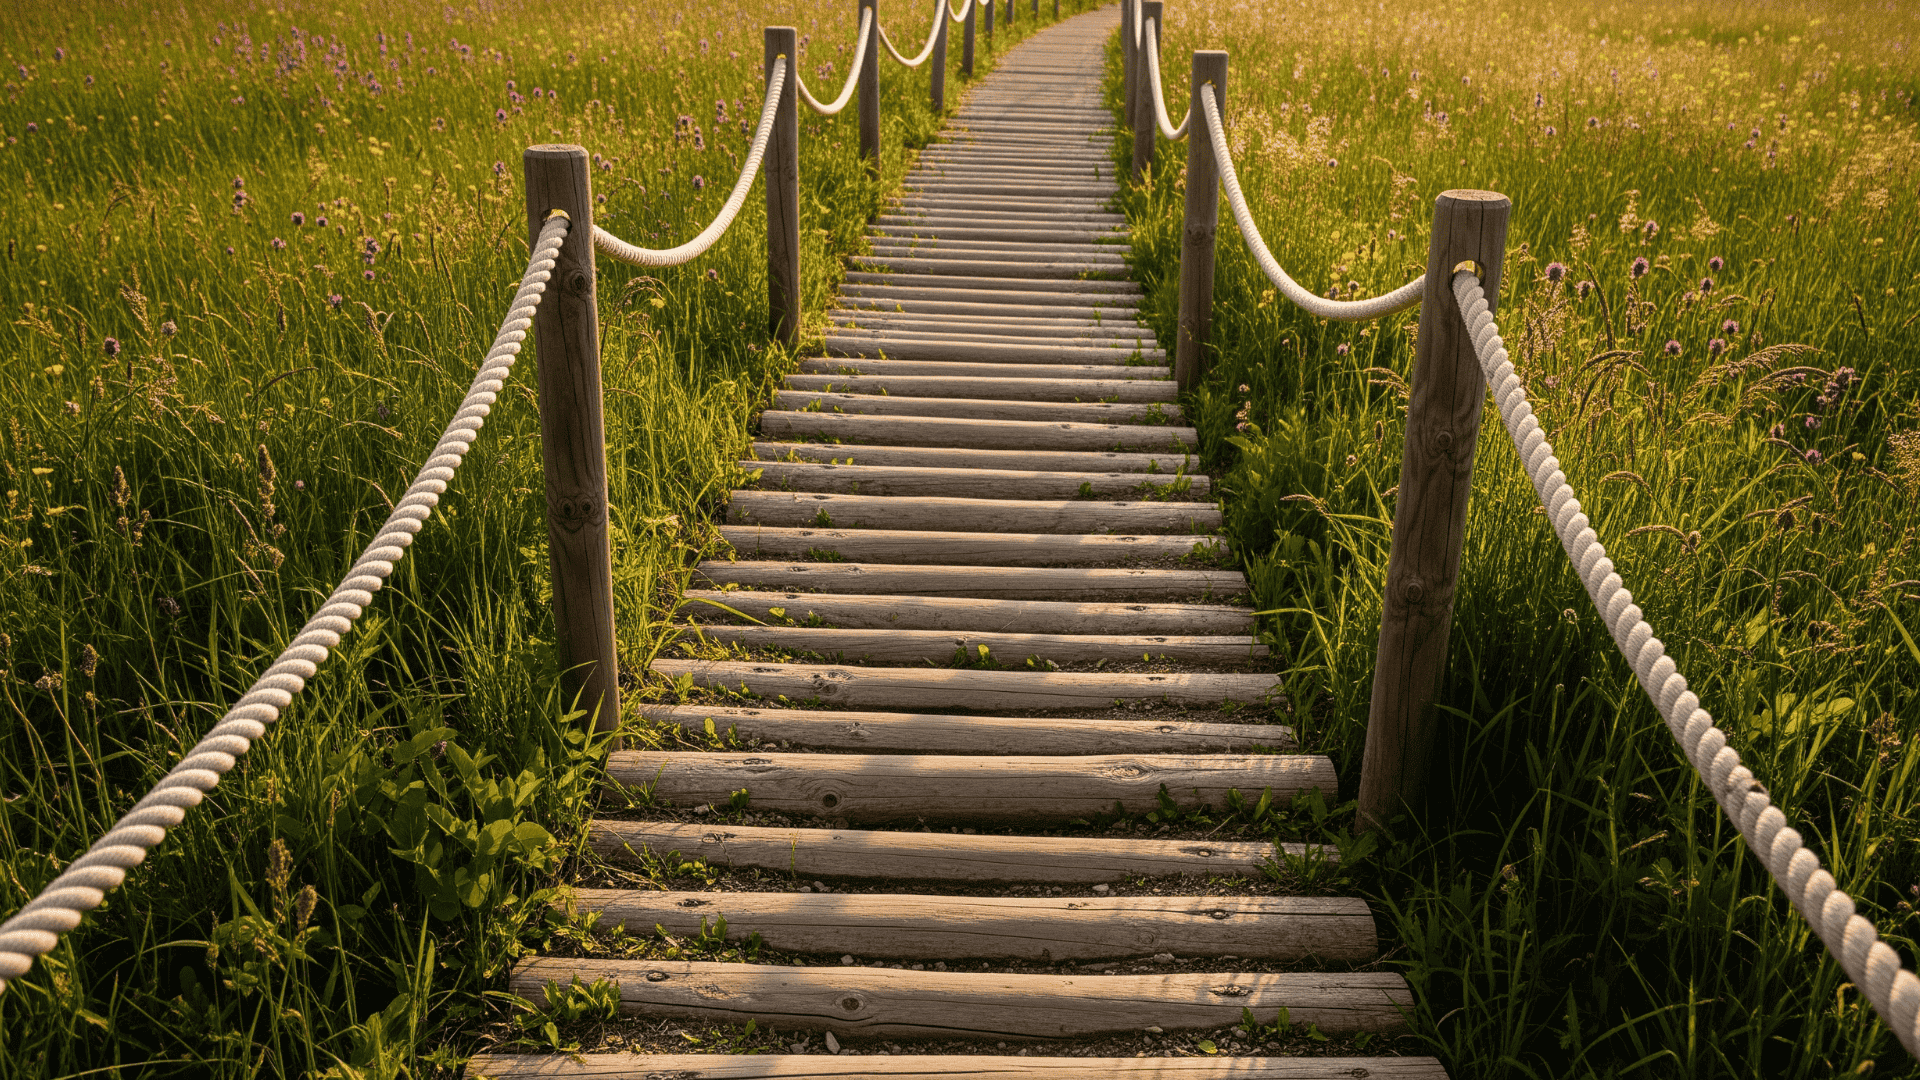
Lay short logs horizontally and line both sides with thick natural rope for a rustic, trail-style walkway. This idea is especially charming for cabins, sloped gardens, or woodland edges.
The logs provide footing, and the rope guides the path visually. Drill through logs and stake them to hold in place. It’s simple to build and creates a cozy, camp-like look with personality.
- Materials: Logs, rope, ground stakes
- Tools: Drill, mallet, handsaw
- Time: 1 day
Tips to Make Your DIY Walkway Last Longer
Building your walkway is just the start; maintaining it is equally important. Simple habits and materials can prolong its life and prevent repairs. Below are ways to keep your DIY walkway strong and attractive.
- Start with a solid base: Compact the soil and add a gravel or sand layer before placing materials. A stable foundation helps prevent sinking, shifting, and tripping over time.
- Use landscape fabric: Placing weed barrier fabric under gravel, mulch, or stone paths helps stop weeds from growing through. It also makes future maintenance much easier.
- Seal natural materials: Wood and concrete surfaces should be sealed to resist moisture and UV damage. This preserves color and texture while preventing early wear or cracking.
- Install edging or borders: Edging helps keep gravel, mulch, and stones neatly in place. It also gives the path a cleaner, more finished look that lasts longer.
- Check and refresh seasonally: Walk your path each season to spot uneven sections, weeds, or erosion. Topping off mulch or gravel yearly keeps everything looking fresh and functional.
Conclusion
I hope these DIY walkway ideas provide a few plans for your yard. Even if you’re after something rustic, modern, or just simple and budget-friendly, there’s a project here that fits.
I personally enjoy how each path adds character while staying affordable and easy to build. With the right materials and a little time, you can create a walkway that not only lasts but also looks great through every season.
Just remember to prepare your base, seal it as necessary, and conduct an annual check to maintain everything properly.
If any of these ideas helped you out or gave you that “aha” moment, share this blog with a friend, save it for later, or post it to your favorite DIY group. Let’s keep good ideas moving, one step at a time.