
Want to add dimension to your walls without hiring a pro? Creating your textured paint is easier than you might think.
In this guide, I’ll show you exactly how to make textured paint with simple ingredients you probably already have at home. No fancy equipment or special skills are needed.
I’ve been experimenting with DIY wall finishes for over a decade. After plenty of trial and error (and some hilariously messy mistakes), I’ve perfected these simple techniques that actually work.
You’ll learn:
- Three foolproof texture recipes using household items
- Step-by-step mixing instructions
- Application tips for different effects
- Common mistakes to avoid
Whether you’re looking to hide wall imperfections or create a custom accent wall, these homemade textured paint methods deliver professional-looking results on a DIY budget.
Let’s make those flat walls into something special.
What Is Textured Paint?
Textured paint is regular paint with a twist. It contains additives that create dimension and depth when applied to a surface.
Think of it as paint that doesn’t dry flat. Instead, it creates bumps, ridges, swirls, or other patterns that you can actually feel when you run your hand over it.
I love textured paint because it adds character to ordinary walls. You’ve probably seen it in rustic farmhouses, trendy restaurants, or artsy homes without realizing it was a simple DIY technique.
Unlike flat paint, textured finishes catch light and create shadows throughout the day.
Textured paint serves both practical and decorative purposes:
- Hides imperfections in walls (cracks, dents, uneven surfaces)
- Creates visual interest and dimension
- Adds a custom, handcrafted look
- Provides a focal point in a room
You can apply textured paint to almost any surface: drywall, plaster, wood, furniture, and even canvas for artwork. The technique changes slightly depending on the surface, but the basic concept remains the same.
The magic happens in what you add to the paint. Sand, joint compound, coffee grounds, or even salt can transform ordinary paint into something with texture and depth.
Store-bought textured paint exists, but making your own gives you complete control over the effect. Plus, it’s much cheaper and more customizable.
Why Make It at Home?
Store-bought textured paint can be surprisingly expensive. I’ve seen small containers selling for $30-40 when the same effect can be created at home for a fraction of the cost.
Making your textured paint puts you in control. When you mix it yourself, you decide exactly how rough or subtle the texture will be. Want more grit? Add more sand. Prefer smoother swirls? Adjust your recipe.
Look around your home – you probably already have most of what you need. Basic ingredients like joint compound, sand, or even coffee grounds can transform regular paint into something special.
Why pay premium prices when the solution is sitting in your garage or kitchen?
Homemade textured paint works perfectly for:
- Small accent walls
- Furniture makeovers
- Art projects
- Quick repairs to match existing textured walls
- Experimenting with different finishes
Mixing small batches gives you flexibility. You can create just what you need for each project instead of being stuck with leftover specialized paint that you may never use again.
I’ve found that homemade versions often apply better than commercial options for DIY projects. They tend to dry more slowly, giving you more working time to get the effect just right.
Plus, there’s something satisfying about creating a custom finish from scratch. Mixing your textured paint makes your walls truly one of a kind.
Supplies You’ll Need
-
Base paint (latex or acrylic)
-
Add-ins for texture (choose one):
-
Sand (fine or coarse)
-
Baking soda or cornstarch
-
Joint compound
-
Plaster of Paris
-
Sawdust (for rough effects)
-
-
Mixing container and stir stick
-
Paintbrush or roller
-
Drop cloth, painter’s tape, gloves
Basic Textured Paint Recipes
These three recipes form the foundation of DIY textured paint. I’ve tested each one extensively and they all deliver reliable results for different effects.
1. Baking Soda or Cornstarch Mix
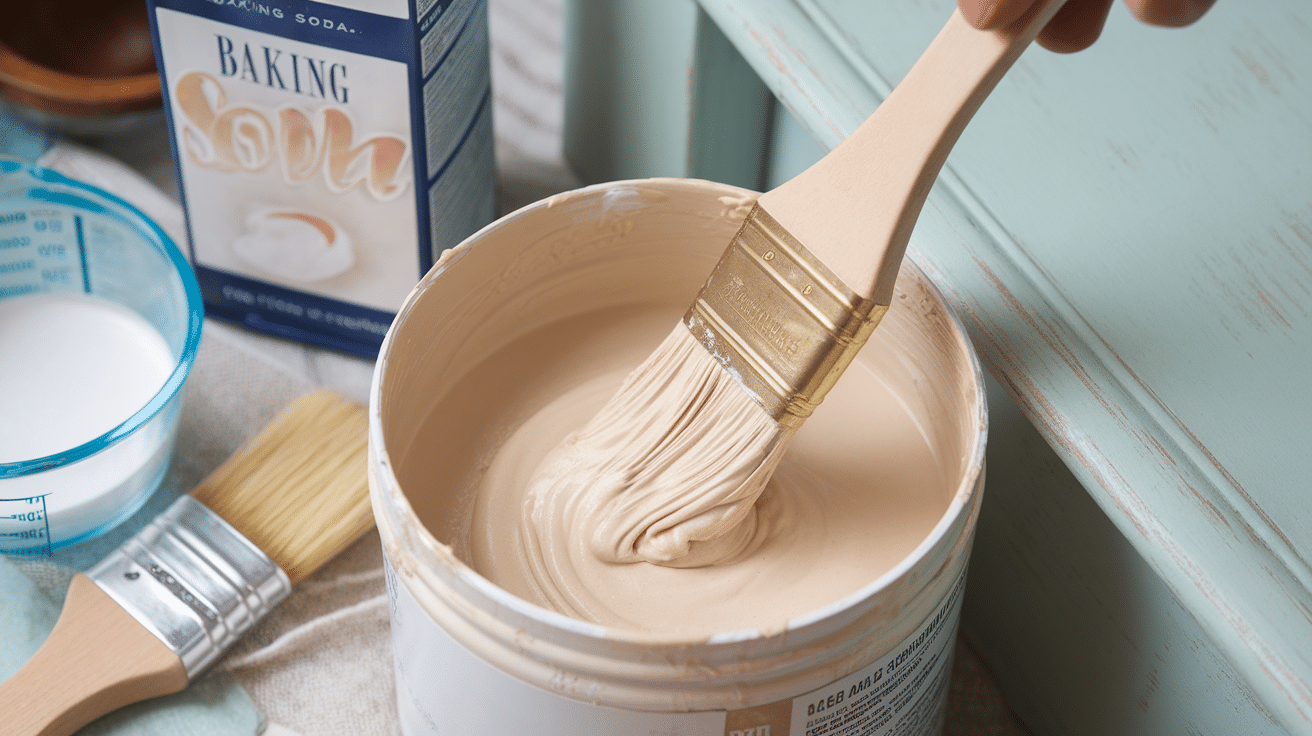
This creates a fine, subtle texture perfect for beginners:
- 1 cup latex paint
- ¼ to ½ cup baking soda or cornstarch (more = more texture)
- Optional: 1-2 tablespoons water if mixture gets too thick
Pour the paint into your container first, then gradually add the powder while stirring. Mix until it has a thick, slightly grainy consistency like pancake batter. No lumps allowed!
This recipe works best for : Subtle textures, furniture projects, and creating a vintage or chalk-paint look.
2. Sand Texture Paint
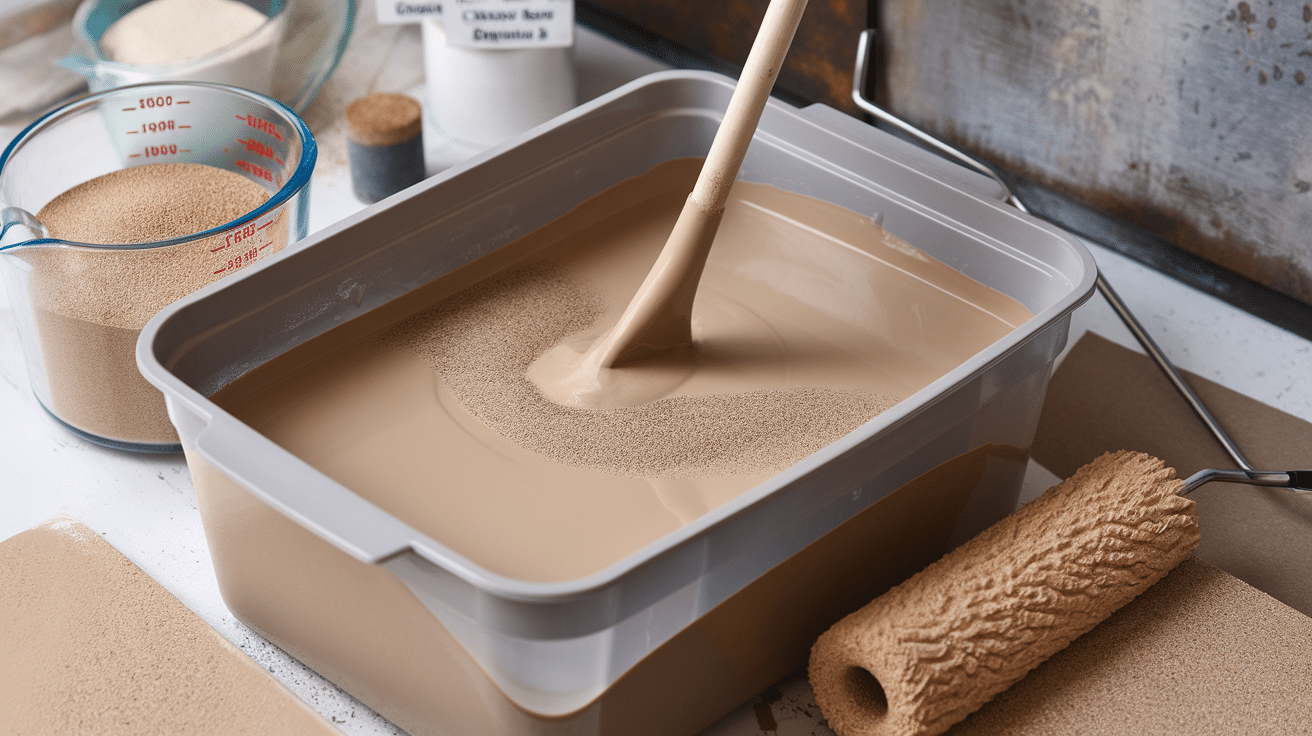
For a more pronounced, gritty texture:
- 1 cup latex paint
- ¼ cup fine or medium sand (fine = subtle, medium = more rough)
- Stir frequently during application as sand settles
Mix thoroughly until the sand is evenly distributed. This mixture will be heavier than regular paint, so use strong stirring motions from the bottom up.
This recipe works best for : Rustic walls, beachy effects, or non-slip surfaces.
3. Joint Compound or Plaster Add-In
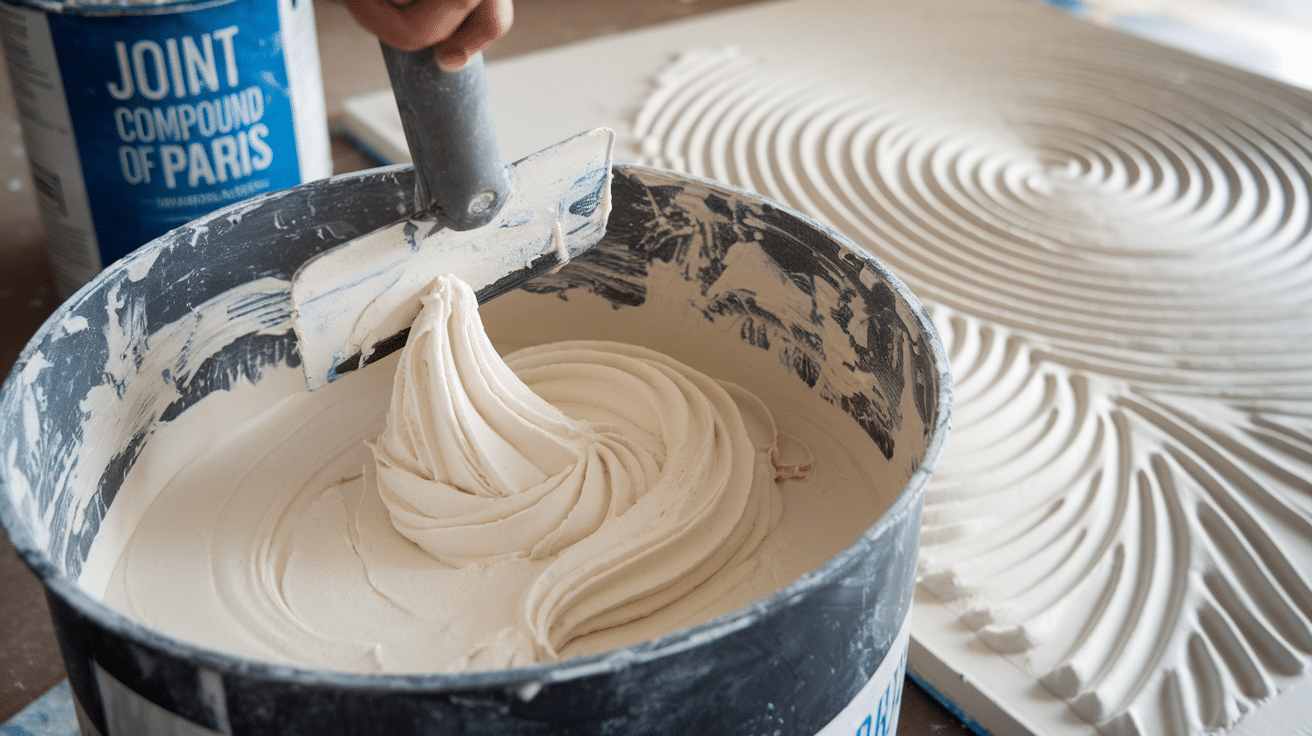
For dramatic, sculptural textures:
- 1 cup latex paint
- 1 cup pre-mixed joint compound or plaster of Paris
- Mix thoroughly until smooth and consistent
This creates a thick, workable paste that can be manipulated with tools to create patterns. Depending on your project, you can adjust the ratio to make it thinner or thicker.
This recipe works best for: Dramatic wall textures, Spanish-style finishes, or artistic effects.
How to Apply Textured Paint
Proper application makes all the difference. I’ve learned through trial and error that the right techniques can transform your DIY texture from amateur to amazing.
Begin with surface preparation. A clean, dry surface is essential for good adhesion. Remove any dust, dirt, or loose paint. For best results, I always recommend priming walls first, especially if you’re covering dark colors or stains.
Stir your textured mix thoroughly before and during application. The texture additives tend to settle at the bottom, so regular stirring ensures consistent results across your surface.
The tool you choose determines the final look.
For different effects, try these application methods:
- Roller: Use a thick-nap roller (¾-inch or more) for an even, all-over texture
- Brush: Creates visible brush strokes and more artistic patterns
- Trowel or putty knife: Perfect for swirls, peaks, or Spanish-style textures
- Plastic bag or sponge: Dab onto the surface for a mottled, organic look
- Combs or notched tools: Drag through wet paint for linear patterns
When applying textured paint, work in small sections. Unlike regular paint, textured mixes dry faster and can be harder to blend if you try to cover too large an area at once.
Allow your first coat to dry completely before adding more texture or paint. Depending on the thickness, this might take 4-24 hours. Rushing this step can cause cracking or peeling.
For highly textured finishes, you might want to add a clear sealer after the paint dries fully, especially in high-traffic areas or bathrooms where moisture is present.
Tips for Best Results
Don’t Skip the Test Patch
I always recommend testing your textured paint mix on a piece of cardboard or scrap drywall before applying it to your wall. This simple step has saved me from countless mistakes.
Start with a lighter texture and build up gradually. It’s much easier to add more texture than to remove it once it’s on your wall. I’ve found that two thinner coats often look better than one thick application.
Breaking your project into manageable sections prevents visible seams or “dry lines” where wet texture meets partially dried texture. For walls, work in 3×3 foot areas, blending the edges before moving to the next section.
Clean your tools immediately after use—textured paint is much harder to remove once dry.
Some additional pro tips I’ve learned the hard way:
- Keep the room temperature moderate (65-75°F) for ideal drying conditions
- Avoid fans or direct airflow that can dry your texture too quickly
- Add a touch more water if your mix becomes too thick during application
- Take photos of your technique so you can match it if you need to continue another day
Texture Can Look Different when Dry
What might seem subtle when wet often becomes more pronounced after drying. When in doubt, go lighter than you think you need.
If you make a mistake, don’t panic. Most textured finishes are forgiving and can be touched up or adjusted while still wet by simply smoothing or adding more texture.
Where to Use Textured Paint
Textured paint isn’t just for walls. I’ve used these DIY mixes for dozens of different projects around my home with amazing results.
Accent walls are perfect candidates for texture. Instead of covering your entire room, focus on one wall to create a focal point. I find that walls behind beds, fireplaces, or in dining rooms make stunning textured accents.
Ceilings often benefit from a subtle texture. A light sand or baking soda mix can hide imperfections overhead without creating heavy, outdated popcorn effects.
Furniture takes on a new life with textured treatment.
Consider these project ideas:
- Transform plain wooden dressers with a chalk-like textured finish
- Give metal planters a stone-look makeover
- Create aged or distressed effects on picture frames
- Add grip and character to lamp bases
- Make custom-textured artwork on canvas
Small decorative items are perfect for experimenting. Before tackling larger projects, try texturing a simple clay pot or wooden box to test techniques with minimal risk.
Outdated kitchen cabinets can look brand new with textured paint and new hardware. I’ve seen 1990s oak cabinets transformed into modern farmhouse style using simple DIY texture techniques.
Remember that textured surfaces collect more dust than smooth ones, so consider this when choosing locations. Smoother finishes might be better for high-touch areas like door fronts.
Things to Avoid
Learn from my mistakes so your textured paint project goes smoothly. After years of experimenting, I’ve identified the most common pitfalls.
Adding too much water ruins texture: I’ve watched perfect mixes turn into runny messes because I tried to thin them out. If your mix feels too thick, add tiny amounts of water (1 teaspoon at a time) while stirring thoroughly.
Proper surface preparation is non-negotiable. Textured paint applied to dusty, dirty, or glossy surfaces will peel or flake off quickly. Always clean thoroughly and sand glossy surfaces before application.
Match your texture to your project. I once used a heavy sand mixture on a delicate antique table—big mistake! The texture’s weight was too much for the thin wood veneer.
Skipping the test patch is like cooking without tasting.
Other crucial mistakes to avoid:
- Mixing too much at once (it can dry out before you use it all)
- Applying in extreme temperatures (too hot or cold affects drying)
- Rushing between coats (leads to cracking and peeling)
- Using the wrong tools (cheap brushes shed bristles into your texture)
Don’t expect perfect uniformity unless you’re using specialized equipment. Handmade texture has natural variations – that’s part of its charm.
Remember that once the texture dries, it’s difficult to remove. If you’re unsure about a permanent change, consider temporary alternatives like textured wallpaper until you’re confident in your technique.
Conclusion
Making textured paint at home puts custom finishes within everyone’s reach. With basic ingredients and simple techniques, you can transform ordinary surfaces into something special.
The process is forgiving, affordable, and surprisingly easy once you understand the basics. Start with small projects to build confidence before tackling entire walls or rooms.
Remember these key points:
- Choose your texture additives based on your desired effect
- Test before committing to large areas
- Apply the right tools for your intended pattern
- Allow proper drying time between coats
Whether you’re hiding wall imperfections or creating an artistic statement, homemade textured paint delivers professional-looking results without the professional price tag.
The best part? Your finished project will be unique, with a custom look that reflects your style and creativity.
Ready to get started? Grab some paint, and let’s add some dimension to your world.
Frequently Asked Questions
How Long Does Homemade Textured Paint Take to Dry?
Most formulations require 4-24 hours to dry completely, depending on thickness. Thicker applications with joint compound or plaster additives may take up to 48 hours to cure fully. Temperature and humidity affect drying time—warm, dry conditions speed up the process.
Can I Color Textured Paint Any Shade I Want?
Yes! The beauty of making your textured paint is that you can use any color as your base. Start with white paint for light colors or tinted paint for darker shades. You can also add paint colorant or tint to your mixture. The texture additives (especially white ones like baking soda) may slightly lighten your final color.
How Do I Clean Walls with Textured Paint?
Gently dust textured walls with a soft brush attachment on your vacuum or a microfiber duster. For cleaning, use a slightly damp cloth with mild soap and water, taking care not to scrub too hard. Heavily textured walls may benefit from sealing with a clear, washable topcoat for easier cleaning.
Will Homemade Textured Paint Crack Over Time?
Properly made and applied DIY textured paint should not crack under normal conditions. To prevent cracking, avoid applying too thickly in a single coat, ensure proper surface preparation, allow full drying between layers, and consider using a primer specially formulated for textured finishes.
How Do I Remove Textured Paint if I Don’t Like It?
Removing textured paint typically requires either sanding (for light textures) or applying a skim coat of joint compound to fill in the texture (for heavier textures). For furniture or smaller items, chemical paint strippers formulated for your specific surface may work. Always test in an inconspicuous area first.