
Are you looking for a simple way to update your kitchen or bathroom? Adding trim to your cabinet doors is an easy and affordable DIY upgrade that can make a huge difference.
In this guide, I’ll walk you through each step of the process, from measuring and cutting to attaching the trim and finishing touches.
No matter your experience level, you’ll find everything you need to approach this project clearly and easily.
You can trust that this step-by-step guide will give you the clear instructions you need to get the job done right. No more confusion or second-guessing! Ready to changeyour space? Look into this to know more.
Why Add Trim toCabinet Doors?
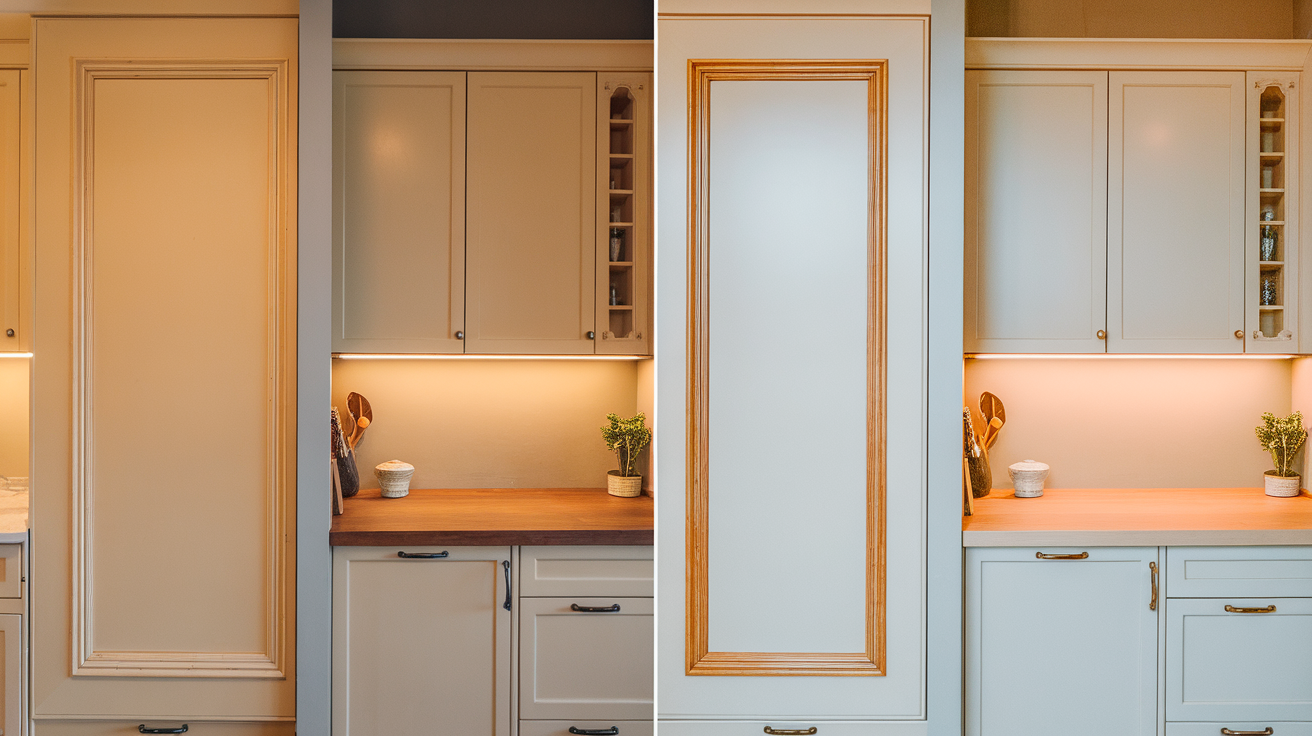
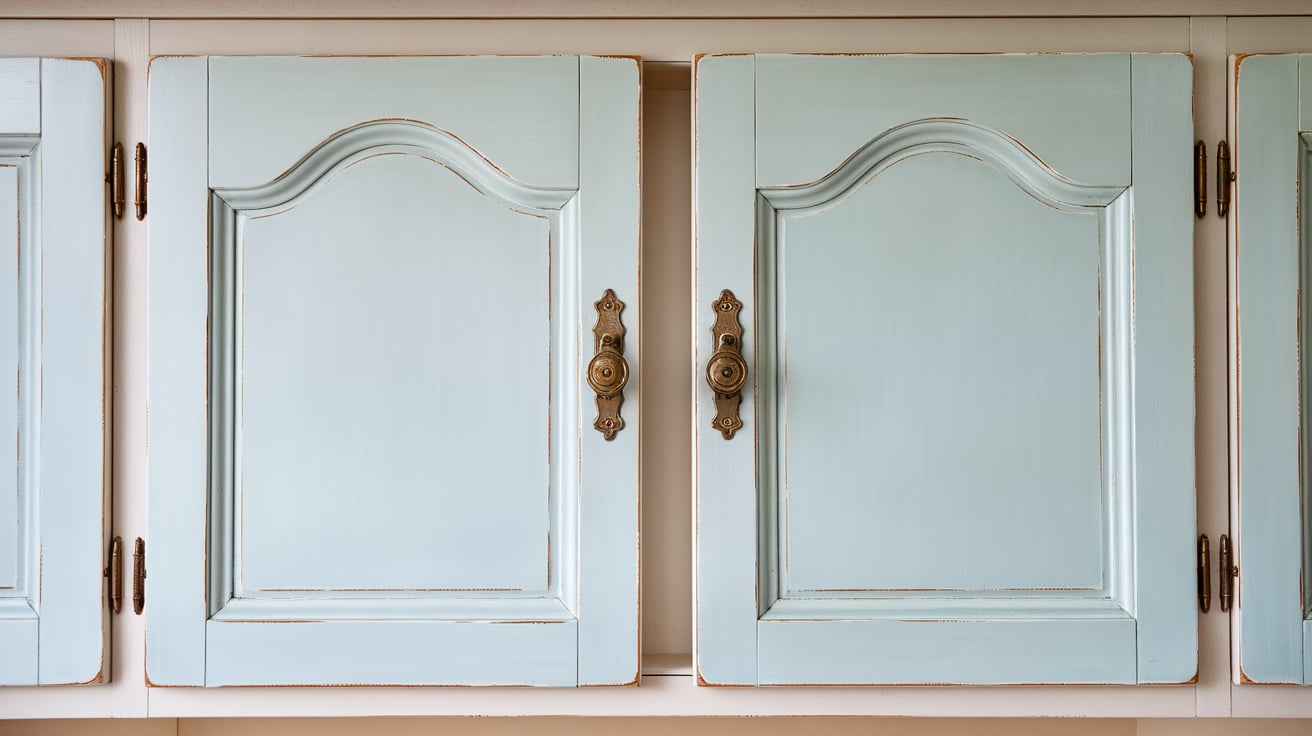
Adding trim to your cabinet doors can completely change their appearance. It adds depth and character, especially to flat-panel doors. What was once plain now has a touch of style.
It’s not just about looks. Adding trim is a lot cheaperthan replacing your cabinets. You get the same upgraded feel, without the high cost.
And here’s the best part: this simple change can boost your home’s value. Buyers love small touches that make a space feel more polished.
Even if you’re not selling, the value is there for your enjoyment. So, trim doesn’t just look good – it’s smart, simple, and affordable.
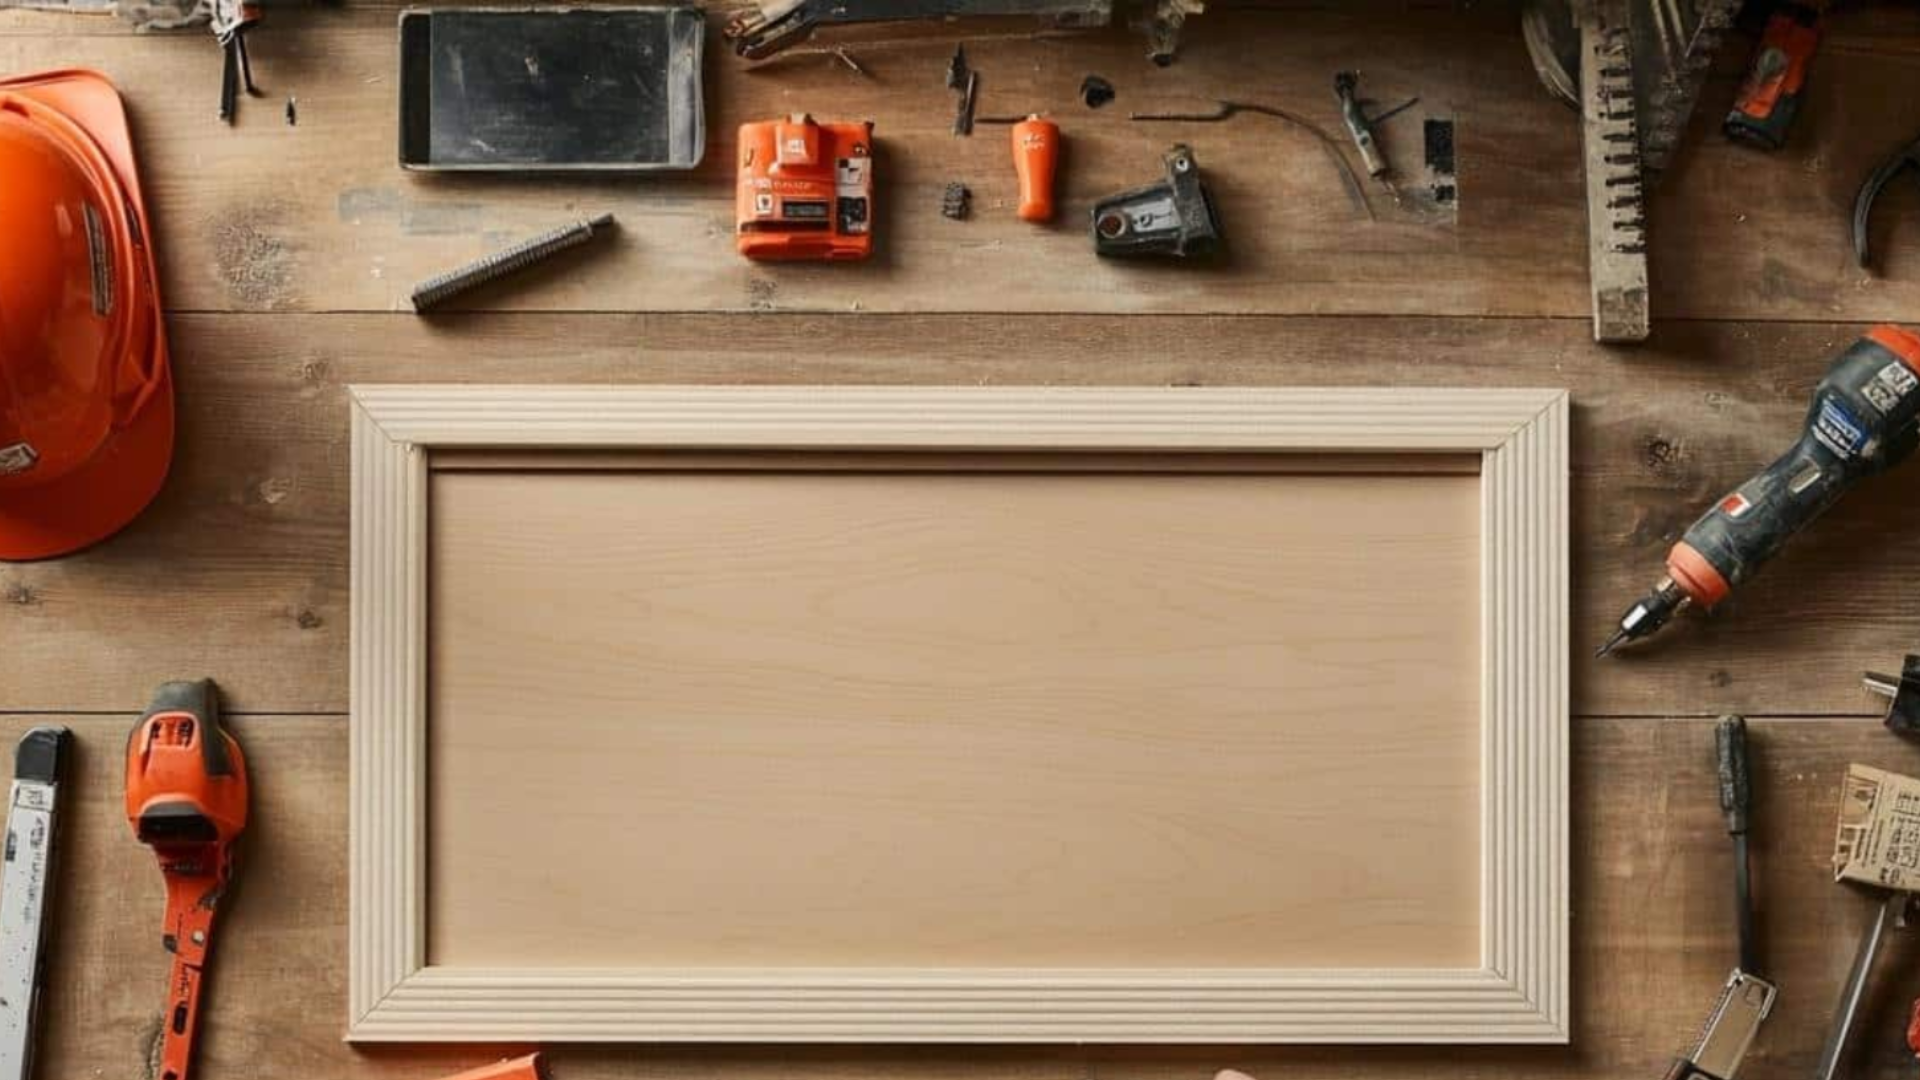
Tools andMaterials You’ll Need
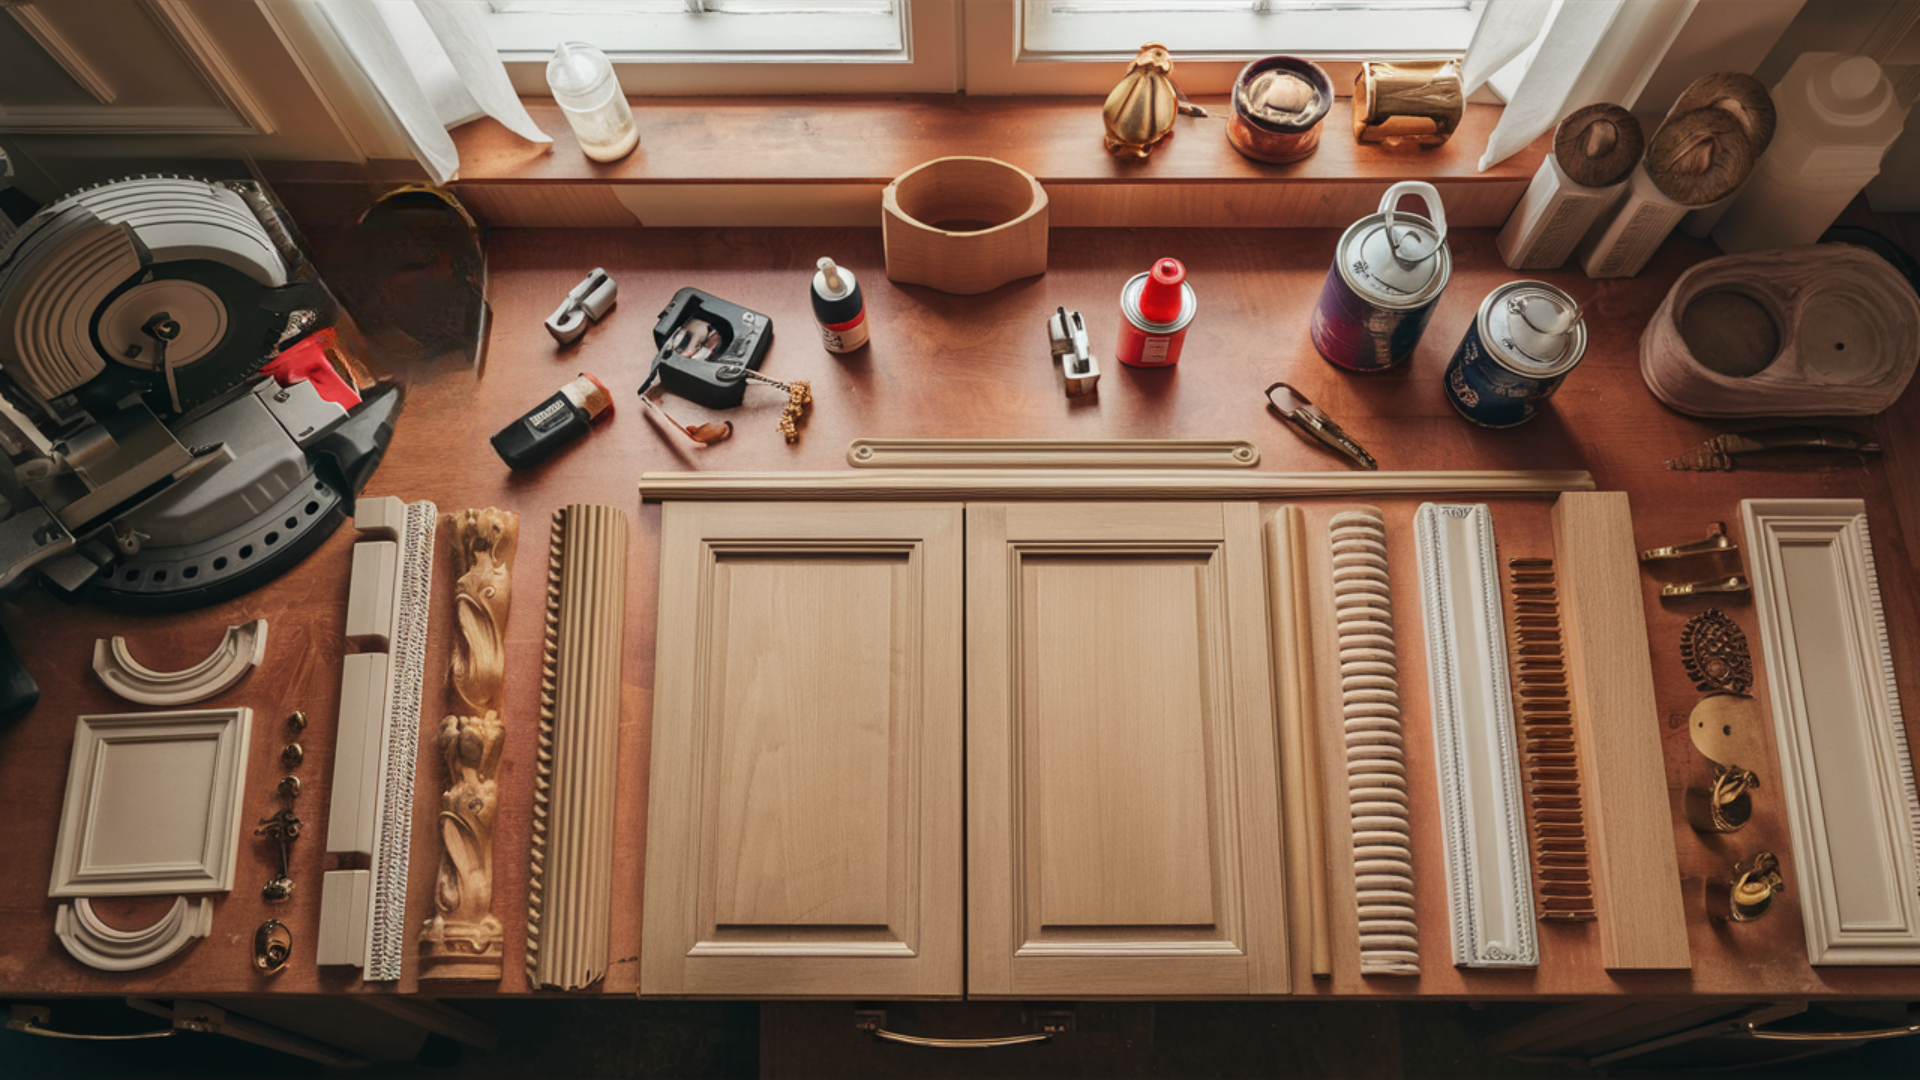
Before you start, make sure you have everything on hand. Here’s what you’ll need:
- Miter saw or miter box: To make clean cuts for the trim.
- Measuring tape: Accurate measurements are key.
- Wood glue: To secure the trim in place.
- Pin nailer or hammer and finishing nails: For attaching the trim.
- Sandpaper or sanding block: To smooth any rough spots.
- Paint or stain: For a polished finish.
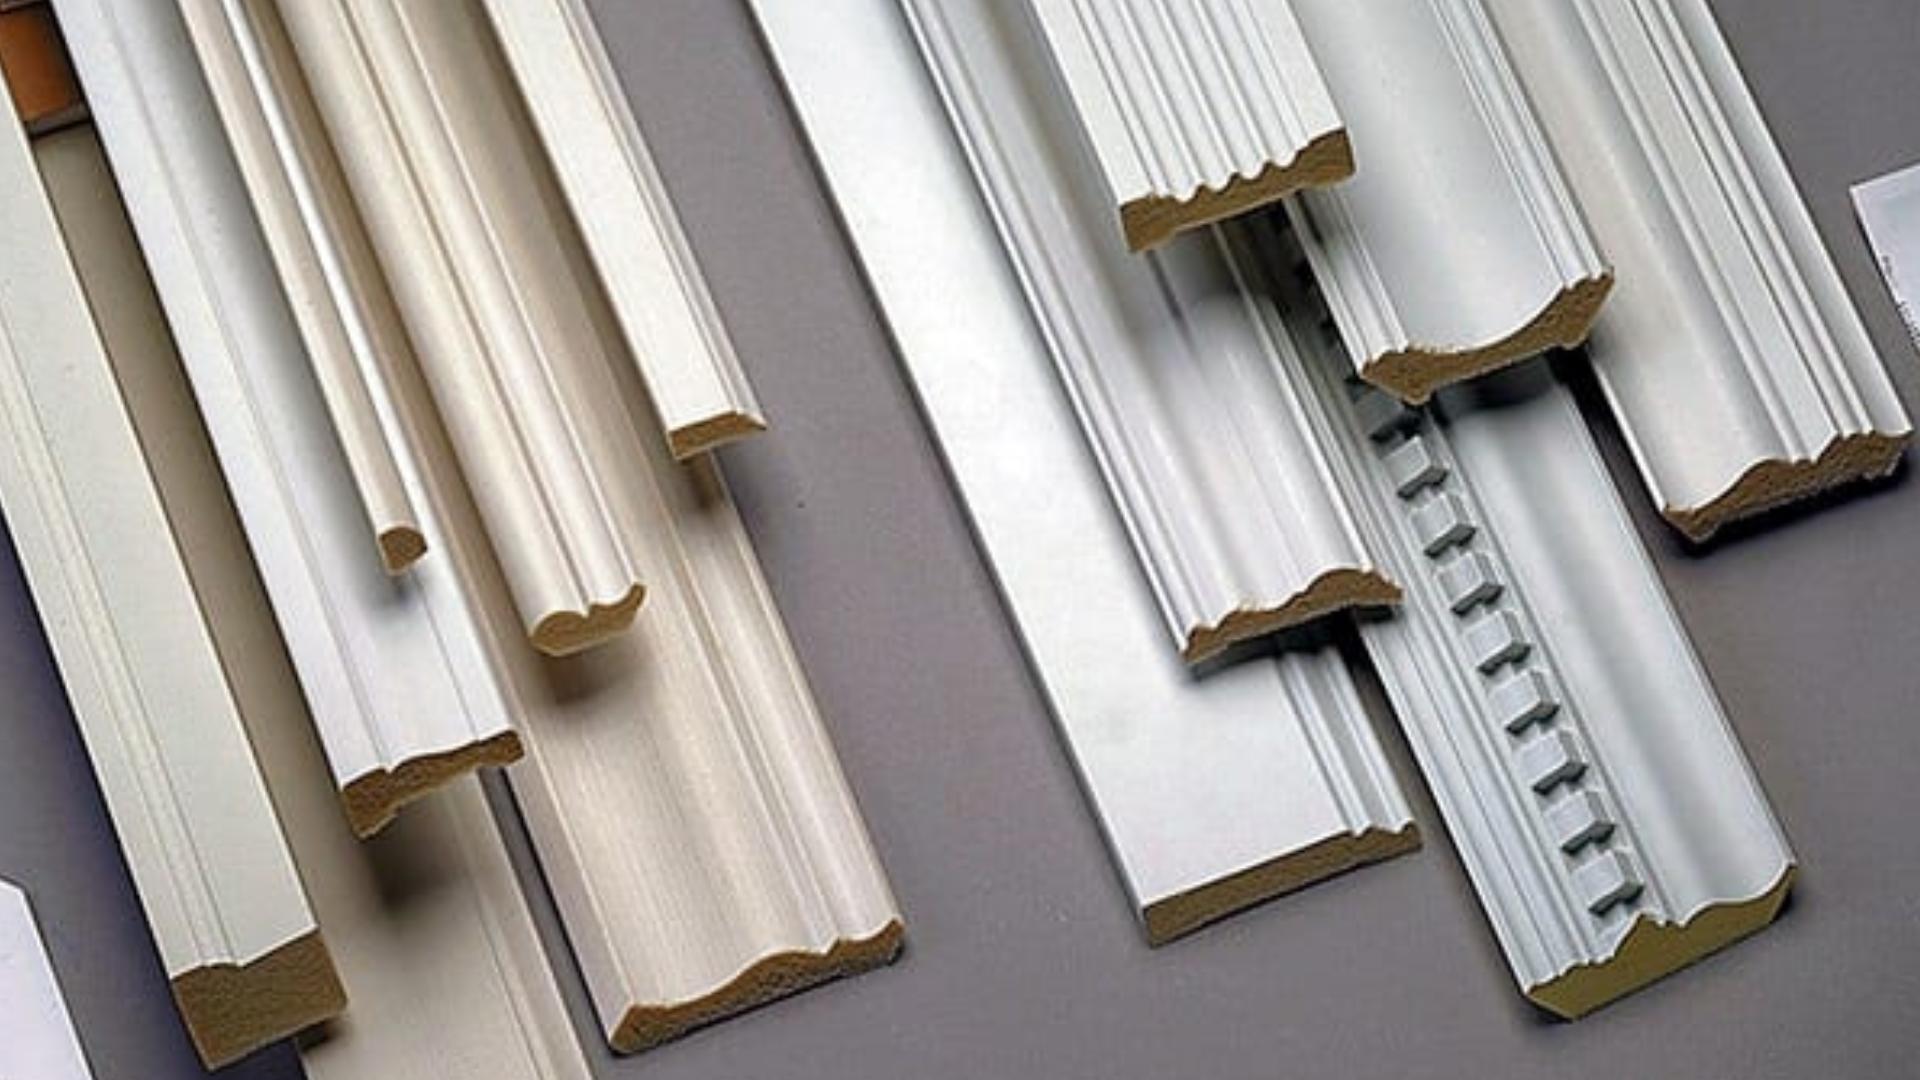
- Trim molding: Choose your style, shaker, colonial, or something else, and pick what fits your space.
- Wood filler: To fill any gaps or holes.
- Primer and paint or wood finish: For that final touch.
- Decorative corner appliqués: Add extra detail if you want.
- Cabinet hardware: Handles or knobs can complete the look.
With these tools and materials, you’ll be all set to add trim and upgrade your cabinet doors!
Step-By-Step Process of Installing Trim on Cabinet Doors
Let’s get started. This process is simple, and I’ll guide you through each step.
Step 1: Measure and Plan
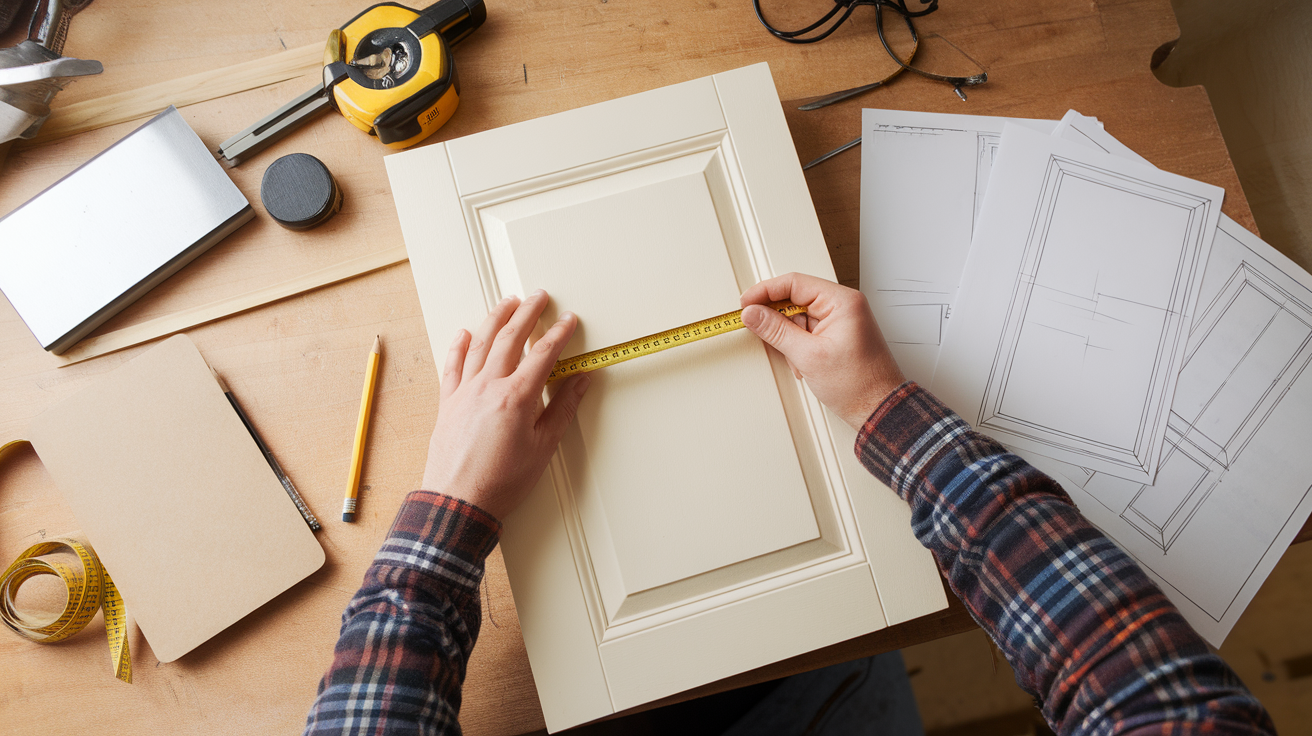
Start by measuringyour cabinet doors. Measure both the height and width carefully to ensure accuracy. Next, decide on your trim layout.
Do you want a single frame, double frame, or inset panel? This will set the style for your doors and help you visualize the final result.
Step 2: Cut the Trim Pieces
Now it’s time to cut. Use a miter sawto cut the trim pieces at 45-degree angles. This will give you clean corners that look professional.
Before gluing, dry-fitthe trim pieces together. Lay them out on the cabinet to check the fit. Adjust if necessary to ensure a perfect match before proceeding with the glue.
Step 3: Attach the Trim
Apply wood glueto the edges of the trim pieces. This will hold them securely in place while the nails are driven in.
Then, use a pin naileror hammer and finishing nails to attach the trim. Make sure everything is secure and check for any misalignment as you go.
Check the alignment. Ensure the edges are flush and the corners are square. Once everything is attached, this will ensure a clean and professional look.
Step 4: Finish the Surface
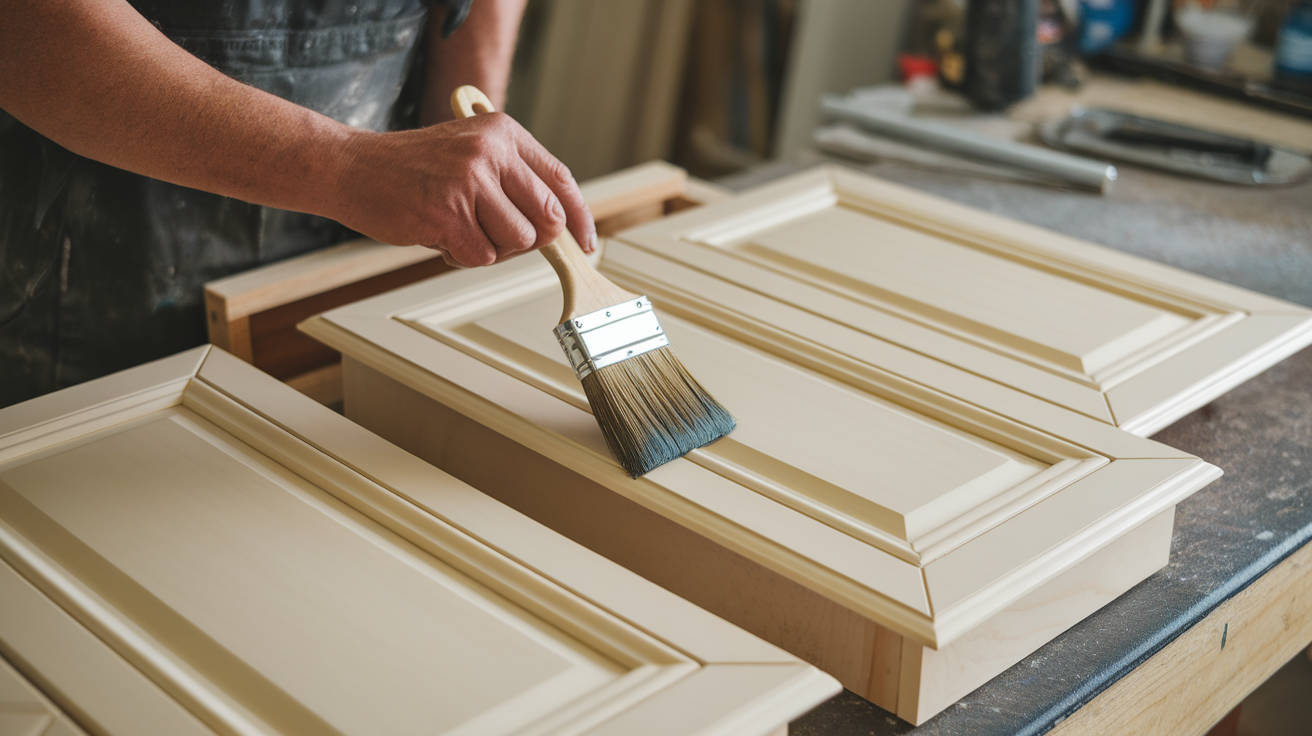
Once the trim is attached, use wood fillerto fill any gaps or nail holes. This step will ensure a smooth, flawless finish.
Let it dry, then sandthe surface until smooth. This will help remove any imperfections and create a seamless surface for painting.
After sanding, apply a primer, then your choice of paintor stain. This gives the trim a finished, professional look and protects it for long-lasting results.
Step 5: Optional Decorative Touches
Want to add some extra flair? You can add decorative corner appliquésfor a unique touch that elevates the design.
Finally, consider installing new hardware. A fresh handle or knob will complete the look of your updated cabinet doors, giving them a more modern feel.
With these steps, your cabinet doors will be changedand look brand new!
Benefits of Adding Trim to Cabinet Doors
Adding trim to your cabinet doors has manybenefits. It’s more than just a cosmetic change.
- Increased Visual Appeal: The trim adds depth and makes the doors look more elegant. It’s a simple way to make your cabinets stand out.
- Cost-Effective Upgrade: Instead of replacing your cabinets, adding trim is an affordable solution. It’s a low-cost way to give your kitchen or bathroom a fresh look.
- Customizable Style: You can choose different trim styles to match your home’s design. Whether you prefer modern, rustic, or classic, there’s a trim style for every taste.
- Improved Home Value: Small upgrades like this can add value to your home. Buyers often appreciate the little details that make a house feel more finished.
In just a few steps, trim can completely change the lookof your space without breaking the bank. It’s an easy way to upgrade without the hassle.
The Best Paints and Stains for Trim
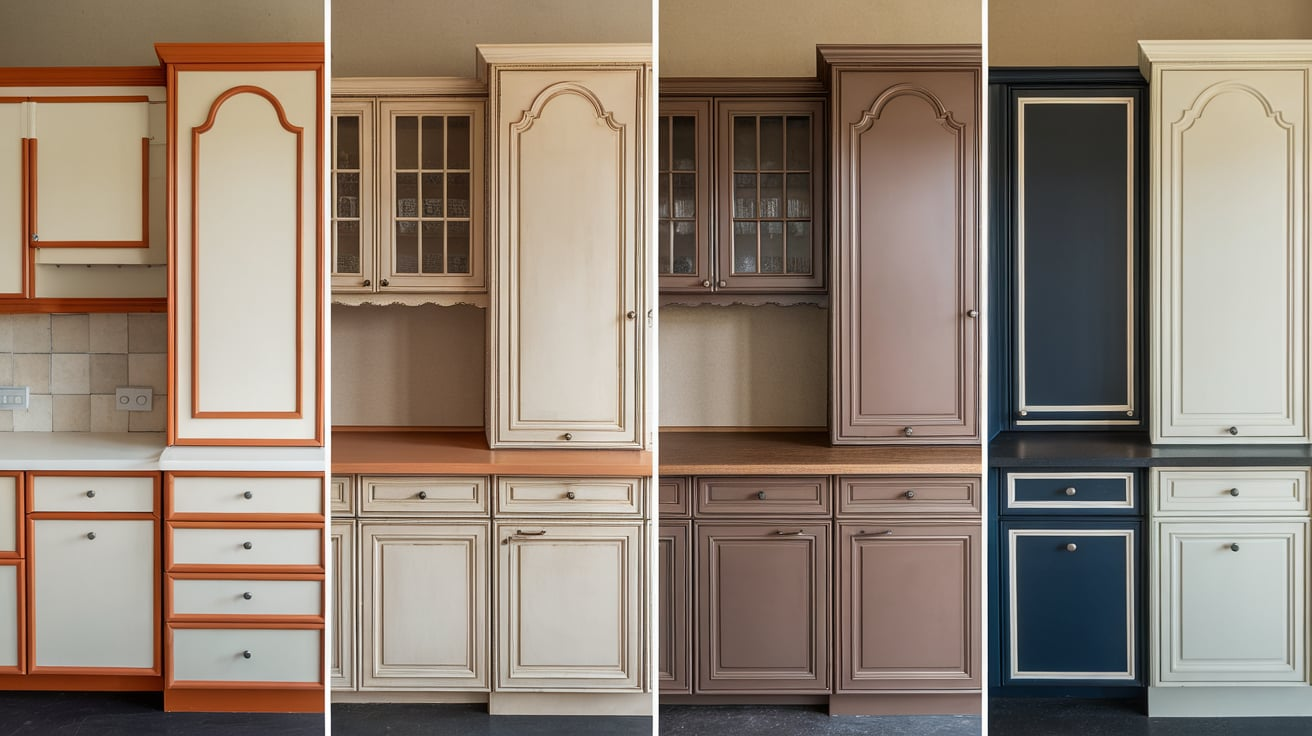
Choosing the right paint or stainfor your trim is important. It affects both the look and durability.
Paint: For a smooth, clean finish, I always choose latex paint. It’s easy to apply and dries quickly. For trim, choose a satin or semi-gloss finish. These finishes are durable and easy to clean.
Stain: To highlightnatural wood, use wood stain. It gives a rich, deep color. Look for a stain with a protective finish included, so you don’t need a separate topcoat.
Primer: Always apply a primer before you paint. This helps the paint stick better and ensures even coverage. It also blocks stains and prevents wood from soaking up too much paint.
Clear Finish: To keep the wood’s natural look, apply a clear finish. This will protect the trim and give it a nice shine.
Pick the option that fits your style. Both paint and stain can make your trim look great, but the right choice depends on the effect you want.
Common Mistakes to Avoid When Adding Trim
Adding trim to cabinet doors can be a rewarding project. But there are a few mistakes to avoid.
- Not Measuring Carefully: Always double-checkyour measurements before cutting. Even a small mistake can throw off the entire project.
- Forgetting to Dry Fit: Before you glue or nail anything, make sure the trim fits. Dry-fitthe pieces first. This step can save you a lot of trouble.
- Using the Wrong Tools: Using the wrong saw or glue can make your work messy. Make sure you have the right toolsfor the job.
- Not Sanding Enough: Sanding might seem like an extra step, but it’s important. It helps the trim look smooth and neat. Don’t skip this part.
- Rushing the Finishing: Applying paint or stain is the last step, but it’s also the most important. Take your timeand apply it carefully for a professional finish.
By avoiding these mistakes, you can make sure your trim looks great and lasts for years.
How to Maintain Trim for Long-Lasting Results
Once you’ve added trim to your cabinet doors, it’s important to keep it looking good.
- Clean Regularly: Dust can build up quickly. Wipe the trim with a soft cloth regularly to keep it clean. For tougher dirt, use a mild soap and water mixture.
- Check for Damage: Over time, trim can get scratched or dented. Inspect it occasionallyfor any damage. If you notice any, it’s easier to fix small issues before they get worse.
- Touch Up Paint or Stain: If the trim starts to look worn, don’t worry. Touching up the paint or staincan bring it back to life. Just make sure to use the same color and finish.
- Avoid Harsh Chemicals: When cleaning, avoid harsh chemicals or abrasive cleaners. These can damage the trim’s finish.
- Re-seal the Trim: If you used wood trim, consider re-sealing it every few years. This will help protect it from moisture and keep it looking fresh.
By keeping your trim clean and well-maintained, you can ensure that it will continue to look beautiful for years to come. It’s an easy way to ensure that your hard work lasts.
Conclusion
Adding trim to your cabinet doors is an easy and affordable way to enhance your space. It adds depth, character, and style to what would otherwise be plain doors.
Plus, it’s a simple DIY project that requires no cabinet replacement, making it both cost-effective and rewarding.
If you’ve been thinking about upgrading your cabinets, this is the perfect time to start. It’s a small change that can havea big impacton your home’s look.
I encourage you to try it out! Personalizing your space with trim can be a fun and satisfying project. Feel free to share your results or ask any questions you have in the comments below. I’d love to hear how it went!
Frequently Asked Questions
Can I Add Trim to Any Cabinet Door?
Yes, trim can be added to almost any cabinet door style, whether flat-panel, shaker, or raised-panel. Just make sure it fits the style you want.
How Long Does It Take to Add Trim to Cabinet Doors?
Measure, cut, and attach the trim, which usually takes a few hours. Allow extra time for drying and finishing. It’s a quick DIY project.
Do I Need to Remove the Cabinet Doors to Add Trim?
It’s not necessary, but it can make the process easier. Removing the doors allows for cleaner cuts and more control during installation.