
Tired of tripping over clutter in your bedroom? A storage bed might be exactly what you need, and yes—you can build one yourself!
In this guide, I’ll walk you through creating a beautiful, functional storage bed that doesn’t cost a fortune. You’ll learn everything from selecting materials to the final assembly steps, with clear instructions anyone can follow.
I’ve spent 12 years building custom furniture for small spaces and refining these techniques through dozens of projects. The design I’m sharing today combines simplicity with practicality—perfect for beginners and experienced woodworkers alike.
Whether you’re dealing with a tiny apartment or just want to organize your bedroom better, this DIY storage bed will give you a place to hide seasonal clothes, extra bedding, or whatever else is crowding your space.
What Is a Storage Bed?
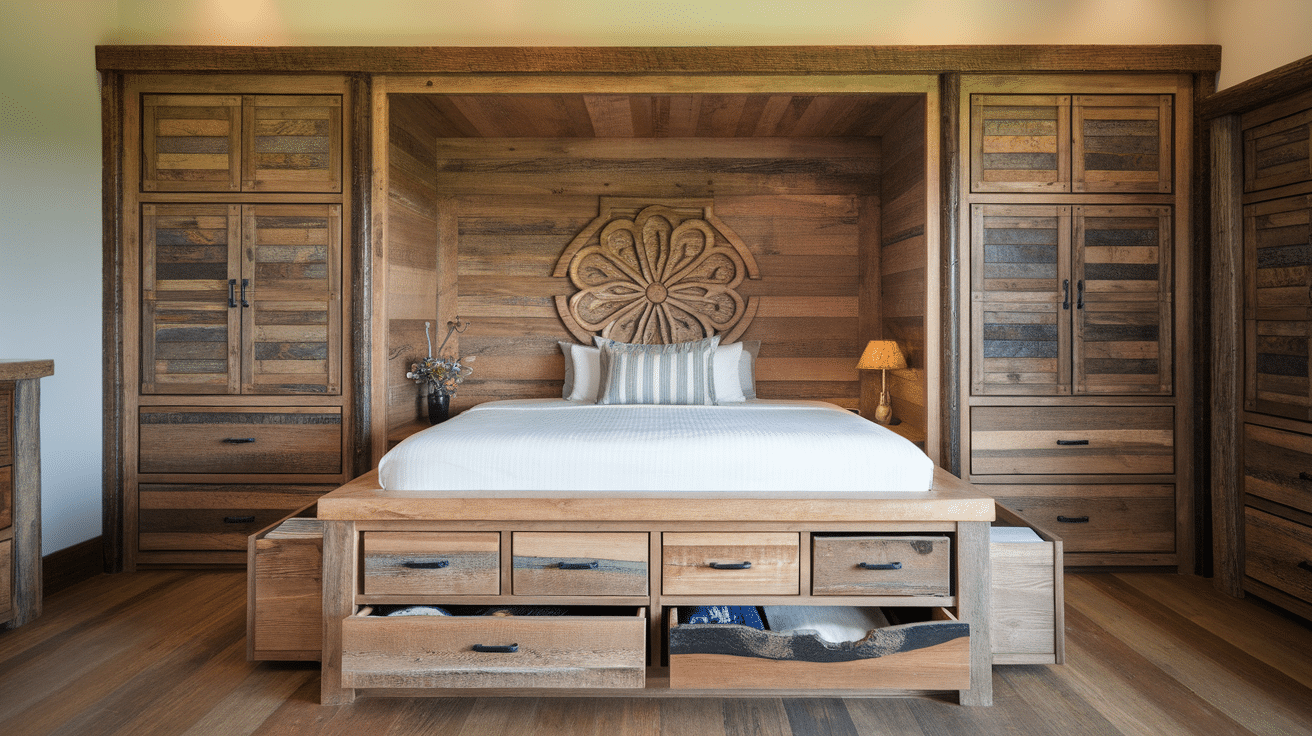
A storage bed is a game-changer for any bedroom. It’s a bed frame that includes built-in storage space underneath the mattress.
Think of it as a dresser and bed combined into one smart piece of furniture. Unlike regular beds that waste all that space underneath, storage beds put it to good use.
I’ve helped dozens of friends build these, and the reaction is always the same: “Why didn’t I do this sooner?”
There are a few different storage bed styles you might consider:
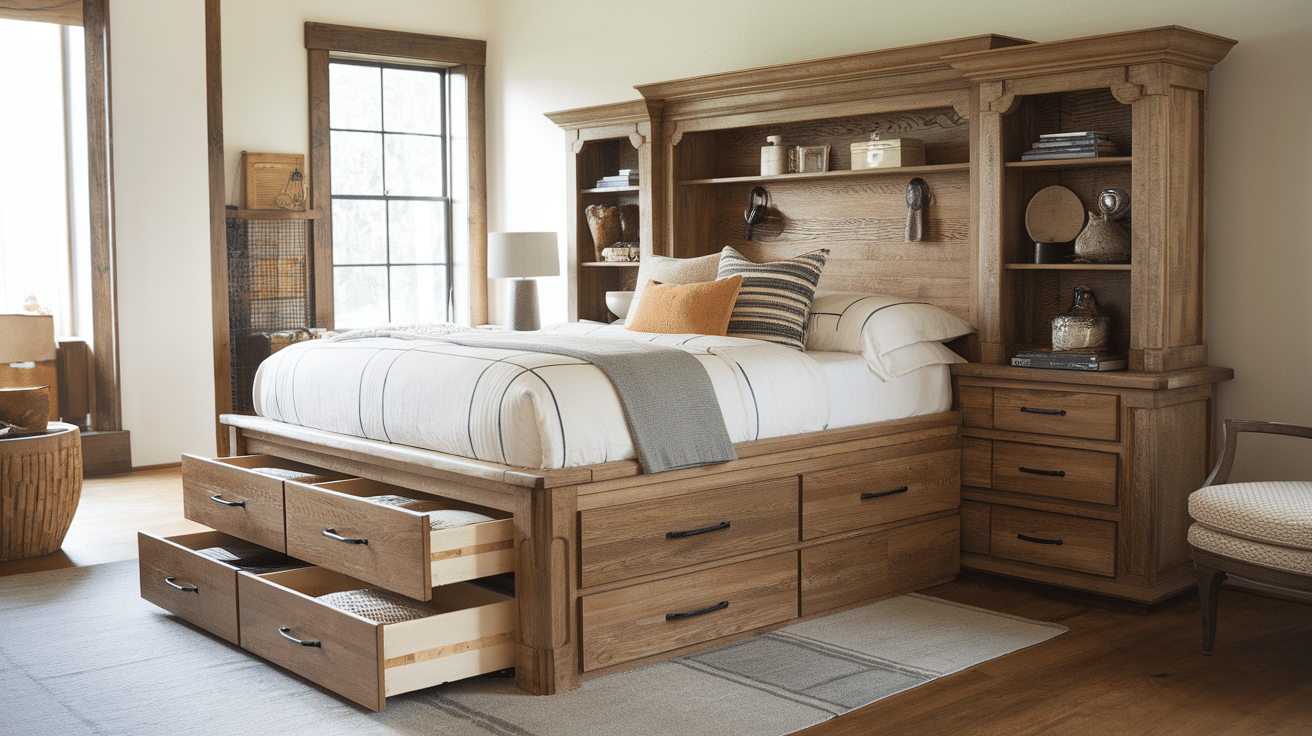
- Platform with drawers: Drawers pull out from the sides of the bed
- Lift-top design: The entire mattress lifts on gas struts to reveal storage underneath
- Bookcase headboard: Combines shelving with your bed for even more storage
- Captain’s bed: Features drawers and sometimes cabinets all around the base
The magic of storage beds is how they hide clutter while keeping items accessible. Your extra blankets, off-season clothes, shoes, and books all have a home that doesn’t take up additional floor space.
You don’t need to be an expert woodworker to build one. With some basic tools and the right plan, you can create a custom storage solution that perfectly fits your needs and space.
Things to Keep in Mind Before Building
Before we look into your storage bed project, take time to plan for the best results.
The key factors to consider:
1. Room Size
- Measure your entire bedroom, not just where the bed sits now
- Allow at least 2-3 feet of walking space around the bed
- Consider door swing and furniture placement
- Remember that drawers need space to extend fully
2. Bed Size
- Standard mattress dimensions vary (Twin: 38″×75″, Full: 54″×75″, Queen: 60″×80″, King: 76″×80″)
- Add 2-3 inches to your frame dimensions beyond the mattress size
- Consider your height when determining bed height—higher beds mean more storage but can be harder to climb into
3. What You Store
- Heavy items need stronger support structures
- Frequently used items should go in easily accessible drawers
- Consider the size of items you’ll store when planning compartments
- Some items need ventilation (like seasonal clothing)
4. Tools Needed
- Basic: Measuring tape, drill, saw, level, screwdriver
- Helpful additions: Kreg jig, clamps, router
- Consider borrowing or renting specialty tools you don’t own
5. Skill Level
- Be honest about your woodworking experience
- Simple platform designs are best for beginners
- Complex drawer systems require more precise measurements
- Start with a simpler design if this is your first major project
I always tell my friends that it’s better to spend extra time planning than to rush into building and regret your decisions later.
Choose the Type of Storage You Want
The type of storage you select will define your entire project. Each option has different benefits and challenges.
1. Drawers
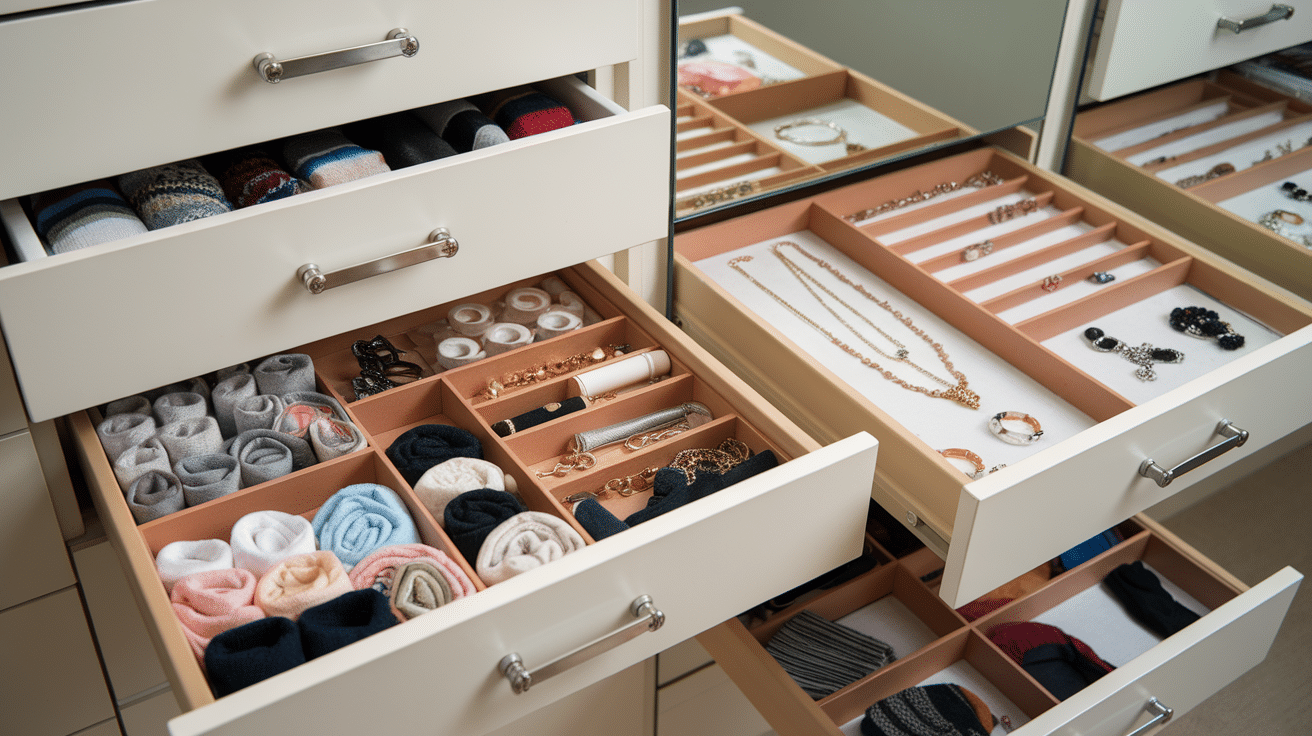
- The most popular and versatile option
- Keeps items dust-free and hidden
- Allows access without moving the mattress
- Requires more woodworking skills and hardware
- Works best for smaller items like clothing or books
I’ve found drawers to be worth the extra effort for everyday items you access frequently.
2. Lift-Up Lid

- Provides the largest single storage space
- Perfect for bulky items like extra bedding or seasonal clothing
- It uses hydraulic pistons to make lifting easy
- Requires moving bedding to access storage
- It is simpler to build than drawer systems
The lift-up design gives you amazing storage volume with relatively simple construction.
3. Open Shelves
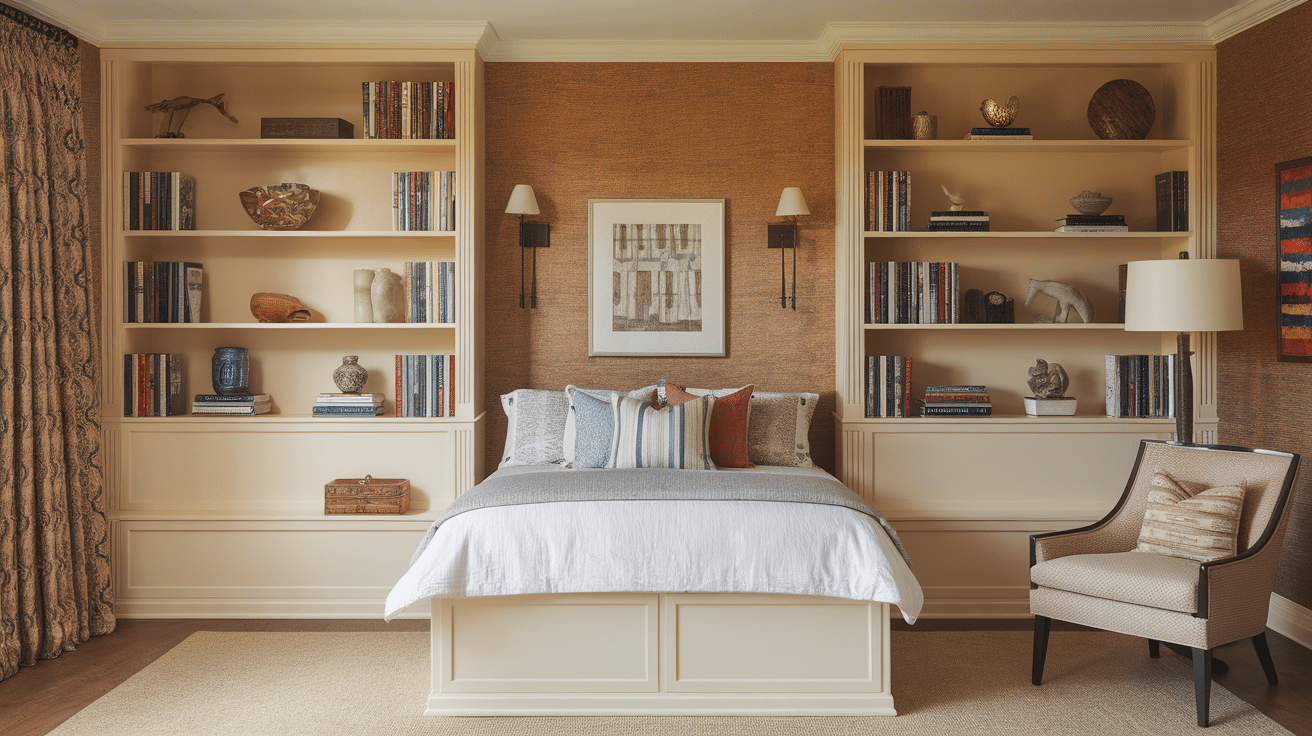
- The easiest option for beginners
- Creates instant access to all items
- Works well for displaying items you want visible
- Offers no protection from dust
- It can look cluttered if not organized well
Open shelves work great if you use decorative baskets or if you’re on a tight budget.
4. Storage Crates
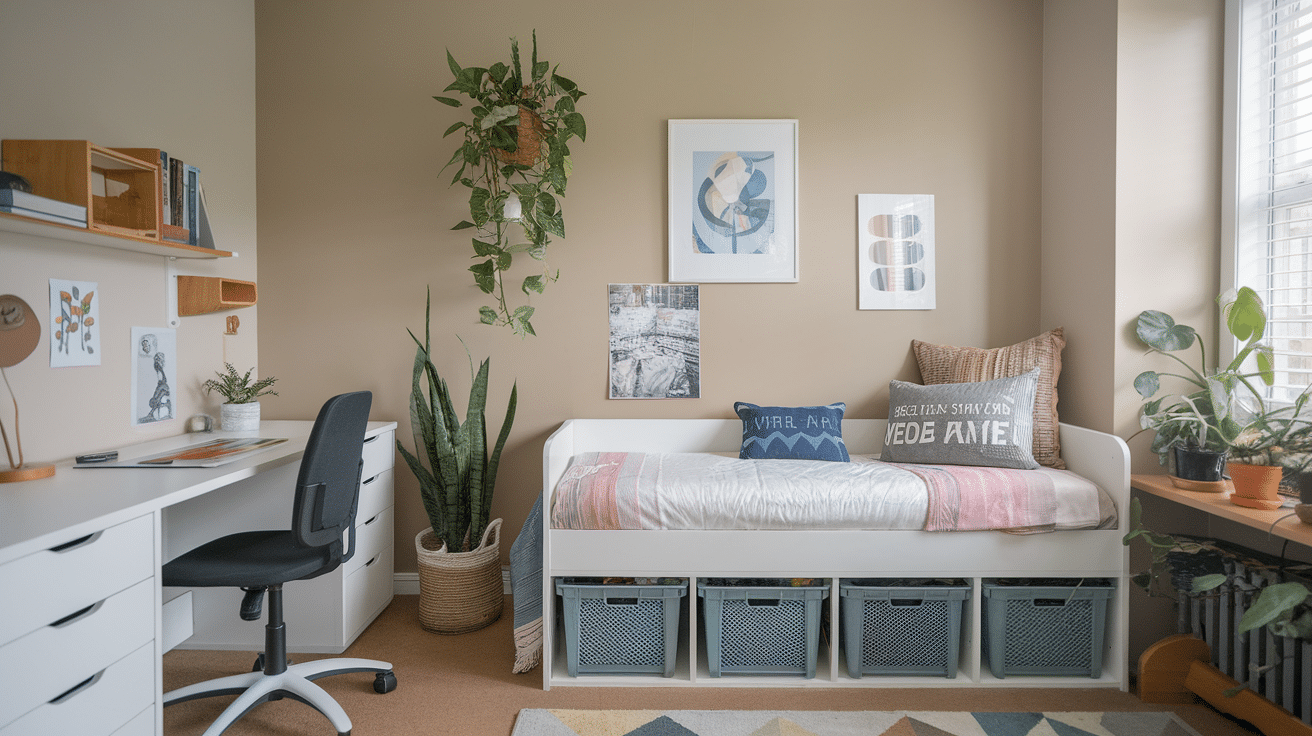
- The middle ground between open shelves and drawers
- Slide-out crates can be removed completely
- Good for categorizing different types of items
- Less precise woodworking is required
- It can be made from inexpensive materials like plywood
This is my go-to recommendation for most first-time builders.
5. Custom Ideas
- Combination of different storage types
- Hidden compartments for valuables
- Fold-out desk or table extension
- Integrated pet bed or storage
- Pull-out nightstand surfaces
Your storage bed can be as unique as your needs. Before deciding, consider how you’ll use the space daily.
Types of Wood to Use
Choosing the right wood is crucial for a sturdy, long-lasting storage bed. Each material has distinct advantages depending on your budget, tools, and experience level.
1. Plywood
- The most popular choice for DIY storage beds
- Strong and resistant to warping
- Available in various thicknesses (¾” recommended for bed frames)
- It comes in different grades (cabinet grade offers the best finish)
- More affordable than solid wood
- Easy to cut with basic tools
I use plywood for most of my projects because it offers the best balance of strength and value.
2. MDF (medium-density Fiberboard)
- Very smooth surface that takes paint beautifully
- There is no grain pattern to work around
- Less expensive than plywood
- Heavier than other options
- Can sag under weight if not properly supported
- Doesn’t hold screws as well as plywood
- Swells if exposed to moisture
MDF works well for painted projects, especially decorative headboards or non-load-bearing parts.
3. Solid Wood
- Most attractive natural finish
- Extremely durable and long-lasting
- Can be repaired and refinished easily
- Significantly more expensive
- May expand and contract with humidity
- Requires more woodworking skill
- Heavier and harder to work with
Pine is the most affordable solid wood option, while oak or maple provide greater durability.
4. Engineered Lumber (like OSB)
- Very economical choice
- Surprisingly strong for structural components
- Not attractive enough for visible areas
- Works well for internal supports or under-bed platforms
- Requires covering with veneer or paint
I sometimes use OSB for the base platform that won’t be seen, saving money for nicer materials elsewhere.
Choose materials that match your skill level and the look you want for your finished bed. For beginners, I recommend starting with good-quality plywood for most components.
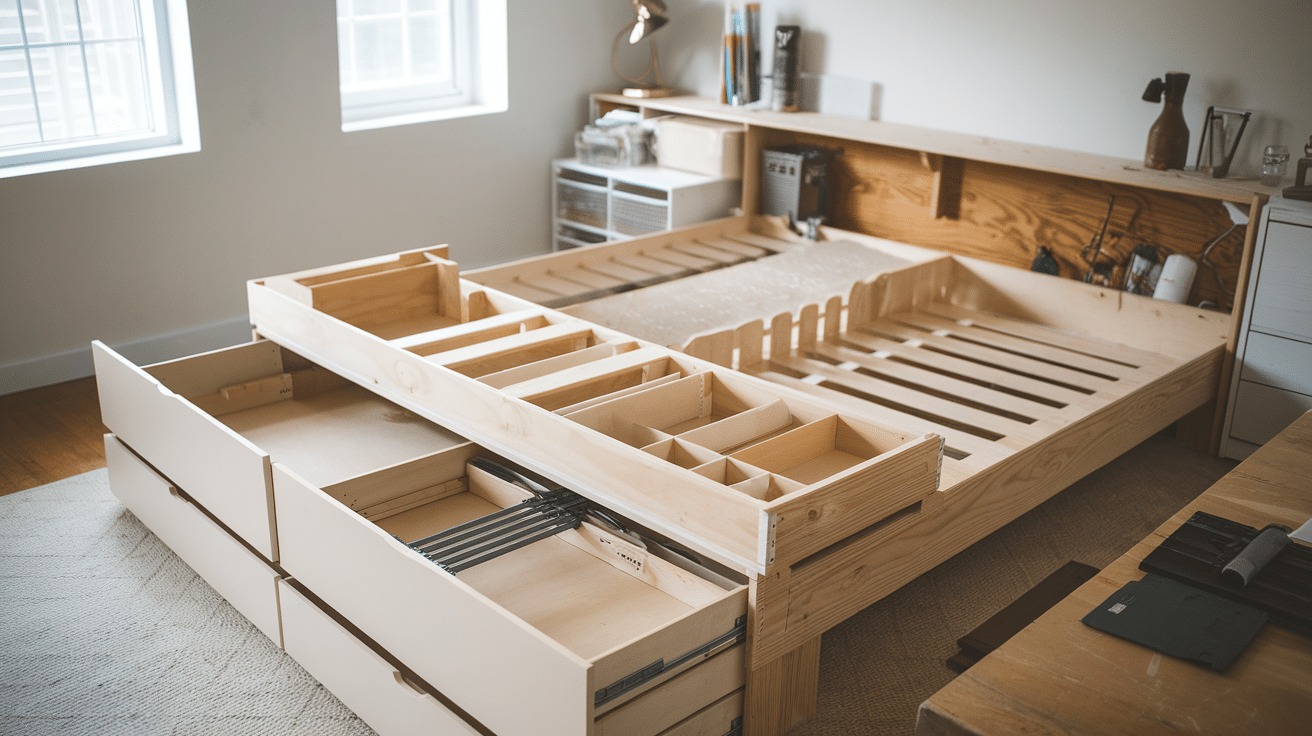
Basic Anatomy of A Storage Bed Frame
Understanding the key components will help you plan and build with confidence. The essential parts that make up a storage bed are:
1. Base
- The foundation that sits directly on the floor
- Typically, a rectangular frame made from 2×4s or 2×6s
- Distributes weight evenly across the floor
- It should be perfectly level for proper support
- Often includes a center support beam for larger beds
Think of the base as the sturdy foundation that everything else builds upon.
2. Supports
- Vertical posts or panels that connect the base to the top platform
- Create the framework for storage spaces
- Provide critical structural strength
- Usually spaced 12-24 inches apart
- It may include cross-bracing for extra stability
I always add extra support in the center where body weight tends to concentrate.
3. Storage Areas
- The functional spaces between supports
- They can be configured as drawers, open compartments, or a single cavity
- The size determines what can be stored inside
- May include drawer slides, dividers, or shelves
- Should have some ventilation to prevent mustiness
Design these areas based on what you specifically plan to store.
4. Top Platform
- The surface that supports your mattress
- Usually made from ¾-inch plywood for strength
- May include slats instead of solid surfaces for ventilation
- It must be strong enough to support sleepers, plus a mattress
- Sometimes consists of a slight lip to prevent the mattress from sliding
Your mattress needs support to avoid sagging and to maintain comfort.
These four elements work together to create a functional, attractive storage bed. Getting each part right ensures your bed will be both comfortable and useful for years to come.
Choosing the Right Bed Frame Size
Selecting the correct size is crucial for both comfort and room functionality. Your storage bed should properly fit your body and your bedroom.
1. Standard Mattress Dimensions
- Twin: 38″ × 75″ – Perfect for kids or single adults in small spaces
- Full/Double: 54″ × 75″ – Works for single adults who want more space
- Queen: 60″ × 80″ – Most popular size for couples or singles who like extra room
- King: 76″ × 80″ – Maximum space for couples, ideal for larger bedrooms
- California King: 72″ × 84″ – Narrower but longer for tall people
Remember that your frame needs to be slightly larger than these dimensions to fit the mattress.
2. Frame Sizing Tips
- Add 2-3 inches to the mattress width and length for your outer frame dimensions.
- For drawer storage, add 2-4 extra inches of height to accommodate drawer boxes.
- Standard bed height is 18-25 inches from floor to top of mattress
- Leave at least 24 inches of walkway space around three sides of the bed
I always recommend measuring your room with tape on the floor before building. This helps visualize how much space the bed will actually take.
3. Room Size Considerations
- Twin or Full: Works in rooms as small as 8×10 feet
- Queen: Needs at least a 10×10 foot room for comfortable movement
- King: Requires a minimum 12×12 foot room to avoid feeling cramped
- Corner placement can save space but limits access to storage on two sides
Your storage access needs should influence placement—drawers need clear space to open fully.
4. Think About Your Future
- Consider how long you’ll use this bed—building for a growing child.
- Will you move soon? Larger beds are harder to transport
- Planning for guests? Consider versatility needs
The right size balances your sleeping comfort, storage needs, and room proportions.
Tools and Materials You’ll Need
Building a storage bed requires specific tools and materials to ensure a strong, stable result. Here’s what you’ll need before starting your project:
1. Essential Tools
- Measuring tape (at least 25 feet long)
- Speed square or framing square
- Level (2-foot length is ideal)
- Power drill with various drill bits
- Circular saw, or miter saw for straight cuts
- Screwdriver set (both Phillips and flathead)
- Sander or sandpaper in various grits
- Pencil for marking cuts
- Clamps (at least 4 medium-sized ones)
Don’t worry if you don’t own everything—many tools can be borrowed or rented for a weekend project.
2. Basic Materials
- Plywood sheets (¾-inch thickness recommended)
- 2×4 lumber for frame and supports
- 1×3 or 1×4 boards for facing and trim
- Wood screws (various lengths: 1¼”, 2″, 2½”)
- Wood glue
- Corner brackets for reinforcement
- Drawer slides (if building drawers)
- Drawer pulls or handles
- Wood putty for filling holes
- Primer and paint or wood stain
I always buy about 10% extra materials to account for mistakes or design changes.
3. Optional Items
- Kreg jig for pocket holes (makes joinery much easier)
- Hydraulic lift mechanisms (for lift-top beds)
- Felt pads for drawer bottoms
- Decorative hardware for a custom look
- Veneer edge banding to cover plywood edges
- Drawer liner material
Having everything ready before you start will save you multiple trips to the hardware store and keep your momentum going throughout the project.
How to Build It (Step-by-Step)
Building a storage bed takes time but is totally manageable when broken into smaller tasks. Here’s how to tackle it from start to finish:
Step 1: Prepare Your Workspace
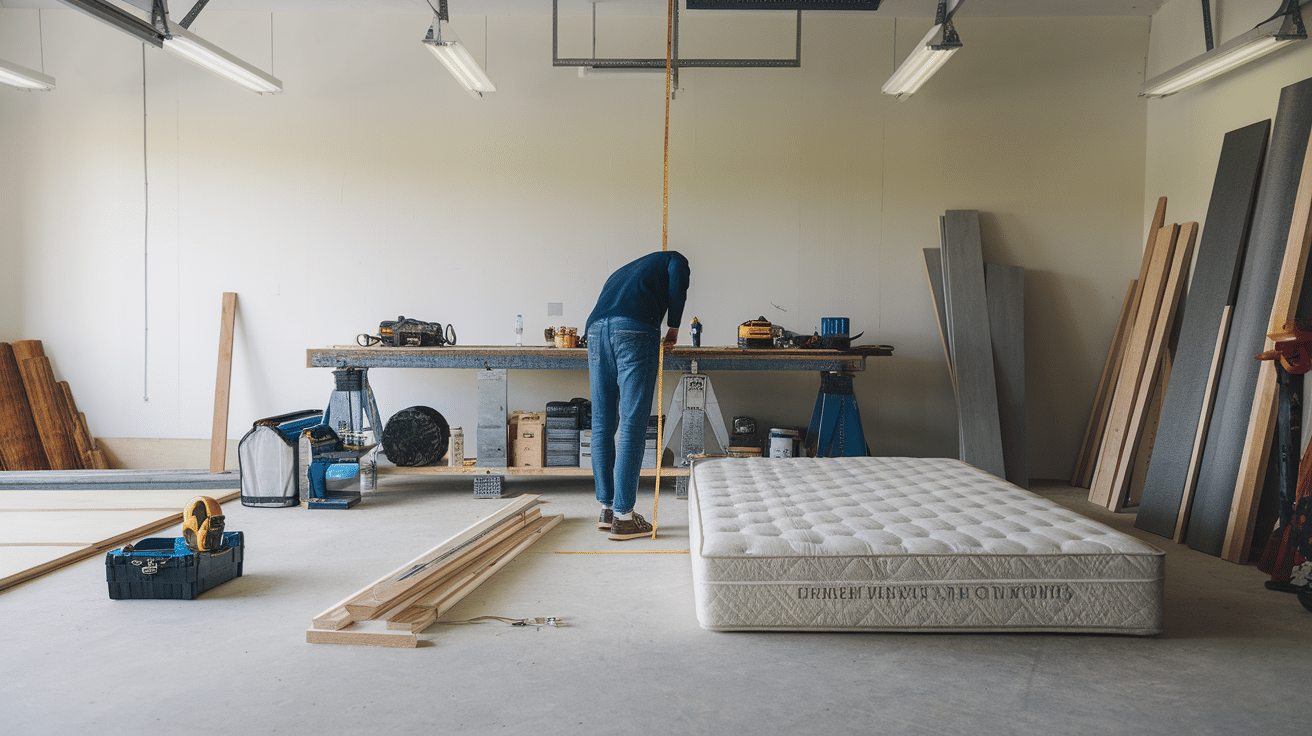
- Clear a large, flat area for building
- Ensure you have good lighting
- Lay out all your tools and materials
- Double-check your measurements against your mattress
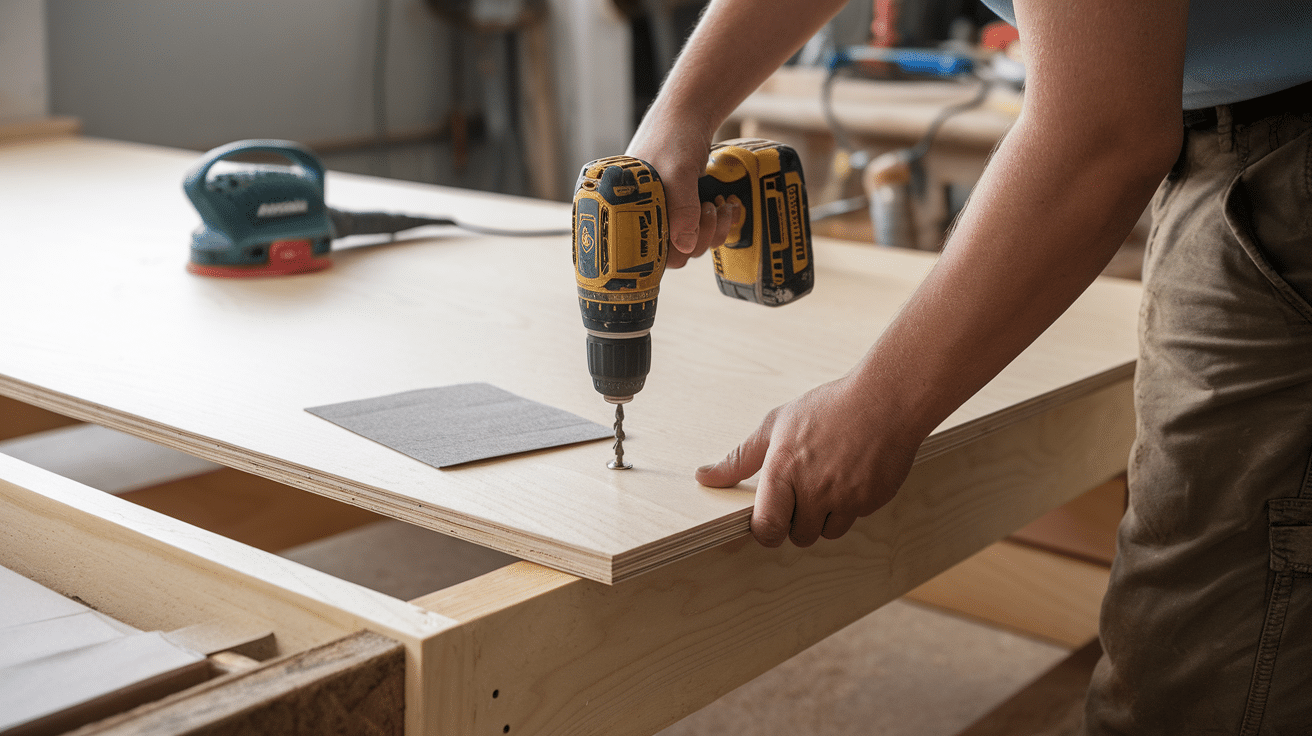
Step 2: Build the Base Frame
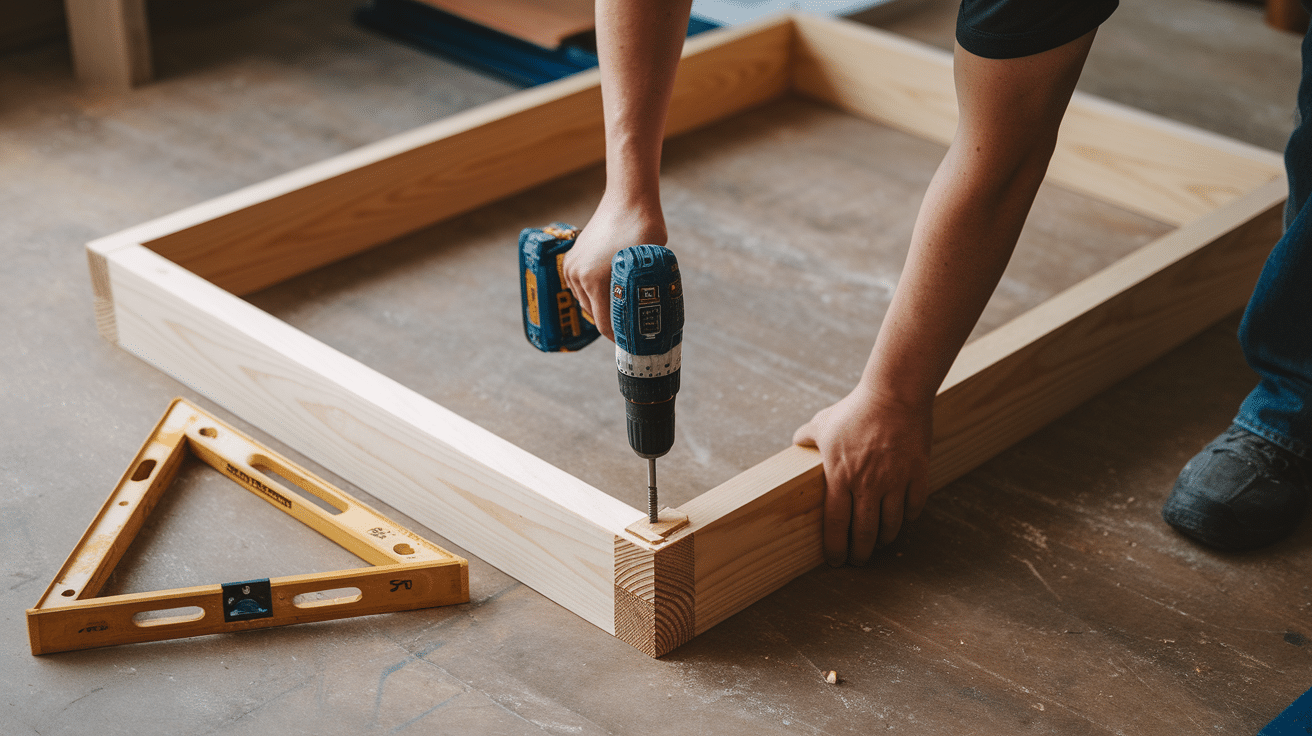
- Cut 2×4s for the outer frame (mattress size plus 2-3 inches)
- Cut additional 2×4s for center support beams
- Pre-drill holes to prevent splitting
- Assemble with 2½” screws at all corners
- Check that corners are square using a framing square
- Verify the frame is level on your floor
Step 3: Add Support Structure
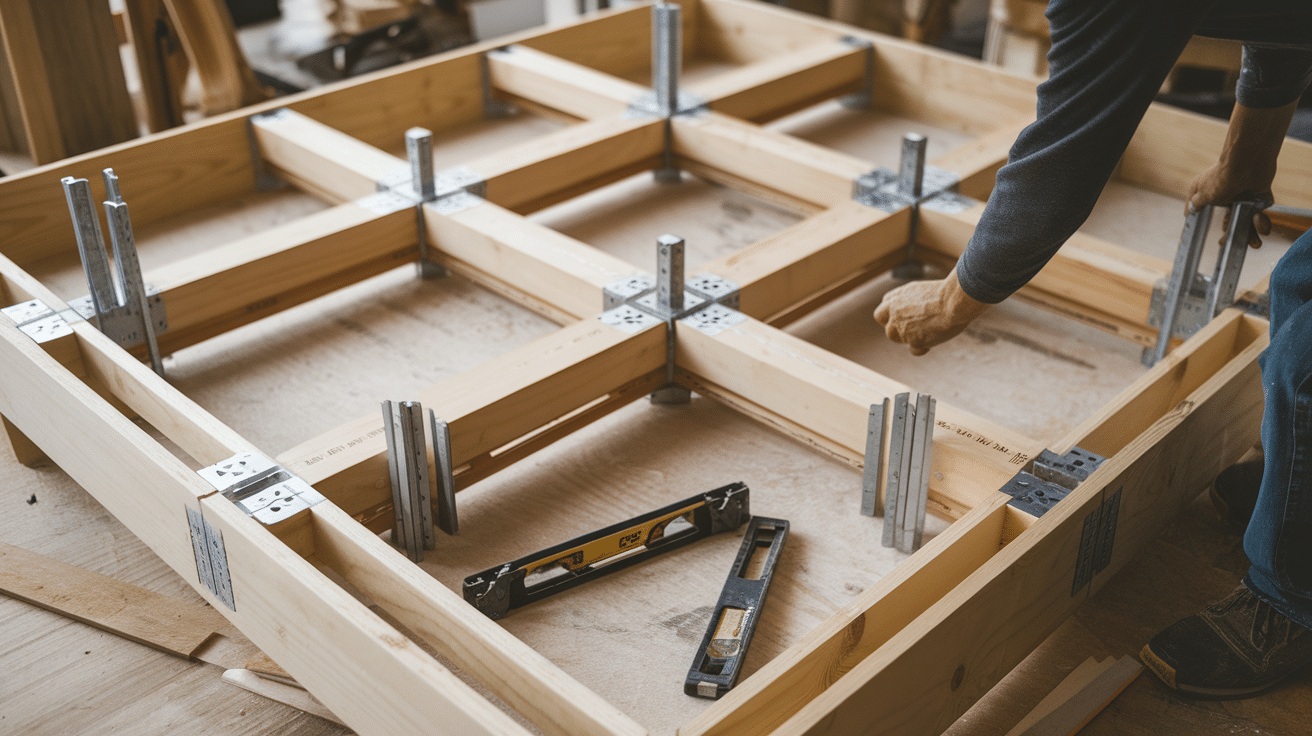
- Install cross supports every 12-16 inches.
- For drawer sections, create frame openings.
- Add vertical supports at corners and divider points
- Reinforce corners with brackets for extra strength
- Check for wobble and add bracing if needed
Step 4: Create Storage Areas
- For drawers: Build drawer boxes using ¾” plywood
- Attach drawer slides to both frame and drawer boxes
- For lift-top: Reinforce the platform for hydraulic lifts
- For open storage: Add any shelves or dividers
- Test fit all components before final attachment
Step 5: Build the Top Platform
- Cut ¾” plywood to match your frame dimensions
- For larger beds, add a center support below the seam
- Sand all edges thoroughly to prevent splinters
- Attach to frame using screws every 8-10 inches
- Add a small lip around the edges if desired (prevents mattress sliding)
Step 6: Add Finishing Touches
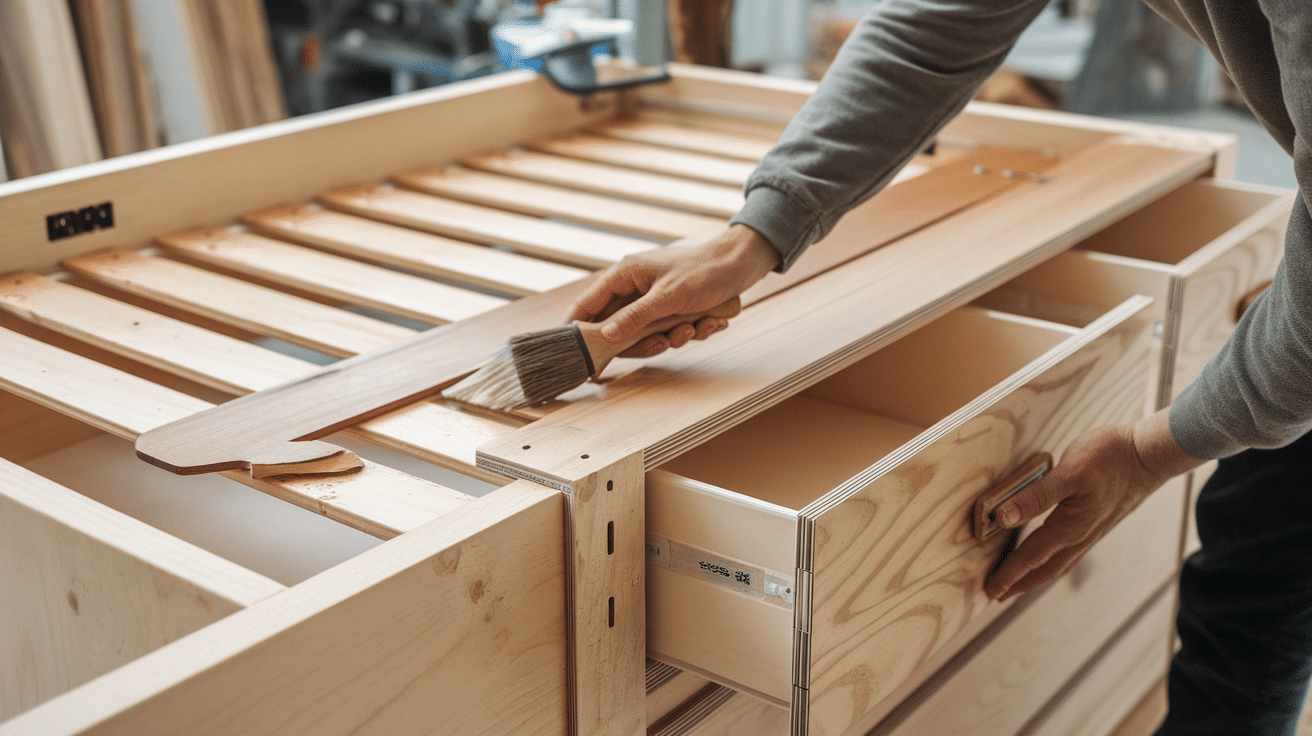
- Sand all visible surfaces and edges
- Fill screw holes with wood putty
- Apply edge banding to hide plywood edges
- Stain or paint as desired
- Add drawer pulls or handles
- Install hydraulic lifts if using a lift-top design
Step 7: Final Assembly and Testing
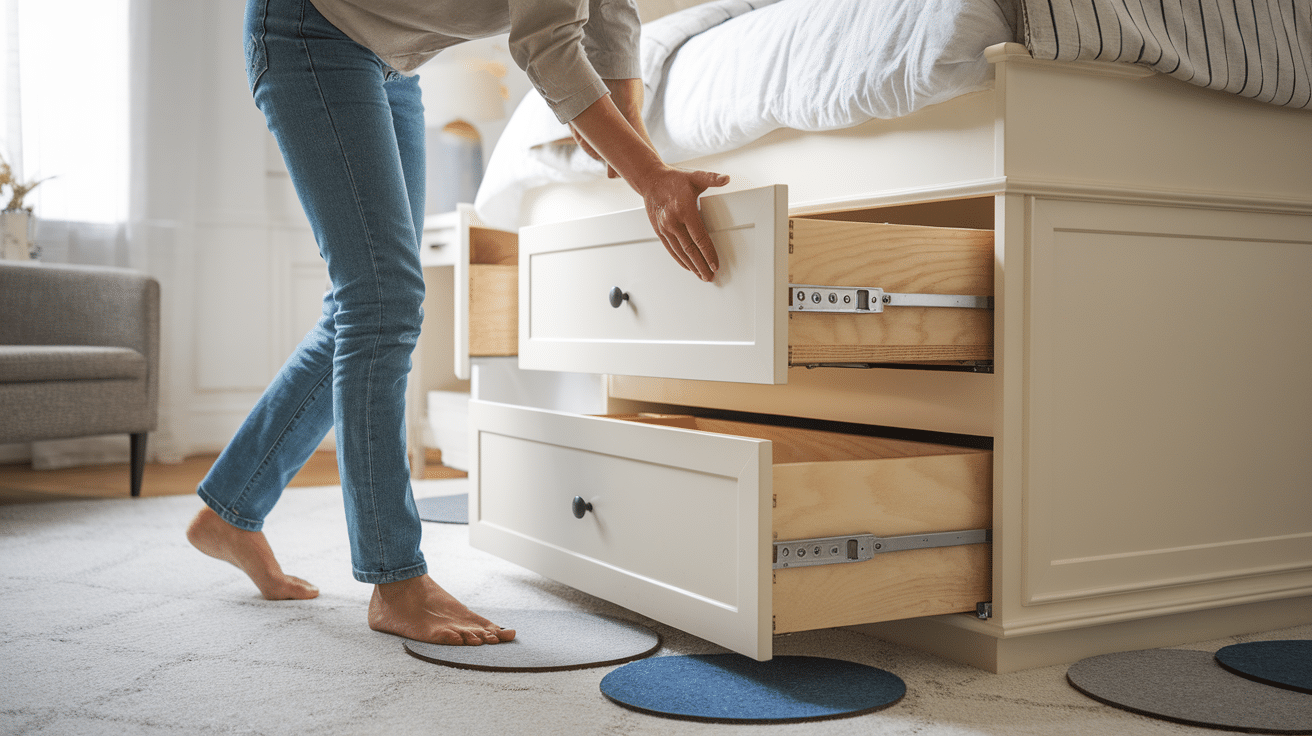
- Make sure all drawers slide smoothly.
- Check that lift mechanisms work properly.
- Test weight capacity with gentle pressure
- Make any needed adjustments to the alignment
- Add felt pads to reduce noise from drawers
I always recommend taking photos as you go—they help if you need to disassemble for a move later on. Remember to give yourself enough time; rushing leads to mistakes. This project typically takes a full weekend for most beginners to complete properly.
Mistakes to Avoid
Even experienced woodworkers make errors when building storage beds. Here are the most common mistakes I’ve seen (and made myself) that you should watch out for:
1. Skipping the Planning Phase
- Rushing to cut wood without detailed measurements
- Not accounting for mattress thickness in overall height
- Failing to check if drawers will clear other furniture
- Solution: Create a detailed sketch with all dimensions before cutting anything
2. Using Inadequate Materials
- Choosing thin plywood that sags under weight
- Using particle board that crumbles when screwed
- Skimping on hardware quality for drawer slides
- Solution: Invest in ¾” plywood and quality hardware—this is not where to cut costs
3. Improper Support Structure
- Not adding enough center supports
- Placing supports too far apart (more than 16″)
- Forgetting to reinforce corners
- Solution: Add extra supports, especially in the middle where body weight concentrates
4. Poor Measurement and Cutting
- Cutting all pieces at once before test fitting
- Not accounting for material thickness in measurements
- Forgetting that 2×4s aren’t actually 2″ by 4″
- Solution: Cut one piece at a time and test fit as you go
5. Overlooking Leveling
- Building on an uneven floor
- Not checking for square corners
- Ignoring small gaps during assembly
- Solution: Use shims where needed and check the level frequently during building
6. Drawer Construction Problems
- Making drawers the exact size of the opening (too tight)
- Installing drawer slides incorrectly
- Not reinforcing drawer bottoms for heavy items
- Solution: Make drawers ¼” smaller than openings and follow slide instructions precisely
7. Finishing Rushed
- Skipping proper sanding between coats
- Not letting stains or paint dry completely
- Applying finishes in high humidity
- Solution: Allow appropriate drying time between steps, even if it extends your project timeline
8. Not Test Fitting
- Fully assembling without checking component fit
- Installing all hardware before testing movement
- Adding finishes before ensuring everything works
- Solution: Dry fit everything before final assembly and finishing
Learning from these common mistakes will save you significant time, money, and frustration. Take your time with each step—a storage bed is a functional piece of furniture you’ll use daily for years.
Aftercare and Maintenance
Proper care will keep your DIY storage bed sturdy and functional for years. Here’s how to maintain it for maximum longevity:
1. Regular Inspections
- Check all screws and hardware every 3-6 months
- Tighten any loose connections immediately
- Look for signs of stress or sagging in the platform
- Inspect drawer slides for smooth operation
- Listen for squeaks or creaks that might indicate loose joints
2. Cleaning Routines
- Dust wooden surfaces weekly with a soft cloth
- Avoid harsh chemical cleaners that can damage finishes
- Use furniture polish appropriate for your finish type
- Clean the drawer tracks and remove any debris that could cause sticking
- Vacuum under the bed if accessible to prevent dust buildup
3. Preventing Damage
- Use felt pads on drawer bottoms to prevent scratching
- Consider furniture wax for drawer slides if they begin to stick
- Avoid excessive weight on any single area of the bed platform
- Use mattress pads to prevent moisture from reaching the wood
- Rotate your mattress regularly to ensure even support
4. Quick Fixes
- Keep spare hardware on hand for replacements
- Touch up scratches promptly with matching stain or paint
- Re-apply clear coat to high-wear areas every few years
- Add additional support if you notice any sagging
- Lubricate any moving parts that become sticky
5. Long-Term Care
- Avoid placing the bed in direct sunlight. It can fade finishes
- Control room humidity to prevent wood expansion/contraction
- Consider a complete refinish every 5-7 years for heavily used beds
- Re-seal any exposed wood if the finish begins to wear thin
- Replace drawer slides if they become damaged or worn out
I always tell people that 10 minutes of maintenance every few months will prevent hours of repairs later on. Your handmade storage bed is an investment worth protecting!
Conclusion
Building your storage bed is one of the most rewarding DIY furniture projects you can tackle. Not only will you gain valuable storage space, but you’ll also create a custom piece that perfectly fits your needs and bedroom.
Throughout this guide, we’ve covered everything from planning and selecting materials to construction techniques and long-term maintenance. The steps might seem challenging at first, but taking it one step at a time makes the process manageable for even beginner woodworkers.
Remember that your first DIY storage bed doesn’t have to be perfect. Each project teaches new skills that make the next one even better. The most important thing is creating something functional that solves your storage problems while giving you a comfortable place to sleep.
I hope this guide has given you the confidence to start building. Your custom storage bed will provide years of use while keeping your bedroom organized and clutter-free. Plus, there’s nothing quite like the satisfaction of telling guests, “I built that myself!”
Happy building and sweet dreams in your new space-saving bed!