
Ever looked at those tiny bottles of alcohol ink at the craft store and winced at the price tag? Me too.
After spending way too much money on commercial inks, I decided there had to be a better way.
Turns out, creating your own vibrant alcohol ink is surprisingly simple. No special skills needed, just a few basic supplies and a bit of creativity.
If you’re a seasoned artist or a complete beginner, this guide will walk you through making custom inks right in your kitchen.
What you’ll learn:
- How to mix colors from scratch
- Cheap alternatives to store-bought inks
- Easy techniques for perfect results
Ready to save money and unleash your inner artist? Let’s get started on your DIY ink-making journey!
What Is DIY Alcohol Ink?
Alcohol ink is like magic paint. It doesn’t soak in; it dances and swirls across smooth surfaces, such as glass, tiles, or special paper.
The colors are bold, unpredictable, and seriously fun.
DIY alcohol ink? That’s your homemade version. Just grab some rubbing alcohol, food coloring, or old markers, and you’re halfway to becoming an ink wizard.
No fancy skills needed. If you can mix a drink, you can make this. It’s art for everyone, simple, cheap, and unique.
With just a splash of alcohol and a few drops of color, you’ll turn everyday stuff into flowing, vibrant art supplies. Curious? Great. You’re in the perfect spot to start.
How to Make DIY Alcohol Ink with Old Markers?
Got a bunch of dried-up markers lying around? Don’t toss them just yet! Follow these budget-friendly DIY methods to turn them into vibrant alcohol inks.
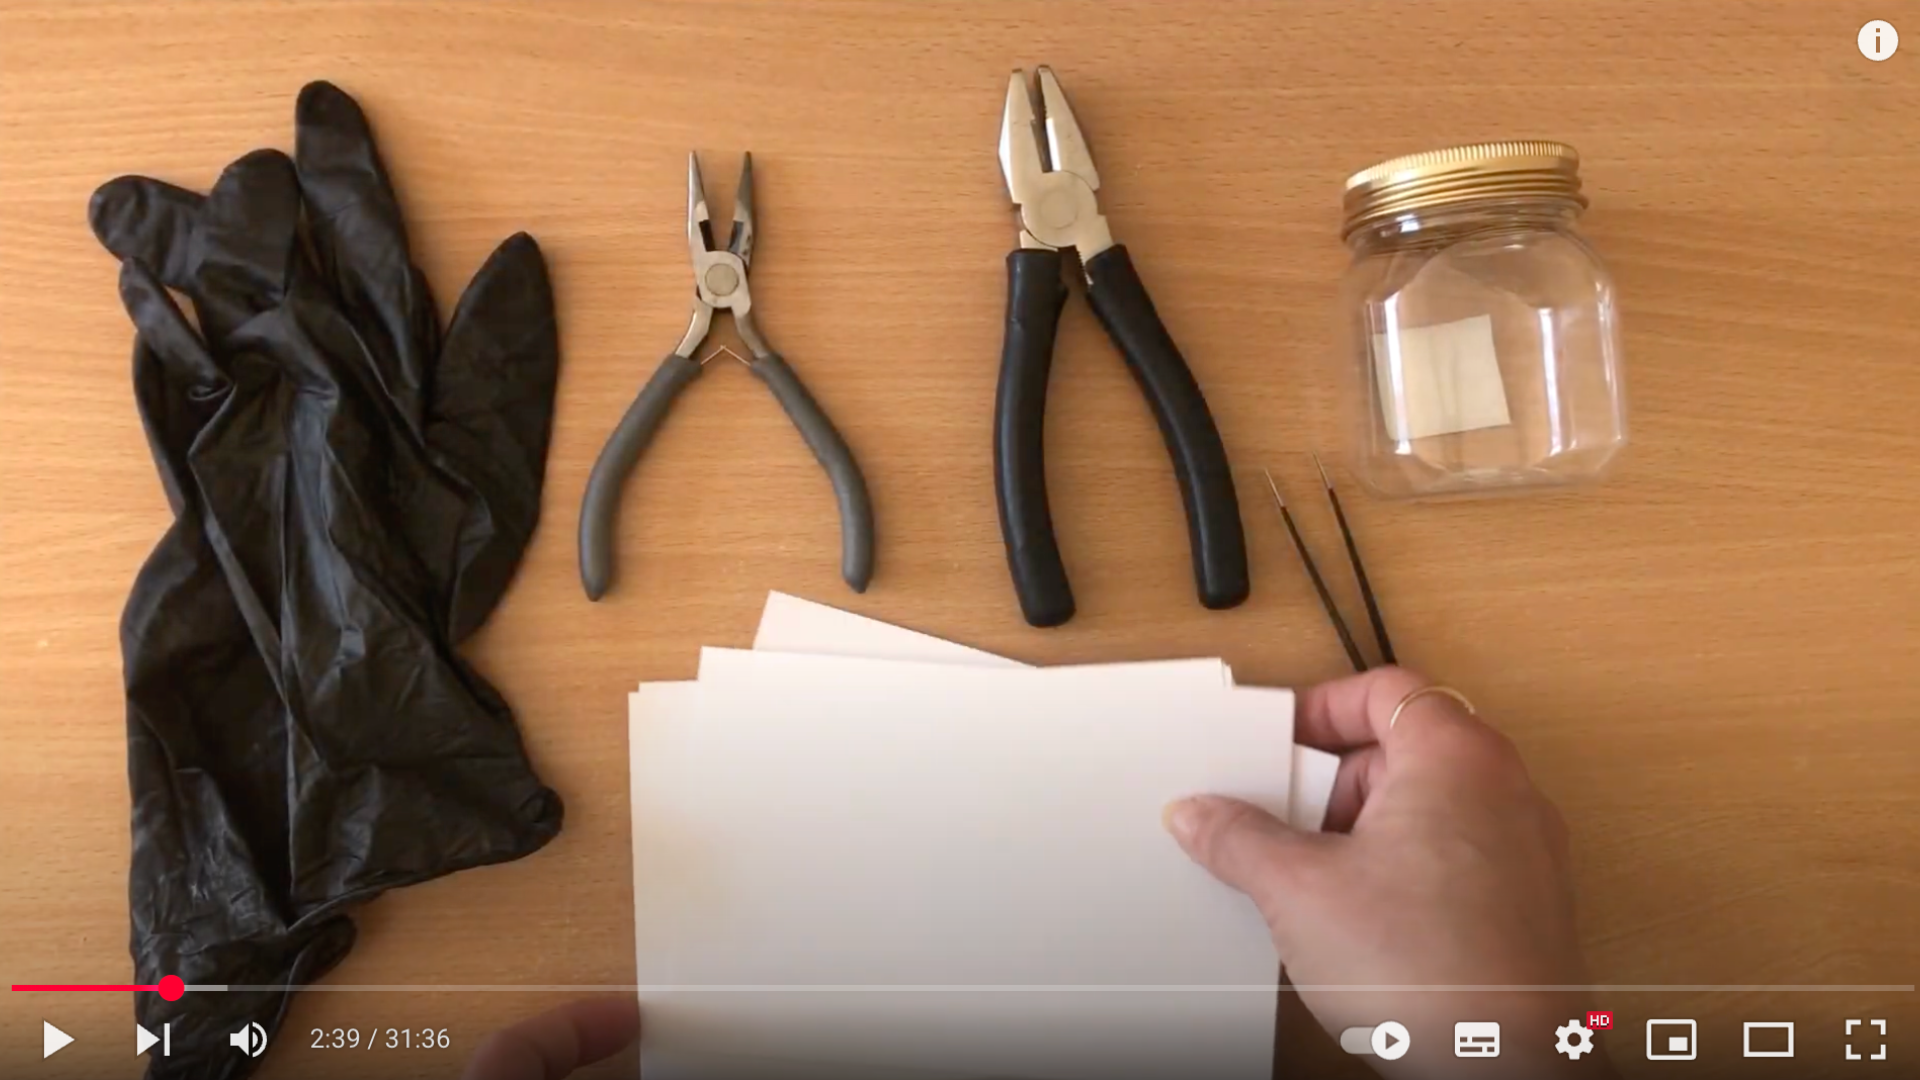
Supplies You’ll Need
- Dried-up alcohol-based markers (at least 2–3 of the same color)
- Rubbing alcohol (preferably ethanol 95% or isopropyl alcohol)
- Small jars or bottles (plastic or glass)
- Gloves and small tools (like tweezers or pliers)
- Photo paper or any non-porous surface
- Protective plastic (e.g., cereal bag or sheet) for your table
Step 1: Gather Your Supplies
To get started, you only need two main ingredients: dried-out markers and rubbing alcohol.
Use ethanol-based methylated spirits, but isopropyl alcohol works as well; just ensure it’s a high-alcohol solution (at least 90%).
For tools, grab some containers (glass or plastic jars, even old skincare bottles), gloves, and tweezers.
You’ll also want a protective surface like a cereal bag to catch spills and absorb drips.
For paper, photo paper or Yupo paper works best, though secondhand photo paper works beautifully. With all this in place, you’re ready to begin.
Step 2: Disassemble the Markers
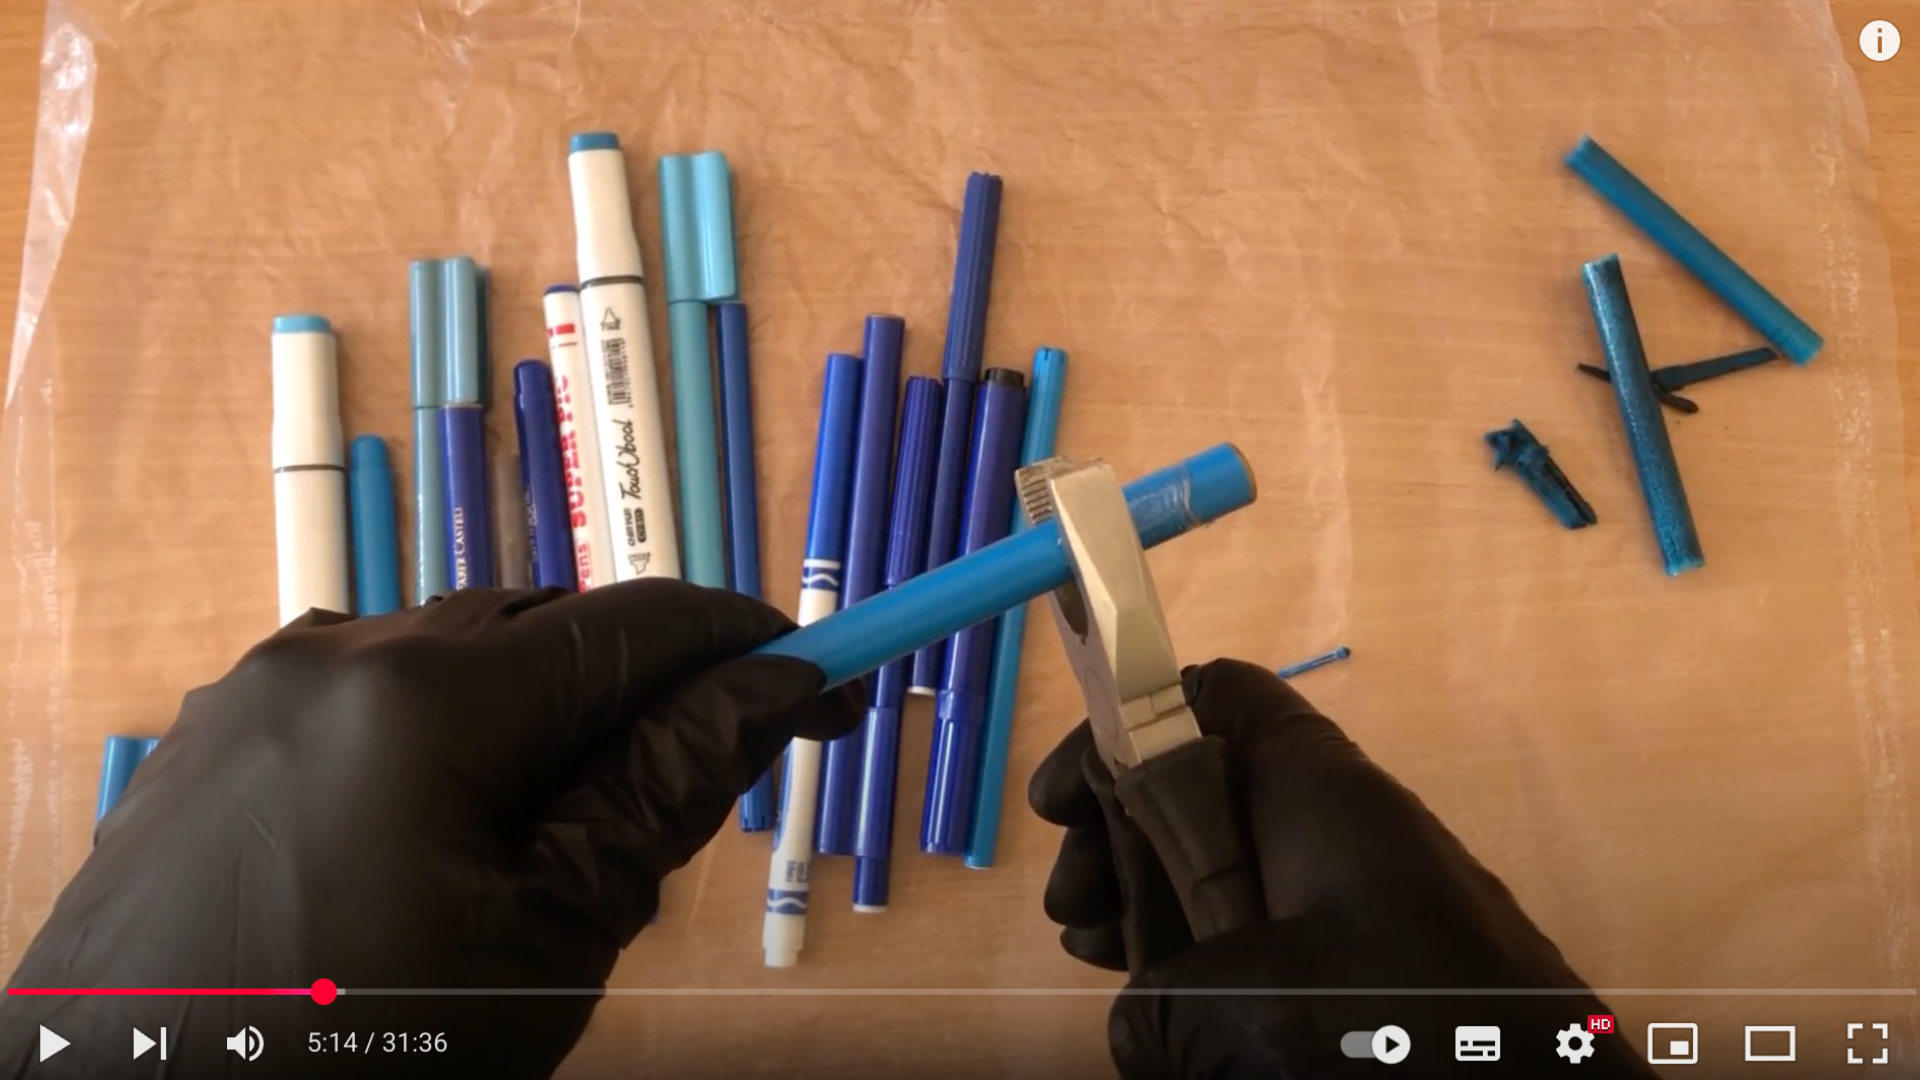
Put on your gloves and begin by pulling out the nibs and spongy ink cores from your old markers.
Each marker design varies; some open easily, while others may require a bit of twisting or even breaking to access the core.
You only need about three used markers to make a strong batch of ink, especially with dark colors. Do not use new markers for this project, as the point is to repurpose waste.
Once removed, place the ink-soaked cores directly into your container; no need to strip off their plastic casing.
Step 3: Add Alcohol to Extract the Ink
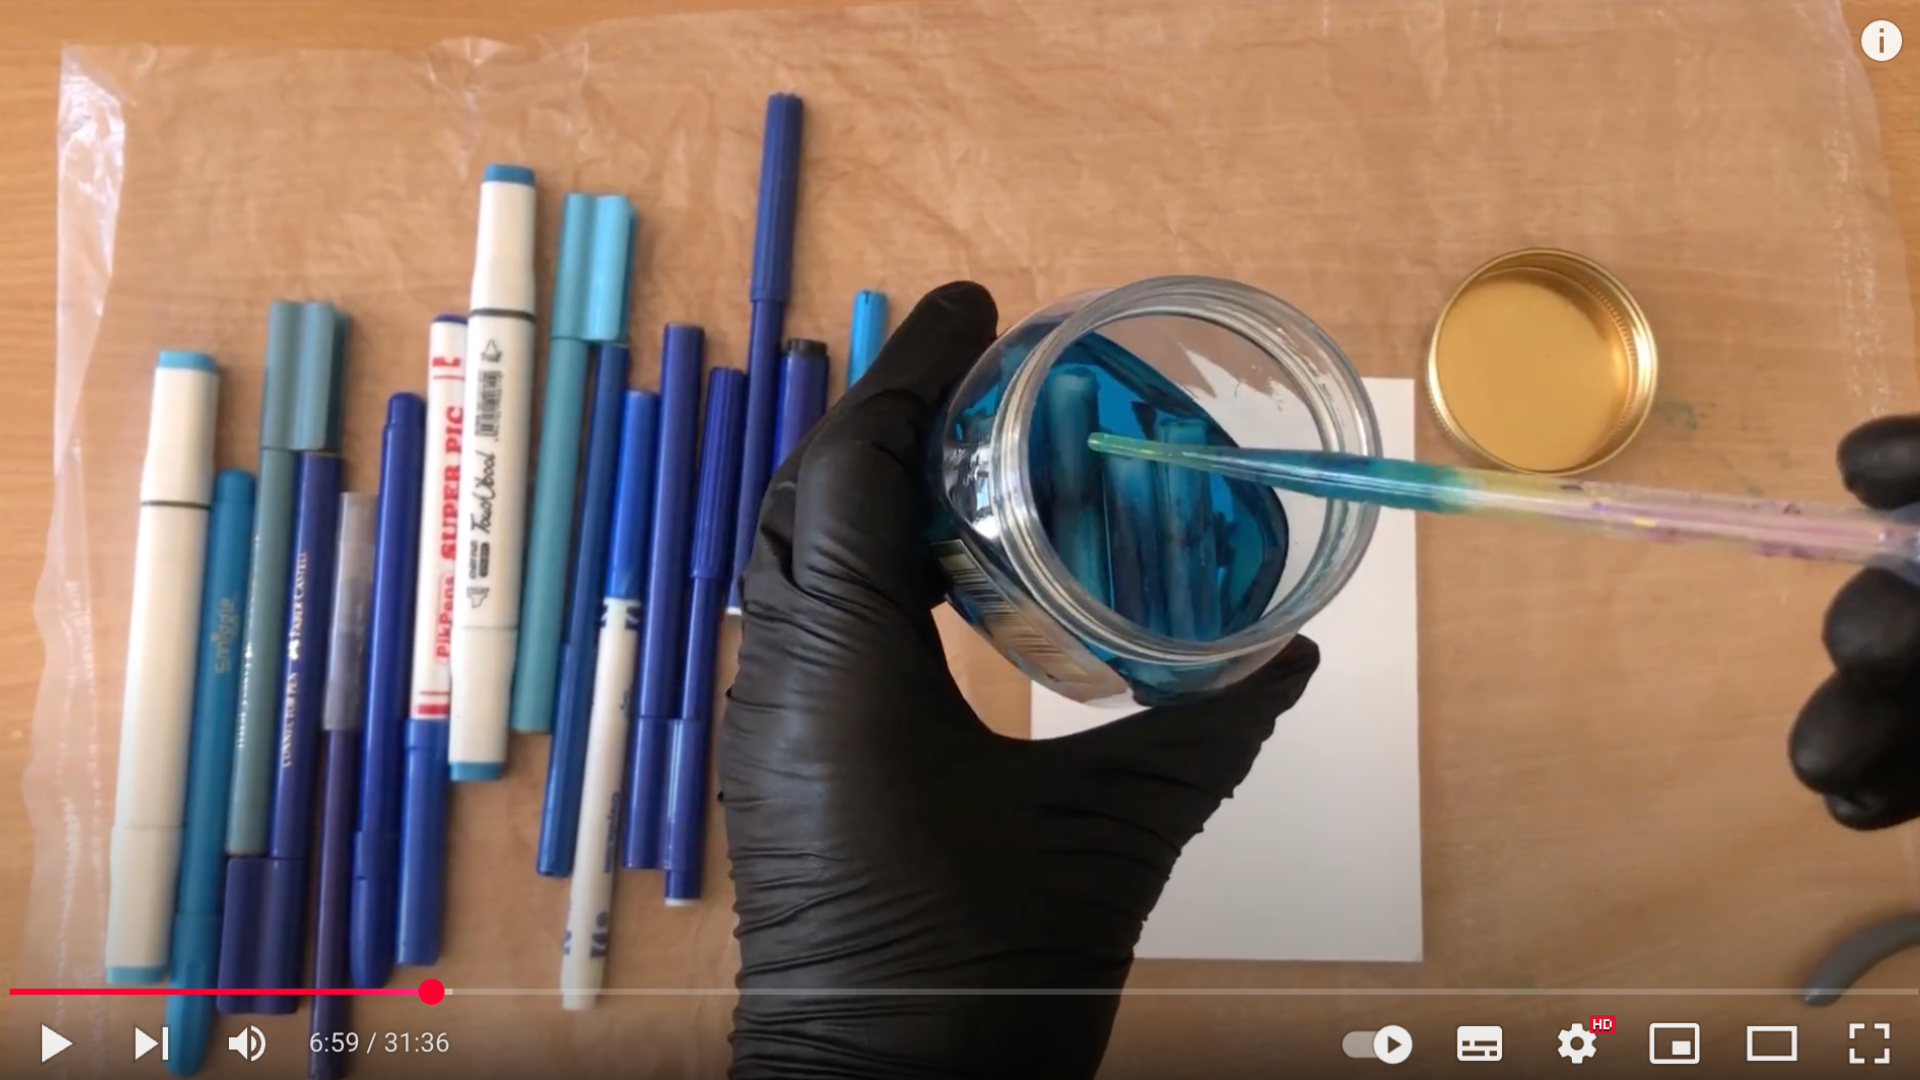
Now it’s time to activate the ink. Pour a small amount of alcohol into the jar until the marker cores are covered.
Immediately, you’ll notice the alcohol pulling pigment from the sponges, creating a colorful liquid.
While you can use it within minutes, leaving it to sit for a few hours will give you a richer, more intense result.
You can reuse the same batch by simply topping off the alcohol when the color starts to fade.
The more cores you add, the darker your solution becomes.
Step 4: Mix and Match Colors
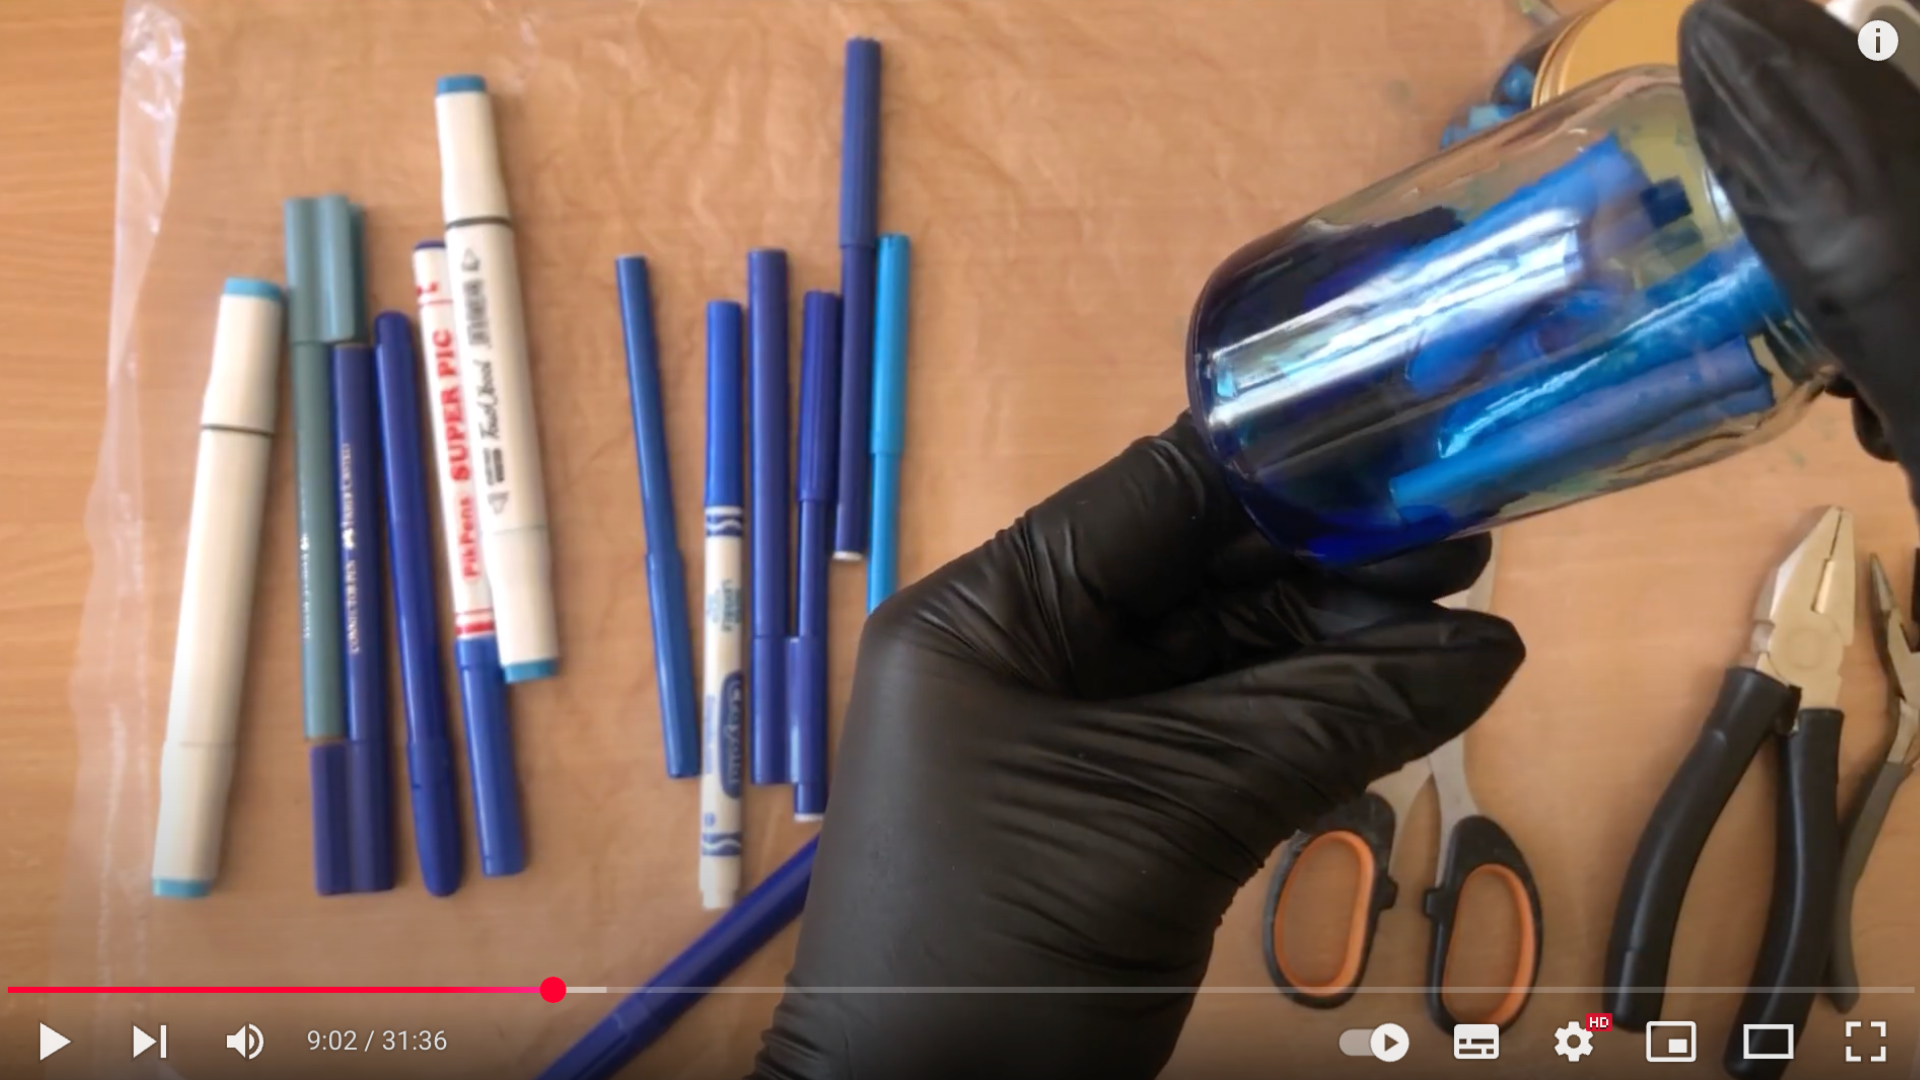
If you want to get creative with colors, try combining different marker cores.
Use a color wheel to help decide which combinations produce secondary colors, mixing blue and yellow for green, or blue and pink for purple.
You can also experiment with highlighters, which can be tricky to open but deliver bright results.
You don’t need separate inks for every shade; just a few base colors like blue, yellow, and pink will allow you to mix dozens of hues on the fly.
Step 5: Start Creating with Your Inks
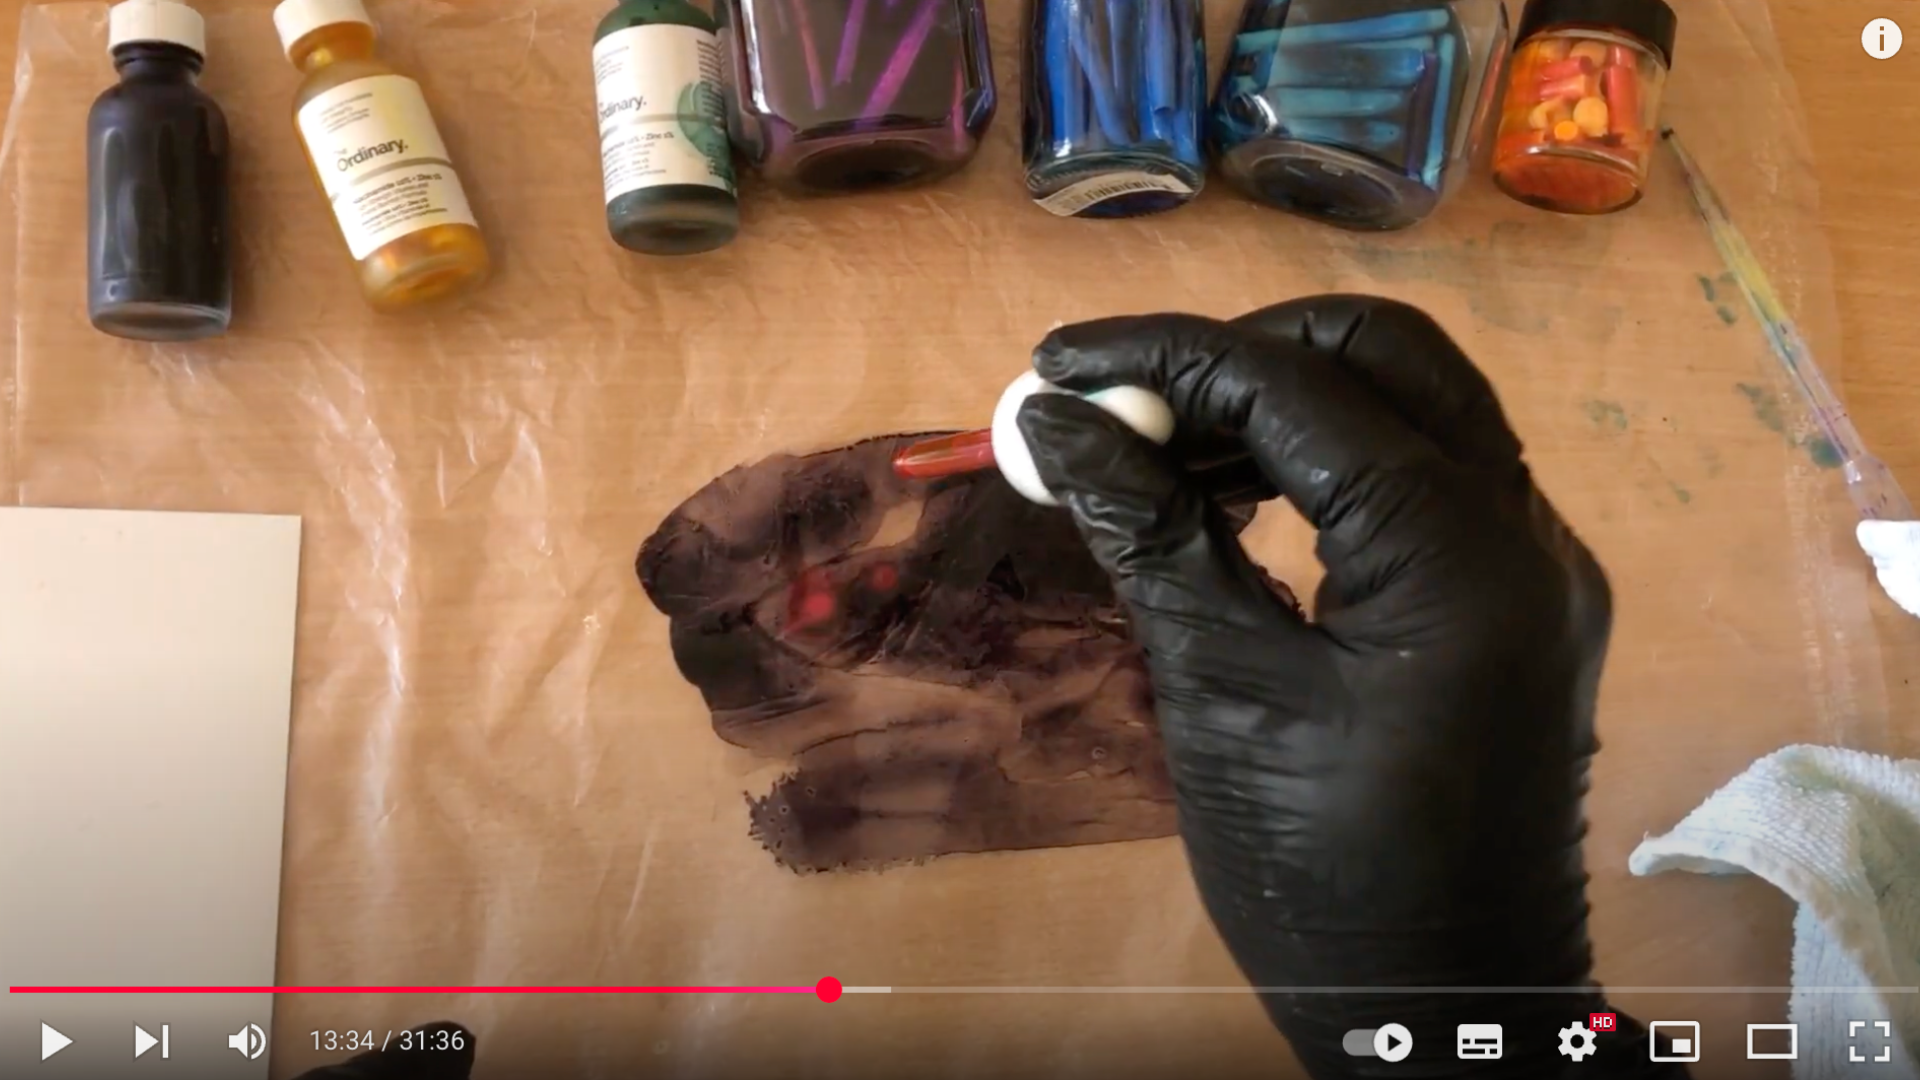
Once your inks are ready, the real fun begins. Drop inks onto a plastic surface, swirling them around, then pressing photo paper down into the mixture.
The alcohol evaporates almost instantly, so you can lift your print and admire the colorful result in seconds.
By layering different colors or dabbing your glove or a sponge into the wet ink, you can create swirls, outlines, and unique patterns.
Step 6: Try Different Surfaces
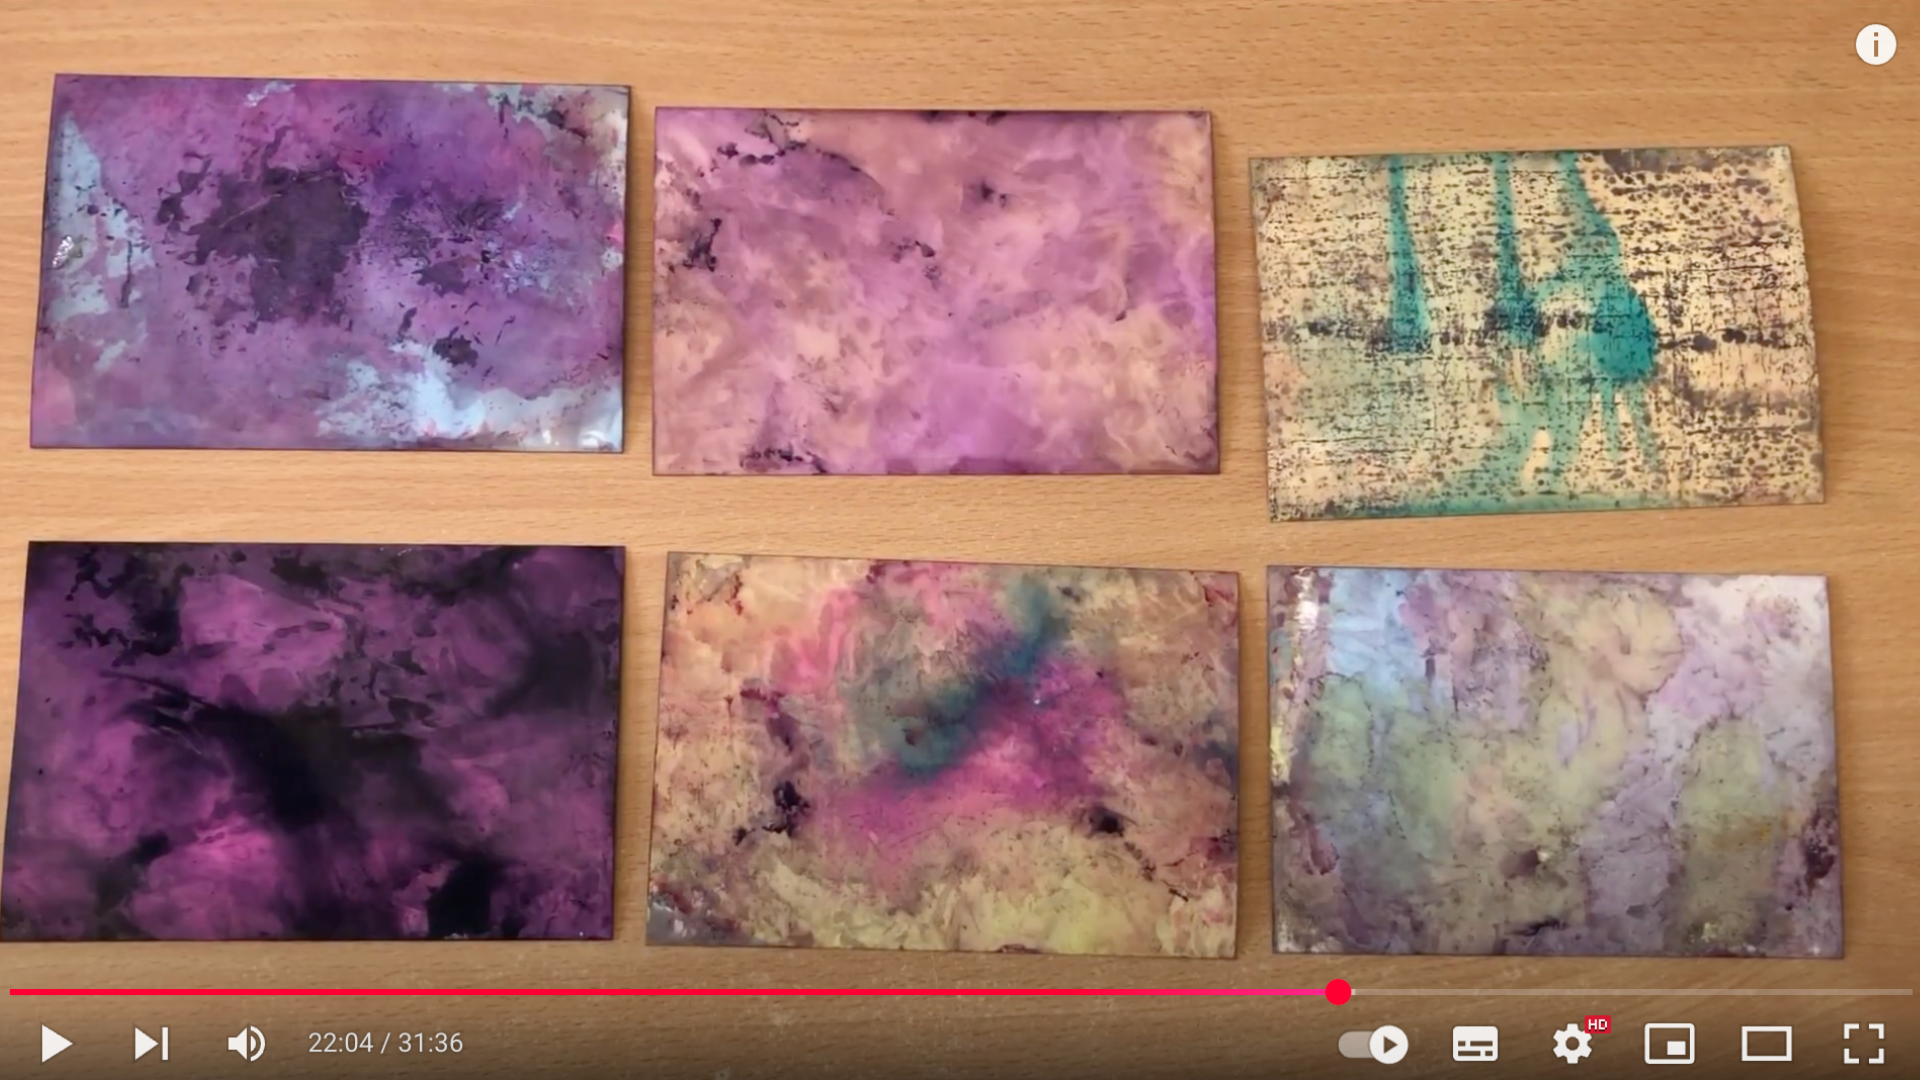
Don’t limit yourself to photo paper. You can test her DIY inks on plain printer paper, acetate packaging, plastic buttons, and even glass.
Regular paper absorbs the ink differently, often producing beautiful blends, especially on the reverse side. However, some surfaces, like acetate, can be sticky or smudgy.
Each surface will create a unique effect and expand your crafting possibilities.
This tutorial is an informative video from Treasure Books. Many thanks to the creator for sharing such a clear and detailed step-by-step guide. You can view the original video on their YouTube channel or watch it directly below.
How to Make DIY Alcohol Ink with Mica?
Mica powder can change your homemade alcohol inks from ordinary to extraordinary, adding shimmer, depth, and metallic magic to your creative projects.
Supplies You’ll Need
- Ultra-fine mica powder
- Isopropyl alcohol (IPA)
- Small mixing container
- Syringe or pipette
- Toothpick or small stir stick
- Gloves
- Paper towels or wipes
- Protective surface or tray
Step 1: Gather Your Materials
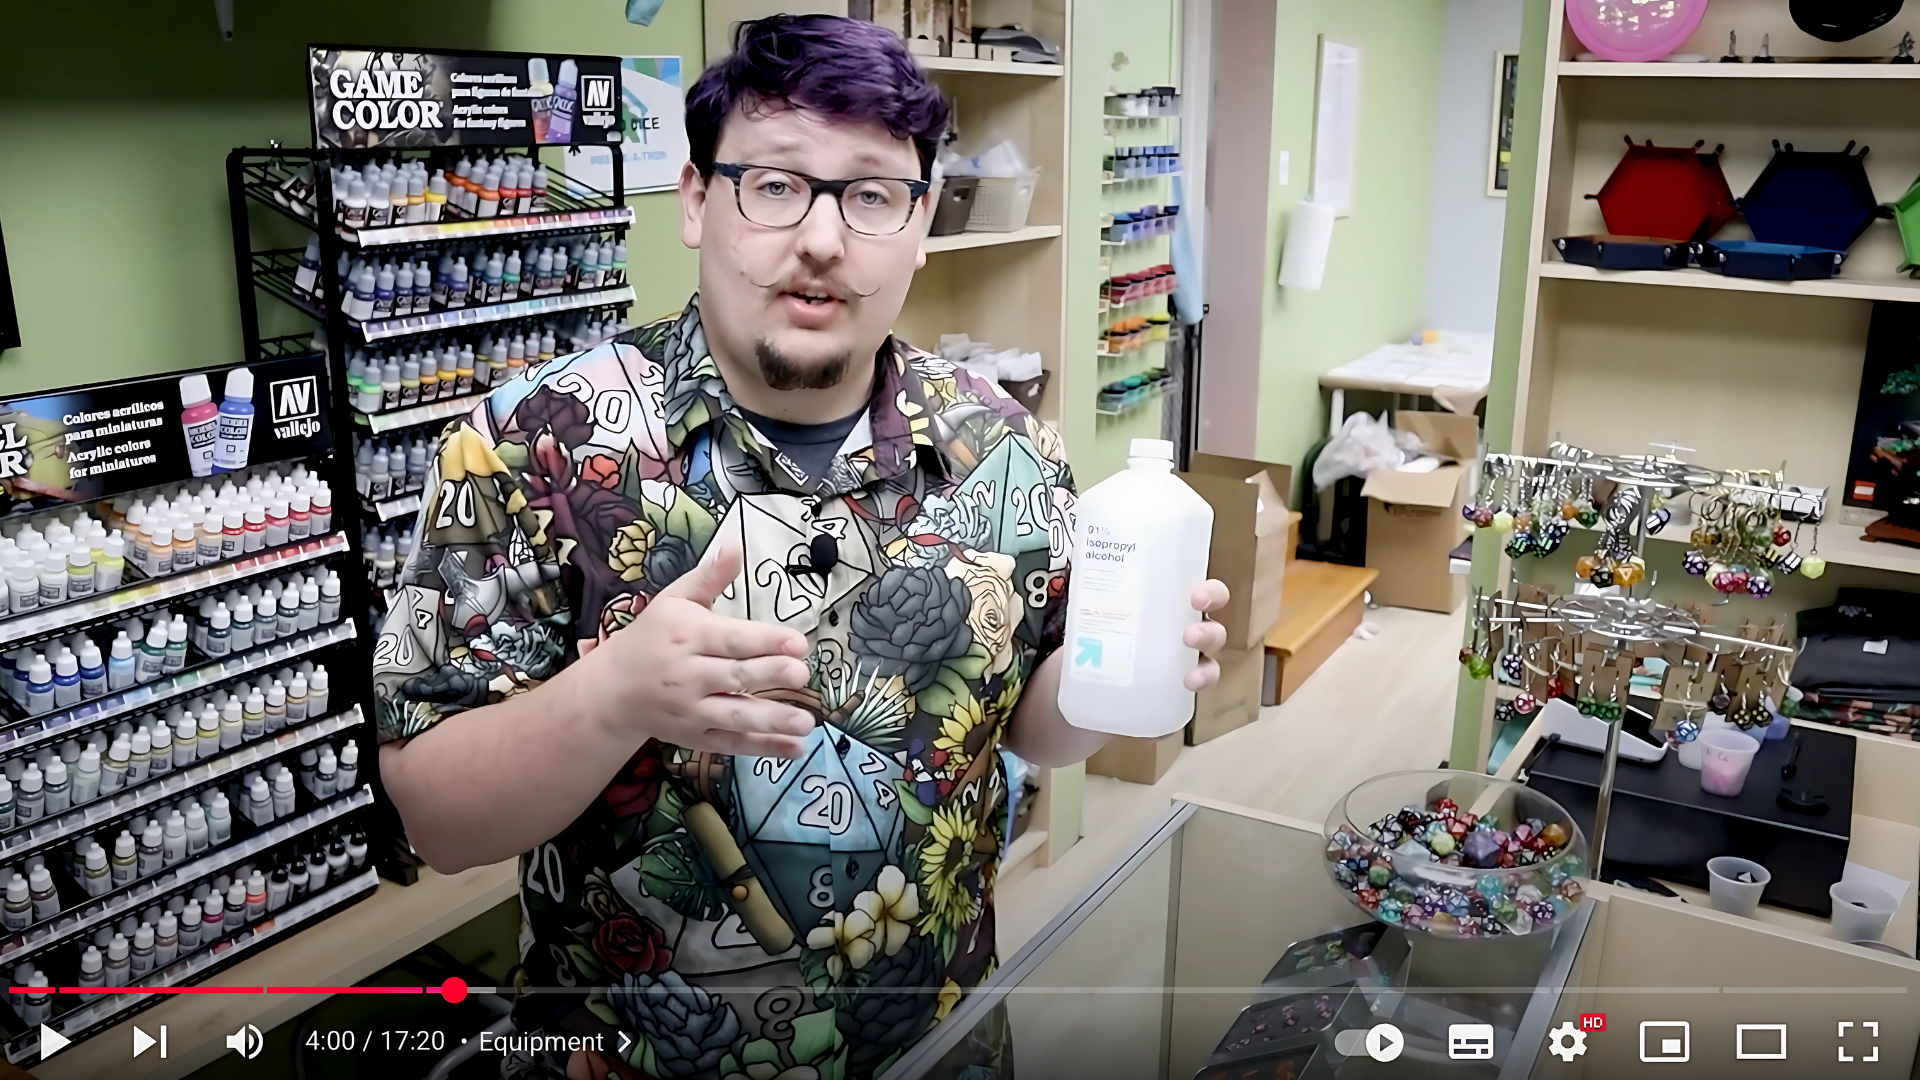
The core ingredient you’ll need is high-purity isopropyl alcohol (IPA). Aim for 91% or higher, which you can usually find at pharmacies.
The higher the alcohol content, the less water you’re introducing into the mix, which is important because water can prevent resin from curing properly.
If you’re unable to find 90 %+ IPA, you can still use 70%, but you’ll need to be cautious, as the extra water may cause curing issues.
Alternatives like denatured alcohol or mineral spirits are also viable, but they interact differently with resin.
If using these, reduce the amount used by half to avoid weakening your ink’s potency or causing chemical incompatibilities.
Step 2: Use the Right Tools
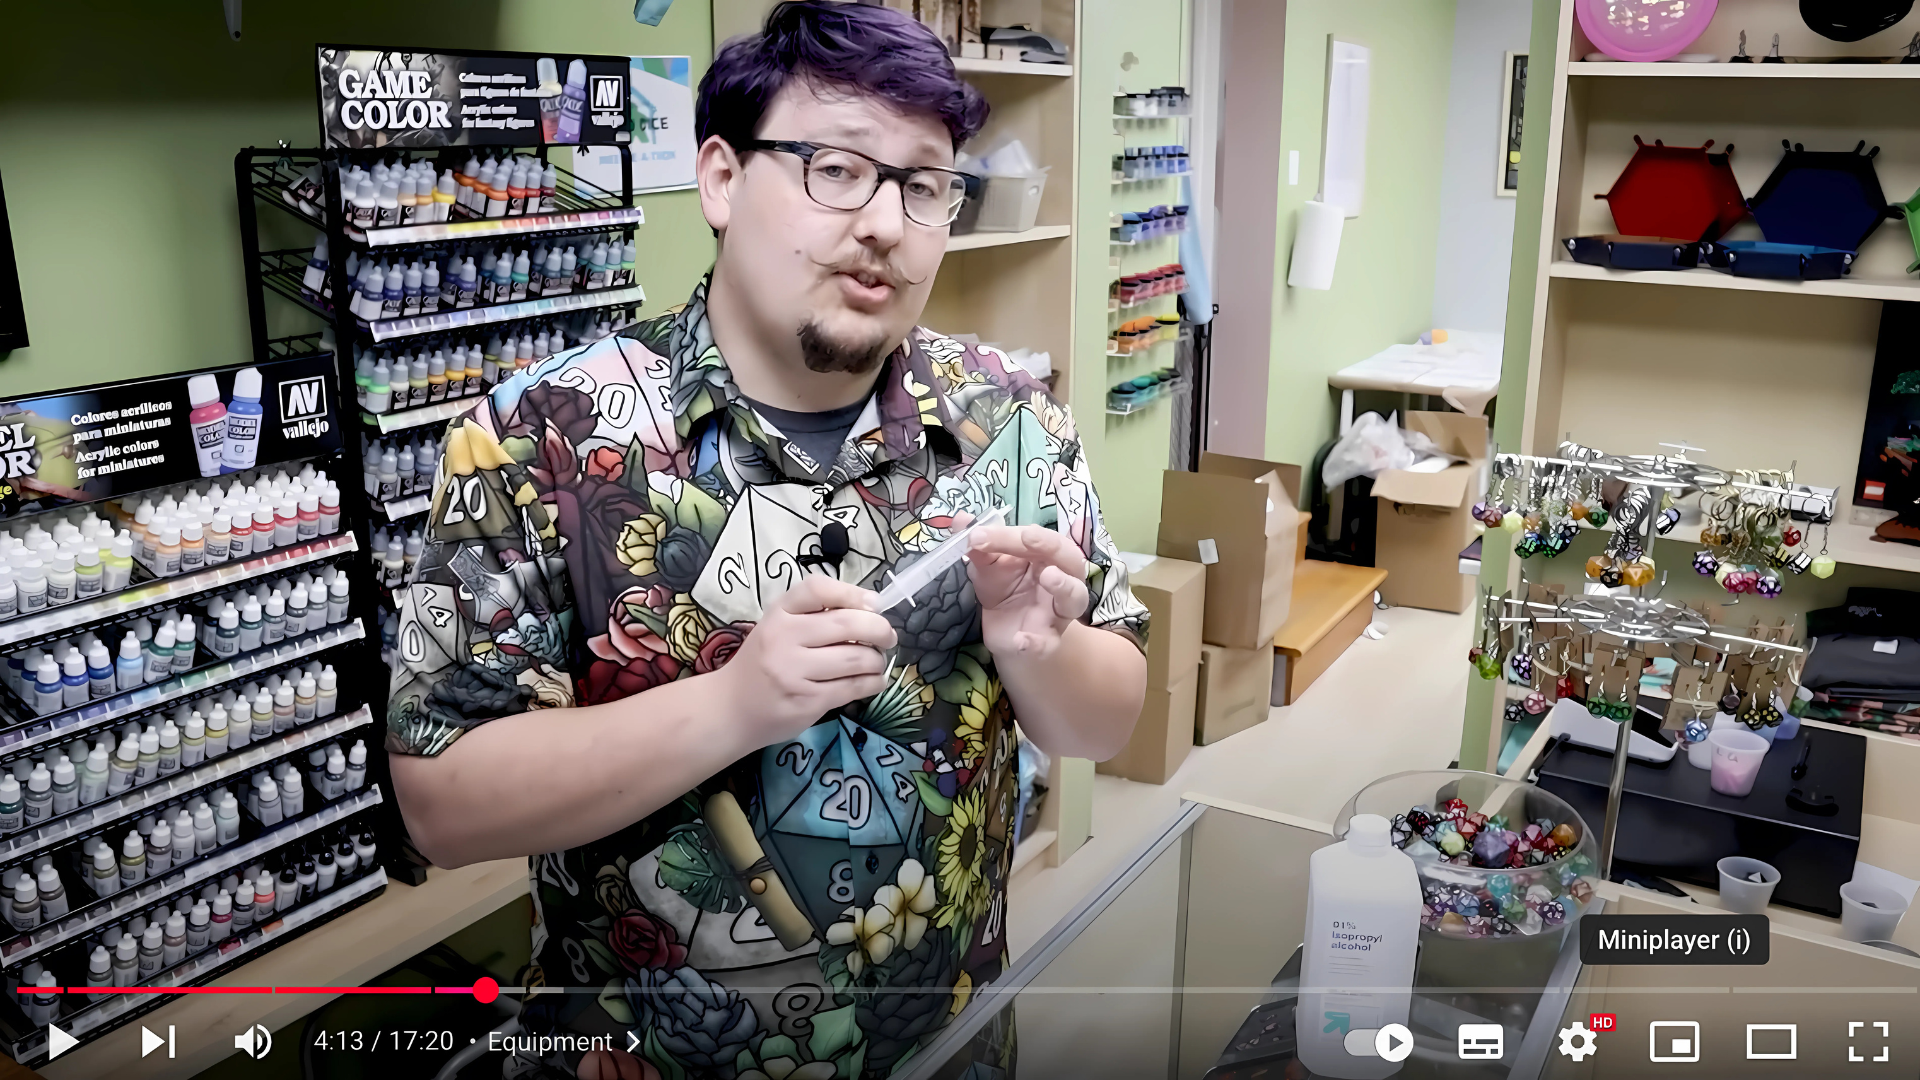
To transfer your alcohol ink cleanly into molds or containers, you’ll need an applicator. Pouring directly from a cup is messy and imprecise.
Instead, use a syringe or pipette. A syringe with a large tip, such as an oral medicine syringe with a 24-gauge tip or larger, is ideal for thicker mica suspensions.
You can easily find these at most stores or online.
These tools give you control over how much ink you use and where it goes. If you’re planning to store your ink for later use, a syringe with a cap is even better.
Step 3: Mix the Mica and Alcohol
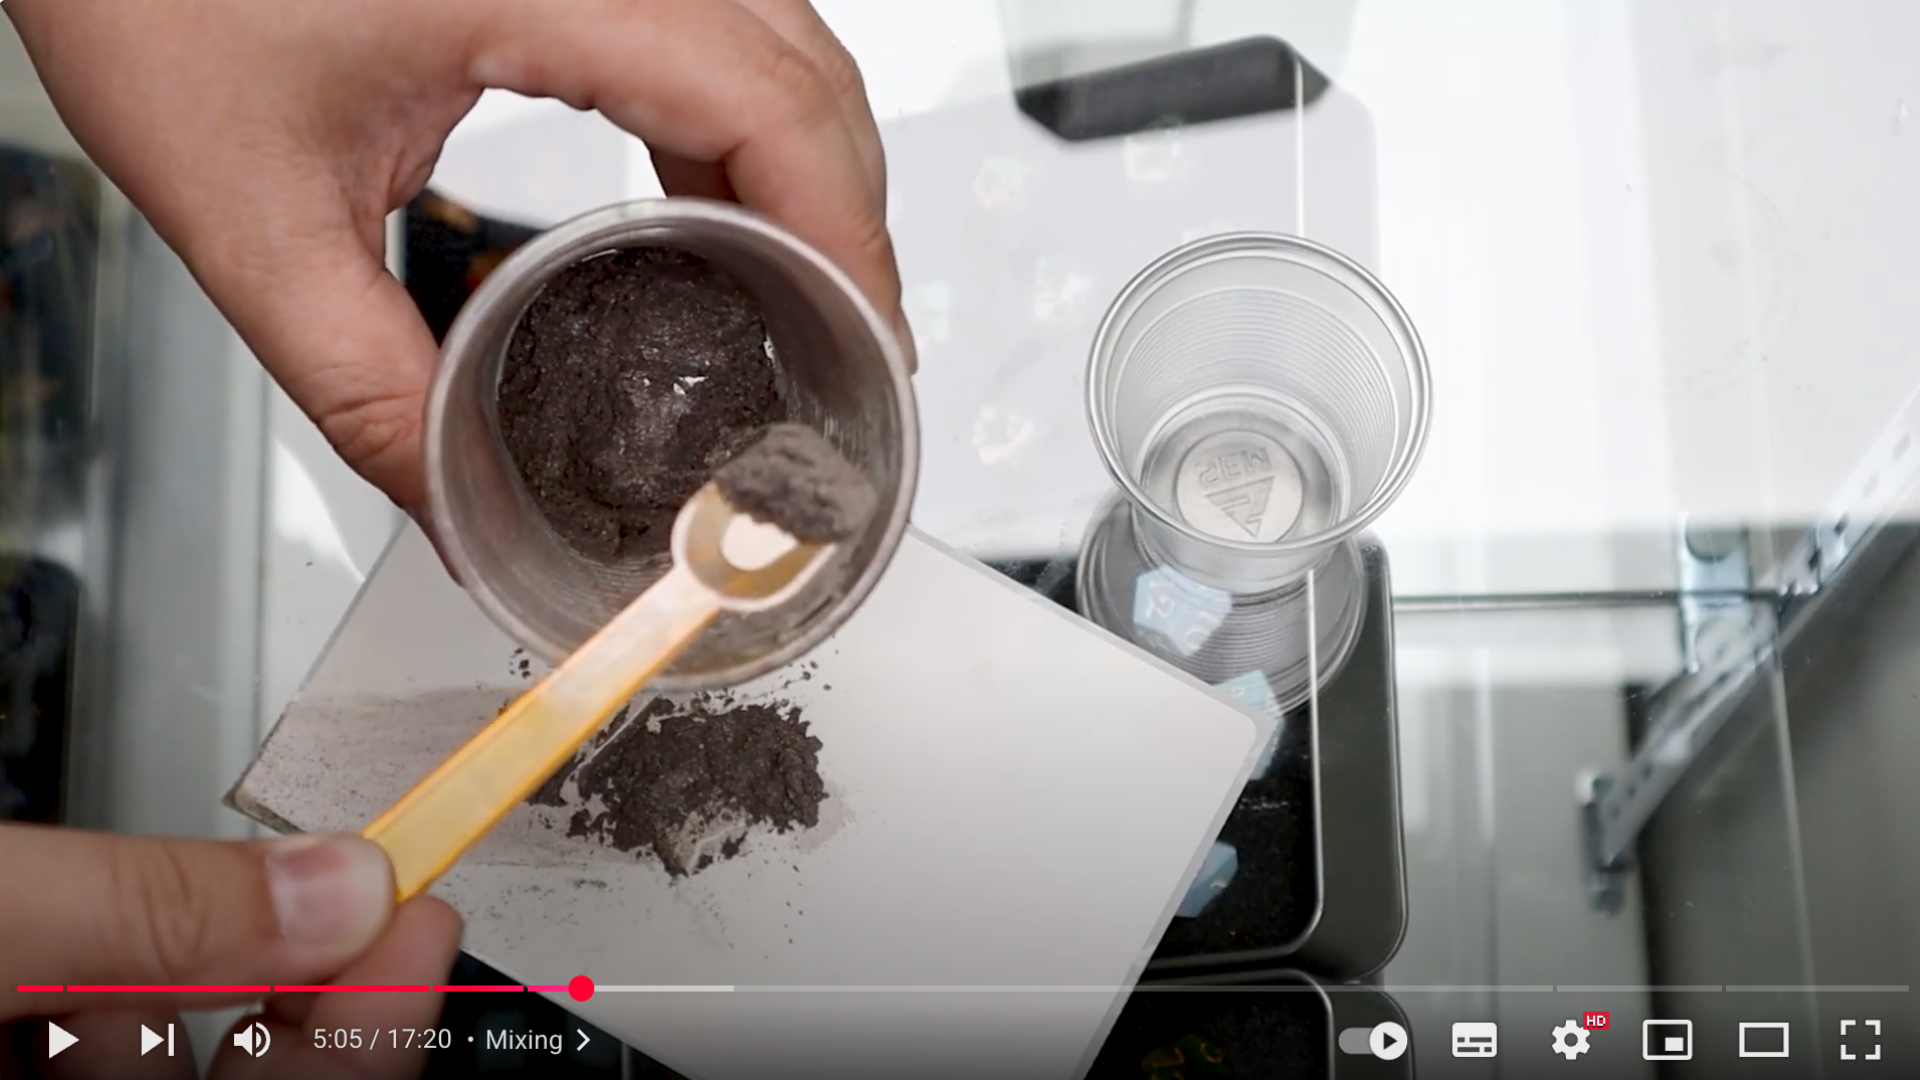
Begin the mixing process by placing about one teaspoon of mica powder into your mixing container.
This will act as your base. Then, slowly add about two milliliters of isopropyl alcohol.
If you’re using a syringe or pipette, you can measure accurately using the graduated markings.
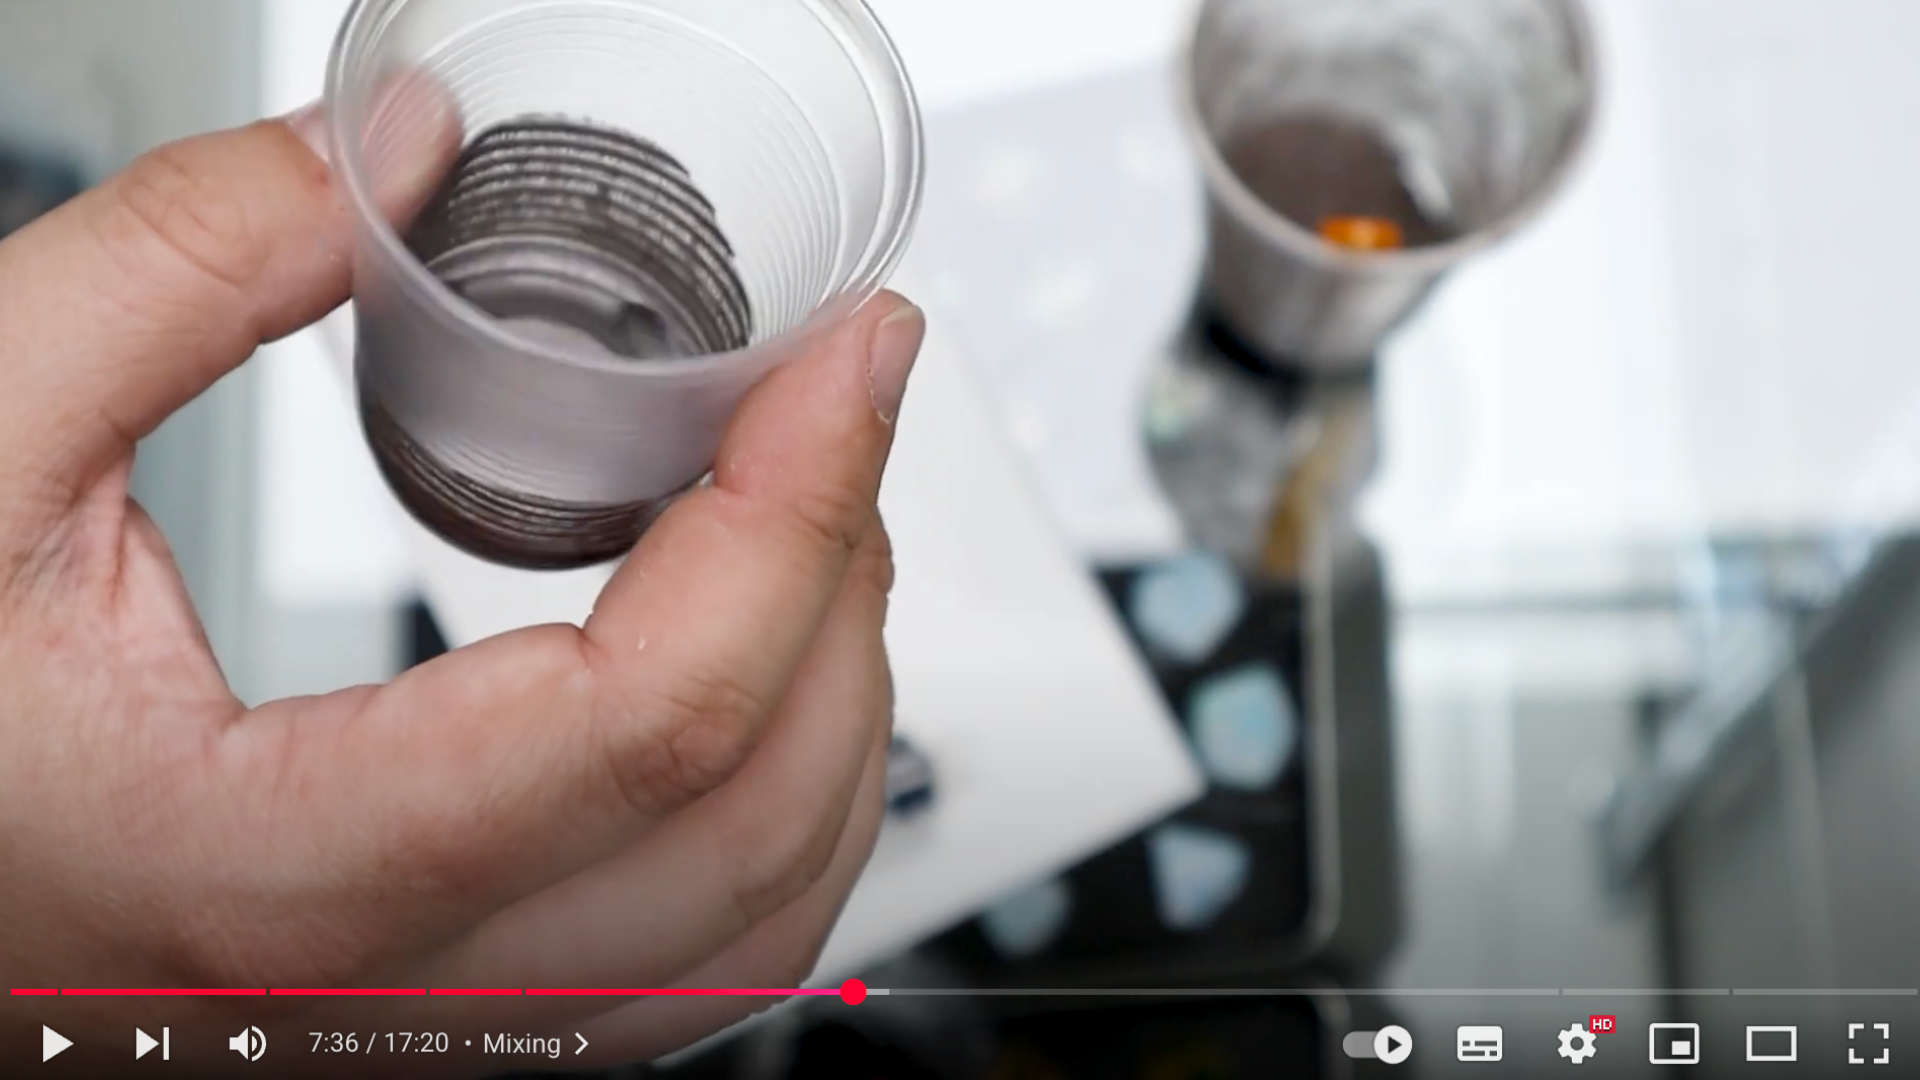
As soon as the alcohol hits the powder, you’ll notice the mica starting to blend and disperse.
Ultra-fine mica powder (50 microns or less) will dissolve and mix almost instantly, creating a thin, shimmery liquid with minimal effort.
You’ll see a vibrant, metallic sheen that signals a well-started blend.
Step 4: Adjust the Thickness
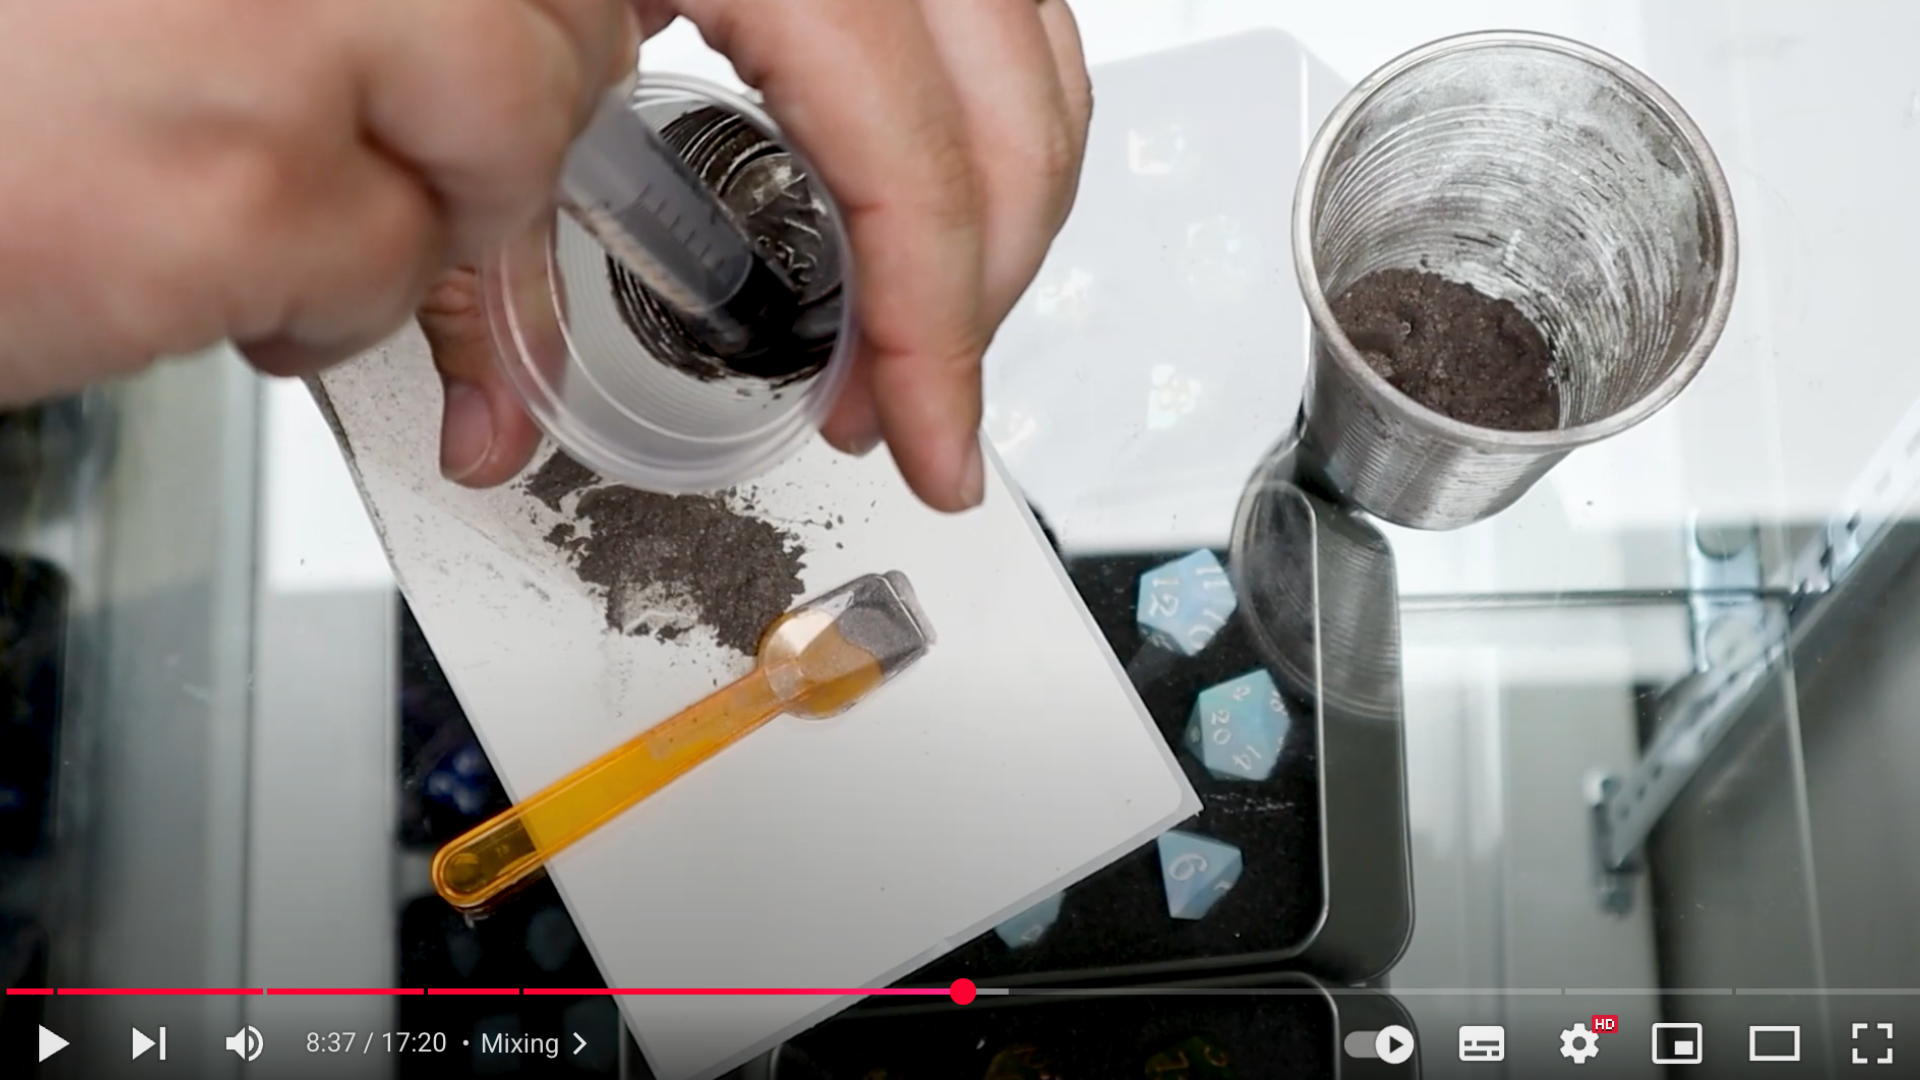
After the initial mixing, evaluate the consistency of your ink. If it’s too thin, gradually add more mica, a teaspoon at a time, and stir thoroughly.
You want to reach a point where the mixture feels thick and saturated but not clumpy.
For maximum shimmer and performance in resin, aim for a heavy load of mica without overdoing it to the point of sediment.
A good tip: swish the mix and check whether all the powder is suspended. If it blends without settling too quickly and has a shiny, velvety look, you’ve likely hit the sweet spot.
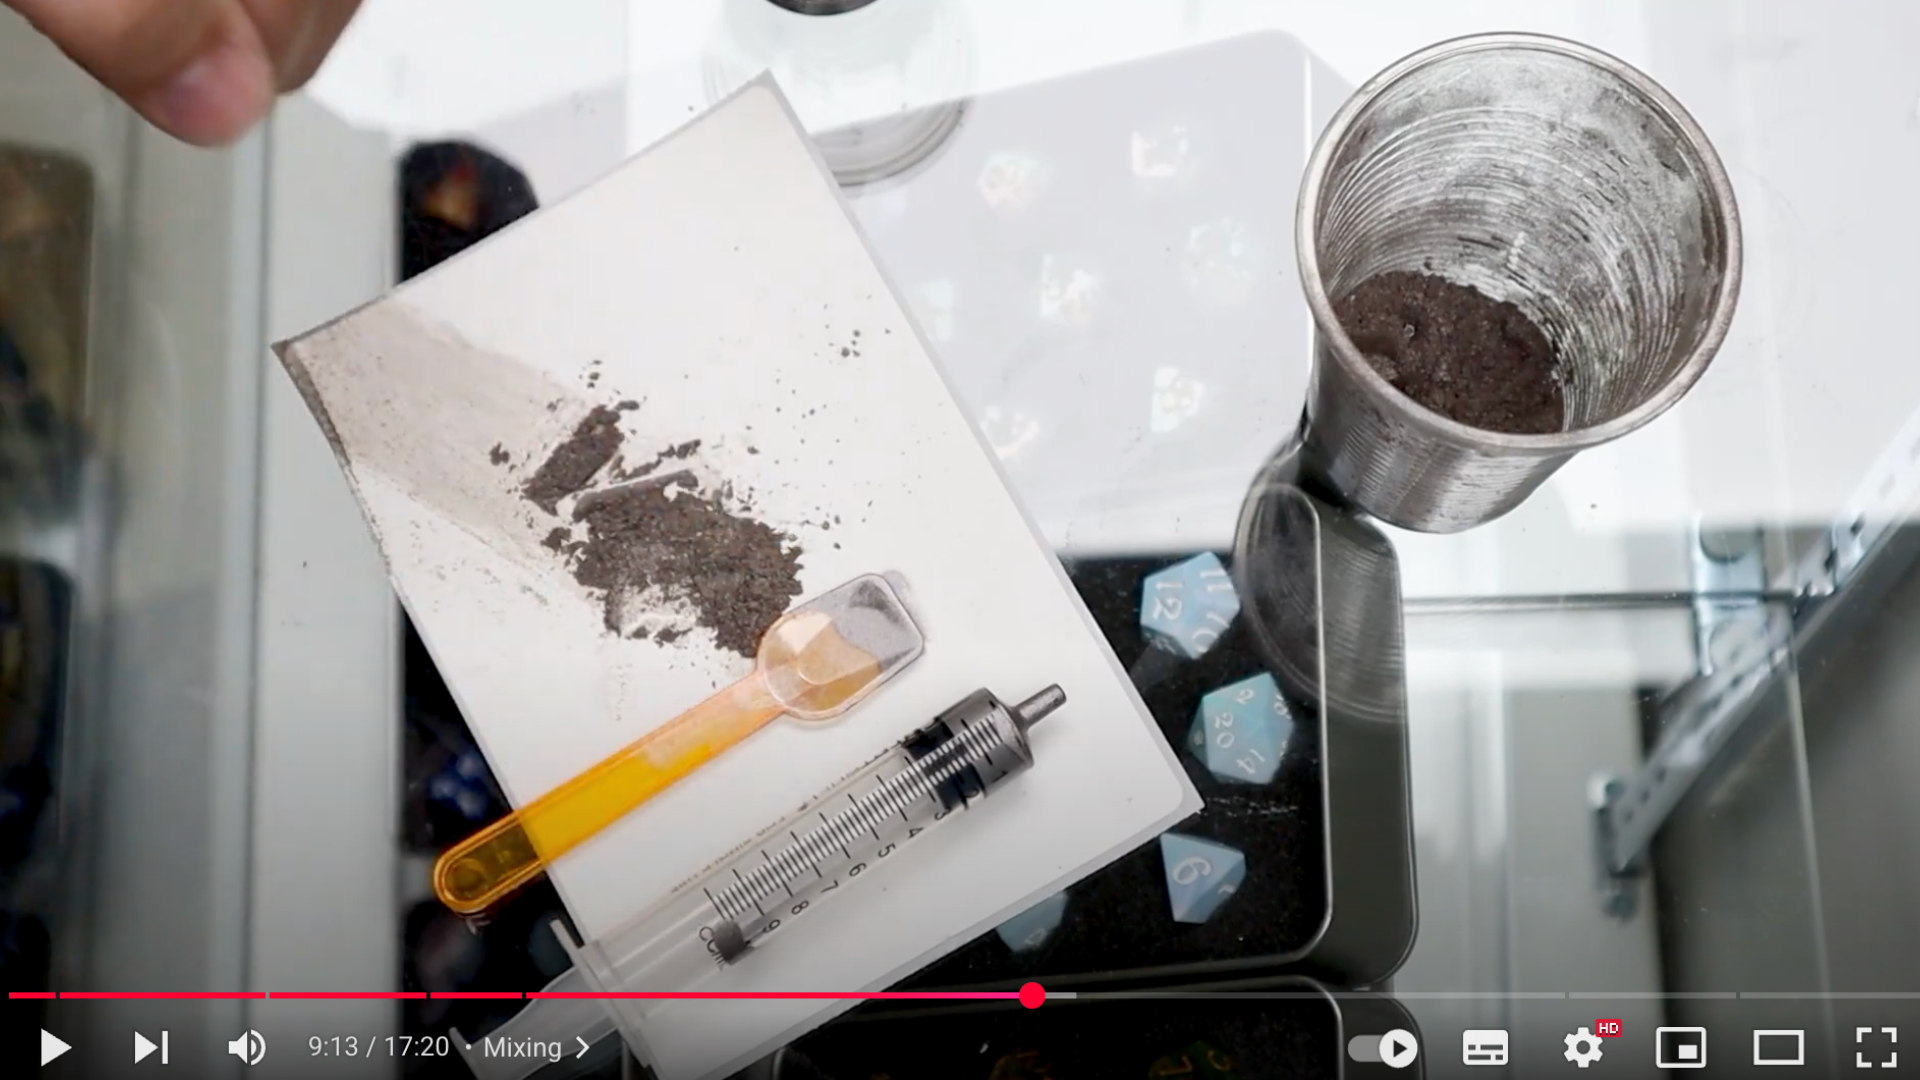
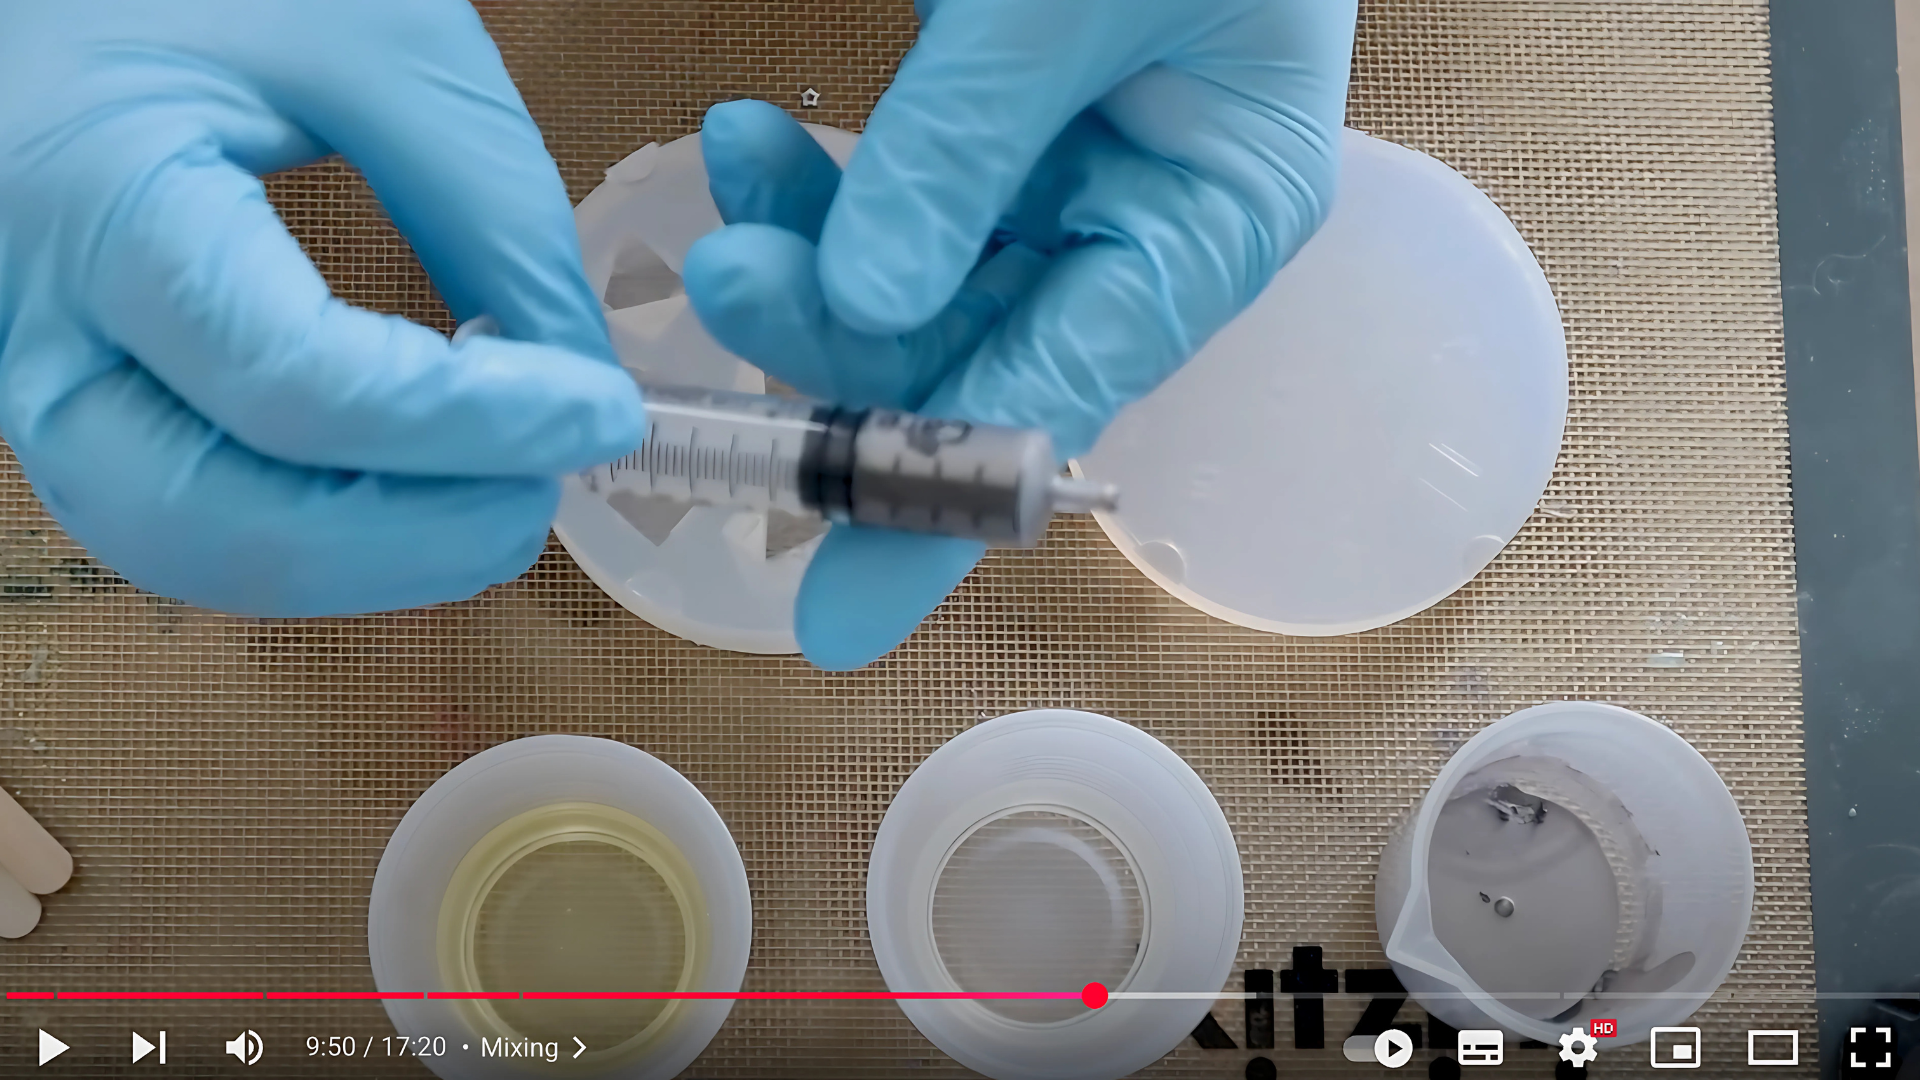
Step 5: Load Your Syringe
Once you’re happy with the mix, use your syringe or pipette to draw up the alcohol ink. Scrape the sides of the container to collect every bit of mica.
It’s normal to draw in a little air; you can expel it by turning the syringe upside down and gently pressing the plunger.
Be cautious not to create a “mica volcano” by pushing too fast, which could cause overflow or splatter.
At this point, your ink is ready to store or use. For short-term storage, keep the syringe capped to prevent evaporation.
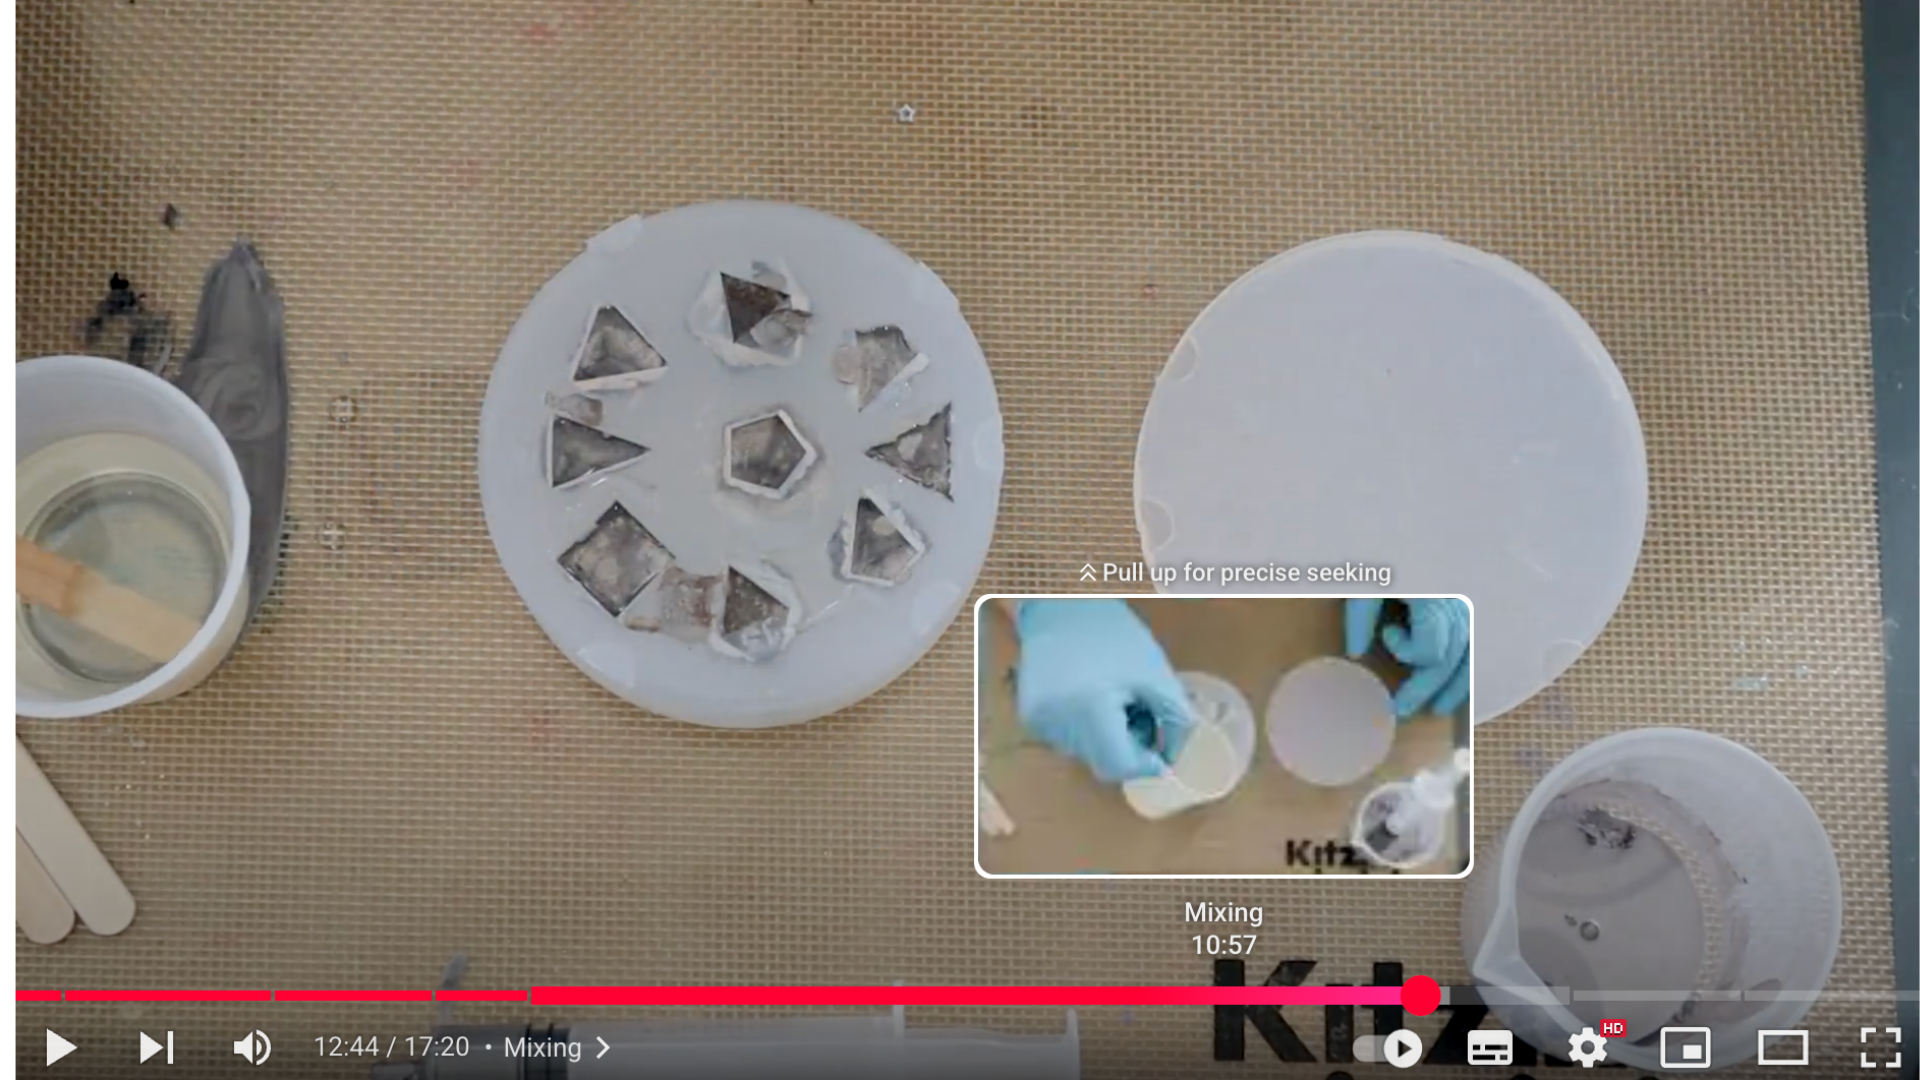
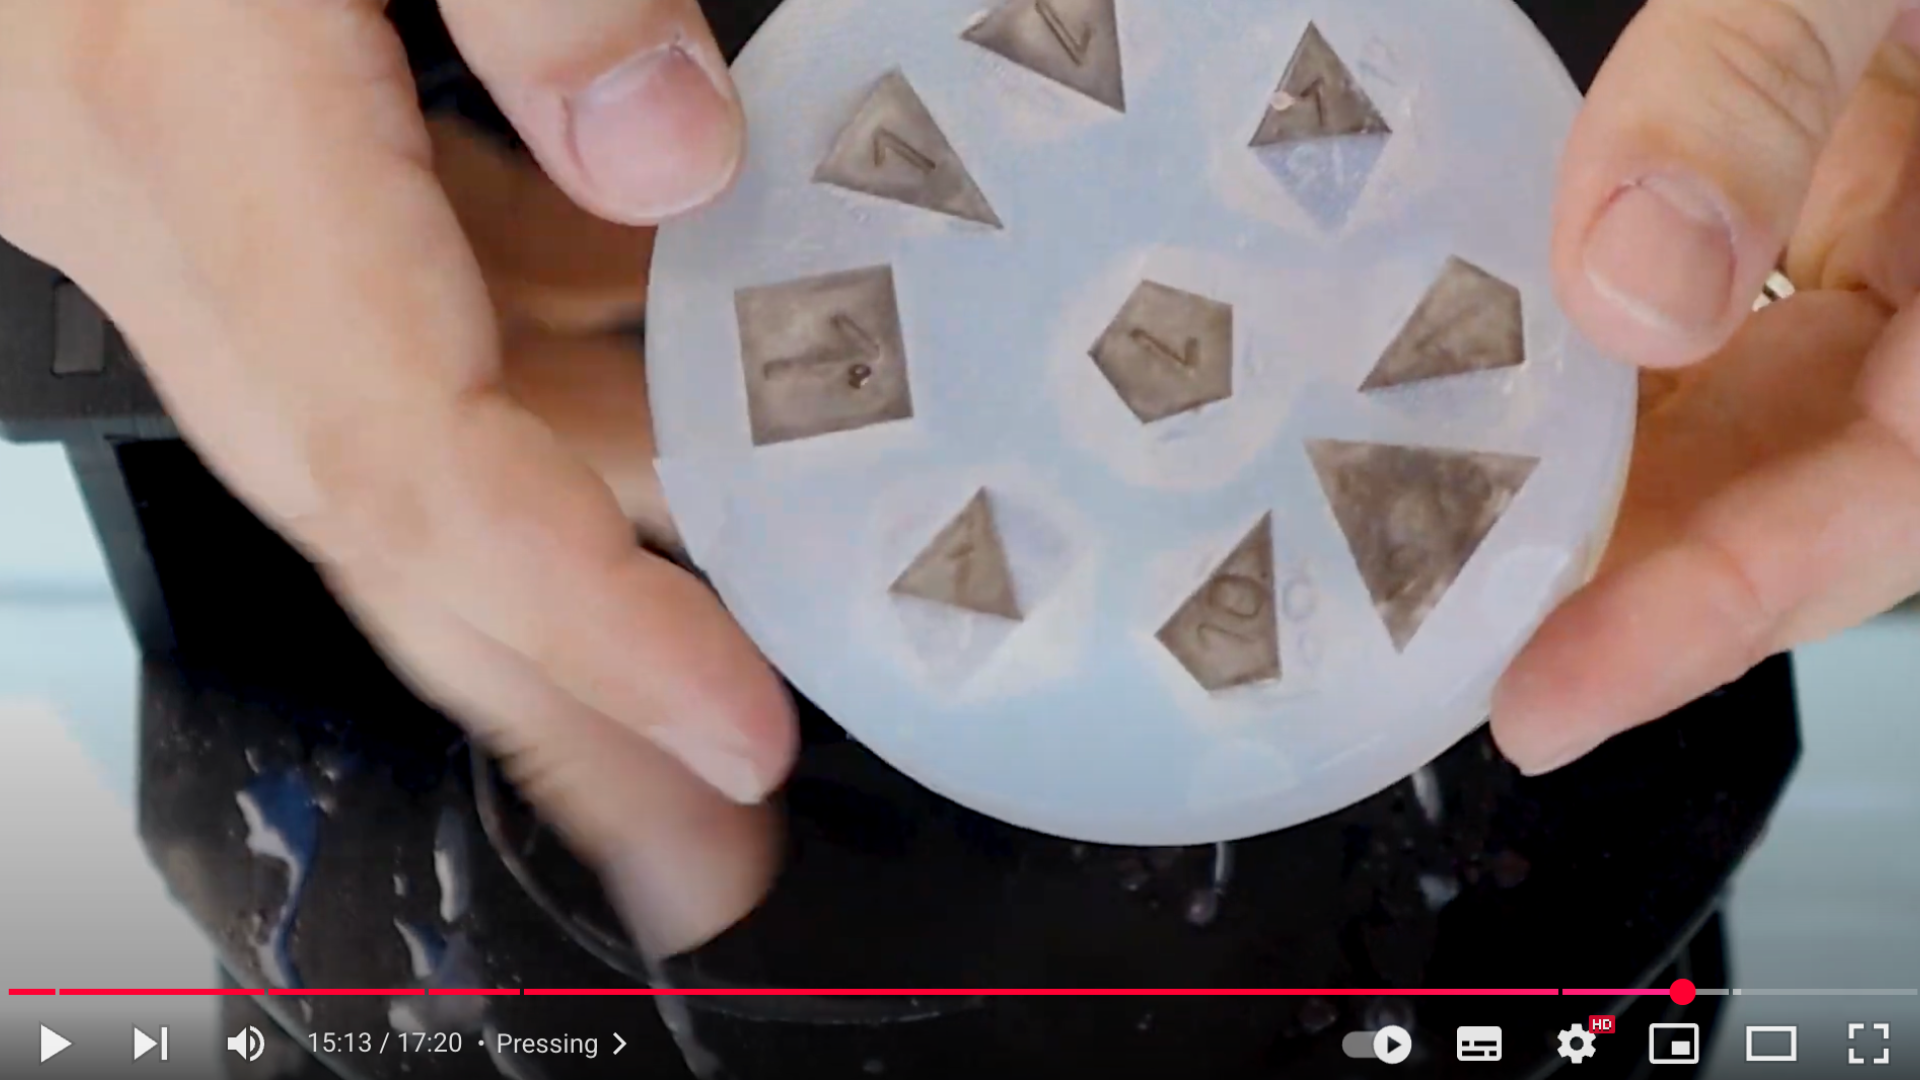
Step 6: Prep Your Resin and Mold
Before applying your ink, prepare your resin and molds. In this example, the resin is polyurethane, which may appear yellowish but will clear as it cures.
As you prep, give your syringe a quick shake to remix any separated mica particles.
Separation is normal, just like commercial alcohol inks; mica needs a shake before use to ensure even distribution.
Once your resin is mixed and molds are clean, you’re ready for the next step.
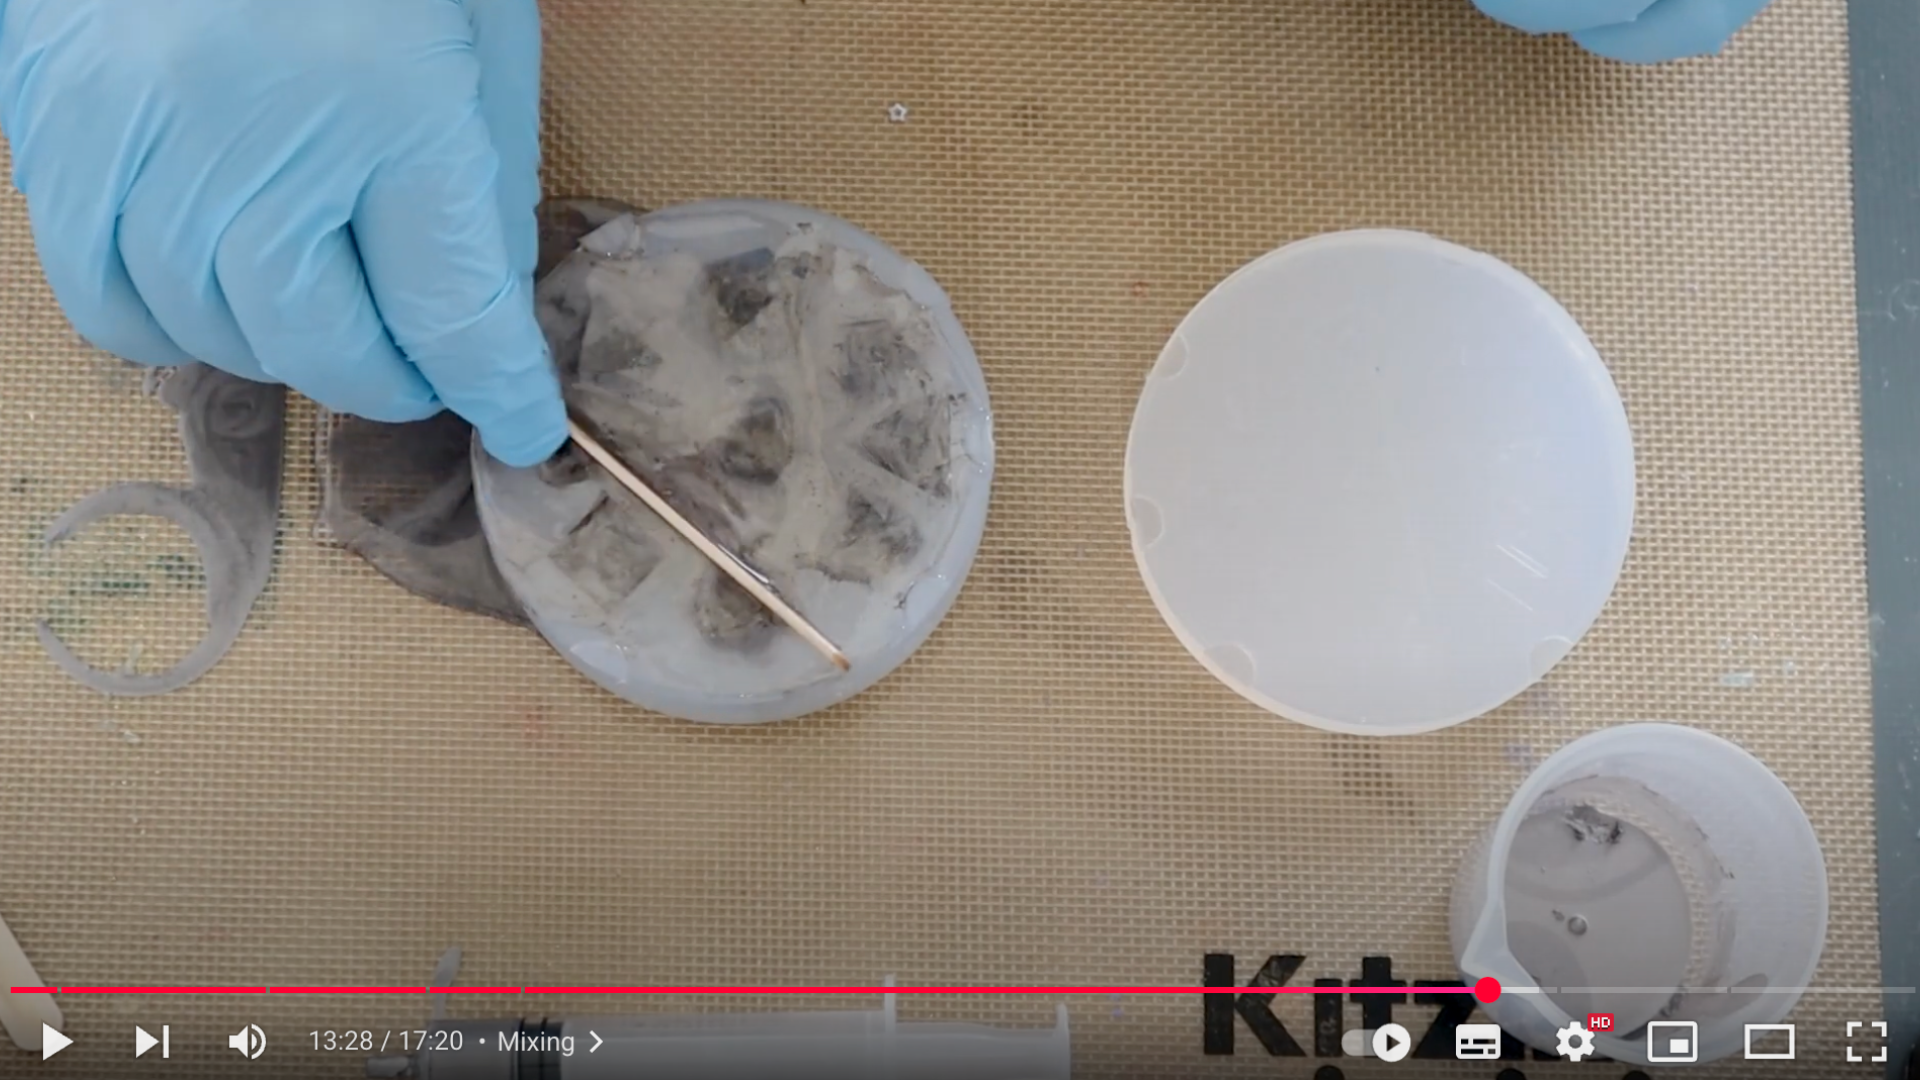
Step 7: Add the Alcohol Ink to Resin
Introduce a small amount of your homemade mica ink into the mixed resin.
A few drops are usually enough to add shimmer and color depth. Mix gently to distribute the shimmer throughout.
When pouring into your mold, fill it about three-quarters full. This allows for topping off later, helping to prevent cove inhibition or overflow.
The key is balance; you want enough ink for shimmer, but not so much that it interferes with curing.
Step 8: Evaporate Extra Alcohol
Because alcohol is highly flammable, this step requires care. Use a lighter or small torch gently to help evaporate excess alcohol sitting on the surface of your mold.
This step improves bonding with the resin and prevents bubbling or wet patches.
However, go slow; too much heat can ignite the alcohol or distort your resin. You’re aiming for a brief flash that evaporates the alcohol, not a bonfire.
Step 9: Final Resin Pour and Cure
Once the excess alcohol has evaporated, pour the remaining resin into your mold to top it off. This helps encapsulate the mica ink fully.
Carefully align the mold cap to avoid bubbles or leaks. Then place it in a pressure pot and cure according to your resin’s instructions.
Step 10: Pressure Pot Cure
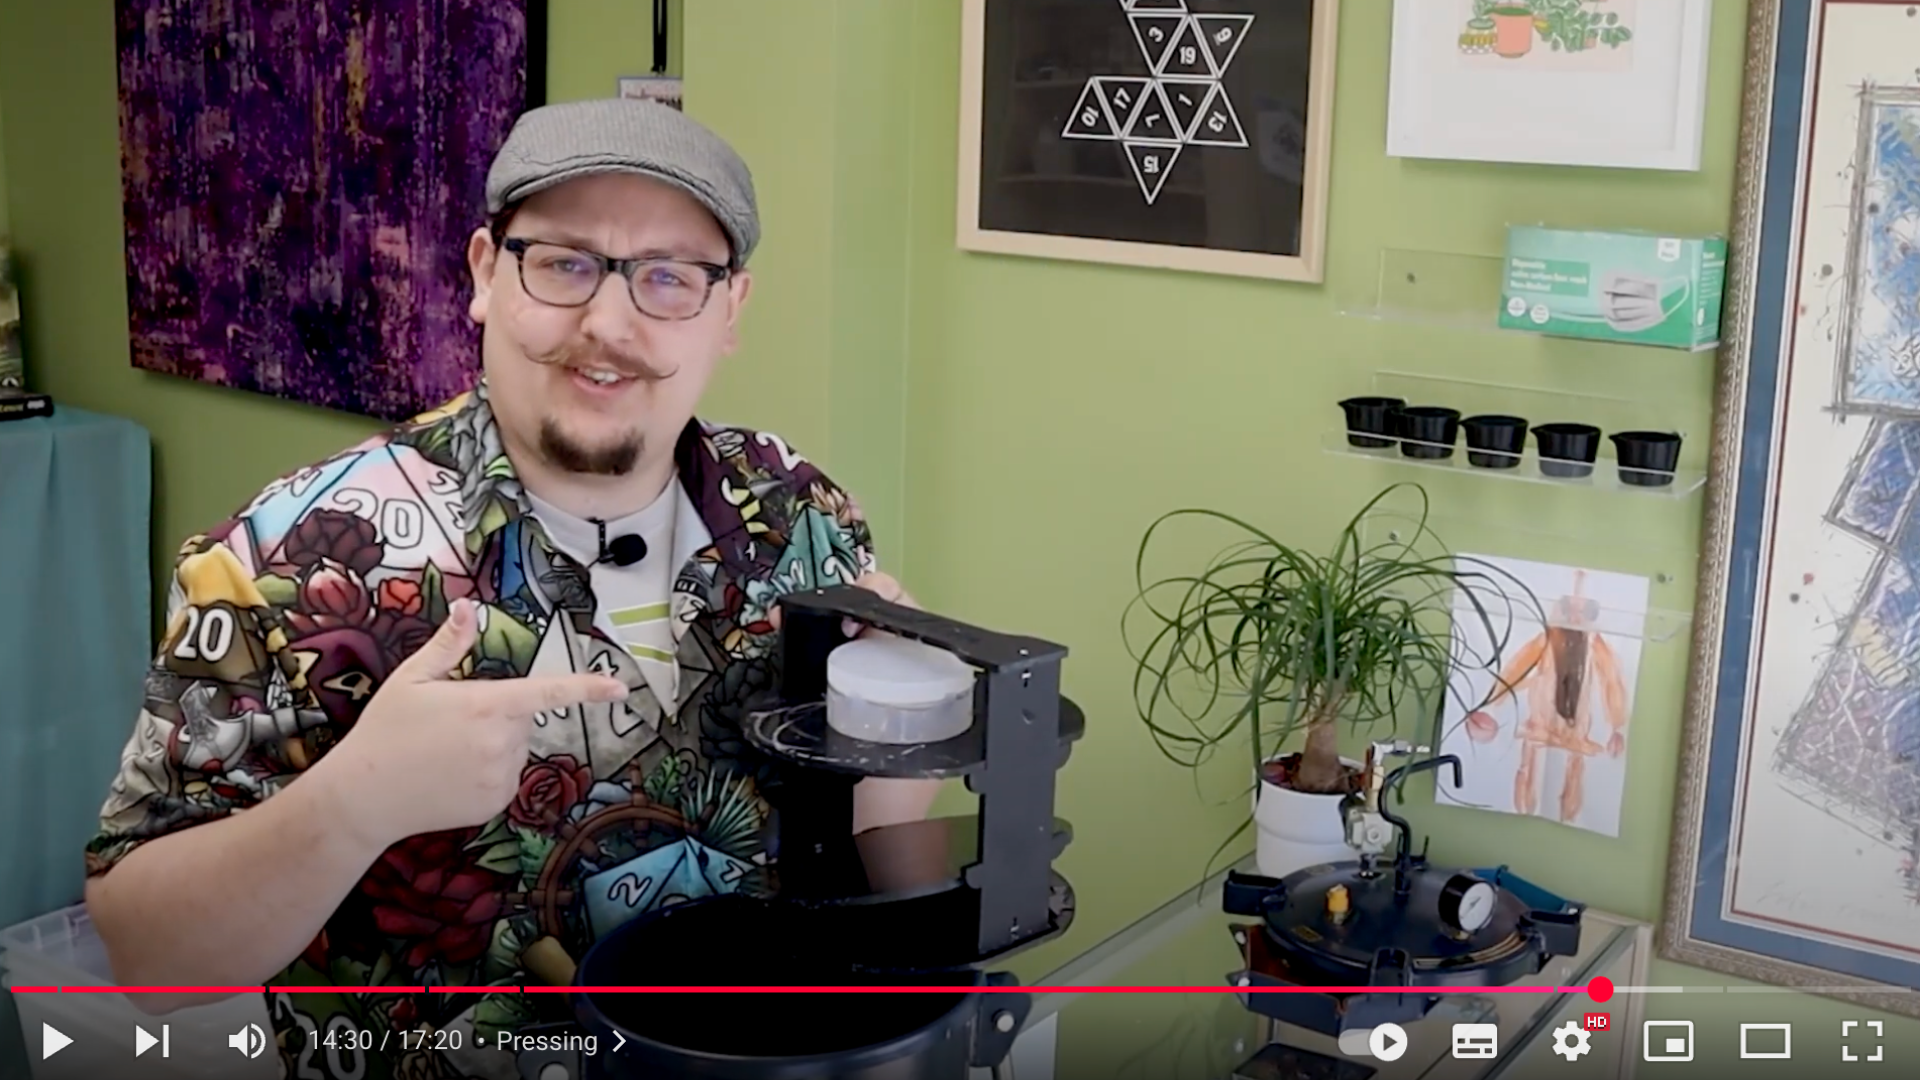
After curing in a pressure pot (for about an hour in this case), it’s time for the big reveal. Release the pressure, open the mold, and examine your finished piece.
You may see a little flashing, excess resin along the edges, which is easily cleaned with a blade or sanding tool.
The result should be a beautifully pigmented piece with metallic swirls and plumes of mica, made possible by your DIY ink and careful layering technique.
Final Results
The finished dice from this demo turned out beautifully. Deep silver tones, metallic shimmer, and classy plume effects give the pieces a high-end look.
To replicate this at home with smaller details, you can also apply mica ink using a toothpick or micro brush.
For more dramatic visual effects, pair it with Blanco Blanco to create the traditional petri style look, where ink pools and drops explode into blooming patterns.
This method offers a perfect blend of control and creativity.
This step-by-step tutorial is by an excellent video from Druid Dice. Huge thanks to the creator for sharing such a clear and informative guide. You can watch the original video on their YouTube channel or view it below.
How to Use DIY Alcohol Ink?
Alcohol ink is a fluid medium that lets you create beautiful art with minimal skill, and these colorful inks can turn ordinary surfaces into extraordinary masterpieces.
1. Unleashing Your DIY Alcohol Ink Creativity
Alcohol ink doesn’t play by normal art rules.
It’s the rebel of the crafting world, and that’s what makes it awesome. No two designs will ever look exactly the same – how cool is that?
2. Surfaces to Try
I’ve experimented with tons of surfaces, and trust me, the possibilities are endless. Ceramic tiles become your personal canvas.
Glass jars change from boring to beautiful with just a few drops. Glossy photo paper? It turns into a mesmerizing landscape of colors that blend and flow like magic.
3. Creative Project Ideas
Want specific ideas? You can try ceramic tile coasters that look like mini abstract paintings, or decorated glass vases that wow your friends.
Gift tags that make people go “Wow, did you make this?” and greeting cards that stand out from store-bought options.
4. Experimentation is Key
There are no mistakes in alcohol ink. Just happy accidents waiting to become art. Drip, swirl, blend – do whatever feels right.
Some of my best designs happened when I stopped trying to control everything and just let the ink do its thing.
5. Tips for Success
Start small and practice on scrap materials. Don’t worry about perfection. Each splash of color tells a story, your story.
Remember that you’re not just making art; you’re creating something uniquely yours.
Conclusion
Your first batch might look messy. And that’s totally okay. Crafting is about the journey, not perfect results. Those first colorful experiments?
They’re your learning playground. Each splash, each unexpected blend tells a story. Don’t stress about getting everything right immediately.
I started exactly where you are – curious and a bit nervous. Some of my early inks looked like wild color explosions.
However, with each attempt, I improved. More confident and more creative.
A quick reminder is that you don’t need fancy art skills. Just grab those markers, some alcohol, and let your imagination flow. Spill, mix, create. No rules, no pressure.
And the best part is that you’re saving money and having fun. Your creativity has no limits.
You don’t need to be a professional artist to make something beautiful, just a little curiosity and a splash of color.