
Have you ever looked at a piece of old veneer furniture and thought, “I wish I could make this look new again”? I have, and the good news is, you can!
Painting veneer furniture is a simple and fun way to give your space a fresh look without spending a lot of money.
Whether it’s a dresser, table, or cabinet, a little paint can make a big difference.
In this blog, I’ll show you how to paint veneer furniture the right way. We’ll talk about what veneer is, how to prep it, what paint to use, and the best steps to get great results.
You don’t need to be an expert, just a little time, the right tools, and some patience. Let’s get started and turn that old piece into something you’ll be proud to show off!
Can You Paint Veneer Furniture?
Yes, you can definitely paint veneer furniture! But first, let’s talk about what veneer furniture actually is.
Veneer is a thin layer of real wood that’s glued on top of something like plywood or particleboard.
It’s not solid wood all the way through, but it still looks nice and is used in lots of furniture pieces because it’s more affordable.
You’ll find veneer on dressers, nightstands, desks, and even cabinets.
Now, just because it’s not solid wood doesn’t mean you can’t paint it. You just have to be a little careful. Since the veneer layer is thin, it’s important not to sand too hard.
With the right prep, like cleaning, light sanding, and using a good primer, you can paint veneer and give it a totally new look.
It’s a great way to refresh your furniture without buying new stuff!
Step-by-Step Guide: How to Paint Veneer Furniture
Transforming veneer furniture doesn’t require fancy tools, just the right steps. Follow this simple guide for a smooth, lasting finish.
Tools and Materials Needed
- Mild degreaser
- A bucket or a container for mixing
- Cleaning brush or hand sponge
- Microfiber cloths
- Screwdriver or drill
- Painter’s tape (optional)
- Wood filler
- Sandpaper (120, 240–400 grit)
- Orbital sander or hand sanding pad
- Shellac-based primer (spray or brush-on)
- Paint tray and liner (plastic bag optional)
- Self-leveling paint (color of choice)
- Mini foam roller and angled paintbrush
- Spray top coat (gloss, satin, or matte)
Step 1: Examine the Furniture
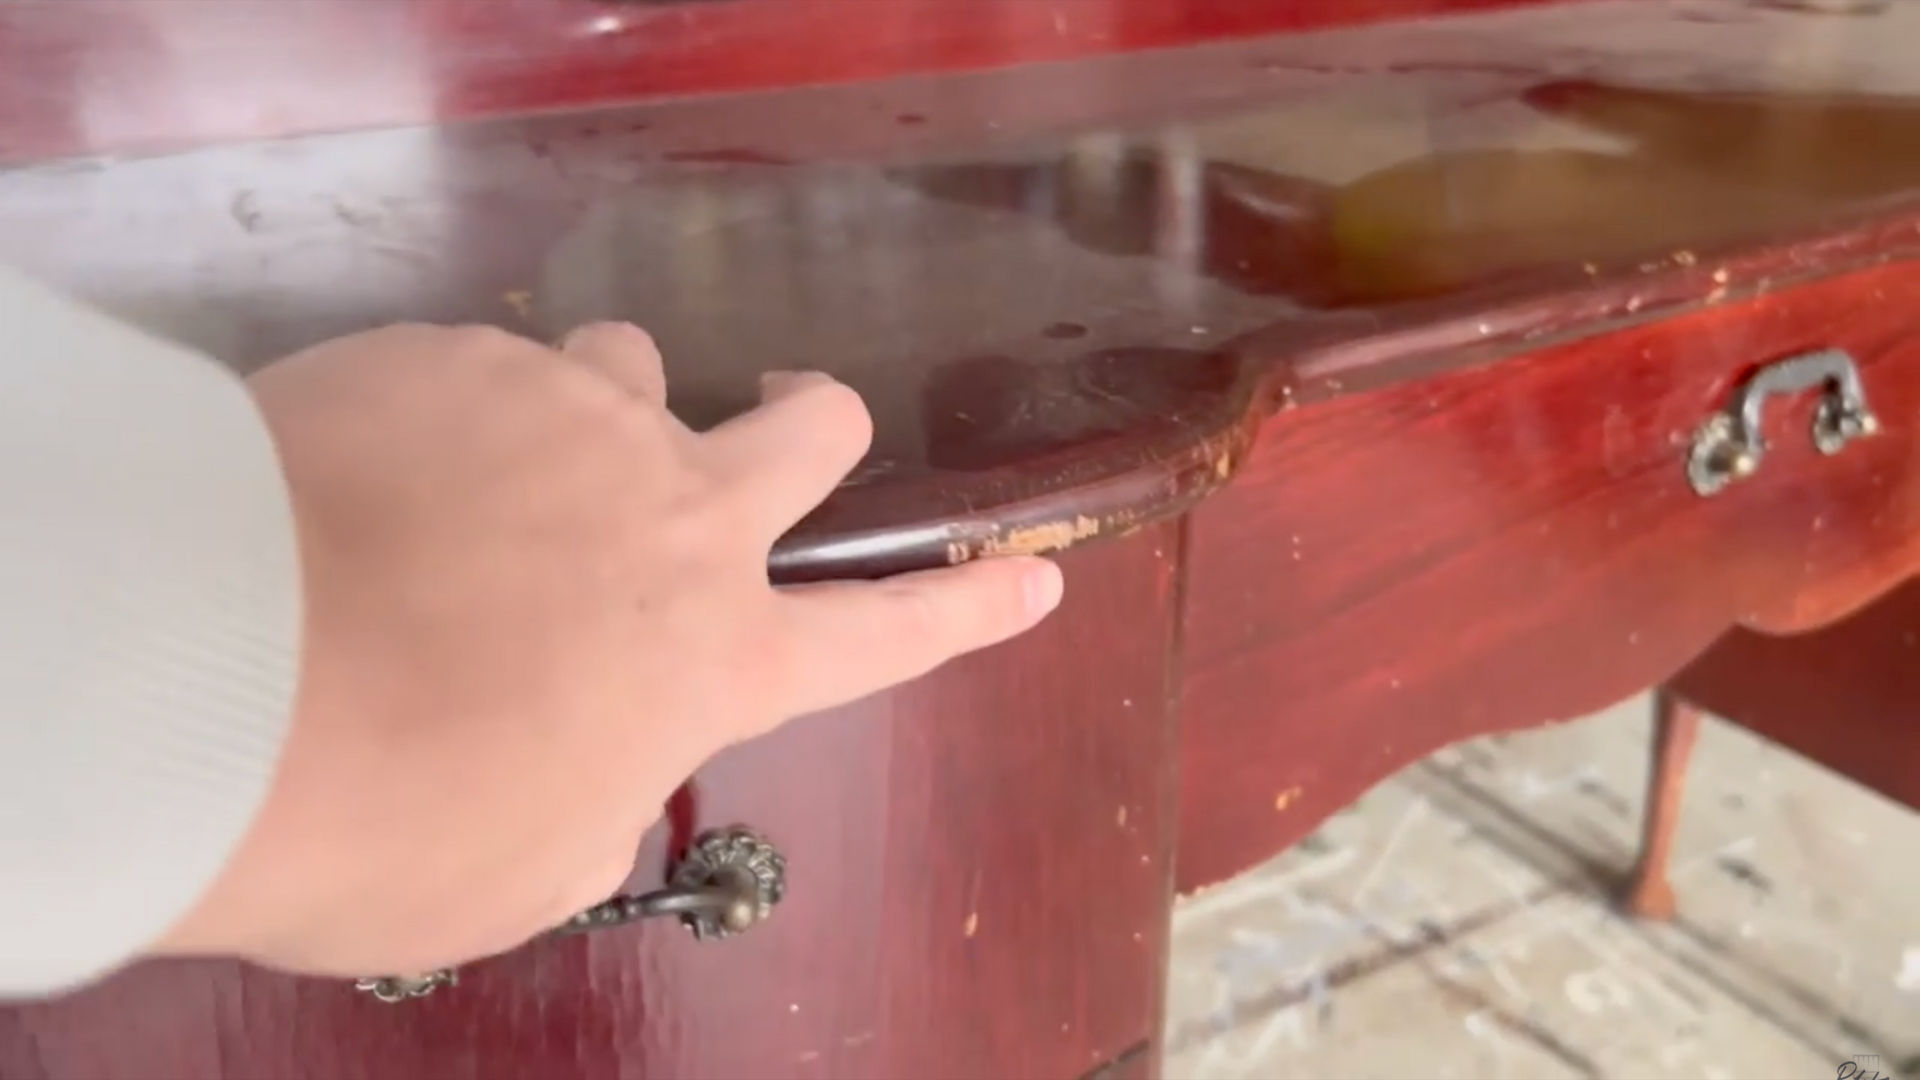
Before starting the makeover, it’s important to inspect the condition of the veneer furniture. Look closely for any visible red undertones or surface imperfections.
Note any dents, scratches, or areas where the veneer may be lifting, as these spots will need extra attention during the repair and sanding stages.
Step 2: Clean the Surface Thoroughly
Cleaning is a critical first step. Use a degreasing agent like Tricleanium mixed with water to remove built-up grime and oils that may interfere with paint adhesion.
This can be applied with a soft brush attached to a drill or with a regular sponge. Once the entire surface has been cleaned, wipe it dry with a microfiber cloth.
Veneer is sensitive to moisture, so it’s important not to let water sit on the surface. Let the piece dry fully before moving on to sanding.
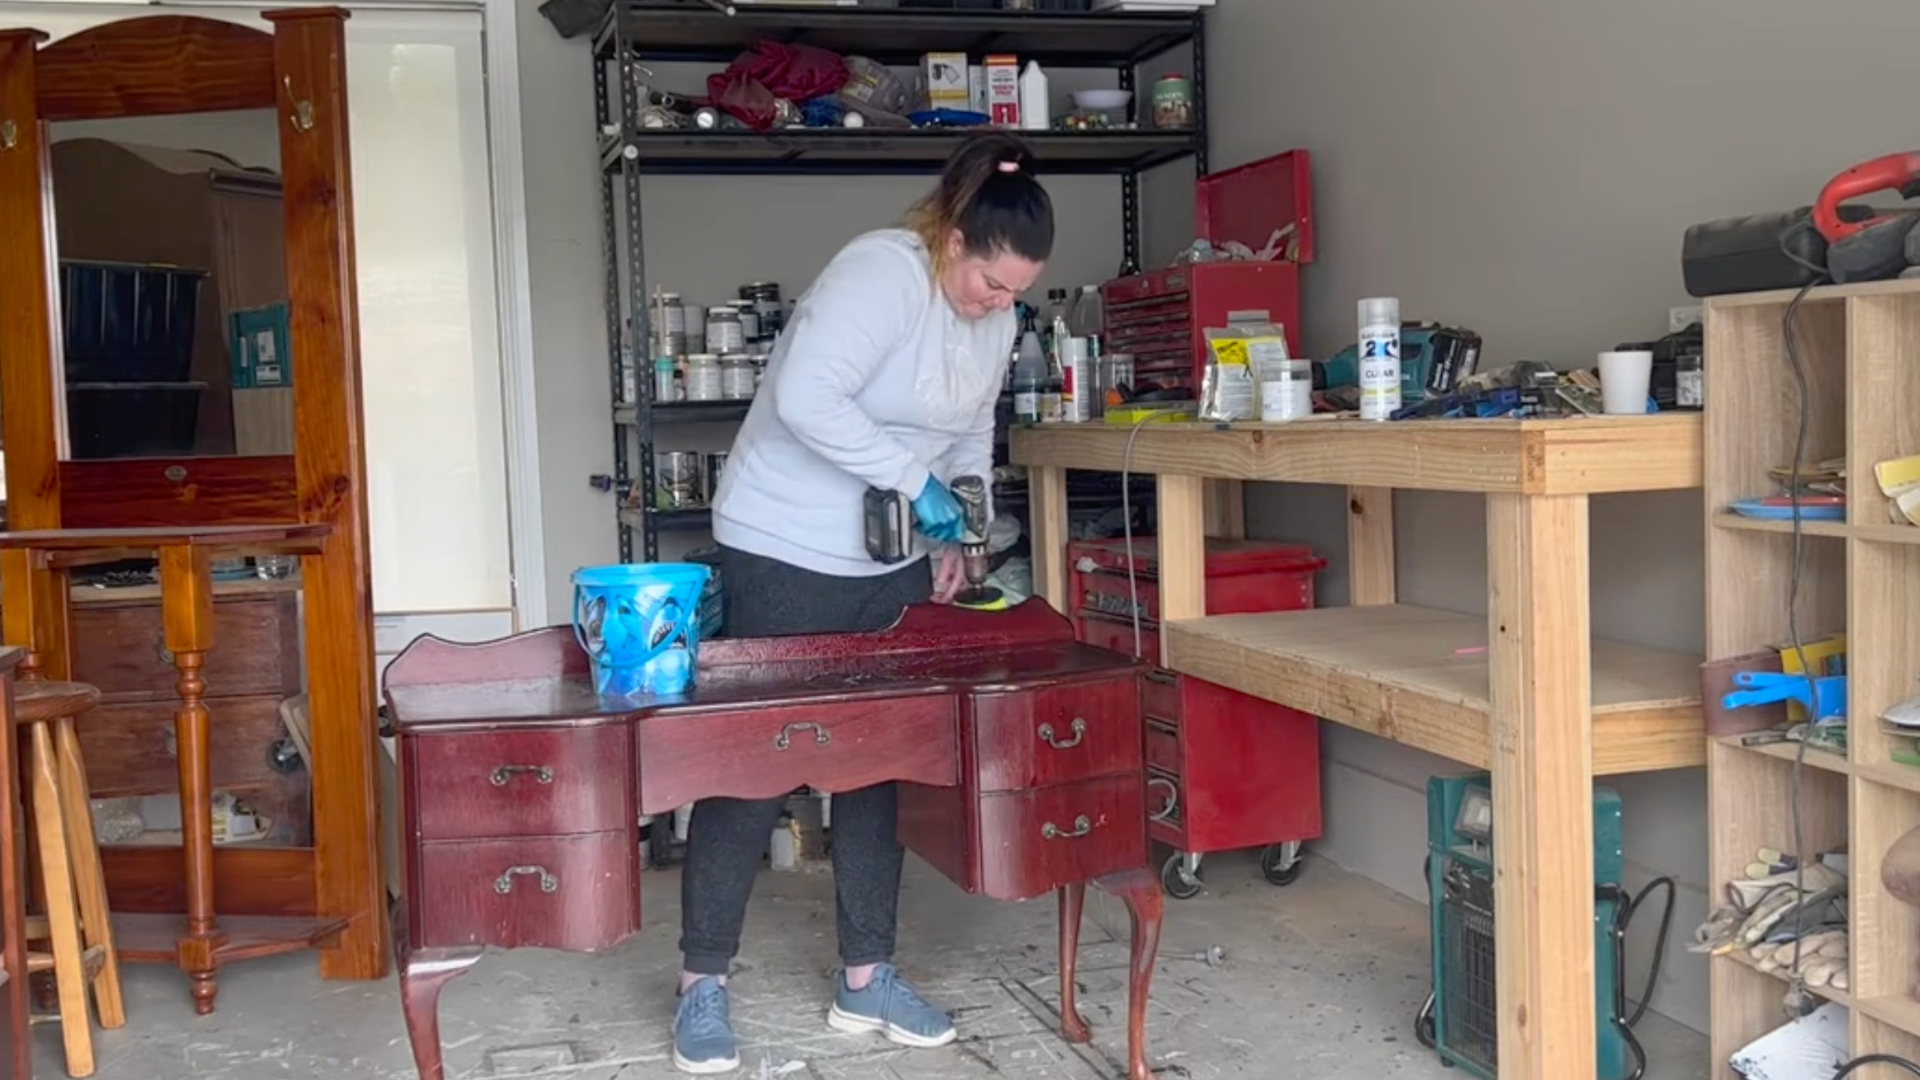
Step 3: Prep by Removing Drawers and Sanding
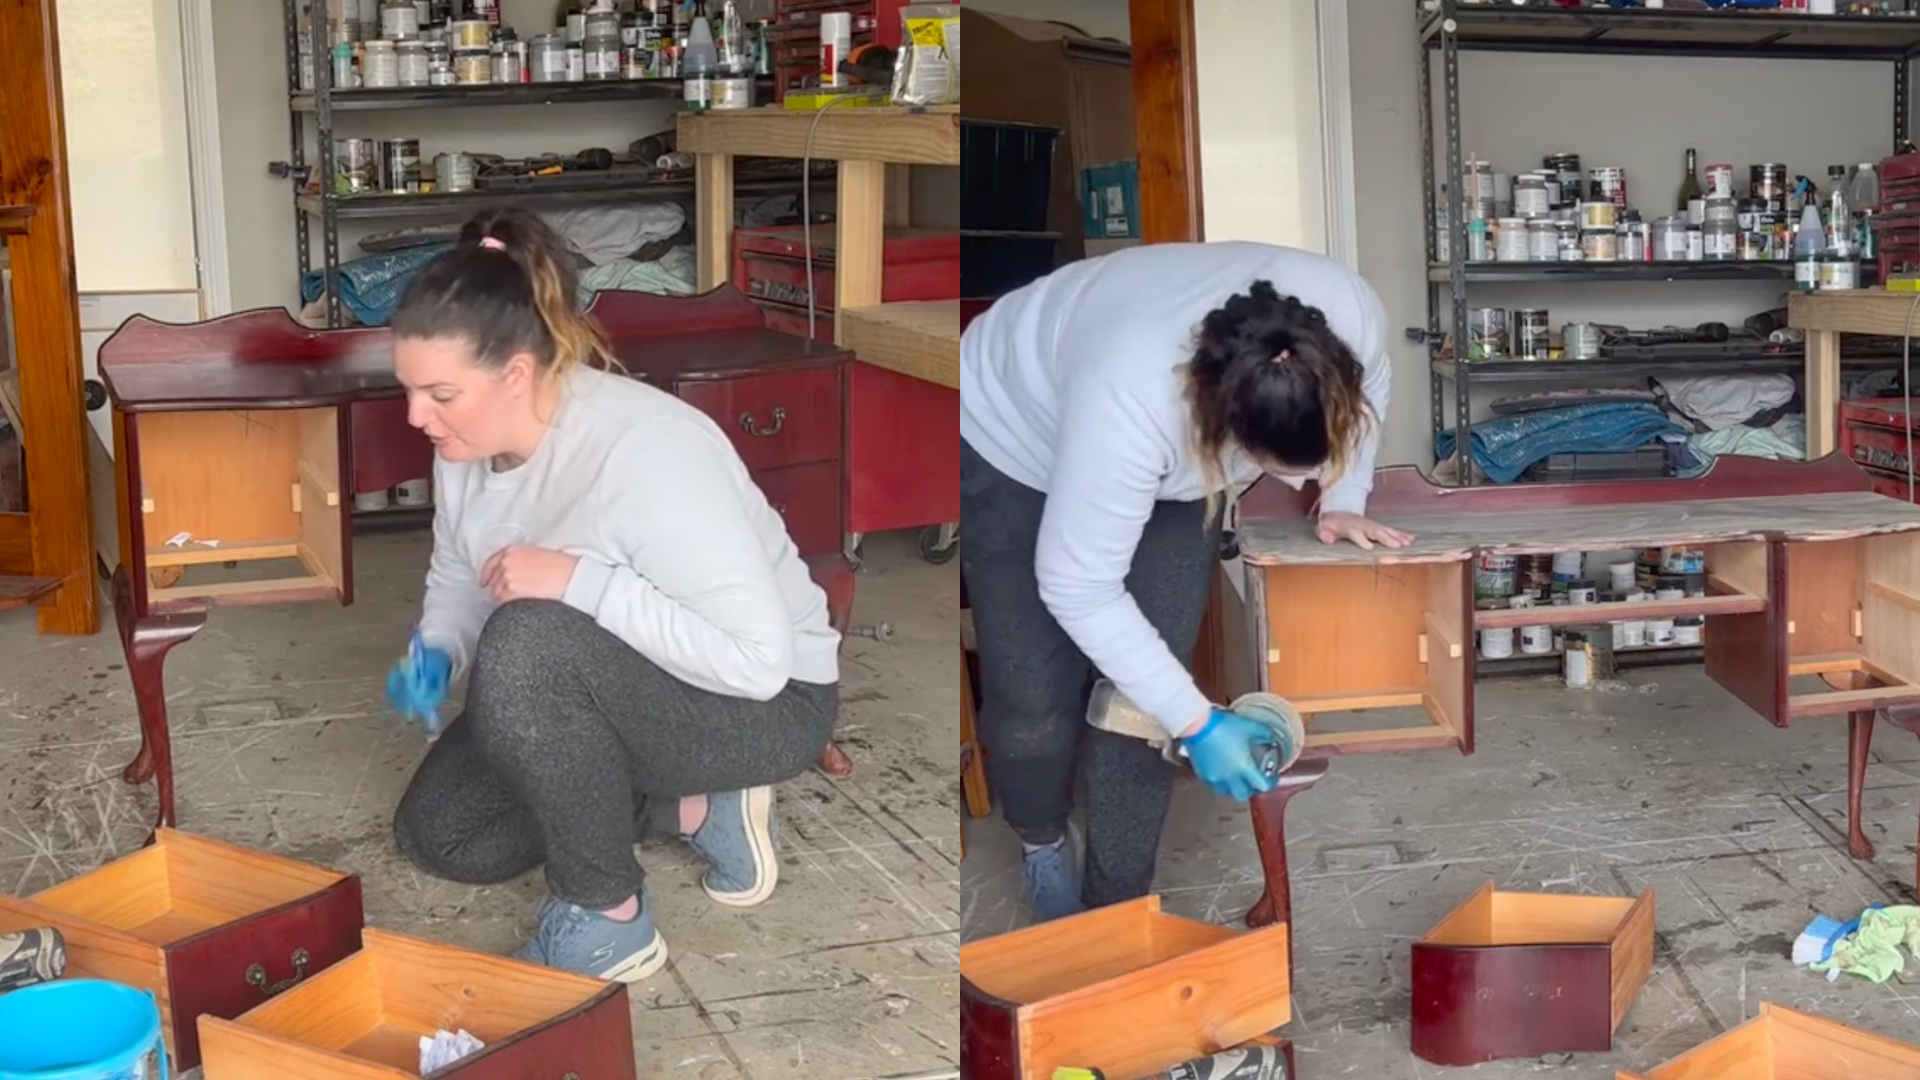
Take out all drawers and number them for easy reassembly. Remove any hardware using a screwdriver or drill.
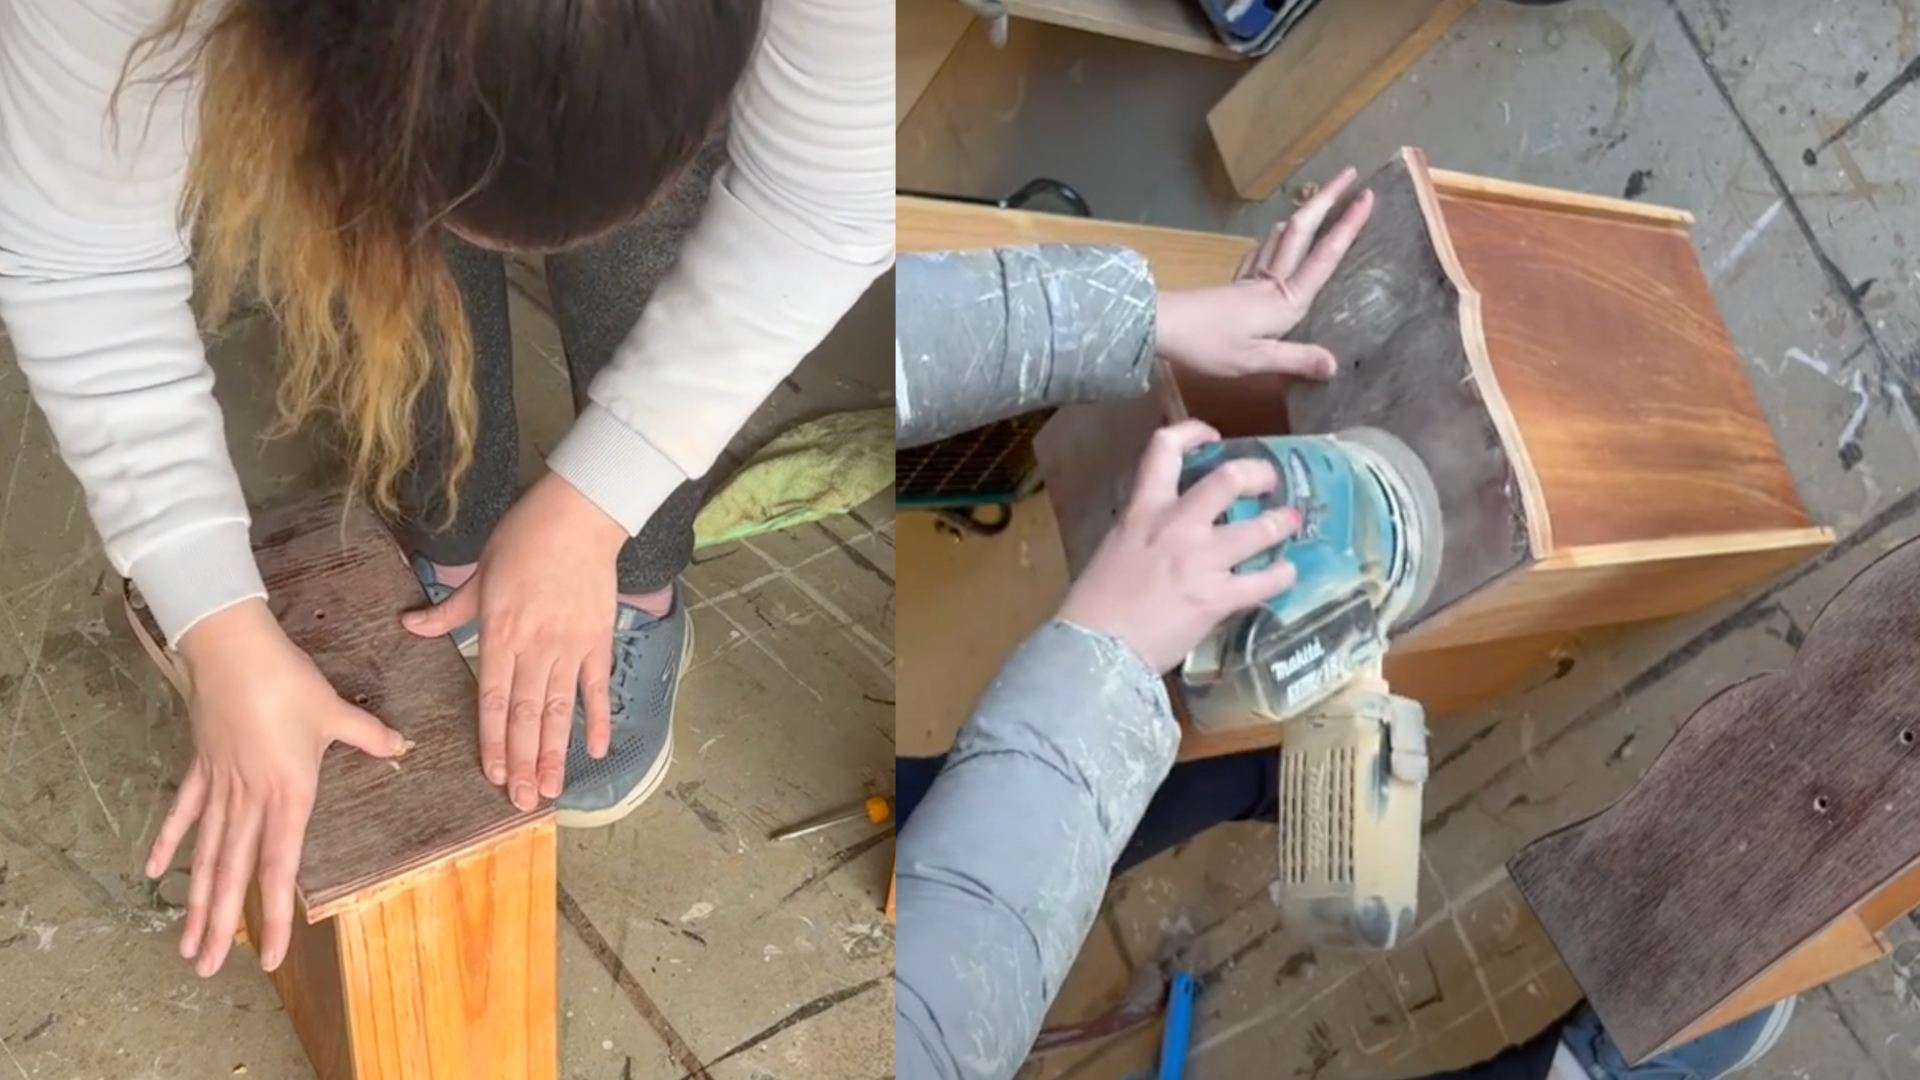
Once disassembled, lightly scuff sand the entire surface using 120-grit sandpaper.
Use an orbital sander for flat areas and a hand pad for edges and corners. The goal is to dull the glossy finish without damaging the veneer.
Step 4: Fill and Repair Imperfections
To ensure a smooth final appearance, fill in any chips or cracks with wood filler.
Apply the filler using fingers or a small tool, pressing it gently into any uneven or damaged areas.
Once it dries completely, sand the repaired spots smooth to blend them into the rest of the surface. This step helps achieve a clean, professional-looking result when the piece is painted.
After sanding and filling, it’s important to remove all leftover dust. Use a clean, slightly damp cloth or microfiber rag to wipe down the entire surface.
Step 5: Apply Primer
Primer is essential for helping paint stick and for sealing in any stains or wood tannins.
A shellac-based primer works well for veneer surfaces and can be applied with a spray can or a brush.
Thin, even coats are key to avoiding drips. In cases where red tones bleed through the primer, a second coat may be required, especially if planning to use light-colored paint.
For darker paints, a single coat may be sufficient.
Once the primer is dry, a light sanding with 240–400 grit sandpaper helps achieve a smooth finish.
This removes any tiny bumps or brush marks, making the surface ideal for the top coat.
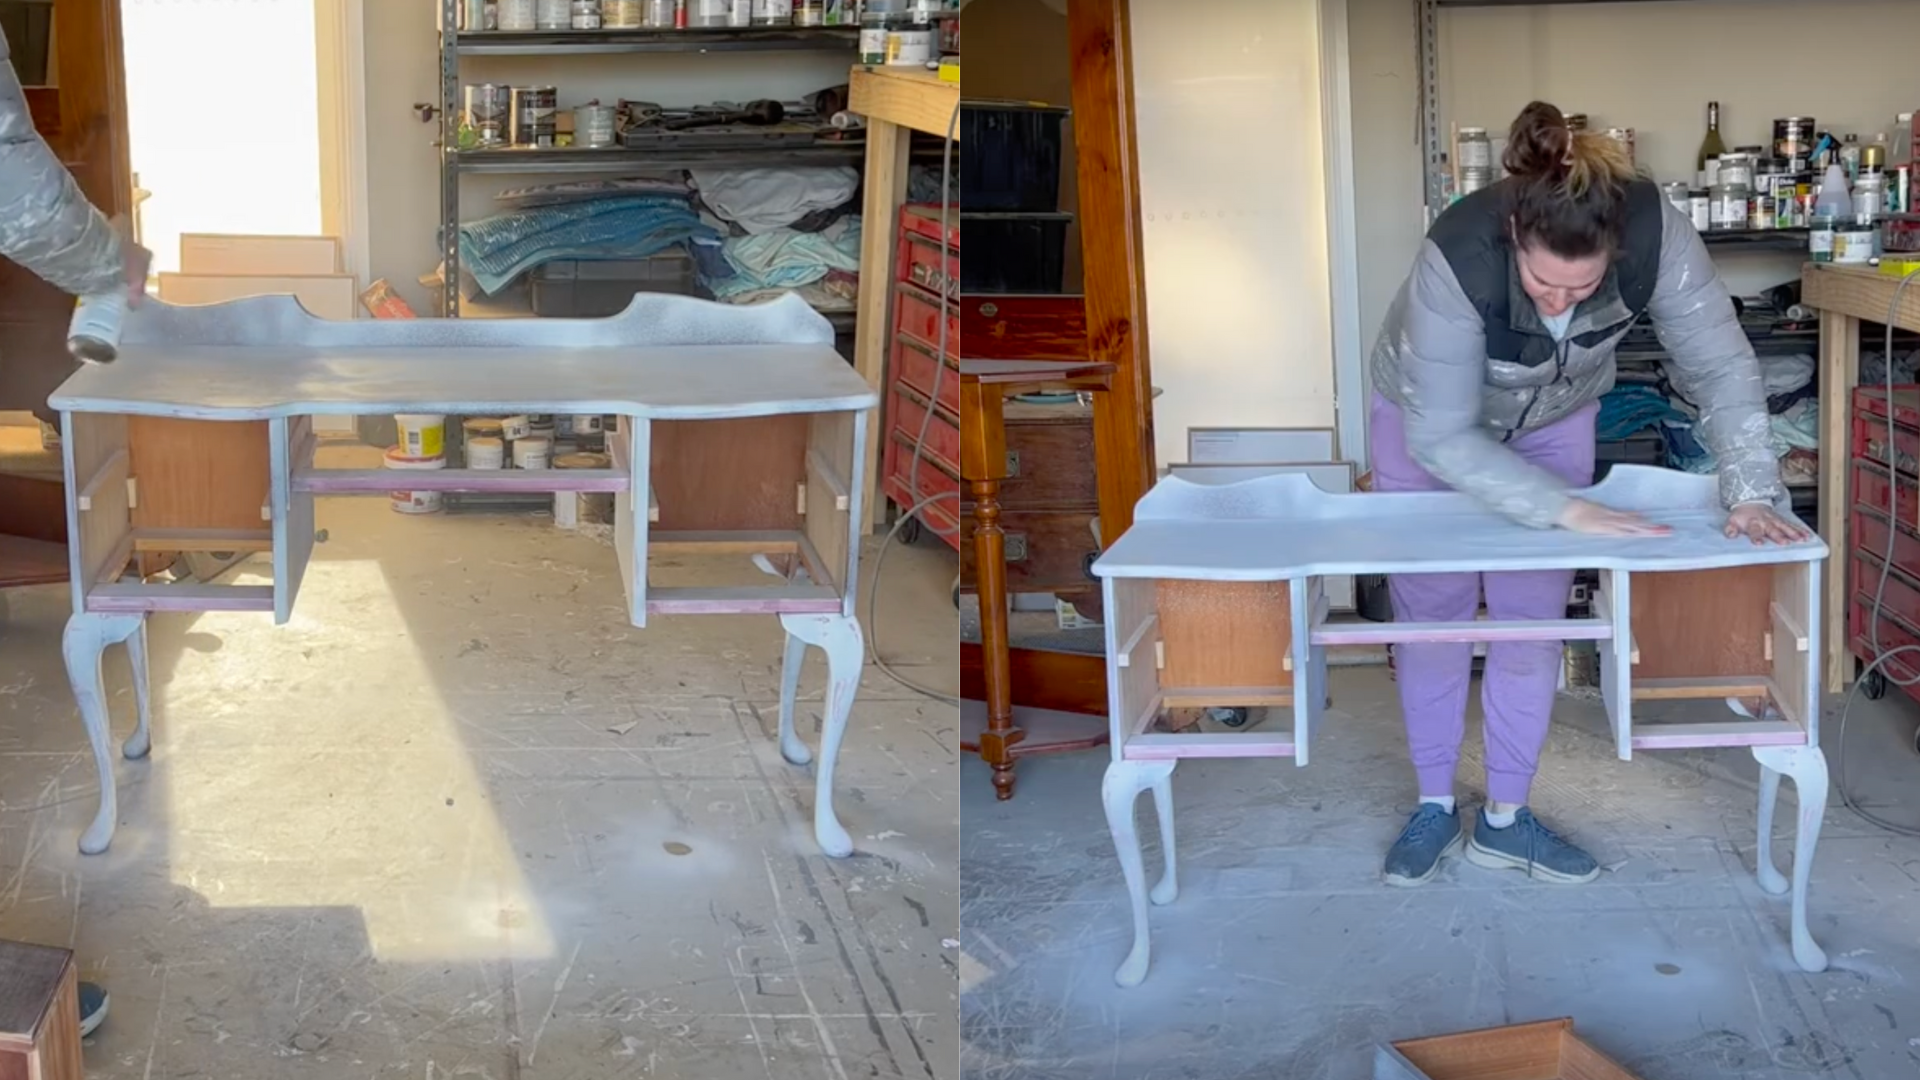
Step 6: Paint the Furniture
Use a high-quality self-leveling paint to minimize brush strokes and roller lines. Pour the paint into a tray lined with a plastic bag for easy cleanup.
Apply paint with a mini roller for large areas and a brush for edges and corners. Thin, even coats help prevent drips and ensure a smooth surface.
Paint all visible surfaces, including drawer fronts, and allow to dry fully before applying the next coat.
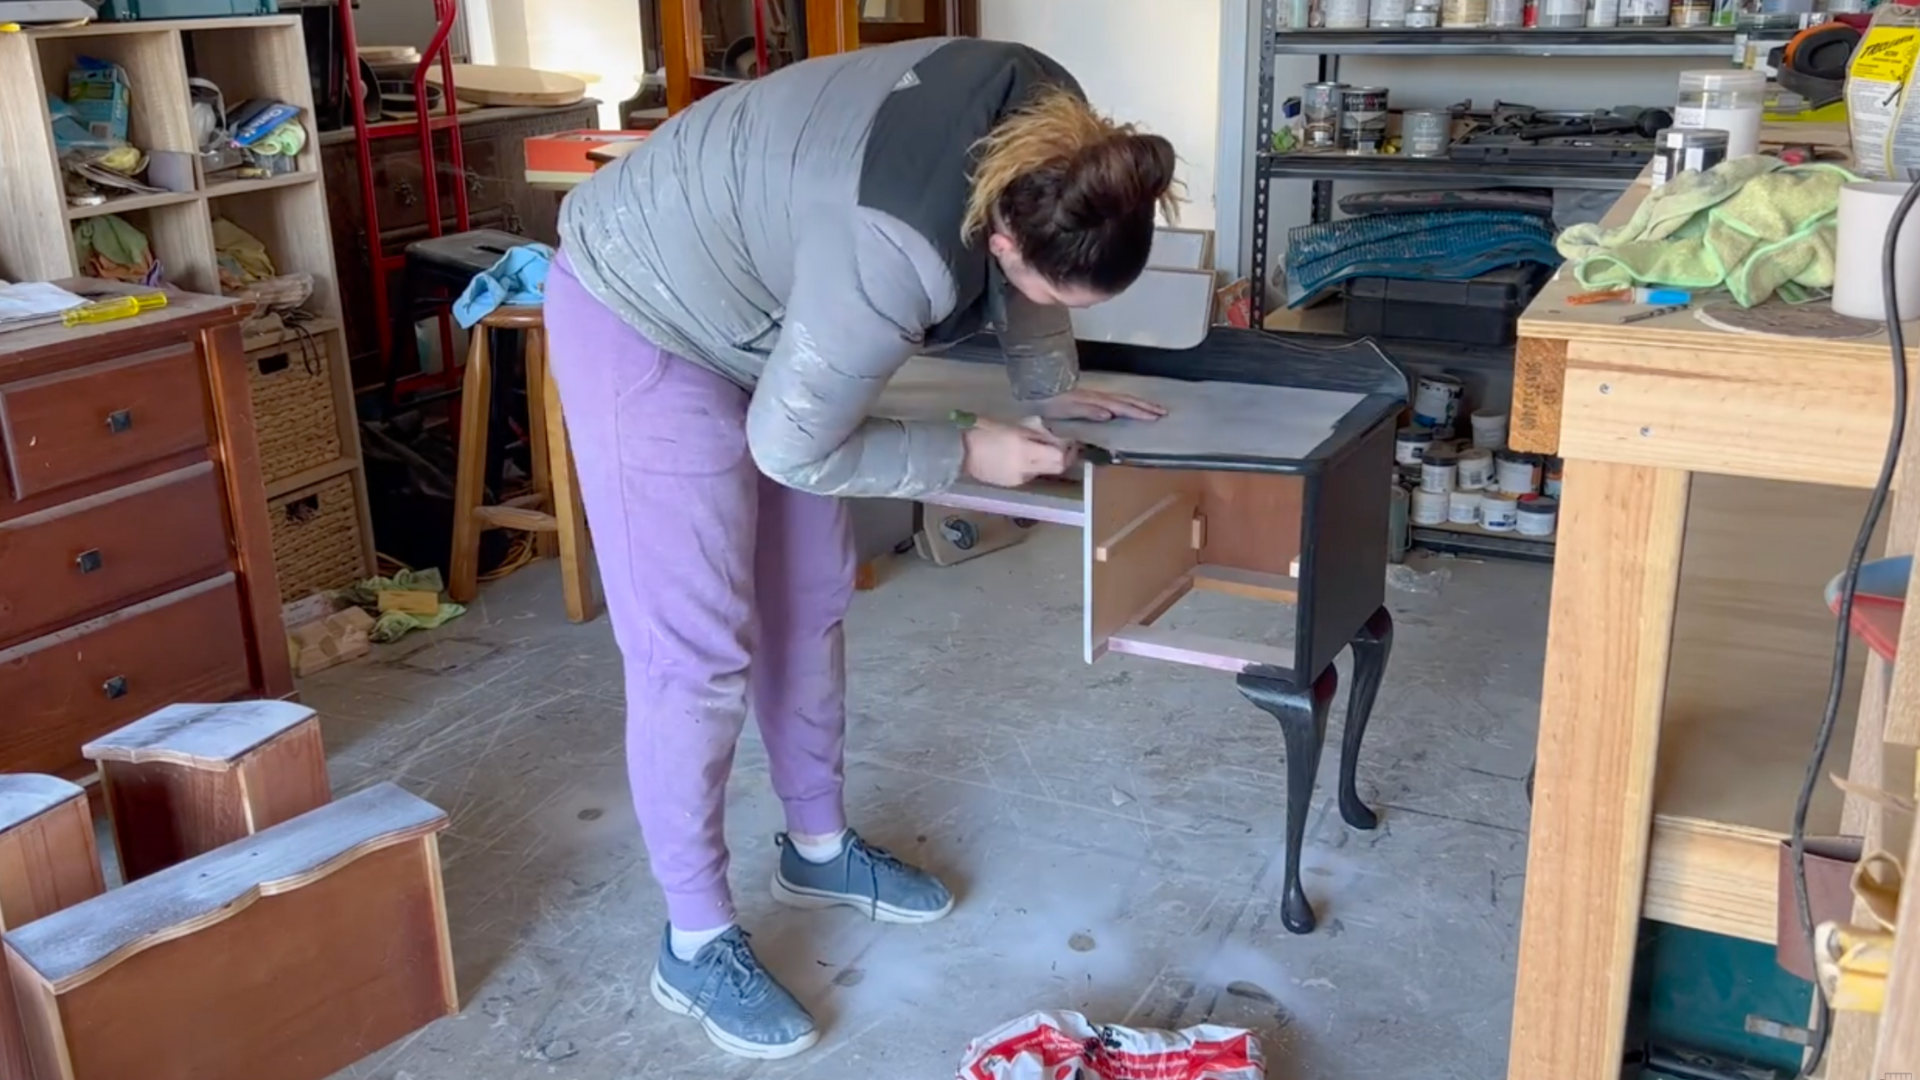
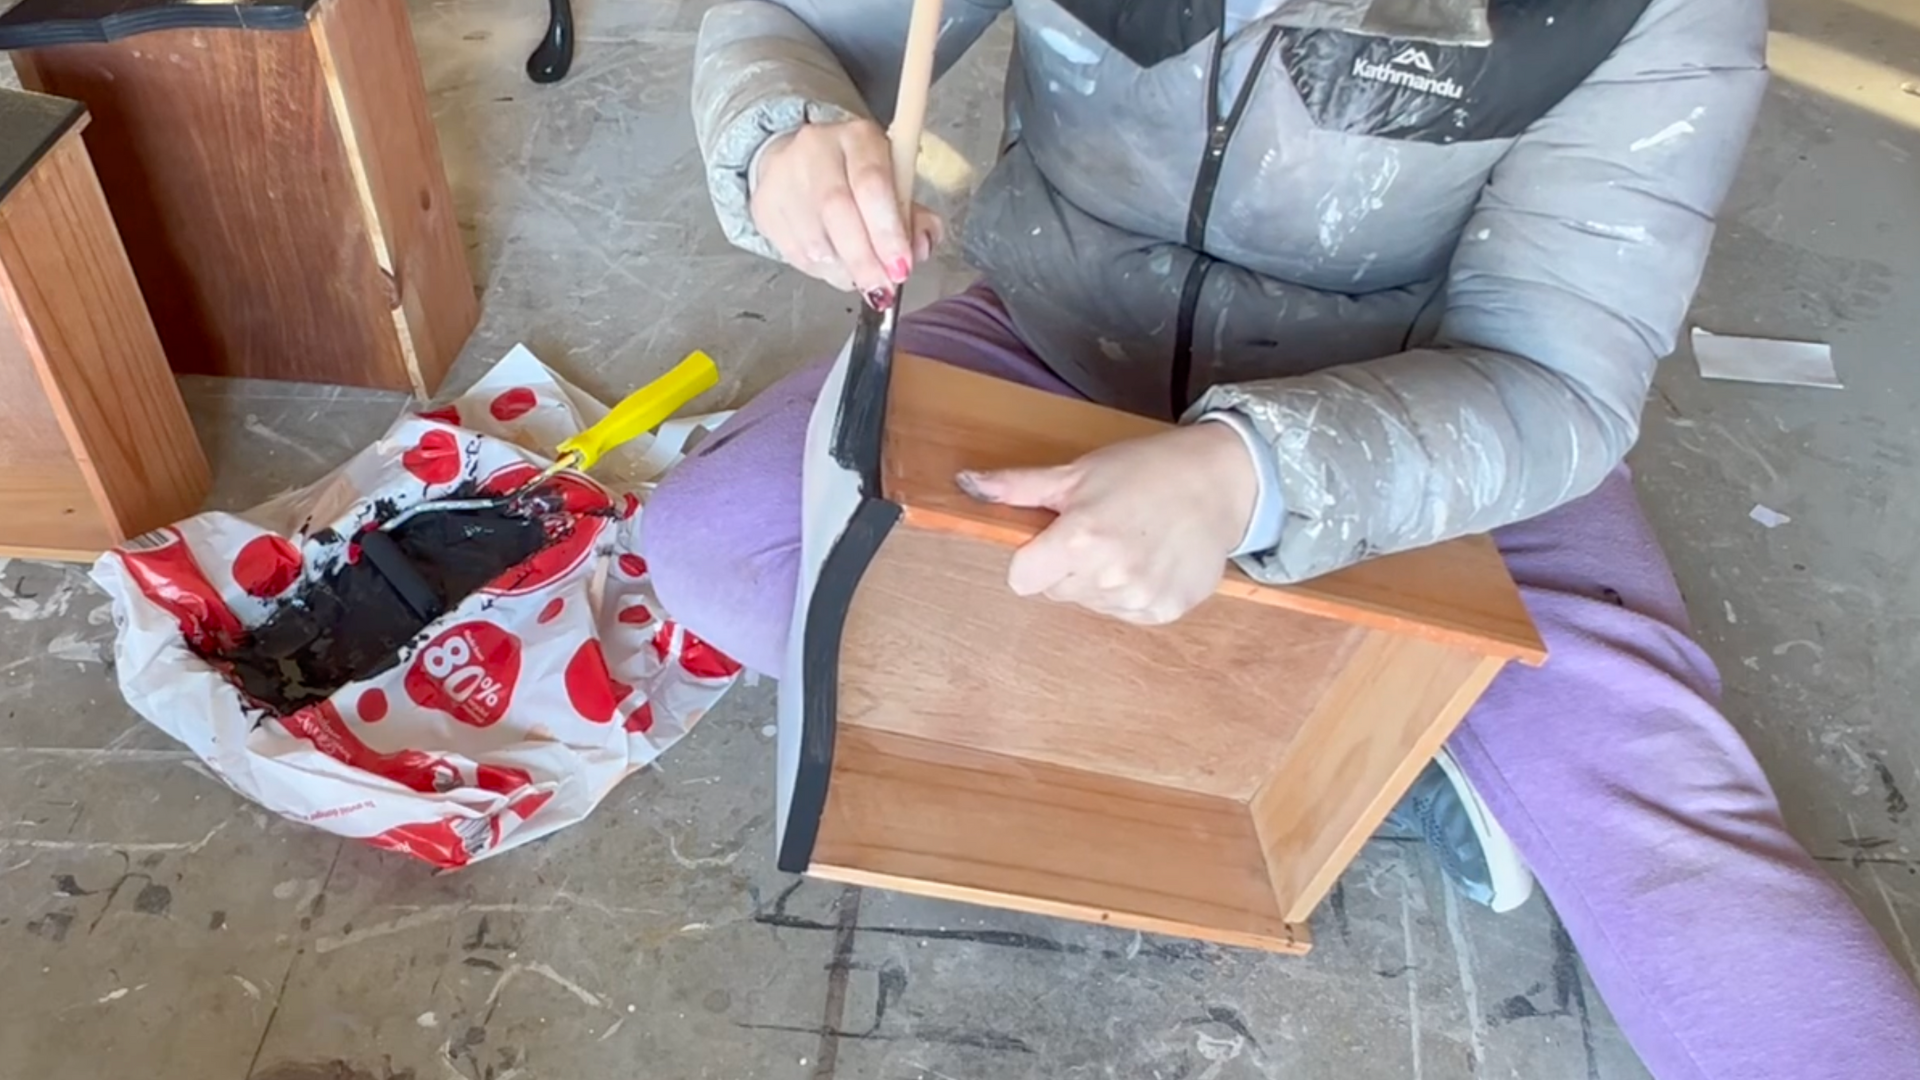
Step 7: Apply a Second Coat
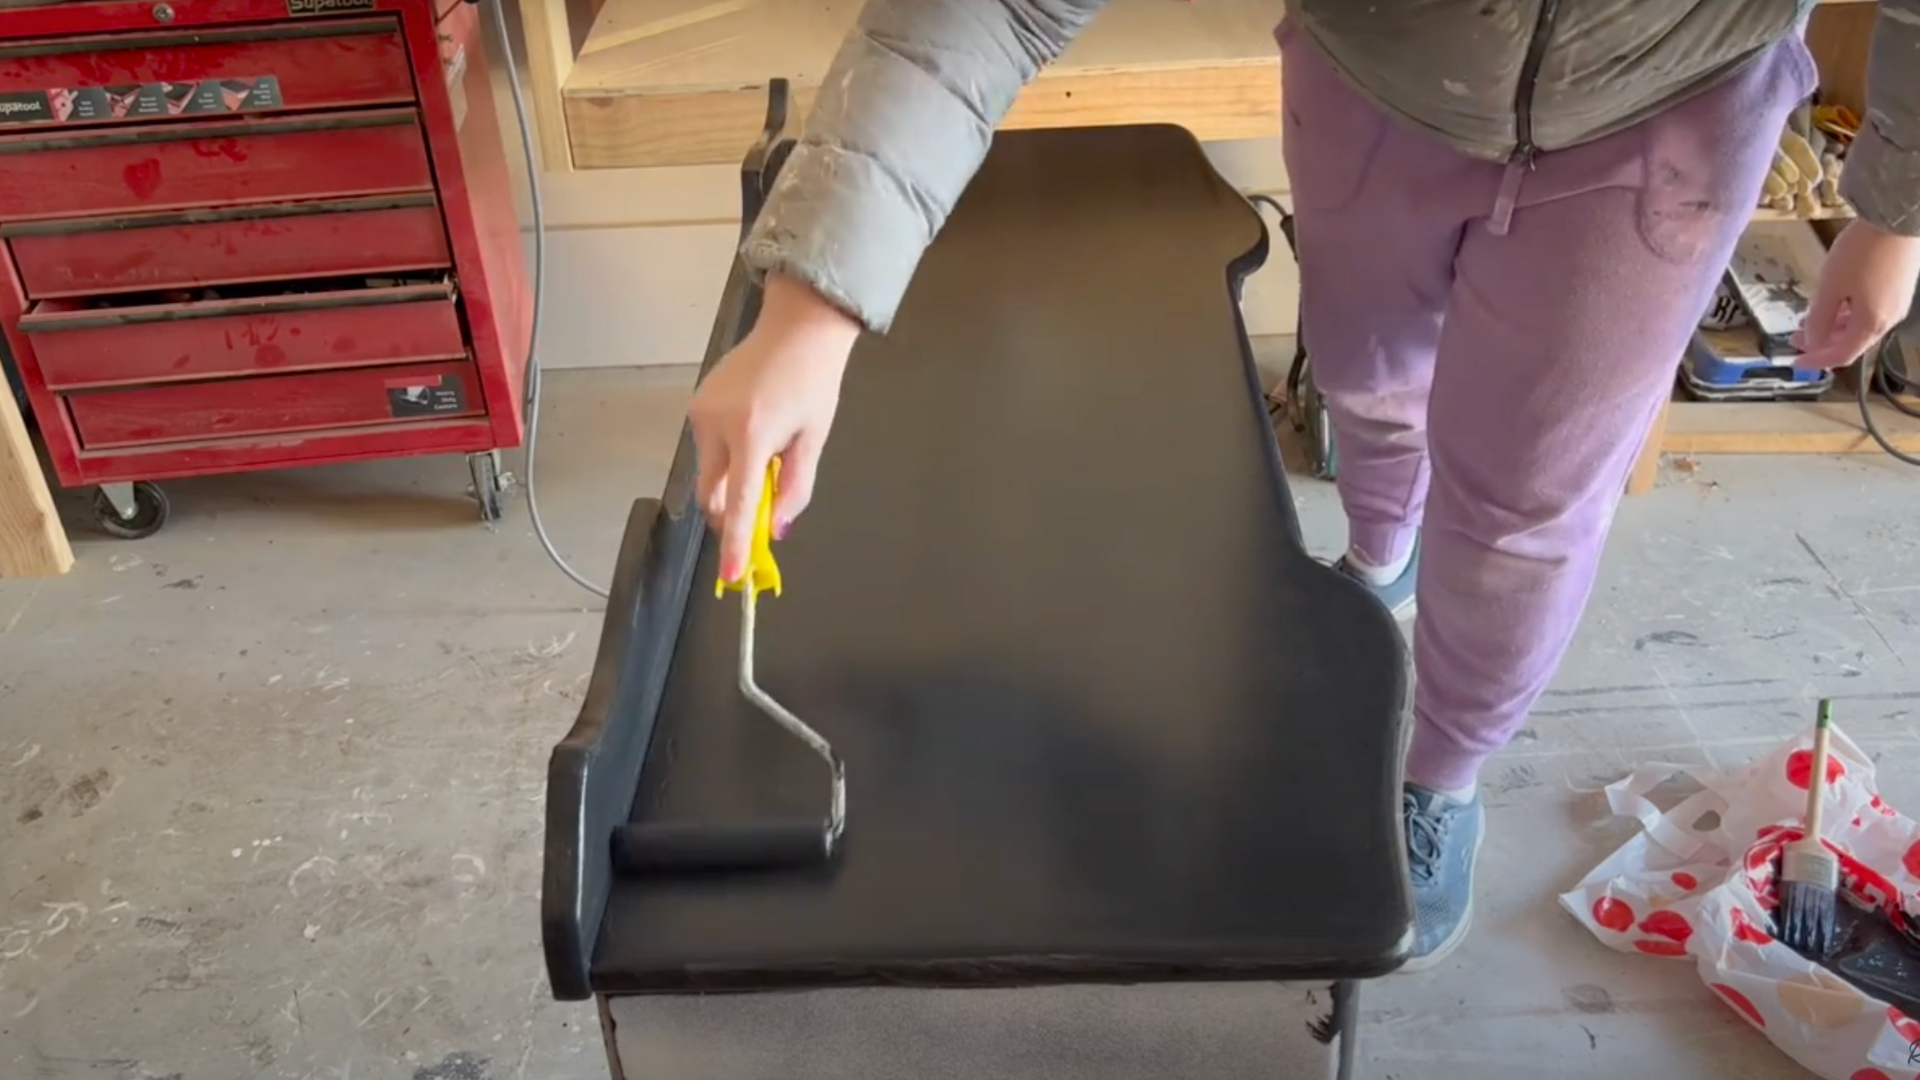
A second coat of paint improves coverage and deepens the color. This is especially important when painting over white primer with a dark color like black.
Repeat the same process as the first coat, ensuring even application and attention to detail around drawer edges and corners.
Step 8: Masking for Clean Edges (Optional)
For beginners or for added precision, apply painter’s tape to the edges of drawers or detailed trim.
This helps create crisp, clean lines and prevents paint from bleeding onto areas that should stay bare.
Masking is especially useful when working with contrasting colors or glossy finishes, where mistakes are more noticeable.
It also saves time on clean-up and reduces the need for touch-ups later.
Step 9: Apply Top Coat
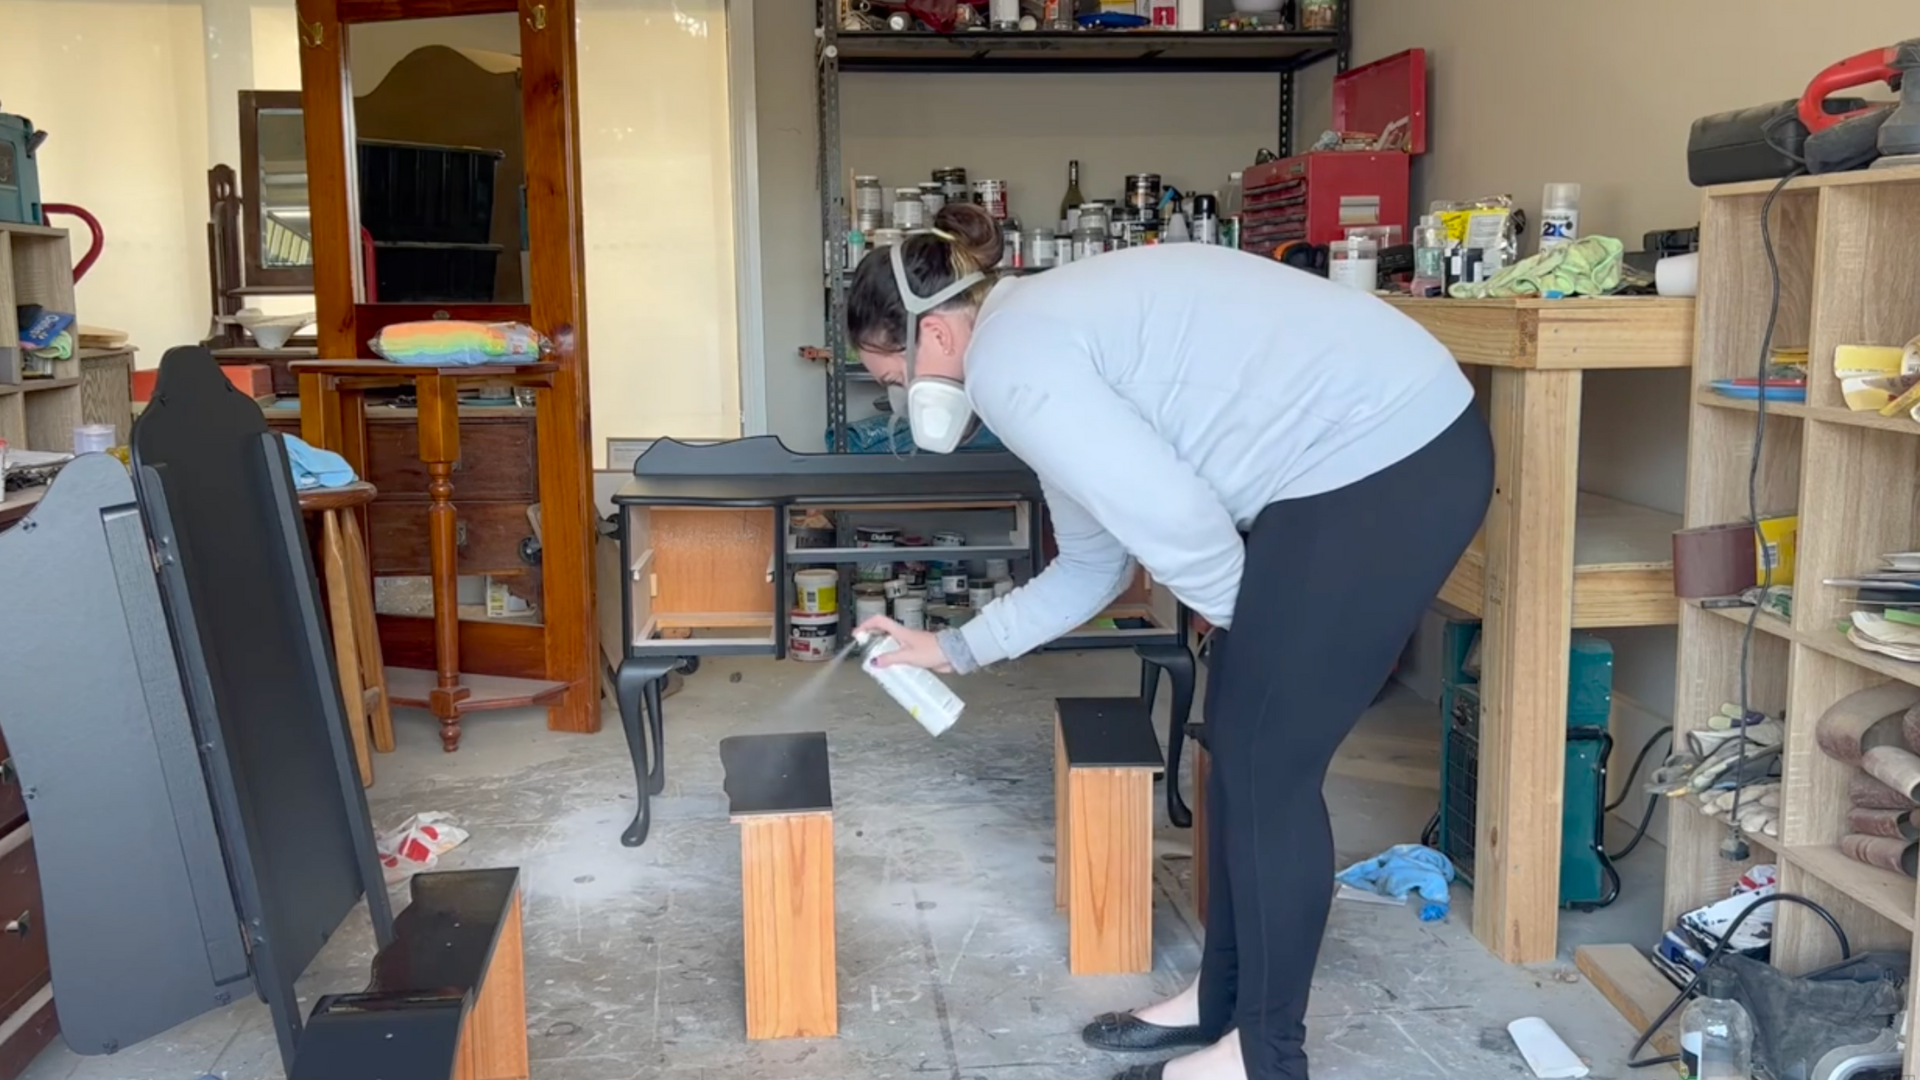
Finish the piece with a protective top coat. A gloss spray finish was used in this example, but options include satin or matte as well.
Spraying provides a smooth, durable finish, especially for high-use furniture.
Always wear a respirator mask when using aerosol products, and apply in a well-ventilated space.
Step 10: Reassemble and Reveal
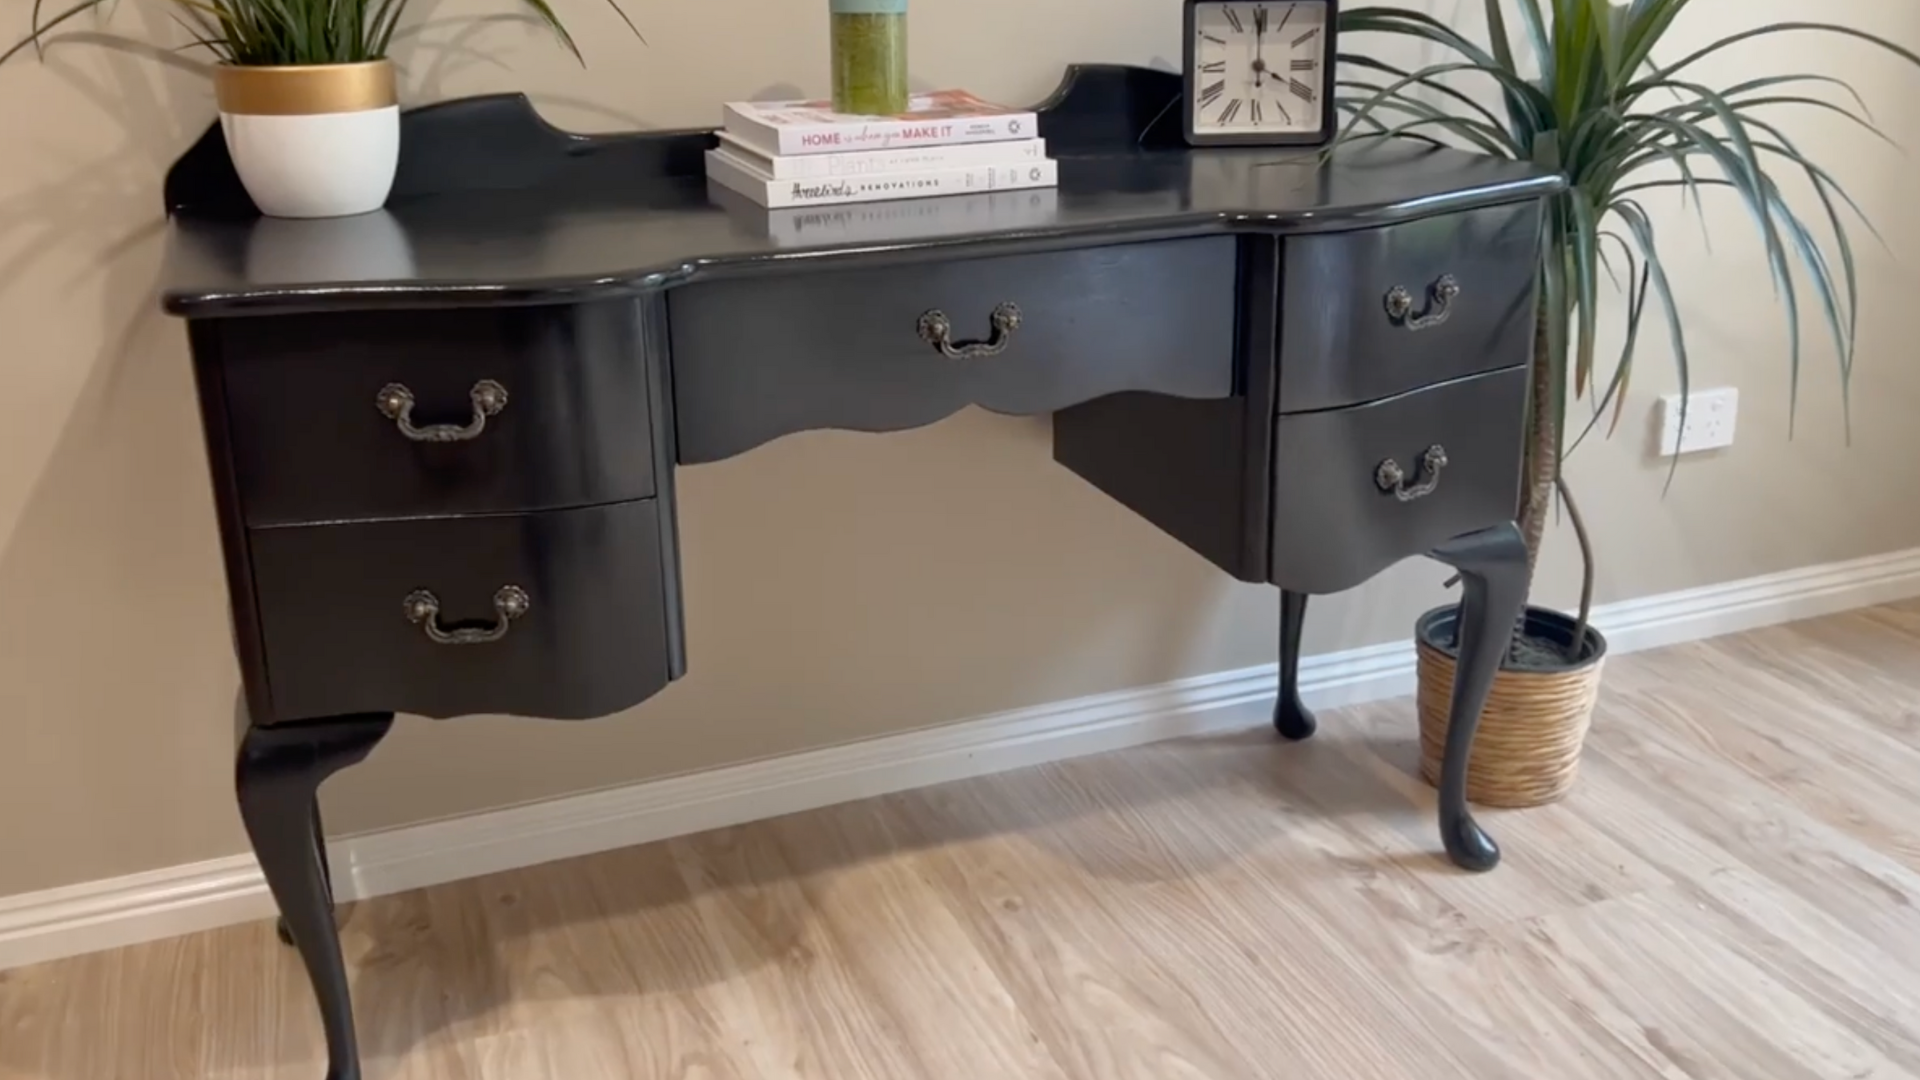
Once the top coat is fully dry, reattach the hardware and place the drawers back in position. The final piece can now be styled and showcased.
The transformation highlights how proper preparation and attention to detail can turn an old veneer item into a stunning statement piece.
This complete process ensures a high-quality, durable finish when painting veneer furniture. By following each step closely, even beginners can achieve professional-looking results.
See the full step-by-step transformation in action, watch the YouTube video by @refinishwithjade
Alternative Painting Methods for Veneer Furniture
Sometimes, the usual brush-and-roller method isn’t the best fit, especially if you want a different look or a faster project.
I’ve tried a few other ways to paint veneer furniture, and some of them work really well, especially if you don’t want to spend too much time sanding or doing a lot of steps.
| Method | Best For | Pros | Cons |
|---|---|---|---|
| Chalk Paint | Vintage or matte finishes | No sanding needed, easy to apply | May need sealing, not ideal for high-use items |
| Mineral Paint | Durable, low-maintenance surfaces | Strong finish, water-resistant | Fewer color choices, more expensive |
| Spray Painting | Smooth, even finishes | Fast, even coverage, no brush marks | Needs ventilation, masking, and more prep |
| Gel Stain Over Paint | Keeping wood texture with color | Looks like wood grain, rich color | Needs careful application and longer dry time |
I personally like chalk paint when I want a quick project that still looks great. If I’m working on a piece that needs to last longer, like a coffee table, I go with mineral paint.
No matter which one you choose, make sure you follow the steps for prepping the veneer. The better the prep, the better the result!
Tips for Success When Painting Veneer Furniture
Painting veneer furniture can be super rewarding, but there are a few things I’ve learned that make the whole process smoother and the results better.
- Test First: Always test your paint and primer on a small spot to make sure it sticks well.
- Don’t Over-Sand: Veneer is thin, so sand lightly just to scuff the surface, not remove it.
- Clean Thoroughly: Dust, oil, or grime can stop paint from sticking – wipe everything down first.
- Use a Bonding Primer: This helps the paint grip better, especially on smooth veneer.
- Apply Thin Coats: Thin layers of paint dry faster and smoother; avoid thick, drippy coats.
- Be Patient: Let each coat fully dry before adding the next, and don’t rush the sealing step.
I’ve made some of these mistakes before, and trust me, taking your time makes a huge difference. Stick to these simple tips for success, and your veneer furniture will turn out beautifully!
Conclusion
Painting veneer furniture is a great way to give old pieces a fresh, new look without spending a lot of money.
With the right prep and a little patience, you can get amazing results, even if you’re not a pro.
From choosing the right paint to using alternative methods like chalk or spray paint, there’s a way to make your project fit your style and timeline.
I’ve learned that taking your time, cleaning well, and applying thin coats really pays off in the end.
If you’re giving new life to a thrift store find or updating something you already own, painting veneer furniture is a fun and creative project.
I hope this guide gave you the confidence to try it out. Grab your supplies, pick a color you love, and get started. You’ll be surprised at how great your furniture can look!