
Are you thinking about updating your kitchen without spending a lot? Painting your oak cabinets is a great way to give your space a fresh, clean look without replacing everything.
Oak cabinets are strong and last a long time, but their orange or yellow tones can feel a little out of date. The good news is, you don’t have to live with a look you don’t like.
With a little time and the right steps, you can make your old oak cabinets look brand new.
In this guide, I’ll explain everything you need to know, from picking the right paint to getting a smooth, lasting finish.
No matter if you’re doing it for the first time or want better results this time around, you’ll find simple, easy-to-follow tips here.
Why Paint Oak Cabinets?
Painting oak cabinets is one of the most effective and affordable ways to give your kitchen a fresh new look without the high cost of replacing everything.
Full cabinet replacements can cost thousands of dollars, but with a bit of time, effort, and the right materials, painting allows you to completely change the appearance of your space at a fraction of the price.
This is especially helpful if you’re working with honey oak cabinets, which can make a kitchen feel dark or outdated.
By painting them in modern colors like white, gray, navy, or sage green, you can brighten the room and give it a clean, updated feel.
Experts like Furni Fixes, Kylie Interiors, and B&Q agree that this simple upgrade can make a big difference.
Not only does it improve how your kitchen looks and feels, but it can also increase your home’s resale value by making the space more appealing to future buyers.
Even if you’re not planning to move, freshly painted cabinets can make your kitchen feel more comfortable and pleasant every day.
Step-By-Step Guide for Painting Oak Cabinets
Below is a step-by-step guide to painting oak cabinets to simplify the process for you.
Step 1: Pore Filling Your Oak Cabinets
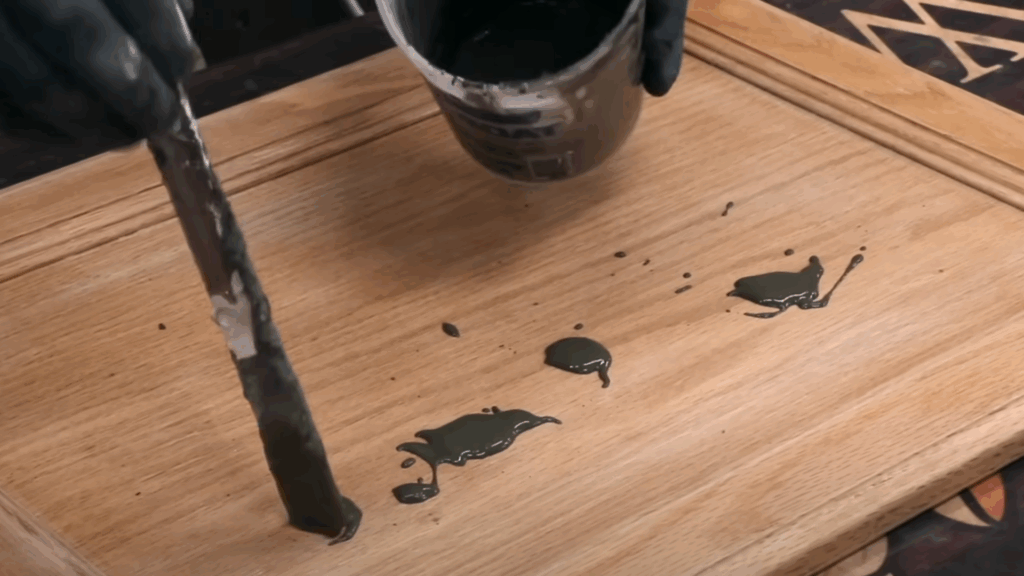
Pore filling is the foundational step to achieving a smooth, professional paint finish on your oak cabinets.
I highly recommend Timber Mate wood filler, a water-based, powdery product that is both easy to spread and sand.
While typically thick, you’ll dilute it with water until it reaches a “pancake batter” consistency. For darker paint colors, you can even add a touch of dye to the filler to aid in coverage.
Apply the diluted filler using a putty knife, spreading it across the grain or at a slight diagonal to effectively drive the material deep into the wood’s pores.
Exercise caution around panel edges, using a thin putty knife to clean out any excess filler meticulously.
Ensure you apply the filler to both the cabinet doors/drawer fronts and the face frames for a consistent, uniform appearance.
While being messy is sometimes unavoidable, remember that any excess left on the surface will require sanding later, so aim for neatness.
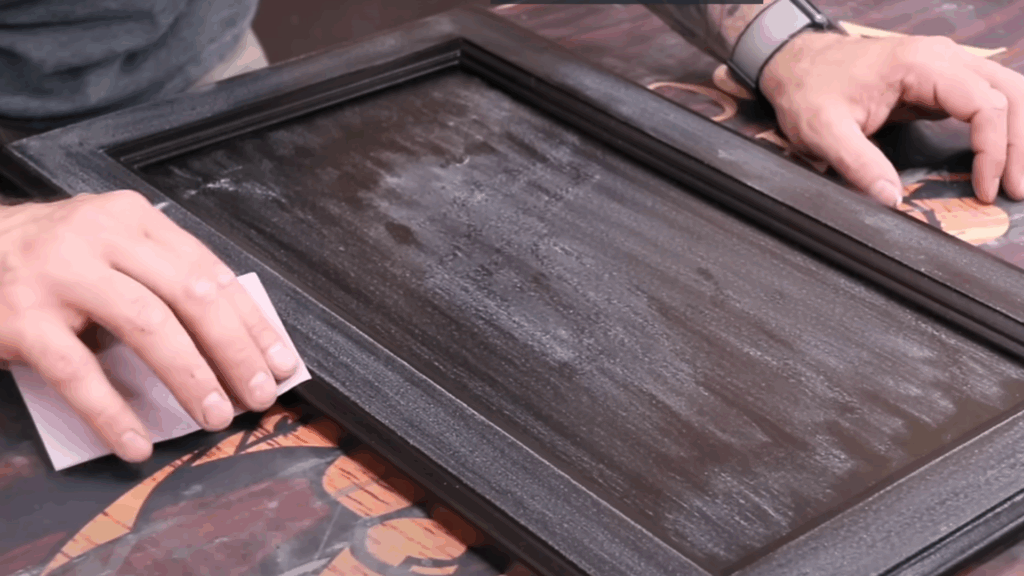
Step 2: Sanding for a Smooth Canvas

Once the pore filler has thoroughly dried, typically within about an hour, the crucial sanding phase begins. This step is vital for achieving that desirable, smooth, professional finish.
Gather your tools: a random orbit sander (or a small sheet sander), a sturdy sanding block, a card scraper for tight corners, and 180-grit or 220-grit sandpaper.
Remember to fold your sandpaper to create crisp, rigid edges that can effectively reach into corners and profiles. Flexible rubber sanding profiles are also excellent for contoured areas.
Most importantly, always wear a respirator or dust mask; inhaling sanding dust is hazardous, and this safety measure is non-negotiable.
When sanding, your goal is to gently remove the excess filler from the surface, leaving it only within the wood’s pores.
Simultaneously, you’ll scuff the original finish, creating a “mechanical tooth” that allows your new paint to bind securely.
If you choose not to pore-fill the back side of the doors, you should still scuff them with 180-grit sandpaper to promote paint adhesion.
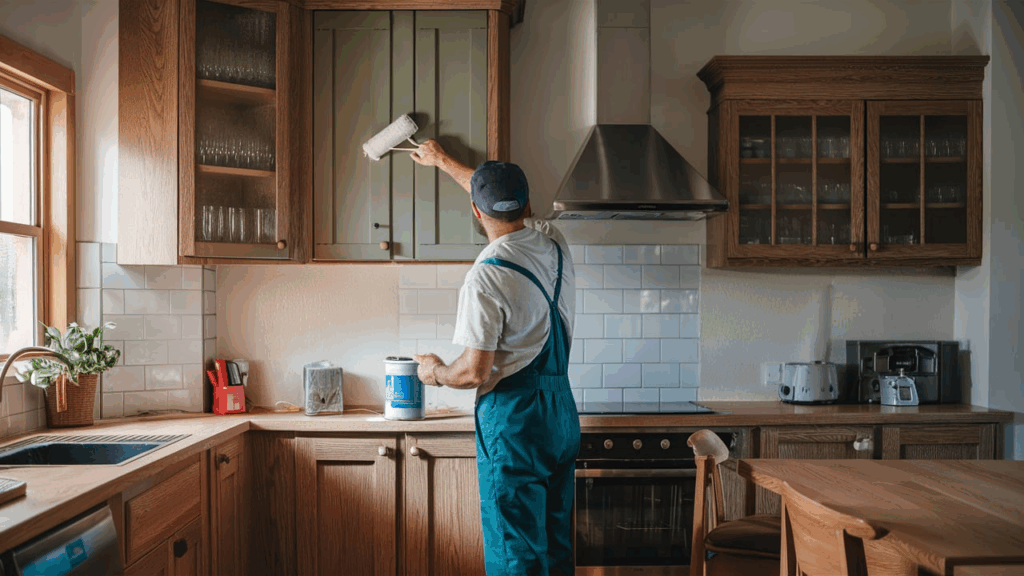
Step 3: Applying the Paint Coats
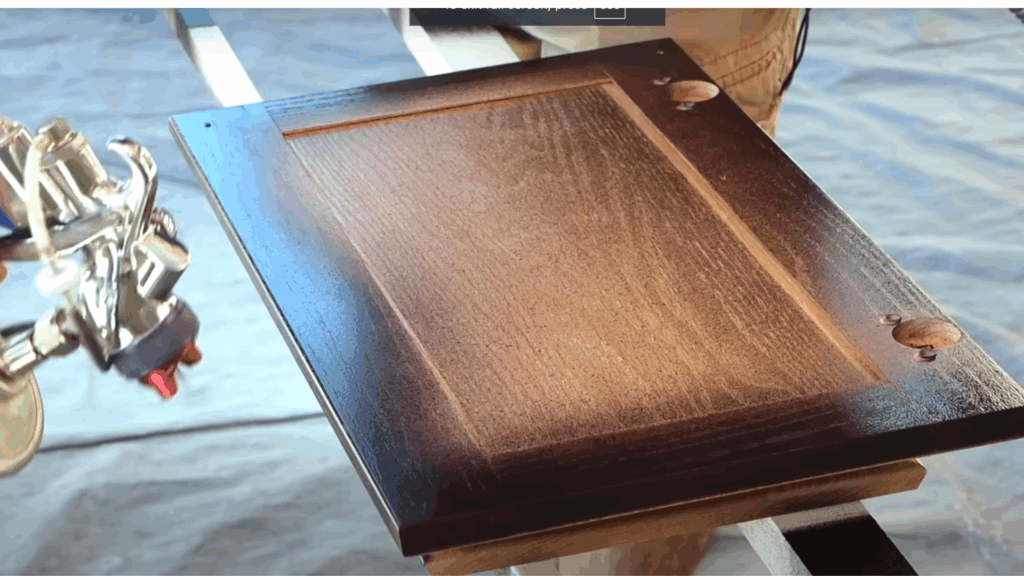
With your cabinets meticulously prepped and sanded, it’s time to introduce color!
I suggest General Finishes Milk Paint, which, despite its name, is a durable acrylic paint offering a beautiful satiny, matte appearance reminiscent of traditional milk paint.
This product boasts excellent durability, which is essential for high-traffic cabinet surfaces.
For application, an HVLP spray gun is recommended. The paint should be diluted by approximately 25% with water and used with a 2mm tip for smooth coverage.
If you don’t have access to a sprayer, you can still achieve impressive results using a high-quality bristle brush, a foam brush, or even a roller for larger, flat panels.
Begin by spraying or brushing the backs of the cabinet doors and drawer fronts, allowing them to dry for a few hours. Then, flip the pieces over and apply two even coats to the front surfaces, ensuring thorough coverage.
Step 4: Applying the Top Coat and Final Sanding
To provide maximum durability and a desirable finish, applying a clear top coat is the next critical step.
I recommend General Finishes High-Performance clear coat with a satin sheen, diluted by about 10% for optimal application.
This top coat offers superior protection, crucial for cabinets that endure daily wear and tear. Its satin sheen makes the surfaces easy to clean and less prone to showing scuff marks compared to a matte finish.
Always follow the manufacturer’s specific instructions regarding the number of coats required and any necessary sanding between coats.
After the final top coat has dried, lightly sand with 320-grit sandpaper to eliminate any tiny dust nibs and achieve a wonderfully smooth, tactile surface.
Be extremely gentle, especially on edges and profiles, to avoid sanding through the finish. Conclude by thoroughly cleaning off all dust using a vacuum or compressed air.
The Remarkable Improvement
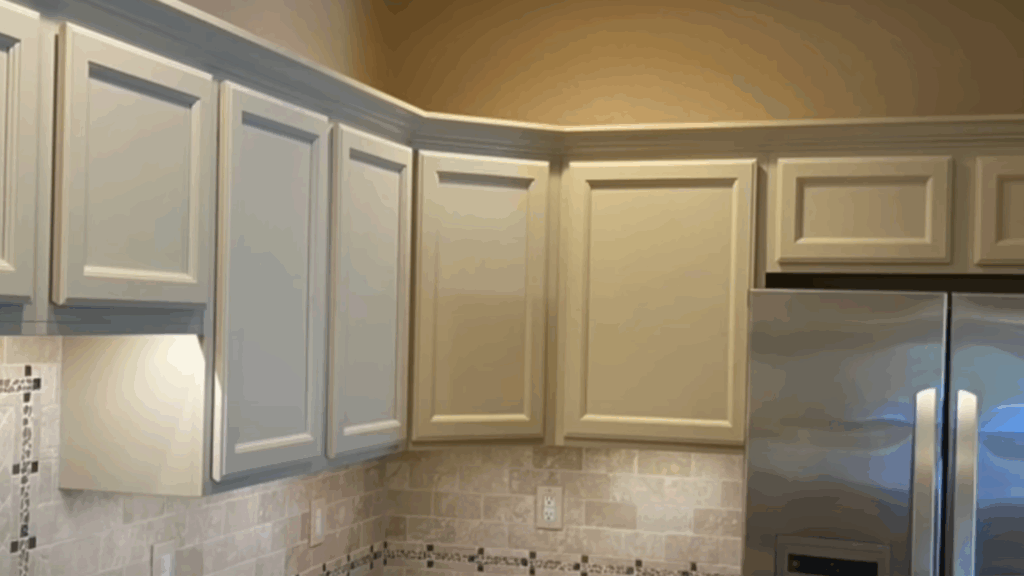
The finished result is a beautiful, satin-finish door with significantly less visible grain thanks to the pore filling.
A satin clear coat makes the cabinets easy to clean and more resistant to scuffs than a matte finish.
Painting your oak cabinets is a significant undertaking, but as this guide shows, it’s a DIY project that can yield incredibly satisfying results. It can extend the life and enhance the look of your kitchen for years to come.
You can watch the full YouTube video by @woodwhisperer to simplify the process for you.
Tips for a Professional Finish
If you want your painted oak cabinets to look smooth and clean, a few simple tricks can help make your project look like an expert did it.
Using Quality Tools
Good tools make a big difference. High-quality brushes and rollers help the paint go on smoother and more evenly.
Cheap tools might leave behind brush hairs, roller lint, or streaks in the paint.
For cabinets, a small angled brush works great for corners and edges, and a smooth foam roller is perfect for the flat areas.
It might cost a little more up front, but better tools give better results and last longer, too.
Maintaining a Wet Edge
When painting, it’s important to keep a “wet edge.” This means working in small sections and not letting the paint dry in one spot before moving to the next.
If part of the paint dries before you blend the next section in, it can leave lap marks or streaks. To avoid this, try to paint in long, even strokes and don’t stop halfway across a panel.
Always finish one full section at a time so everything dries evenly.
Patience Between Coats
One of the most common mistakes is rushing to add the next coat before the first one is dry. Even if the paint feels dry to the touch, it might still be soft underneath.
Letting each coat dry fully helps the paint stick better and prevents smudging or peeling. Check the paint can for drying times, and when in doubt, wait a little longer.
Taking your time now means a smoother, stronger finish that will last much longer.
Maintenance and Care Post-Painting
Once your oak cabinets are freshly painted, you’ll want to keep them looking great for as long as possible. With a little care and attention, your new finish can stay clean and smooth for years.
Cleaning Painted Cabinets
Painted cabinets don’t need much work to stay nice, but gentle cleaning is key. Use a soft cloth or sponge dipped in warm water and a small amount of mild dish soap.
Avoid strong cleaners or scrub brushes, as they can scratch the paint or wear it down over time. Be sure to wipe up spills or grease quickly so they don’t stain.
A gentle cleaning every week or two will help your cabinets stay neat and bright.
Touch-Up Tips
Even with care, your cabinets might get a chip or scratch over time. It’s completely normal, especially in busy kitchens.
To fix it, keep a little extra paint from your project in a tightly sealed jar. When needed, use a small brush to dab paint over the spot, just enough to cover it.
Let it dry fully before using that area again. Doing small touch-ups when needed will help your cabinets look good without having to repaint everything.
Common Mistakes to Avoid
Painting oak cabinets can give your kitchen a nice new look, but only if you avoid a few common mistakes. Taking shortcuts might save time now, but it can lead to problems later.
I have mentioned below three things to watch out for so your cabinets turn out clean, smooth, and strong.
- Skipping Surface Preparation: Jumping into painting without cleaning or sanding can cause paint to peel or not stick. Always clean with a degreaser and lightly sand the surface first.
- Applying Thick Paint Layers: Thick coats lead to drips, uneven color, and longer drying time. Apply 2–3 thin coats, letting each dry fully for a smooth finish.
- Neglecting to Label Hardware: Not labeling doors, screws, and hinges makes reassembly hard. Use labeled bags or sticky notes to stay organized.
Conclusion
Painting oak cabinets is a great way to give your kitchen a fresh, clean look without spending a lot of money.
With the right prep, paint, and a little patience, you can make old, worn-out cabinets look completely different.
From choosing the right tools and colors to avoiding common mistakes, every step you take adds to the final result. It’s not hard, but it does take time and care.
The good news is, you can do it! No matter if you want a bright, modern style or something soft and classic, paint gives you the freedom to make your space your own.
Plus, it feels good to step back and see a job you did yourself. So if your oak cabinets are looking tired, don’t replace them, paint them.
You’ll be surprised at how big a difference a little paint can make.