
The first step towards a successful drylining project is choosing the right sheets of plasterboard. The next is knowing how to work with the sheets to produce a smooth and perfect finish. These handy tips below will help you achieve just that when plasterboarding any room.
How To Ensure Your Plasterboard Sheets Are Cut Straight
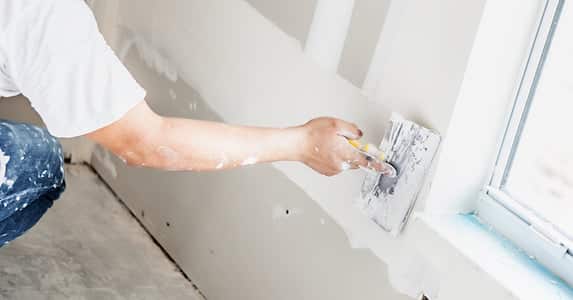
It’s not enough to use a spirit level when assessing the alignment of your plasterboard sheets https://insulationwholesale.co.uk/plasterboard-drylining/plasterboard .
Lay Them Flat
Sometimes, the sheets can slightly shift as you cut through them, leaving you with a not-so-straight board. Work around this by laying your sheets on the ground so they are flat and cutting them from that position.
When Cutting Vertically
If you prefer to cut them in the vertical position, ensure they are well-supported so they don’t wobble. One way to do this is by keeping a bunch of them together. With the boards thus supported, it’s easy to maintain a straight line when you use a level because the sheets won’t shift as you cut them.
Use Tape Measure
You can also use your tape measure to make straight cuts. This tip works great if you need many small boards and saves you plenty of time instead of measuring out the boards each time you need to cut bits of the plasterboard sheet. To use your measuring tape as a guide, follow these steps:
- Pull the tape measure to the desired mark (e.g. 40 inches). Place your finger on that mark.
- On your other hand, hold a knife between the thumb and index finger and place it at the beginning of the tape.
- Now, move both hands along the plasterboard sheet, ripping the board with the knife as you go.
- Once you have the desired length of plasterboard, fold the board away from the cut, then rip it out.
How To Prevent Moisture Buildup When Mounting Plasterboard
Insulated or moisture-resistant plasterboard is your best bet for preventing moisture buildup when drylining. Nonetheless, there are ways to curb moisture retention with your chosen plasterboard. Here’s how to go about it:
Choose plasterboard sheets with a high condensation resistance factor (CRF) or U-value.
CRF numbers indicate the plasterboard’s ability to resist moisture formation. Plasterboard sheets with higher numbers offer better moisture protection.
Ensure the insulation layer faces the room’s interior.
Positioning is key. Mount the plasterboard with the insulation layer facing the inside of the room to prevent moisture from getting trapped inside the insulation and keep the risk of condensation low.
Seal gaps and joints
Use minimal-expansion polyurethane foam to seal any gaps around the edges. This special sealant creates a permanent, waterproof bond that prevents vapor from penetrating the tiny crevices between junctions. Additionally, use plasterboard tape to reinforce the seams along joints and fastener heads.
Add a vapour barrier
Coat the mounted plasterboard sheets with a vapour barrier primer to further reduce vapour diffusion.
Use a Plasterboard Lift When Working on the Ceiling
A plasterboard lift beats hauling sheets of plasterboard over your head any day. It’s not only safer, but it also makes for a smooth operation. You reduce the risk of falls and use less effort to move the sheets of plasterboard up to the ceiling.
Buying a plasterboard lift makes sense if you intend to undertake lots of plasterboard projects. But if you’ll be working on ceiling projects occasionally, you can rent a lift instead. There are companies specializing in lift hire services across the UK, so it’s possible to access good deals near you.
Another option would be to enquire from local professional home renovation businesses. Many would let you borrow theirs or lease it at a fair fee.
Conclusion
Drylining becomes doable for the average DIY buffs if they know a few tricks to smoothen the process. Plasterboard sheets are easy to work with, and the tips above can help you measure, cut and move your boards with skill and protect your walls from moisture damage.
FAQs
Which size of plasterboard is best for home use?
You can get plasterboard sheets in any custom thickness. However, the standard thickness options on the market are 9.5 mm and 12.5 mm. The 9.5 mm thickness is prone to bending and is therefore recommended for ceilings only, except for bathroom ceilings where the 12.5 mm option is better suited due to its higher moisture resistance. The 12.5 mm thick plasterboard is primarily used on walls since it withstands pressure better than the 9.5 mm. It also offers higher moisture, acoustic, and fire resistance.
Is plasterboard safe to use in the bathroom?
Yes, plasterboard is a safe material to use in the bathroom. Because of the high humidity in bathrooms and other wet areas, however, it is advisable to use moisture-resistant plasterboard. These sheets usually have water-repellent additives in the core to keep moisture away.
What is the best tool for cutting plasterboard?
Any sharp knife will do, although a Stanley or craft knife is best suited for the job. There is also a type of jab saw called a drywall saw designed for cutting plasterboard. This saw has a thicker blade than the typical saw and coarse teeth meant to cut through plasterboard without dulling.