
A kitchen refresh doesn’t have to mean a full remodel. Small, thoughtful changes can shift how the space looks and works, all while staying within a reasonable budget.
The ideas below focus on high-impact updates you can tackle in a weekend or two. Each one aims for a polished, tailored look without a designer price.
1. Refresh the Backsplash
A new backsplash changes color, texture, and light all at once. Even a small run behind the range or sink can make the room feel new.
- Peel-and-stick tiles for a quick test of pattern or color.
- Classic ceramic or porcelain subway tile with tight grout lines.
- A single-slab backsplash panel (laminate, acrylic, or thin stone-look sheet) for a seamless look.
- Look: Clean lines, crisp edges, and a tidy finish at outlets and corners.
- Feel: Fresh, bright, and cohesive.
- Best for: Kitchens with busy counters that need a calm backdrop.
- Cost: $150–$1,200 depending on material and square footage.
- DIY level: Beginner to intermediate (tile setting and clean grout work take patience).
- Extra tip: Use color-matched caulk where tile meets the counter to keep the joint neat and water-tight.
Quick install notes
- Prep is everything: degrease, prime glossy paint, and dry-fit tile sheets.
- Keep cuts hidden under outlets or at the last row.
- Choose a grout color that matches tile for a smooth field or a contrast tone for pattern.
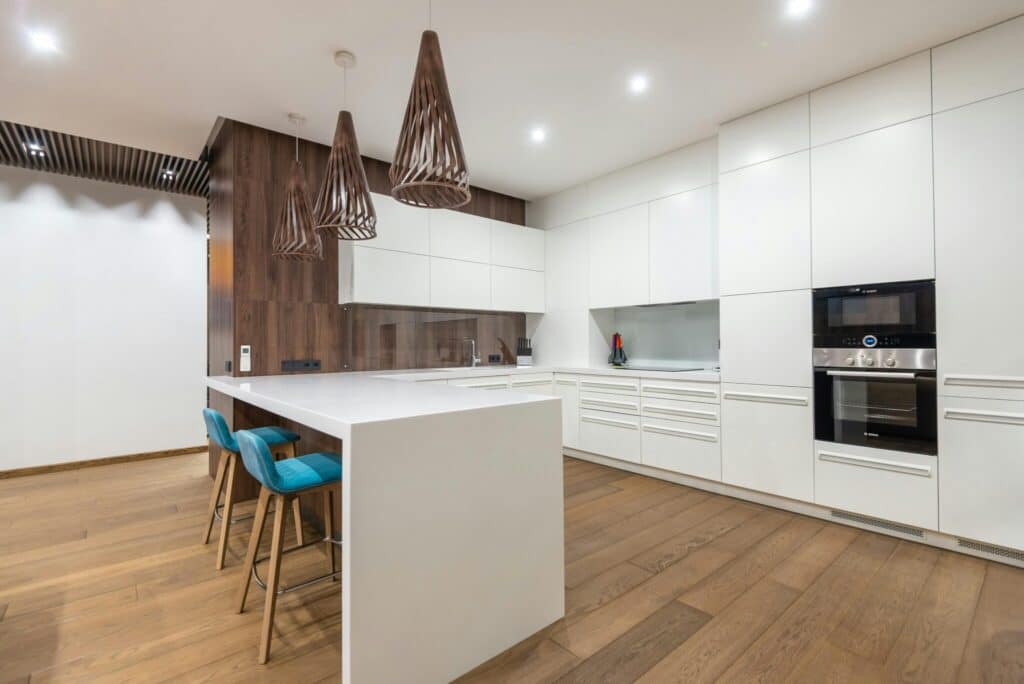
2. Rethink Lighting Layers
Good lighting helps finishes read true and makes work areas less tiring. Plan for three layers: task, ambient, and accent.
- Under-cabinet LED tape or bars for shadow-free prep zones.
- A semi-flush or track fixture to brighten the whole room.
- Two or three matching pendants over an island for shape and balance.
- Look: Warm, even light with consistent color temperature (2700K–3000K).
- Feel: Clear, calm, and inviting at any time of day.
- Best for: Spaces with dark corners or glare from a single ceiling light.
- Cost: $250–$1,200 for quality fixtures, dimmers, and bulbs.
- DIY level: Beginner for plug-in or battery units; intermediate for hardwired swaps.
- Extra tip: Install dimmers so dinner and prep can share the same fixtures without harsh glare.
Bulb choice
- Pick one color temperature for the whole kitchen.
- Aim for 90+ CRI for better color on paint and counters.
3. Swap in a Statement Faucet
A sleek, high-arc faucet reads like jewelry for the sink. It’s one hole, one part, big impact.
- Pull-down sprayer with magnetic dock.
- Ceramic cartridge, metal body, and braided supply lines.
- A finish that matches or smartly mixes with hardware.
- Look: Tall silhouette, clean handle action, tight spray pattern.
- Feel: Solid, smooth, and efficient.
- Best for: Sinks that see daily cooking and cleanup.
- Cost: $250–$1,000 including new supply lines and a soap dispenser or air gap cover.
- DIY level: Beginner to intermediate; clear access under the sink is key.
- Extra tip: Add a simple under-sink water filter for coffee and cooking. Many slim kits install in under an hour.
4. Upgrade Hardware as a Set
Swapping knobs and pulls across the whole room ties doors, drawers, and appliances together. Choose one style and finish for a tailored result.
- Count every piece, then add 10% for errors and future use.
- Standardize pull lengths (one length for drawers, one for doors) for a uniform line.
- Use a drilling jig to keep holes consistent.
- Look: Consistent spacing, aligned centers, and level pulls.
- Feel: Crisp and finished.
- Best for: Any kitchen with mixed, dated, or worn hardware.
- Cost: $120–$700, depending on material and quantity.
- DIY level: Beginner; measure twice and test on a scrap first.
- Extra tip: If hinges show, match their tone or paint them to blend with the door.
5. Countertop Quick Wins
Full counter replacement can run high, but selective moves still make a big difference.
- Prefinished butcher block for a small island or coffee zone.
- High-pressure laminate top for a short L, peninsula cap, or laundry-adjacent counter.
- Counter resurfacing with a pro-grade coating kit for a uniform, stone-look field.
- Look: Smooth seams, tight caulk line at backsplash, and well-oiled wood if used.
- Feel: Warm on wood, sleek on laminate or coated surfaces.
- Best for: Islands, baking corners, or damaged sections that draw the eye.
- Cost: $300–$1,500 based on size and finish.
- DIY level: Beginner for laminate swap with prefab sizes; intermediate for cutting sink openings and finishing edges.
- Extra tip: Pair a compact counter project with new lighting to keep the whole view consistent.
6. Smart Cabinet Move: Partial Replacement
You can change what you see most without touching every box in the room. Swapping a small run of uppers or adding one new feature cabinet gives a built-in feel on a tight budget.
For a big visual change without a custom price tag, many homeowners choose RTA cabinets to replace only the most visible uppers.
- A glass-door section near the range for dishes.
- Taller 39–42 inch uppers to close the gap to the ceiling.
- A shallow pantry cabinet with roll-outs where a bookcase used to be.
- Look: Door styles and finishes that coordinate with existing bases; finished end panels and crown for a tidy frame.
- Feel: Intentional and tailored.
- Best for: Kitchens with solid base cabinets but dated uppers.
- Cost: $600–$1,500 for a few RTA boxes, doors, trim, and fillers.
- DIY level: Intermediate; accurate leveling and secure wall studs matter.
- Extra tip: Order matching touch-up paint or a small can of stain for nail holes and miters.
Fit checklist
- Verify ceiling height and crown size before ordering.
- Plan fillers at walls to keep doors from rubbing.
- Use cabinet hanging rails or ledger boards for safe install.
7. Built‑In Look Storage
Inside-the-cabinet upgrades make daily use faster and help doors close cleanly. When coordinated across a few zones, they read like custom work.
- Pull-out trash and recycling on full-extension slides.
- Roll-out trays in base cabinets for pots and small appliances.
- Vertical tray dividers for sheets and cutting boards.
- Tiered spice or utility pull-outs near the range.
- Look: Quiet motion, soft-close slides, and clean face-frame reveals.
- Feel: Orderly and efficient.
- Best for: Busy kitchens short on accessible storage.
- Cost: $150–$1,200 depending on quantity and slide quality.
- DIY level: Beginner to intermediate; square, centered slide mounts are key.
- Extra tip: Match slide types (soft-close, full extension) across the room for a consistent feel.
Putting It All Together
Pick two or three projects that touch the same sightline—backsplash, lighting, and hardware form a strong trio.
If cabinets are the main concern, pair a small run of new uppers with under-cabinet lights and fresh pulls for a tidy, made-for-the-space look. Keep finishes consistent, plan your cuts, and allow time for clean prep.
With steady steps and smart choices, a custom look is well within reach—and well within budget.
To Conclude
Good planning turns small upgrades into a kitchen that feels considered. Focus on the surfaces you see first and the features you use most.
With a clear list, a weekend, and the right parts, you can get a polished result without a full remodel.