
Have you been staring at those dull, worn-out taps in your bathroom or kitchen? I was in the same spot last year.
Painting your taps is easier than you think. With some basic supplies and a little patience, you can make them look brand new again without spending a fortune on replacements.
In this guide, I’ll walk you through:
- How to paint a tap step-by-step
- The basic tools you’ll need (nothing fancy)
- Common mistakes and how to avoid them
Many people worry about making a mess or ending up with peeling paint. I had those same concerns! But after trying different methods, I found a simple approach that works well.
You don’t need to be an expert. My guide breaks everything down into small, manageable steps that anyone can follow.
Trust me – if I could transform my rusty old kitchen tap into something that looks fresh and new, you can too.
Why Paint Your Taps?
Before we get into the how-to, let’s talk about why painting your taps makes sense:
- Save money: A new tap can cost $80-200 plus installation fees
- Update your look: Change the style without major remodeling
- Fix cosmetic issues: hides scratches, water spots, and discoloration
- Eco-friendly: Reuse instead of replace
- Satisfaction: Complete a home improvement project yourself
I painted my bathroom taps last year when I wanted to update the look but couldn’t afford new fixtures. The total cost was under $50, and they still look great today.
Supplies You’ll Need
Before starting your tap painting project, gather these basic supplies:
- Sandpaper (220 grit and 400 grit)
- Painter’s tape
- Primer made for metal surfaces
- Paint suitable for metal (spray paint works best)
- Clear sealer (optional but helpful)
- Cleaning cloth and mild cleaner
- Drop cloth to protect surrounding areas
- Gloves to keep your hands clean
- Face mask for protection from fumes
- Small paintbrush for touch-ups and hard-to-reach areas
Preparing Your Tap
The prep work makes a huge difference in the longevity of your paint job. Don’t skip these steps! Many beginners rush straight to painting, eager to see the transformation, but professionals know that 80% of a successful paint job happens before the first coat of paint.
Proper preparation creates the foundation that determines whether your paint will last for years or begin peeling within weeks.
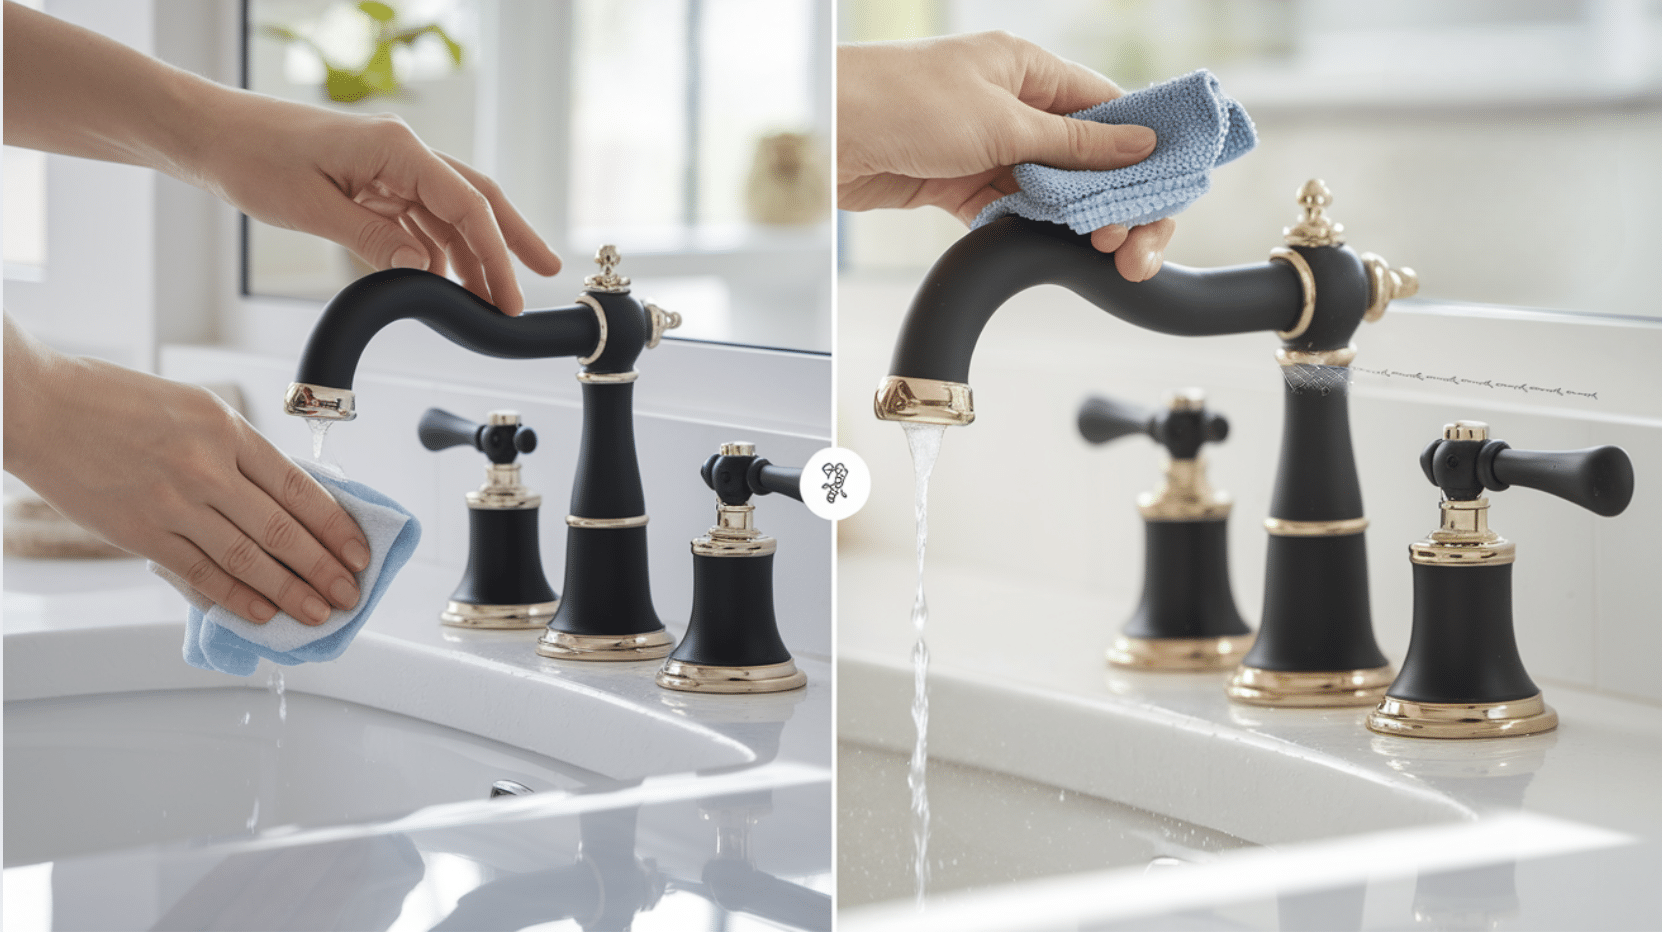
1. Clean thoroughly
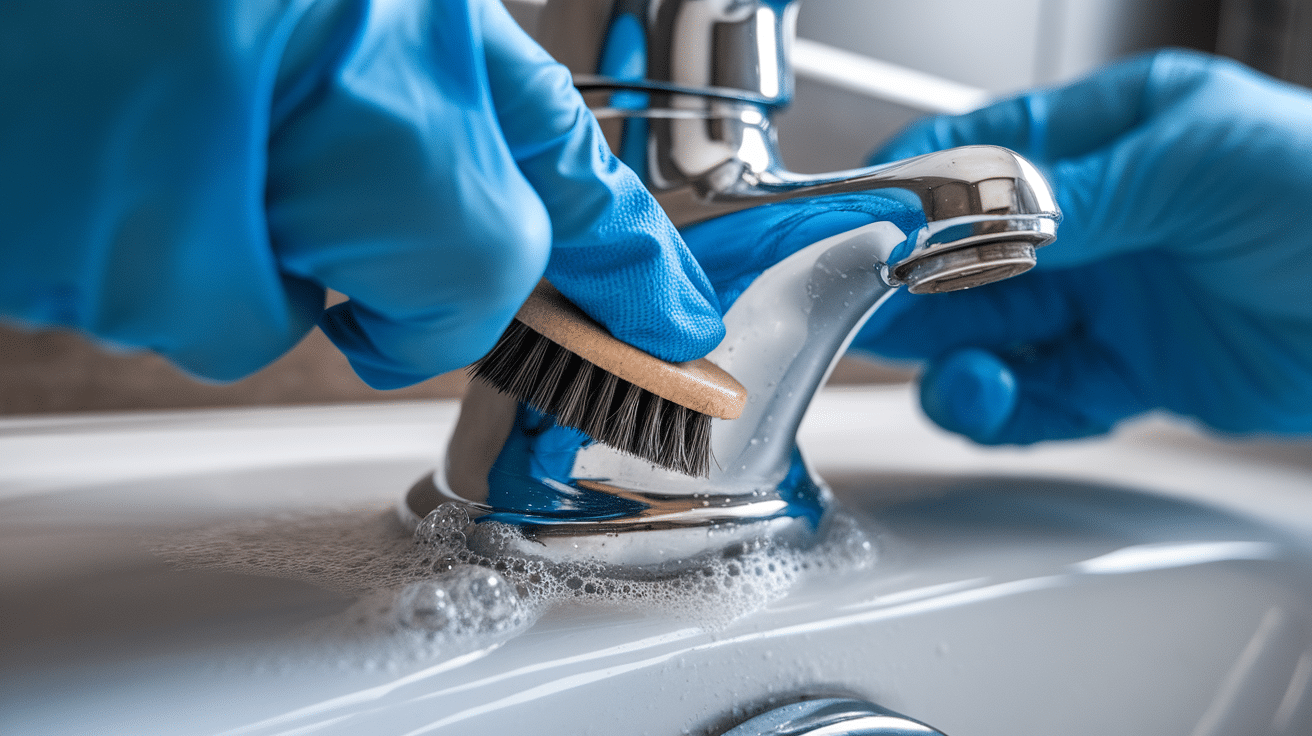
Before you begin painting, proper cleaning is essential. Turn off the water supply to your tap, then thoroughly wipe away all soap scum, water spots, and dirt from the surface.
Use a mild cleaner that won’t leave a residue, and be particularly careful to ensure the tap is completely dry before proceeding.
For those hard-to-reach areas around the base and in crevices, a cotton swab dipped in cleaner works perfectly to remove built-up grime and mineral deposits.
This thorough cleaning process creates the clean base needed for the paint to adhere properly and last longer.
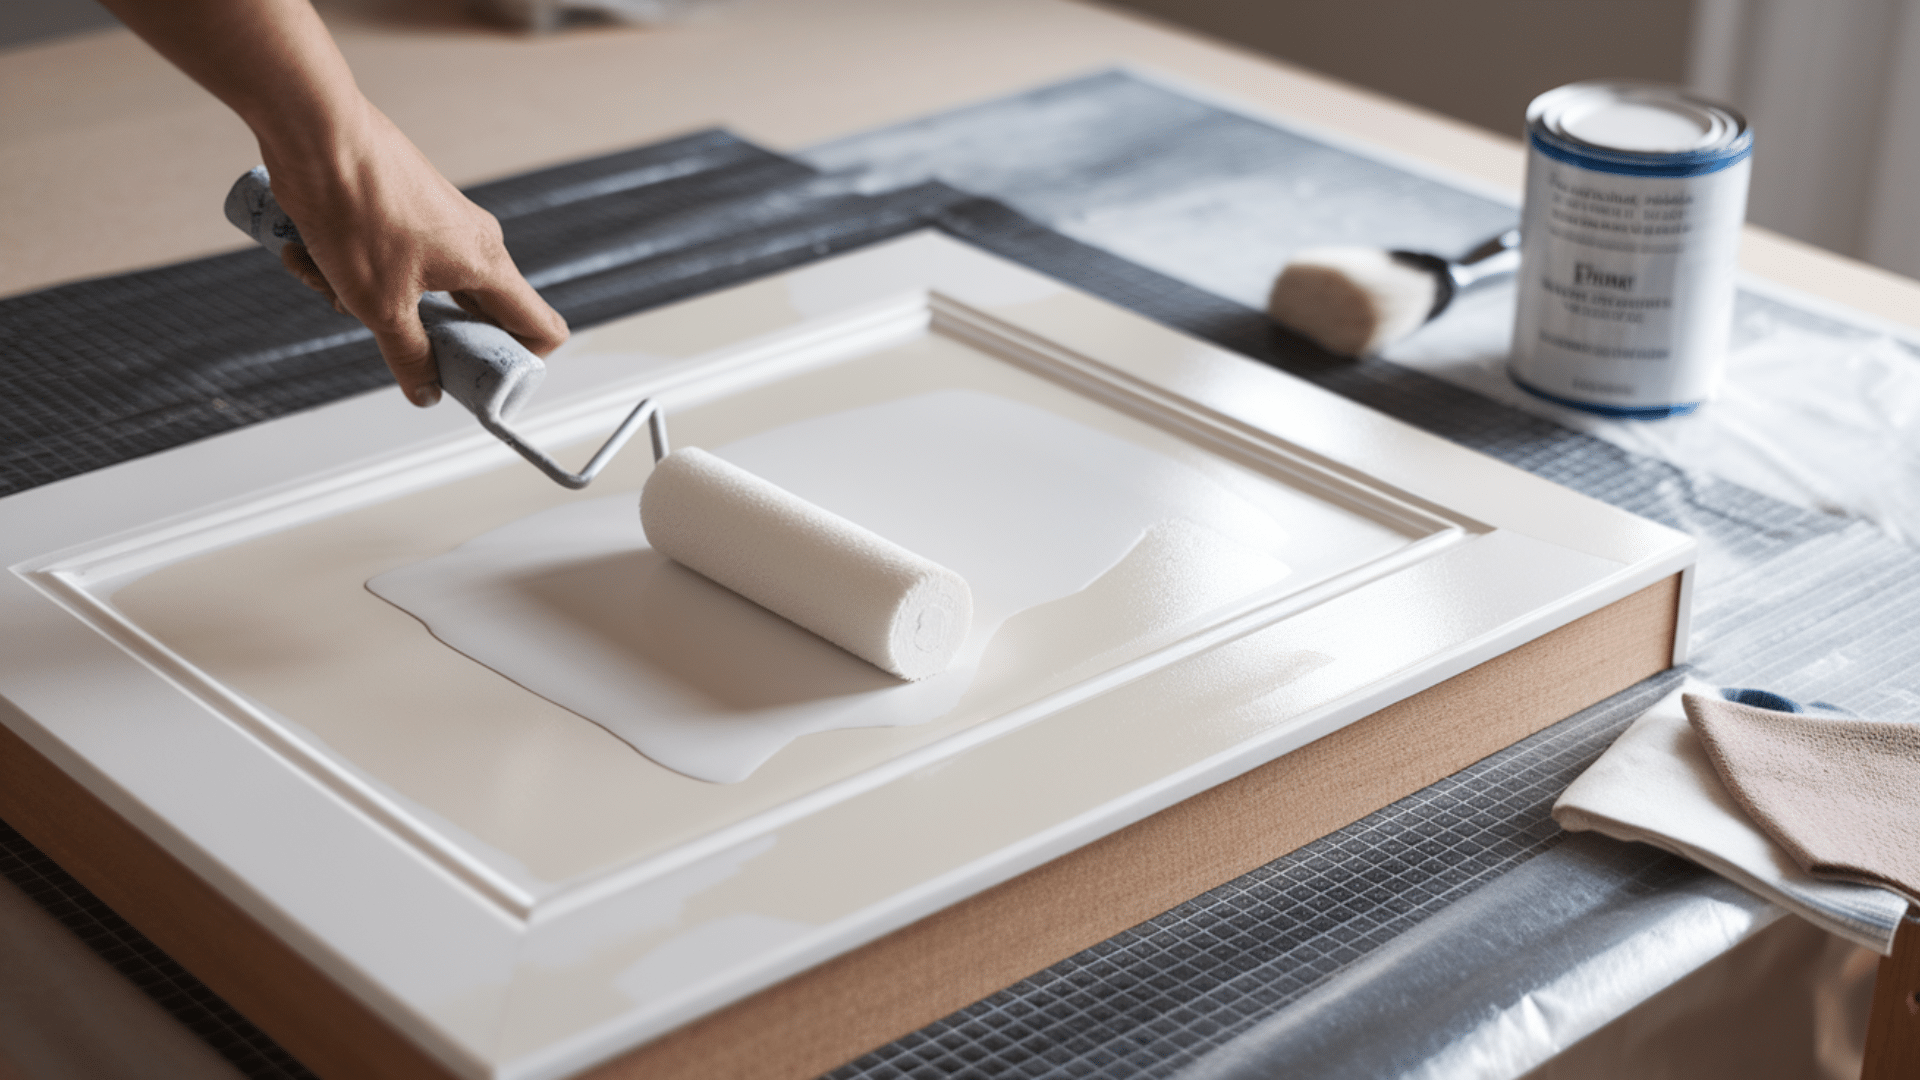
2. Sand lightly
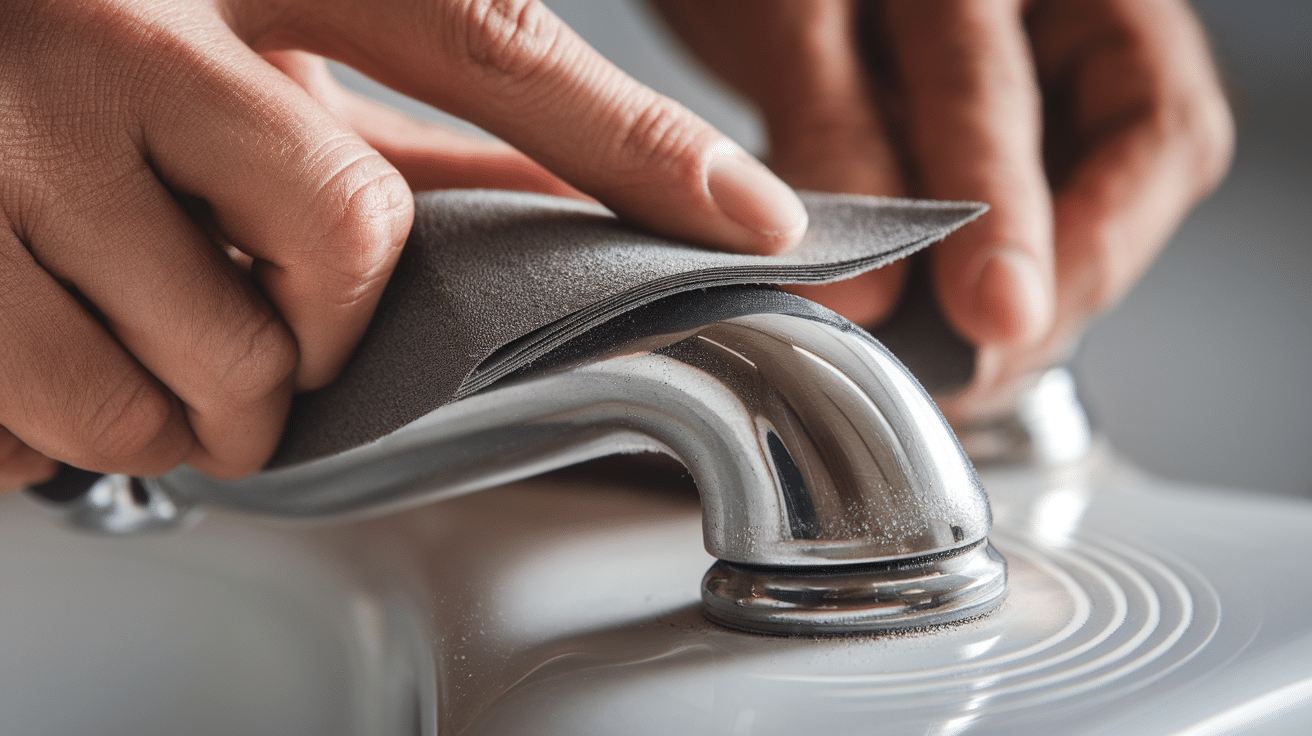
After cleaning, prepare the surface by lightly sanding with 220-grit sandpaper.
Work across all areas of the tap with gentle pressure—remember, you’re not trying to remove material; you’re just creating a slightly textured surface that helps the primer and paint adhere better.
Once you’ve finished with the initial sanding, wipe away all dust with a clean cloth to ensure no particles remain. For the best results, follow up with a second, finer sanding using 400-grit sandpaper.
This creates an even smoother base, resulting in a more professional-looking finish without visible imperfections under the paint.
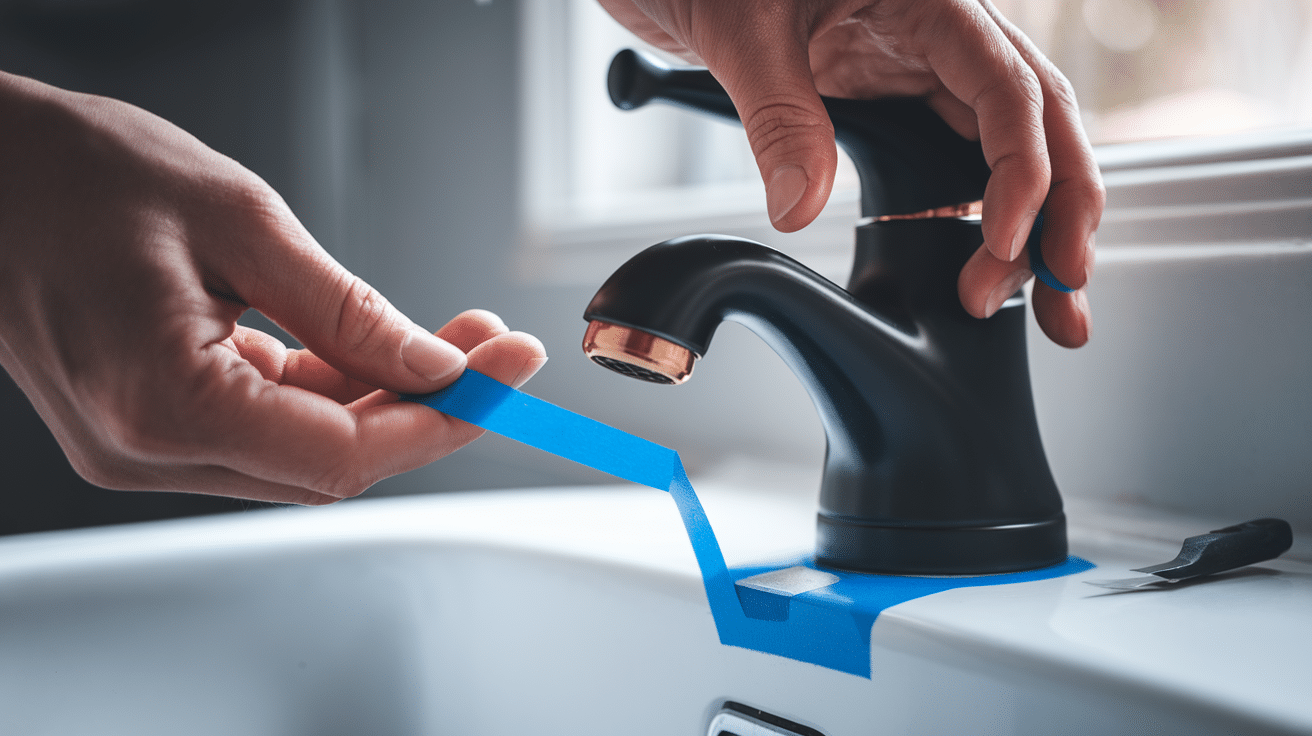
3. Tape carefully
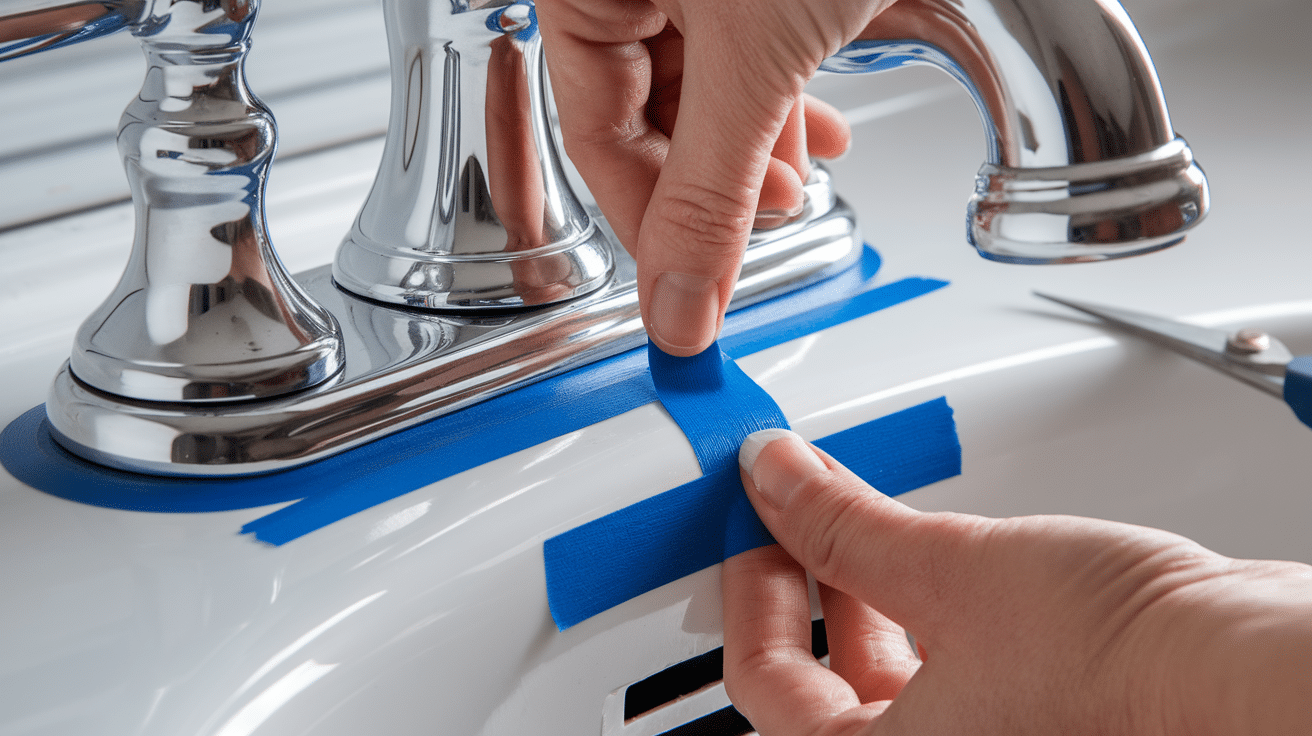
The final preparation step is to mask off areas that should remain unpainted carefully. Cover any parts you don’t want painted with painter’s tape, paying extra attention to the base and handles, where precise lines matter most.
Extend your taping to protect the sink or counter surrounding the tap, creating a clean boundary that will result in professional-looking edges.
Once all the tape is in place, use your finger or a plastic card to press down firmly along all the edges. This critical step prevents paint from seeping underneath and creating messy lines.
Taking your time during this taping process will save you considerable frustration and touch-up work later.
Good prep work might take 30 minutes, but it’s worth it! A well-prepped tap will hold paint much longer than one that was rushed.
Step-by-Step Painting Process
Now for the fun part – actually painting your tap! After all that cleaning, sanding, and taping, you’re finally ready to see your vision take shape.
This is where your tap begins its transformation from tired and worn to fresh and stylish.
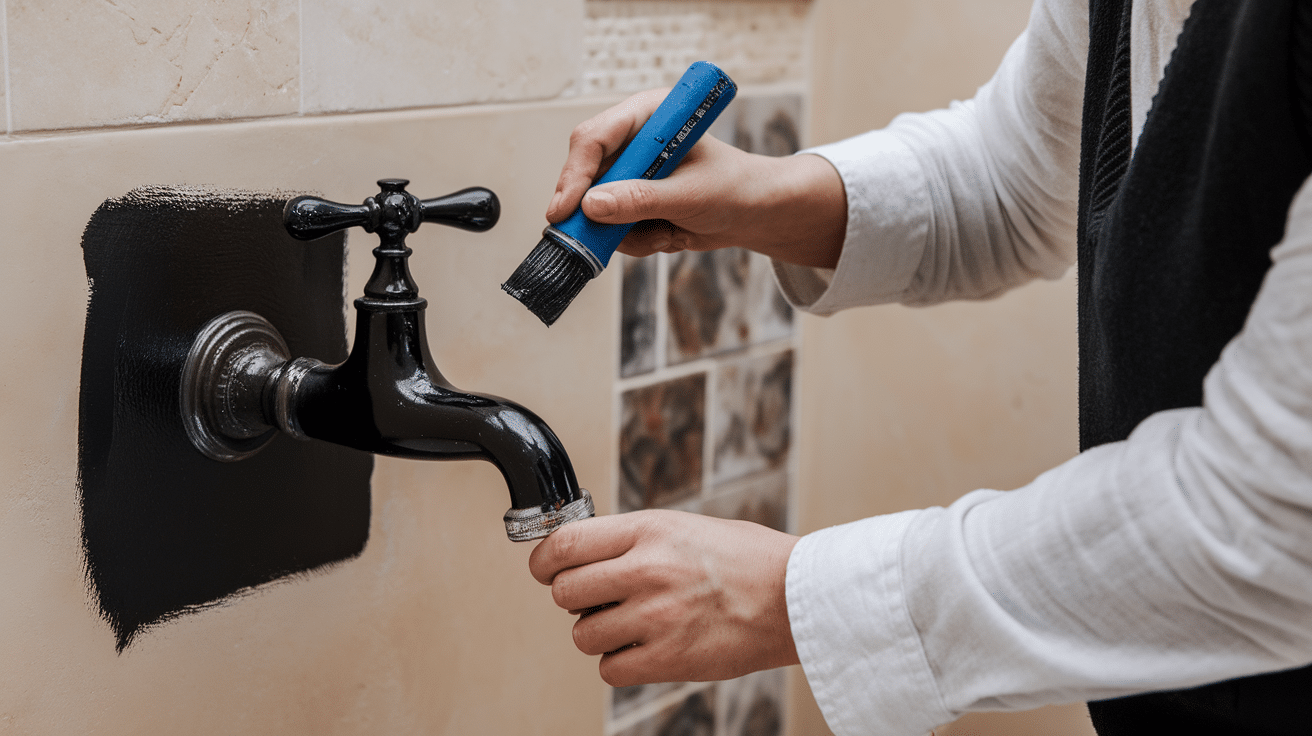
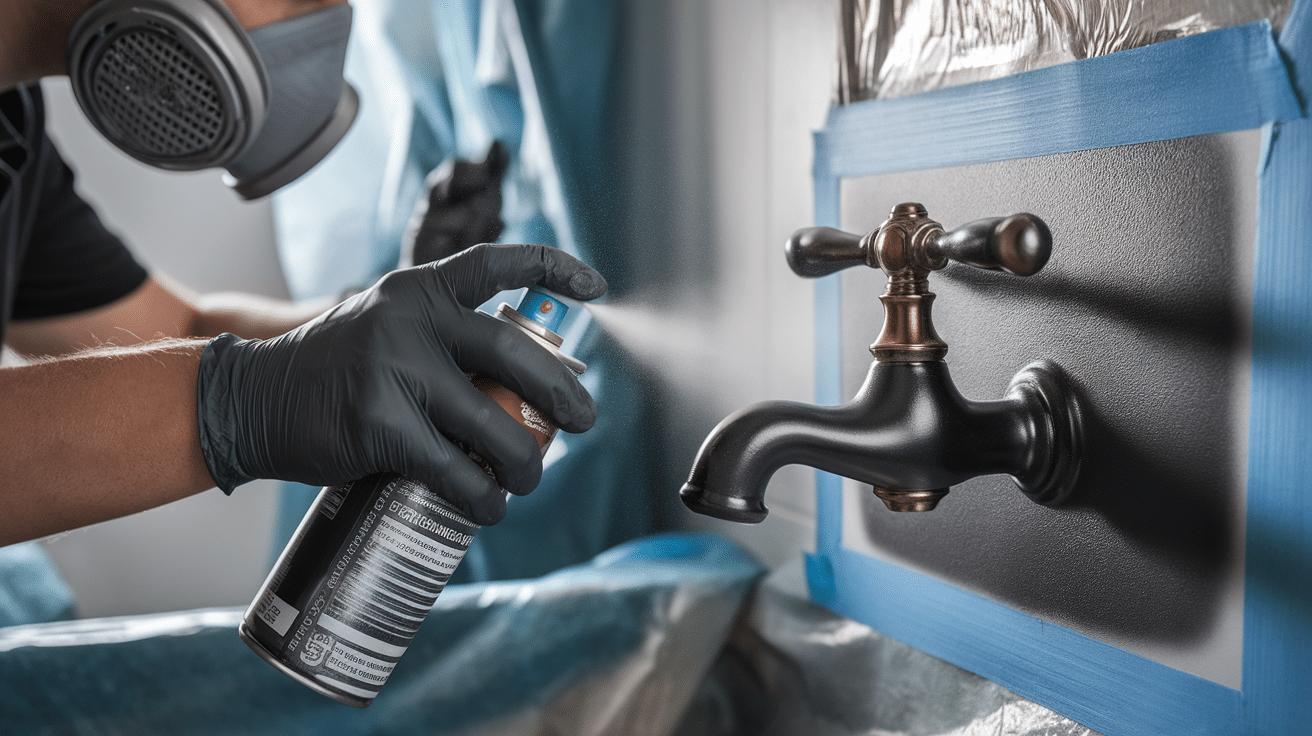
1. Apply Primer
Begin the actual painting process by first applying primer. If you’re using spray primer, shake the can thoroughly for at least one minute to ensure the contents are properly mixed.
Position the can about 8-10 inches away from the tap—too close and you’ll get drips, too far and you’ll get a dusty finish.
Apply a thin, even coat using a smooth sweeping motion, keeping the can moving continuously to avoid heavy spots. Allow this first coat to dry completely, which typically takes 1-2 hours, depending on temperature and humidity.
Once dry, check for areas where the metal is still visible. If needed, apply a second coat following the same technique. The primer is ready for paint only when it has complete, even coverage with no metal showing through.
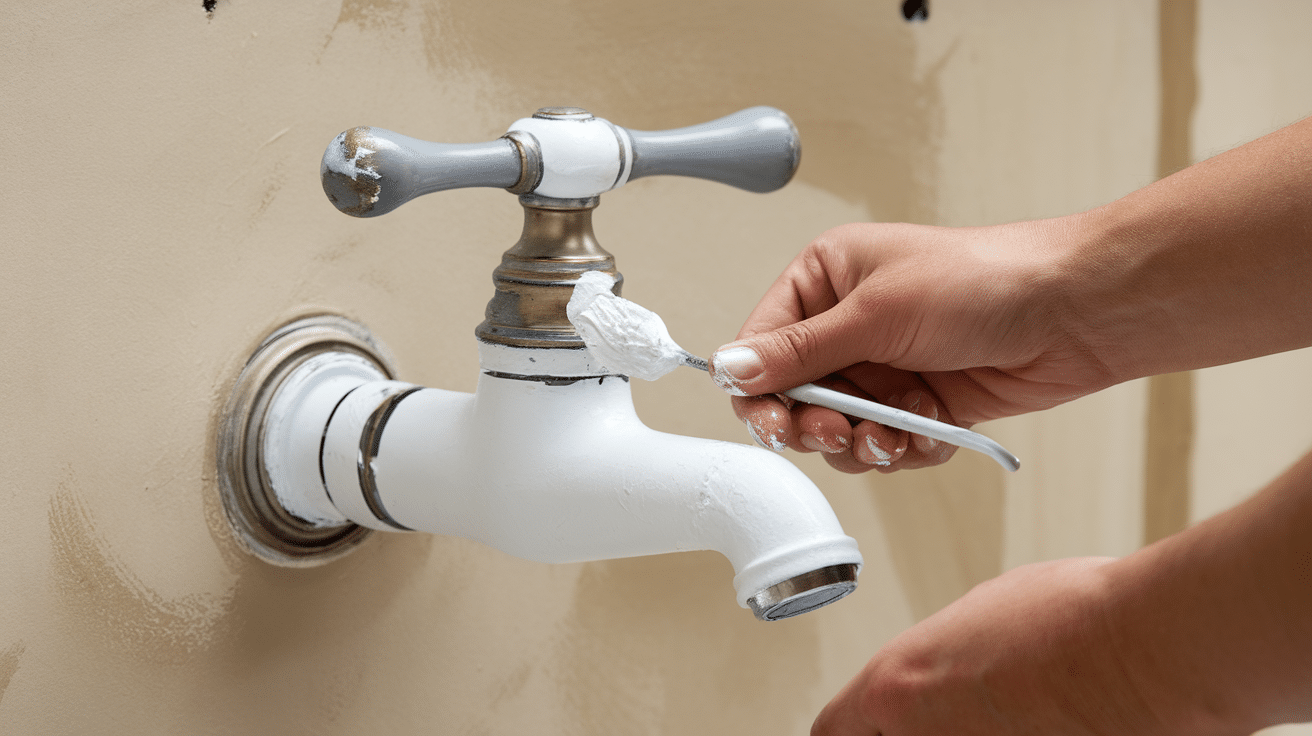
2. Paint Application
When you’re ready to apply the paint, preparation is key. Shake the paint can vigorously for a full minute to ensure the color and ingredients are completely mixed. As you paint, apply thin, even layers rather than trying to cover everything in one go.
Keep the can moving constantly in a smooth motion to prevent drips or pooling in any one area. For best results with spray paint, use short, controlled bursts rather than a continuous spray.
Remember that 2-3 thin coats will always yield a better finish than a single thick coat, even if it means a bit more waiting time.
Allow 20-30 minutes between coats, though you should always check your specific paint’s instructions, as drying times can vary. If you’re using brush-on paint instead of spray, invest in a high-quality synthetic brush that won’t shed bristles or leave obvious stroke marks.
3. Drying Between Coats
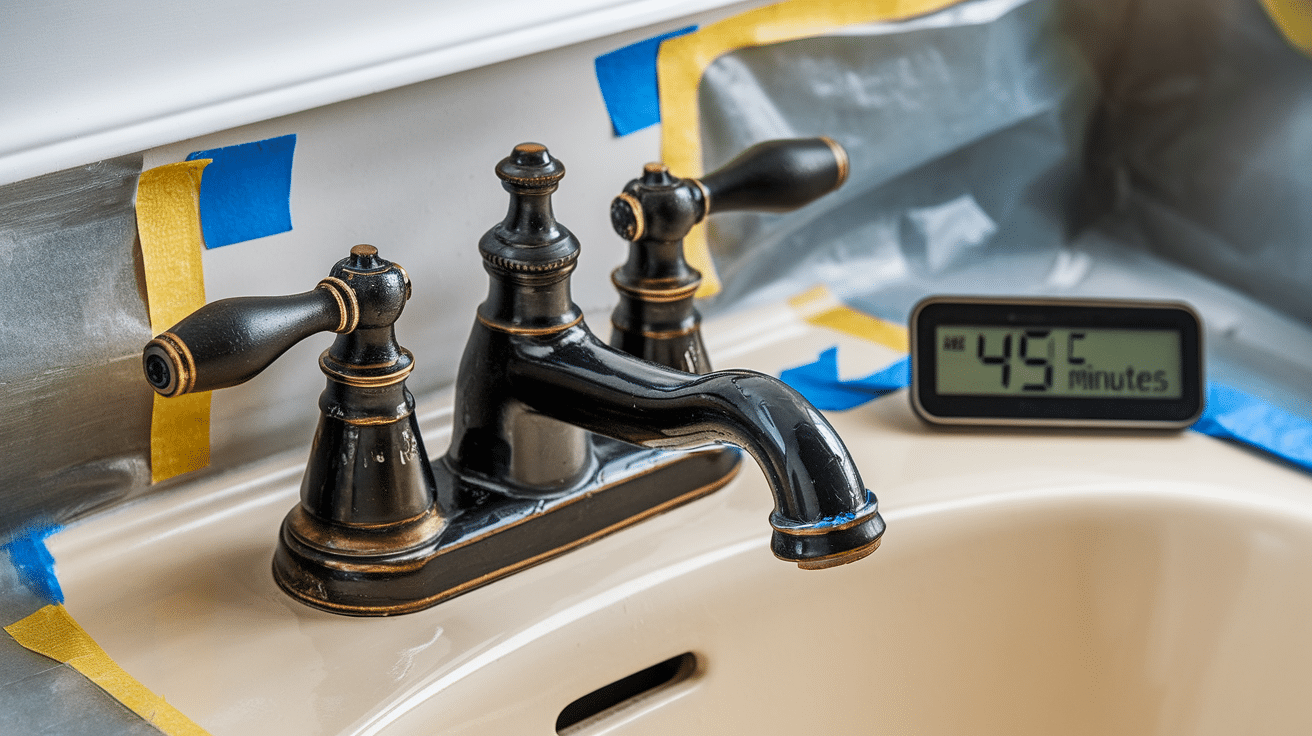
Be patient! Rush this step, and your finish will suffer. Patience during the drying process is crucial for a professional-looking finish.
Set a timer between coats to avoid the temptation to rush the process—applying the next coat too soon is a common mistake that leads to peeling and bubbling.
Before adding another layer, touch the surface gently to confirm it doesn’t feel tacky or sticky. For optimal drying, aim for an environment between 65-75°F with low humidity, as these conditions allow the paint to cure properly.
If you’re working in colder temperatures or more humid conditions, be prepared to allow extra drying time—sometimes up to twice as long as the manufacturer recommends. This extended drying period ensures that each layer is completely set before adding the next one.
4. Apply a Clear Sealer (optional)
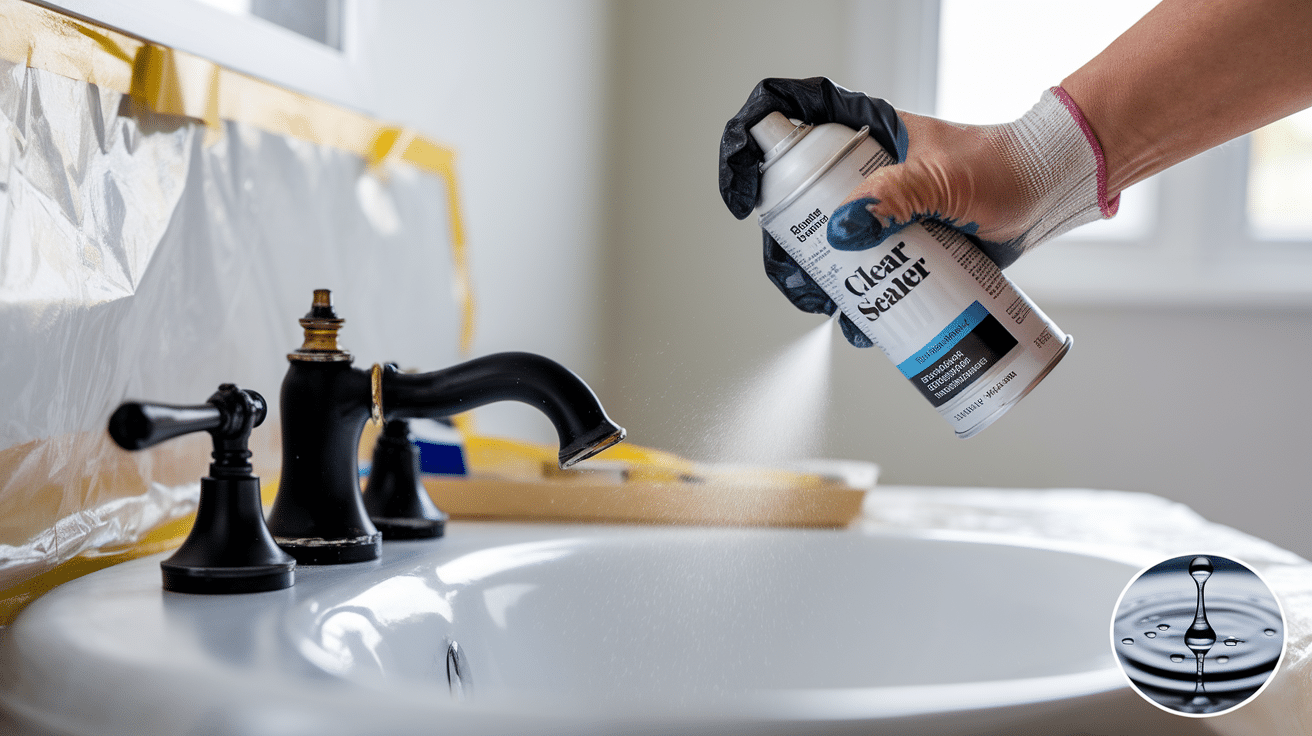
The final step in your tap painting project is applying a protective clear coat. Once the paint is fully dry—ideally waiting a full 24 hours to ensure complete curing—apply 1-2 light coats of clear sealer.
This protective layer is not just optional but essential for longevity, as it adds significant protection against daily water exposure and regular handling.
Be sure to choose a water-resistant sealer specifically designed for high-moisture environments, particularly for bathroom taps that face constant water contact.
Like the paint itself, apply the sealer in thin, even coats and allow proper drying time between applications for the most durable finish.
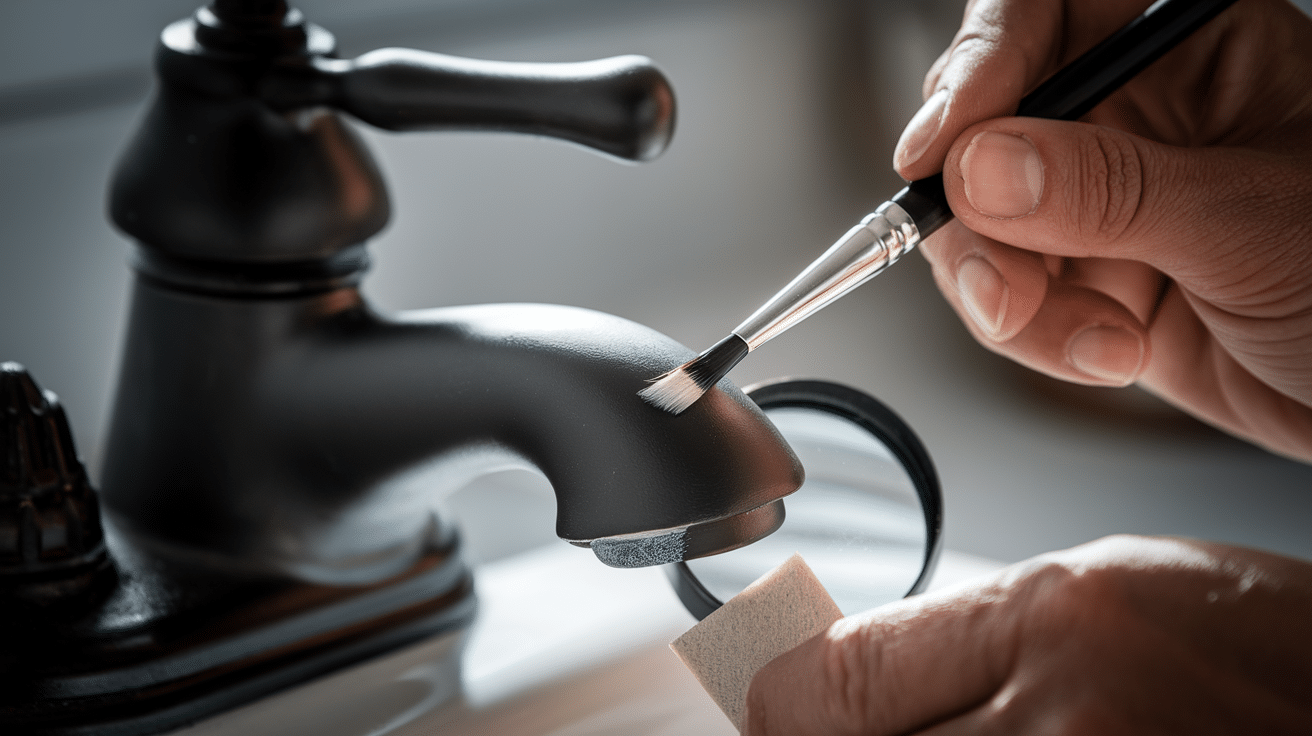
Painting Different Parts of The Tap
- For the spout: Start from the top and work your way down
- For handles: Paint the sides first, then the top and bottom
- For tight areas: Use a small brush for touch-ups after spray painting
The whole painting process takes about a day, including drying time. Most of that time is spent waiting between steps, so plan other activities during the waiting periods.
Common Mistakes and How to Avoid Them
Let me save you from the mistakes I made on my first try:
Paint Peeling Too Soon
When painting different parts of your tap, it’s important to use specific techniques for each area to ensure complete, even coverage.
For the spout, start from the top and work your way down with smooth, sweeping motions to prevent drips from forming.
- Cause: Not cleaning or sanding properly
- Fix: Take extra time on prep work – it’s worth it!
Uneven and Blotchy Finish
One of the most common mistakes when painting taps is applying too much paint in a single coat. When you put on a thick layer, the paint tends to pool in certain areas, creating drips, uneven texture, and a longer drying time.
This often leads to a tacky finish that never properly hardens.
- Cause: Applying too much paint at once
- Fix: Use multiple thin coats instead of one thick one
Painted Parts Sticking
Many beginners encounter a frustrating issue with painted parts sticking together or not functioning properly after painting.
This happens when paint seeps into the tap’s moving mechanisms, hinges, or joints. Once dried, this paint creates friction between surfaces meant to move against each other, making handles difficult to turn or completely stuck.
- Cause: Paint on moving parts or joints
- Fix: Make sure to tape off any moving parts and joints carefully
Visible Brush Marks
Visible brush marks can quickly make your tap painting project look amateur instead of professional.
This common issue occurs when using standard paintbrushes on smooth metal surfaces, as even high-quality brushes tend to leave stroke lines that become more noticeable as the paint dries.
- Cause: Using a brush instead of spray paint
- Fix: Spray paint gives a smoother finish, or use high-density foam rollers for small areas.
Water Spots Appearing Quickly
Water spots appearing on your freshly painted taps can be disheartening after all your hard work.
This happens because paint alone, even when fully cured, often can’t withstand constant water exposure in bathroom and kitchen environments.
- Cause: No protective sealer
- Fix: Apply a clear, waterproof sealer as your final step
Taking your time with each step will help you avoid most of these issues. Remember that rushing usually leads to a redo later.
Finishing Touches and Care Tips
After your paint and sealer are completely dry (wait at least 24 hours), you’re ready for the final steps that complete your tap transformation.
This waiting period is crucial—even though the surface might feel dry to the touch much sooner, paint continues to cure and harden beneath it for a full day or more.
1. Remove Tape Carefully
When removing the painter’s tape, pull it away slowly at a 45-degree angle rather than yanking it straight up, which helps prevent the tape from taking paint with it. I
f you notice the paint beginning to lift as you remove the tape, stop immediately and use a razor blade to carefully score along the edge, creating a clean separation between the tape and your painted surface.
For best results, remove the tape during the cooler part of the day, typically morning or evening, when the paint is slightly harder and less likely to lift or stretch with the tape.
2. Test Moving Parts

After removing the tape, it’s essential to test all moving parts of your newly painted tap. Gently test the handles to ensure they turn smoothly without sticking or resistance.
If you encounter any stiffness or feel something caught, carefully inspect the joints and connection points for paint that might have seeped in despite your taping efforts.
3. Fix Minor Imperfections
Even with careful application, you might discover minor imperfections once everything is dry.
For small drips or bumps in the paint, use very fine sandpaper (800-grit) with an extremely gentle touch to smooth the surface without damaging the surrounding paint.
4. Reconnect Water Supply
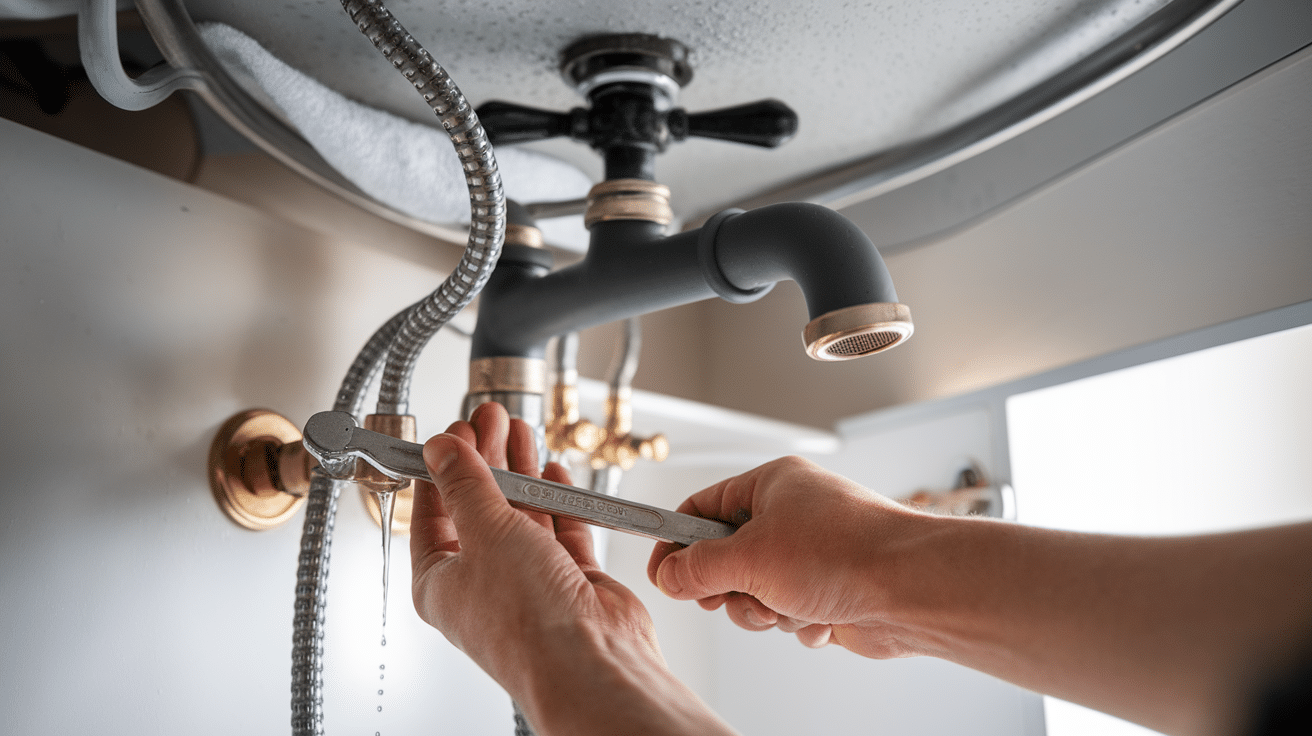
Before declaring your project complete, ensure the paint has fully cured according to the manufacturer’s instructions—this final curing time may be longer than just the surface drying time.
Once you’re confident the paint has hardened completely, carefully turn the water supply back on, doing so slowly to prevent sudden pressure changes that could damage connections.
5. Long-Term Care for Painted Taps
To keep your painted taps looking good before declaring your project complete, ensure the paint has fully cured according to the manufacturer’s instructions—this final curing time may be longer than just the surface drying time.
Once you’re confident the paint has hardened completely, carefully turn the water supply back on, doing so slowly to prevent sudden pressure changes that could damage connections.
When to Repaint?
Signs that your tap needs repainting:
- Paint is chipping in multiple places
- Color has faded significantly
- Water has seeped under the paint, causing bubbling
With proper care, your painted taps should look great for 1-2 years before needing a touch-up. Due to heavier use, kitchen taps typically require more frequent touch-ups than bathroom taps.
Environmental Considerations
When working with paint and related materials:
- Look for low-VOC or water-based options when possible
- Dispose of leftover paint properly (check local regulations)
- Use up leftover paint on other small metal items to reduce waste
Conclusion
Painting your taps is a simple way to update your bathroom or kitchen without spending much money. By following these steps and taking your time, you can create a finish that looks professional.
The key points to remember:
- Clean and sand properly before painting
- Use thin, even coats and be patient between them
- Protect your work with a clear sealer
This weekend project can save you hundreds of dollars compared to buying and installing new fixtures. Plus, you get the satisfaction of doing it yourself!
Now that you know how to do it, what’s stopping you? Those old, dull taps could look brand new by the end of the weekend.
Have you painted taps before? Did you try a specific color or finish? Share your experience in the comments below! I’d love to see how your project turned out.