
Is your front yard making you cringe every time you pull into the driveway? You’re not alone.
In this blog, I’ll walk you through that tired front yard into a space you’ll be proud to show off—no complicated landscaping degree required.
I’ve helped dozens of homeowners turn problem yards into neighborhood standouts. After 15 years of landscaping work, I’ve learned what truly works—and what’s just a waste of money.
We’ll cover:
- Simple weekend projects with big impact
- Budget-friendly plants that thrive with minimal care
- Curb-appeal tricks that boost home value
- Common mistakes to avoid
Whether you’re looking to sell your home or want to smile when you arrive home, this guide will take you from planning to completion.
Let’s turn that embarrassing yard into your home’s best feature.
Take a Good Look at What You Have
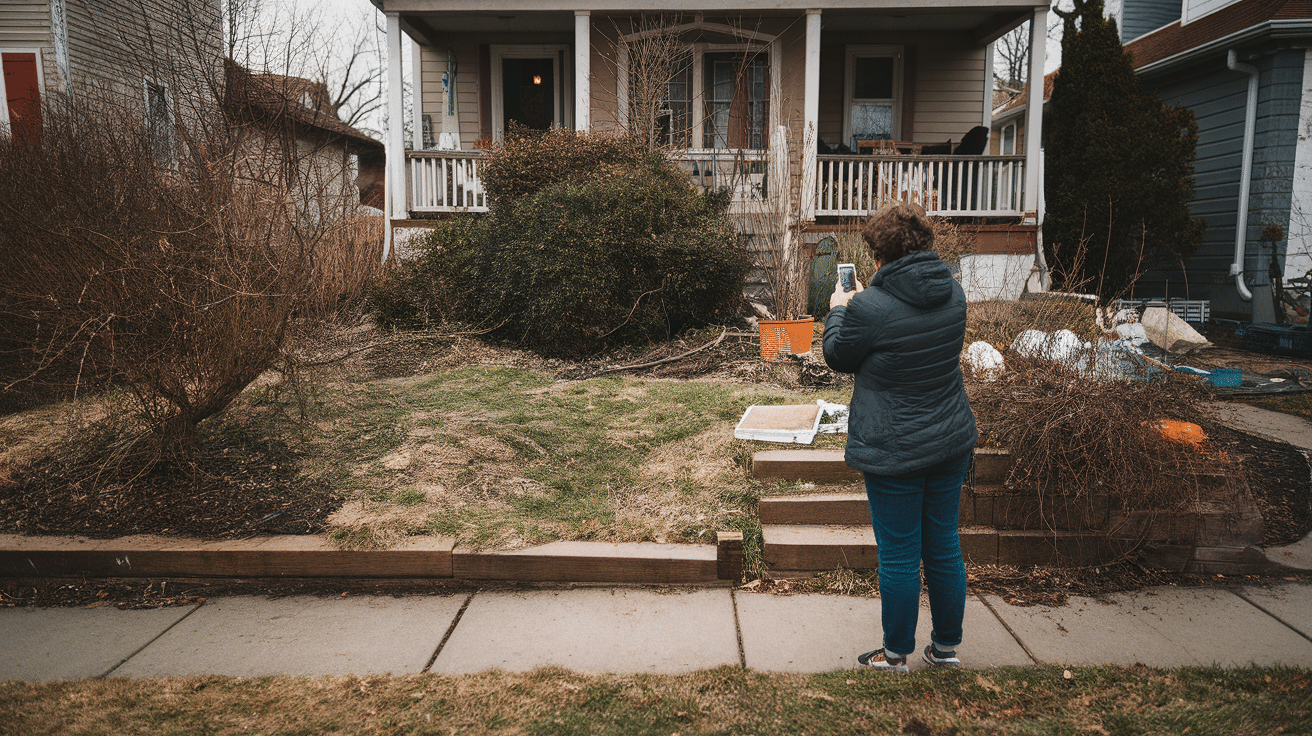
The first step to fixing your front yard is honest assessment. I always tell my clients to start by seeing their property through fresh eyes.
Walk across the street and really look at your house. This new perspective changes everything. You’ll notice things you miss every day.
What stands out? What makes you proud? What makes you wince?
This isn’t about being critical—it’s about being clear about what you’re working with.
Take photos from different angles. These will help you plan and also give you satisfying “before” pictures to compare later.
As you look at your yard, ask yourself:
- Which areas catch your eye first (good or bad)?
- Where does water collect after rain?
- Which spots get full sun vs. shade?
- What’s the first thing you’d like to change?
Don’t rush this step. I’ve seen people waste hundreds of dollars fixing the wrong problems first.
Consider walking by at different times of day. Morning and afternoon light can completely change how your yard looks.
Make simple notes about what works and what doesn’t. Your observations now will save you time and money later.
Set Your Goals and Budget
Know what you want before you spend a dollar. I can’t stress this enough. Without clear goals, your yard makeover can quickly spiral out of control.
Ask yourself why you’re doing this. Are you tired of the brown lawn? Need more privacy from neighbors? Want to impress guests? Your “why” shapes everything that follows.
You don’t need to tackle everything at once. Breaking your project into phases often makes more sense for both your sanity and your wallet.
Think about how you actually live, not just how yards look in magazines.
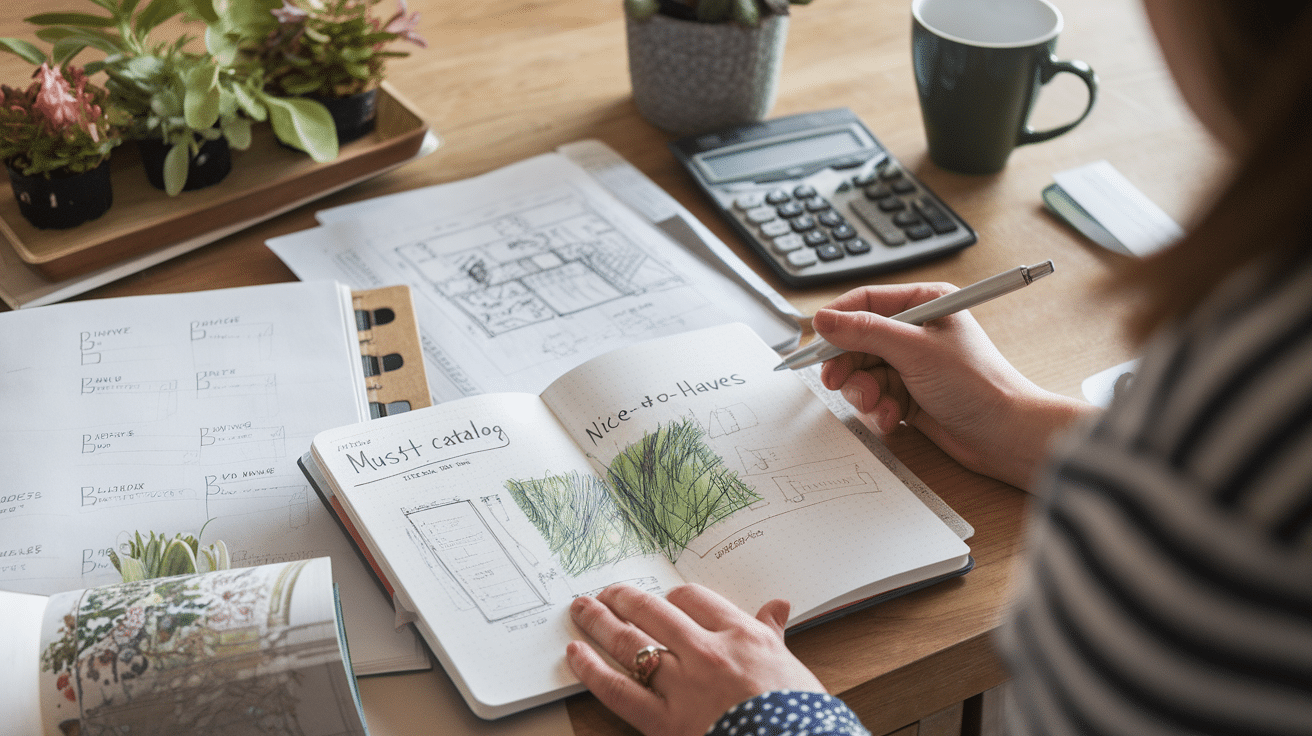
Make a simple list dividing elements into:
- Must-haves (things that solve your biggest problems)
- Nice-to-haves (things you can add later if budget allows)
- Not-for-me (things that look good but don’t fit your lifestyle)
Your budget doesn’t need to be huge, but it needs to be real. I’ve transformed front yards for $500 and $5,000. The difference is scope, not potential impact.
Be honest about maintenance, too. A gorgeous garden that needs daily attention might not be right for your busy life. Sometimes, the best choices are the ones that look good without constant work.
Set aside about 10% of your budget for unexpected costs. Something always comes up—a broken sprinkler head, an extra bag of soil, or that perfect plant you didn’t plan for.
Clean Up and Clear Out

Start with a blank canvas. I always tell my clients that removing the bad stuff is just as important as adding new elements.
Grab some work gloves and a few garbage bags. The first step is getting rid of anything dead, dying, or just plain ugly.
You’d be amazed at how much better your yard looks after simply pulling weeds and trimming overgrown bushes. This alone can transform your curb appeal in a single afternoon.
Think of this as the “decluttering” phase for your yard.
Focus on these key clean-up tasks:
- Pull all weeds (get the roots when possible)
- Remove any dead or struggling plants
- Cut back bushes that block windows or walkways
- Rake up old leaves and debris
- Clear toys, tools, or other items that don’t belong
Power washing is like magic for outdoor spaces. Rent a machine for a day and watch years of dirt disappear from your walkways, driveway, and even siding.
The edges matter, too. Create clean lines between grass and garden beds. Sharp edges instantly make your yard look more maintained.
This cleanup phase costs very little but makes a massive difference. Some of my clients are so happy with this step alone that they slow down their timeline for the rest of the project.
Plan Your Layout
A thoughtful layout makes the difference between amateur and amazing. I’ve seen yards with expensive plants look messy, while yards with simple materials look stunning – all because of layout.
Think of your front yard like a stage. What do you want people to notice first? Usually, it’s your front door, not your garbage cans.
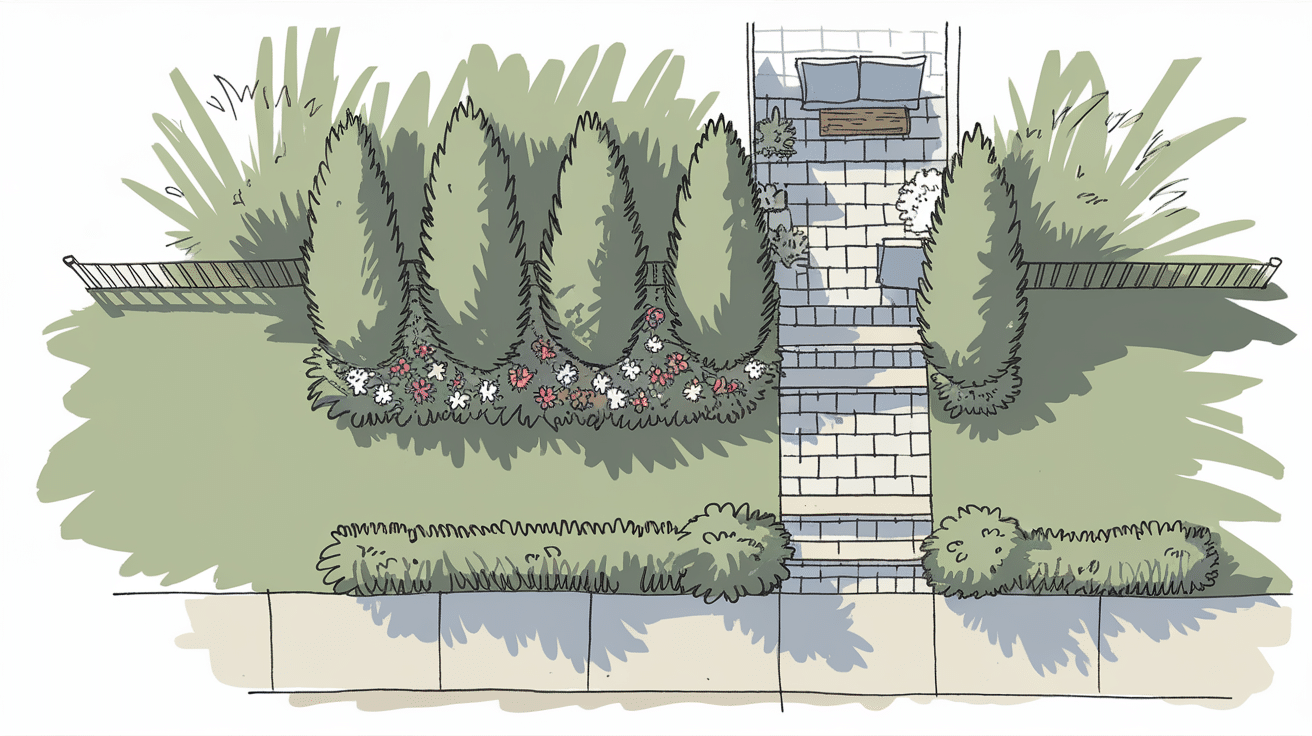
Start by sketching a simple bird’ s-eye view of your space. Nothing fancy—just boxes and circles on paper to represent different areas.
The right layout feels natural, like it was always meant to be that way.
When planning, remember these key principles:
- Layer plants by height (tallest in back, shortest in front)
- Create focal points that draw the eye (a specimen tree, large planter, or seating area)
- Balance visual weight on both sides of your entry
- Allow for practical paths and access points
Defining spaces gives your yard purpose. Even small front yards can have distinct areas – perhaps a tidy lawn, a welcoming entry path, and colorful planting beds along the foundation.
Edging is worth every penny and minute spent. Clean borders between lawn and garden beds instantly upgrade your yard’s appearance. Use stone, metal, or even buried landscape timbers to create definition.
Consider traffic flow, too. How do people move through your space? Make sure paths are wide enough (at least 3 feet for main walkways) and connect logical points.
Choose Your Plants and Materials
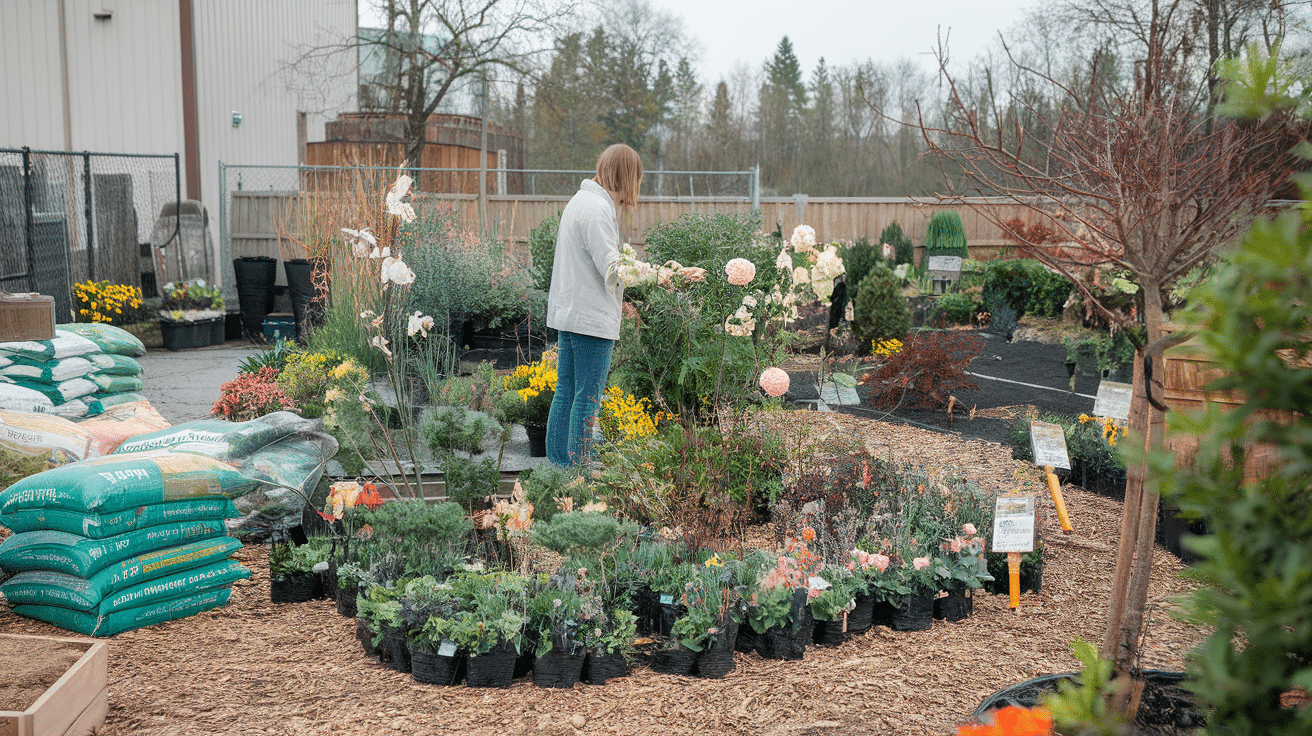
Plants are the stars of your yard show. I always tell homeowners to spend time on this decision because the right plants make maintenance easier and your yard more beautiful.
Start with what actually grows well in your area. Fighting your climate is a losing battle. Your local garden center or extension office can suggest native plants that thrive with minimal fuss.
Consider how much sun different parts of your yard receive. That sunny spot near the mailbox needs different plants than the shady area under your front window.
The most beautiful yards combine different types of plants for year-round interest.
For a balanced yard, include:
- Evergreens for permanent structure (like boxwood or juniper)
- Flowering shrubs for seasonal color (like hydrangea or azalea)
- Perennials that come back each year (like black-eyed Susan or hostas)
- A few annuals for instant color (like petunias or marigolds)
Materials matter just as much as plants. Quality mulch reduces weeds and holds moisture, making your plant beds look neat while helping plants thrive.
Decorative stone or gravel works well in problem areas where plants struggle. It also adds texture and contrast between green spaces.
Don’t forget the impact of hardscaping. Simple stepping stones, a refreshed concrete walkway, or stacked stone borders add structure and permanence to your design.
Group similar plants together for visual impact rather than scattering single plants throughout the yard. Clusters of 3 or 5 plants look more intentional than one-of-everything.
Add Hardscaping or Features
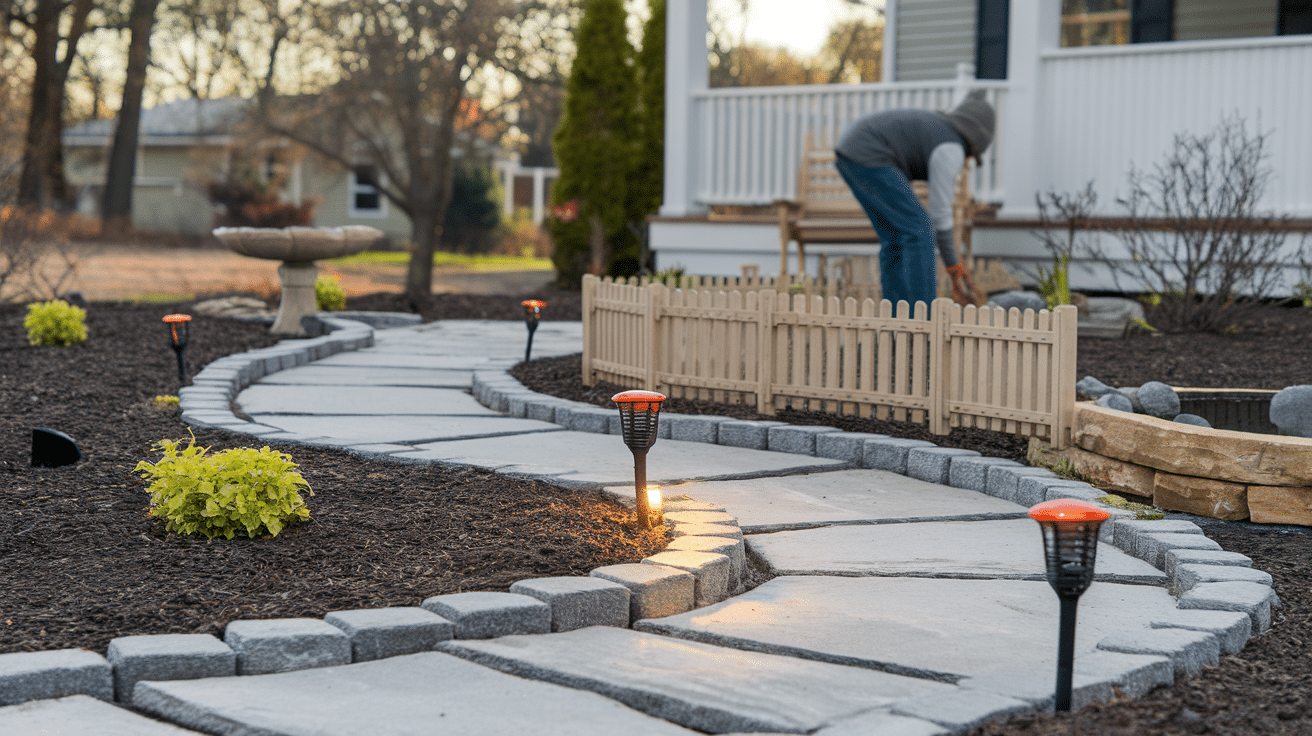
Hardscaping makes your yard shine in all seasons. I’ve seen how these permanent elements create structure when flowers fade and trees lose leaves.
Think of hardscaping as the backbone of your landscape. These non-plant elements give your yard a finished, intentional look that stands the test of time.
A clear, defined walkway to your front door makes a huge difference. Whether it’s concrete, pavers, gravel, or stepping stones, this path guides visitors and creates visual flow.
The materials you choose tell a story about your home.
Consider adding these features for maximum impact:
- A simple stone border around flower beds
- Fresh steps leading to your porch
- A low decorative fence to frame the yard
- Upgraded house numbers or mailboxes
- A small bench or seating area
Lighting transforms your yard day and night. Solar path lights are affordable and easy to install. They highlight your walkway while adding safety after dark.
Don’t overlook your existing hardscaping. Sometimes, simply power washing your concrete walkway or staining your wooden porch makes these features look brand new.
Water features sound fancy, but even a simple birdbath adds charm without breaking the bank. It brings wildlife to your yard and creates a focal point.
Remember that less is often more. A few quality hardscape elements make more impact than many cheap ones scattered throughout your yard.
Finishing Touches
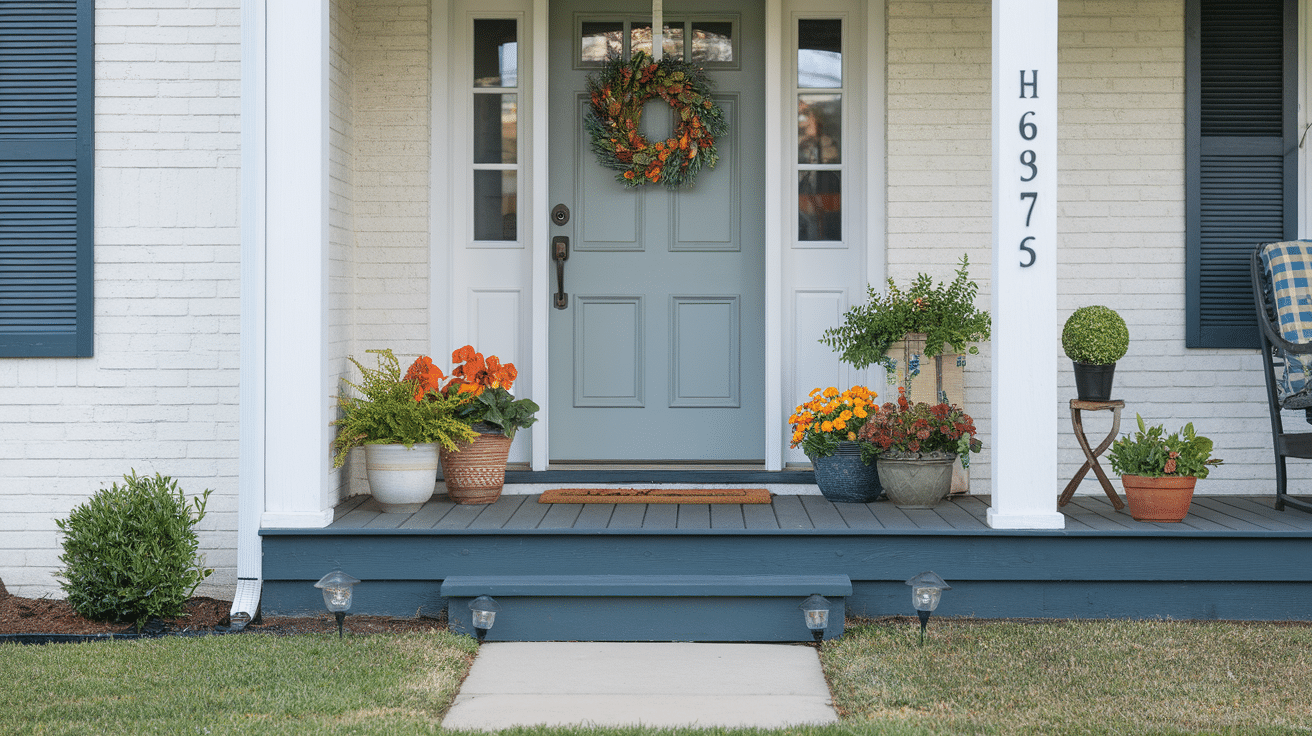
The small details often make the biggest impression. I’ve seen how these final elements can transform a nice yard into a showstopper.
Look at your front door area. This is where guests pause before entering, so make it count. A fresh coat of paint on your door in a bold, welcoming color costs little but changes everything.
New house numbers in a modern style instantly update your home’s look. Choose numbers that contrast with your siding so they’re easy to read from the street.
Think of these finishing touches as jewelry for your home.
Consider these high-impact details:
- A quality doormat that reflects your style
- Matching porch lights on either side of the door
- Window boxes filled with seasonal flowers
- A simple wreath that you can change seasonally
- Potted plants to frame your entrance
Container gardens add instant color where you need it most. Place large pots on porch steps or beside the front door with plants that pop against your home’s color.
Remember that maintenance is crucial after all your hard work. Please set up a simple watering schedule for new plants until they’re established. Even low-maintenance yards need some attention.
Take “after” photos when you’re done. Not only will you enjoy seeing the transformation, but you’ll also have a record of what your yard looks like at its best for future planning.
Before-and-After Photos
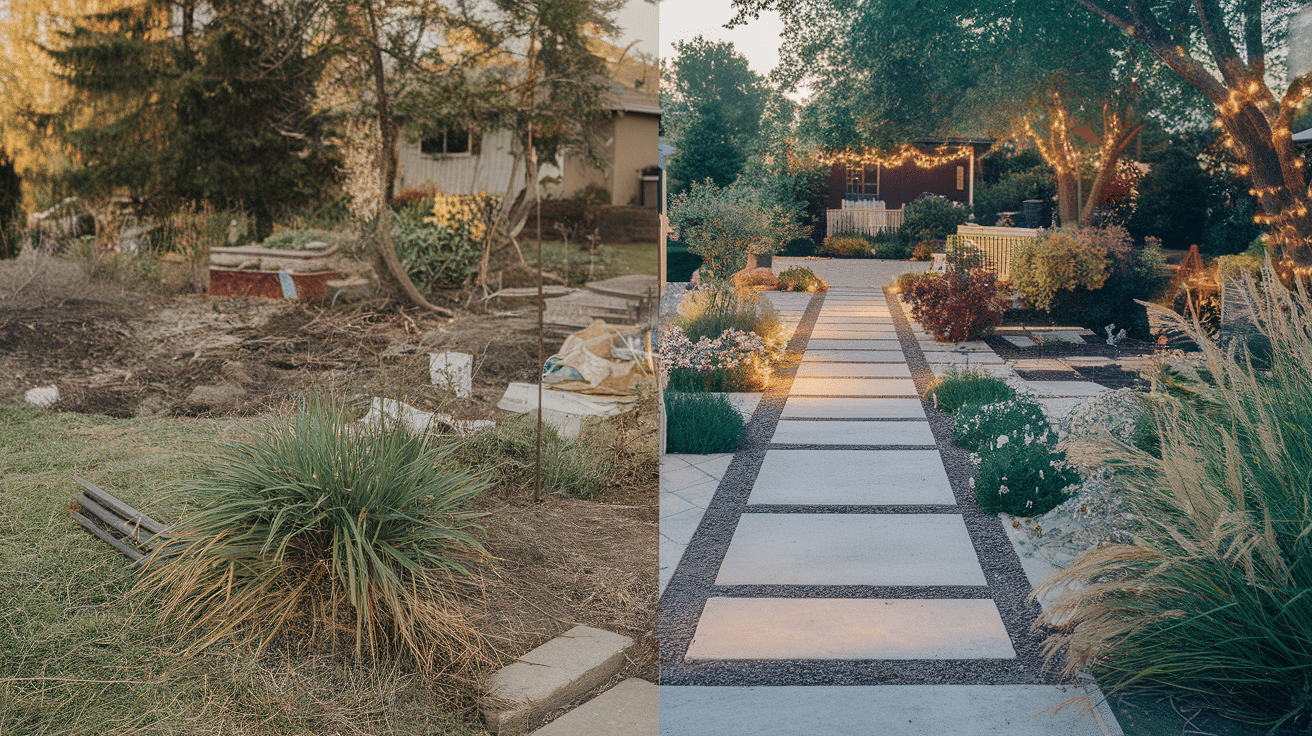
Document your transformation journey. I always tell my clients to take photos at every stage of their yard makeover.
Start with clear “before” pictures from several angles. These might make you cringe now, but they’ll become your favorite comparison points later.
Snap photos during the process, too. Catching that moment when you’re knee-deep in mulch or celebrating a finished flower bed makes the final reveal even sweeter.
There’s something incredibly satisfying about scrolling back through your yard’s evolution.
When you’re finished:
- Take “after” photos at the same angles as your “before” shots
- Try to capture pictures in similar lighting conditions
- Include close-ups of your favorite new features
- Take photos in different seasons as your landscape matures
Share your success with others. Post your transformation photos on social media with #FrontYardMakeover or tag our blog’s page @YardTransformations.
Your before-and-after story might be exactly what inspires a neighbor or friend to tackle their yard project. Plus, the positive comments will reinforce all your hard work.
Consider creating a simple photo album or digital folder to track your yard’s progress over time. This becomes especially valuable when planning future projects or seasonal updates.
Conclusion
Your front yard sets the tone for your entire home. With these simple steps, you can transform it from an eyesore into a point of pride.
Remember that yard makeovers don’t need to happen all at once. When done thoughtfully, even small changes can make a big difference.
The key steps to success are:
- An honest assessment of what you have
- Clear goals that match your lifestyle
- Thorough cleanup before adding anything new
- Thoughtful plant and material choices
- Paying attention to finishing details
Whether you spend a weekend refreshing what you have or embark on a complete transformation, the process should be enjoyable. Take your time, celebrate small victories, and watch as your yard evolves.
Ready to get started? Grab a notebook, walk outside, and begin seeing your yard’s potential. Your “after” photos are waiting to happen.
Frequently Asked Questions
How Much Does a Front Yard Makeover Typically Cost?
A DIY front yard refresh can cost as little as $500-1,000 for basics like plants, mulch, and simple hardscaping. Professional landscaping typically starts around $3,000-5,000 for a small to medium yard and can range up to $15,000+ for complete transformations with premium features.
What Are the Best Low-Maintenance Plants for Front Yards?
Look for native plants adapted to your region. Good low-maintenance options often include ornamental grasses, flowering shrubs like hydrangeas or spirea, evergreens such as boxwood or juniper, and ground covers like creeping thyme or sedum. Native perennials typically require less water and care.
How Long Does a Front Yard Makeover Usually Take?
A basic DIY refresh can be completed in 1-2 weekends. Larger projects involving hardscaping, irrigation systems, or extensive planting typically take 2-4 weeks. Professional landscaping projects are usually faster but depend on the complexity and crew size.
When Is the Best Time of Year to Start a Yard Makeover?
Spring and fall are ideal in most regions. Spring offers good planting conditions with moderate temperatures and regular rainfall. Fall planting gives roots time to establish before the summer heat. Avoid major projects during extreme heat, drought, or freezing conditions.
How Can I Make My Small Front Yard Look Bigger?
Use diagonal pathways to create the illusion of more space. Choose a limited color palette with lighter colors. Create depth with layers of different plant heights. Incorporate mirrors or reflective surfaces in design elements. Repeat a few plant varieties rather than many different types.