
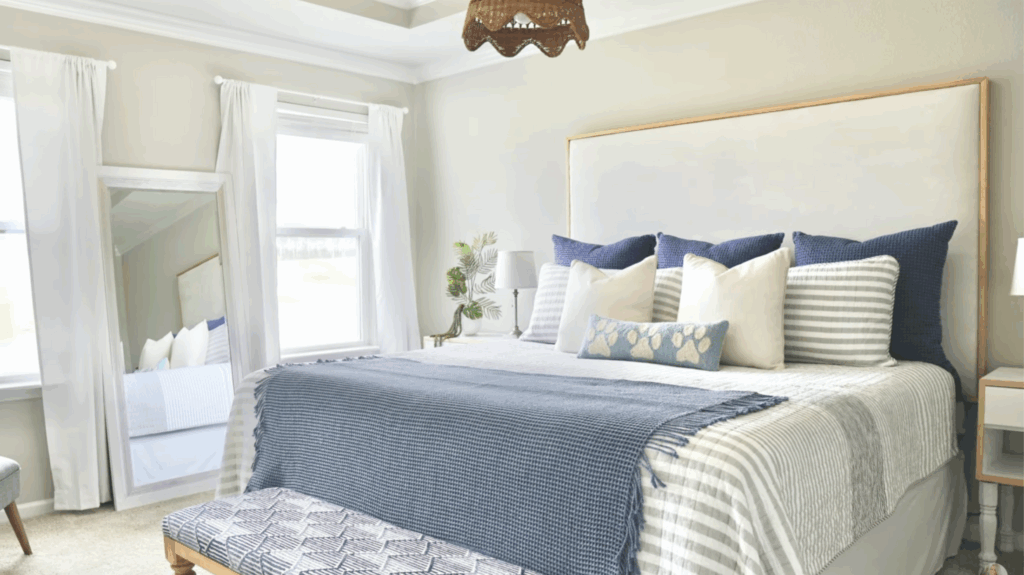
Improving your bedroom doesn’t have to mean a big remodel or blowing your entire weekend budget at a furniture store.
Sometimes, all it takes is one special piece, something that adds comfort, beauty, and a little of your personality. That’s exactly what this DIY upholstered headboard project does.
If you’re someone who enjoys getting hands-on, loves finding creative ways to decorate, or wants a cozy bedroom upgrade without the high price tag, I think you’re going to really enjoy this one.
It’s the kind of weekend project that feels super rewarding, simple enough to do solo, or fun to tackle with a helper.
This headboard is more than just a backdrop for your pillows. It becomes the highlight of the room, something you’ll be proud to say, “I made that.”
And with just a bit of fabric, wood, and effort, you can create a piece that fits your space perfectly.
Why Make Your Own Headboard?
I get it, there are tons of gorgeous headboards out there. But have you ever fallen in love with one, only to find it’s either way too expensive or just not the right size or style for your space?
That’s exactly what pushed me to try making one myself, and honestly, I’m so glad I did.
It gave me a chance to create something that felt truly personal and matched my bedroom perfectly. When you build your own headboard, you’re in control.
You get to choose the fabric that speaks to your vibe, decide how soft and plush you want it to feel, and even pick the kind of trim that ties in with the rest of your room.
May it be a warm rustic stain, a bold pop of color, or a classy neutral, the end result is 100% your own design. And let’s be real, there’s something deeply satisfying about stepping back at the end and thinking, “Yep, I made that.”
You’ll pick up a few new skills, boost your DIY confidence, and walk away with a custom piece you’ll be proud of for years.
If you’re looking for a budget-friendly, beginner-friendly, totally customizable home upgrade, this is a fantastic place to start.
What You’ll Need
Before you start building, gather all your tools and materials in one place. Having everything ready makes the project smoother and way more enjoyable.
Materials
- Upholstery fabric
- One-inch foam or a mattress pad
- 48″ x 77″ plywood sheet
- 2×2 boards (for the frame)
- 1×3 boards (for trim)
- Wood glue
- 2½” wood screws
- 1″ wood screws
- 1½” brad nails
- Stain and polyurethane
- Spray adhesive
- Heavy-duty picture frame hangers
Tools
- Kreg jig (set to 1½”)
- Power drill
- Staple gun
- Nail gun
- Table saw or circular saw
- Measuring tape
- Scissors
- Sandpaper
Easy Steps to Build Your Own Upholstered Headboard
Let’s break this project down into six simple, doable steps you can tackle in a weekend. Take your time and enjoy the process!
Step 1: Build the Frame
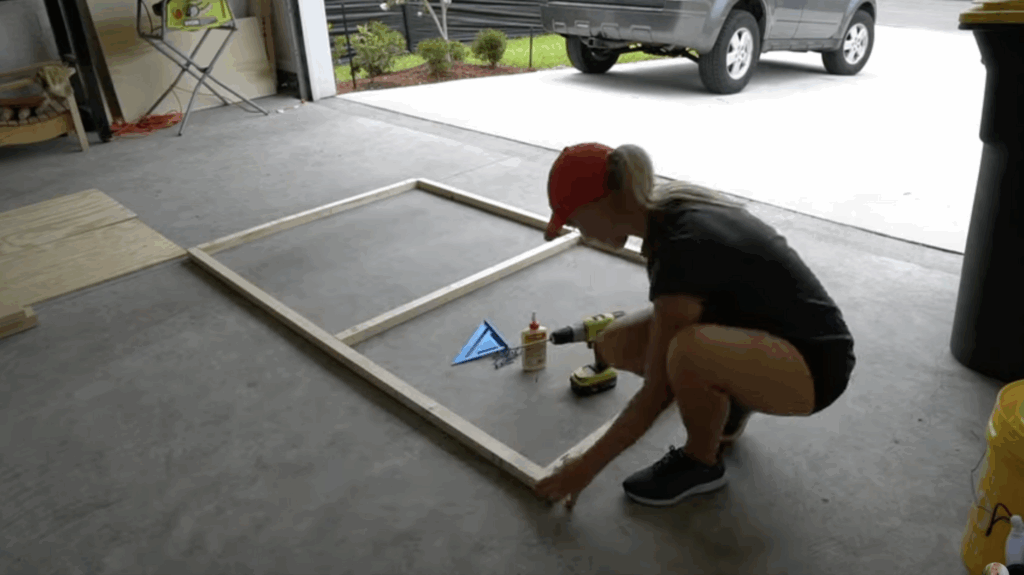
Start by cutting your wood: for a king-size headboard, you’ll need three 45″ pieces for the vertical supports and two 77″ pieces for the top and bottom.
Drill pocket holes into both ends of the short boards using a Kreg jig (set to 1½”).Then, lay everything out to form a rectangle and secure with 2½” screws and a dab of wood glue.
Once that’s done, attach the plywood to the frame using 1″ screws. This becomes the sturdy backing for everything to come.
Step 2: Add the Foam
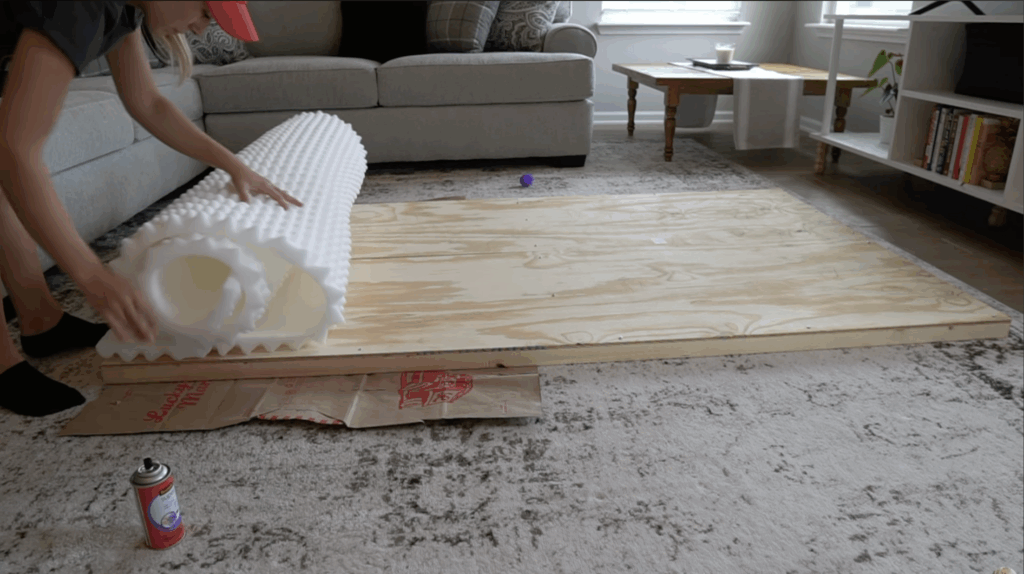
Here’s a great money-saving tip: instead of upholstery foam, use a mattress pad! It’s affordable, comfy, and super easy to cut.
Trim the pad to fit the plywood and secure it with spray adhesive. Press it down well to avoid bubbles or lumps; this is what gives your headboard its cushiony feel.
Step 3: Wrap It in Batting
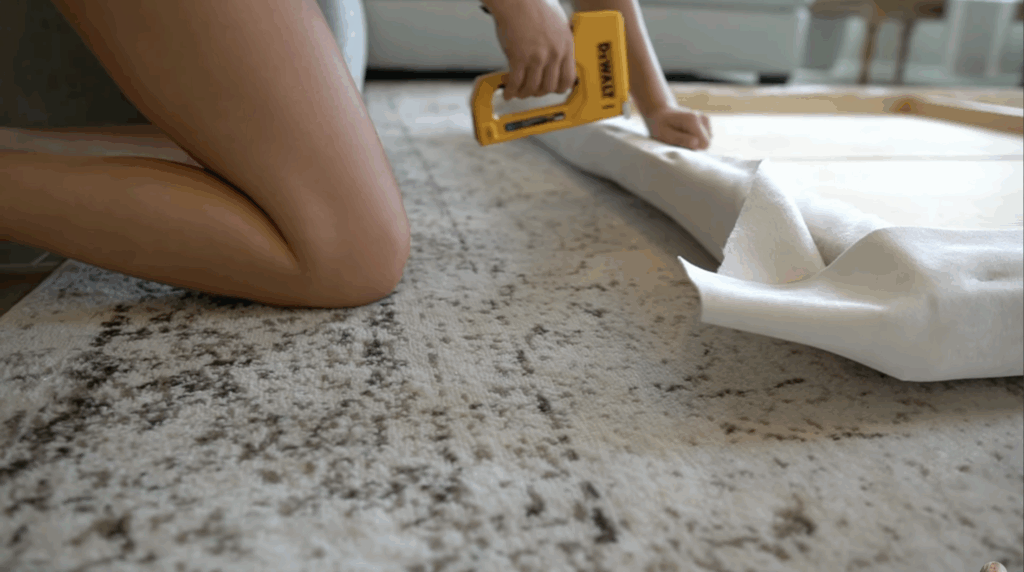
Find a clean, open spot on your floor for this step. Lay the batting flat, place your headboard face down on top, and cut the corners neatly for folding.
Pull the batting tight around the edges and staple it to the back of the frame every few inches. This soft layer helps smooth out the foam and gives the finished piece a professional feel.
Step 4: Add the Trim
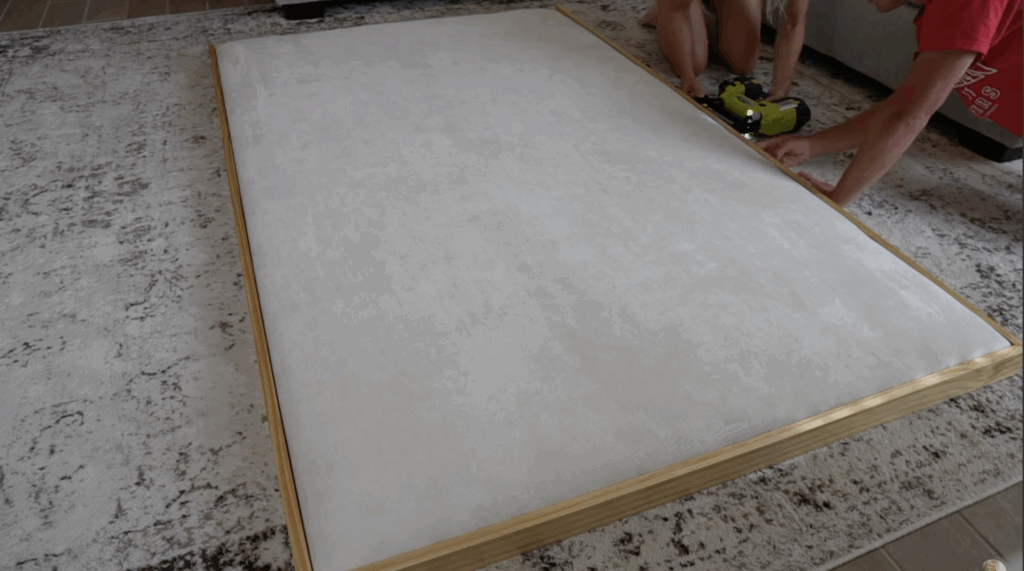
To make your headboard look finished and polished, add wood trim around the front edges. I trimmed down 1×3 boards to 1×2.5” using a table saw, but you can stick with straight cuts for a simpler route.
Cut your trim to size (either 45° angles or straight ends), sand everything smooth, then stain and seal with polyurethane.
Once dry, attach the trim using a nail gun and 1½” brad nails. Fill nail holes if needed for a flawless finish.
Step 5: Hang and Admire
You’re in the home stretch! Use heavy-duty picture hangers or a French cleat system to mount your new headboard on the wall.
Measure carefully, drill into studs or use anchors, and get it hung securely. Once it’s up, step back and admire your handiwork. You made something beautiful, functional, and totally you.
This blog is inspired by “How to Make an Upholstered Headboard” by @Home With Stefani. For a more detailed understanding, watch the video below.
Style Ideas and Customization Options
Once you’ve built the basic headboard, there’s plenty of room to get creative and make it truly your own. These are some fun and stylish ways to customize it:
- Tufting with buttons – Sew fabric-covered buttons into the foam for a classic, tailored look that adds dimension and texture.
- Shape it up – Cut the plywood into an arch, curve, or scalloped edge for a soft, whimsical, or beautiful silhouette, depending on your style.
- Add nailhead trim – Line the edges with nailhead strips to give it a classy, high-end finish often seen in designer pieces.
- Go bold with fabric – Choose velvet for luxe vibes, linen for a calm, airy look, or a bold patterned fabric to create a statement piece that anchors the room.
Don’t be afraid to mix styles or test out samples before committing.
These creative touches turn your DIY project into a stunning and personalized showpiece that reflects your personality and design taste.
Tips for Success
- Pull that fabric tight! Loose fabric leads to wrinkles, so staple firmly and evenly for a smooth finish.
- Mattress pad works just like upholstery foam, but it’s way more affordable.
- Test your stain first. Try it on scrap trim to be sure it’s the tone you want before applying it to your final pieces.
- Don’t stress the cuts. Straight corners look clean and are easier to work with than angled ones, perfect if you’re new to woodworking.
- Keep your space clean. Dust and crumbs can show up under fabric. Start with a tidy floor or table.
- Use quality staples. Cheap staples can jam or break; invest in a good pack for smoother stapling.
- Let the stain dry completely. Don’t rush to attach trim. Give stain and polyurethane proper time to cure for a long-lasting finish.
Conclusion
There’s something really heartwarming about building something that brings both beauty and comfort to your space. This DIY upholstered headboard isn’t just a home upgrade; it’s a little reflection of you.
Whether you go for bold color, soft neutrals, or somewhere in between, you’ll end up with a piece that feels truly personal and handmade with love.
Honestly, every time I walk into my bedroom and see this headboard, I smile a little.
It reminds me of the fun I had making it and the pride that comes with creating something with my own two hands.
And I hope you get that same feeling, because it’s more than just a project; it’s an experience. So go ahead, gather your supplies, put on your favorite playlist, and make yourself a cozy, custom headboard.
And when is it up on your wall? Don’t forget to admire it every chance you get.
You absolutely deserve that moment.