
When working with Mortise and Tenon joints, the order in which you make them can affect the strength and accuracy of your project.
Deciding whether to make the mortise or tenon first is a common dilemma for woodworkers of all skill levels.
In this blog, I will share the process of creating Mortise and Tenon joints, focusing on which part to make first.
I will cover why the order matters, offer helpful tips for achieving better results, and point out common mistakes to avoid.
If you’re just starting out or looking to fine-tune your skills, this guide is designed to make your woodworking projects easier and more precise.
By the end, you’ll understand the best approach for perfecting your Mortise and Tenon joints.
What are Mortise and Tenon Joints?
Mortise and Tenon joints are a classic woodworking technique for joining two pieces of wood.
The mortise is a hole or recess cut into one piece of wood, while the tenon is a protruding section on the other piece that fits snugly into the mortise.
Together, they create a strong, durable connection, often used in furniture making, framing, and cabinetry.
The joint is known for its strength and load-bearing capacity, making it ideal for structural applications.
Traditionally, these joints were created by hand, but modern tools like routers and jigs have made the process more efficient.
The precision required to create a perfect fit between the mortise and tenon is key to the strength of the joint.
Whether you’re a beginner or an experienced woodworker, understanding how to craft Mortise and Tenon joints is important for high-quality woodworking projects.
Should the Mortise or Tenon Be Made First?
When crafting Mortise and Tenon joints, the order in which you make them is crucial for the joint’s strength and precision. Whether you start with the mortise or the tenon can depend on your technique and the tools used.
| Aspect | Mortise First (Recommended) | Tenon First (Situational) |
|---|---|---|
| Primary Benefit | Tenons easily trimmed to fit; mortises harder to enlarge | Use a tenon to mark the exact mortise location |
| Best Tools | Chisel, mortiser, plunge router | Table saw, bandsaw for tenons; then chisel |
| Risk Level | Low – forgiving adjustments | Higher – mortise must match tenon perfectly |
| Skill Level | Beginners to pros | Intermediate with machines |
| Expert Consensus | Tage Frid, Fine Woodworking standard | Some power tool workflows |
| When to Choose | Custom single pieces, hand-tool projects, high-accuracy builds | High-volume runs, dedicated tenon jig workflows |
Tools You Need for Crafting Mortise and Tenon Joints
When crafting Mortise and Tenon joints, having the right tools is essential for achieving precision and a secure connection. These tools help ensure that both the mortise and tenon fit perfectly, resulting in a professional joint.
- Drill Press
- Doweling Jigs
- Japanese Saw
- Woodworking Plane
- Coping Saw
- Block Plane
- Square or Framing Square
- Band Saw
- Sanders (for smoothing cuts)
- Adjustable Wrench
- Files or Rasp
- Wooden Blocks (for alignment)
How to Make a Mortise and Tenon Joint?
I use a mortise and tenon joint when I want two pieces of wood to fit together firmly. The process involves marking, cutting the mortise hole, shaping the tenon, and testing the fit carefully.
Step 1: Marking the Mortise Location
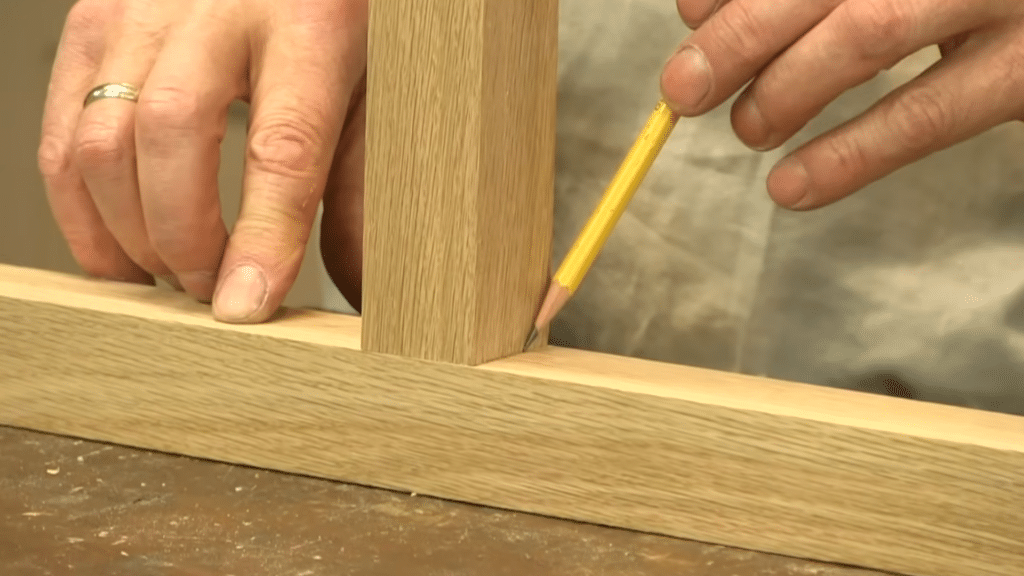
Start by marking the location of the mortise on the wood piece. Use a pencil to draw two clear lines that will guide where the cut will happen.
These lines help you see the exact area that needs to be removed.
Make sure the lines stay straight and accurate because they decide the final position and size of the mortise.
Extend the lines across the full surface to transfer the marks to the opposite side. This keeps the mortise even on both sides and helps the tenon fit neatly later.
Step 2: Preparing the Tenon Thickness
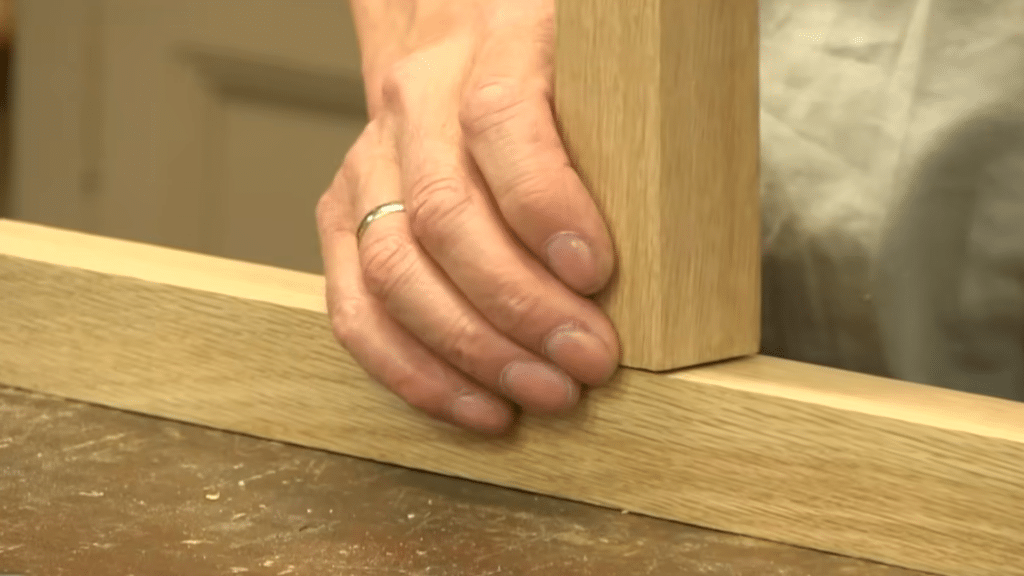
First, measure and mark the thickness of the tenon on the wood. Use a square to draw straight and accurate lines so the cut stays even.
Place your finger on the outside edge of the piece while measuring to help keep the mark in the right position.
This step sets the width of the tenon so it matches the mortise.
Keep the thickness as exact as possible. A precise size helps the tenon slide into the mortise properly and creates a tight and strong wood joint.
Step 3: Cutting the Mortise and Tenon to Size
Using a half-inch chisel, begin cutting the mortise.
The tenon must fit snugly into the mortise, so be sure to adjust the chisel so the fit is tight but not too forced.
When cutting the tenon, ensure it matches the width of the mortise perfectly. Position the chisel between the tips of the pins, avoiding the base, to ensure precise cutting.
Take your time during this step, as it is crucial to achieving a strong, tight joint between the mortise and tenon.
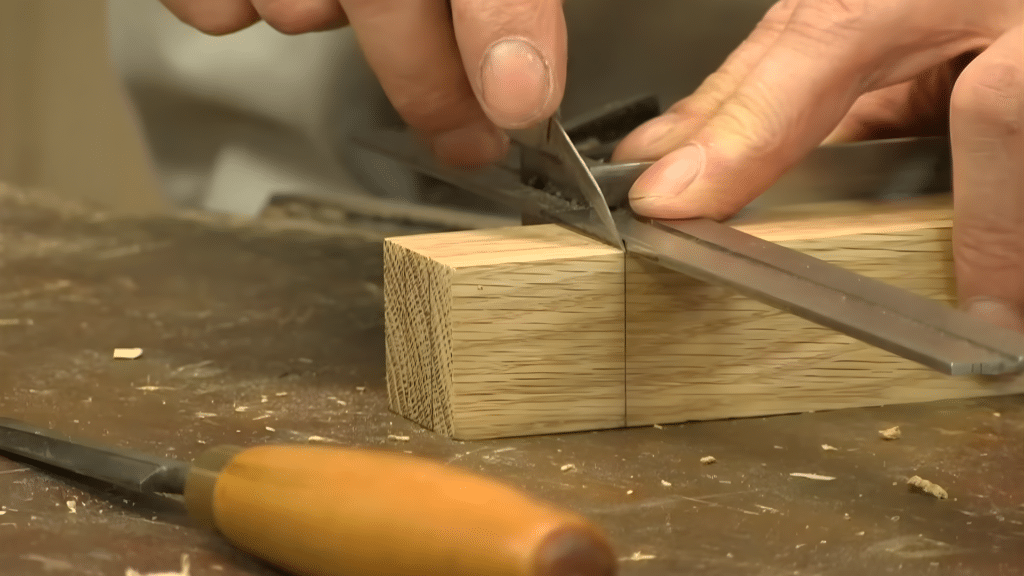
Step 4: Creating Knife Walls for Precision
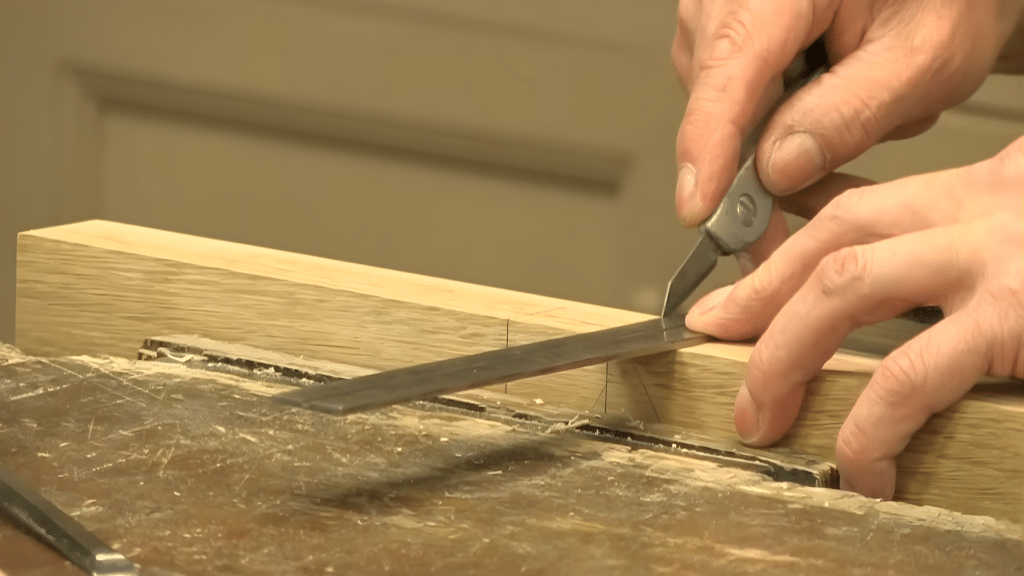
Use a marking knife to create precise knife walls around the mortise.
These knife walls define the exact width of the tenon and ensure a clean cut. The knife should be placed on the edges of your pencil lines, allowing it to transfer the measurements accurately onto the wood.
By creating these walls, you’re providing a guide for the chisel to follow, ensuring that the cuts are consistent, straight, and precise.
This step prevents the chisel from wandering and helps maintain the joint’s accuracy.
Step 5: Chopping the Mortise
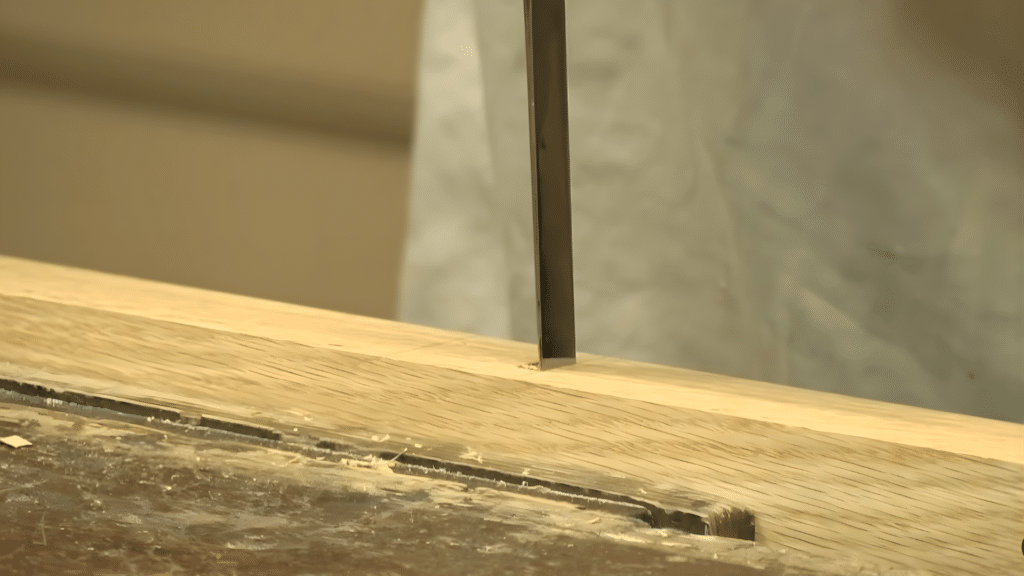
Now it’s time to chop the mortise. Start by aligning the chisel with the knife walls, then make shallow cuts into the wood.
Gradually deepen the cuts as you work through the material, keeping the chisel perpendicular to the surface.
Don’t go too deep at once; work in small increments.
As you progress, the knife walls will guide the chisel, ensuring that the mortise is cut evenly. Take your time and regularly check the depth to make sure you’re staying on track.
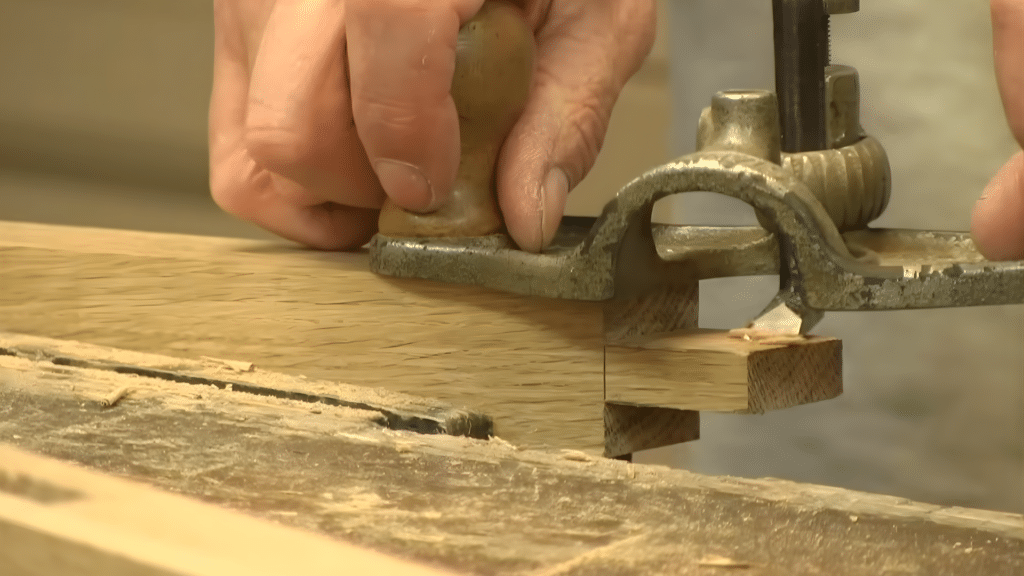
Step 6: Cleaning the Mortise Walls
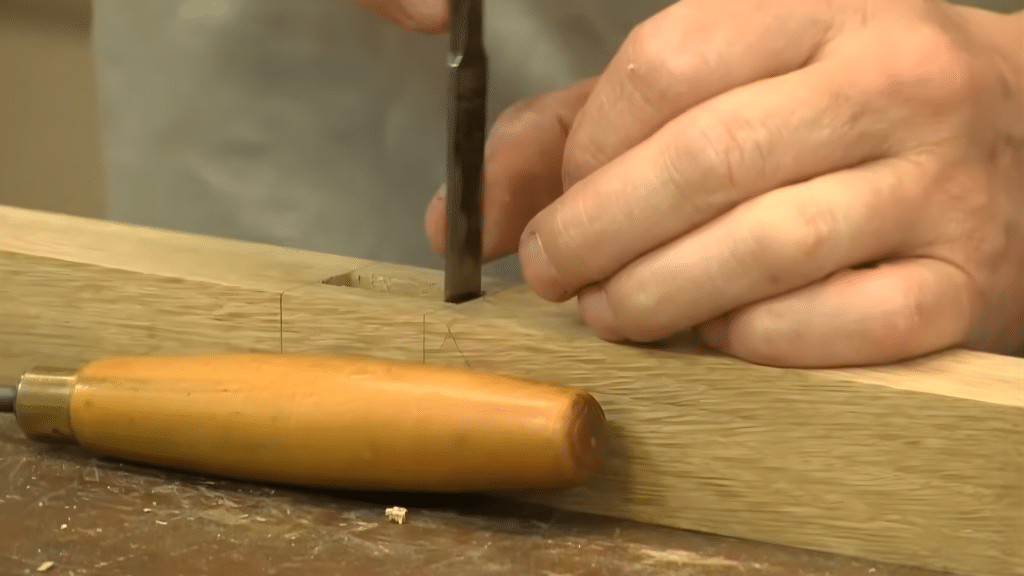
Once the majority of the waste has been removed from the mortise, use your chisel to clean up the walls.
Carefully shave off any remaining fibers that could affect the tenon’s fit.
The goal is to create crisp, clean walls so that the tenon fits perfectly into the mortise. Don’t rush this step; take your time to make sure the walls are smooth and even.
This will help the tenon slide in easily without forcing, resulting in a tight, strong connection between the two pieces.
Step 7: Cutting the Tenon
To cut the tenon, start by marking the shoulder lines on your workpiece.
Use a tenon saw to make the cuts along these lines, ensuring you’re cutting on the waste side of the line.
This ensures the tenon will be slightly larger than necessary, allowing for fine-tuning later. As you cut, use your thumb or finger to guide the saw along the shoulder lines.
This step sets the foundation for the tenon’s size and shape, making it ready to fit into the mortise.
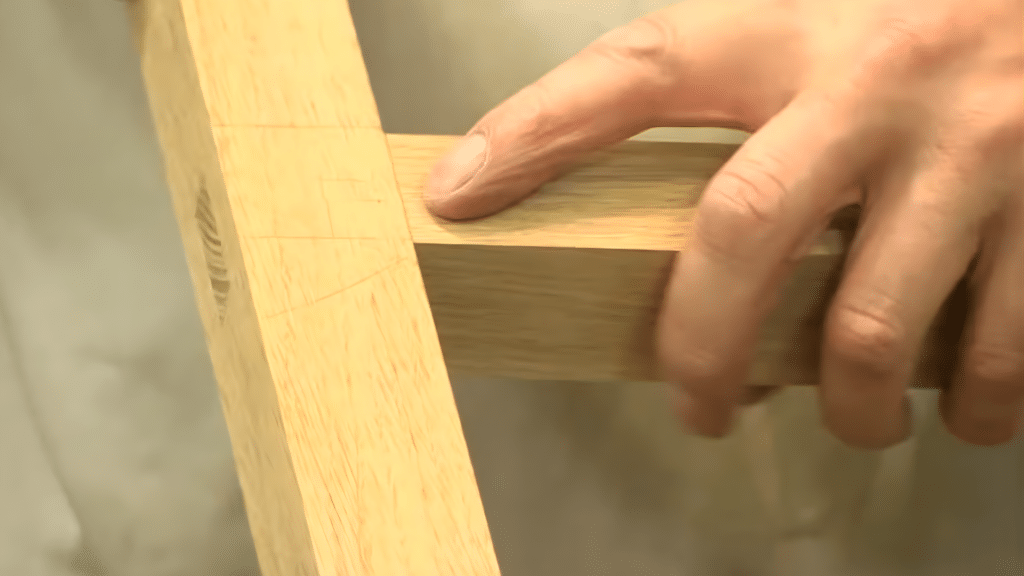
Step 8: Final Adjustments to the Tenon Fit
Once the tenon is cut, test the fit by trying to insert it into the mortise. If it’s too tight, use a chisel to pare down the edges of the tenon slightly.
Work slowly and check the fit frequently to avoid removing too much wood.
The tenon should fit snugly into the mortise, with minimal gaps. Make sure that both pieces align perfectly, as any misalignment could affect the strength and appearance of the joint.
Once you’re happy with the fit, the tenon is ready to be assembled.
Step 9: Applying Pressure to the Joint
With the tenon and mortise now fitting together, apply gentle pressure to the joint to check for tightness. Feel for any resistance and listen for the sound of a clean, firm fit.
If the joint is still too tight, adjust the tenon slightly. Keep pressing the joint together until it’s perfectly snug, but don’t force it.
If you feel any uneven pressure, it may indicate that the joint is slightly off.
Fine-tune the fit by making minor adjustments until the joint is secure and the edges align well.
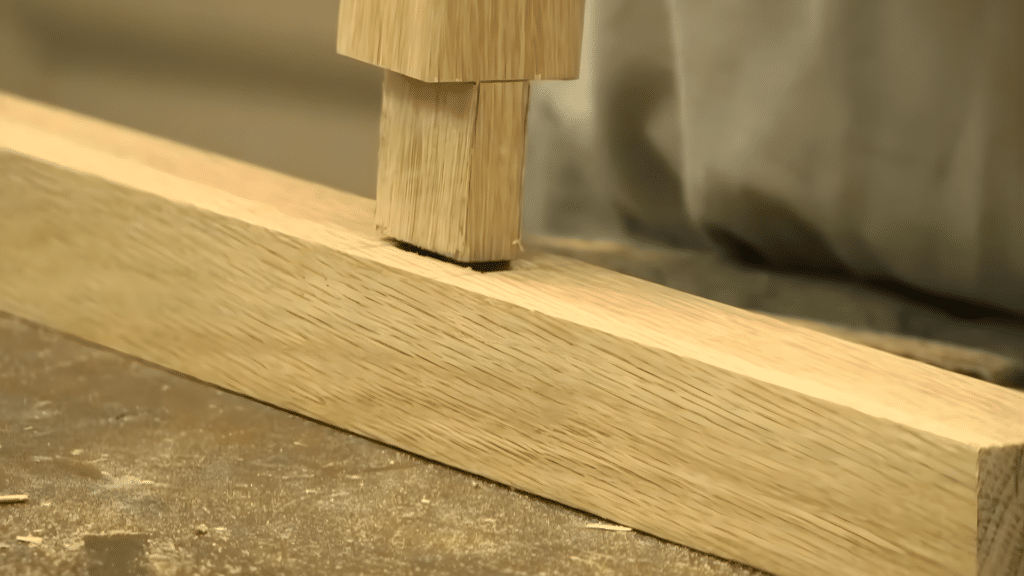
Step 10: Finishing the Joint
Once the joint is properly fitted, flush any protruding tenon with the surface of the workpiece. This ensures a clean and smooth finish.
If necessary, plane down any uneven areas and trim any excess.
At this stage, the joint is ready for final assembly. You can either glue and wedge it or use a drawbore pin to secure it further.
By following these steps carefully, you’ll have a strong, precise Mortise and Tenon joint that is ready for your woodworking project
This tutorial is based on a helpful video by Paul Sellers. You can check out the original video on their YouTube channel here or watch it below.
Tips for Achieving Precision in Mortise and Tenon Joints
Achieving precision in Mortise and Tenon joints requires careful planning and attention to detail. These tips will help ensure that your joints fit perfectly and are strong enough for your woodworking projects.
- Accurate Marking: Always mark the mortise and tenon lines clearly using a square and a sharp pencil. Straight and visible lines guide your cuts and help keep the joint aligned.
- Use Sharp Tools: Sharp chisels and saws cut wood more cleanly and give better control. Dull tools can slip, damage the edges, and make the joint uneven.
- Check Measurements Twice: Measure the thickness and position of the tenon carefully before cutting. Double-checking helps avoid mistakes that can cause a loose or tight joint.
- Cut Slowly and Carefully: Work slowly when cutting the mortise and shaping the tenon. Careful cuts help keep the shape accurate and prevent removing too much wood.
- Test the Fit Before Final Assembly: Place the tenon into the mortise before gluing or fixing the joint. This step lets you adjust the fit so the pieces connect properly.
Different Types of Mortise and Tenon Joint
Mortise and tenon joints come in several forms depending on how the wood pieces connect. Each type offers a slightly different structure and purpose in woodworking projects.
1. Through Mortise and Tenon Joint
A through mortise and tenon joint is one of the oldest and strongest forms used in woodworking.
In this design, the tenon passes completely through the mortise hole and becomes visible on the opposite side of the wood piece.
This allows the joint to lock tightly and gives extra strength to the structure. Woodworkers often use this joint in tables, chairs, and frames where durability is important.
Because the tenon goes all the way through, it also gives a traditional handcrafted look to the finished furniture.
2. Blind Mortise and Tenon Joint
A blind mortise and tenon joint, also called a stub joint, hides the tenon inside the mortise hole.
The tenon does not pass through the other side of the wood, so it remains invisible once the pieces are connected. This makes the joint useful for furniture that needs a clean and smooth outer surface.
It still provides strong support, especially in cabinets and wooden frames.
Woodworkers prefer this joint when they want strength without showing the connection on the outside of the piece.
3. Haunched Mortise and Tenon Joint
A haunched mortise and tenon joint includes a small extension called a haunch that fits into a shallow recess near the mortise edge.
This extra section helps keep the wood stable and prevents twisting or movement over time.
It is often used in doors, window frames, and cabinet construction where wide panels meet narrow rails. The haunch strengthens the corner area and keeps the joint aligned.
This design improves stability while still maintaining the traditional mortise and tenon structure.
4. Wedged Mortise and Tenon Joint
A wedged mortise and tenon joint uses small wedges to tighten the connection between the wood pieces.
After inserting the tenon into the mortise, the woodworker places wedges into small cuts at the end of the tenon. When hammered in, the wedges spread the tenon inside the mortise, locking it firmly in place.
This technique creates a very strong hold without relying only on glue. It is commonly used in furniture frames, timber structures, and traditional woodworking projects.
5. Loose Mortise and Tenon Joint
A loose mortise and tenon joint works slightly differently from the traditional design. Instead of cutting a tenon directly on one wood piece, both pieces receive matching mortise slots.
A separate tenon piece, usually called a floating tenon, fits into both slots to connect them.
This method can make the cutting process easier and more precise when using modern woodworking tools. Many woodworkers use this joint in furniture building because it allows accurate alignment and strong support.
6. Double Mortise and Tenon Joint
A double mortise and tenon joint includes two tenons that fit into two matching mortise holes on the opposite piece of wood. This design increases the surface area of the joint and creates a stronger connection.
It is often used for large furniture parts or thick wooden frames where extra strength is needed.
By dividing the tenon into two smaller sections, the wood can handle stress better. This joint helps keep large structures stable and secure over time.
Alternatives to Mortise and Tenon Joints
Woodworkers sometimes use other joints when they want a simpler build or faster assembly. These options can still provide solid connections depending on the project and tools used.
- Dowel Joint: This joint uses small wooden pins called dowels to connect two pieces of wood. Holes are drilled into both pieces, and the dowels fit tightly inside with glue for support.
- Pocket Hole Joint: A pocket hole joint uses angled screws to hold two wood pieces together. A special jig helps drill the hole so the screw pulls the boards tightly into place.
- Biscuit Joint: In this method, small oval wood pieces called biscuits fit into matching slots cut into the boards. Glue makes the biscuit swell slightly, helping hold the joint securely.
- Lap Joint: A lap joint forms when a section of wood is removed from each piece so they overlap. This creates a flat connection that is simple to cut and useful for frames.
- Box Joint: A box joint uses interlocking square fingers cut into both pieces of wood. These fingers fit together tightly and provide a strong bond, often used in wooden boxes and drawers.
- Butt Joint: A butt joint is one of the simplest connections in woodworking. Two pieces of wood are joined by placing one end against another and securing them with screws, nails, or glue.
Conclusion
Making a precise mortise and tenon joint takes care and practice, but the strong results make the effort worthwhile.
Whether you start with the mortise or the tenon, following the correct steps and using the right tools will help you achieve a solid, well-fitted joint.
The key is taking your time, ensuring measurements are accurate, and making small adjustments when necessary.
By mastering this technique, you’ll improve the quality and durability of your woodworking projects.
Have you tried making Mortise and Tenon joints in your own projects? What worked well for you, or what challenges did you face?
Share your experiences, tips, and questions in the comments below.
It’s always great to hear how others approach the process, and your insights could help someone else refine their technique.