
Looking to hide that gap beneath your home without emptying your wallet? You’re in the right place.
In this article, I’ll share 10 budget-friendly house skirting options that look great and protect your home. These ideas range from simple weekend projects to more polished solutions—all at prices that won’t break the bank.
Your home deserves to look finished without the hefty price tag.
You’ll look at:
- Creative DIY options under $500
- Materials you might not have considered
- Step-by-step guidance for installation
- Maintenance tips to extend the life of your skirting
Whether you have a manufactured home, raised foundation, or deck that needs skirting, these affordable ideas will transform that unsightly space into something you’ll be proud to show off.
What Is House Skirting?
House skirting is the material that wraps around the bottom portion of your home to fill the gap between the structure and the ground. Think of it as a wall that goes around the base of your house.
I see many homeowners confused about whether they need skirting. If your home sits above ground level with an open space underneath, skirting is what gives it a finished look.
You’ll commonly find skirting on:
- Mobile and manufactured homes
- Homes built on piers or stilts
- Elevated cabins or cottages
- Porches and decks with space underneath
Ever noticed how homes look incomplete when you can see underneath them? That’s the problem skirting solves.
Skirting serves three main purposes for your home:
Protection: It keeps animals, pests, and debris from getting underneath your home. Without proper skirting, you might end up with unwanted critters making homes there.
Insulation: A good skirting system helps maintain temperature by preventing cold air from flowing under your home in winter. This can actually save you money on heating bills.
Visual appeal: Perhaps the most obvious benefit is that skirting gives your home a finished, polished look. It turns that awkward gap into an intentional part of your home’s design.
Just like shoes complete an outfit, proper skirting completes your home’s appearance while providing practical benefits.
Things to Consider Before Choosing Skirting
Before you buy a single panel of skirting, take the time to think about what your home actually needs. I’ve seen too many people waste money on options that looked good but failed within a year.
Your local climate plays a huge role in what will work best. In wet areas, you need materials that resist moisture and mold. Desert dwellers should focus on heat resistance and pest barriers.
Short-term savings often lead to long-term costs. While $500 vinyl skirting might seem expensive compared to $200 plywood, if the plywood rots and needs replacement in two years, you haven’t saved anything.
The cheapest option rarely turns out to be the most affordable in the end.
Consider These Crucial Factors
Ventilation needs: Proper airflow is required to prevent moisture buildup on your home’s underside. Most building codes require one square foot of vent space for every 150 square feet of under-house area.
Access requirements: You’ll need easy ways to get beneath your home for repairs. I recommend at least one access panel on each side of your house, sized large enough for a person to crawl through comfortably.
Climate-specific concerns include:
- Snowy regions: Skirting must handle snow piling against it
- Humid areas: Need moisture-resistant materials and extra venting
- Wildfire zones: Consider fire-resistant options
- Flood-prone locations: Removable or water-resistant designs
Look at your home’s overall style, too. The skirting should match or complement your siding, trim, and overall design. Even practical choices can look intentional when they coordinate with your home’s existing elements.
Cheap House Skirting Options
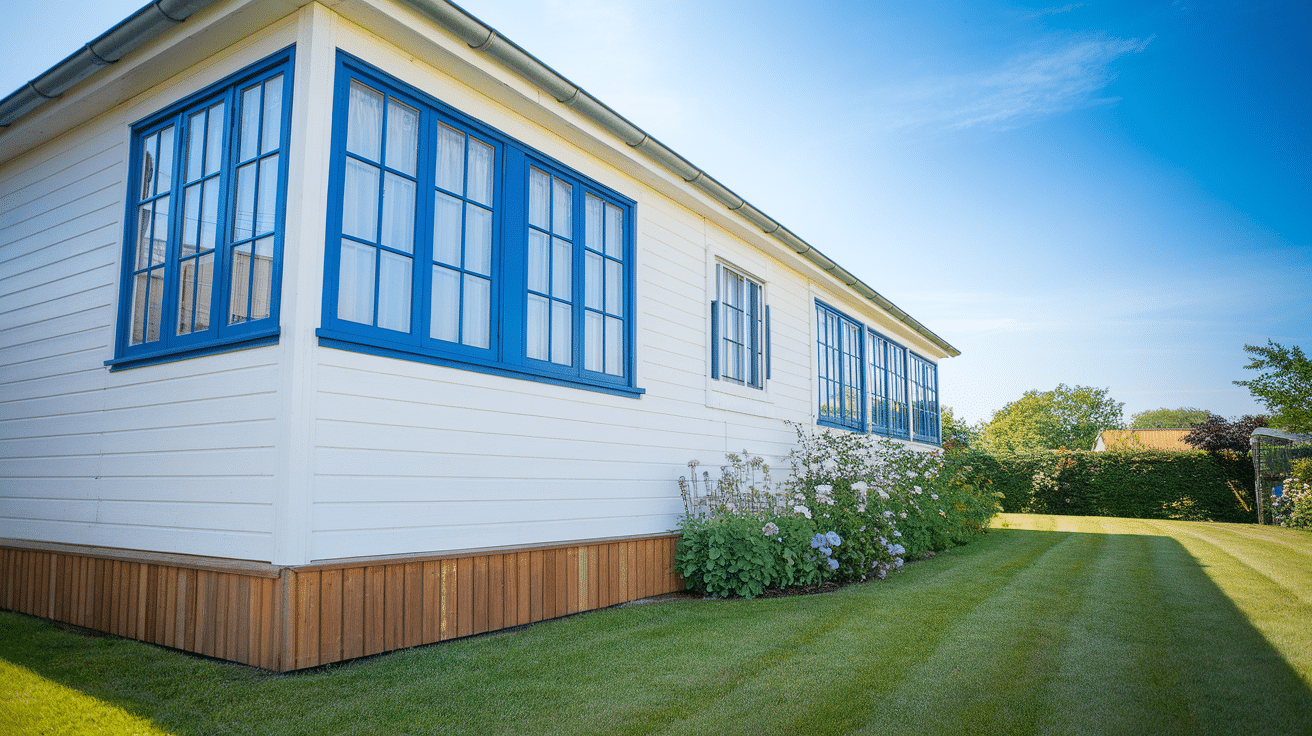
1. Vinyl Skirting Panels
Vinyl panels give you the most bang for your buck. I’ve installed these for dozens of clients who were surprised by how good they look for the price (approx. $1.50-$3 per square foot).
These lightweight panels snap together easily and resist weather damage far better than you might expect. Many homeowners can install these themselves in a weekend.
Think of vinyl skirting as the workhorse of affordable options.
Look for panels with built-in ventilation to avoid moisture problems under your home. Most home improvement stores carry basic white, but online suppliers offer more color choices that might better match your home.
The downside? Vinyl can crack in extreme cold and may dent from weed trimmer impacts. I recommend buying a few extra panels to keep as replacements if damage occurs.
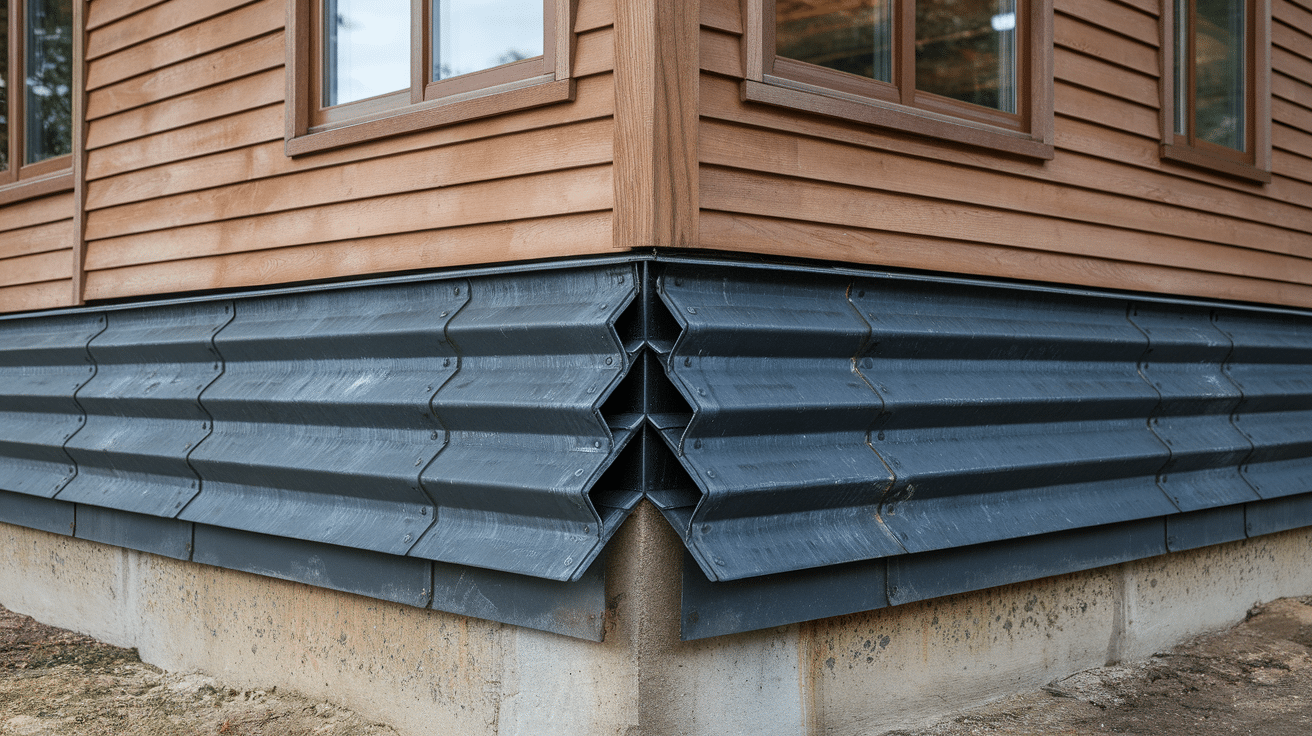
2. Metal Roofing Panels or Siding Leftovers
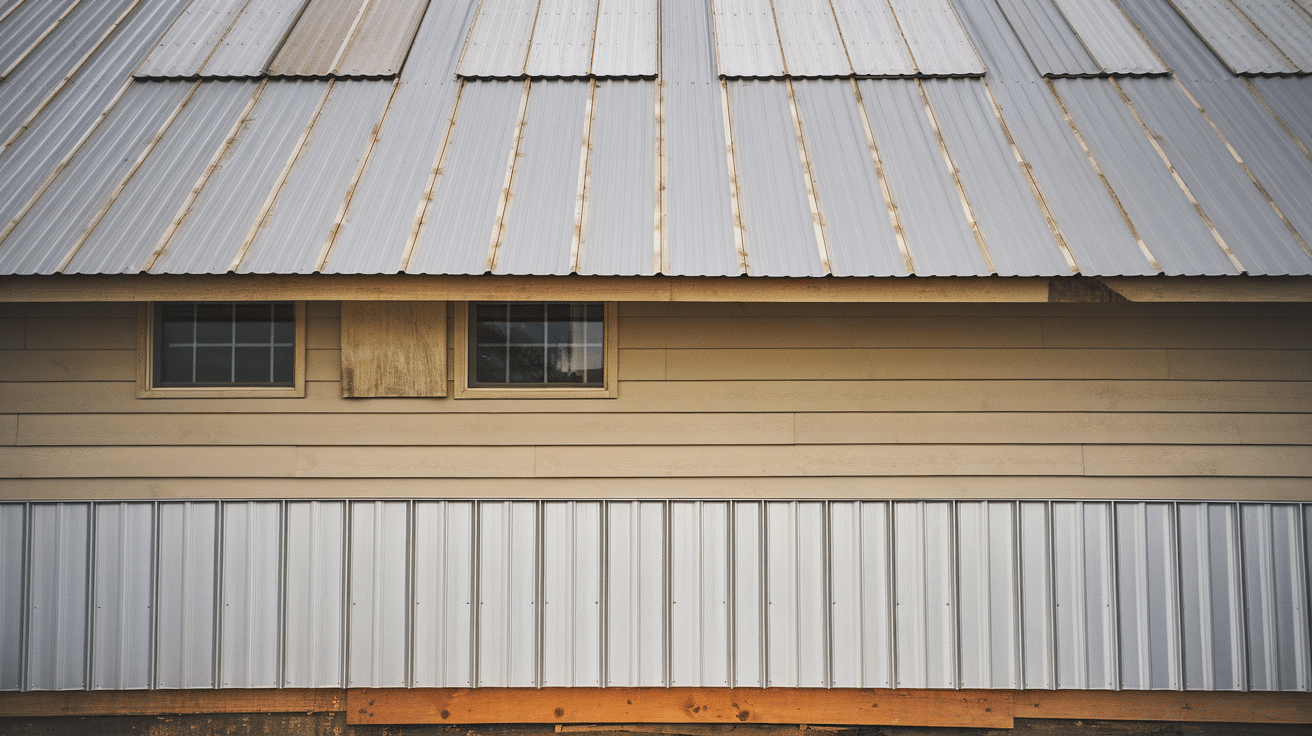
Metal gives your home a modern or rustic look, depending on the finish you choose. Corrugated metal panels cost about approx. $2-$4 per square foot but are often leftovers from other projects.
I love how durable metal skirting is against the weather and pests. Unlike some cheaper options, it won’t rot or warp.
Watch for sharp edges during installation—wear gloves! You’ll need to cut ventilation holes manually, which requires the right tools.
The industrial appearance works especially well with:
- Farmhouse style homes
- Modern cabins
- Homes with metal roof accents
Pro tip: Check construction sites or metal suppliers for remnants at deeply discounted prices.
3. Pressure-Treated Wood Panels or Pallets
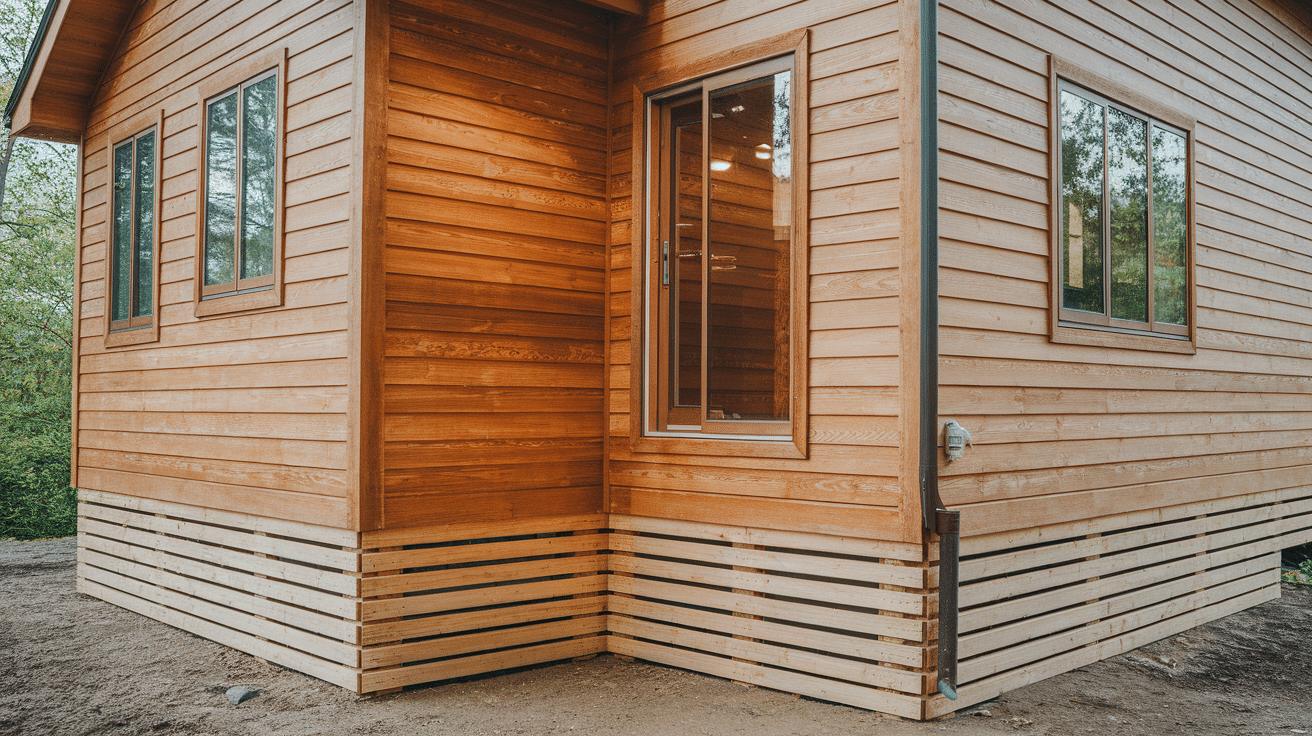
Wood creates a warm, natural look that blends beautifully with wooded surroundings. Basic pressure-treated plywood runs approx. $1-$2 per square foot.
Free or cheap wooden pallets offer an even more budget-friendly approach. With just a little disassembly and creativity, I’ve helped homeowners transform these into attractive skirting.
Wood requires more maintenance than other materials. Plan to repaint or restain every 2-3 years and check regularly for signs of rot or insect damage.
The effort pays off in charm, though. Few materials look as naturally appealing as wood with a quality stain.
4. Cement Board or Fiberboard Sheets
Cement board lasts virtually forever compared to other budget options. At approx. $3-$5 per square foot, it’s on the higher end of “affordable,” but its durability makes up for the cost.
These heavy sheets resist moisture, fire, and pests. They won’t warp or rot like wood options might.
Installation is more difficult due to the weight and cutting requirements.
You’ll need:
- A circular saw with the right blade
- Help from at least one other person
- Proper screws and supporting framework
The smooth surface takes paint beautifully, allowing you to match your home’s exact color scheme.
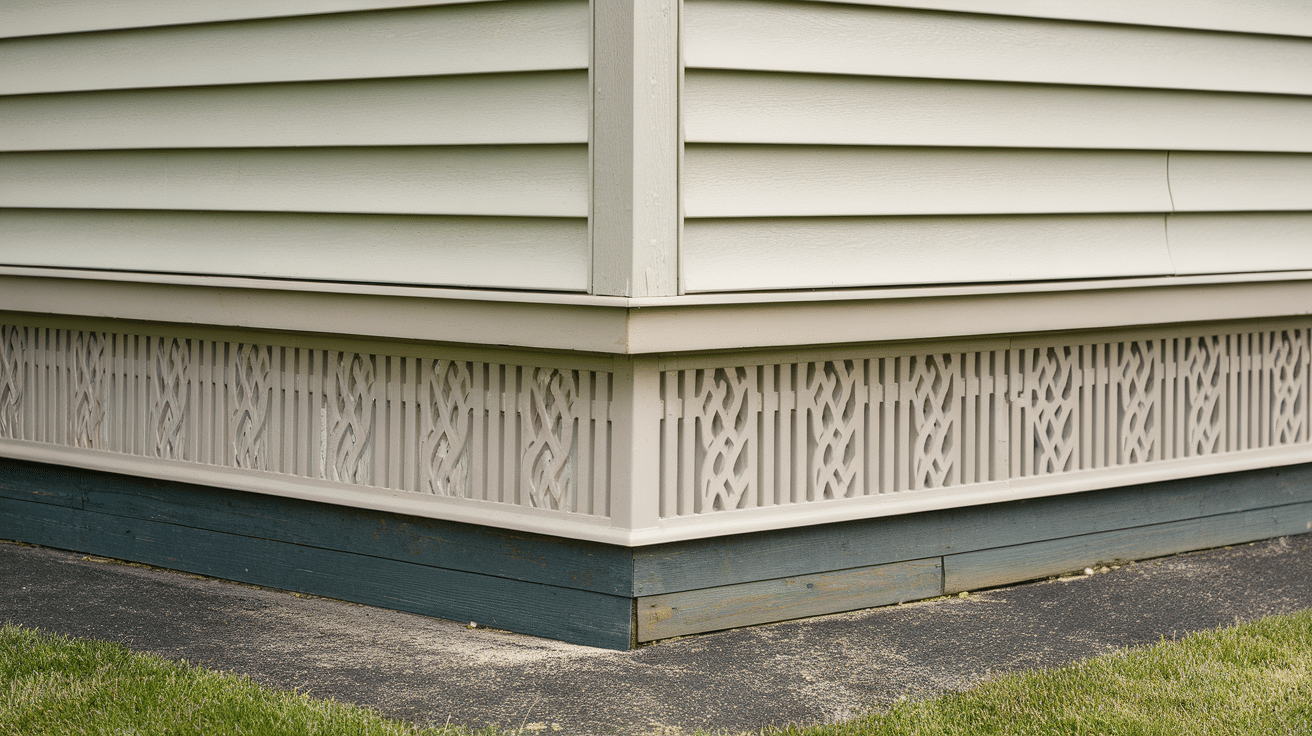
5. Plywood with Lattice Overlay

This combination approach costs under approx. $2 per square foot while looking more expensive than plain plywood alone.
Start with exterior-grade plywood as your backing, then attach plastic or wooden lattice over it. The lattice adds texture and interest while hiding the plywood seams.
It’s like putting a fancy frame around a simple picture.
You’ll need to seal the plywood well before installation. To maximize its lifespan, I suggest a good primer plus two coats of exterior paint.
Remember: Cut ventilation holes before installing and position them behind the lattice for a cleaner look.
6. Recycled Materials
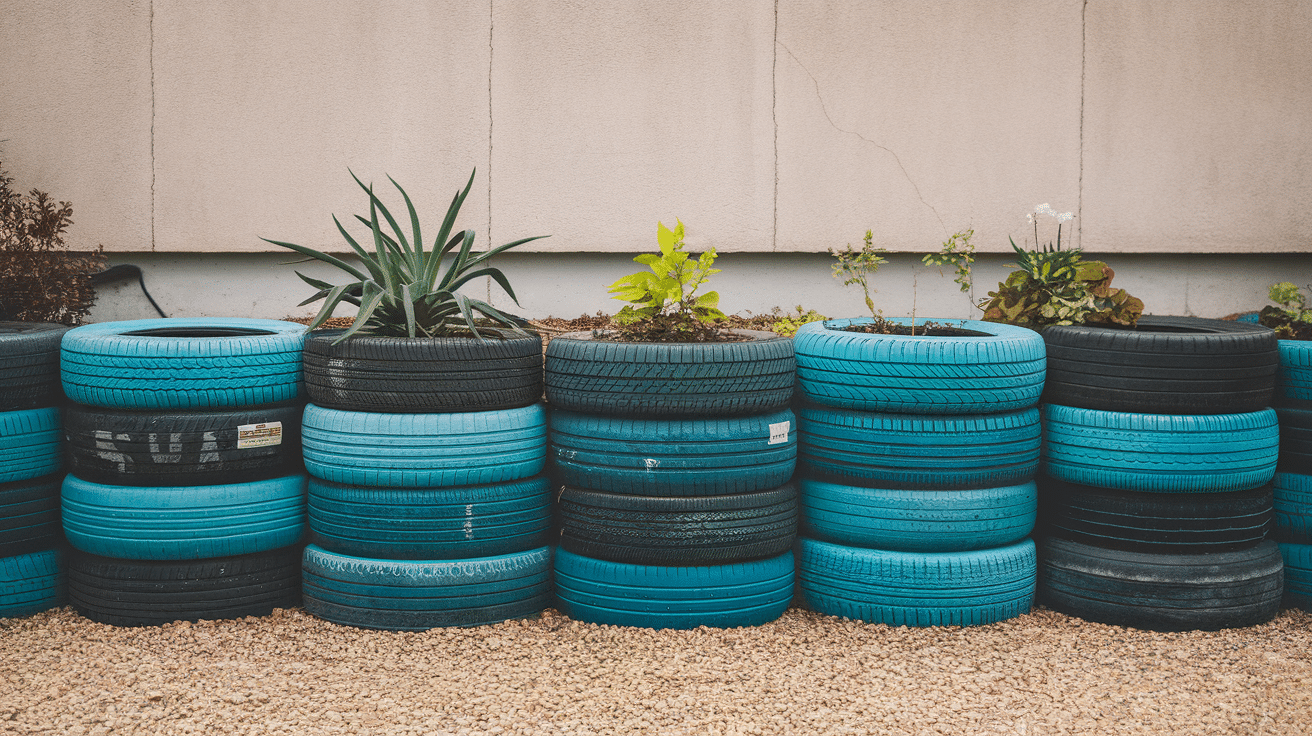
My most creative clients use salvaged materials that cost next to nothing. Old fencing, reclaimed barn wood, or composite decking leftovers all make unique skirting.
The key to making recycled materials look intentional rather than thrown-together is consistency in:
- Height of all sections
- Spacing between elements
- Color scheme (either natural variations or painted the same shade)
Installation methods vary widely depending on the materials you’re working with. Compared to store-bought options, prepare these materials in advance, and plan extra time for them.
Commercial products can’t match the unique character these materials bring. Your home will have a one-of-a-kind skirting that tells a story.
7. Corrugated Metal Panels
Corrugated metal creates a striking, contemporary look that stands up to tough conditions. Panels typically cost approx. $2-$3 per square foot, making it midrange for skirting materials.
Many homeowners save money by repurposing old roofing or barn siding. I’ve seen beautiful installations using weathered metal that adds character while costing almost nothing.
Metal requires minimal maintenance—just occasional hosing to remove dirt. It won’t rot, burn, or attract insects, making it perfect for areas with harsh weather or pest concerns.
The industrial aesthetic works especially well with modern farmhouse or contemporary designs, adding textural interest and durability that can last decades.
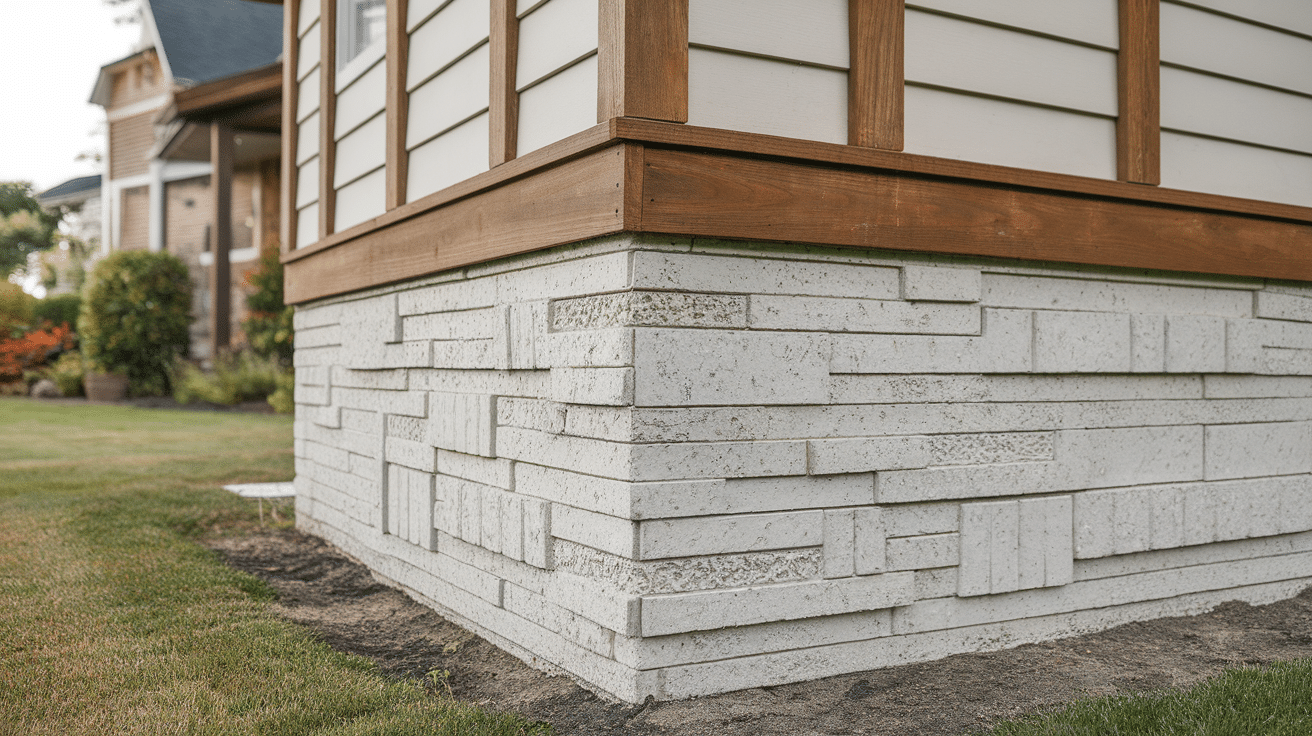
8. Faux Stone Skirting Panels
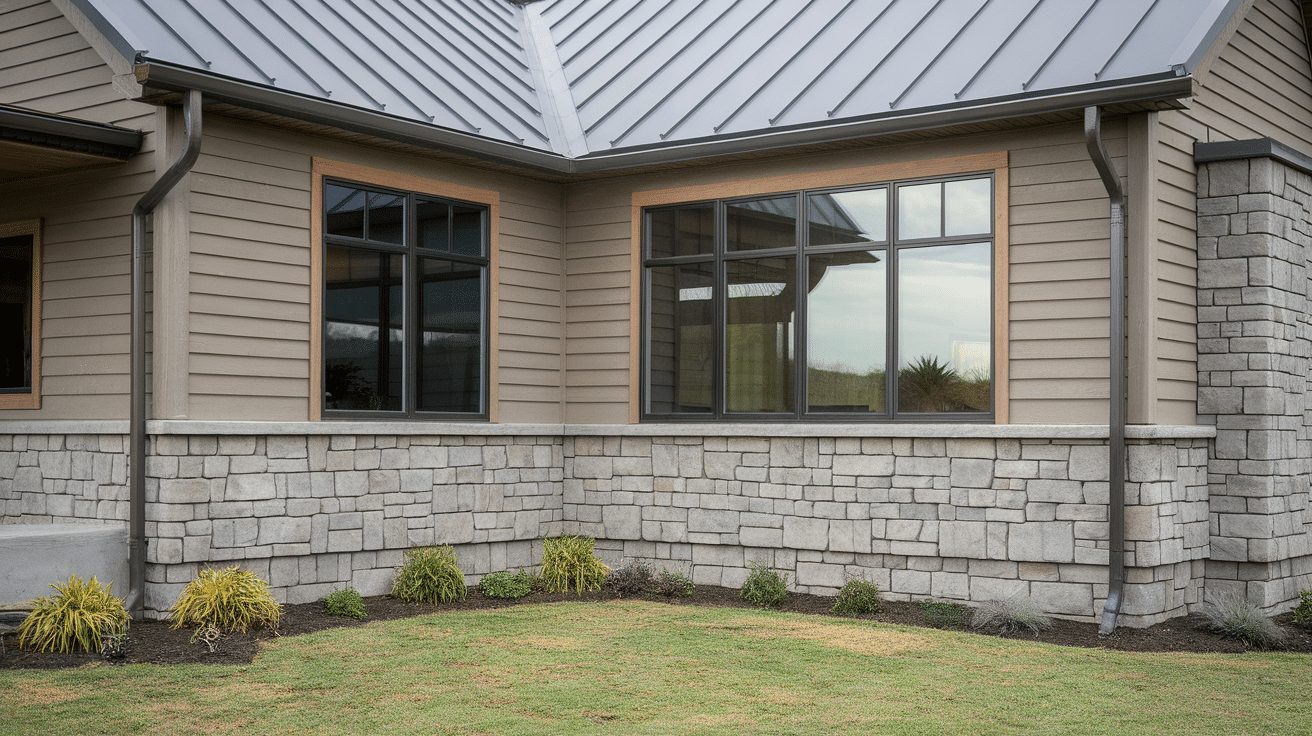
Faux stone offers the luxury look of real stone at one-third the cost. Panels run approximately. $4-$7 per square foot and installs much more quickly than genuine stone.
These lightweight panels can be cut with ordinary tools, making them DIY-friendly. Most systems use simple interlocking designs that create a seamless appearance.
Unlike real stone, these panels won’t crack in freezing conditions. They maintain their appearance for 10+ years with minimal maintenance—just occasional cleaning with mild soap.
This option works wonderfully for permanent homes and cabins where you want an upscale appearance without the high-end price tag or installation headaches.
9. Reclaimed Fencing or Pallets

If you source creatively, using reclaimed materials can bring your skirting cost down to nearly zero. The only expenses might be fasteners and sealant (approx. $0.50-$1 per square foot total).
This approach requires more labor but delivers unmatched character. I’ve helped homeowners transform fence boards and pallets into distinctive skirting that tells a story.
Weatherproofing is essential—apply a quality exterior sealer or paint to prevent premature deterioration. Even with protection, expect to replace individual boards every 5-7 years.
The rustic, handcrafted appearance perfectly complements country cottages, cabins, and bohemian-styled homes, creating a lived-in charm that manufactured materials can’t match.
10. Brick Veneer Panels
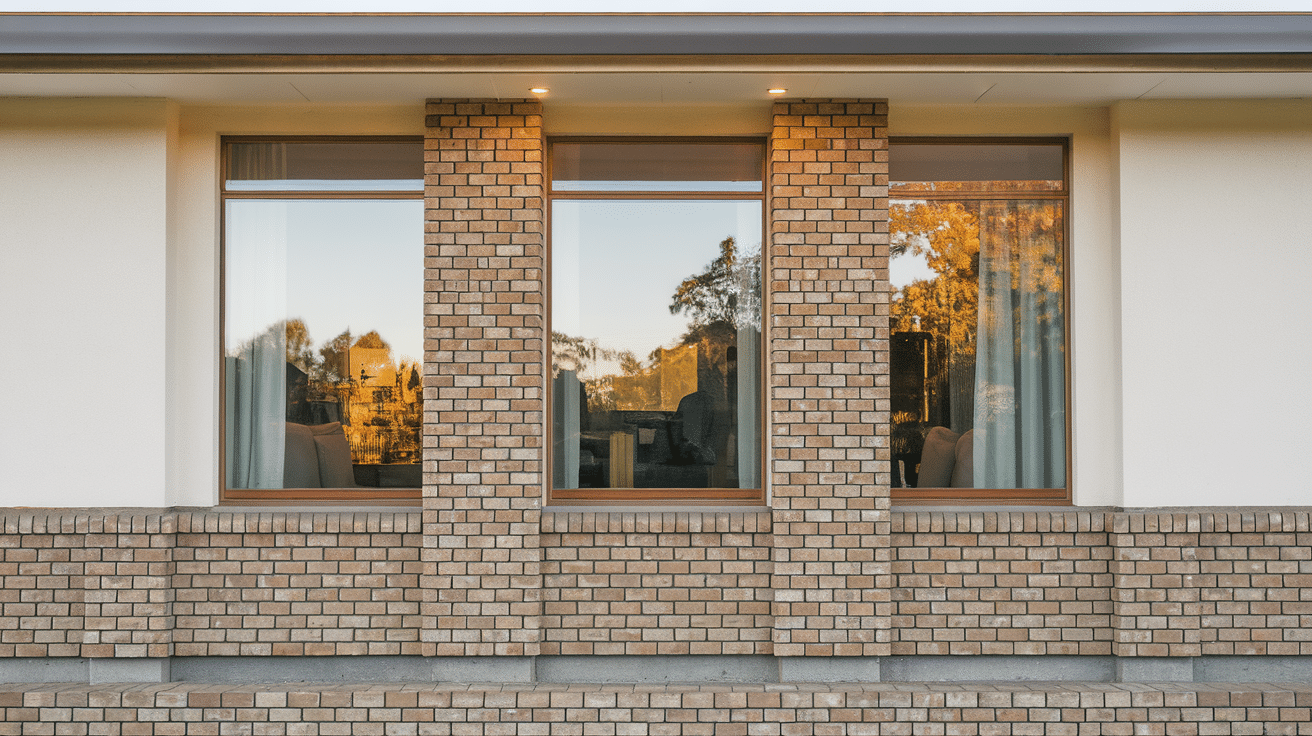
Brick veneer offers the timeless appeal of brick at approx. $5-$8 per square foot, about half the cost of genuine brick installation.
These panels install with construction adhesive and screws, requiring basic DIY skills and standard tools. Most homeowners can complete an average installation in a weekend.
Quality panels last 20+ years with virtually no maintenance. They won’t fade significantly and resist impact better than many alternative skirting materials.
The traditional appearance adds instant curb appeal and works beautifully with Colonial, Craftsman, and conventional home designs, giving your property a substantial, established look.
Decorative Touches on a Budget
Adding beauty to your house’s skirting doesn’t require expensive materials or professional help. Simple additions like color-matched paint, decorative corner trim, or strategically placed faux stone panels can transform basic skirting into an attractive feature.
Even budget-friendly landscaping, such as mulch beds or perennial plantings along the skirting edge, creates a finished look that enhances your home’s overall appearance without straining your wallet.
Paint or Stain for a Cohesive Look
Match your paint to your house trim colors. Look for missing paint at hardware stores. These cost 50-75% less than the regular price. Always apply primer first. This helps paint stick better, so you’ll need fewer coats of paint. Only use exterior-grade paint. It fights against fading and moisture. Try a two-tone design. Put darker colors on the bottom. Use lighter colors above.
Faux Stone Accents
Add faux stone only in key spots. Focus on visible corners. Place some near your entryway. Shop the clearance section first. Look for leftover pieces. Place stone panels at eye level. This creates maximum visual impact. Use regular skirting for the rest. This saves you money. Check Facebook Marketplace for unused panels. Many people have leftovers from their projects.
Trim and Edging Details
Use corner trim to hide ugly seams. Add a cap rail across the top edge. It creates a finished look. Try vinyl J-channel for panel edges. It looks clean and professional. Paint thin wood strips in bold colors. Use them as custom trim. Look for clearance molding. Even fancy crown molding works well as a decorative element. The right trim makes simple skirting look expensive.
Landscaping Integration
Plant perennials that come back yearly. Spread mulch along the skirting edge. It creates a nice transition. Add solar lights near decorative sections. They look great at night. Place large rocks strategically. They break up long skirting sections. Choose climbing vines carefully. Some can damage your skirting. Plant them on separate trellises instead.
DIY Decorative Elements
Make stencils for custom patterns. Paint them on plain skirting. Attach outdoor-rated rope in patterns. Add wood decorations at the corners. Please make sure they’re exterior grade. Display your house number or family name. Install solar accent lights. They create beautiful evening shadows and highlight your handiwork.
Conclusion
House skirting doesn’t have to drain your bank account. With these affordable options, you can transform the look of your home while protecting what’s underneath.
Whether you choose vinyl panels for easy installation, repurposed materials for unique character, or pressure-treated wood for a natural look, the key is proper planning and installation. Remember to include adequate ventilation, access points, and appropriate weatherproofing.
The right skirting makes your entire property look more finished and valuable. It also keeps critters out and helps with energy efficiency—benefits that pay off long after the project is complete.
If you’re uncertain about your skills, start with a small section. You can always expand as your confidence grows.
Your home deserves to look its best from top to bottom. With these budget-friendly skirting ideas, that’s now within reach.
Frequently Asked Questions
How Much Does Diy House Skirting Typically Cost Compared to Professional Installation?
DIY skirting costs around $2–$5 per square foot. Materials total $300- $1,000 for 150–200 sq ft. Hiring pros adds $500–$1,500, but cutting labor costs can save 40–60%.
How Do I Keep Animals from Getting Under My House Through the Skirting?
Bury the skirting 2–6 inches deep or add a buried barrier. Use mesh behind vents, seal gaps over ¼ inch, and install auto-closing vent covers. Check and repair damage often.
Does House Skirting Provide Insulation Benefits or Lower Energy Bills?
Proper skirting can cut energy costs by 10–15% by blocking cold air and keeping temps stable. In colder areas, add insulation behind the skirting for better results.
How Often Does House Skirting Need to Be Replaced or Maintained?
Vinyl skirting lasts 10–15 years, metal 15–20+, and treated wood 7–12 with care. Inspect twice a year, clean annually, and reseal wood every 2–3 years. Fix damage quickly to avoid bigger issues.
Do I Need a Building Permit to Install House Skirting?
Permit rules vary. Some areas require them for skirting, especially on mobile homes or with structural changes. Always check locally. Most places also require vents—1 sq ft per 150 sq ft of under-home space.
2
1 Comment
Where did you find the decorative underpinning in item #1?