
Not everyone has space for a full home gym, but half a garage can be more than enough. With the right layout and smart planning, this area can become a strong, motivating workout zone.
Many homeowners are now using part of their garage to create a space for daily training without taking over the entire room.
A well-designed half garage gym can balance function and style while still leaving room for storage or parking. The key is using the space wisely.
This guide shares practical and creative ideas to help shape a setup that feels organized, efficient, and built for real results.
Why Choose a Half Garage Gym?
A half garage gym is a practical option for homeowners who want a dedicated workout space without sacrificing the entire garage. Many households still need room for storage, tools, bicycles, seasonal items, or even space to park one vehicle.
By using only half of the garage, it becomes possible to create a well-balanced setup that supports consistent training while keeping the space functional for everyday needs.
This approach also helps manage costs more effectively. A smaller gym requires less flooring, fewer building materials, and usually fewer large machines.
As a result, it becomes easier to build the space gradually. Equipment can be added over time as fitness goals evolve, rather than purchasing everything at once.
Most importantly, a half garage gym keeps workouts convenient and accessible. There is no commute, no waiting for equipment, and no ongoing membership fees.
How to Plan Your Half Garage Gym Layout
Before buying equipment, measure the space. A standard two-car garage is about 20 by 20 feet. Half of that gives around 200 square feet. That is enough for strength training, cardio, and storage if arranged well.
Start by deciding:
- Where will the large equipment go?
- How much open floor space is needed?
- Will the garage door still open?
- Is there space for storage shelves?
Sketch a simple layout on paper. Mark walls, outlets, windows, and the garage door. This helps avoid mistakes later. Smart planning is the basis of all great half garage gym ideas for the home.
Smart Layout and Design Ideas for a Half Garage Gym
The ideas below focus on practical setups that maximize function without making the garage feel crowded.
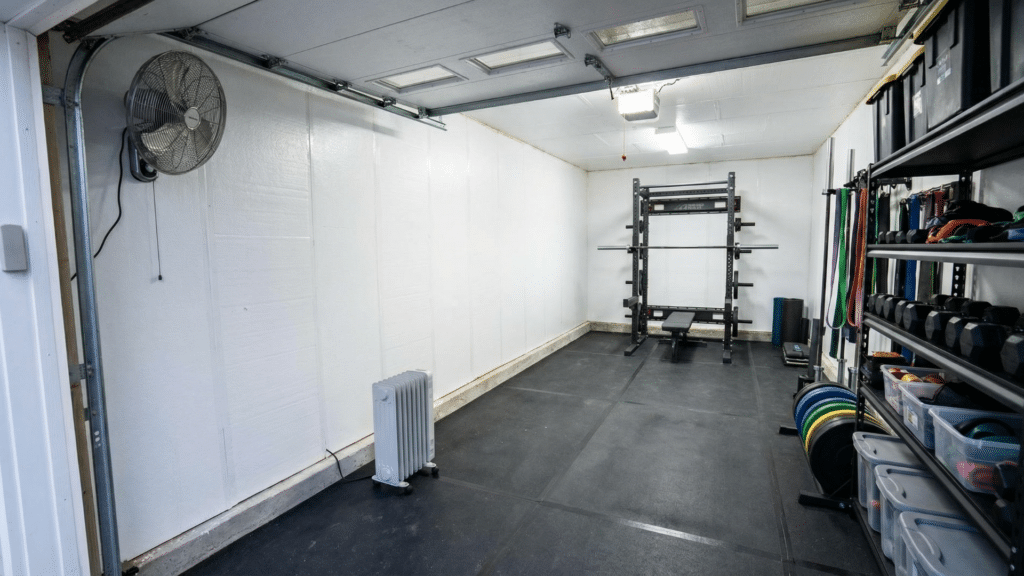
1. The Wall-Mounted Strength Zone
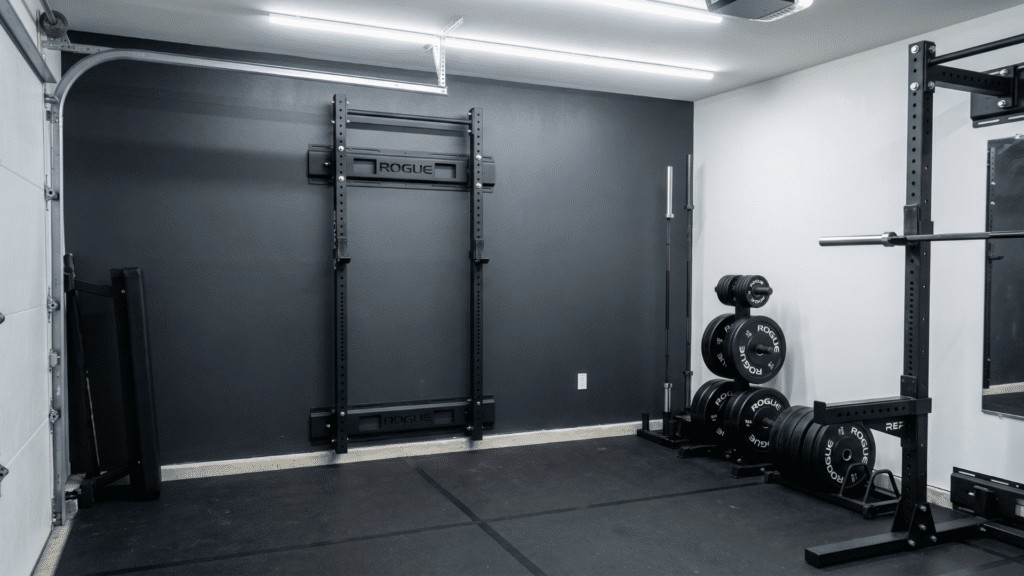
This layout turns one wall into a focused strength training station while keeping the rest of the half garage open.
Layout Plan:
Install a folding or compact squat rack centered on the longest wall. Leave 6–8 feet of clear floor space in front for squats, presses, and deadlifts.
Position the bench so it can slide under the rack when not in use. Keep one side of the wall open for plate storage to avoid spreading equipment across the floor.
Equipment to Include:
- Folding or compact squat rack
- Adjustable bench
- Barbell
- Bumper plates
Storage Strategy: Mount plate pegs directly on the rack or wall. Use small hooks for collars and resistance bands to keep accessories off the ground.
Design Tips: Paint the rack wall a darker accent color to define the lifting zone. Install bright overhead lighting directly above the rack.
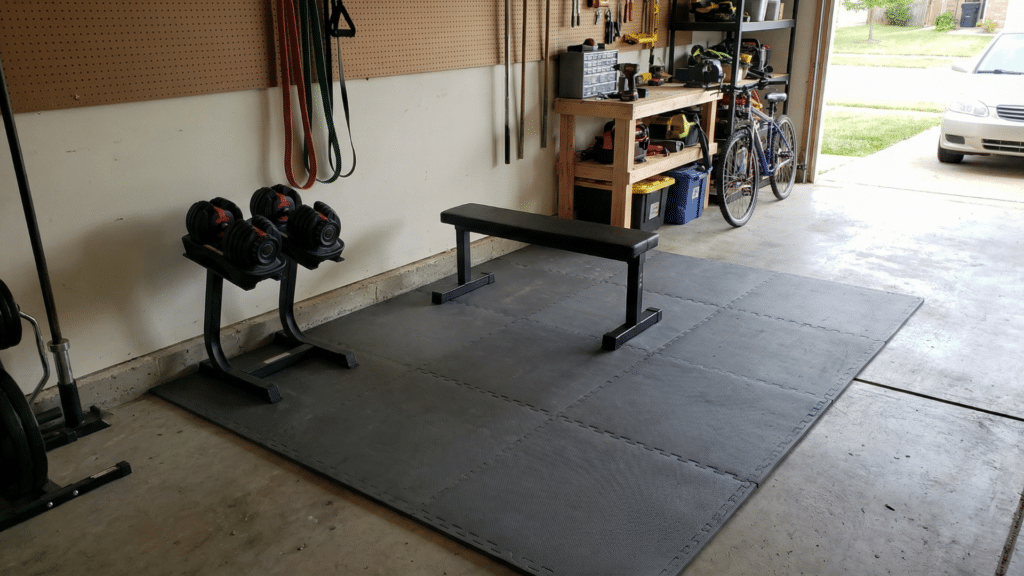
2. The Minimalist Dumbbell Setup
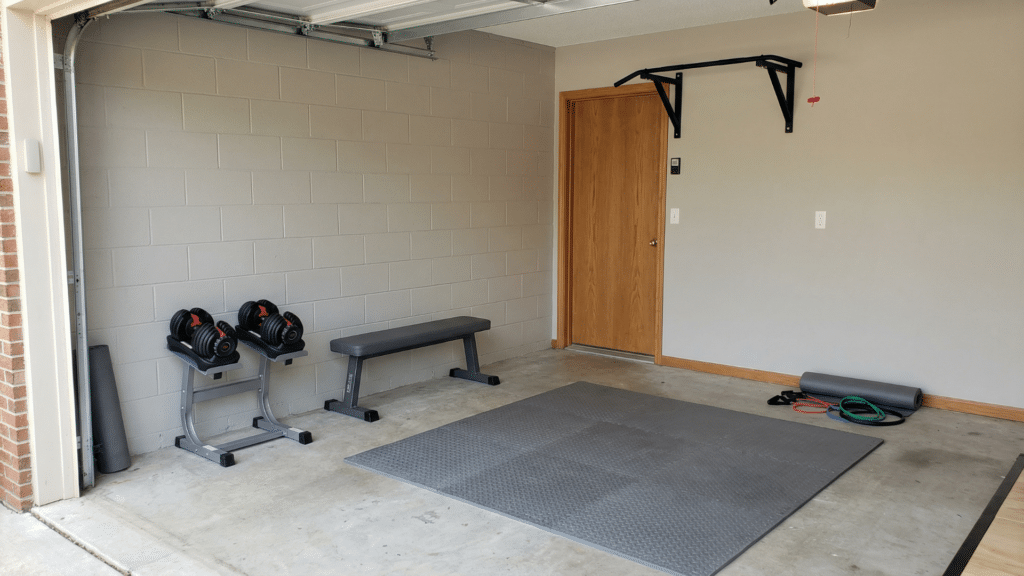
This setup focuses on flexibility and simplicity without installing a full rack system.
Layout Plan:
Place adjustable dumbbells against one side wall using a low-profile rack. Leave at least 7 feet of open space in front for lunges, presses, and mobility drills.
Keep the bench parallel to the wall so it can move easily between exercises. Install a pull-up bar above a doorway or mounted high on the wall.
Equipment to Include:
- Adjustable dumbbells
- Adjustable bench
- Pull-up bar
- Resistance bands
Storage Strategy: Use a pegboard above the dumbbells for bands and small accessories. Store mats upright in a corner stand to avoid clutter.
Design Tips: Stick to a neutral color scheme to maintain a clean appearance. Avoid overcrowding the wall with extra equipment.
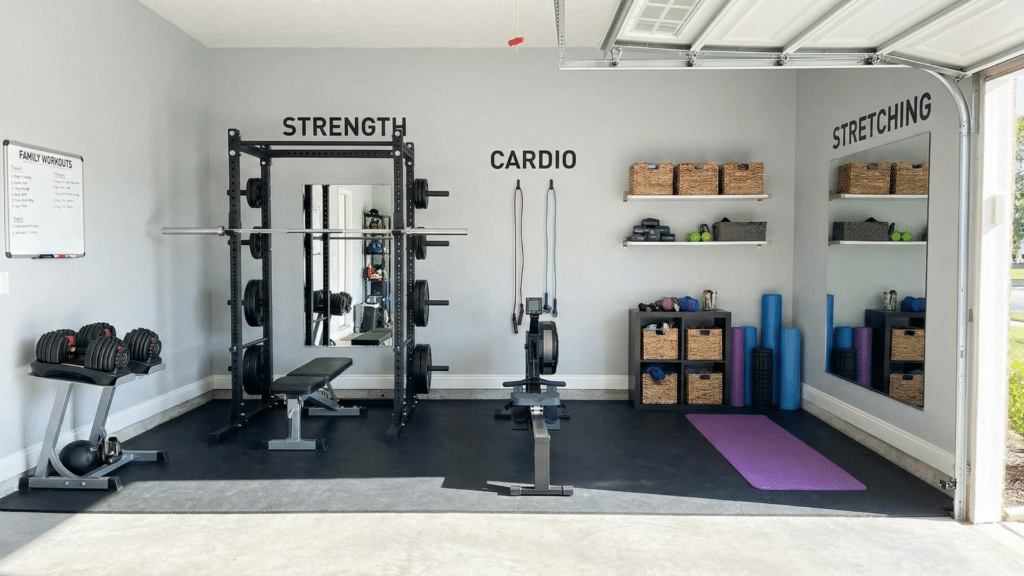
3. The Cardio + Strength Split Layout
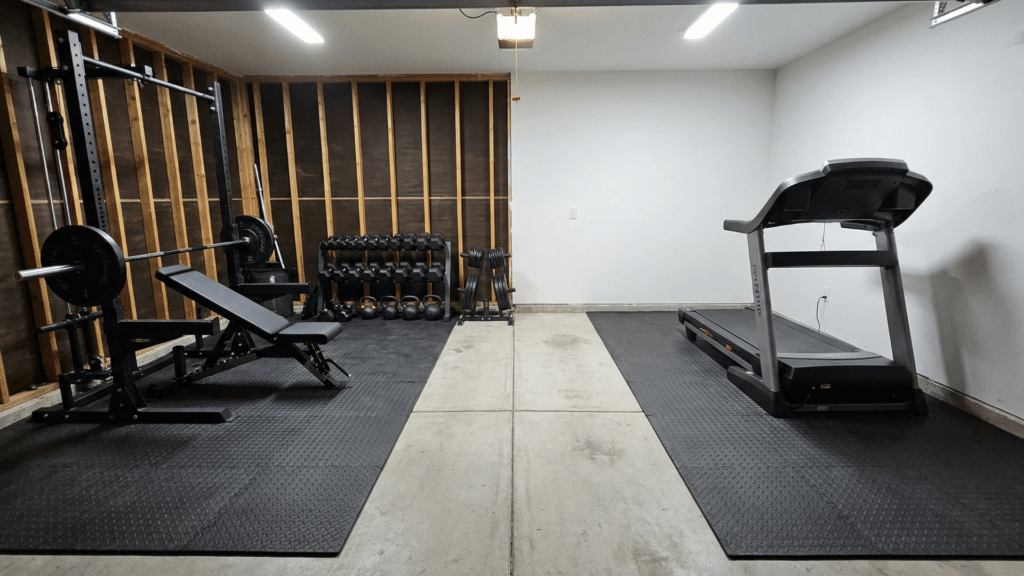
This design divides the half garage into two clearly defined zones to prevent equipment overlap.
Layout Plan:
Use the back wall for strength equipment. Install a compact rack and bench centered on that wall with at least 6–8 feet of working space in front. On the opposite side, line up cardio equipment such as a foldable treadmill or upright rower.
Maintain a walkway at least 3 feet wide between the two zones to ensure safe transitions during workouts. Place cardio equipment near the garage door if you plan to open it for ventilation.
Equipment to Include:
- Compact squat rack
- Adjustable bench
- Dumbbells or a barbell
- Foldable treadmill or rower
Storage Strategy: Use vertical plate storage and wall-mounted hooks to prevent floor congestion. Keep cardio cords secured along the wall.
Design Tips: Use rubber flooring in the strength zone and leave the cardio side on standard garage coating for subtle separation.
4. The Functional Training Studio
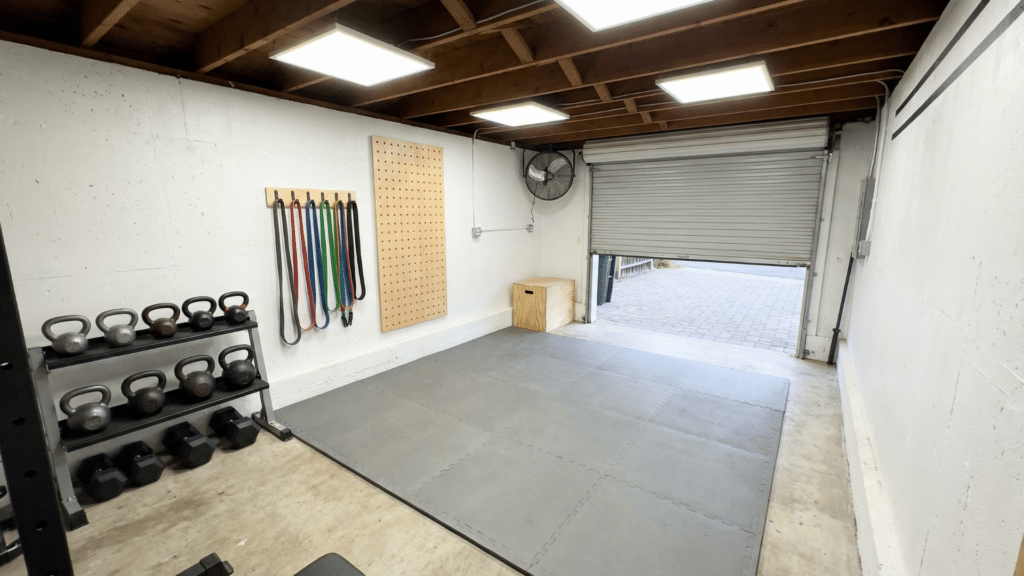
This layout focuses on open space for movement rather than fixed machines.
Layout Plan:
Push all equipment to the perimeter walls and leave at least an 8×8-foot open area in the center for circuits, kettlebell swings, and bodyweight exercises.
Mount band anchors along one wall and install a pull-up bar high enough for full extension. Keep the center completely clear for unrestricted movement.
Equipment to Include:
- Kettlebells
- Slam balls
- Resistance bands
- Plyometric box
Storage Strategy: Use corner shelves for kettlebells and wall hooks for jump ropes and bands to keep the floor open.
Design Tips: Add a visible interval timer and keep the lighting bright to give the space a studio feel.
5. The Fold-Away Equipment Design
This design allows the garage to switch back to parking or storage when needed.
Layout Plan:
Install a folding rack against one wall and use a bench that can store vertically. Choose cardio machines that stand upright when not in use.
Keep all equipment along one side to maintain flexibility. Fold everything flat after workouts to free up space.
Equipment to Include:
- Folding rack
- Foldable bench
- Upright rower
- Adjustable dumbbells
Storage Strategy: Mount the plate storage on the rack frame and use magnetic hooks for small accessories.
Design Tips: Keep equipment colors consistent to maintain a clean look in shared spaces.
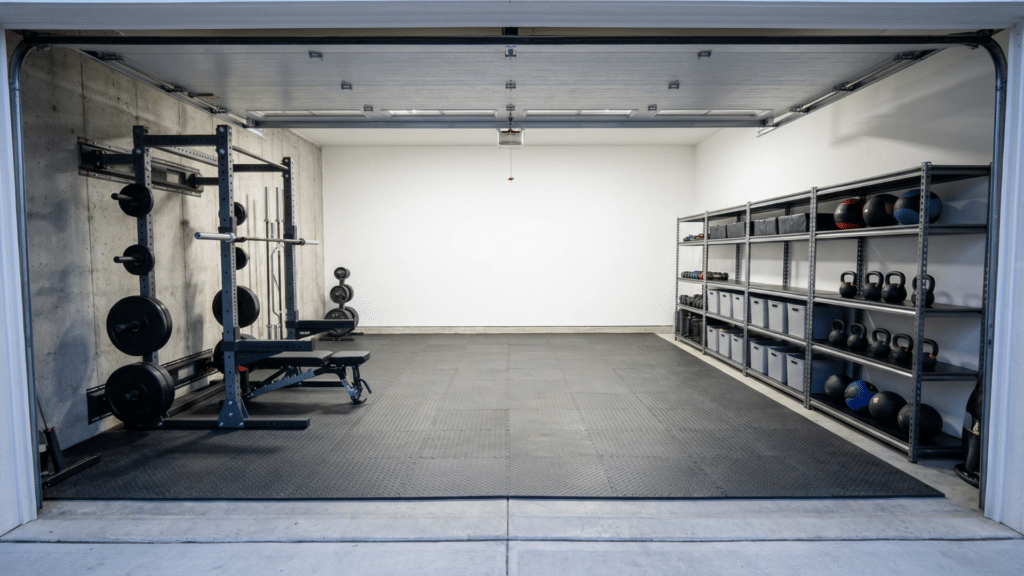
6. The Industrial Strength Corner
This layout uses one corner for heavy lifting while leaving the rest open.
Layout Plan:
Anchor a power rack in the back corner of the half garage. Leave 6 feet of clearance in front for barbell lifts. Keep one side open for safe plate loading. Maintain open floor space for accessory work.
Equipment to Include:
- Power rack
- Barbell
- Bumper plates
- Adjustable bench
Storage Strategy: Use steel shelving near the rack for belts and wraps. Keep plates stored vertically.
Design Tips: Install exposed LED lighting and keep walls neutral for a raw, focused look.
7. The Bright and Airy Layout
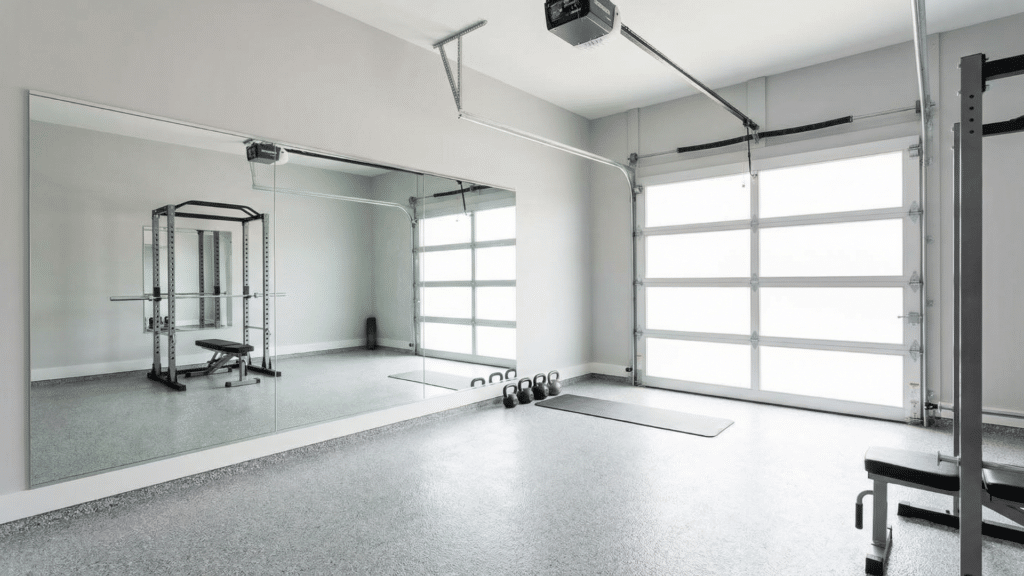
This design increases the sense of space using light and reflection.
Layout Plan:
Position equipment along walls opposite windows or the garage door. Leave at least 6 feet of open floor space in the center. Install a large mirror to reflect natural light.
Equipment to Include:
- Compact rack
- Dumbbells
- Bench
- Resistance bands
Storage Strategy: Use floating shelves and closed cabinets to reduce visual clutter.
Design Tips: Paint walls light gray or white and upgrade to bright LED lighting.
8. The Budget Starter Setup
A simple entry-level setup that covers essential strength training.
Layout Plan:
Dedicate one wall to basic equipment storage and leave the center open for bodyweight exercises. Ensure enough floor space for lunges and presses. Keep the layout flexible for future additions.
Equipment to Include:
- Adjustable dumbbells
- Flat bench
- Pull-up bar
- Resistance bands
Storage Strategy: Use a basic metal shelving unit and store mats upright in a corner.
Design Tips: Install rubber tiles only in the main training area to control costs.
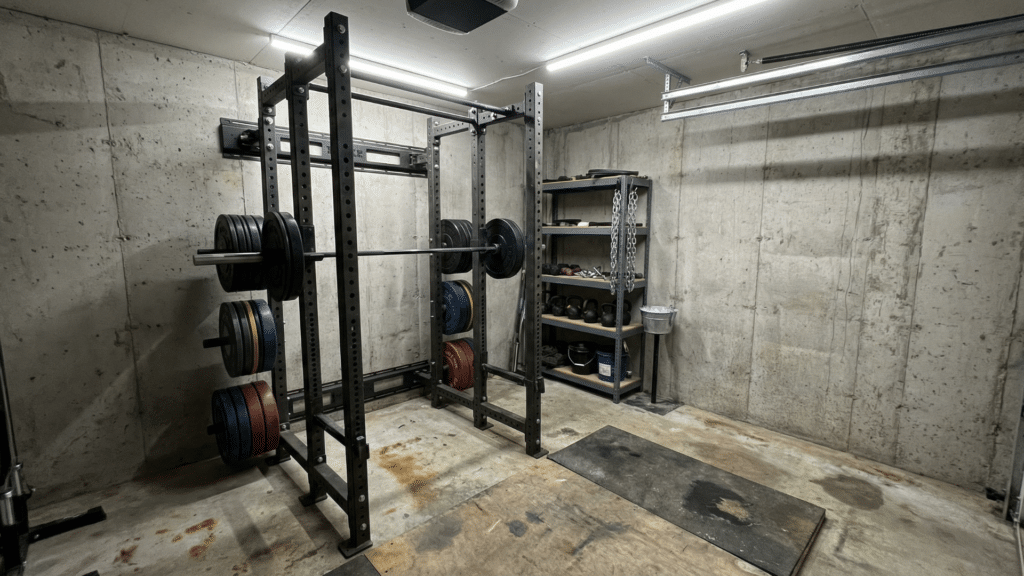
9. The Compact Powerlifting Setup

Built specifically for heavy lifting in limited depth.
Layout Plan:
Install a short-depth rack near the back wall. Leave 5–6 feet of clearance in front for squats and presses.
Attach plate storage directly to the rack to eliminate extra floor units. Confirm ceiling clearance before installation.
Equipment to Include:
- Short-depth rack
- Barbell
- Bumper plates
- Bench
Storage Strategy: Mount weight pegs on the rack uprights and store collars on small hooks.
Design Tips: Use darker flooring to hide chalk and wear marks.
10. The Cardio-Focused Garage Gym

Designed primarily for endurance and conditioning workouts.
Layout Plan:
Align cardio machines along one wall and leave at least 4 feet of clearance behind each machine. Keep a clear area in the center for stretching and cooldown exercises. Position fans near machines for airflow.
Equipment to Include:
- Treadmill
- Rowing machine
- Spin bike
- Stretch mat
Storage Strategy: Install narrow wall shelves for water bottles and towels. Secure cords along the baseboards.
Design Tips: Mount a tablet holder or small screen at eye level for long sessions.
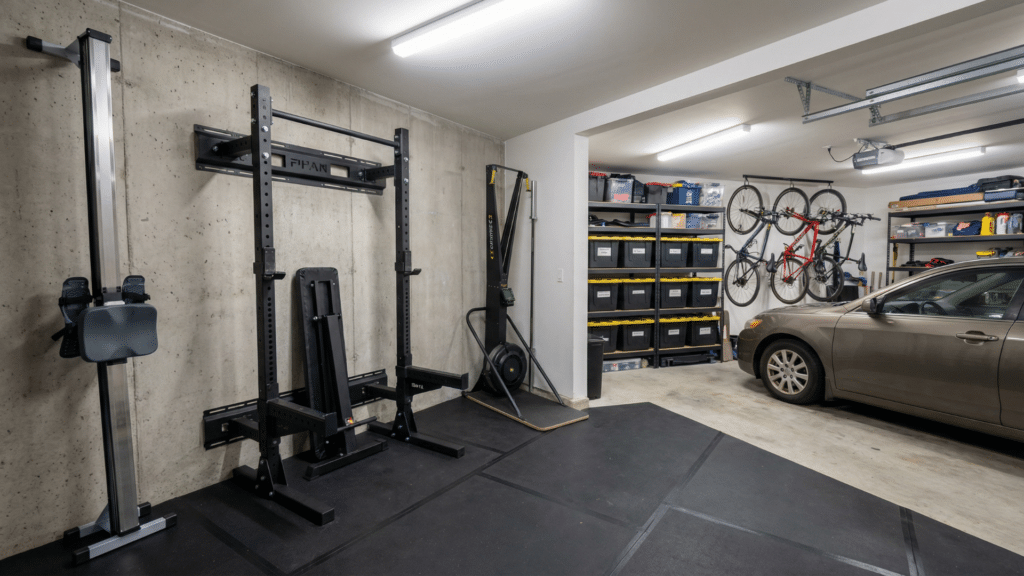
11. The Hybrid Storage + Gym Layout
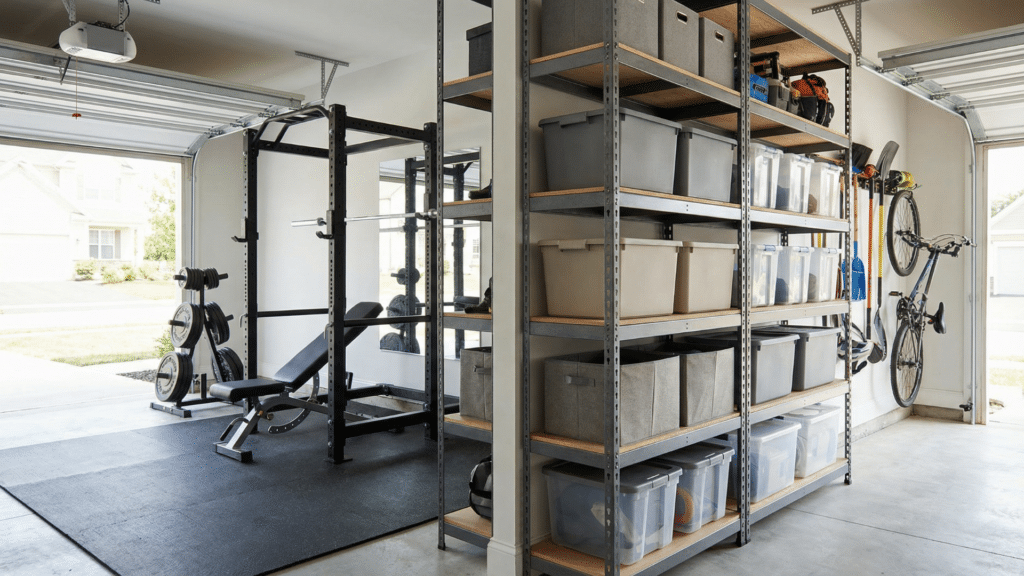
This design allows the garage to function as both a workout space and a storage area without blending the two.
Layout Plan:
Use tall shelving units or storage cabinets to create a visual divider between the gym half and the storage half. Position your rack or bench setup against the far wall to keep it clearly separated from household items.
Leave at least 6–8 feet of working space in front of lifting equipment and maintain a 3-foot walkway between zones. Keep the gym side visually clean and defined.
Equipment to Include:
- Compact rack or wall-mounted rack
- Adjustable bench
- Dumbbells or a barbell
- Resistance bands
Storage Strategy: Install ceiling-mounted racks on the storage side for seasonal bins. Keep tools and household items strictly outside the gym boundary.
Design Tips: Use a different wall color or rubber flooring on the gym side to create a clear visual break between storage and training areas.
12. The Boxing and Conditioning Corner
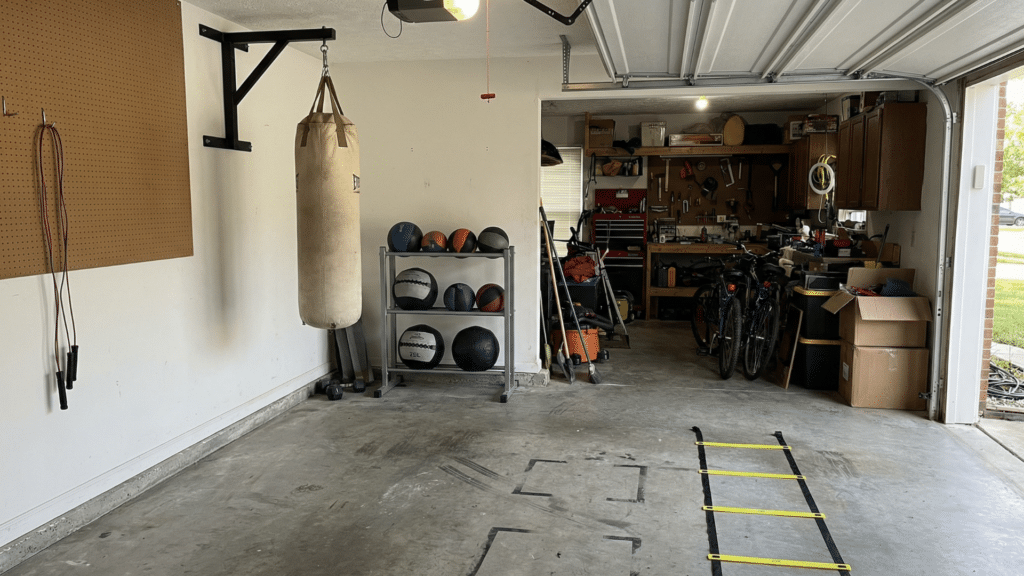
This setup focuses on striking and conditioning without requiring large machines.
Layout Plan
Mount a heavy bag in one rear corner using a secure wall or ceiling bracket. Leave at least 6 feet of clearance around the bag for safe movement.
Keep one adjacent wall open for shadowboxing drills and footwork practice. Ensure there is enough overhead space for quick movements and jump rope sessions.
Equipment to Include:
- Heavy bag
- Gloves and wraps
- Jump rope
- Medicine ball
Storage Strategy: Install wall hooks for gloves and wraps. Use a compact corner rack to keep medicine balls off the floor.
Design Tips: Add a mounted interval timer and bright lighting focused on the striking area for better visibility.
13. The All-Black Modern Setup
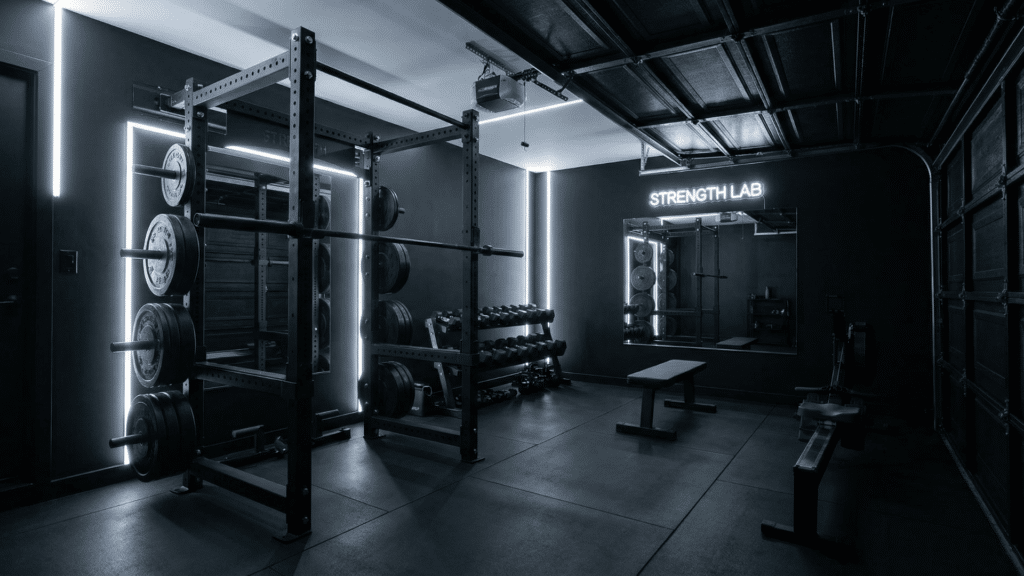
A clean, consistent aesthetic that makes the gym feel intentional and professional.
Layout Plan:
Center a rack along the main wall and align dumbbell storage evenly on one side. Leave 6–8 feet of open floor space in front for compound lifts.
Keep equipment arranged in straight lines to maintain visual order. Avoid mixing colors or mismatched equipment.
Equipment to Include:
- Black power rack
- Black bumper plates
- Adjustable bench
- Dumbbells
Storage Strategy: Use matching black wall-mounted storage and keep all accessories grouped in one area.
Design Tips: Install cool-white LED lighting to contrast with darker walls and highlight equipment lines.
14. The Mirror-Focused Training Wall
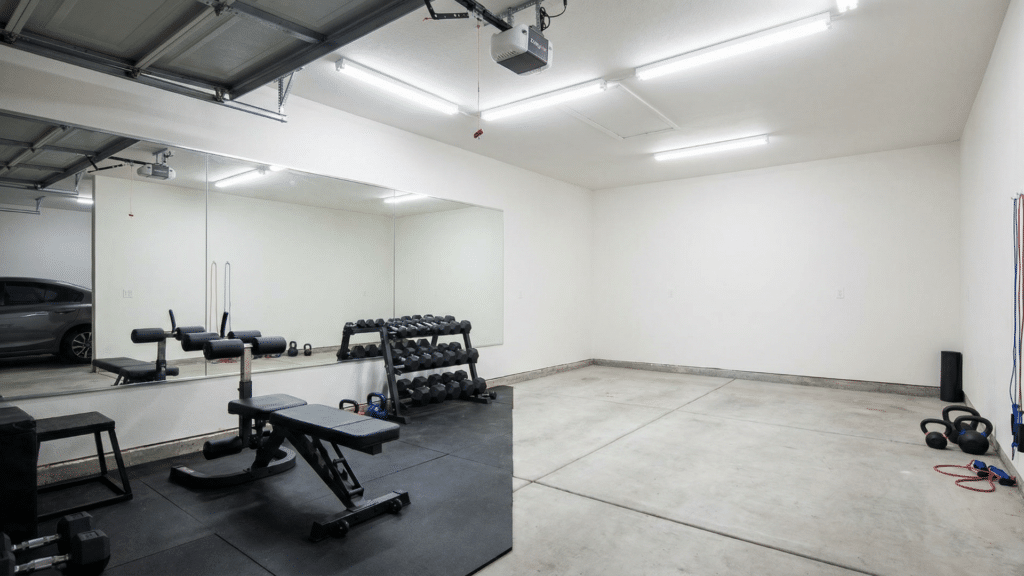
This layout uses mirrors to improve form and visually expand the space.
Layout Plan:
Install a wide mirror panel along the primary training wall. Position your rack or bench facing the mirror and leave at least 5–6 feet of space for a full range of motion.
Avoid placing tall equipment directly in front of the mirror. Keep the central floor area open.
Equipment to Include:
- Adjustable bench
- Dumbbells
- Compact rack
- Resistance bands
Storage Strategy: Store accessories below mirror height and avoid tall shelving that blocks reflection.
Design Tips: Use frameless mirror panels for a seamless appearance and pair them with bright overhead lighting.
15. The Climate-Controlled Setup
Designed for consistent training throughout the year.
Layout Plan:
Position the lifting equipment away from the garage door to reduce temperature swings. Install insulation panels if possible and keep airflow around cardio machines.
Leave adequate spacing between equipment and walls for ventilation. Maintain a clear path to any heating or cooling units.
Equipment to Include:
- Compact rack
- Bench
- Portable heater or wall fan
- Dehumidifier
Storage Strategy: Use sealed containers for chalk and accessories to protect against humidity. Keep electronics elevated off the floor.
Design Tips: Add weatherstripping around the garage door and upgrade the lighting to maintain brightness during the colder months.
16. The Multi-Use Family Layout
This setup supports multiple users with different workout preferences.
Layout Plan:
Divide the half garage into small zones: strength along one wall, cardio along another, and stretching space in the center.
Leave at least 3 feet between zones for safe movement. Choose adjustable equipment that can fit different heights and skill levels. Keep the central space flexible.
Equipment to Include:
- Adjustable dumbbells
- Bench
- Compact cardio machine
- Stretch mats
Storage Strategy: Use labeled bins for each family member’s accessories and install shared wall hooks for towels and bands.
Design Tips: Keep wall colors neutral and lighting bright to create a welcoming environment for all users.
17. The Long-Term Growth Layout
Built for gradual expansion without needing a full redesign.
Layout Plan:
Start by installing essential equipment along one wall and leave at least one wall section open for future additions.
Maintain 6–8 feet of working space in front of primary equipment. Avoid filling every corner during the initial setup. Keep pathways clear for potential upgrades.
Equipment to Include:
- Basic rack
- Barbell
- Bench
- Starter plate set
Storage Strategy: Pre-install extra wall anchors or mounting points for future storage upgrades. Choose modular shelving that can expand.
Design Tips: Plan lighting and electrical access early to support future machines or attachments.
Soundproofing Tips for Garage Gyms
A half garage gym can generate a lot of noise, especially during lifting sessions or cardio workouts. The following tips help reduce noise and keep workouts more controlled.
- Install thick rubber flooring or horse stall mats to absorb impact from dropped weights.
- Use bumper plates instead of iron plates to reduce vibration and sharp noise.
- Add foam or acoustic panels to garage walls to soften echoes and sound reflection.
- Seal gaps around the garage door with weather stripping to prevent sound leakage.
- Place lifting platforms on top of rubber mats for extra impact protection.
- Avoid dropping weights directly on concrete floors.
- Use padded barbell crash cushions for heavy lifts.
- Securely mount equipment to prevent rattling during movement.
- Add rugs or dense mats under cardio machines to reduce vibration.
- Close the garage door during early-morning or late-night workouts to reduce noise from passing traffic.
Safety Considerations
A half garage gym should be arranged with safety as a top priority. Keep these key safety points in mind:
- Clearance Space: Leave at least 3 feet around racks, benches, and cardio machines for safe movement.
- Secure Installation: Anchor racks and pull-up bars to wall studs or concrete to prevent tipping.
- Proper Flooring: Install thick rubber mats to reduce slipping and absorb impact from weights.
- Organized Storage: Store plates, dumbbells, and accessories off the floor to avoid trip hazards.
- Ceiling Height Check: Confirm enough overhead clearance before performing presses or jumps.
- Stable Equipment: Regularly tighten bolts and inspect equipment for wear or looseness.
- Electrical Safety: Secure cords along walls and avoid overloading outlets.
- Adequate Lighting: Use bright LED lights to improve visibility during lifts.
- Ventilation: Ensure airflow to prevent overheating during intense workouts.
- Emergency Access: Keep a small first-aid kit nearby and maintain a clear exit path.
To Conclude
A well-designed half garage gym can completely change how workouts fit into daily life. With smart layout planning, proper storage, and the right equipment choices, even a limited space can feel organized and powerful.
The key is to use every wall, corner, and walkway to its full potential. Clear zones, safe spacing, and consistent design make the space easier to use and maintain.
Over time, the setup can grow as goals evolve without feeling overcrowded. A half garage gym does not need to be large to be effective.
Start with a clear plan, choose a layout that fits your needs, and begin building your space today.