
When I want to refresh a tiled space without dealing with demolition, I often think about tiling over tile. It saves time, reduces mess, and lets me skip the hassle of ripping up old materials.
Removing tile can get loud, dusty, and expensive fast, especially in older homes.
Tiling over the existing surface feels more manageable and doesn’t leave me with damaged subfloors or extra repairs.
But I always make sure the current tile is flat, well-secured, and in solid condition before I commit.
If it moves or sounds hollow when I tap it, I don’t take the risk. You might be thinking about doing the same thing, especially for older kitchens or bathrooms that still look okay but feel dated.
Done right, this method holds up beautifully and saves serious effort.
Can You Tile Over Tile?
Yes, I do it when the original tile is in good condition and laid on a stable surface. The key is making sure the tile is flat and doesn’t have cracks or movement.
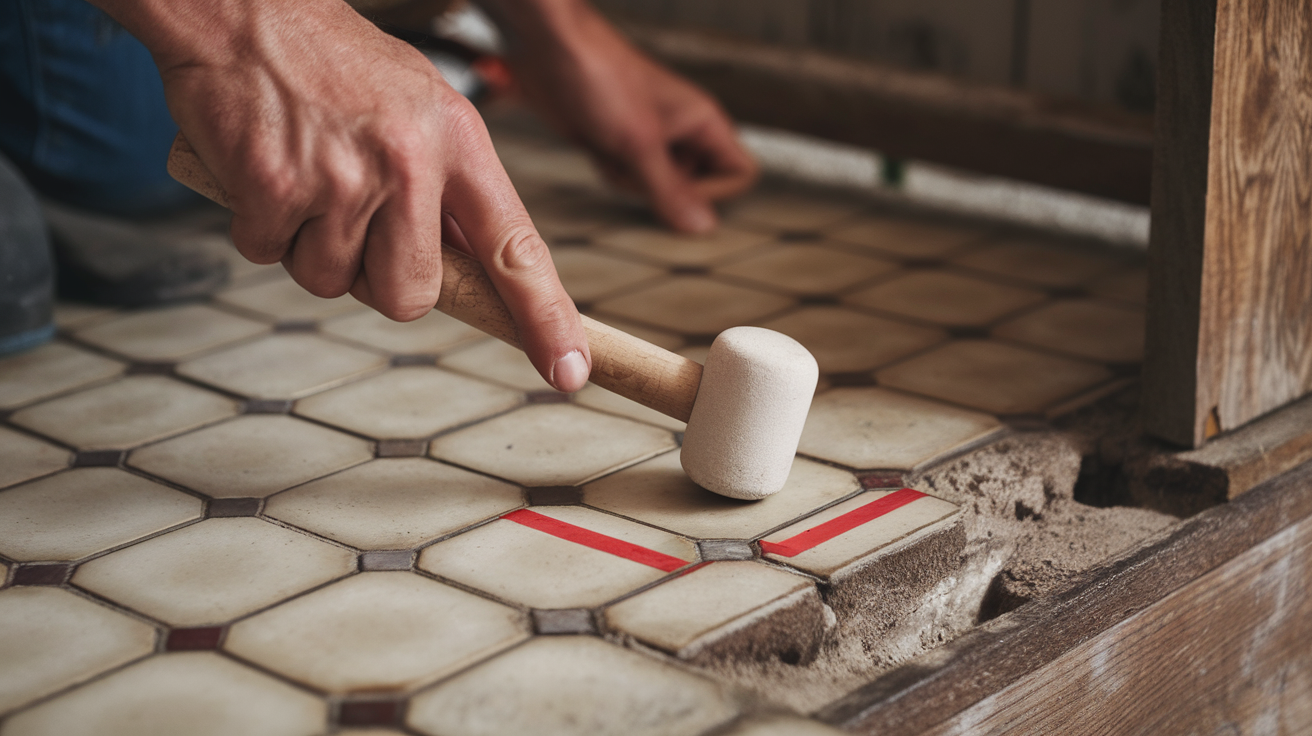
I start by tapping the tiles with a rubber mallet to listen for hollow spots, which might mean loose adhesive underneath.
If the sound is solid and nothing shifts, I feel confident it can support another tile layer.
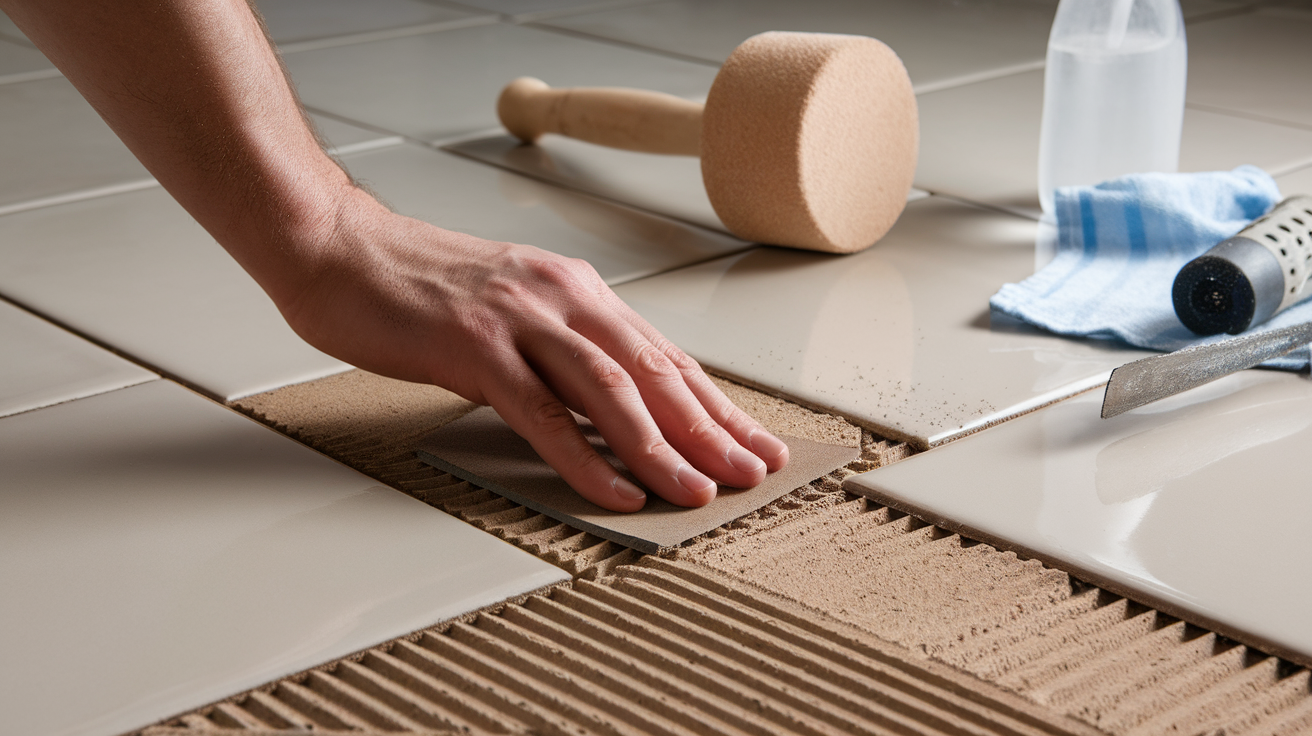
That said, I never jump straight into applying mortar. I prep the surface carefully, clean it with a degreaser, then lightly sand it with a coarse grit to give it some grip.
Glossy tiles won’t hold adhesive properly without abrasion.
This method works on both floors and walls, but only in areas that stay dry. Any spot with moisture issues needs a different approach entirely.
Pros of Tiling Over Existing Tile
Tiling over tile has its perks, especially for quicker and cleaner updates:
- No demolition needed: Saves time, avoids dust, and skips hauling old tile.
- Less labor: Surface prep and new tile can often be done in a day.
- Minimal height increase: Usually under ½ inch, making transitions easy.
- Cleaner for walls: Ideal in lived-in spaces with minimal mess.
- Good for small areas: Bathrooms and laundry rooms benefit most.
Cons to Watch Out For
Still, there are important things to consider before getting started:
- Added height: Can affect doors, trim, or appliances.
- Adhesion issues: Glossy or uneven tiles may need sanding and primer.
- Hidden moisture: Can’t see water damage or mold behind old tile.
- Structural concerns: Extra weight on walls must be considered.
How I Decide If Tiling Over Tile Is the Right Move?
Tiling over tile can be a smart shortcut, but I don’t always go that route. It depends on what I find beneath the surface.
I go for it when:
- The existing tile is flat, solid, and not cracked or loose
- I want to avoid the mess and cost of demolition
- I need a faster upgrade on a tight timeline
- The subfloor or backer board is still in good shape
- I’m changing the look, not fixing a structural issue
I avoid it when:
- Tiles sound hollow, shift underfoot, or show cracks
- Moisture or mold is suspected beneath the original layer
- Floor height would rise too much for doors or trim
- I notice unevenness that can’t be corrected with leveling clips
Best Practices for Prepping the Surface
If you’re going to tile over tile, your prep has to be thorough. Here’s what I do every time:
- Clean completely. I use a degreaser or tile cleaner to remove residue, wax, and dirt.
- Check for damage. Any cracked or loose tiles will be removed or patched.
- Roughen the surface. I sand glossy tiles or use a grinder to help the adhesive grip.
- Vacuum thoroughly. Dust can weaken the bond.
- Apply bonding primer (if needed). On shiny surfaces, a tile-to-tile bonding agent improves adhesion.
This process takes time, but it keeps the new tile from popping up or shifting later.
What Adhesive Works Best?
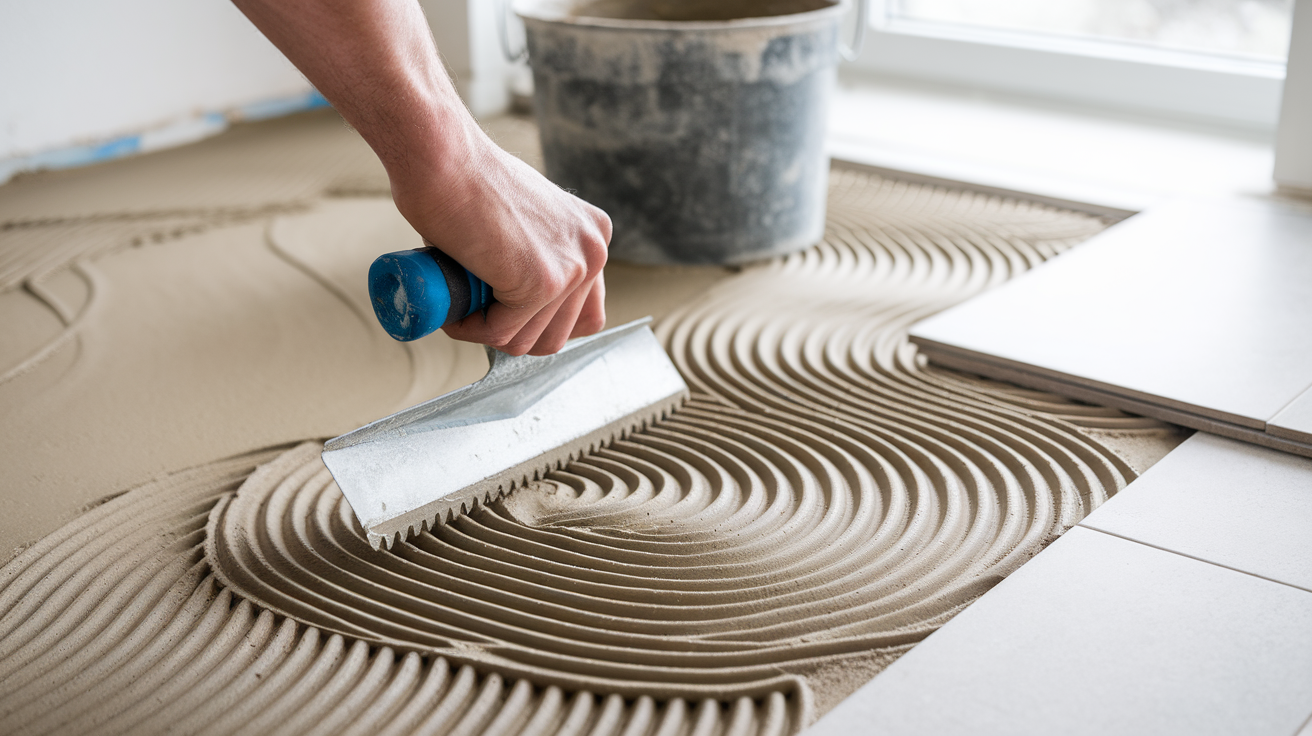
I always use a modified thinset mortar with added polymers. It sticks better to nonporous surfaces like tile.
Some brands also sell adhesives specifically made for tile-over-tile applications. I avoid using mastic or lightweight adhesives because they don’t bond well between two sealed surfaces.
Thinset gives me enough working time and a strong hold. I apply it with a notched trowel and press firmly, making sure each tile sets flush and stays in place.
I also back-butter larger tiles to ensure full contact with the adhesive. If the tile wobbles or doesn’t grip right away, I lift it and check coverage.
Getting that solid bond early prevents problems down the road, no shifting, no hollow spots.
Practical Tips and Common Concerns for Tiling Over Tile
When I work on tile-over-tile projects, I follow a few key steps and watch for common trouble spots. These tips help me avoid frustration and get a cleaner, longer-lasting finish.
- Watch Tile Height: Adding a new tile layer increases floor height. I always measure door clearances and make sure appliances still fit. If needed, I trim doors or adjust thresholds.
- Check Wall Weight: Two tile layers can get heavy. For walls, I make sure the backer board or wall studs can support the weight. If the tile flexes or pulls, I rethink the plan.
- Plan Smooth Transitions: Where tile meets carpet or hardwood, I use trims or reducer strips to create clean edges. This gives the room a finished look and prevents tripping hazards.
- Protect Moisture Zones: Bathrooms need extra care. I always add a waterproof membrane if I’m tiling over existing tile in a shower or around a tub. It prevents long-term water damage.
- Test Your Surface First: I apply one tile with adhesive, let it cure for 48 hours, then try to remove it. If it’s hard to pull up, I know the surface is strong enough to proceed.
Conclusion
Tiling over tile is a great option when you need a faster, cleaner upgrade, but only if you prep the surface right. I check the old tile for stability, clean it well, and sand the surface before laying new tile.
I also use the right adhesive and tools to get a strong bond.
If your space has flat, undamaged tile and no moisture issues, tiling over it saves time and labor. But I don’t skip corners, planning and prep always lead to better results.
I always double-check door clearances and trim transitions before I begin.
Omitting those details can lead to issues after the tiles are installed. In the end, tiling over tile can look just as polished, if you lay the groundwork properly.
For your next tile project, think about what’s under the surface. If it’s solid, you’re good to go. If not, starting fresh may still be the smarter path.