
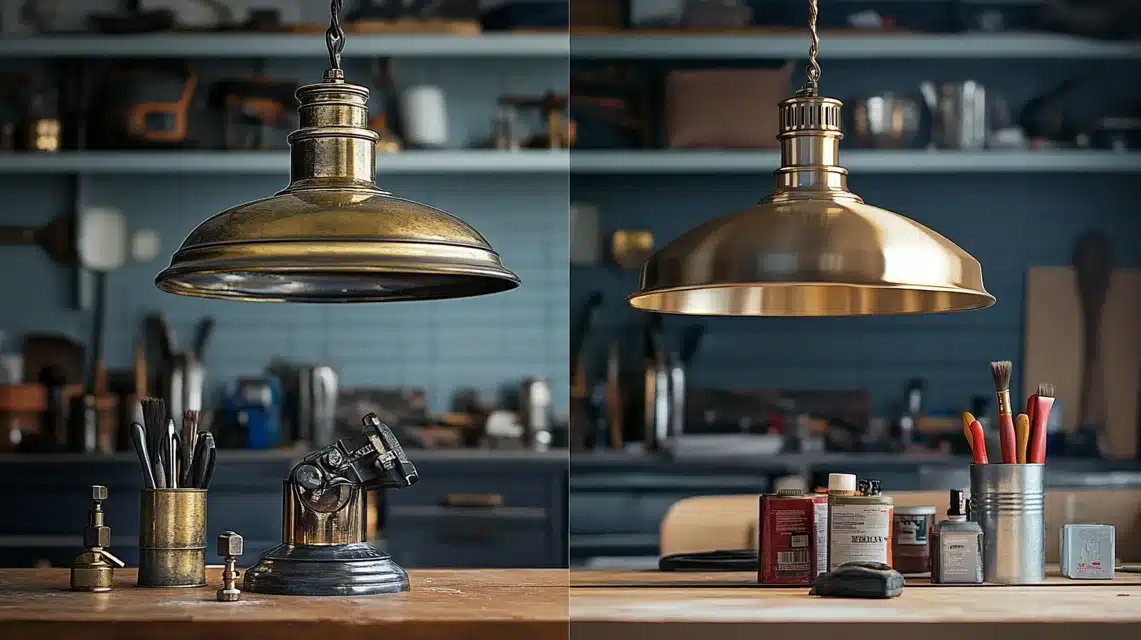
Want to update your old light fixtures without buying new ones? Spray painting offers a budget-friendly way to give dated fixtures a fresh look.
You can transform brass, chrome, or old-painted fixtures into beautiful satin nickel pieces with basic tools and careful preparation.
This project takes about 24 hours, mostly drying time, and costs under $20 in materials.
Before starting, gather your supplies and create a well-ventilated workspace to ensure the best results.
How to repurpose a light fixture using satin nickel spray paint
Materials Required
- Old light fixture
- 150-grit sandpaper
- Masking tape (painter’s tape)
- Wet rag
- Vacuum cleaner
- Styrofoam or cardboard box (for supporting the fixture while painting)
- Rust-Oleum Universal Metallic Paint & Primer in Satin Nickel (or any paint of your choice)
- Respirator mask (for safety)
- Gloves (optional for protection)
- Eye protection (optional for safety)
- Screwdriver (to remove bulbs and globes)
- Paper towels (for cleaning)
Step 1: Prepare the Light Fixture
- Remove any bulbs and glass globes from the fixture.
- Take off any screws holding the globes in place.
- Ensure the fixture is clean by wiping off any dust or dirt.
Step 2: Sand the Fixture
- Use 150-grit sandpaper to scuff the surface of the fixture (don’t strip it to bare metal, just scuff to allow paint to adhere).
- Focus on areas where the paint is chipped or uneven.
- Sand carefully to avoid inhaling dust (wear a mask and consider wearing gloves and eye protection).
Step 3: Clean the Fixture
- After sanding, wipe the fixture down with a wet rag to remove all dust.
- Vacuum any remaining dust from the work area.
Step 4: Mask Off Areas
- Use painter’s tape to cover any parts you don’t want to paint (e.g., ceramic light fixture areas and electrical components).
- Make sure the screws are also covered properly to match the color of the fixture.
Step 5: Set Up for Spray Painting
- Place the fixture on a surface like styrofoam or in a cardboard box to hold it steady.
- Shake the spray paint can for 2 minutes before use.
Step 6: Apply the First Coat of Paint
- Use a spray paint that combines primer and paint (e.g., Rust-Oleum Universal Metallic Paint and Primer in Satin Nickel).
- Hold the can 8-12 inches from the fixture and spray in light bursts across the surface, ensuring even coverage.
- Apply the first coat lightly to avoid drips.
Step 7: Let the First Coat Dry
- Allow the first coat to dry for 30 minutes (it will be touch-dry) and handle after 2 hours.
- Check the instructions for your specific paint for re-coat times (for this spray paint, apply a second coat within 1 hour).
Step 8: Apply the Second Coat of Paint
- After 1 hour, apply a second coat in the same manner as the first.
- Ensure even coverage and avoid overspraying.
Step 9: Allow the Fixture to Dry
- Let the fixture dry fully (24 hours for complete drying time).
- Ensure the paint is fully set before reattaching the globes and installing the fixture.
Step 10: Reassemble and Install
- Once the fixture is fully dry, reattach the glass globes and bulbs.
- Install the fixture back in its original location.
What type of spray paint works best for bathroom fixtures?
- Use paint and primer in one, specifically designed for metals, like Rust-Oleum Universal Metallic or similar products.
- Choose a water-resistant or moisture-resistant spray paint, as bathroom fixtures are exposed to humidity.
- Depending on the desired look, look for satin, matte, or gloss finishes.
- Ensure the spray paint is labeled as durable for metal and resistant to rust and corrosion.
How can you ensure the finish is durable and long-lasting?
Proper Preparation:
- Thoroughly clean the fixture to remove dirt, grease, and residue.
- Sand lightly with 150-grit sandpaper to create a surface for the paint to adhere to.
- Wipe away all dust before painting.
Use a Quality Primer: If not using a paint-and-primer combo, apply a metal-specific primer before painting.
Follow Drying Instructions: Allow the paint to dry for the recommended time between coats and before use (typically 24-48 hours).
Seal the Paint: Apply a clear protective topcoat designed for metal for added durability.
Are there any safety precautions to consider?
1. Ventilation: Always work in a well-ventilated area or outdoors.
2. Protective Gear:
- Wear a respirator mask to avoid inhaling fumes.
- Use gloves to protect your hands from paint and chemicals.
- Wear eye protection to prevent accidental splashes.
3. Proper Disposal: Responsibly dispose of paint cans and materials, following local waste disposal guidelines.
Can you spray paint over chrome or brass finishes?
Yes, you can spray paint over chrome or brass finishes with proper preparation:
- Clean Thoroughly: Remove any grease, grime, or fingerprints.
- Sand Lightly: Use 150-grit sandpaper to roughen the surface, allowing the paint to adhere better.
- Prime if Needed: Apply a metal primer to ensure proper adhesion, especially on smooth finishes like chrome.
- Choose the Right Paint: Use a paint specifically designed for metals.
How can you prevent common painting issues like drips or uneven coverage?
1. Shake the Can Well: Shake the spray paint for at least 2 minutes to mix thoroughly.
2. Keep a Consistent Distance: Hold the can 8-12 inches from the surface.
3. Apply Thin Coats:
- Use light, even strokes rather than covering everything in one coat.
- Allow adequate drying time between coats.
4. Avoid over-spraying: Spray in short bursts rather than holding the nozzle down continuously.
5. Test First: Practice on a piece of cardboard or scrap metal to perfect your technique.
6. Watch for Drips: If drips occur, sand them lightly once the paint is dry and apply another thin coat.
Summing Up
Updating light fixtures with spray paint saves money while giving your space an updated look.
Remember that success depends mostly on proper preparation and patience between coats.
Don’t rush the drying time, and pay special attention to cleaning and sanding steps.
Once complete, your newly painted fixture should last for years with proper care.
Consider this technique for other metal fixtures around your home, from doorknobs to cabinet hardware, to create a cohesive look throughout your space.