
Are you running out of space to hang wet clothes? Maybe you’re always using chairs, door frames, or the edge of the bathtub.
It can make your home feel messy fast. That’s why building your own wall-mounted drying rack is such a smart idea.
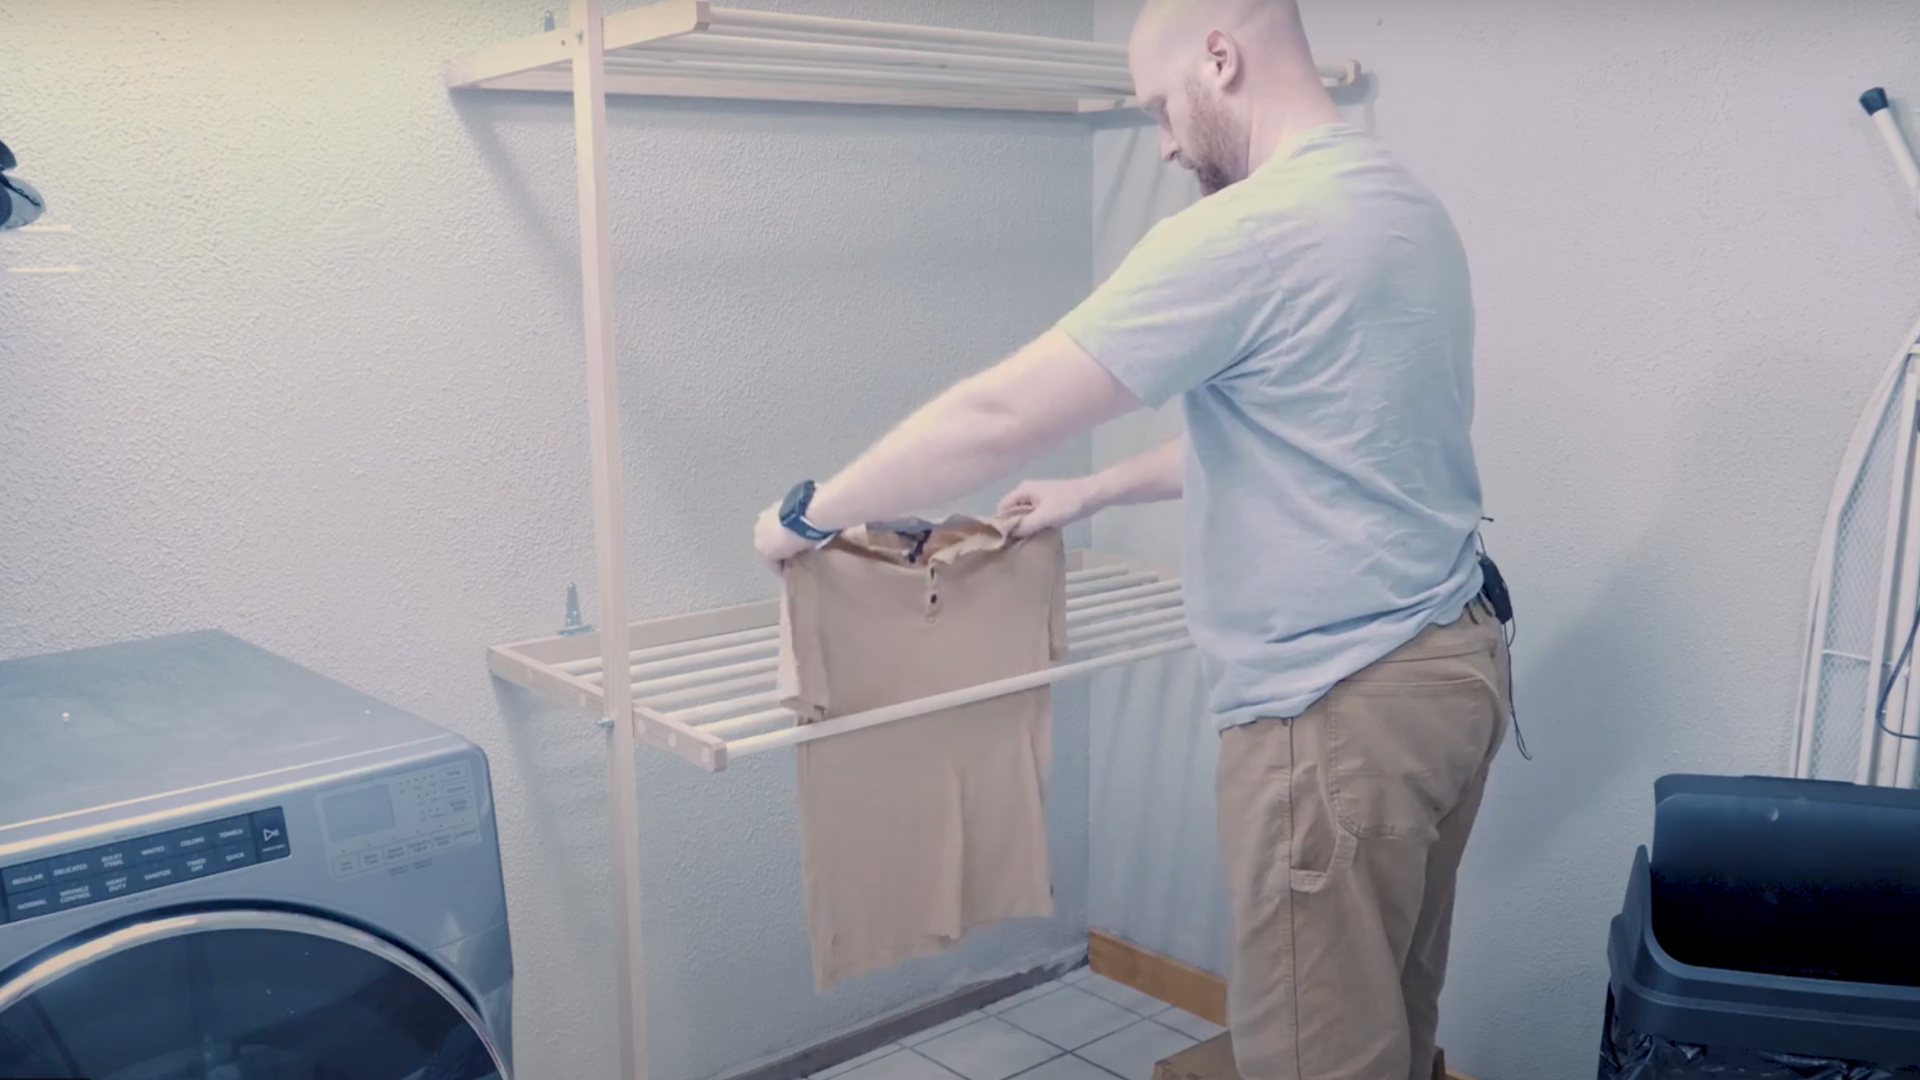
The DIY drying rack stays out of the way when you don’t need it. It’s strong, easy to use, and swings up and down with the help of pivoting arms.
That means you get plenty of space for air-drying clothes, and when you’re done, the rack just folds back against the wall more clutter!
In this post, I’ll show you step-by-step how to build one yourself.
You’ll get a full list of materials, clear instructions, and tips to make the job easier-even if you’re new to woodworking.
This drying rack has made my laundry room so much neater, and I know it can help you too. Ready to get started? Let’s go!
Is It Cheaper to Build Your Drying Rack?
You might wonder if building your own drying rack is really cheaper. The answer is yes, most of the time! Buying a high-quality wooden rack can be pretty expensive.
But if you build it yourself, you’ll likely spend less, depending on the wood and tools you already have.
Poplar dowels and red oak aren’t too pricey, and you can buy just what you need.
If you already have tools like a saw or drill, that saves even more. Plus, your rack will be sturdier and made to fit your space.
So not only do you save money-you get a custom rack that’s built to last. Sounds like a win!
What You’ll Need to Build Your Drying Rack
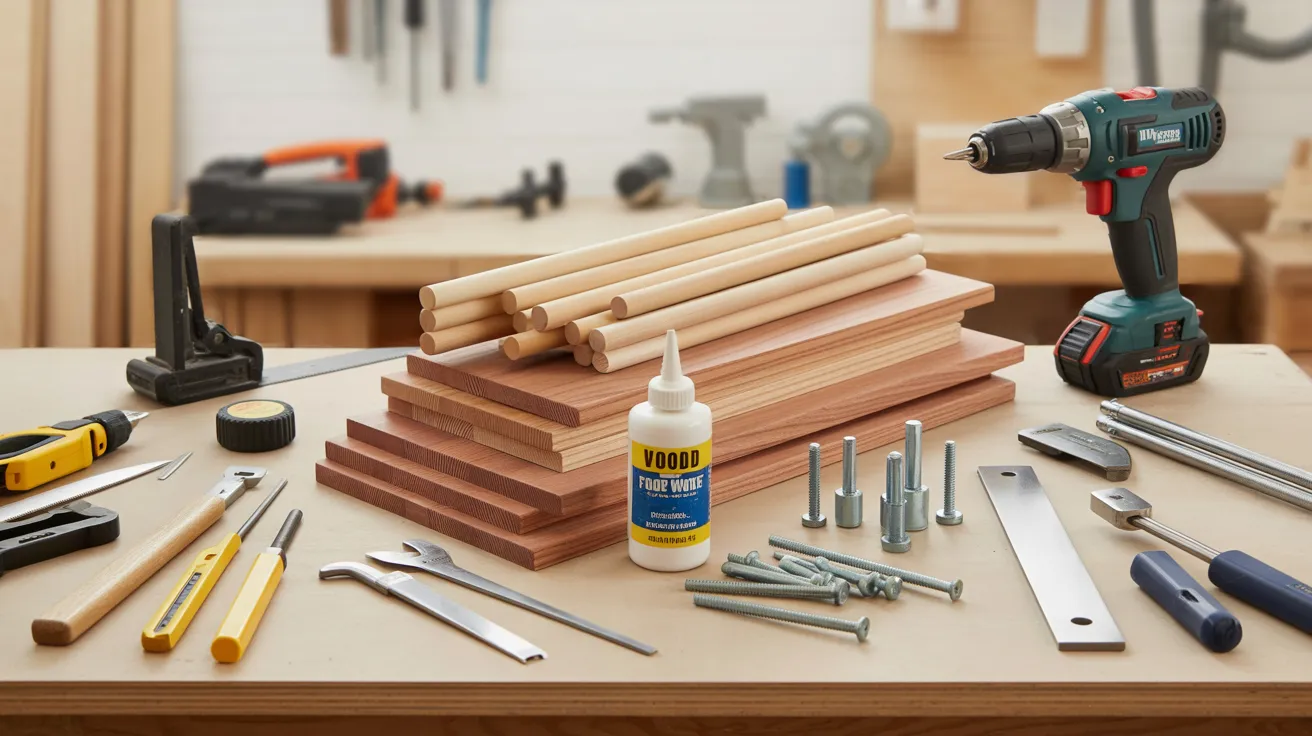
Before you begin building, it’s essential to gather all your necessary materials and tools. Don’t worry-most of these are easy to find at your local hardware store or online.
Materials
- Red Oak Boards: These make up the frame. You’ll need pieces that are 3/4 inch thick and 1.5 inches wide.
- Poplar Dowels: These round wooden rods will hold the clothes. Get ones that are 3/4 inch thick and about 4 feet long.
- Wood Glue: For holding joints together securely.
- Hinges: To attach the rack supports to the wall.
- Bolts, Washers, and Lock Nuts: These help your rack swing up and down.
- Lag Screws: To safely attach your drying rack to the wall.
Tools
- Drill
- Chisels
- Hand Saw or Power Saw
- Measuring Tape and Pencil
- Clamps and Vise
- Flush-Cut Saw
- Magnets or Stud Finder
Step-by-Step Process: How to Build Your DIY Drying Rack
Step 1: Cut and Prepare the Main Rails
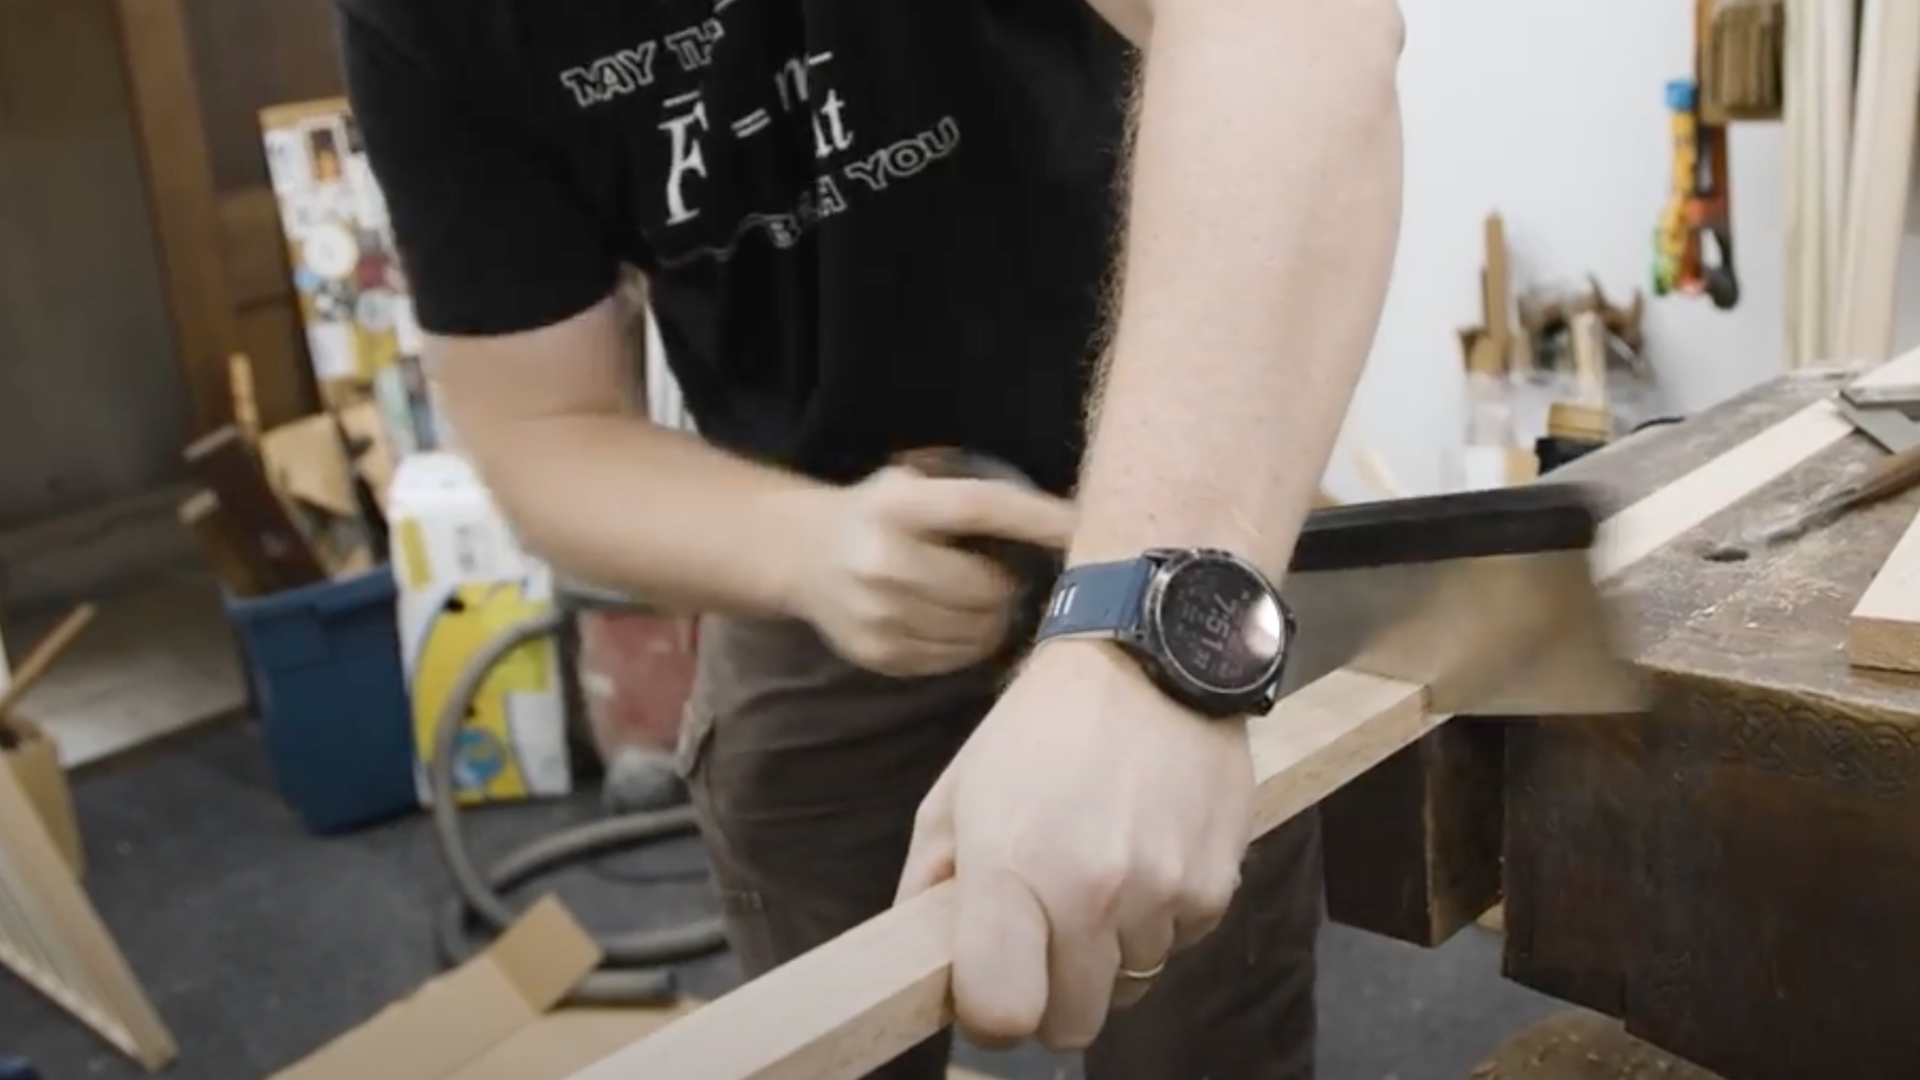
The main rails are the long wood pieces that make up your rack’s frame. You’ll need two rails that attach to the wall and two that stretch out to hold the dowels.
Use red oak for strength. In this build, the back rail is 4 feet long, and the side rails stick out 2 feet. You can adjust the size if you need to.
Measure carefully and mark your cuts with a pencil. Use a hand saw or power saw to cut your wood pieces.
Take your time, clean, straight cuts make everything fit better later on.
Step 2: Make Strong Dovetail Joints for the Frame
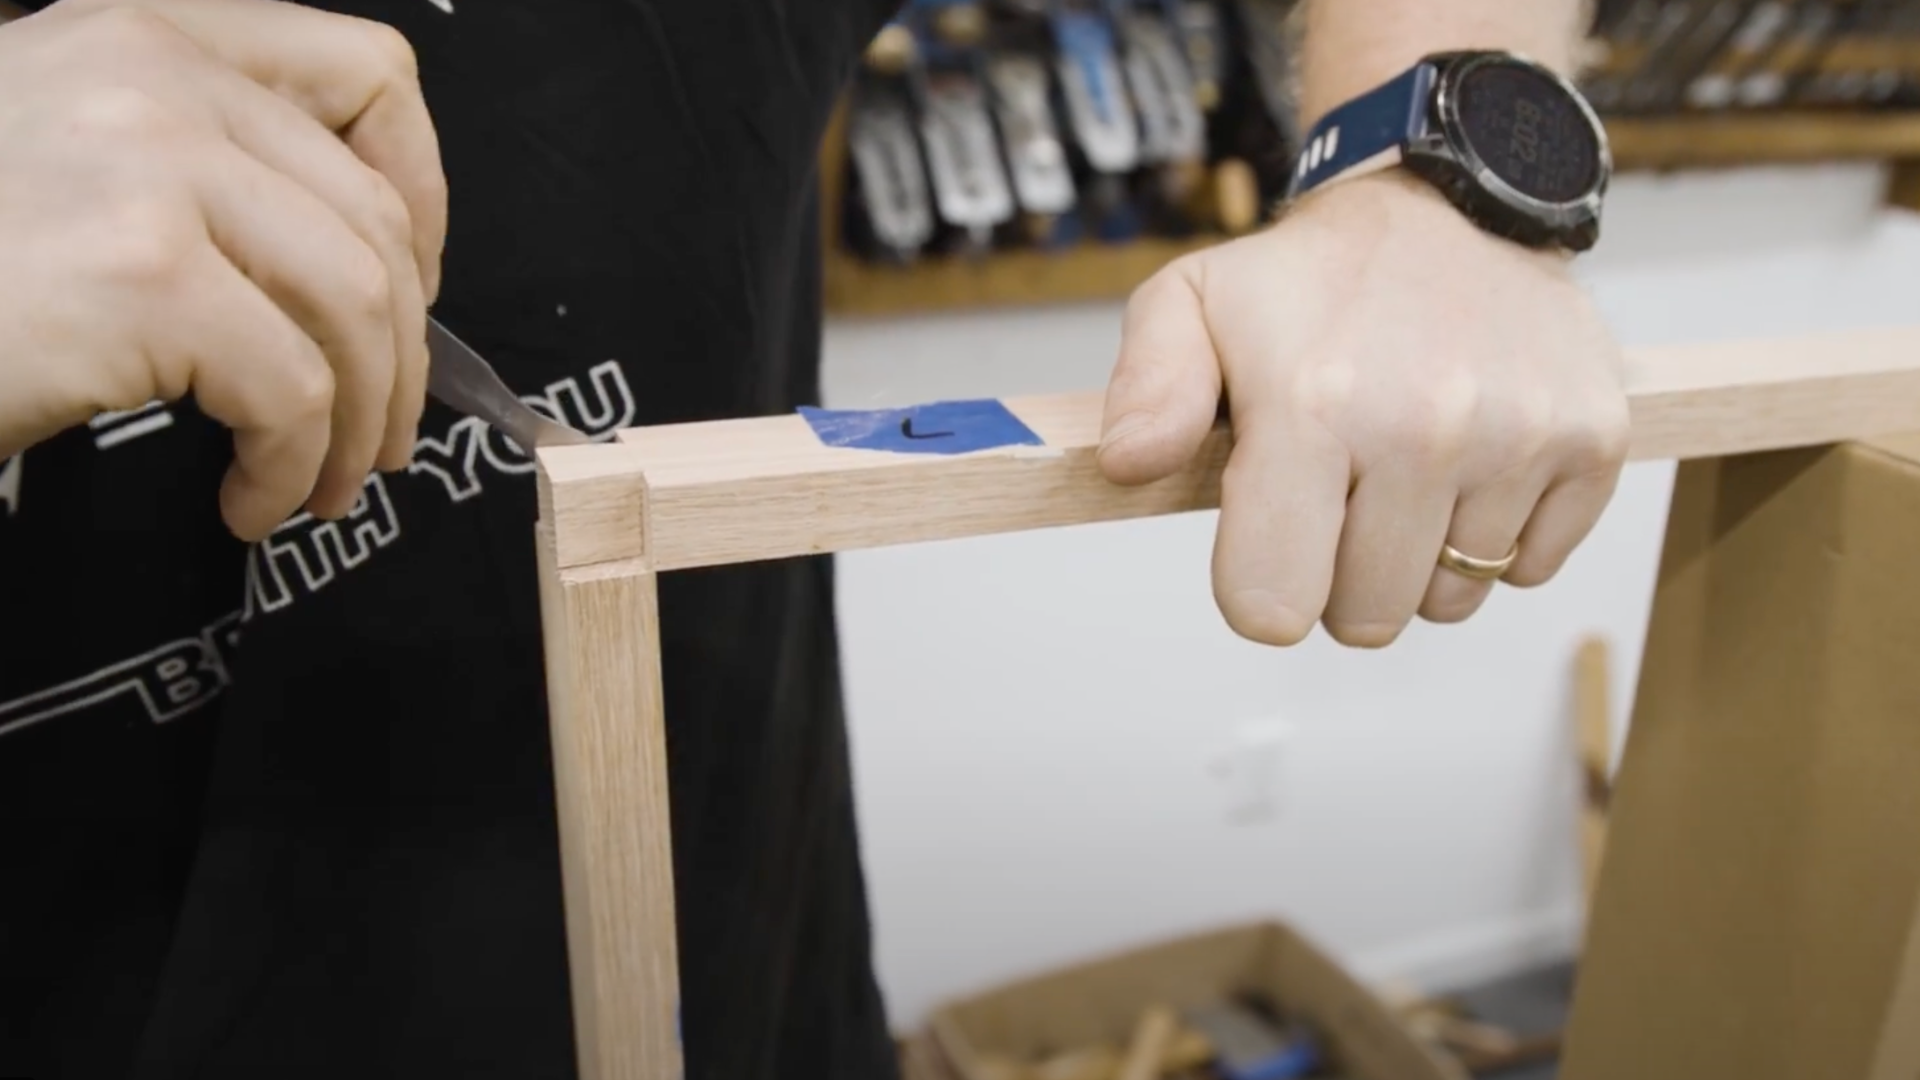
Dovetail joints connect the side rails to the back piece and help keep everything strong. Start by marking the dovetail “tails” at the end of your side rails.
Use a pencil and ruler to draw triangle shapes. Then, carefully cut along the lines with a saw. Stack the rails to cut two at once if you want to save time.
After cutting the tails, place the back board standing upright and trace the shapes onto it. Use a chisel to remove the wood between the lines and create the “pins.” Test the fit.
The pieces should slide together snugly.
Step 3: Prepare and Chamfer the Poplar Dowels
Now it’s time to get the rods ready. These dowels are what your clothes will hang on. Use poplar rods that are 3/4 inch thick and 4 feet long.
You’ll need enough to go across your drying rack. To give them a smooth look, use sandpaper to soften the ends. If you want, add a small bevel, called a chamfer, to each tip using a plane or file.
This little detail makes the rack look more finished and helps stop clothes from catching on sharp edges.
Once your dowels are prepped, set them aside until it’s time to insert them.
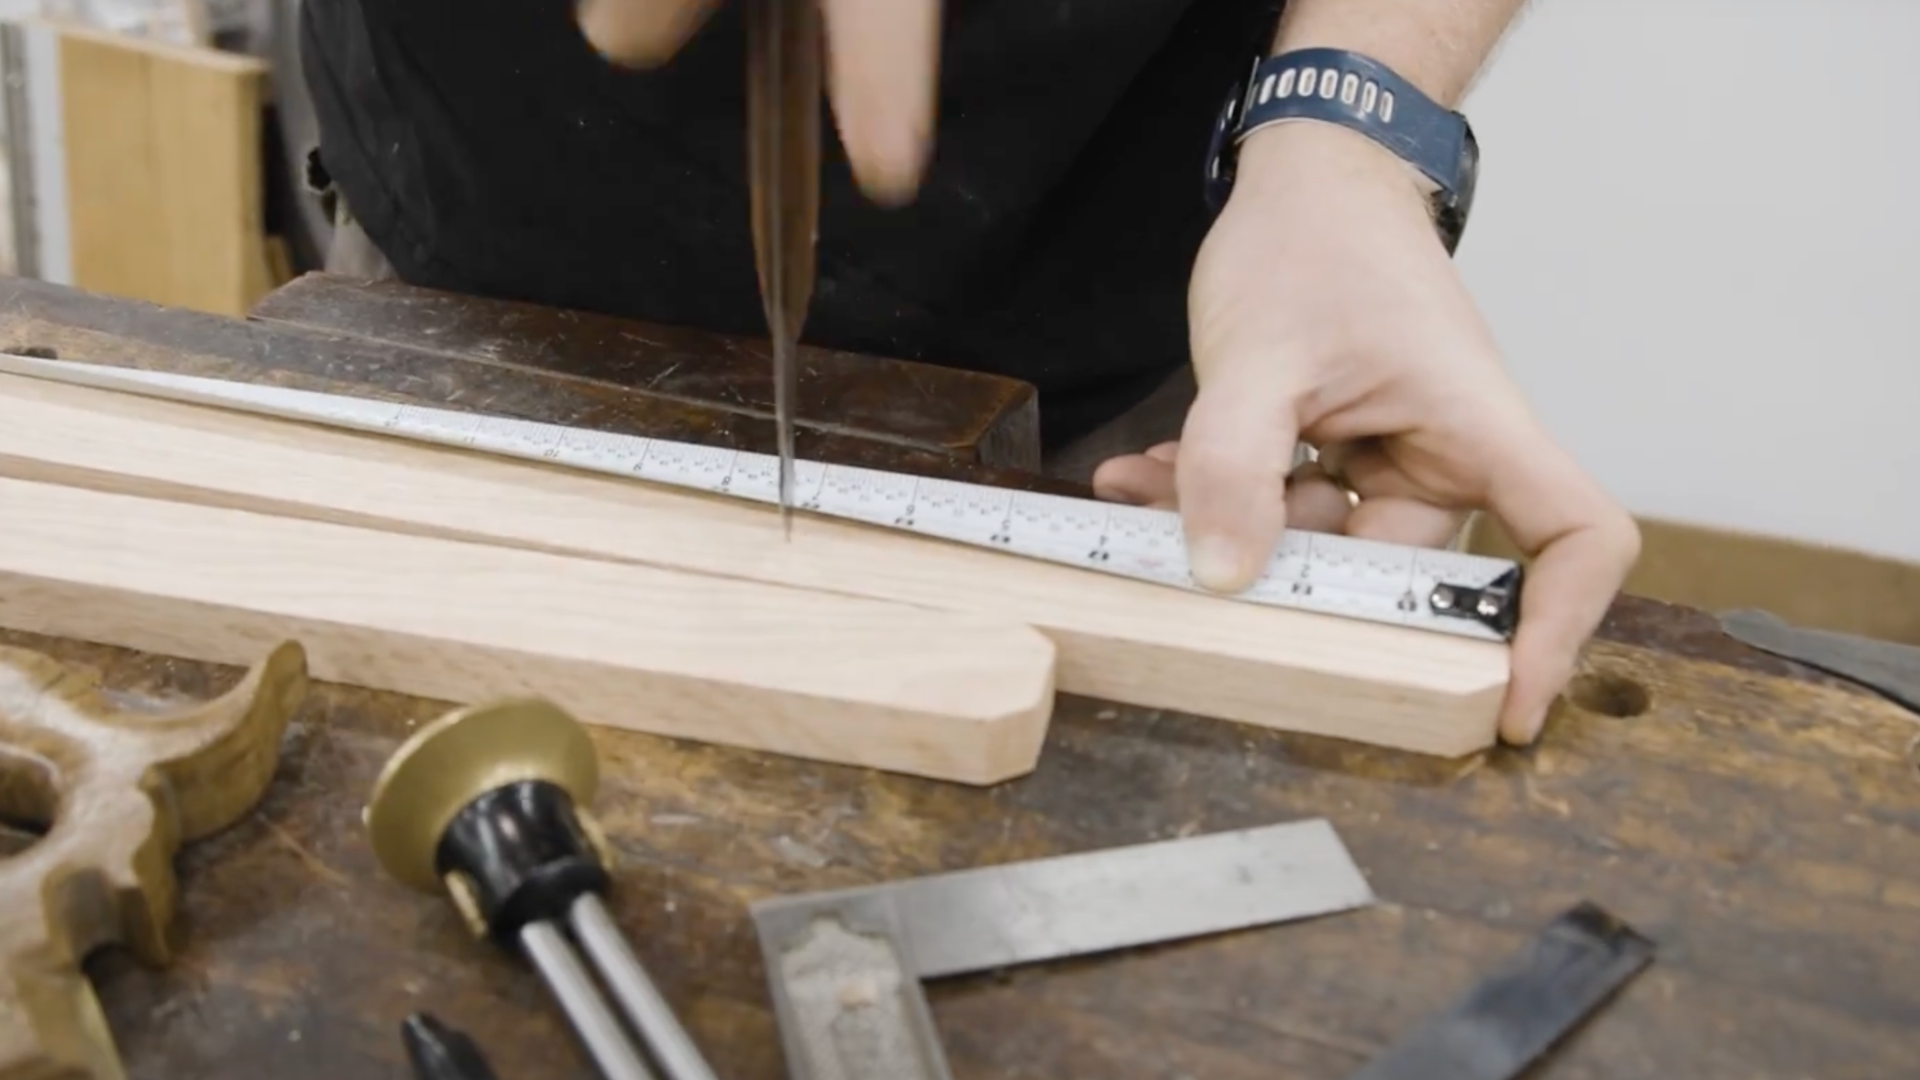
Step 4: Mark and Drill Holes for the Dowels

Take your side rails and decide how many rods you want. Mark where each dowel will go.
In this project, dowels are spaced 3 inches apart, but you can use 3.5 inches if you prefer.
Clap both rails together so the holes line up perfectly. First, drill small pilot holes all the way through to help guide the larger drill bit.
Then switch to a 3/4 inch auger bit to make the actual dowel holes. Be sure to go straight so the dowels sit evenly.
Take your time here- neat holes will make everything line up better in the next step.
Step 5: Put the Frame Together with Glue and Dowels
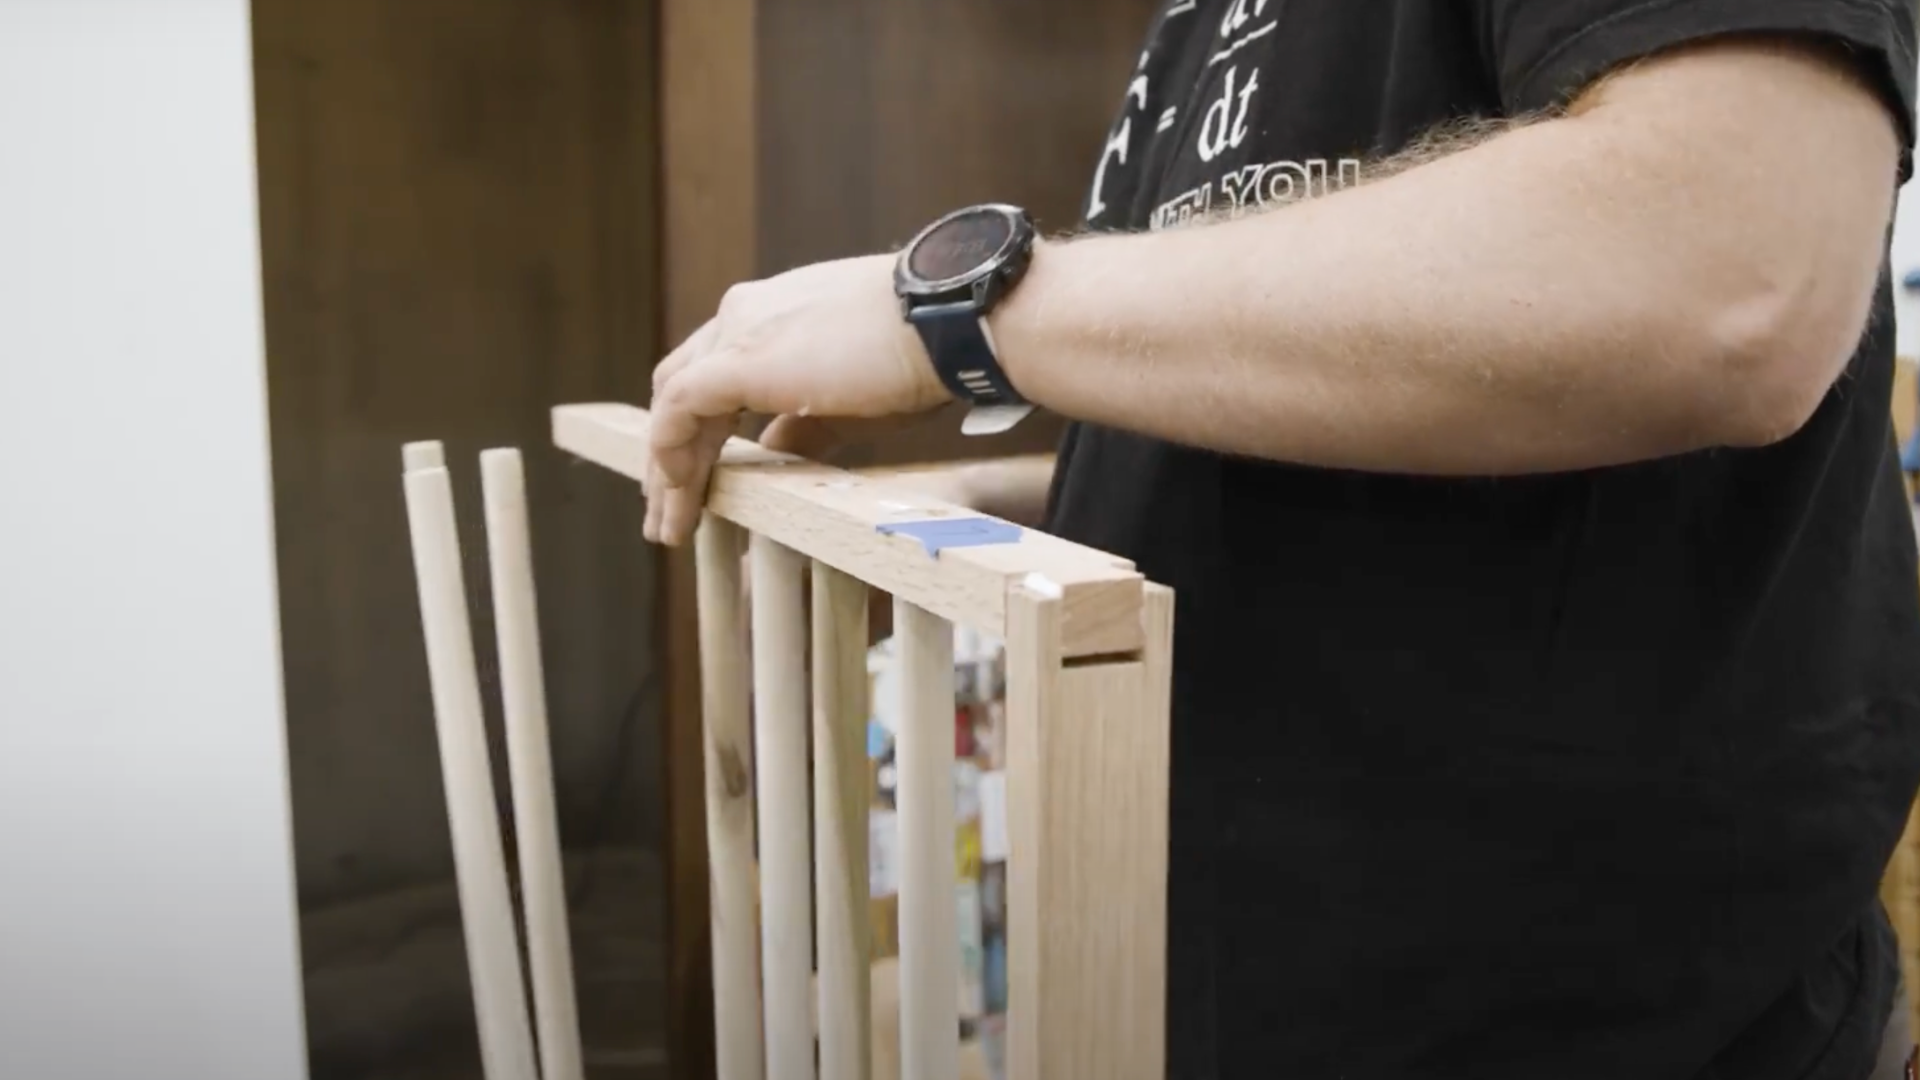
Now comes the fun part- putting it all together! Start by adding wood glue to the dovetail joints. Fit the side rails into the back rail using the dovetails you made.
Then take your poplar dowels and press them into the holes on one side rail. Make sure they fit tight.
Once they’re all in, add glue to the holes on the second rail. Carefully press or tap the second rail onto the dowels.
This part can be tricky, so go slow and make sure everything lines up.
When it’s fully together, let the glue dry completely before moving on.
Step 6: Trim and Smooth the Dowel Ends
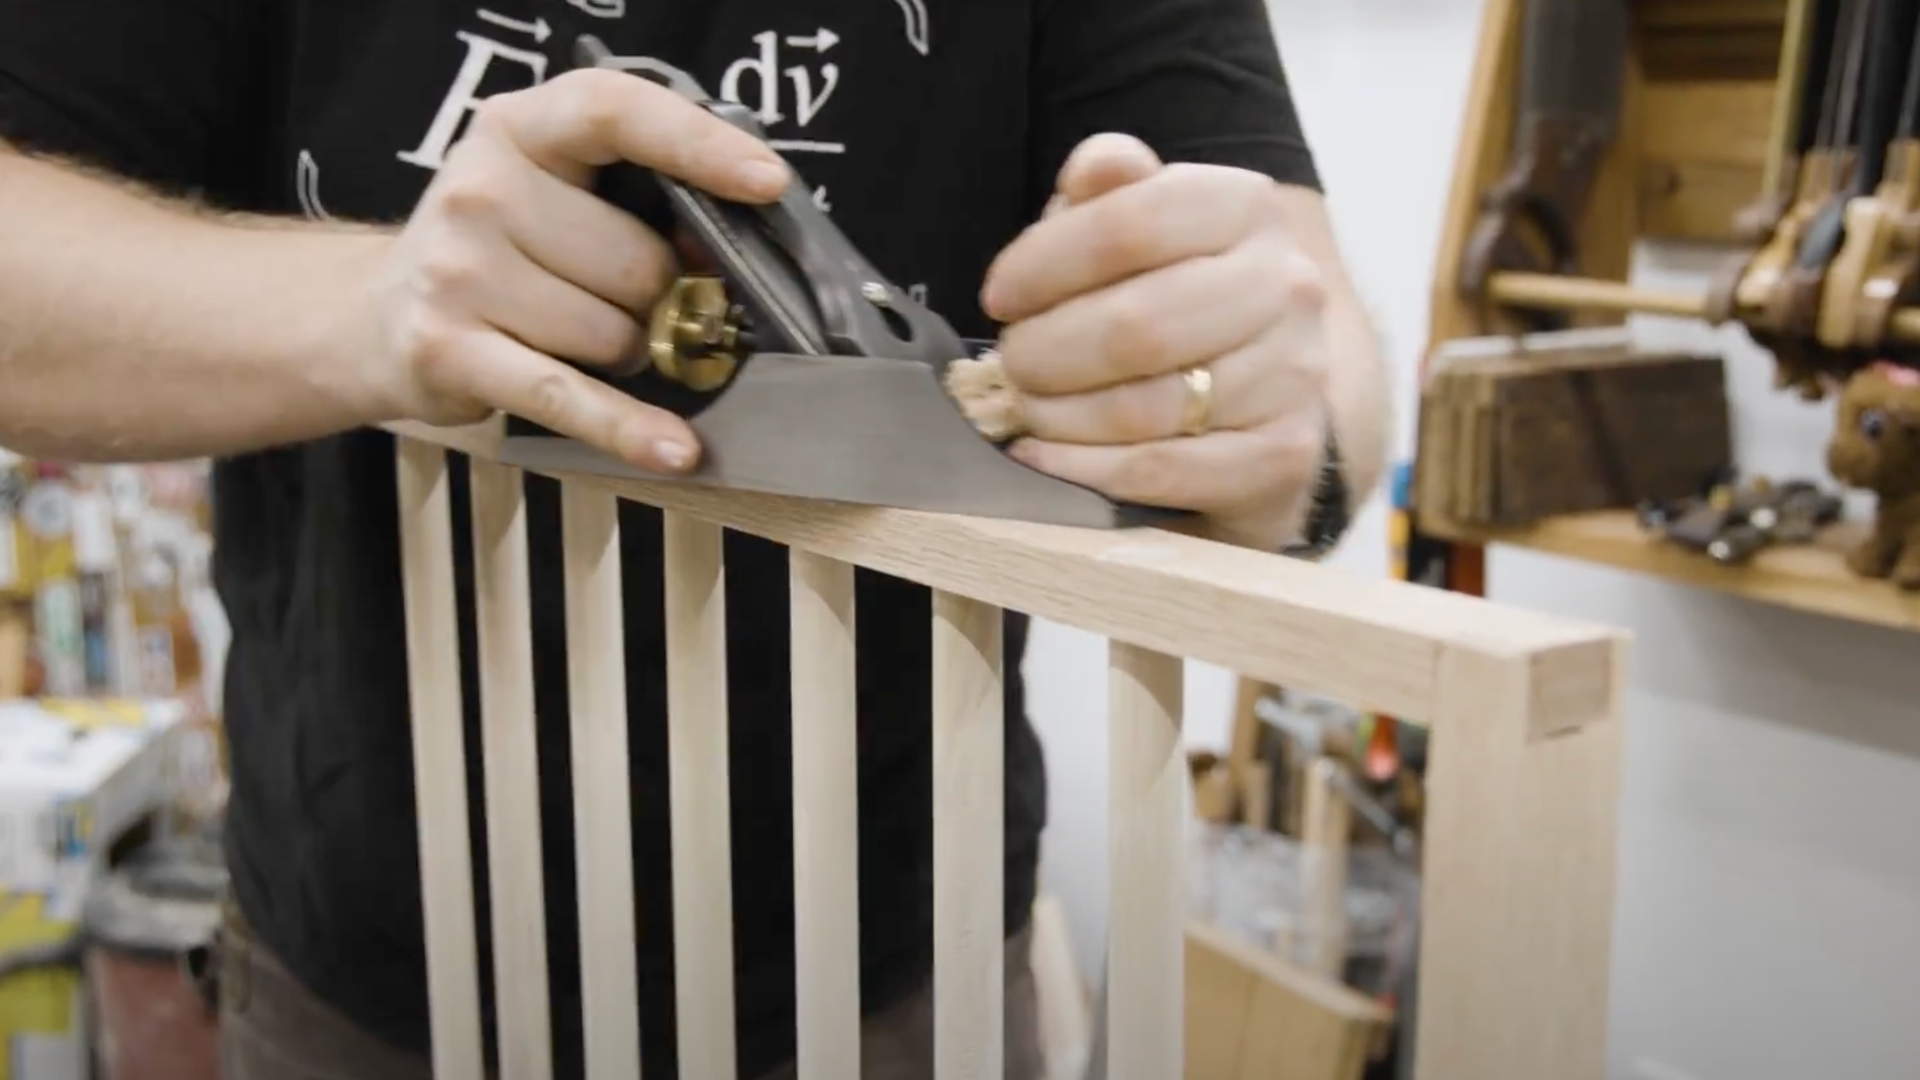
After the glue dries, you may notice some dowels stick out past the rails. Use a flush-cut saw to trim off any extra length so the sides are smooth.
Then, take a hand plane or sandpaper and smooth the ends where you cut. This step helps prevent rough edges that could snag your clothes.
You can also lightly sand the whole rack if it feels rough anywhere.
If you want, you can leave the wood natural or add a clear finish to protect it from moisture.
Now your rack should look clean, smooth, and ready to hang!
Step 7: Make the Vertical Supports and Add the Pivot
The vertical supports let your rack swing up and down from the wall. Cut two wood boards the same length. In this project, they are 68 inches long.
Drill a hole through each support at the height where the drying rack will attach. Use a bolt with a washer and lock nut to connect each support to your drying rack.
This makes the pivot point. The rack should swing up easily and stay strong. Try lifting it to test the movement.
It’s okay if it feels snug at first- it just means it’s built well and won’t wobble.
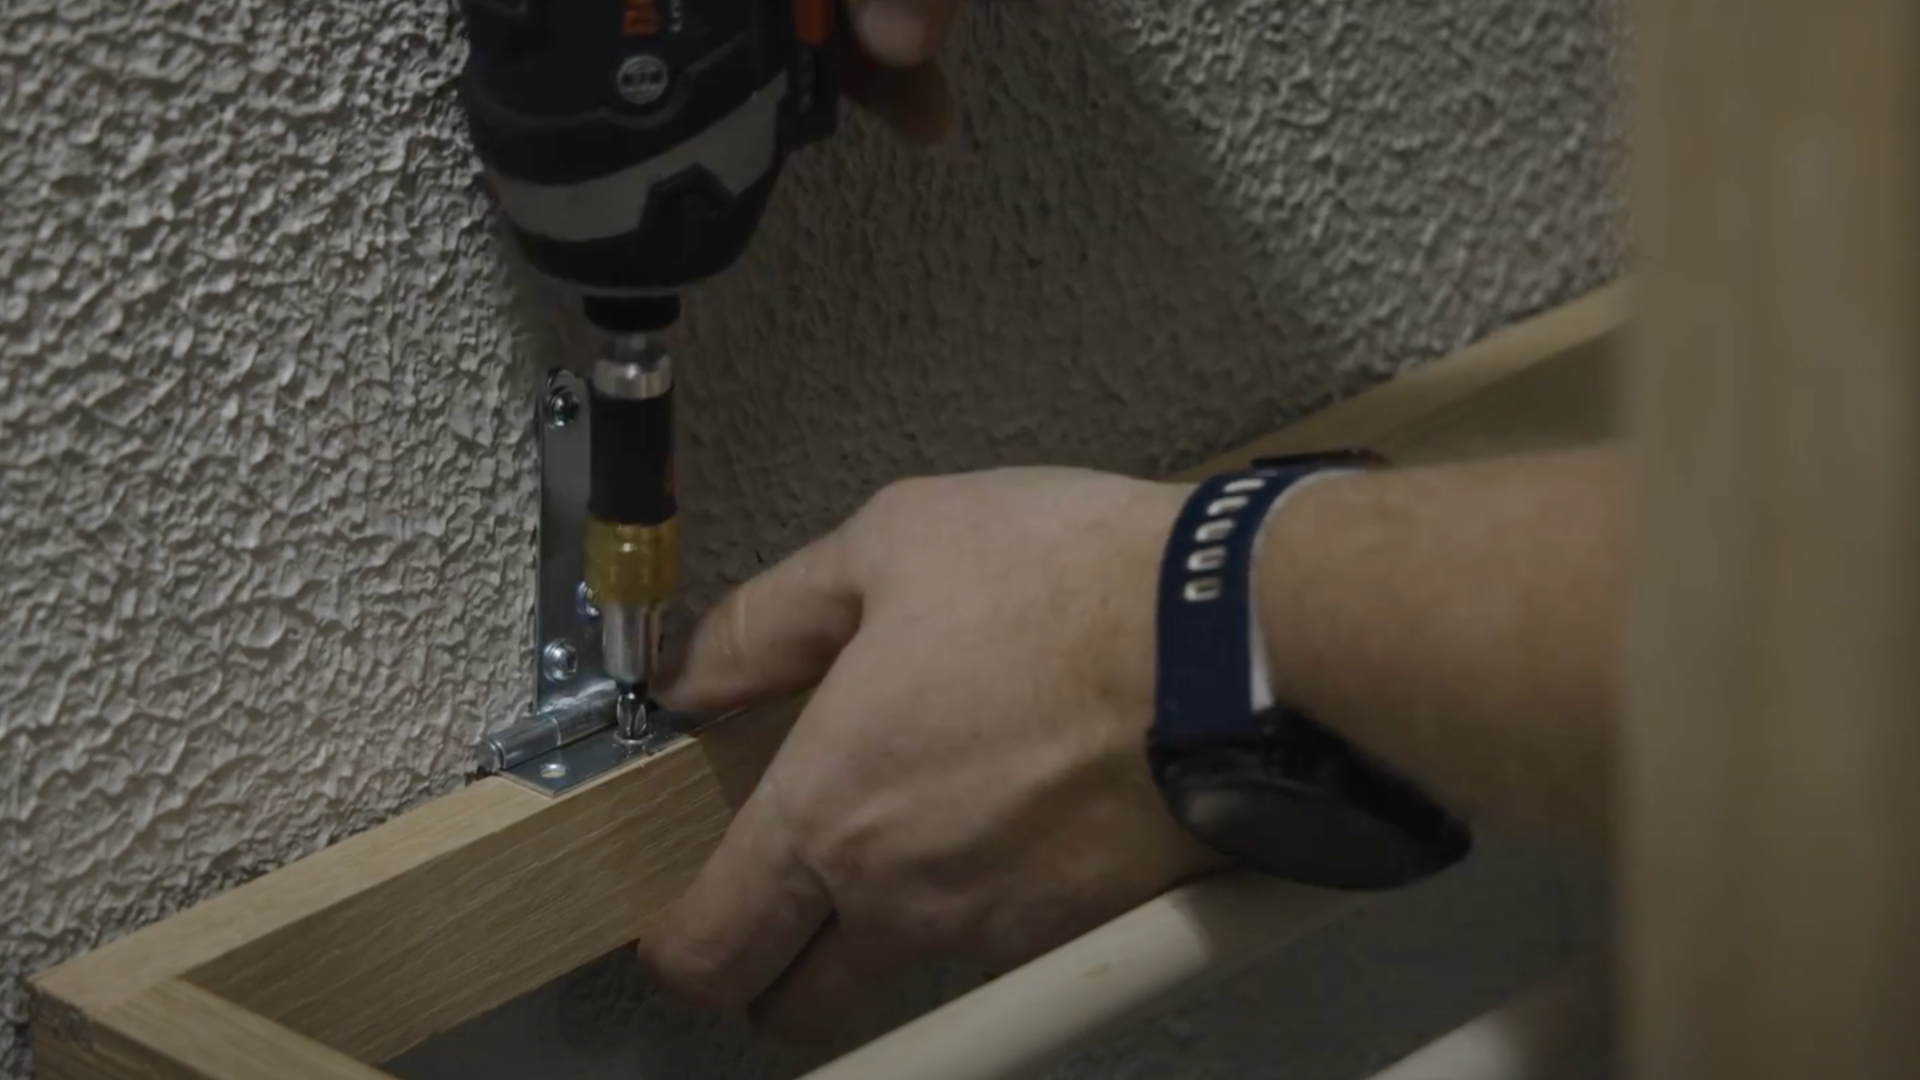
Step 8: Mount the Rack to the Wall
Now it’s time to hang your drying rack. First, use a magnet or stud finder to locate the wall studs.
Mark where you want the bottom of your rack to go. Hold one vertical support up and screw the hinges into the wood and the wall. Repeat this for the second support.
Then lift your rack into place and screw it to the pivot holes on the vertical supports. Make sure it swings up and down smoothly.
If you’re building two racks, repeat the steps for the second one above the first.
Now your drying rack is ready to use!
Want to see it in action? Watch the full step-by-step video by @Wood By Wright How To it makes the whole project super easy to follow!
Common Mistakes to Avoid When Building
Even simple DIY projects can go off track if you’re not paying close attention. Some common mistakes to watch out for when building your rack:
- Not measuring twice: Inaccurate measurements lead to misaligned parts that don’t fit together properly.
- Drilling crooked holes: This can cause dowels to tilt or not fit at all.
- Skipping clamps when drilling: Clamping your wood keeps everything steady and improves accuracy.
- Forgetting to dry-fit: Always test fit your pieces before gluing to catch alignment issues early.
- Not finding wall studs: Mounting a rack without anchoring it to studs can make it fall later.
Avoiding these mistakes helps your project go smoothly. Take your time, follow each step, and you’ll save yourself from frustrating fixes later on.
Conclusion
Making your own drying rack might seem tricky at first, but I promise- it’s totally doable.
With just a few tools and some simple steps, you can build something that actually makes laundry easier. I loved how this project turned out, and I use my rack all the time.
It keeps my space neat, and I don’t have to drape clothes over chairs anymore.
If you’re like me and want something that’s both useful and nice to look at, this is a great weekend project to try. You don’t have to be an expert woodworker.
Just take your time, follow each step, and double-check your work as you go. I hope this guide helps you feel ready and excited to build your own.
Give it a try. I think you’ll be proud of what you make. Once it’s up on your wall, you’ll wonder how you ever did laundry without it!