
DIY raised garden bed projects became my go-to solution when gardening in the ground stopped working for me.
If you want a cleaner, more controlled way to grow plants, this guide is for you. I shared everything so you can build with confidence, even if this is your first time.
A raised garden bed is simply a contained planting area built above ground.
You build a frame, add layered soil, and grow in better conditions with fewer weeds and less strain.
In this article, you’ll learn the full process from start to finish. Also, what tools to gather, how to build a sturdy frame, and how to layer the bed so roots grow strong.
I have also shared common mistakes to avoid, tips from other gardeners, and easy ways to keep your soil healthy over time.
Choosing the Right Location for Your DIY Raised Garden Bed
Choosing the right spot for your raised garden bed helps plants grow better from the start.
Place the bed where it gets at least 6 to 8 hours of sunlight each day, since most vegetables need steady light. Pick an area with good drainage so water does not pool after rain.
Avoid low spots where soil stays wet for long periods. Keep the bed close to a water source to make watering easier and more consistent.
The ground should be fairly level to prevent soil from shifting over time.
Also, make sure the location is easy to reach from all sides so planting, watering, and harvesting feel simple.
A well-chosen spot saves time, reduces plant stress, and helps your raised bed stay productive throughout the growing season without extra effort.
Tools and Materials You Will Need
Having these items on hand makes the process smoother and helps avoid delays. Each tool plays a simple role in keeping your build straight, secure, and easy to manage.
- Measuring tape
- Drill or screwdriver
- Hand saw or circular saw
- Level
- Hammer
- Work gloves
- Untreated wood boards
- Wood screws or exterior screws
- Corner brackets or braces (optional)
- Cardboard or newspaper
- Dry leaves or straw
- Compost
- Topsoil or garden soil
- Mulch for the top layer
How to Build and Layer a DIY Raised Garden Bed Frame?
Building a raised garden bed frame is just the start. Proper layering controls drainage, soil health, and how well plants grow.
Step 1: Remove Existing Plants
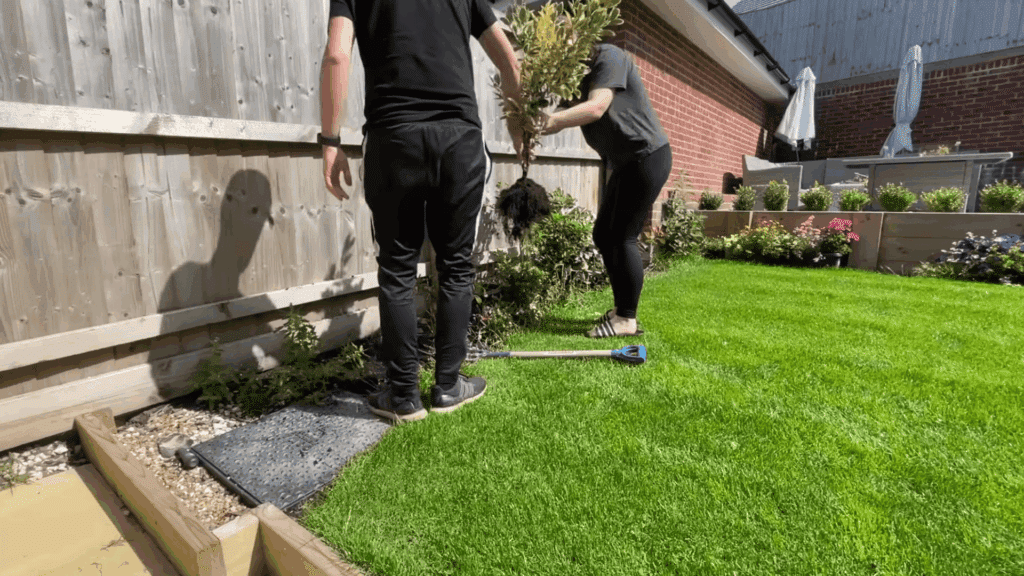
The first step is clearing the existing flower bed so the area is ready to work. A garden fork is used to loosen the soil around each plant, which makes it easier to lift them without damaging the roots.
Larger plants are kept to reuse later, while smaller seasonal plants are removed.
Taking time here keeps the soil workable and prevents root damage.
Once everything is cleared, the bed surface is visible, making it easier to measure, dig, and place the raised bed frame accurately.
Step 2: Mark out the Raised Bed Area
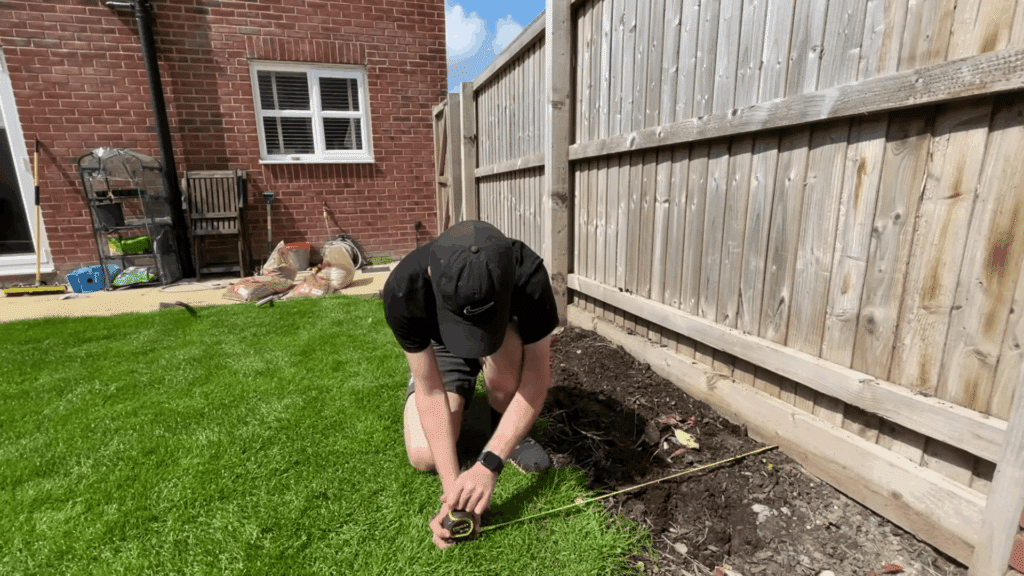
After clearing the space, the next step is marking where the raised bed will sit.
A string line is used to outline the exact boundaries, helping visualize the final size and position. Measurements are checked carefully to allow for the thickness of the sleepers on all sides.
This step helps avoid alignment issues later and ensures the bed fits well within the space.
Clearly marking the area also makes digging and frame placement more accurate and much easier to manage.
Step 3: Dig a Drainage Trench

Once the layout is marked, a shallow trench is dug around the full perimeter of the bed. The trench is slightly wider than the sleepers to allow room for drainage material.
This space is designed to be filled with gravel, so the wooden frame does not sit directly on soil.
Adding this trench helps water drain away from the base, reduces moisture buildup, and supports the frame evenly, which improves stability and helps extend the life of the raised bed.
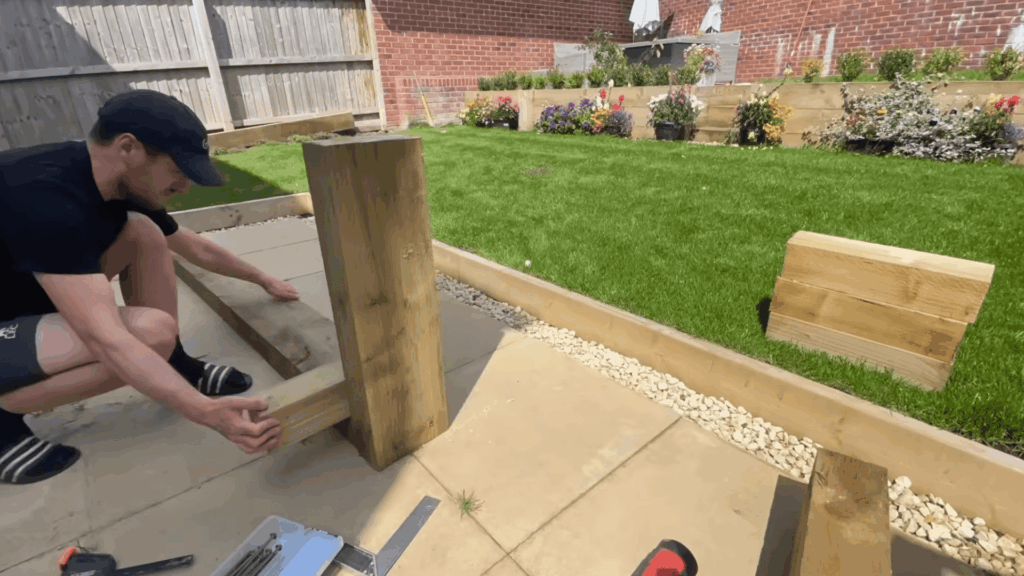
Step 4: Cut Sleepers and Support Posts
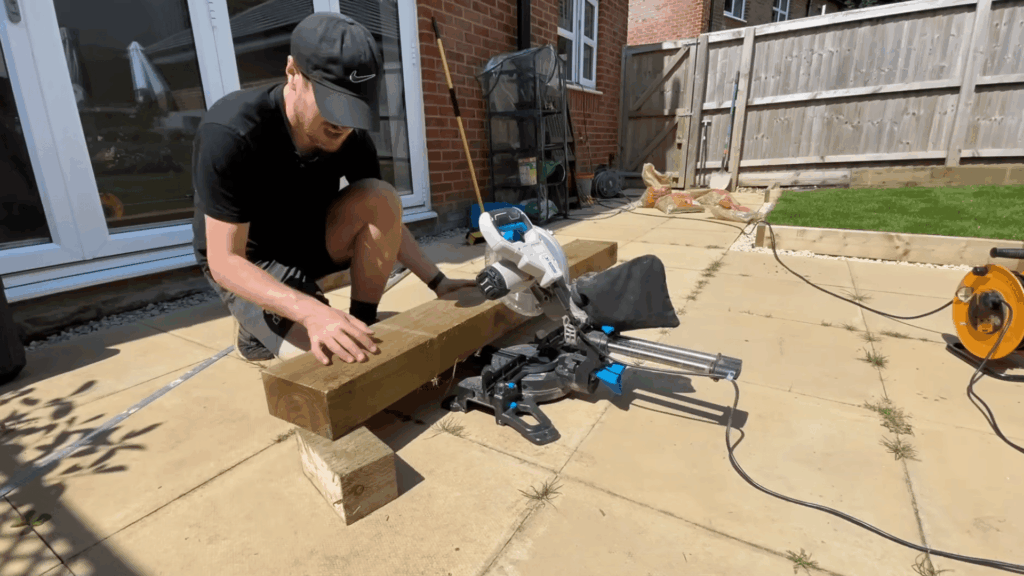
With the layout set, the sleepers and support posts are measured and cut to size.
Each piece is checked several times before cutting to make sure the frame fits together properly. One sleeper is shortened to fit the available space near the fence, while posts are prepared for the inside corners.
Because sleepers are heavy and awkward to handle, this step takes time and effort.
Careful cutting here helps the frame stay square and makes assembly easier later.
Step 5: Treat All Cut Wood Ends
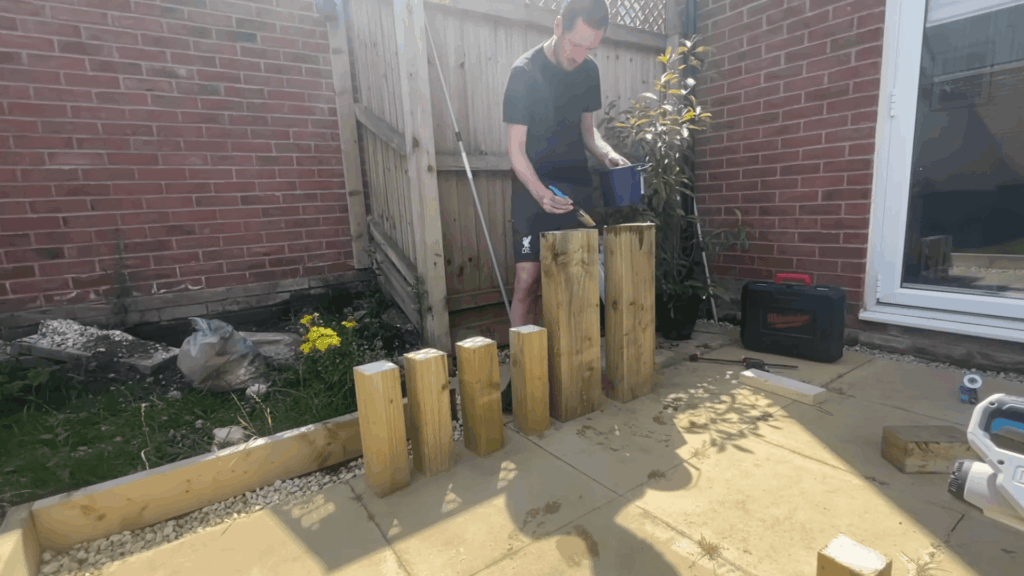
After cutting, all exposed ends of the wood are treated with a wood preservative.
Even treated sleepers need extra protection where cuts are made, as these areas are more likely to absorb moisture. Applying treatment helps slow down rot and wear over time.
The wood is left out to dry fully before assembly begins.
This extra step may seem small, but it plays a big role in helping the raised bed last longer once it is filled with soil.
Step 6: Assemble the Bottom Frame Layer
The next step is putting together the bottom frame of the raised bed. The sleepers are laid out on a flat surface so the joints line up correctly.
Clamps are used to hold the wood steady while long screws secure the corners.
Working on a level surface helps keep the frame square and strong. Once assembled, the full frame is carefully moved into position.
This part takes effort because of the weight, but a solid base makes the rest of the build much easier.
Step 7: Level the Frame and Add Gravel

Before securing the frame, gravel is placed along the trench where the sleepers will rest.
The frame is then set in position and checked carefully for any uneven areas. Stones are packed underneath low spots to help bring the frame level on all sides.
This process spreads the weight evenly across the base and allows water to drain away from the wood.
Spending extra time leveling at this stage helps prevent movement later and keeps the raised bed stable once it is filled with soil and plants.
Step 8: Build the Top Layer
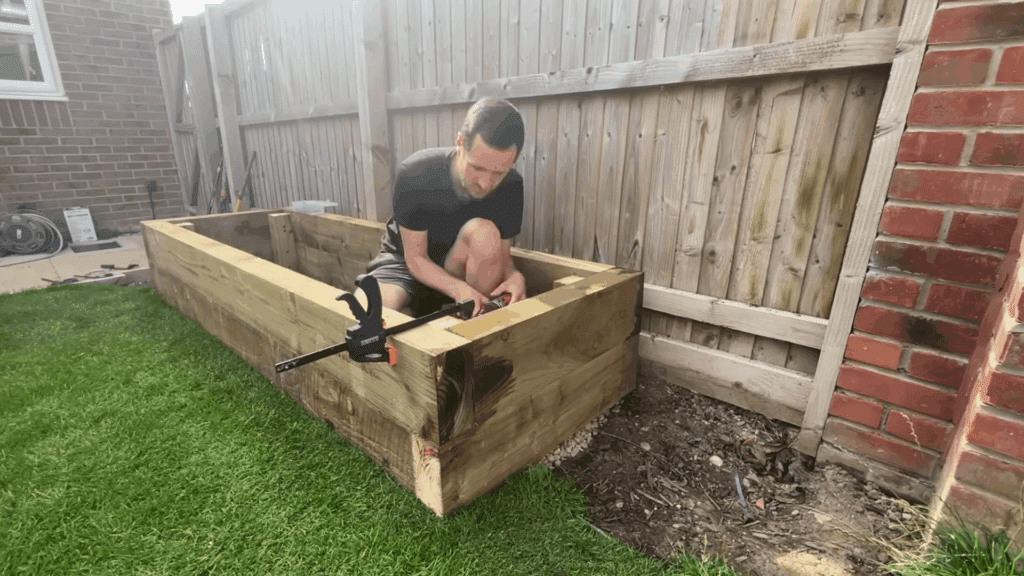
With the base level secured, the second layer of sleepers is added to increase the bed’s height.
Each sleeper is positioned carefully and checked for fit before fixing. Internal support posts connect the top layer to the base, helping keep the structure straight and firm.
Clamps are used to hold pieces steady while screws are driven in.
Taking time to measure and adjust ensures the corners stay square and the sleepers sit flush, creating a strong and balanced frame.
Step 9: Protect the Inside Walls
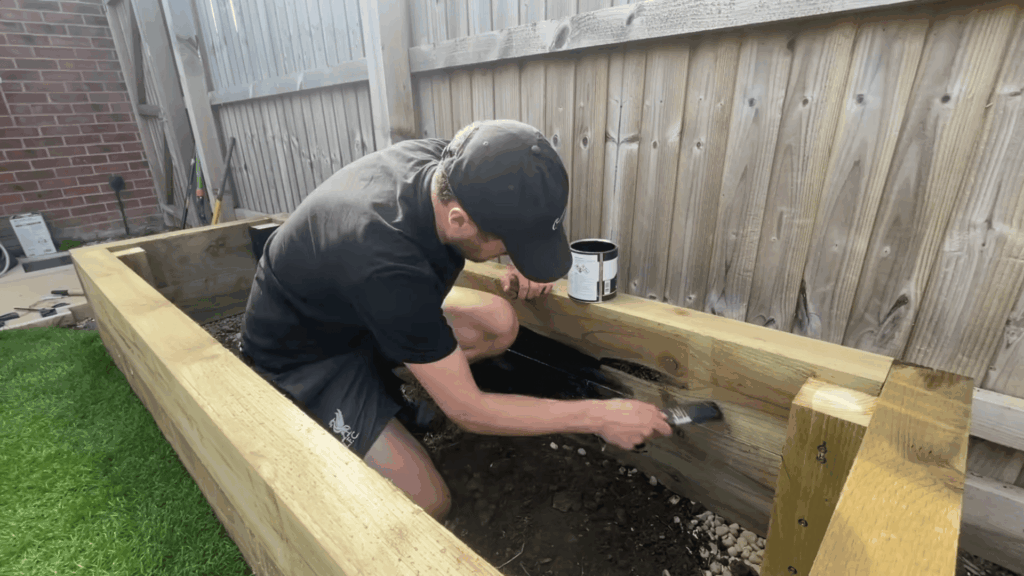
Before any soil is added, the inside walls of the raised bed are coated with black bitumen paint to help protect the wood.
This layer acts as a barrier against constant moisture from the soil, which can cause damage over time.
The paint is thick and sticky, so it takes patience to spread it evenly with a brush. Every interior surface that will touch soil is covered.
While this step will not prevent wear completely, it helps slow deterioration and extends the overall life of the raised bed.
Step 10: Layer the Raised Bed Fill
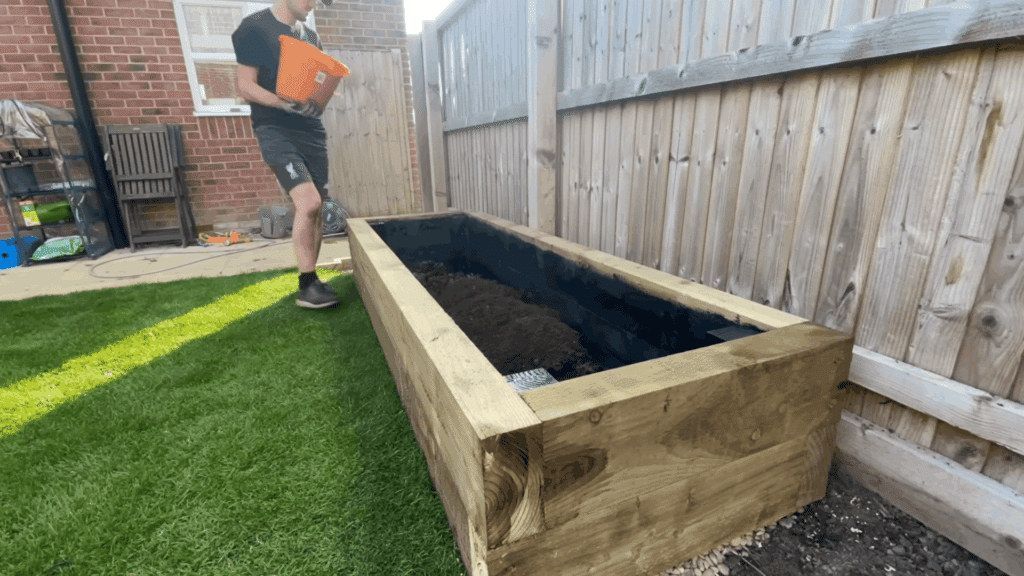
The raised bed is filled using a layered approach to make better use of the space.
Grass clippings are added first to form the base layer, which will slowly break down and add organic matter over time. This also helps reduce how much soil is needed.
Compost and topsoil are then added on top to fill the remaining depth of the bed.
The soil is spread evenly and lightly leveled to create a smooth surface, making it ready for planting and healthy root development.
Step 11: Replant and Finish
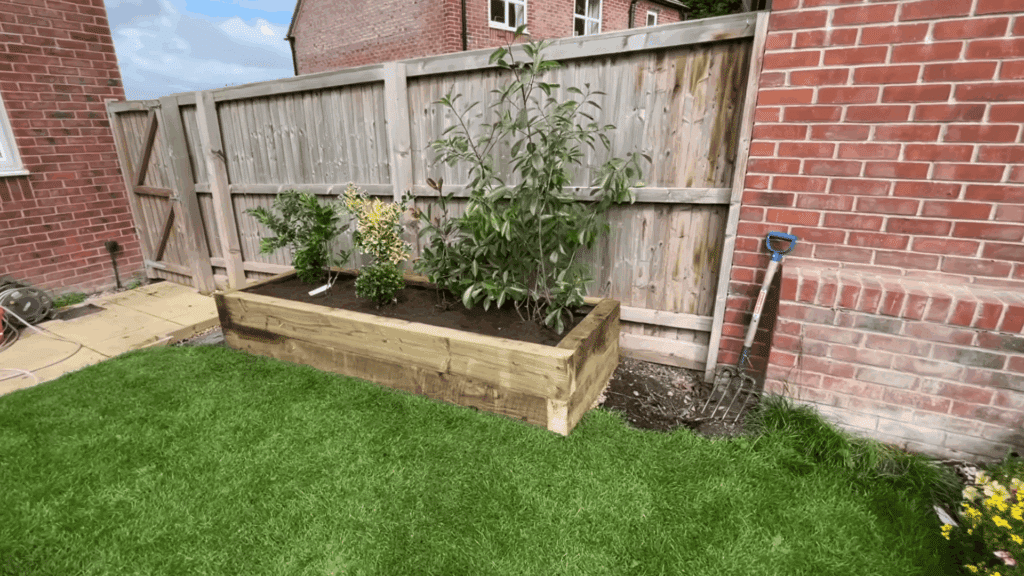
Once the bed is fully filled, the saved plants are placed back into their new positions.
Taller plants are set closer to the fence so they can fill the space and offer better coverage as they grow. Each plant is gently settled into the soil, then topped with extra compost to support early root growth.
After planting, the soil surface is smoothed and checked for level.
With planting finished, the raised garden bed is complete and ready for healthy growth in the coming growing season.
This tutorial is based on a helpful video by NoviceGardener. You can check out the original video on their YouTube channel here or watch it below.
Layering Tips Shared by Gardeners Online
Gardeners online on Reddit often agree that raised bed layering does not need to be complicated. One common tip is to mix soil and compost together instead of creating strict layers.
Many experienced gardeners say plants grow best when roots can move freely through a consistent soil mix.
Some still add a light organic base, like leaves or green waste, mainly to hold moisture and save on soil, not to create hard layers.
Another helpful tip is to skip wood chips or mulch inside the bed since they break down slowly and can block roots.
Gardeners also suggest checking with your city for free compost or mulch made from yard waste. This keeps costs low and improves soil quality.
Overall, the shared advice is simple: focus on good soil, keep it loose, and avoid overthinking the process.
Why Layering a Raised Garden Bed Matters?
Layering is more than filling a box with soil. It affects how water moves, how roots grow, and how healthy your plants stay.
1. Improves Drainage and Prevents Water Buildup
Proper layering helps water move through the bed instead of sitting at the bottom. When excess water drains well, roots stay healthy and are less likely to rot.
Lower layers made from coarse or organic materials create space for water to flow, especially after heavy rain.
This setup keeps soil from becoming compacted and allows air to reach plant roots.
Over time, good drainage also helps maintain soil balance and reduces the risk of mold, pests, and plant stress caused by soggy conditions.
2. Supports Strong Root Growth
Layered beds give roots room to grow down and spread out naturally. Softer materials at the base make it easier for roots to push through, while nutrient-rich layers above provide steady feeding.
This structure helps plants anchor better, making them stronger against wind and weather.
Healthy root systems also absorb water and nutrients more efficiently.
As layers break down over time, they continue to improve soil texture, helping roots grow deeper and stay strong throughout the growing season.
3. Builds Healthier Soil Over Time
Each layer in a raised bed plays a role in improving soil quality. Organic materials slowly break down and add nutrients back into the soil.
This natural process feeds beneficial microbes that help plants grow better.
As the layers settle, they create loose, rich soil that holds moisture without becoming heavy. Over time, this reduces the need for frequent soil replacement and fertilizers.
A well-layered bed becomes easier to maintain and more productive with each growing season.
Common Mistakes to Avoid when Layering
Small missteps can affect plant growth more than expected. Being aware of these issues helps prevent soil and drainage problems later.
- Using treated wood, plastic sheets, or non-organic fillers
- Skipping the base layer that helps with drainage
- Packing layers too tightly, which blocks airflow
- Adding too much fresh compost at once
- Ignoring soil depth needs for deeper-root plants
- Forgetting to water layers as you build the bed
Conclusion
Building and layering a raised garden bed the right way gives you more than a place to plant. You get better soil, healthier roots, fewer weeds, and a setup that is easier to manage season after season.
When you take time to build a solid frame and layer with purpose, your plants reward you with steady growth and better harvests.
If you are new to this, start small and keep it simple. One bed is enough to learn what works in your space.
Each season teaches you something new, and that is part of the fun.
Growing your own food feels rewarding in a way store trips never will. If you have built a raised bed or plan to start one, share your experience in the comments below.