
Caulking your bathtub may seem tricky at first, but it’s actually a simple DIY task anyone can handle. If you notice cracks, gaps, or old peeling caulk around your tub, it’s a clear sign it needs attention.
Learning how to caulk a tub helps prevent water leaks, stops mold from forming, and keeps your bathroom looking fresh and clean.
You don’t need fancy tools or expert skills to get started. With the right materials and a step-by-step approach, you can achieve smooth, professional-looking results at home.
In this guide, you’ll find easy instructions along with a helpful video tutorial so you can follow each step visually. Even beginners can complete this project with confidence.
Why Caulking Your Tub Is Important
Caulking may seem like a small detail, but it plays a big role in protecting your bathroom. It seals the gap between the tub and the wall, stopping water from leaking behind surfaces.
Without proper caulk, moisture can build up, leading to mold, mildew, and even damage to your walls or floors.
Fresh caulk also makes your bathtub look neat and well-maintained. Over time, old caulk can crack, peel, or turn dark, which makes your bathroom look worn out.
By learning how to caulk a tub, you’re not just improving the look; you’re also helping your bathroom last longer and stay safe from water damage.
It also saves you money by avoiding costly repairs later.
Step-by-Step: How to Caulk a Tub
Follow these simple steps to get a clean, smooth finish while caulking your tub. Each step is easy to follow, even if you’re doing this for the first time.
Materials Required
Before you begin, gather all the tools and supplies you’ll need. Having everything ready will make the job faster and easier.
Step 1: Clean and Dry the Surface
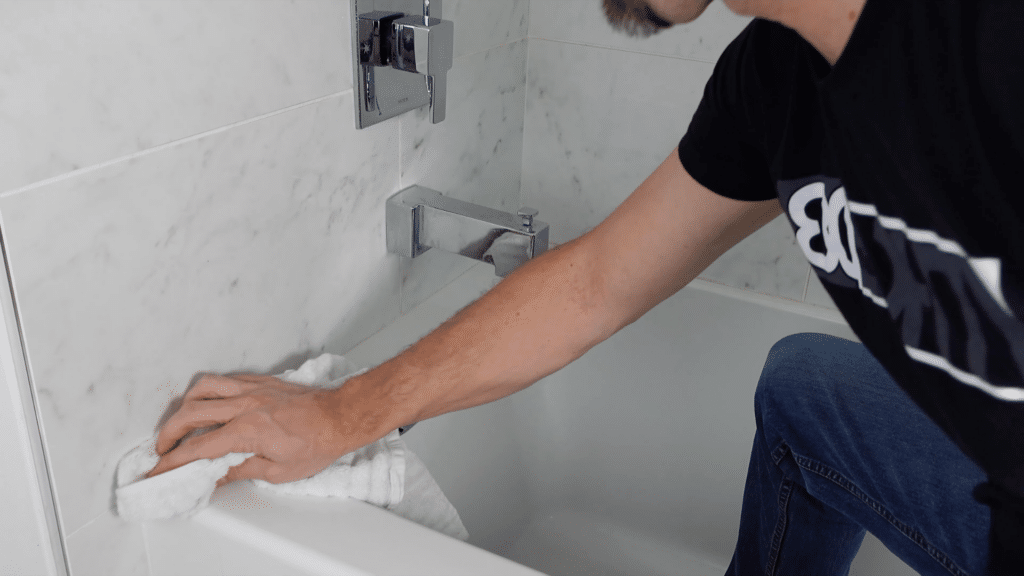
Before applying caulk, make sure the surface is completely clean and dry. Dirt, soap residue, or moisture can stop the caulk from sticking properly.
Wipe down the tub edges, corners, and joints using a cloth and cleaner. Then let everything dry fully. This step is very important because good adhesion depends on it.
Identify all areas that need caulking, including edges, corners, floor joints, and around fixtures where water can enter
Planning these spots before starting helps prevent leaks and ensures full protection for your bathroom
Step 2: Apply Caulk with Steady Pressure
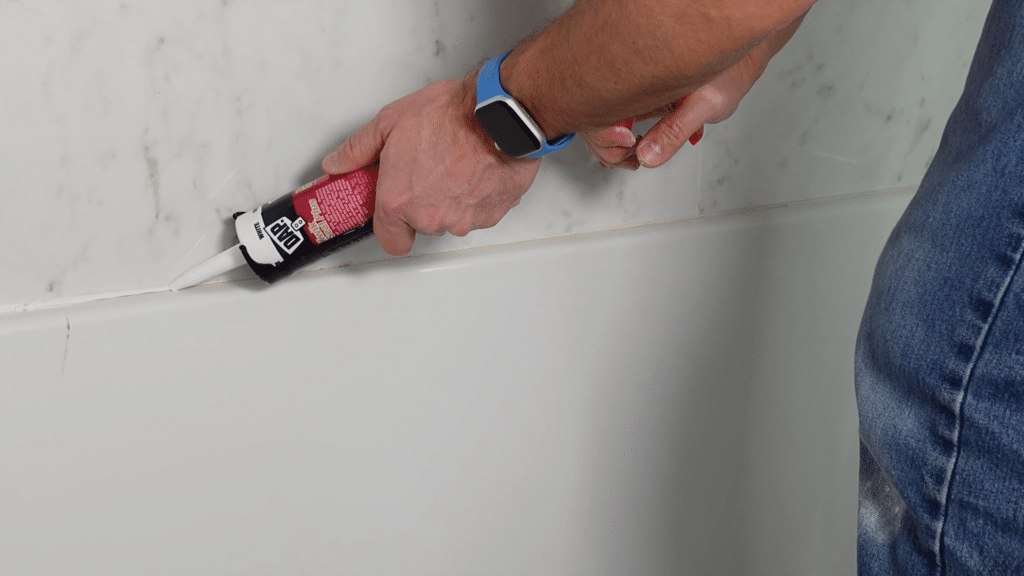
Now it’s time to apply the caulk. Hold the caulking gun at a slight angle and gently squeeze the trigger. Move slowly along the surface while keeping even pressure.
This helps create a smooth, consistent caulk line. It may feel tricky at first, but take your time. Try not to rush, as uneven pressure can cause gaps or messy lines.
Remember, this step takes a bit of practice. Focus on keeping your hand steady and moving at a steady pace to get the best results.
Step 3: Smooth the Caulk Line
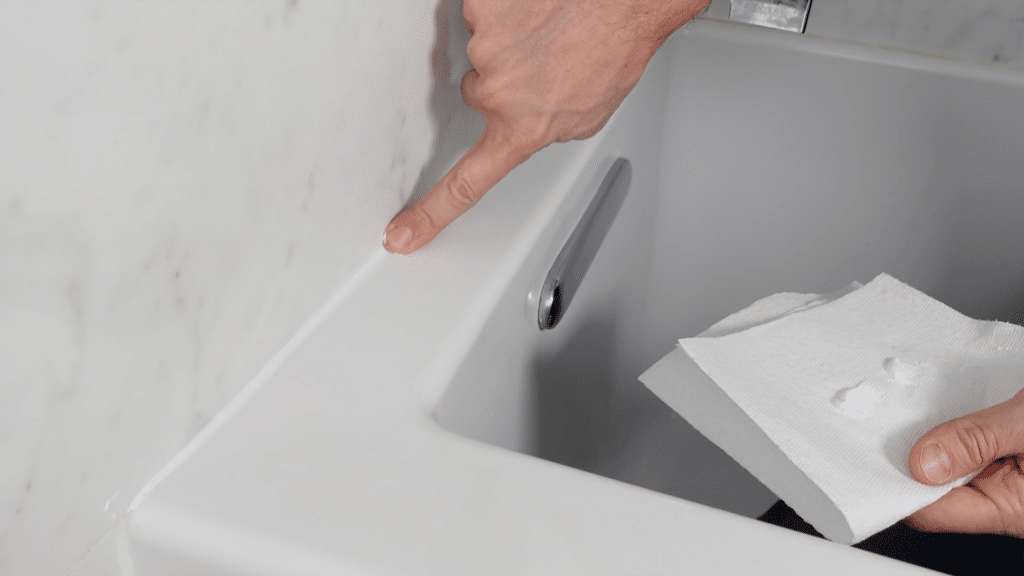
Once the caulk is applied, use your finger to smooth it out. Gently run your finger along the bead of caulk while applying light pressure.
This pushes the caulk deeper into the gap, giving it a clean finish. Keep paper towels nearby to wipe off excess caulk from your fingers.
If there’s too much caulk, press slightly harder as you move along. Start with light pressure and increase as needed. This step helps improve both the look and effectiveness of the seal.
Step 4: Use the Right Caulk for Special Areas
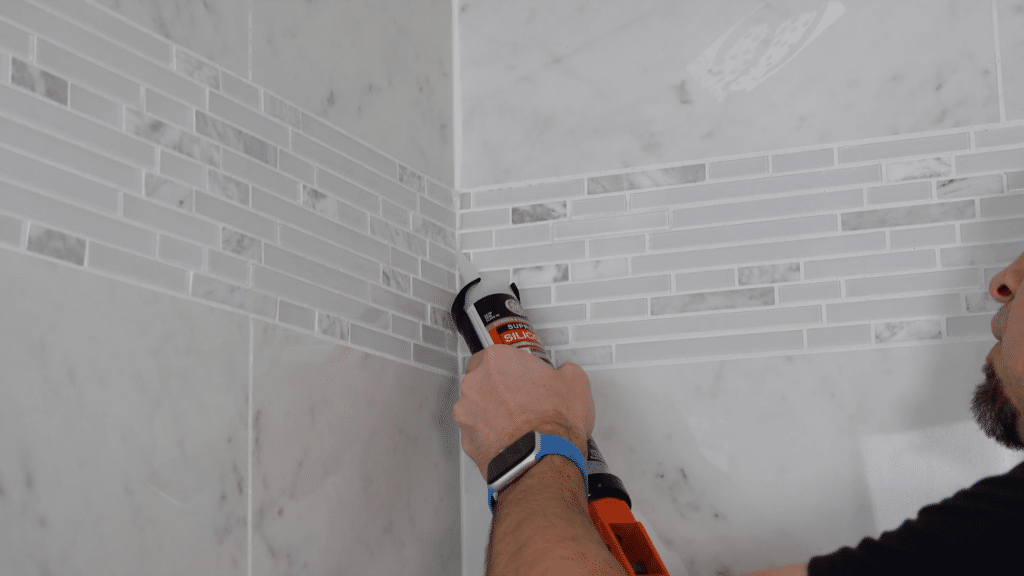
If your tub has glass tiles or decorative surfaces, choose the right type of caulk. Clear silicone works best for glass because it blends in and avoids visible streaks.
White caulk can leave marks and make the area look messy. Also, check for niches or built-in shelves in your shower.
These areas need caulking, too, especially along the bottom edges where water can collect. Paying attention to these small details helps prevent hidden leaks and keeps your bathroom looking clean and polished.
Step 5: Let the Caulk Dry Properly
After finishing, the most important step is to let the caulk dry completely. Avoid using the tub or exposing it to water during this time.
If it gets wet too soon, the caulk can come off, and you’ll have to redo the work. Drying time usually takes about 24 hours, depending on the product.
Also, seal your caulk tube properly after use to prevent it from drying out. Giving enough time for curing ensures a strong, long-lasting seal that protects your tub from leaks.
For a better understanding of each step, watching the full process on the YouTube channel Reluctant DIYers can be very helpful. Check the video tutorial to see how each step is done clearly
Best Type of Caulk for Bathtubs
Choosing the right caulk helps create a strong, waterproof seal that lasts longer. The right option will protect your tub from leaks and mold.
| Types | Best Use | Key Benefit |
|---|---|---|
| Silicone Caulk | Bathrooms | Waterproof & mold-resistant |
| Acrylic Caulk | Light use | Easy to apply |
| Siliconized Acrylic | DIY projects | Flexible & simple to use |
| Mold-Resistant Caulk | Wet areas | Prevents mildew |
| Polyurethane Caulk | Heavy-duty use | Strong and durable |
Silicone caulk is the best choice for most bathtubs.
Pro Tips for a Clean Finish
Getting a smooth, neat caulk line takes a little care and the right technique. These simple tips will help you achieve a clean, professional look every time.
- Use Painter’s Tape: Apply tape along both sides of the gap to create straight, sharp edges and avoid messy lines
- Cut the Nozzle Properly: Cut the caulk tube tip at a small angle for better control and a thinner, even bead
- Apply Even Pressure: Keep steady pressure on the caulk gun to avoid bumps or gaps in the line
- Smooth immediately: Run your finger or tool right after applying to shape the caulk before it starts drying
- Keep Paper Towels Handy: Wipe excess caulk from your fingers quickly to prevent smudging
- Work in Small Sections: Focus on one section at a time to maintain better control and cleaner results
When Should You Re-Caulk Your Tub?
You should re-caulk your tub when you notice signs that the old seal is no longer working properly. Look for cracks, peeling, or gaps along the edges where the tub meets the wall.
If the caulk looks discolored or has black spots, it may be mold or mildew, which means it’s time to replace it. Water leaks or damp areas around the tub are also clear signs that the seal has failed.
In general, most tubs need re-caulking every few years, depending on use and moisture levels. Checking your caulk regularly helps you catch problems early and avoid bigger repairs later.
It also helps keep your bathroom looking clean and fresh. Ignoring damaged caulk for too long can lead to costly water damage behind the walls.
Maintenance Tips to Keep Your Tub Caulk in Good Shape
Taking a few simple steps to maintain your tub caulk can help extend its life, prevent damage, and keep your bathroom looking clean and well cared for.
| Tip | What to Do | Benefit |
|---|---|---|
| Wipe After Use | Dry tub edges after each use | Reduces moisture buildup |
| Regular Cleaning | Use a mild cleaner regularly | Prevents mold and mildew |
| Avoid Harsh Chemicals | Skip strong or abrasive cleaners | Protects caulk from damage |
| Inspect Often | Check for cracks, gaps, or peeling | Helps catch issues early |
| Fix Small Problems | Repair minor damage quickly | Prevents costly repairs |
| Improve Ventilation | Keep airflow with a fan or a window | Reduces humidity buildup |
| Dry Corners | Focus on joints and tight areas | Stops water from collecting |
Common Mistakes to Avoid
Even a small mistake can ruin the final look and shorten the lifespan of your caulk. Avoid these common errors to achieve a clean, long-lasting result.
- Skipping Surface Cleaning: Applying caulk on dirty or wet surfaces can cause it to peel off quickly
- Using Too Much Caulk: Overapplying makes the line messy and harder to smooth properly
- Not Using Tape: Skipping painter’s tape can lead to uneven and sloppy edges
- Rushing the Application: Moving too fast can create gaps or uneven lines
- Ignoring Dry Time: Using the tub too soon can ruin the seal and force you to redo the job
- Choosing the Wrong Caulk: Using non-waterproof caulk can lead to mold and early damage
Final Thoughts
I hope this guide made caulking your tub feel simple and doable.
Learning how to caulk a tub is a simple skill that can make a big difference in your bathroom. It helps prevent water damage, keeps mold away, and gives your tub a clean, fresh look.
With the right tools and a step-by-step approach, even beginners can handle this task with ease.
Take your time, follow each step carefully, and don’t rush the process. Paying attention to small details, such as cleaning the surface and letting the caulk dry properly, will give you better results.
Once you’re done, you’ll not only improve your bathroom’s appearance but also protect it from future problems. It’s an easy DIY project that saves money and adds value to your home.
With a little practice, you’ll get smoother and cleaner results every time. Soon, this will feel like a quick and simple task you can do whenever needed.
If this helped you, save this guide or share it with someone who might need it!
Frequently Asked Questions
How Long does Bathtub Caulk Typically Last?
Bathtub caulk usually lasts around 3 to 5 years with proper care. Using high-quality silicone and keeping the area clean can help it last longer.
Can You Apply New Caulk Over Old Caulk?
It’s best to remove old caulk before applying a new layer. This ensures better adhesion and a cleaner, longer-lasting finish.
What Temperature is Best for Caulking a Tub?
A moderate temperature between 40°F and 80°F works best. Extreme heat or cold can affect how the caulk sets and dries.
How do You Store Leftover Caulk After Use?
Seal the nozzle tightly with a cap or plastic wrap. This prevents air from drying it out and keeps it usable for later.
Is it Necessary to Ventilate the Bathroom During Caulking?
Yes, good airflow helps reduce fumes and speeds up drying. Open windows or use a fan for better ventilation.