
Want to make your dinner table feel extra special without a lot of effort? Folding a napkin into a rose is a simple trick that really impresses guests.
It adds a beautiful, fancy touch to any meal, whether it’s a holiday dinner, a birthday, or just a regular weeknight.
In this easy guide, I’ll show you exactly how I turn a plain square napkin into a lovely rose shape.
You won’t need anything extra, no special tools or skills, just a napkin and a few minutes of your time.
Even if you’ve never folded a napkin before, don’t worry. This rose fold is beginner-friendly, and with a little practice, you’ll see great results right away.
It’s a fun, creative way to dress up your table and make any meal feel more thoughtful and put together.
So let’s take a simple napkin and turn it into something eye-catching and stylish. You’ll be surprised by how easy it is!
Why Fold a Napkin Into a Rose?
I’ve folded all kinds of napkins over the years, but the rose fold is still my favorite every time.
It makes a big impression right away, and when guests see a rose at their place, they feel like the meal is truly special. It shows that you took a little extra time to make things nice.
What’s great is that it’s simple to do, even if you’re not perfect with folds. The rose shape still looks beautiful.
It works for any event, pick a napkin color that fits your theme. Once it’s folded, the rose holds its shape, so you won’t have to worry about it sliding off the plate.
The best part is how fast it is. After learning the steps, you’ll be able to fold a bunch of them in minutes. It’s an easy trick that adds a big wow factor to your table without taking a lot of time.
Materials You’ll Need
Creating napkin roses is simple and doesn’t require any fancy supplies. With just a few basic items, you’ll be ready to start folding in no time. Here’s what you’ll need:
- Square cloth napkins (cotton or linen)
- A flat surface for folding
- Clean hands
A few helpful tips when picking your napkins:
- Use napkins at least 16″ x 16″
- Choose stiffer fabrics for better shape
- Pick solid colors to highlight folds
- Try starched napkins for easier handling
- Paper napkins can work for practice, but cloth gives the best results.
How to Fold a Napkin Into a Rose?
Turning a flat napkin into a blooming rose might seem like magic, but it’s actually a sequence of simple folds and rolls.
Take your time with each step, and soon you’ll be creating perfect roses without even thinking about it.
1. Lay the Napkin Flat on a Clean Surface
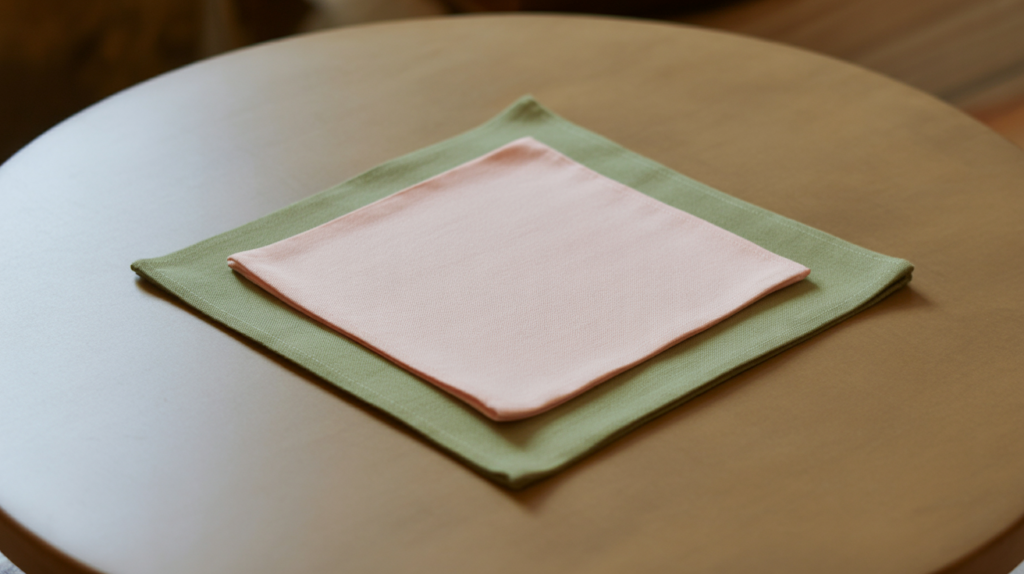
Start by placing your napkin on a clean, flat surface with enough room to spread it out fully. Smooth out any wrinkles with your hands so it lies flat and even.
Make sure the napkin is positioned like a square in front of you, not a diamond. This setup makes the rest of the folding steps much easier to follow.
If your napkin has a decorative or patterned side, turn that side face down. This way, the nice side will show on the outside once you finish your rose.
2. Fold the Napkin Diagonally into a Triangle
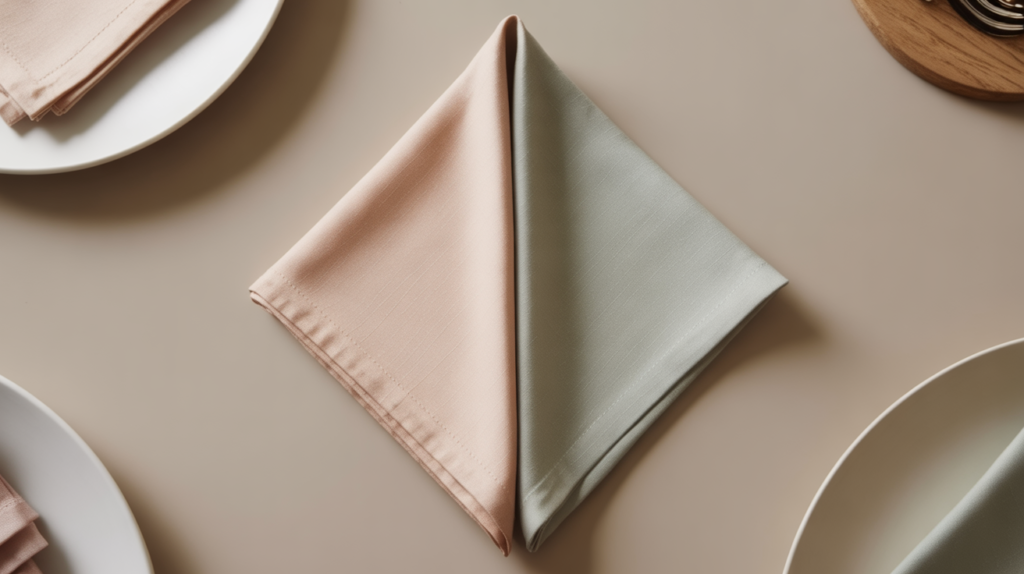
Take one corner of your square napkin and bring it over to the opposite corner to make a large triangle.
Once the corners are lined up, gently press the folded edge with your fingers to create a clean crease. This crease helps the rose hold its shape better.
Make sure the two corners match up as closely as possible. If they’re off now, it might affect the final look of your rose, making it uneven or lopsided when you’re done folding.
3. Roll the Long Edge Toward the Pointed Tip
Place the triangle so the long side is closest to you and the pointed tip is facing away. Starting from the right corner of the long edge, begin to roll the napkin tightly toward the left corner.
Try to keep the roll snug without stretching or pulling the fabric too hard. The tighter the center, the more your rose will look like real petals stacked in the middle.
A loose roll will still work, but may not look as polished or stay in place as easily once finished.
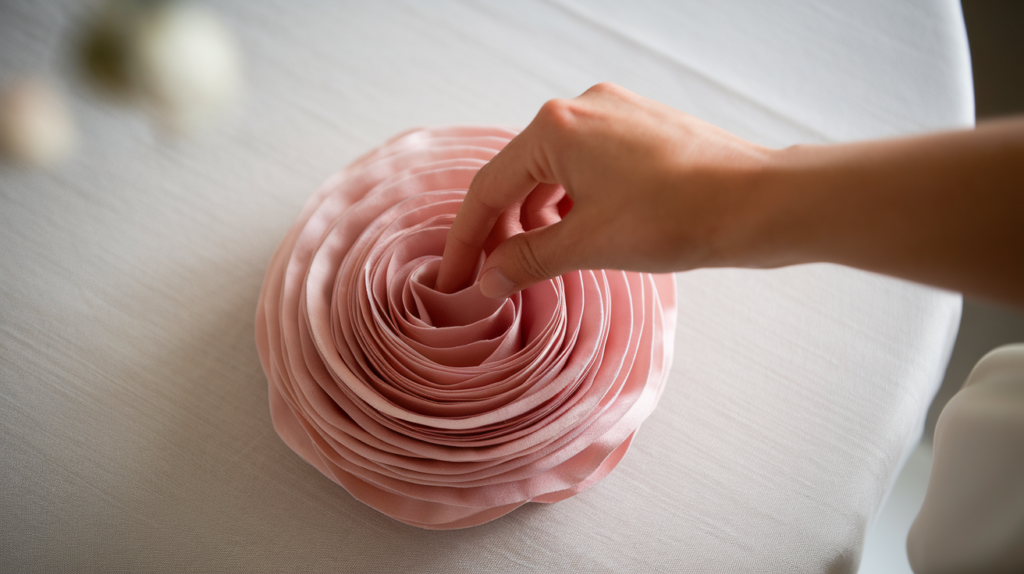
4. Begin Rolling the Napkin into a Spiral
Once you’ve rolled about one-third of the long edge, stop and begin curving the roll upward toward the tip.
You’ll now roll the napkin in a spiral motion, working your way around to form the body of the rose.
The napkin should naturally begin curling into shape. Keep the tension even, not too tight, or it may wrinkle, and not too loose, or it could fall apart.
This spiral gives the rose its layered, petal-like appearance, so take your time and adjust as needed.
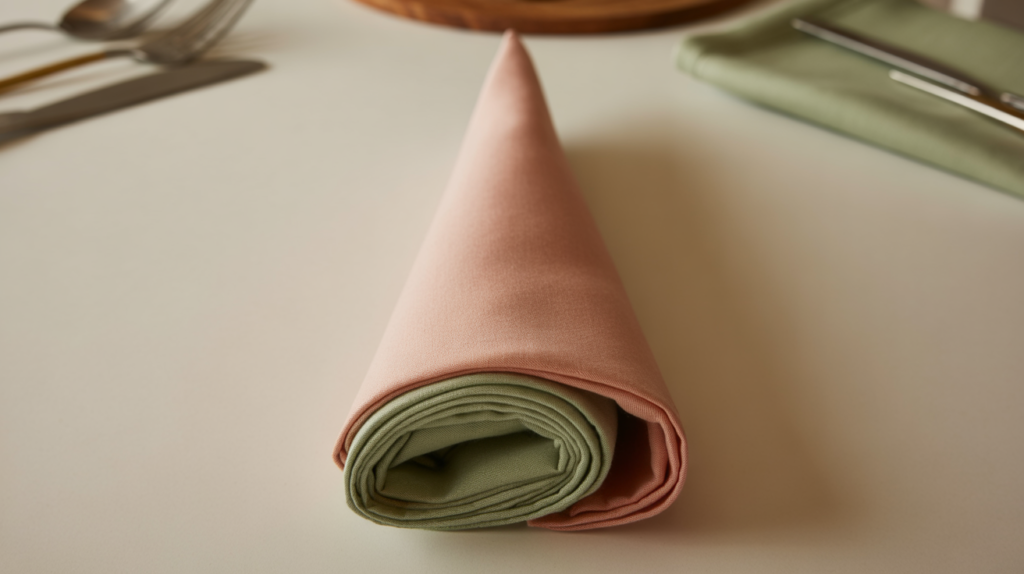
5. Tuck the Loose End Under the Bottom
After you’ve spiraled the napkin all the way to the pointed end, you’ll be left with a small tail. Carefully flip your rose over and tuck this end under the base to hold everything together.
This tucked section becomes the bottom of the rose and helps it stand upright on the table. If the rose feels too loose or too tight, now’s the time to gently fix it. ‘
You can press the center tighter or loosen the roll a little until it looks balanced and stays in place.
6. Adjust the Outer Layer to Look Like Petals
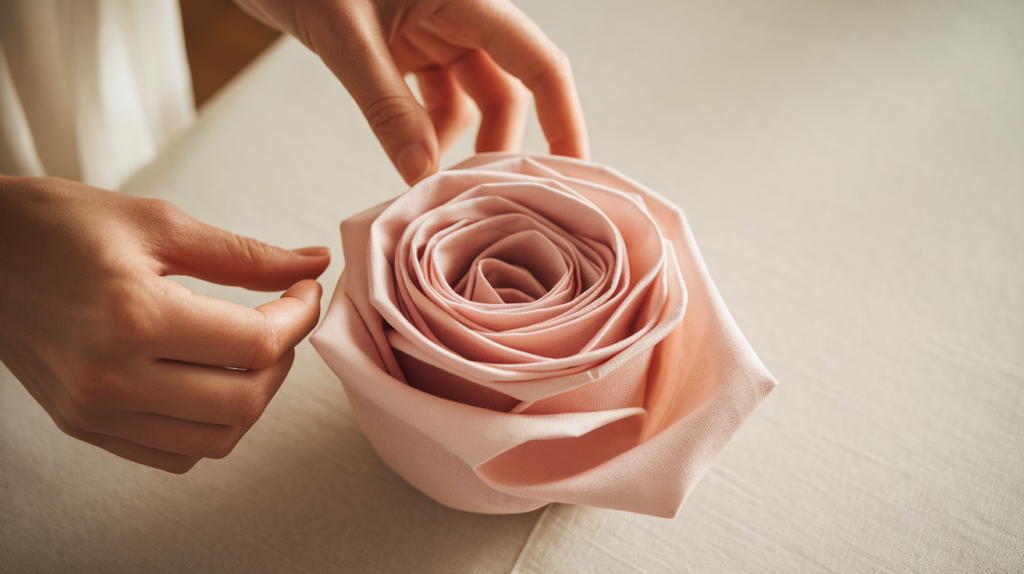
This step adds the finishing touch to your rose. Gently pull the outer edges of the napkin downward and slightly outward to shape them like real rose petals.
If you want your rose to look more open, adjust more layers to create a full bloom. If you like a neater or tighter look, leave the edges mostly curled in.
Don’t worry about being perfect, roses in nature aren’t all the same. The little differences in shape and fold make your napkin rose look more realistic and beautiful.
7. Add a Napkin Ring or Stem
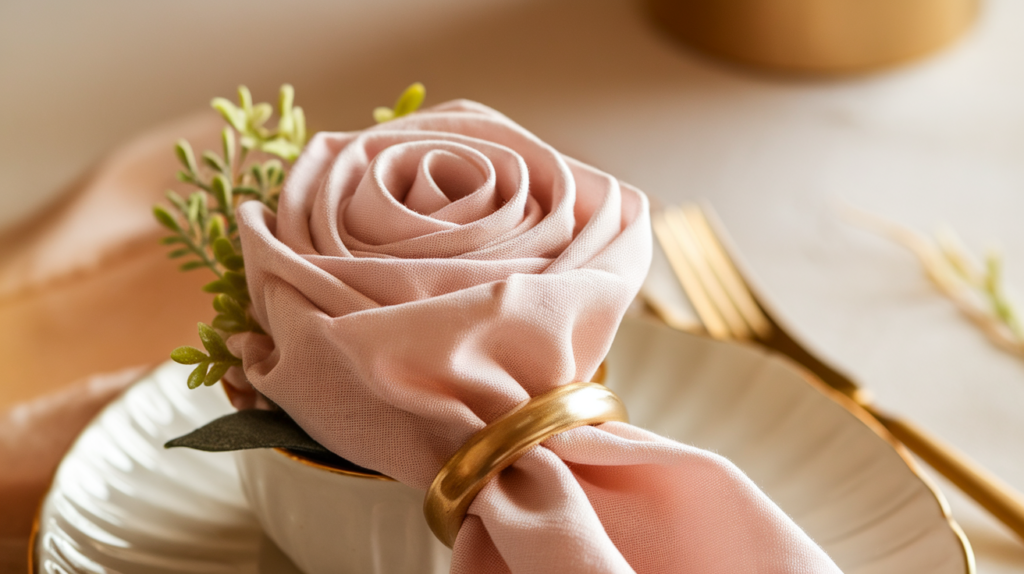
For an extra stylish look, you can slide a napkin ring around the base of your rose to hold everything neatly in place.
It also helps the rose stay upright, especially during meals or events. If you want a natural feel, try tucking in a small fake stem or even a bit of real greenery.
If you’re using the rose as part of a centerpiece, you can also place it in a teacup or small holder.
These simple touches add even more beauty and help your rose keep its shape all night long.
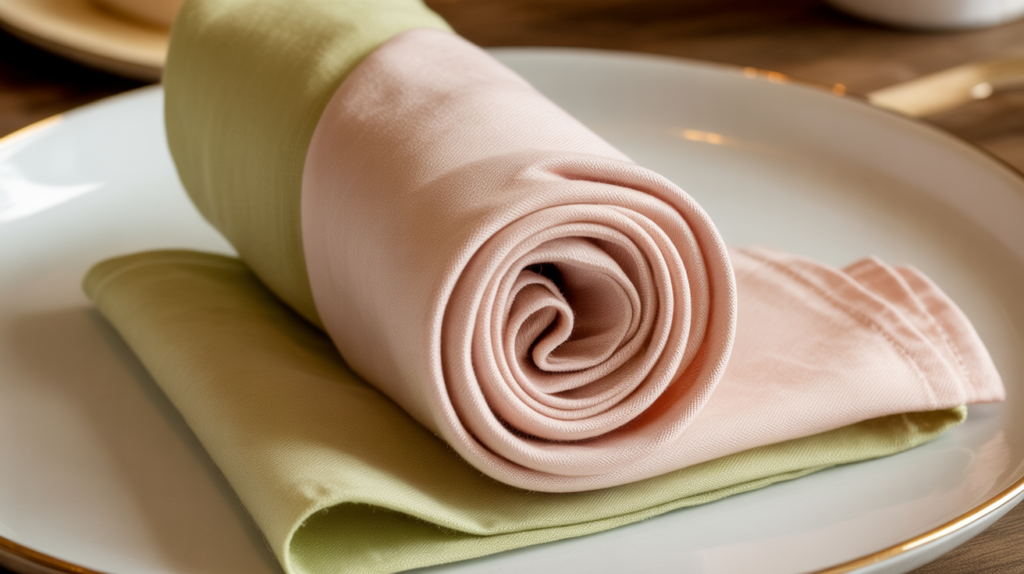
Creative Ways to Display Your Rose Napkins
Now that you’ve learned how to fold a napkin into a rose, it’s time to have some fun showing off your work.
Some of my favorite ways to display rose napkins in a way that’s charming, thoughtful, and eye-catching are:
- Place one rose on each plate to make every seat feel special and elegant.
- Stand them up in water glasses for a fancy, upright look that adds height and interest.
- Line several roses down the center of the table like a floral runner for a dramatic display.
- Use a cupcake stand to stack napkin roses at different heights and create a bouquet effect.
- Match napkin colors to the season or holiday for a coordinated, festive feel.
- Mix napkin roses with real flowers or greenery to create a lovely, low-cost centerpiece.
- Tuck a place card or note between the petals to add a personal, welcoming touch for each guest.
With just a little creativity, you can turn these simple napkin roses into standout decorations that bring warmth and charm to your table.
Try a few of these ideas and see which one you love most!
Conclusion
Mastering the napkin rose fold is one of those small wins that can really elevate your table.
With just a simple square napkin and a few steps, I’ve turned everyday fabric into something eye-catching and thoughtful.
Don’t stress if your first roses aren’t perfect; Practice makes it easier, and even imperfect folds still look beautiful.
Try using different napkin sizes, colors, or fabrics to match your style or dinner theme.
Whether it’s a holiday, a birthday, or just a cozy night in, these little touches can make any meal feel extra special.
Got a favorite fold or want to try something new? Share your photos or questions in the comments; I’d love to see what you create!