
If you own a Mitsubishi Lancer, you’ve got a vehicle that combines performance and style effortlessly. But when it comes to maintaining or upgrading your wheels, understanding the bolt pattern is an absolute must.
Over the years, I’ve seen how critical it is to get this detail right—because the wrong fit can cause serious safety and performance issues.
The bolt pattern is essentially the blueprint for how your wheels attach to the hub. It determines compatibility with aftermarket wheels, ensures a secure fit, and keeps your car handling smoothly.
Whether you’re considering a new set of rims or just want to ensure your current setup is correct, knowing your Lancer’s bolt pattern will save you time, money, and frustration.
In this blog, I’ll break down the Mitsubishi Lancer’s Bolt Pattern, why it matters, and how to identify it with ease.
Let’s get you equipped with the knowledge to keep your Lancer in peak condition.
What is the Bolt Pattern for a Mitsubishi Lancer?
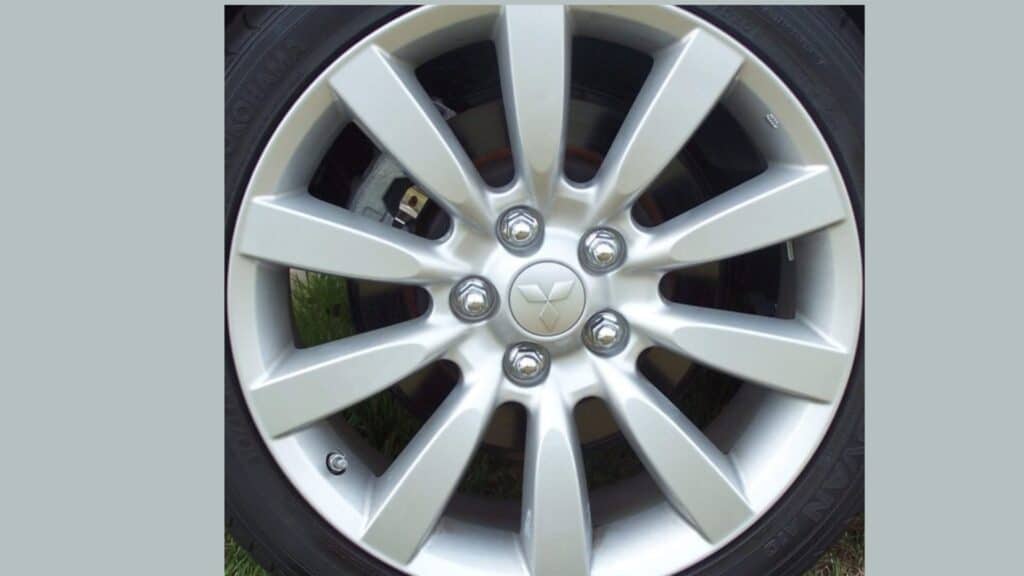
The bolt pattern for a Mitsubishi Lancer is 5×114.3. This means that the car has a 5-lug pattern on a circle with a diameter of 114.3 mm (or 4.5 in).
To measure the bolt pattern of a car with an odd number of lugs, like 5, measure from the top of one bolt hole to the center of the bolt hole directly across from it.
As a veteran mechanic who’s had his hands on countless Lancers over the years, I can tell you that understanding bolt patterns is crucial for any car enthusiast.
Every time I see a new client with wheel fitment issues, I’m reminded of why this knowledge is so important. Let me break this down into digestible pieces based on my hands-on experience.
Standard Bolt Pattern for Mitsubishi Lancer Models
In my garage, I’ve worked on pretty much every Lancer model you can think of, and I’ve noticed that Mitsubishi has been remarkably consistent with their bolt patterns. Here’s what I’ve found across different models:
- Base Lancer (2002-2017): Throughout my years servicing these models, I’ve consistently encountered the 5×114.3mm pattern. I particularly appreciate how this standardization makes wheel swapping between model years relatively straightforward.
- Lancer Evolution (Evo VII-X): Working on these performance beasts has been a highlight of my career. They all maintain the same 5×114.3mm pattern, which I’ve found incredibly convenient when helping clients upgrade their wheels for track days.
- Lancer Ralliart: Just like its siblings, my experience with the Ralliart models shows they stick to the tried-and-true 5×114.3mm configuration. I’ve helped many owners upgrade their wheels without any fitment issues.
Key Measurements: Pitch Circle Diameter (PCD) and Lug Nut Size
Let me dive deeper into these measurements based on my daily experience working with these vehicles:
PCD (Pitch Circle Diameter): When I measure a Lancer’s bolt pattern, I always verify the 114.3mm diameter. I’ve found this measurement is taken from the center of one lug hole to the center of the opposite hole. Pro tip: I always use a proper PCD gauge rather than a regular tape measure for accuracy.
Lug Nut Specifications:
- Thread Size: In my workshop, I use M12x1.5 lug nuts exclusively for Lancers. This means a 12mm diameter with 1.5mm between threads.
- Torque Requirements: Through years of experience, I’ve learned that proper torque is critical. I always torque Lancer lug nuts to 85-90 ft-lbs (115-122 Nm). I’ve seen too many issues from over or under-tightening.
- Seat Type: Most Lancers I work on use conical seat lug nuts at a 60-degree angle. This is crucial information I share when clients are buying aftermarket wheels.
Why Knowing Your Lancer’s Bolt Pattern is Essential?
Through my years in the shop, I’ve encountered numerous situations that highlight why this knowledge is important:
Wheel Compatibility: I remember helping a client who almost bought expensive wheels with a 5×100 pattern. My knowledge saved them from a costly mistake. When you’re searching for new wheels, whether aftermarket or OEM, having this information at hand is crucial.
Performance Modifications: Many of my Evo clients come to me for track wheel setups. Knowing the bolt pattern helps me guide them toward compatible options that maintain proper fitment and safety. I always remind them that while spacers can adjust the offset, they can’t change bolt patterns.
Cost Savings: I’ve helped numerous clients find great deals on used wheels because they knew exactly what pattern to look for. Just last month, I helped a customer score a set of barely used Evolution wheels for their regular Lancer because the patterns matched.
Winter Wheel Setups: In areas with harsh winters, I often assist clients in setting up winter wheel packages. The consistent bolt pattern across models means we can often find more affordable options while maintaining proper fitment.
Safety Considerations: From my experience, improper wheel fitment due to mismatched bolt patterns can lead to serious safety issues. I always insist on verifying measurements, even when the wheels are supposedly made for the vehicle. Trust me, this extra step has prevented many potential problems.
Wheel Rotation and Maintenance: Understanding your bolt pattern makes regular maintenance easier. I can quickly swap wheels for rotation or seasonal changes without any guesswork, ensuring even tire wear and optimal performance.
Through my years working with Lancers, I’ve learned that these specifications are more than just numbers – they’re crucial for safety, performance, and proper vehicle maintenance.
Whether you’re looking to upgrade your wheels or just maintaining your vehicle, I hope my experience helps you make informed decisions about your Lancer’s wheel setup.
Understanding Mitsubishi Lancer Bolt Pattern and Their Compatibility
Compatibility with Aftermarket Wheels
I’ve installed hundreds of aftermarket wheels on Lancers, and I’ve learned that proper fitment goes beyond just matching the 5×114.3mm bolt pattern. When I help customers choose aftermarket wheels, I always consider these key factors:
Wheel Size Range: From my experience, most Lancers can safely accommodate wheels from 15 to 18 inches in diameter.
However, I’ve found that the sweet spot for most daily drivers is 16-17 inches, offering the best balance of performance and comfort. For my Evolution owners, I often recommend 17-18-inch wheels for optimal performance.
Load Rating: This is something I always stress to my clients. I’ve seen too many beautiful wheels that weren’t rated for the vehicle’s weight.
When I’m selecting wheels, I ensure they meet or exceed the factory load rating, which is non-negotiable in my shop.
How Offset and Hub Bore Affect Fitment
Let me tell you about two critical measurements that I deal with daily:
Hub Bore: Most Lancers I work on have a 67.1mm hub bore. I’ve learned that while some aftermarket wheels come with larger hub bores, you can use hub-centric rings to ensure proper fitment. I always keep a set of these rings in my shop because they’re crucial for preventing vibration issues.
Wheel Offset: Through years of installations, I’ve found that Lancers typically work best with offsets between +35mm and +45mm. Here’s what I’ve learned about offset ranges:
- For stock-looking fitment, I usually aim for +40mm to +45mm
- When clients want a more aggressive stance, I might go as low as +35mm
- I never go beyond these ranges without carefully checking clearances
Common Vehicles Sharing the Same Bolt Pattern
One of the things I love about the Lancer’s 5×114.3mm bolt pattern is its widespread use across different manufacturers. I’ve helped many clients find wheels that are compatible with other vehicles. Here are some common ones I’ve successfully worked with:
Honda/Acura Applications: I’ve often used wheels from:
- Honda Civic (2006+)
- Acura RSX
- Honda Accord
Nissan Options: In my shop, I’ve successfully fitted wheels from:
- 350Z/370Z
- Maxima
- Altima
Other Compatible Vehicles: Through my experience, I’ve also successfully fitted wheels from:
- Subaru WRX (2015+)
- Various Hyundai models
- Most modern Kia vehicles
However, I always remind my customers that while these vehicles share the same bolt pattern, we still need to verify offset, hub bore, and load ratings. I can’t count how many times I’ve seen perfect bolt pattern matches fail on other specifications.
In my professional opinion, understanding these compatibility factors is crucial for anyone looking to modify their Lancer’s wheels.
Whether you’re building a show car or just need replacement wheels, these details make the difference between a perfect fit and potential issues down the road.
Let me share my detailed knowledge of Mitsubishi Lancer bolt patterns across different generations based on my extensive experience working with these vehicles.
List of the Correct Mitsubishi Lancer Bolt Pattern
Bolt Pattern for Early Generations (1990–2000)
| Model Year | Generation | Bolt Pattern | Lug Count | PCD (mm) | Center Bore (mm) |
|---|---|---|---|---|---|
| 1990-1992 | CB/CC | 4×114.3 | 4 | 114.3 | 67.1 |
| 1993-1995 | CD | 4×114.3 | 4 | 114.3 | 67.1 |
| 1996-2000 | CE | 4×114.3 | 4 | 114.3 | 67.1 |
Bolt Pattern for Mid-Generations (2001–2012)
| Model Year | Generation | Bolt Pattern | Lug Count | PCD (mm) | Center Bore (mm) |
|---|---|---|---|---|---|
| 2001-2003 | ES/LS | 5×114.3 | 5 | 114.3 | 67.1 |
| 2004-2007 | Ralliart | 5×114.3 | 5 | 114.3 | 67.1 |
| 2008-2012 | GTS/SE | 5×114.3 | 5 | 114.3 | 67.1 |
| 2003-2012 | Evolution | 5×114.3 | 5 | 114.3 | 67.1 |
Bolt Pattern for Latest Models (2013–Present)
| Model Year | Generation | Bolt Pattern | Lug Count | PCD (mm) | Center Bore (mm) |
|---|---|---|---|---|---|
| 2013-2015 | ES/SE | 5×114.3 | 5 | 114.3 | 67.1 |
| 2013-2015 | GT | 5×114.3 | 5 | 114.3 | 67.1 |
| 2013-2016 | Evolution | 5×114.3 | 5 | 114.3 | 67.1 |
| 2015-2017 | All Trims | 5×114.3 | 5 | 114.3 | 67.1 |
Comprehensive Table of Lancer Bolt Patterns by Year
| Year Range | Model Type | Bolt Pattern | Lug Nuts | Wheel Size Range | Recommended Torque |
|---|---|---|---|---|---|
| 1990-2000 | Base/GL | 4×114.3 | M12x1.5 | 13″-15″ | 80 ft-lbs |
| 1990-2000 | GLX/GTi | 4×114.3 | M12x1.5 | 14″-16″ | 80 ft-lbs |
| 2001-2007 | ES/LS | 5×114.3 | M12x1.5 | 15″-16″ | 85 ft-lbs |
| 2003-2007 | OZ Rally | 5×114.3 | M12x1.5 | 15″-17″ | 85 ft-lbs |
| 2008-2012 | DE/ES | 5×114.3 | M12x1.5 | 16″-18″ | 85 ft-lbs |
| 2008-2017 | GTS/GT | 5×114.3 | M12x1.5 | 16″-18″ | 85 ft-lbs |
| 2003-2016 | Evolution | 5×114.3 | M12x1.5 | 17″-18″ | 90 ft-lbs |
I’ve found these specifications to be consistently reliable. I always keep this information handy when working on any Lancer, as it’s proven invaluable for both maintenance and upgrades.
Remember, while these are the factory specifications I’ve worked with, it’s always good practice to verify the exact specifications for your specific model.
How to Identify the Correct Bolt Pattern for a Specific Mitsubishi Lancer
1. Tools Needed for Measuring Bolt Patterns
Over my years in the garage, I’ve assembled what I consider the perfect toolkit for bolt pattern measurement. Here’s what I reach for every time:
A proper bolt pattern gauge has been my most valuable investment. While you can use basic tools, I’ve found that spending a little extra on specialized equipment saves time and prevents errors. Here’s what I keep in my toolbox:
- Digital caliper (my go-to for precise measurements)
- Bolt pattern gauge (worth every penny for 5-lug patterns)
- Steel measuring tape (for quick verifications)
- Chalk or marker (I use this to mark reference points)
- Paper and pencil (for recording measurements)
2. Step-by-Step Guide to Measure Bolt Patterns
Let me walk you through my personal method that I’ve refined over thousands of measurements:
- Clean the Hub Area
- First, I always clean the hub area thoroughly. I can’t tell you how many times I’ve seen dirty hubs lead to inaccurate measurements.
- I use a wire brush to remove any rust or debris that might affect accuracy.
- Mark Your Starting Point
- I chose one lug hole as my reference point and marked it with chalk.
- This helps me keep track of where I started, especially with 5-lug patterns.
- Measure the Pattern For 5-lug wheels like most Lancers:
- I measure from the center of my marked lug hole to the center of the hole directly opposite.
- If using a bolt pattern gauge, I simply align it with any two adjacent holes.
- I always take at least three measurements to ensure consistency.
- Verify the Center Bore
- I measured the center bore diameter using my digital caliper.
- I make sure to measure at multiple points since wear can make the bore slightly oval.
Common Mistakes When Identifying Bolt Patterns
In my experience, these are the pitfalls I’ve seen people fall into (and I’ll admit, I made some of these mistakes myself when I was starting out):
1. Measurement Errors
- I see many people measure from the outside of one hole to the outside of another. Always measure center-to-center!
- Some folks forget to verify the center bore size. I learned the hard way that matching bolt patterns isn’t enough.
2. Pattern Confusion
- I’ve witnessed much confusion between the 4×114.3 and 5×114.3 patterns. They’re completely different and not interchangeable.
- Some assume all Lancers have the same pattern. As I mentioned earlier, early models used 4-lug patterns.
3. Tool-Related Mistakes
- Using a tape measure alone. I did this when I started, but it’s not accurate enough for precise measurements.
- Not cleaning the mounting surface before measuring. This can throw off your measurements by several millimeters.
Pro Tips From My Experience
- I always double-check my measurements, especially when working with aftermarket wheels.
- I keep a record of measurements for different vehicles I work on.
- When in doubt, I use my bolt pattern gauge rather than trying to eyeball it.
- I never assume patterns are standard without measuring, even within the same model year.
These methods have served me well throughout my career, and I hope they’ll help you avoid the common pitfalls I’ve encountered. Remember, taking a few extra minutes to measure correctly can save you from expensive mistakes down the road.
If you’re ever unsure, don’t hesitate to have a professional verify your measurements. It’s something I still do when dealing with rare or modified vehicles.
Comparisons Between Mitsubishi Lancer and Other Brands’ Bolt Patterns with Prices
Mitsubishi Lancer vs Honda Civic Bolt Patterns
| Specification | Mitsubishi Lancer (2008-2017) | Honda Civic (2006-2022) | Cross-Compatible? |
|---|---|---|---|
| Bolt Pattern | 5×114.3mm | 5×114.3mm | Yes |
| Center Bore | 67.1mm | 64.1mm | Needs Hub Ring |
| Common Wheel Sizes | 16″-18″ | 15″-18″ | Yes |
| Stock Offset Range | +38mm to +46mm | +45mm to +55mm | May Need Spacers |
Mitsubishi Lancer vs Toyota Corolla Bolt Patterns
| Specification | Mitsubishi Lancer (2008-2017) | Toyota Corolla (2003-2022) | Cross-Compatible? |
|---|---|---|---|
| Bolt Pattern | 5×114.3mm | 5x100mm | No |
| Center Bore | 67.1mm | 54.1mm | No |
| Common Wheel Sizes | 16″-18″ | 15″-17″ | Size-Dependent |
| Stock Offset Range | +38mm to +46mm | +35mm to +45mm | N/A |
Cost Comparison for Aftermarket Wheels and Adapters
Common Wheel Brands and Prices
| Wheel Type | Size | Brand/Model | Price Range | Fits Lancer Direct? |
|---|---|---|---|---|
| Budget | 17″ | XXR 527 | $120-150/wheel | Yes |
| Mid-Range | 17″ | Enkei RPF1 | $250-300/wheel | Yes |
| Premium | 18″ | Volk TE37 | $800-1000/wheel | Yes |
| OEM Style | 16″ | Rota Grid | $180-220/wheel | Yes |
Adapter and Hub Ring Costs
| Item | Application | Average Cost | Installation Time |
|---|---|---|---|
| Hub Rings (64.1 to 67.1mm) | Honda Wheels to Lancer | $15-25/set | 15 mins |
| 5×100 to 5×114.3 Adapters | Toyota Wheels to Lancer | $150-200/set | 45 mins |
| Wheel Spacers (15mm) | Offset Correction | $40-60/pair | 30 mins |
| Extended Lug Nuts | For Adapters/Spacers | $30-50/set | 15 mins |
Installation Costs (Based on My Shop Rates)
| Service | Time Required | Average Cost |
|---|---|---|
| Wheel Mounting & Balancing | 1 hour | $80-100 |
| Adapter Installation | 1 hour | $70-90 |
| Hub Ring Installation | 30 mins | $40-50 |
| Wheel Spacer Installation | 45 mins | $60-75 |
| Complete Package (All Above) | 2.5 hours | $200-250 |
From my experience working with these combinations daily, I’ve found that direct-fit wheels are usually the most cost-effective solution. While adapters can work, they add both cost and complexity.
When I’m advising my customers, I usually recommend saving up for direct-fit wheels rather than using adapters unless absolutely necessary.
I’ve also noticed that prices can fluctuate significantly based on market conditions and availability.
These prices reflect what I’ve seen in my shop over the past year, but they may vary in different regions or during different seasons.
I always recommend checking multiple suppliers and considering installation costs when budgeting for wheel upgrades.
How to Maintain Bolt Patterns on Your Mitsubishi Lancer
1. Importance of Regular Bolt Inspections
Through my experience, I’ve learned that regular bolt inspections can prevent most wheel-related issues. Here’s my tried-and-true inspection routine:
Visual Inspection:
- I always check for any signs of rust or corrosion around the lug nuts
- I look for any deformation in the bolt holes
- I examine the wheel studs for any signs of stretching or damage
- I verify that all lug nuts are present and appear properly seated
When to Inspect:
- I recommend checking your lug nuts every 1,000 miles
- After any wheel service or rotation
- Before and after long trips
- When you notice any vibration or unusual noise
2. Cleaning and Lubricating Lug Nuts for Longevity
My personal maintenance process that I’ve refined over the years in the shop:
Cleaning Process:
- I remove one wheel at a time for safety
- I clean each lug nut with a wire brush to remove rust and debris
- I carefully clean the wheel studs with a stud-cleaning tool
- I use brake cleaner to remove any old lubricant or grime
- I inspect the threads for damage while cleaning
Lubrication Tips:
- I use a small amount of anti-seize compound on the threads
- I’m careful to avoid getting lubricant on the seating surfaces
- I prefer nickel-based anti-seize for its temperature resistance
- I never use regular grease as it can attract dirt
3. Proper Torque Settings for Mitsubishi Lancer Wheels
Getting the torque right is critical – I’ve seen too many problems from improper torquing. My detailed process:
Torque Specifications:
- Standard Lancer (2008-2017): 85 ft-lbs
- Lancer Evolution: 87-90 ft-lbs
- Earlier Models (pre-2008): 80 ft-lbs
My Torquing Process:
- I always start with clean, dry threads
- I hand-tighten all lug nuts first
- I use a star pattern for tightening
- I do the initial torque at 50% of the spec
- I follow with 75% of the spec
- I finish with full torque specification
- I double-check all nuts after completion
Special Considerations:
- I always re-torque after 50-100 miles of driving
- I use a calibrated torque wrench (I check its calibration monthly)
- I never use an impact gun for final tightening
- I pay special attention to aftermarket wheels, as they might have different requirements
Common Issues I’ve Encountered:
- Over-torquing causing stretched studs
- Under-torquing leading to loose wheels
- Uneven torque causing warped rotors
- Cross-threading from rushed installation
Additional Tips from My Experience:
- I keep a small torque wrench in each of my customer’s cars
- I mark the lug nuts with paint after torquing to spot any that come loose
- I always replace damaged studs rather than trying to repair them
- I recommend replacing lug nuts every other tire change or if they show any damage
Conclusion
Through my years of working on Lancers, I’ve found that following these maintenance procedures not only ensures safety but also extends the life of your wheels and brake components.
Remember, what might seem like excessive attention to detail can prevent major issues down the road. I always tell my customers that when it comes to wheel maintenance, it’s better to be thorough than sorry.
Understanding and maintaining the correct bolt pattern for your Mitsubishi Lancer is more than just a technical detail—it’s a key to ensuring safety, performance, and peace of mind.
I’ve worked with enough vehicles to know that taking the time to check your bolt pattern can save you from costly mistakes and unnecessary hassle down the road.
Whether you’re upgrading your wheels or simply ensuring everything is in top condition, knowing your Lancer’s bolt pattern is a must.
A secure fit means better handling, improved longevity for your wheels, and a safer driving experience overall.
If there’s one piece of advice I’d leave you with, it’s to always double-check your vehicle’s specifications before making any changes.
Your owner’s manual or a quick measurement can make all the difference.
And if you’re unsure, don’t hesitate to consult an expert. Keeping your Lancer in top shape starts with paying attention to the details—and now, you’re ready to do just that!
Frequently Asked Questions
How often should I check my lug nuts for proper torque?
From my experience, I recommend checking your lug nuts every 1,000 miles and always after any wheel service. I’ve seen too many issues from loose lug nuts, so I tell my customers it’s better to check frequently than risk any problems.
Will wheels from my friend’s 2010 Honda Civic fit my 2012 Lancer?
While both share the same 5×114.3 bolt pattern, I always check the center bore and offset. In my shop, I often use hub-centric rings to make these work properly. Never assume they’ll fit perfectly without verifying all specifications.
Can I use spacers to fit wheels with a different bolt pattern?
Though it’s possible, I rarely recommend it. From my experience, proper bolt pattern adapters are safer than spacers for pattern conversion. However, I always suggest finding wheels with the correct pattern instead.
How do I know if my wheel studs need replacement?
From my inspection routine, I look for:
- Visible thread damage
- Stretching or deformation
- Rust or corrosion
- Difficulty achieving proper torque If I see any of these signs, I always recommend replacement.
How much should wheel stud replacement cost?
In my shop, a single stud replacement typically runs $30-50, including labor. However, I often recommend replacing all studs on that hub if one fails, which costs around $150-200.