
Your wedding bouquet holds more than just flowers – it carries memories of one of life’s most special days. The scent, colors, and arrangement all tell the story of your celebration.
Many brides want to keep this memory alive beyond the wedding day. When kept well, your bouquet can become a daily reminder of your love story and the joy of your wedding.
What if you could wake up to this reminder every morning? In this blog, I’ll show you how to preserve your bouquet and keep it looking beautiful for years to come. This blog will cover:
- Simple at-home methods anyone can try
- Common Mistakes to Avoid When Preserving Flowers
- Creative display ideas for your home
You don’t need special tools or skills, just a little time, care, and creativity to turn your bouquet into something you’ll treasure for years.
When to Start the Preservation Process?
Time matters when saving your wedding bouquet. The sooner you begin, the better your results will be.
I always tell the brides to start within 2-3 days after the wedding. Fresh flowers hold their color and shape much better than wilted ones.
Want the very best outcome? Plan ahead before your wedding day.
Quick tips to keep flowers fresh until preservation:
- Store your bouquet in a cool place (40-42°F is perfect)
- Lightly mist the flowers with water
- Cut stem ends at an angle under running water
- Keep away from fruit (they release gases that speed up wilting)
Don’t worry about handling this yourself! You’ll be busy celebrating—or heading off to your honeymoon.
Remember: your bouquet needs attention while you’re enjoying your first days as newlyweds. A trusted helper can make sure your flowers get the care they need when you can’t be there.
Creative Ways to Preserve Your Wedding Bouquet
These are some wonderful methods to keep your wedding flowers as lasting mementos. I’ve tried many of these myself and helped countless brides save their special bouquets.
1. Press the Flowers in a Book
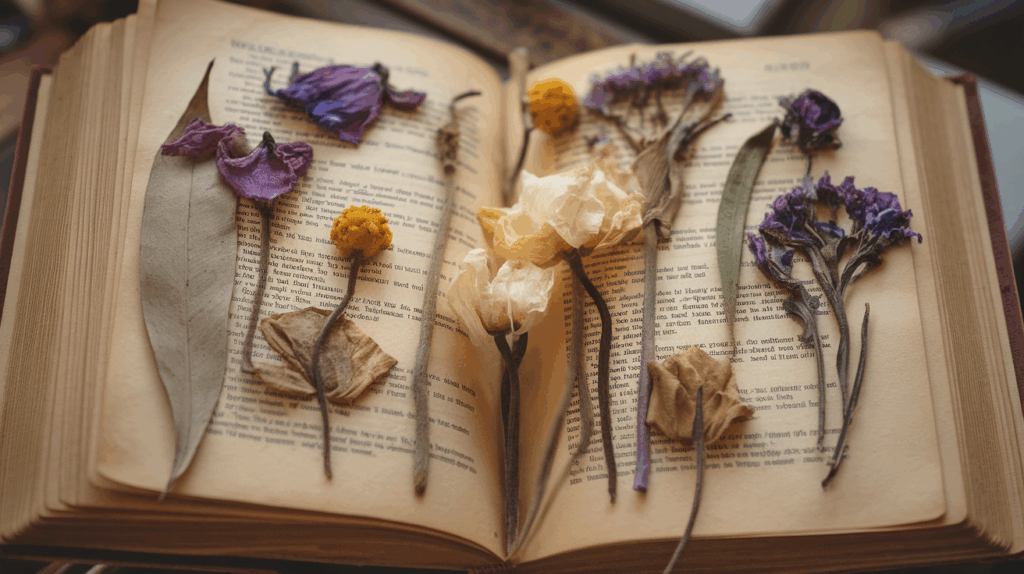
This classic method creates flat, dried flowers that keep their color surprisingly well. I love how pressed flowers capture the delicate details of each petal.
Place your flowers between two sheets of parchment paper inside a heavy book, then stack more books on top.
The process takes about 2-4 weeks, but the results can last for decades when done right.
DIY or Budget Options:
- Use your wedding photo album or guest book for extra meaning
- Try a microwave flower press for same-day results
- Arrange flowers in patterns before pressing to create ready-to-frame art
2. Dry the Bouquet Upside Down

Hanging your bouquet upside down is perhaps the simplest preservation method. The stems stay straight while the petals dry in a naturally curved position.
Hang in a dry, dark closet with good air flow for 2-3 weeks. This technique works best for roses, lavender, baby’s breath, and most sturdy flowers.
DIY or Budget Options:
- Use dental floss to hang from a hanger in your closet
- Spray with hairspray (unscented) when fully dry to add strength
- Add a few drops of essential oil to stems after drying for a subtle scent
3. Use Silica Gel for Drying
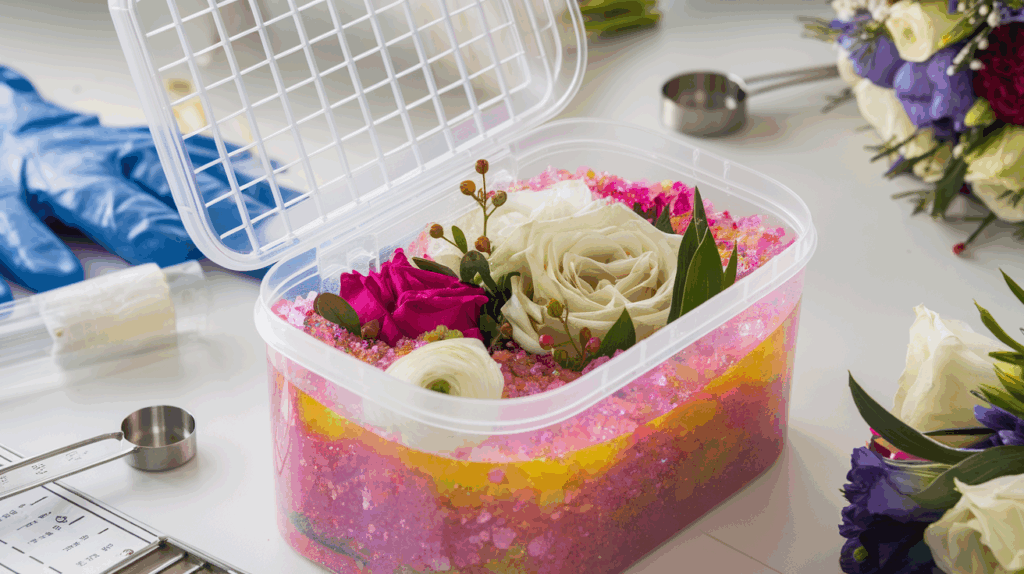
Silica gel drying gives the most lifelike results of any at-home method. The tiny crystals pull moisture from the flowers while helping them hold their shape.
Cover your blooms completely in a container of silica gel and seal for 3-7 days. When done, your flowers will look almost fresh and have much better color than air-drying.
DIY or Budget Options:
- Buy silica gel in bulk at craft stores (much cheaper than small packets)
- Reuse the silica gel by drying it in your oven after each use
- Mix with regular sand (1:1 ratio) to make supplies go further
4. Create a Resin Flower Block
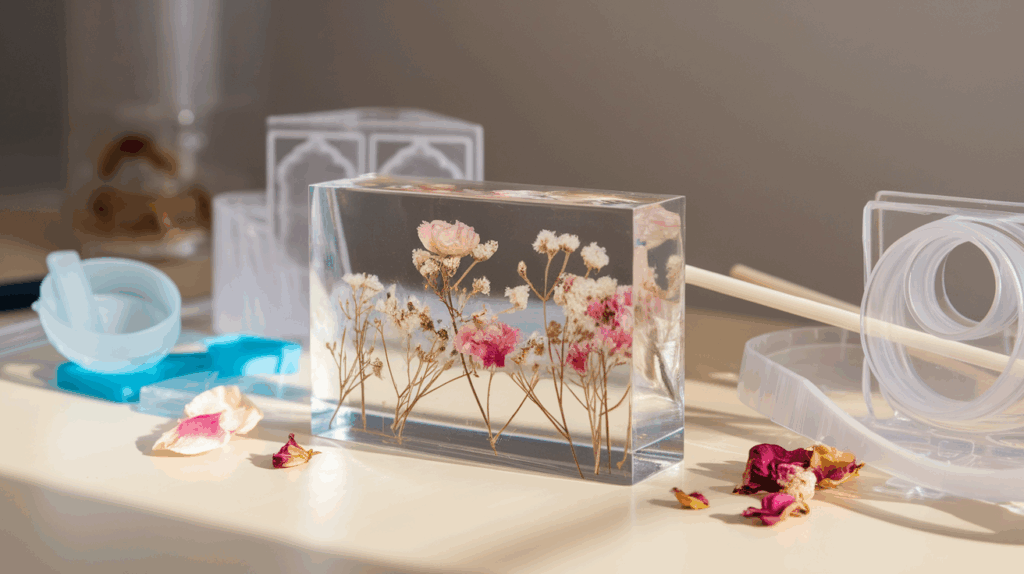
Resin preservation locks your flowers in a clear time capsule. The liquid resin hardens around your blooms, stopping the aging process and creating a beautiful display piece.
I find this method works with whole small flowers or individual petals from larger blooms. The finished piece can serve as a paperweight, desk ornament, or shelf display.
DIY or Budget Options:
- Start with small silicone molds for easier first-time success
- Practice with single flowers before attempting a full arrangement
- Add tiny wedding mementos like confetti or ribbon scraps alongside the flowers
5. Make a Shadow Box Display
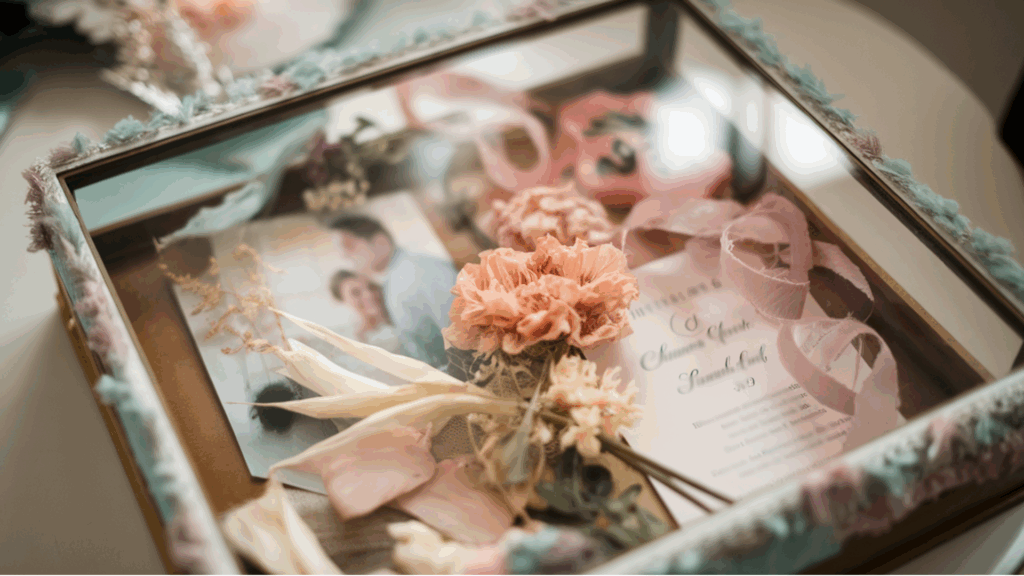
Shadow boxes let you create a three-dimensional memory of your wedding day.
The deep frame gives space for your bouquet alongside other mementos, perhaps your invitation, a photo, or a cake topper.
Flowers should be dried first (using any method) before placing them in the box. The glass front protects while letting you view everything inside.
DIY or Budget Options:
- Use a wine box with a hinged lid instead of buying a shadow box
- Add a background of your wedding colors for extra pop
- Include pressed flowers from your table settings or bridesmaids’ bouquets
6. Store It Under a Glass Cloche or Dome
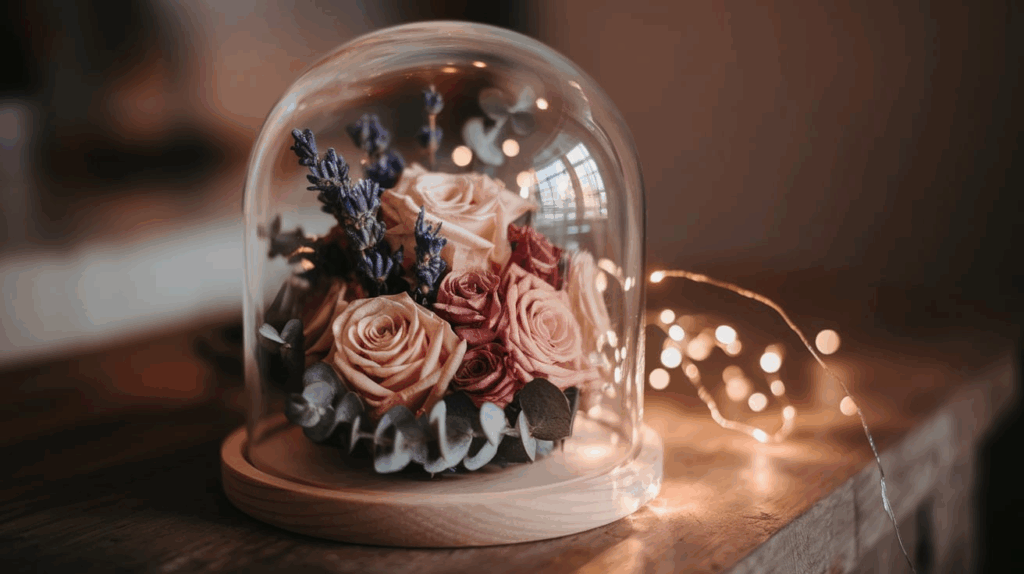
A glass dome creates an eye-catching display that keeps dust away from your preserved flowers. The clear dome makes your bouquet feel like a treasured museum piece.
This works best with bouquets that have been dried using silica gel or freeze-drying to maintain their shape. The sealed environment also helps prevent fading.
DIY or Budget Options:
- Look for glass cake stands with domes at thrift stores
- Use a large mason jar turned upside down for small arrangements
- Add a tiny battery-operated string light inside for a magical glow
7. Turn Flowers Into Jewelry Keepsakes
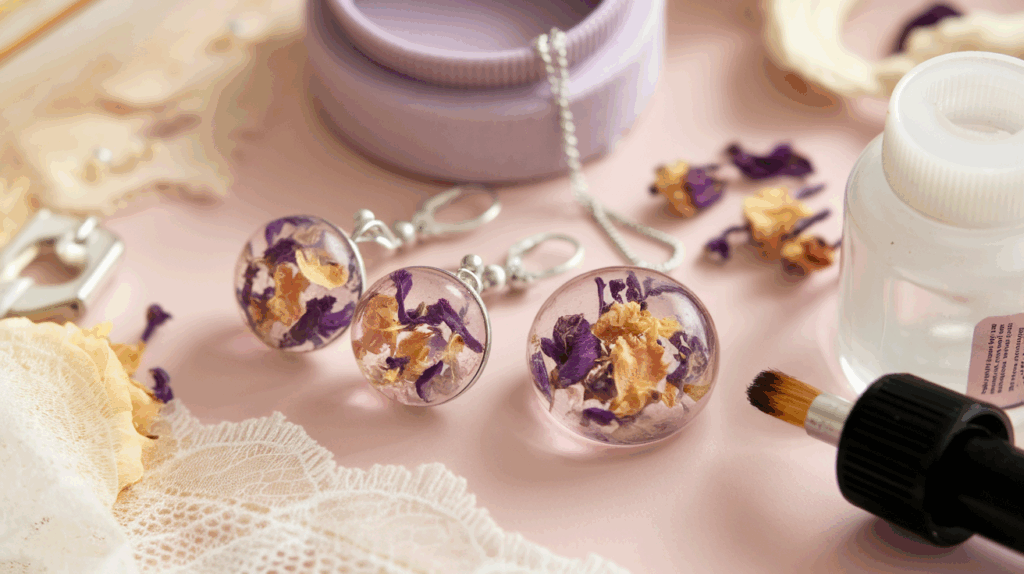
Flower jewelry lets you carry a piece of your wedding day with you anywhere. Small blooms or petals can be sealed in resin pendants, earrings, or bracelets.
I love how this method creates wearable memories you can enjoy daily, rather than a display that stays at home.
DIY or Budget Options:
- Buy pre-made jewelry bezels and fill with tiny dried petals
- Create simple resin earrings with flower petals and resin kits
- Make several pieces to give as gifts to your bridal party
8. Frame the Pressed Flowers as Art
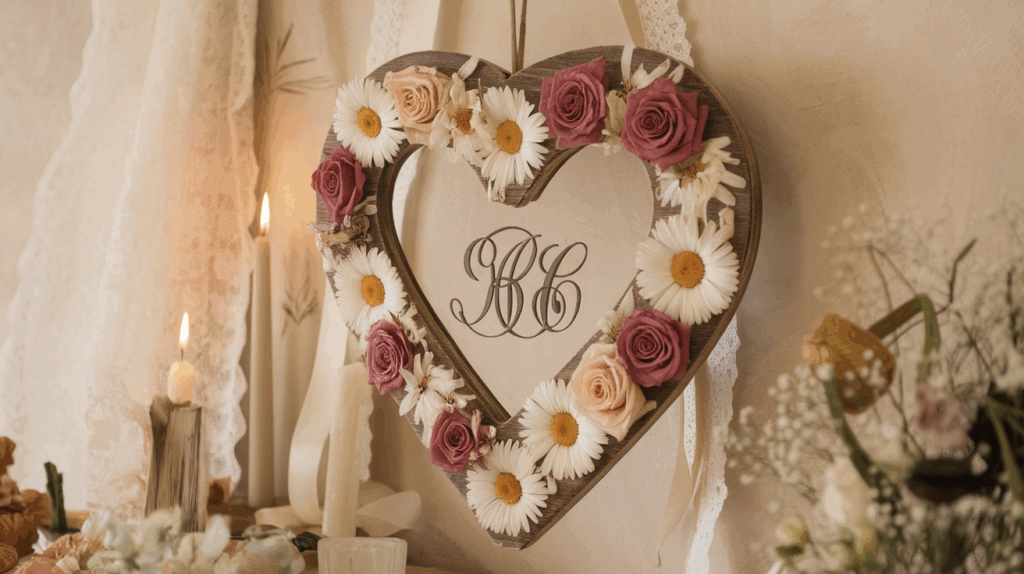
Framing pressed flowers turns your bouquet into wall art for your home. The flat, pressed blooms can be arranged in beautiful patterns, initials, or heart shapes.
Use a floating frame (glass on both sides) to let light shine through the petals. This method lets you enjoy your bouquet every day as part of your home décor.
DIY or Budget Options:
- Use a digital frame and add a wedding photo as the background
- Create multiple small frames with different sections of your bouquet
- Add pressed greenery from your bouquet for more dimension and color variety
9. Preserve It Through Professional Freeze-Drying
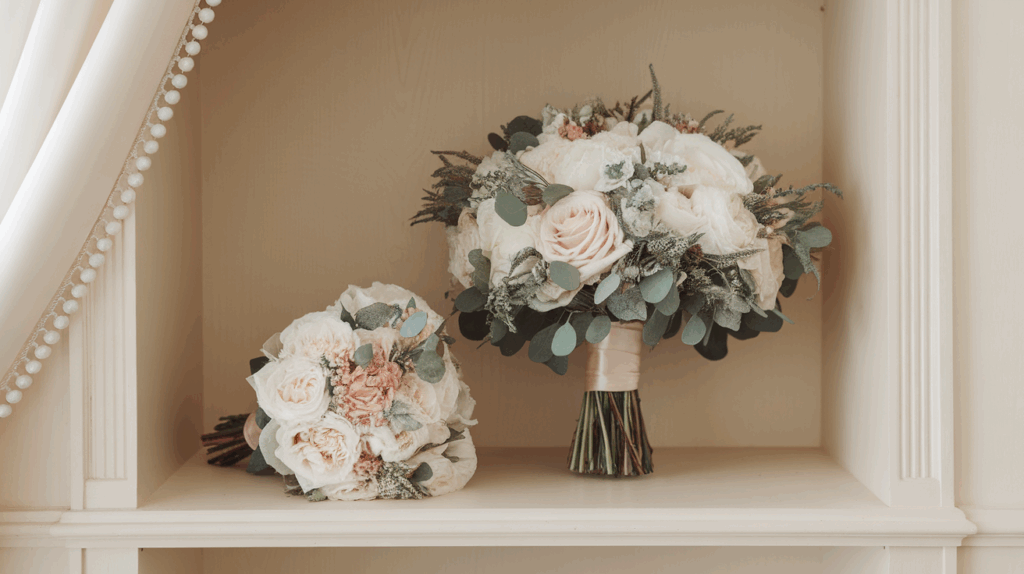
Freeze-drying is the gold standard for whole bouquet preservation. The process removes moisture at very low temperatures, keeping the flowers looking almost fresh.
Your bouquet maintains its original shape, size, and much of its color. This method costs the most but gives the most realistic results that can last 20+ years.
DIY or Budget Options:
- Share the cost with other brides by sending bouquets together
- Ask about payment plans—many preservation companies offer them
- Preserve just a portion of your bouquet to reduce costs
10. Make a Scented Potpourri Mix
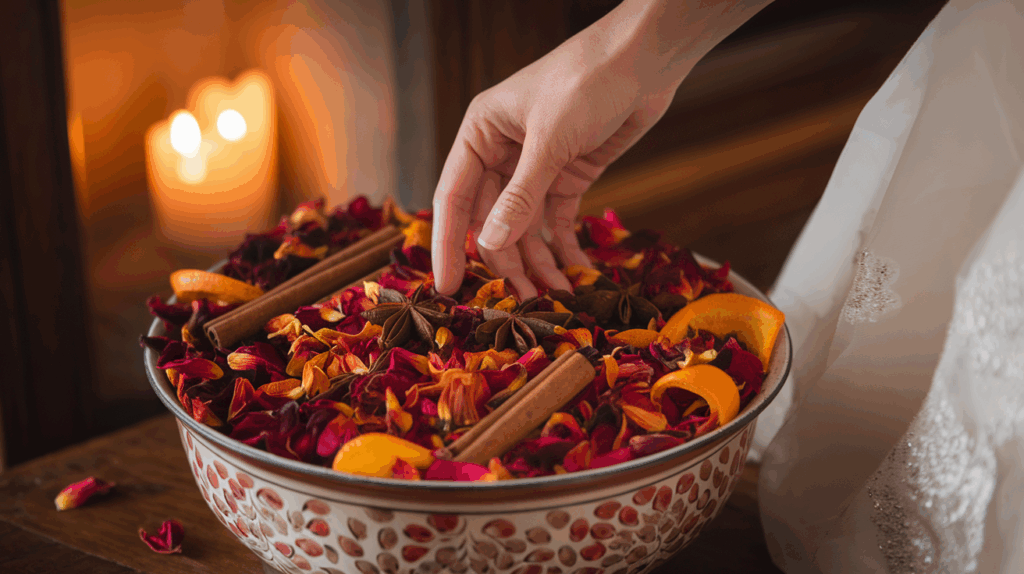
Potpourri preserves both the look and fragrance of your wedding flowers. The dried petals release their scent when touched or warmed.
I like adding spices like cinnamon or drops of essential oil that match your wedding flowers. Display your potpourri in a special dish or small sachet bags throughout your home.
DIY or Budget Options:
- Mix with dried orange peels and cinnamon sticks for a spicy scent
- Make small sachets as thank-you gifts for wedding guests
- Use clear ornaments filled with potpourri for holiday decorations
11. Dip Flowers in Wax for a Unique Look
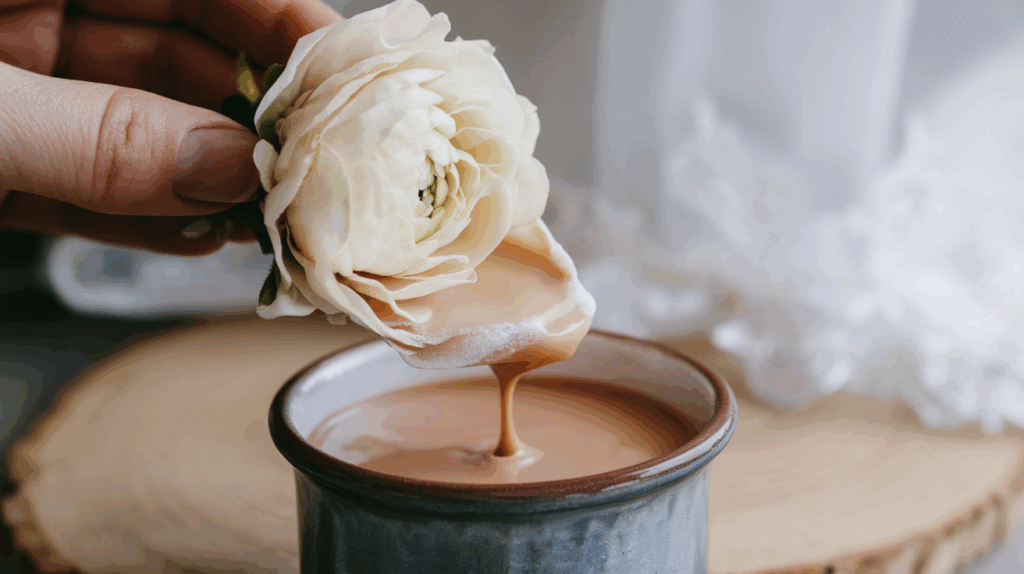
Wax-dipping creates a soft, frosted look that preserves flowers for several months. The wax seals in moisture and helps maintain the flower’s shape.
This method works best for single blooms rather than full bouquets. The finished flowers have a slight sheen and feel pliable rather than brittle like dried flowers.
DIY or Budget Options:
- Use leftover unscented candles, melted down in a slow cooker
- Add a drop of food coloring to clear wax for a tinted effect
- Dip just the edges for a “frosted” look that shows the natural flower color
Common Mistakes to Avoid when Preserving Flowers
I’ve seen many wedding bouquets turn brown, moldy, or fall apart completely because of simple mistakes. Let’s see what mistakes to watch out for:
1. Choosing the Wrong Flowers
Not all flowers preserve well. Roses, carnations, and lavender keep their shape and color nicely. Tulips, lilies, and hydrangeas? Not so much. They often turn brown or shrivel up badly.
I recommend checking which flowers work best for your chosen preservation method before your wedding.
This way, you can talk to your florist about including these flower types in your bouquet.
2. Waiting Too Long to Start
Time is not your friend when it comes to fresh flowers. Every hour that passes after your wedding means your bouquet loses moisture and begins to fade.
You should begin preserving within 48 hours at most. I’ve noticed the best results come from bouquets that were preserved within 24 hours of the ceremony.
3. Handling Petals Too Much
Flower petals bruise easily, just like fruit. Each time you touch them, you leave oils from your fingers and cause tiny damages that show up later as brown spots.
Always handle your bouquet by the stems when possible. If you need to touch the flowers, use clean cotton gloves or tweezers for careful positioning.
4. Trapping Moisture Inside
This is the number one cause of moldy preserved flowers! If you seal or display flowers before they’re 100% dry, you’re asking for trouble.
Make sure your flowers are completely dry before putting them in a frame, resin, or sealed container.
I test by gently pressing tissue paper against them, and if there’s any moisture transfer, they need more drying time.
5. Using Poor-Quality Materials
Cheap frames, low-grade silica gel, or discount display cases won’t protect your flowers for years to come.
The few extra dollars spent on good materials makes the difference between a keepsake that lasts decades versus one that falls apart next year.
Don’t worry if you’ve already made one or two of these mistakes, there’s usually a fix!
Many preservation problems can be corrected with the right know-how. Just reach out, and I can help you find a solution.
Caring for Your Preserved Bouquet Over Time

Your preserved bouquet can stay beautiful for many years with proper care. I’ve seen well-maintained wedding flowers last for decades!
1. Find the Right Spot for Display
Keep your preserved flowers away from windows and direct sunlight. UV rays will fade those lovely colors faster than you’d expect.
I’ve seen bright pink roses turn pale in just a few months when placed on a sunny windowsill.
Choose a wall or shelf that doesn’t get hit by sun during any part of the day. North-facing rooms often work best for this.
2. Monitor the Room Environment
Temperature and humidity are the silent enemies of preserved flowers. Too much heat can make petals brittle, while dampness leads to mold.
Avoid hanging your bouquet in bathrooms, kitchens, and entryways. The best spot? A bedroom or living room wall away from heaters, air vents, and doors.
3. Clean with Extra Care
Dust will settle on your preserved flowers just like any other item in your home. But you can’t just wipe them with a cloth!
I clean my preserved bouquets every few months using a small, soft makeup brush for gentle dusting, and a Camera lens air blower for hard-to-reach spots.
4. Check Your Display Case Regularly
If your flowers are in a frame or resin, keep an eye on the container itself. Glass can develop condensation if the seal isn’t perfect. Resin might yellow slightly over time.
Every six months, give your display a quick inspection. Look for any signs of moisture, cracks, or other changes that might need attention.
Conclusion
Your wedding bouquet tells a story. The flowers you chose, their colors, and even their scent all represent chapters of your love story.
By taking steps to save these flowers, you’re keeping this story alive for years to come. Which method feels right for you?
Some of my brides prefer classic pressed flowers in a frame, while others love the modern look of flowers in glass. There’s no wrong choice, just the one that fits your style and home.
I hope these methods have given you plenty of options to consider. The method you pick should match not just your style but also how much time you want to spend on the project.
Remember this that no matter how you preserve it, what matters most is the love it represents.
When you glance at your preserved bouquet years from now, you’ll be taken back to that special day when your journey as a married couple began.