
Thinking about installing wood-look tile and unsure how to stagger it the right way? That was precisely my concern when I started remodeling my guest room.
I wanted the warm, natural feel of hardwood but with the durability of tile. Still, getting the stagger right wasn’t as simple as it looked on Pinterest.
The wrong offset can lead to lippage, weird seams, or a floor that feels “off.” After digging through tile forums, watching tutorials, and learning from a few missteps, I figured out what works.
In this blog, I’ll walk through everything I know from choosing the best layout to avoiding common mistakes. If you want your floor to look good and last, this guide’s for you.
Why Staggering Matters for Wood Look Tile
Staggered wood-look tile is essential for both aesthetics and floor durability.
Proper staggering creates a natural, flowing look, while poor alignment can lead to awkward patterns, tripping hazards, and structural issues like lippage or shifting tiles.
Using a consistent stagger, such as a 1/3 offset instead of a 1/2, helps distribute stress evenly and reduces warping.
This not only improves the overall appearance but also strengthens the installation, ensuring a longer-lasting, professional floor.
Common Stagger Patterns to Consider
Choosing the correct stagger pattern for wood-look tile affects both the aesthetics and stability of your floor. Different patterns create unique visual flows and suit various room shapes and tile sizes.
1. 1/3 Offset Layout
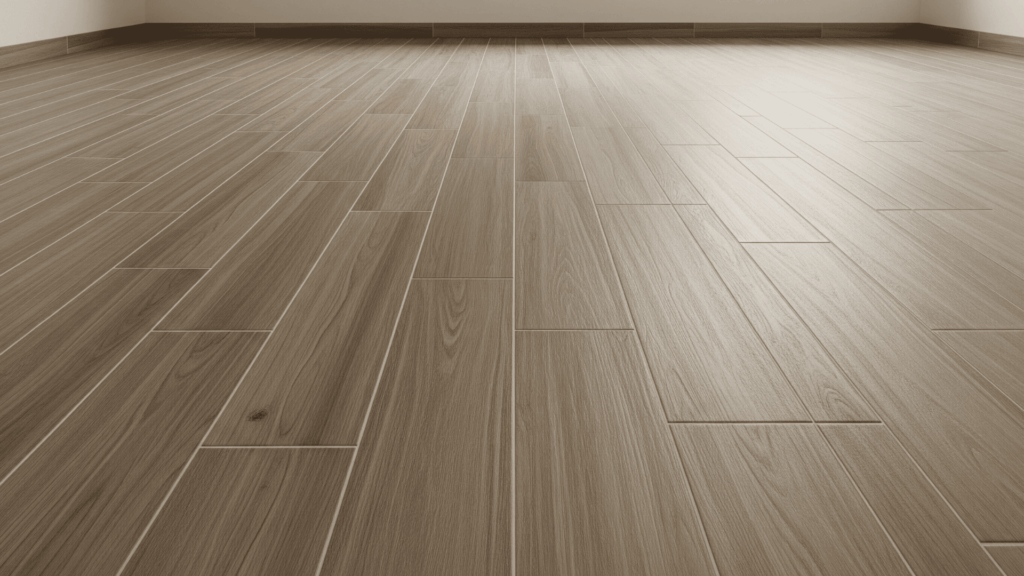
The 1/3 offset layout staggers each tile by one-third of the tile’s length in each row.
This spacing reduces lippage by avoiding end-to-end alignment of tile edges, especially important for longer planks that may have slight warping.
It mimics the natural appearance of real hardwood flooring, creating a consistent and balanced visual flow.
Manufacturers often recommend this pattern for wood-look tiles, making it one of the safest and most practical choices.
It’s also beginner-friendly, ideal for DIYers who want reliable results with fewer installation issues or rework.
2. Random Stagger Layout
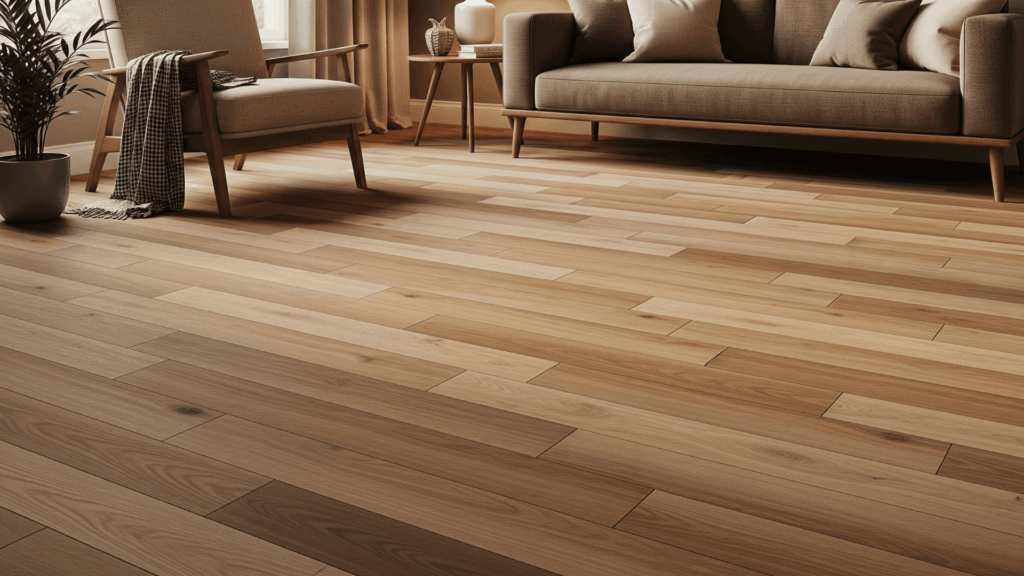
The random stagger layout gives the most natural, wood-like appearance by varying the offset from tile to tile.
There’s no strict pattern; some tiles may shift by a quarter length, others by half or more.
This randomness replicates the organic feel of hardwood planks, featuring diverse grain and varying lengths. However, it takes planning to avoid accidental clusters or lines that draw attention.
You’ll need to lay out a few rows dry first and adjust placements to keep things visually balanced. It’s great for rustic or casual spaces that embrace a relaxed, imperfect charm.
3. Herringbone Layout
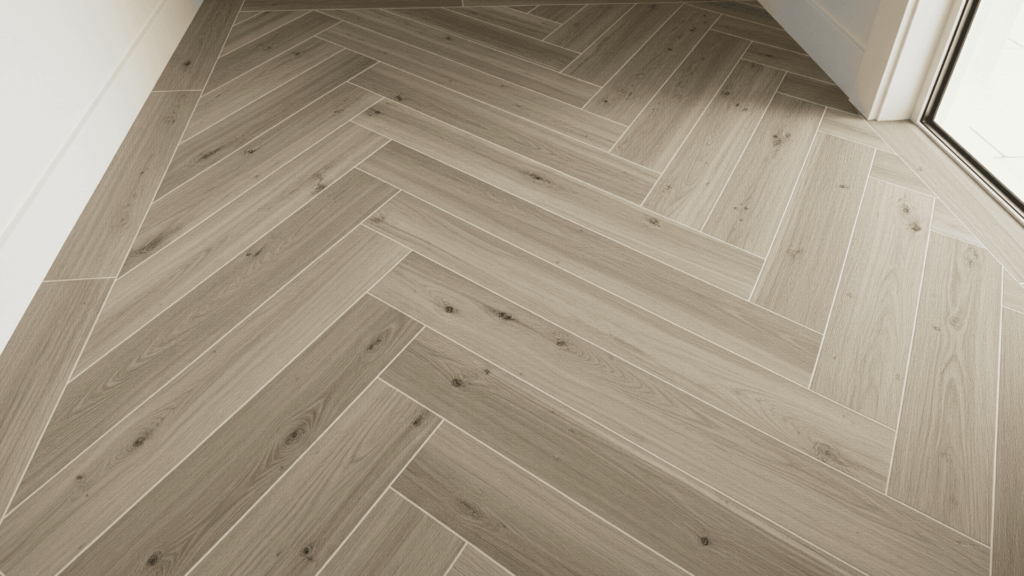
The herringbone layout arranges rectangular tiles in a zigzag “V” pattern, creating strong visual movement across the floor.
It adds a sense of refinement and culture and is often used to accent entryways, powder rooms, or backsplashes.
This layout works exceptionally well in small or narrow spaces where the angled pattern draws the eye and adds depth. Installing it takes precision cuts that must be clean, and angles must align perfectly.
Quick overview of common stagger patterns:
| PATTERN | BEST FOR | NOTES |
|---|---|---|
| 1/3 Offset | Most rooms | Minimizes lippage risk |
| Random Stagger | Rustic/natural look | Plan to avoid repetition |
| Herringbone | Small/moderate tiles | Visually complex, trendy |
Helpful Tips from Online Forums on Tile Installation
Online forums are filled with real-life experiences from both DIY enthusiasts and tile professionals.
Many users warned against using a 50% offset due to lippage and uneven edges. A top suggestion was always to dry lay your tiles first to visualize the stagger and spacing.
Others emphasized reading the manufacturer’s recommendations printed on the box; ignoring these led to costly mistakes.
Forum threads offered valuable tips on mixing tile lengths, avoiding repetitive patterns, and utilizing layout tools to achieve a clean and professional finish.
- Avoid 50% Offsets: Many users shared regrets after using 50% offsets, which often caused lippage and uneven surfaces.
- Dry Layout First: Laying out tiles before setting helps plan patterns, check spacing, and avoid awkward cuts.
- Follow Manufacturer Guidelines: Tile boxes usually suggest the best stagger range, following it helps avoid problems and voided warranties.
Common Staggering Challenges and How to Solve Them
Staggered wood-look tile can lead to issues like lippage, cracks, or awkward patterns if not installed correctly. Planning makes your layout smoother and your results more professional.
1. Lippage (Uneven Tile Edges)
Lippage occurs when the edges don’t sit flush, leaving raised lips that cause tripping or cast shadows.
It’s usually due to warped tiles or an offset that’s too aggressive, like a 50% stagger on long planks.
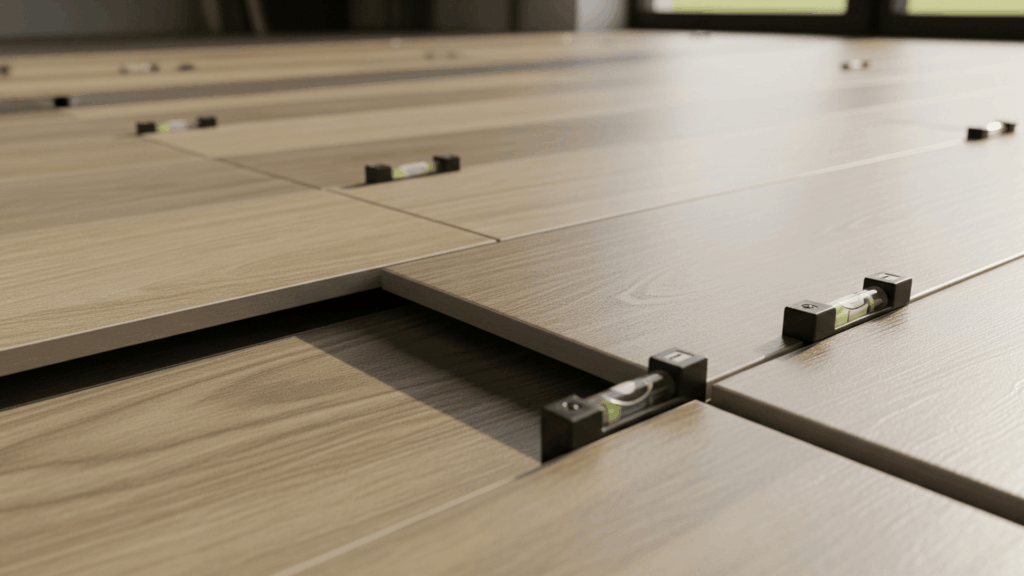
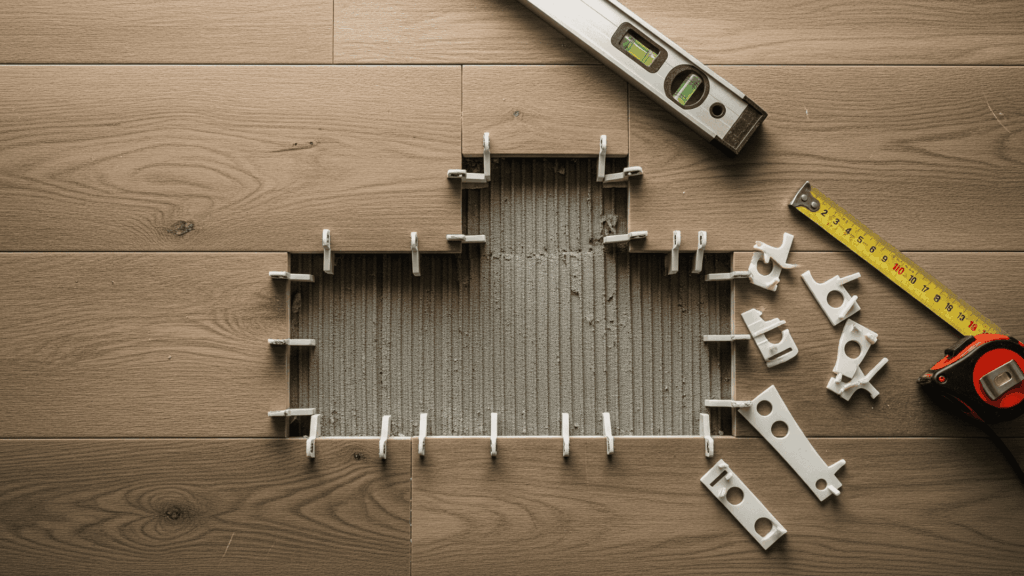
To minimize this, use a 1/3 offset and always check for flatness before setting the tiles in place. Tile leveling systems, like wedge and clip kits, are beneficial.
They apply gentle pressure across tiles while the mortar cures, keeping edges aligned. Use them throughout the job for a smoother, more professional result with minimal height variation.
2. Repeating Patterns in Random Layouts

Random stagger patterns are meant to look natural, but if not pre-planned, they can form unintentional repeating seams that disrupt the flow.
To avoid this, dry lay several rows first and mix tile lengths and grains across the layout. Rotate tiles as needed to prevent noticeable clusters or patterns.
Keep an eye on where seams line up and intentionally vary placement.
Stepping back every few rows to assess the overall look helps catch visual repetition early, allowing adjustments before the mortar sets.
3. Cracks Along Joints
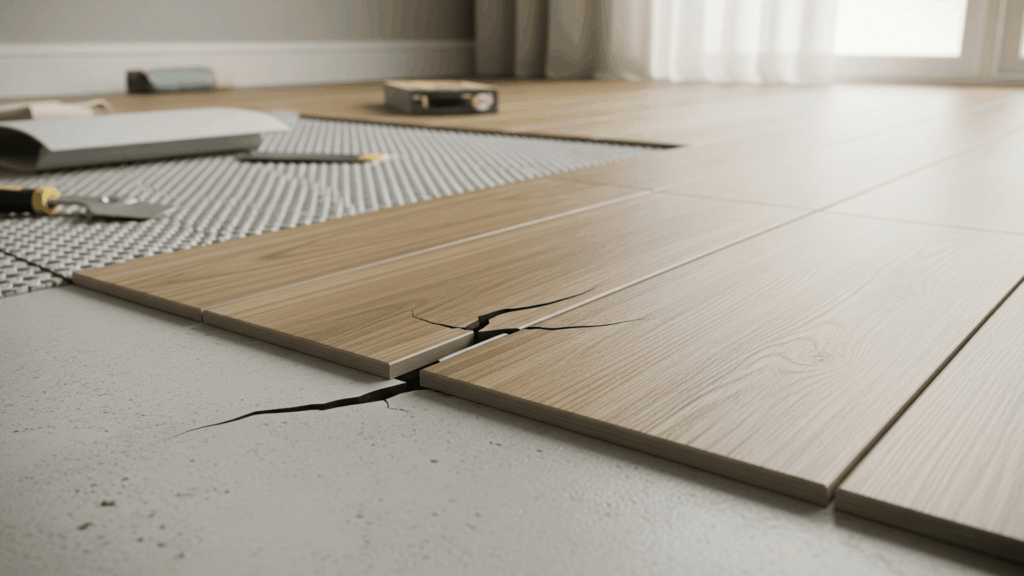
Cracks in tile often occur when grout lines align with weak points in the subfloor or seams in backer boards. That stress travels up and cracks the tile over time.
Always offset tile joints from any subfloor joints, especially when using large-format or wood-look planks. Before starting, make sure your subfloor is flat, secure, and adequately reinforced.
Consider using an uncoupling membrane, such as Ditra, to absorb movement and protect against shifts or settling.
It adds a buffer layer that reduces stress, keeping your tile intact even as the house naturally expands or contracts.
4. Uneven Grout Lines
Wavy or inconsistent grout lines instantly make tile jobs look amateur.
This usually happens when spacers are skipped, tile edges are irregular, or the installer moves too fast without checking alignment.
Always use spacers, preferably T-shaped or cross spacers, and insert them snugly at each corner. Pause every few tiles to double-check straightness with a level or straight edge.
Don’t rely on eyeballing alone, especially on large floors. If needed, snap chalk lines to guide your layout. Taking the time to align and space consistently results in a cleaner, more polished finish.
Valuable Tips to Make Your Job Easier
These simple but valuable tips help achieve a smooth, durable, and professional-looking tile installation with fewer mistakes.
1. Use Tile Spacers
Tile spacers help keep grout lines straight, even, and consistent across the floor.
This is crucial when working with wood-look tiles, as uneven gaps can compromise the realistic plank effect.
Select a spacer size that matches your grout width, typically 1/8 inch or 3/16 inch. Insert them at all four corners of each tile and check alignment frequently with a level.
Remove spacers before the mortar dries to prevent them from getting stuck or cracking the tile edges later.
2. Back Butter Tiles
Back buttering means applying a thin layer of mortar to the back of each tile before laying it.
This step fills in tiny curves or dips and ensures complete contact with the floor, reducing the risk of loose or hollow tiles.
Spread the mortar evenly with the flat side of your trowel. Combine this with notched mortar on the floor.
Lightly twist and press each tile into place. This double-adhesion method consistently yields a stronger, more professional finish.
3. Use Laser Lines
A laser level is one of the best tools for keeping your tile rows perfectly straight. Just set it along your starting wall or a reference point across the room.
It projects a bright line that you can follow as you lay each row. This is especially helpful in large or oddly shaped spaces where drift happens easily.
Use a chalk line or tape measure to double-check. Staying aligned from start to finish makes the whole job smoother and neater.
Conclusion
Staggering wood-look tile can feel tricky at first, but with some thoughtful planning and basic tools, the job becomes much easier. The way tiles are staggered plays a massive role in both the appearance and long-term performance of the floor.
A well-planned layout adds natural flow, reduces shifting, and helps prevent cracks or lippage. Use spacers to maintain consistent grout lines, and laser lines to stay on track.
Dry laying a few rows before applying mortar helps catch mistakes early. Avoid aggressive offsets and follow the recommended staggering patterns for optimal results.
The finished floor should look nice and feel solid underfoot. Taking the time to get it right makes a big difference.
Share this guide with friends or family tackling their tile project; it could save them a lot of hassle and help them complete it correctly.