
Building an outdoor fireplace is a fantastic way to enhance your backyard and create a cozy, inviting space. I’ve always found that an outdoor fireplace brings warmth, beauty, and a touch of luxury to any outdoor area.
Not only does it extend the usability of your backyard during cooler months, but it also provides a perfect gathering place for family and friends.
In this guide, I will walk you through step-by-step instructions for building your own outdoor fireplace.
From preparing the foundation to adding the final touches, I’ll cover everything you need to know to complete your project with confidence.
With the right materials, tools, and patience, you can create a beautiful and functional fireplace that will be a stunning addition to your outdoor living space.
What is an Outdoor Fireplace?
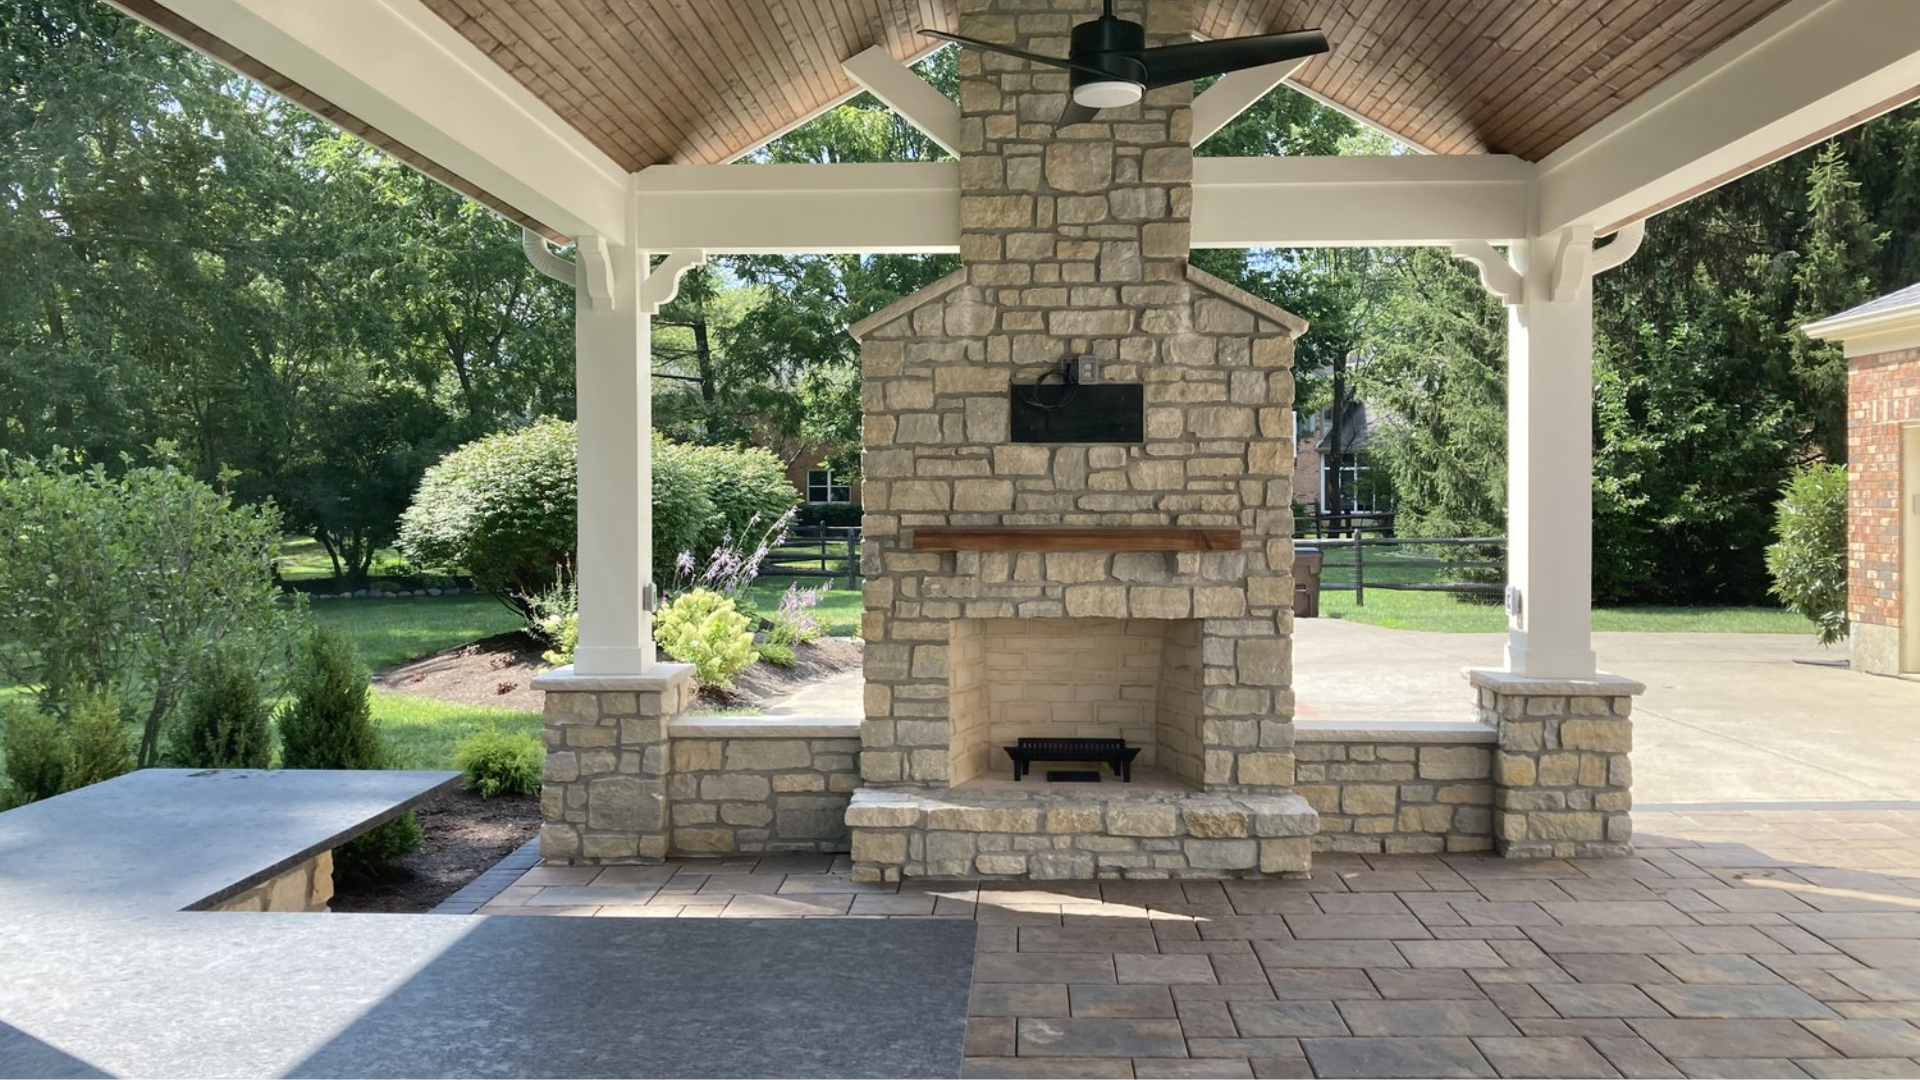
An outdoor fireplace is a functional and decorative structure designed for use in outdoor spaces, providing warmth, ambiance, and a gathering place for friends and family.
Typically made from materials like stone, brick, or metal, outdoor fireplaces are built to withstand the elements while adding a touch of elegance to your backyard or patio.
They serve as a focal point for outdoor living areas, perfect for enjoying cool evenings, cooking, or just relaxing by the fire.
Whether built as a permanent fixture or as part of a larger outdoor design, an outdoor fireplace can enhance the aesthetics of your home’s exterior while creating a cozy, inviting atmosphere for year-round outdoor entertainment.
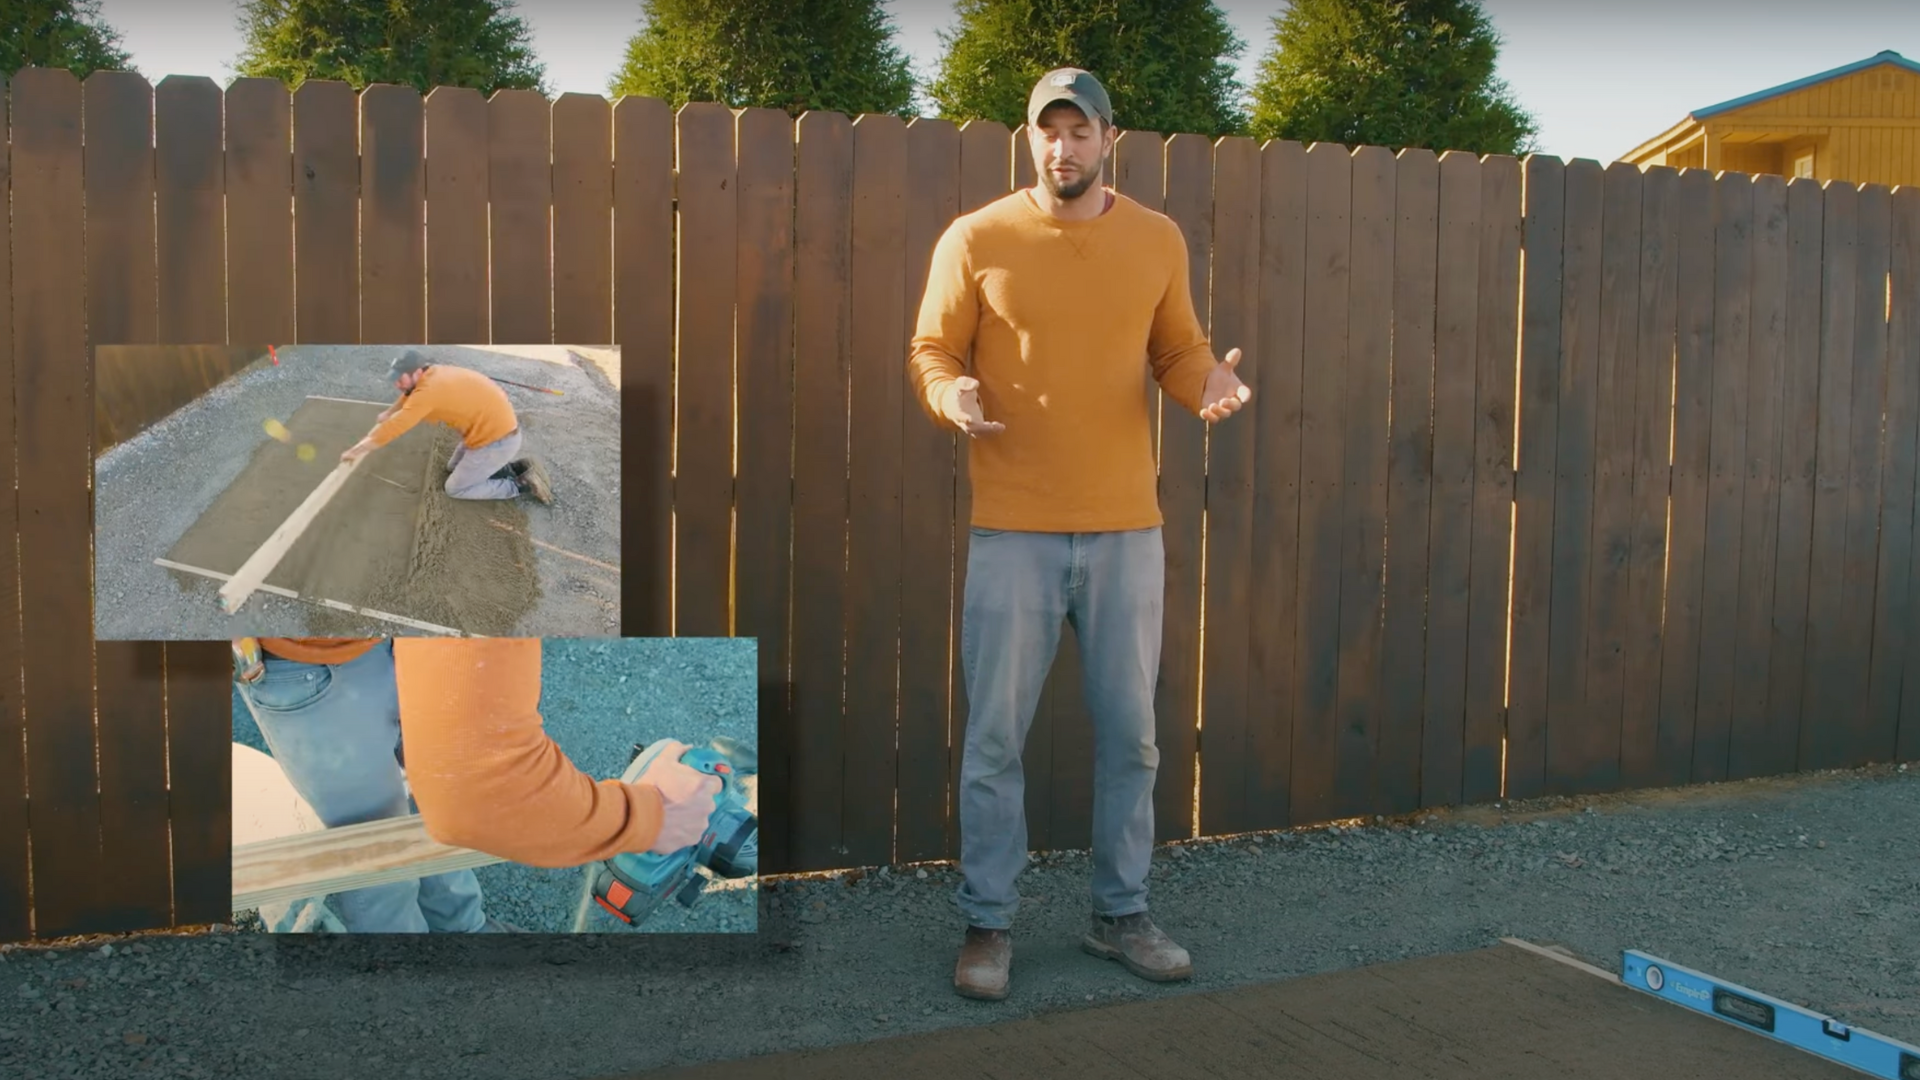
Step-by-Step Guide to Building Your Outdoor Fireplace
Building your own outdoor fireplace can be a fun and rewarding project, and with the Barrington Fireplace Kit from Cornerstone Rocks, it’s easier than you might think.
Materials Needed
Before you begin building your outdoor fireplace, gather all the necessary materials.
- Barrington Fireplace Kit
- Tape measure
- 4-foot level
- String line
- Hammer
- Nails (for marking arcs)
- Non-stretching metal tape measure
- Sand for leveling
- Firebrick (for the firebox)
- Firebox glue
- Lintel blocks and angle iron
- Glue for firebrick installation
- Gloves and safety gear
Step 1: Prepare Your Foundation
The foundation is the most important part of building an outdoor fireplace. It needs to be level and stable to ensure the entire structure is solid and safe.
Start by digging a trench for the foundation, making sure it’s about 6 inches deep and wide enough to accommodate the base of your fireplace.
After the trench is ready, fill it with gravel, packing it down firmly to create a solid base. Make sure the gravel is level across the entire area, as any imperfections here will affect the stability of the entire structure.
Step 2: Mark the Layout
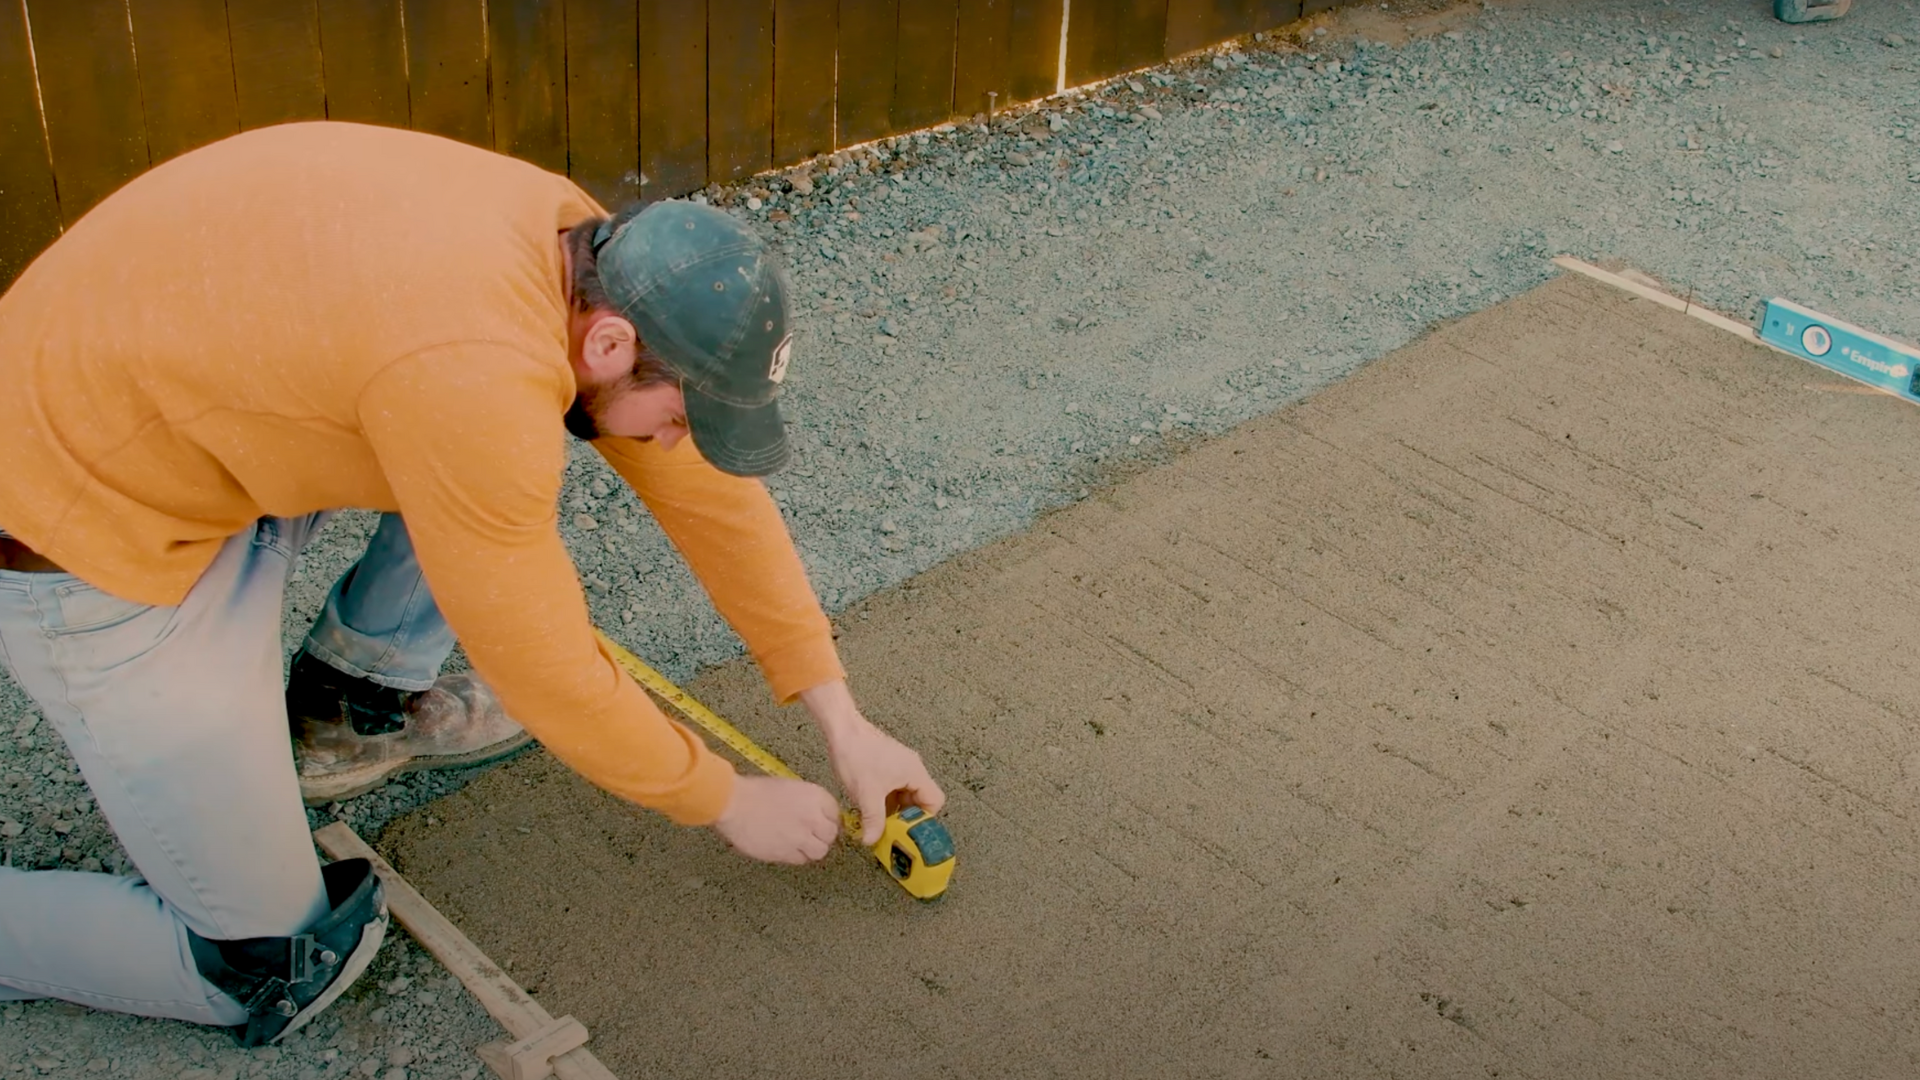
Once your foundation is in place, the next step is marking the layout of your fireplace. Measure out the dimensions of the fireplace and mark them on the ground.
Use a metal tape measure to measure five feet from a nearby structure (like a fence or wall), and mark two arcs at this distance.
Use a string line to connect the arcs at the peak, ensuring your layout is symmetrical and properly aligned. This will ensure that your fireplace is built in the right location and has the proper proportions.
Step 3: Begin Laying the Blocks
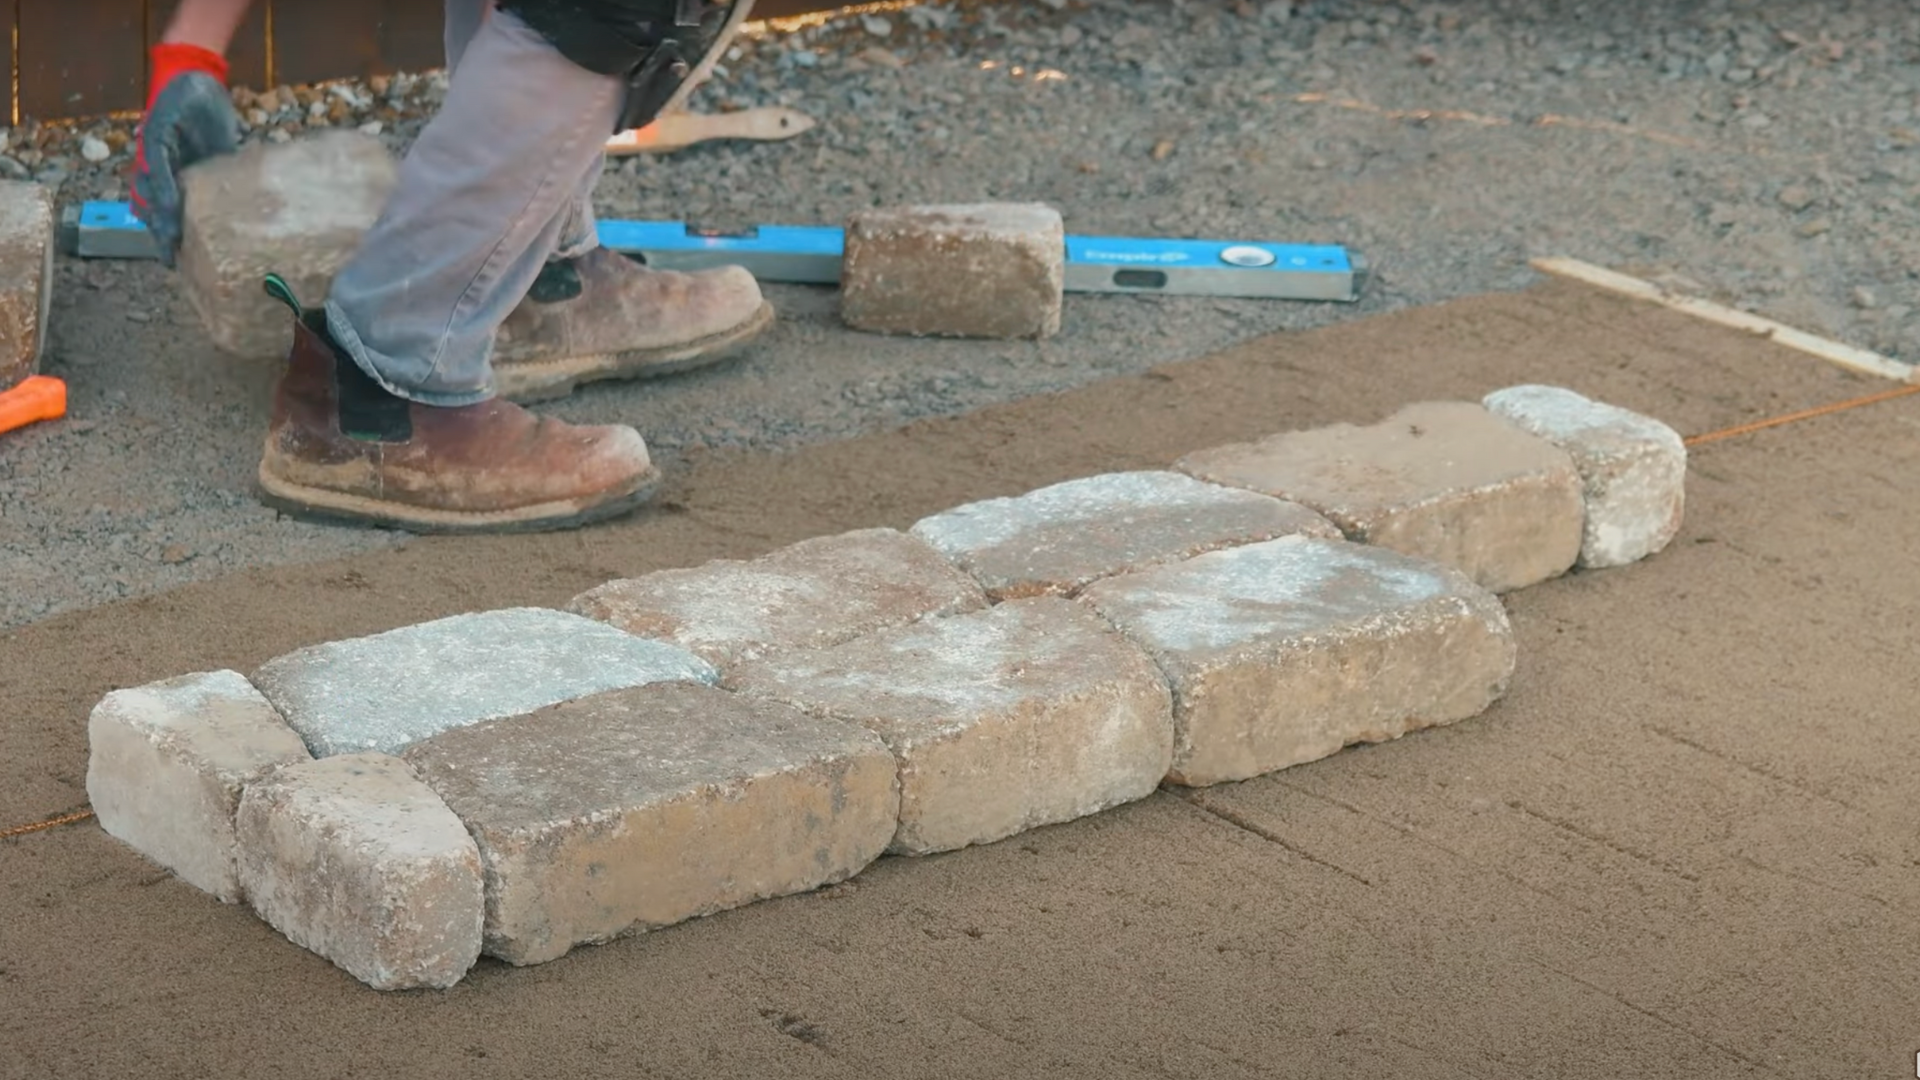
Now that the layout is marked, it’s time to start laying the blocks for the base course. Begin by setting the first row of bricks according to your marked layout.
The base course is crucial, as it will serve as the foundation for the rest of your fireplace. Use a 4-foot level to ensure that the bricks are straight both front-to-back and side-to-side.
Take your time to set the blocks properly, as any misalignment here can cause problems later on.
Step 4: Level Each Block
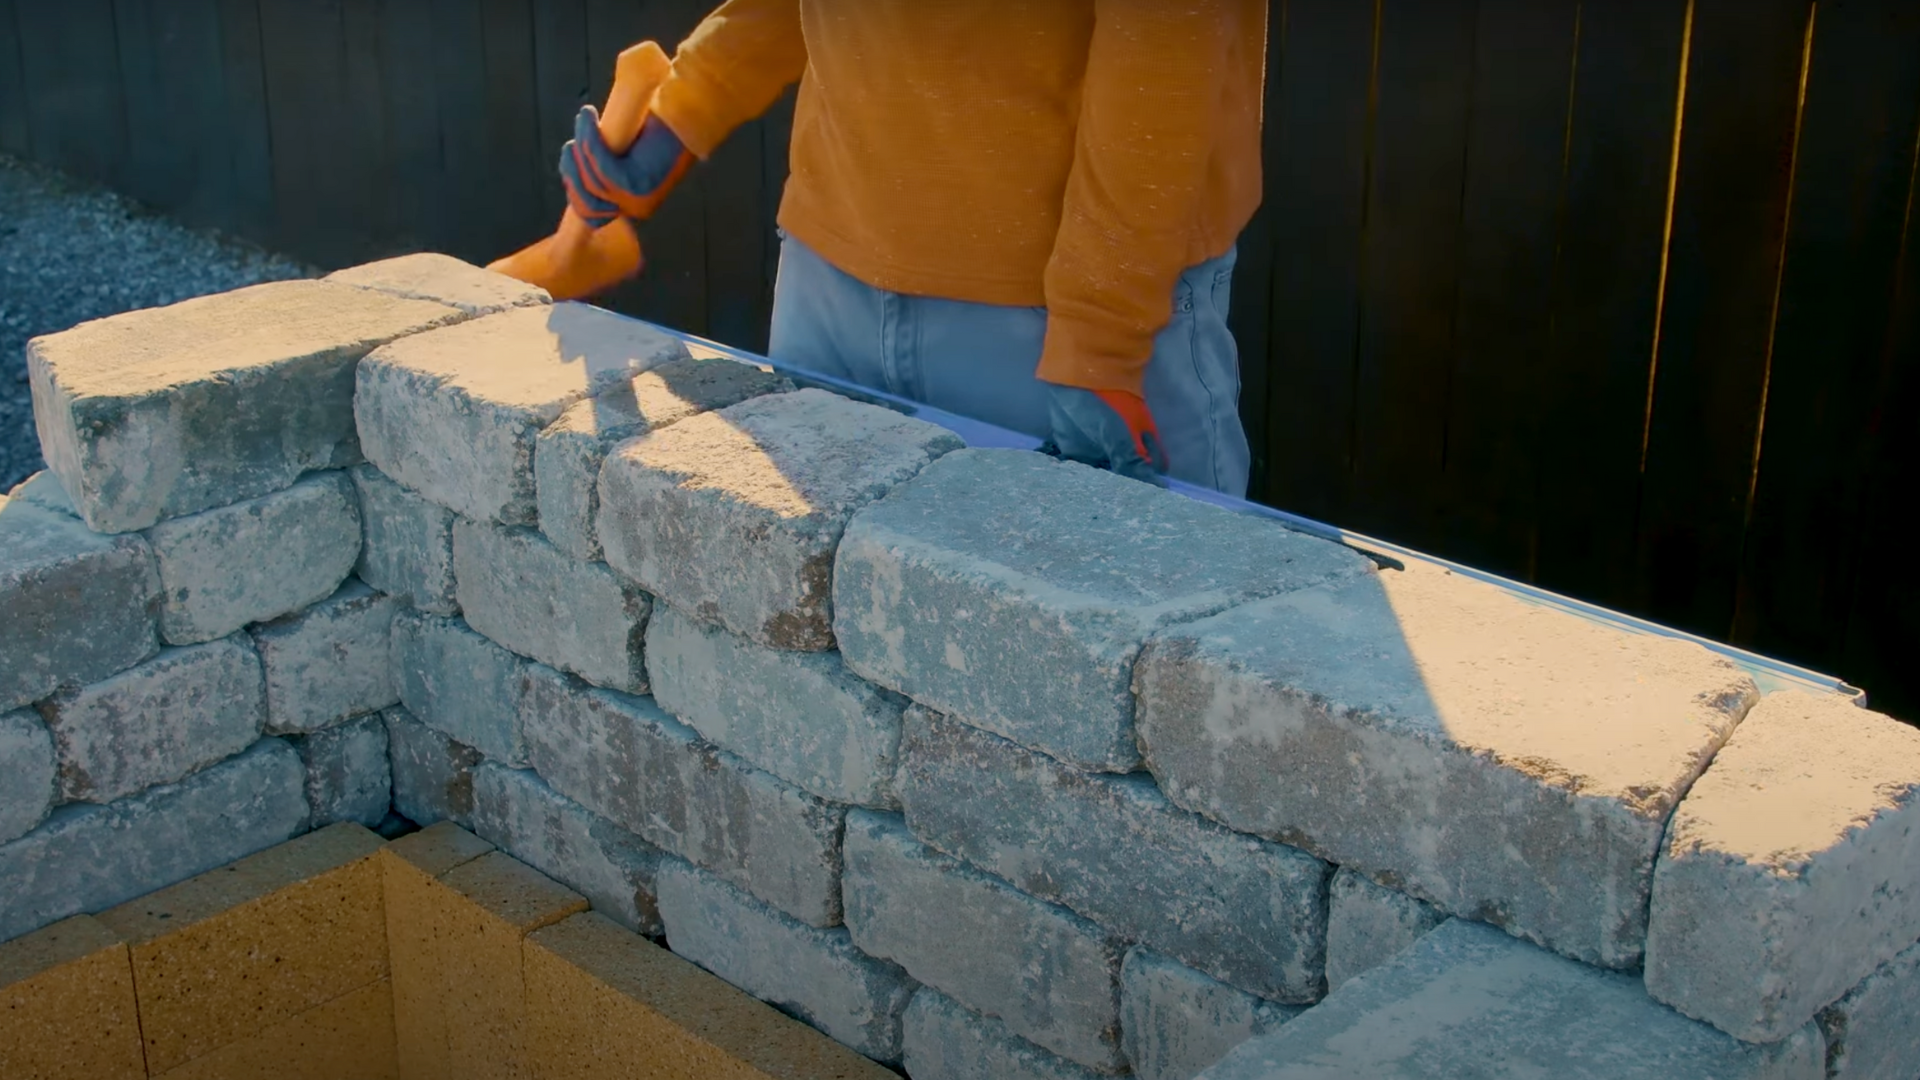
As you stack the blocks, be sure to level each one before continuing. This is an important step because the blocks must be properly aligned to ensure the stability and levelness of the fireplace as it grows taller.
After each block is placed, double-check its alignment using a level. If necessary, adjust the blocks or add more mortar to ensure they are perfectly level.
Taking the time to get it right at this stage will save you time and frustration in later steps.
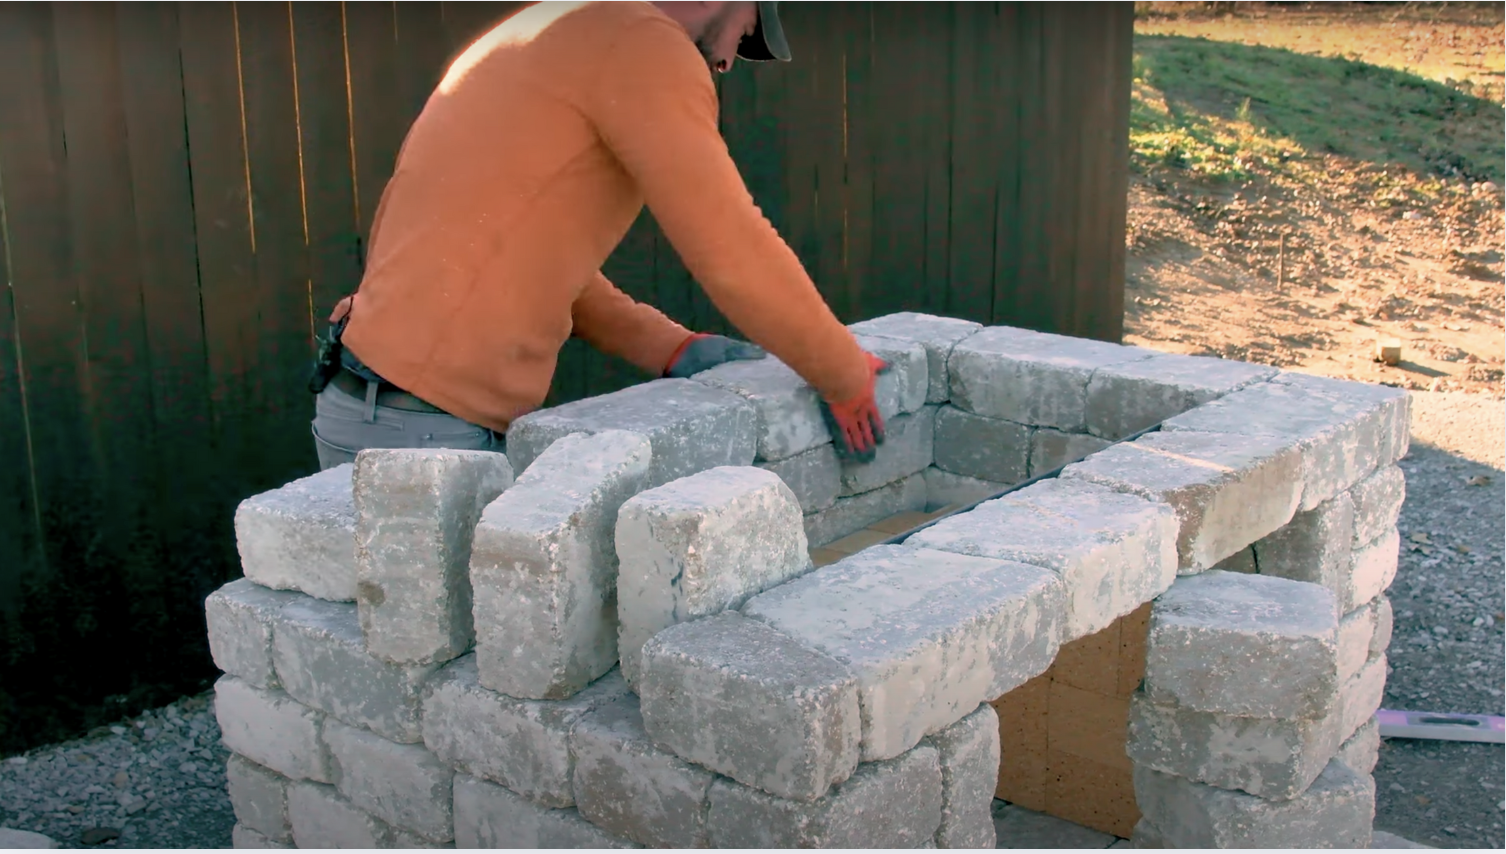
Step 5: Install the Firebox
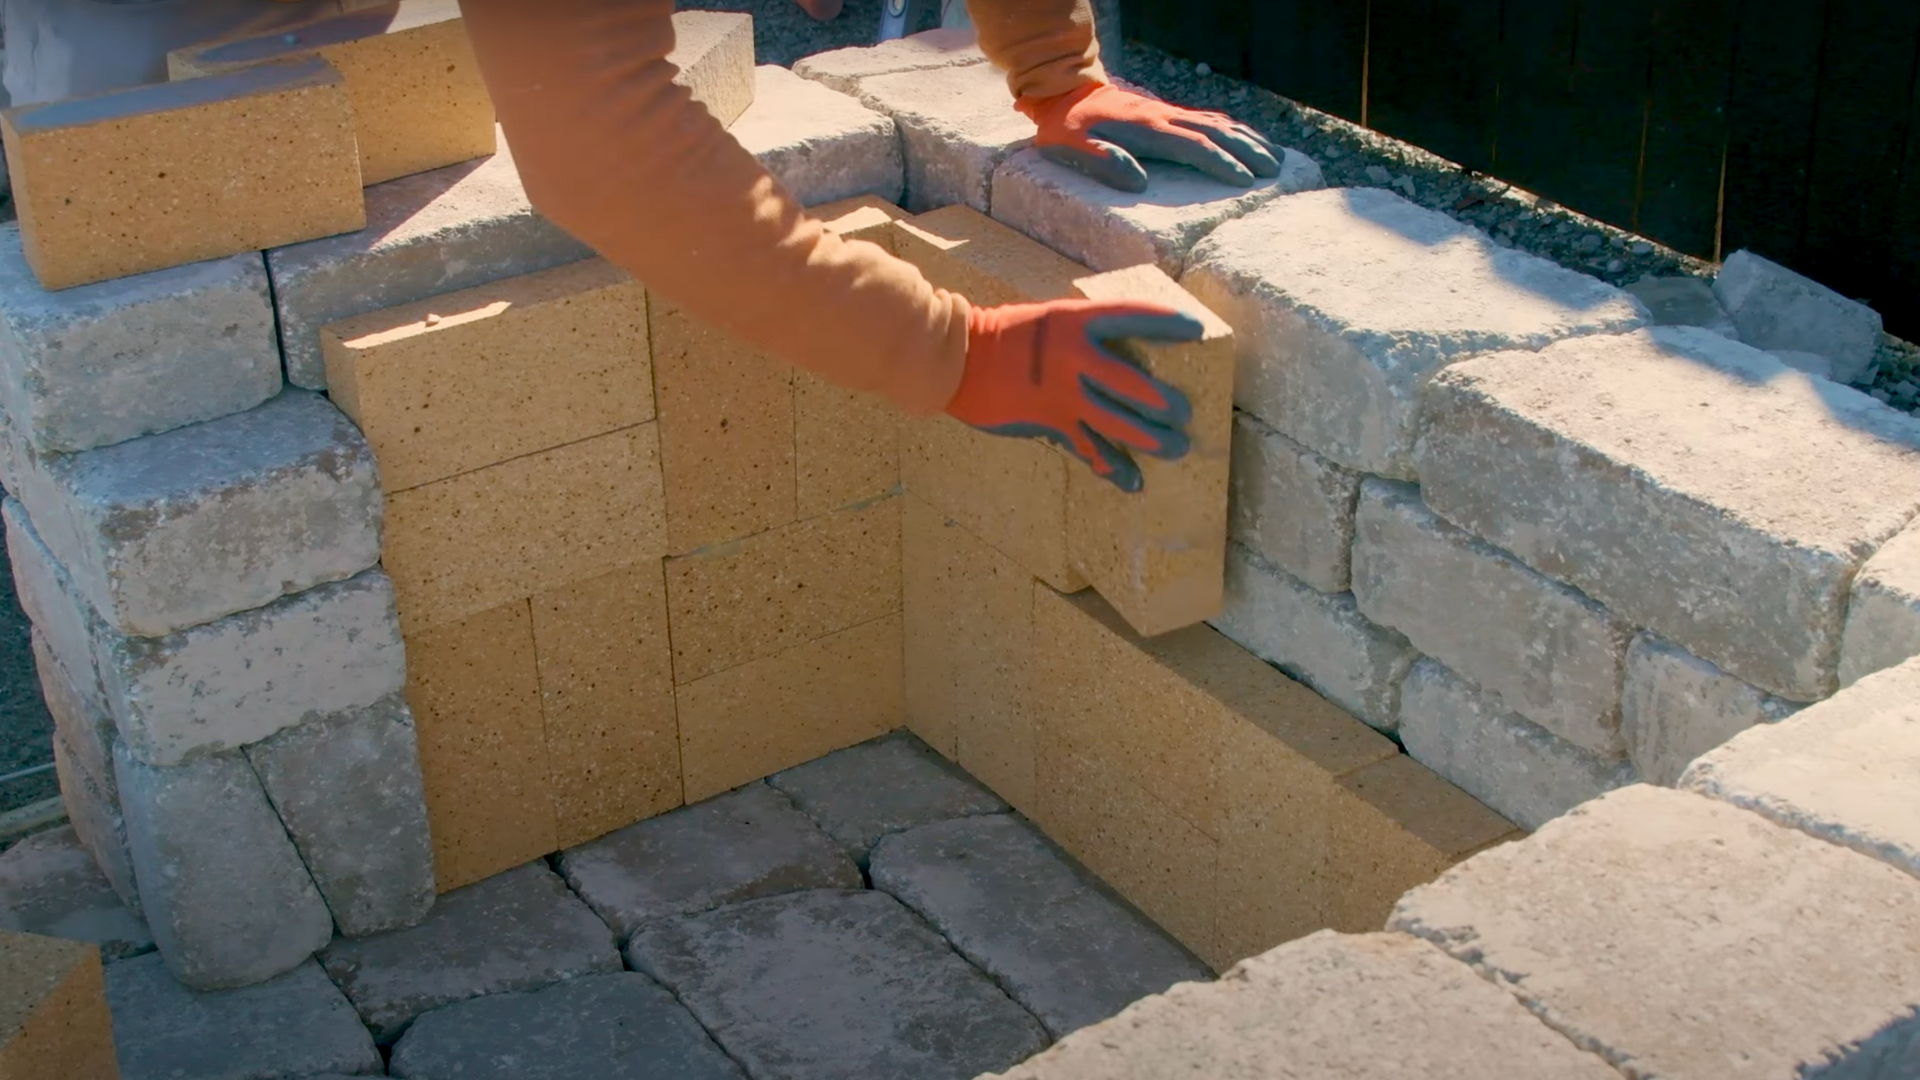
The firebox is the area where the fire will burn, so it’s important to make sure it’s built securely and properly. Start by gluing the fire bricks together using firebox glue, especially at the bottom and sides for added stability.
Stack the firebricks carefully, ensuring the firebox walls are aligned and strong. The firebox needs to be able to handle the intense heat from the fire, so make sure everything is securely in place and properly bonded together.
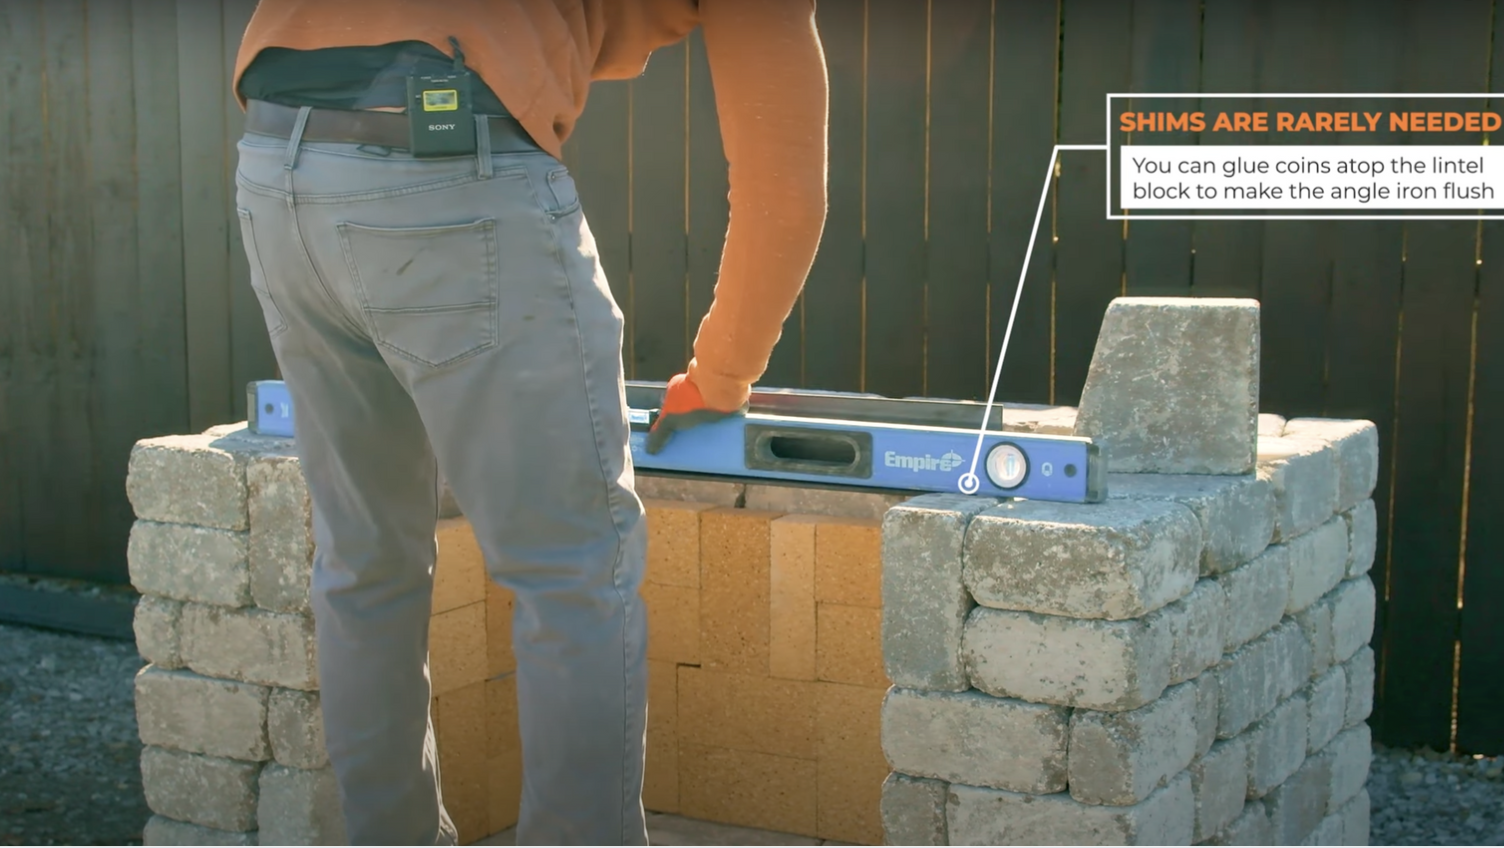
Step 6: Install the Lintel
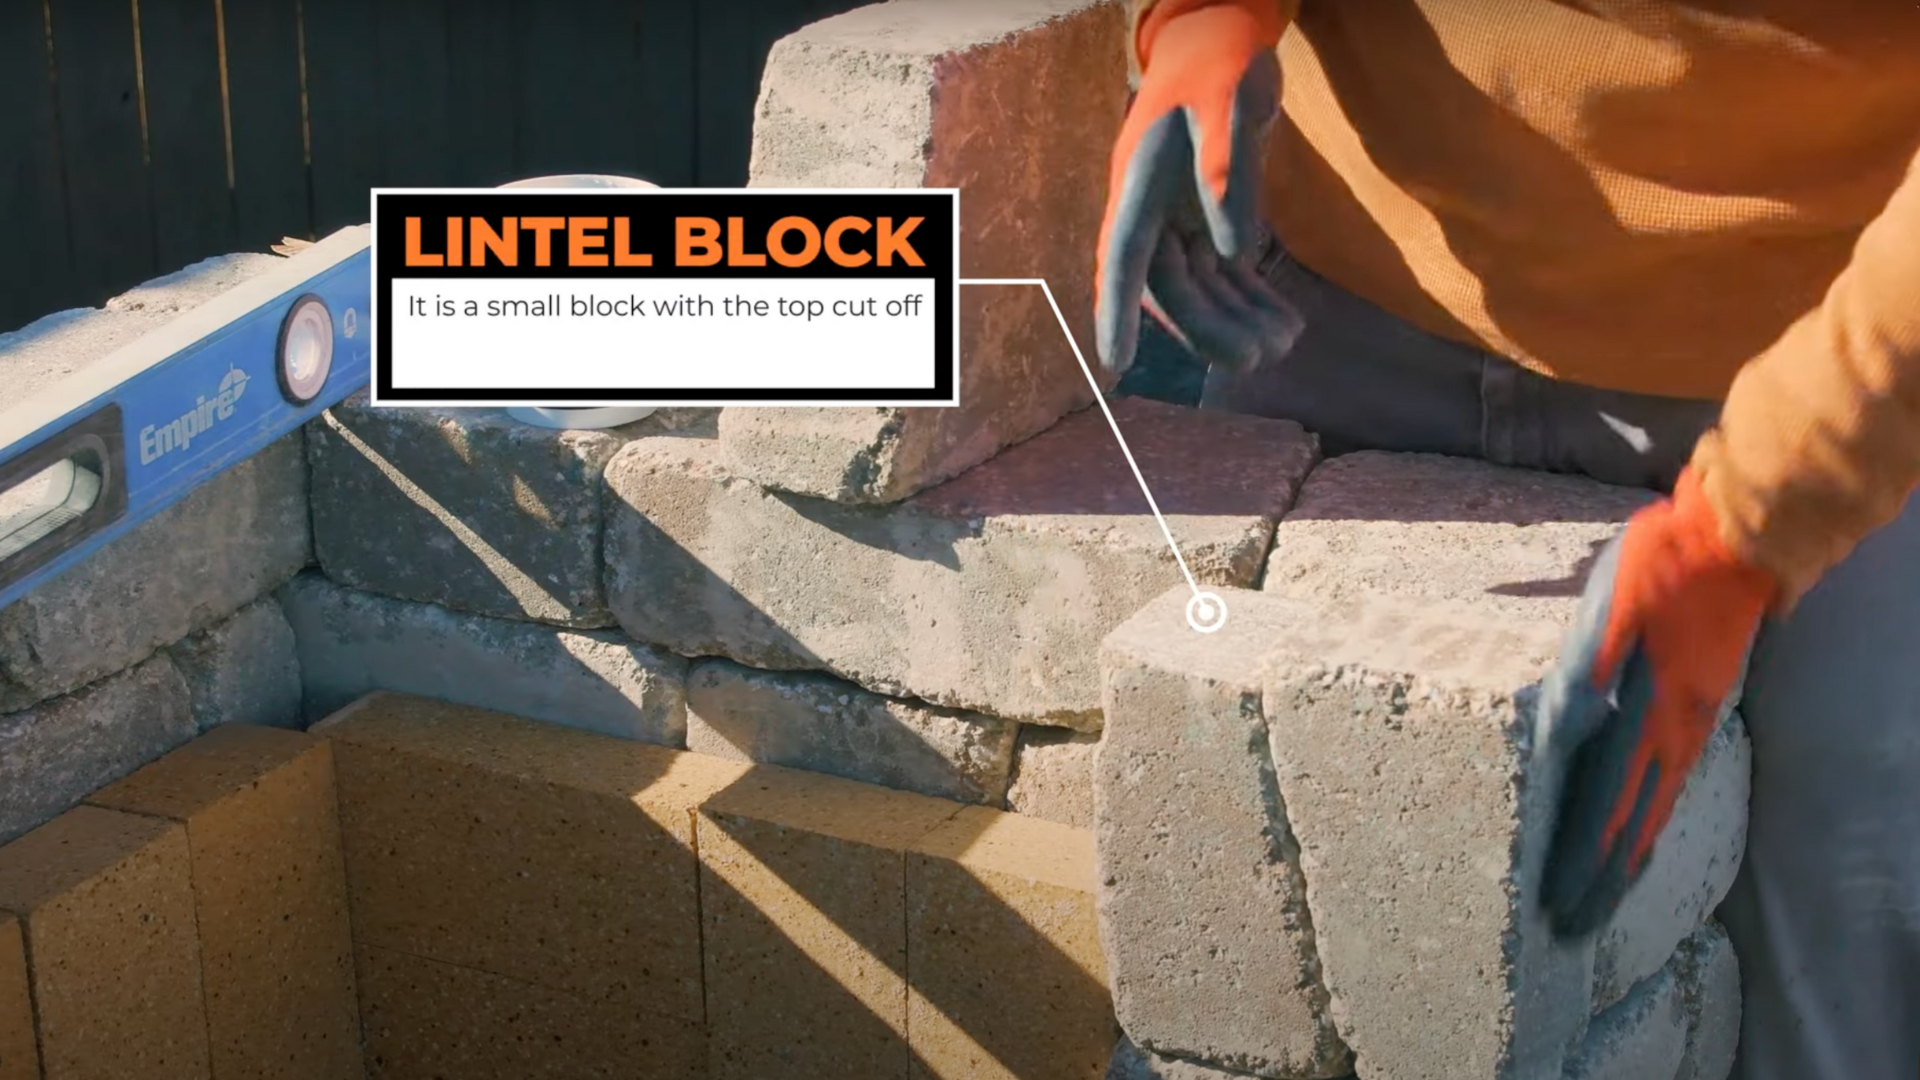
The lintel is the support structure that holds the weight above the firebox. To install the lintel, glue the sides of the lintel blocks to the firebox.
If necessary, use coins or washers to shim the angle iron to ensure that it is set flush. Once the lintel is properly in place, use your level to double-check that everything is aligned.
The lintel must be level and stable to support the weight of the bricks that will be placed on top.
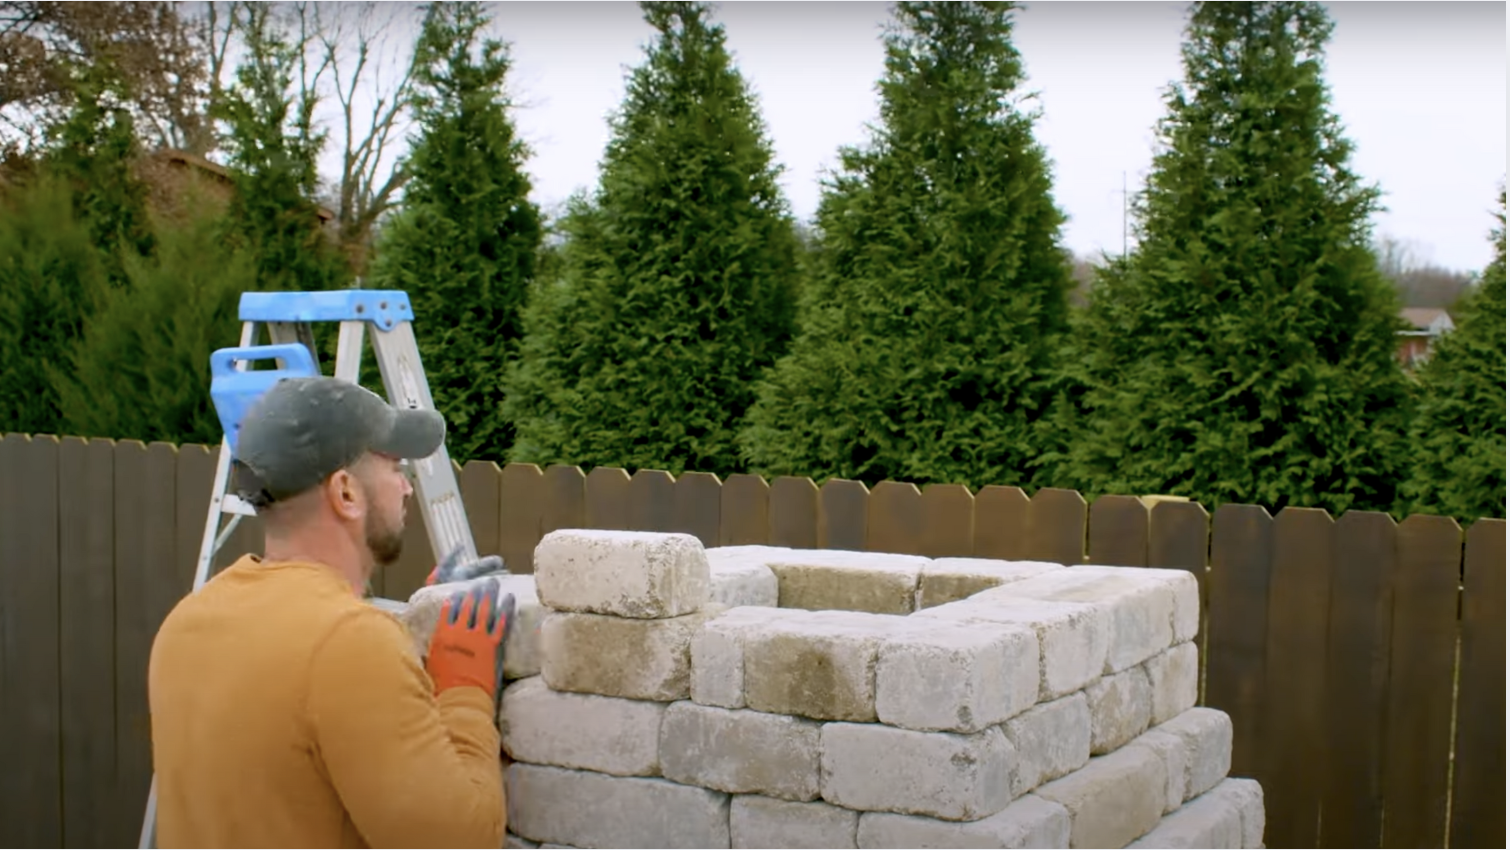
Step 7: Stack the First Course on the Lintel
After installing the lintel, it’s time to start stacking the first course of bricks on top. This layer is crucial because it will form the base for the chimney and the rest of the structure.
Make sure the blocks are properly aligned and level as you stack them. You may need to temporarily support the middle blocks with extra blocks to keep everything in place.
Once the blocks are aligned and stable, remove the temporary supports and check again to ensure the structure is level and secure.
Step 8: Build the Smoke Chamber
Now that the lower portion of the fireplace is complete, it’s time to build the smoke chamber. This part of the fireplace directs the smoke from the fire up the chimney and out of the fireplace.
As you build the smoke chamber, be sure that the walls are level and square. Check your work regularly with your level to make sure the structure is plumb and stable.
The smoke chamber serves as the second foundation for the build, so it’s important to get it right.
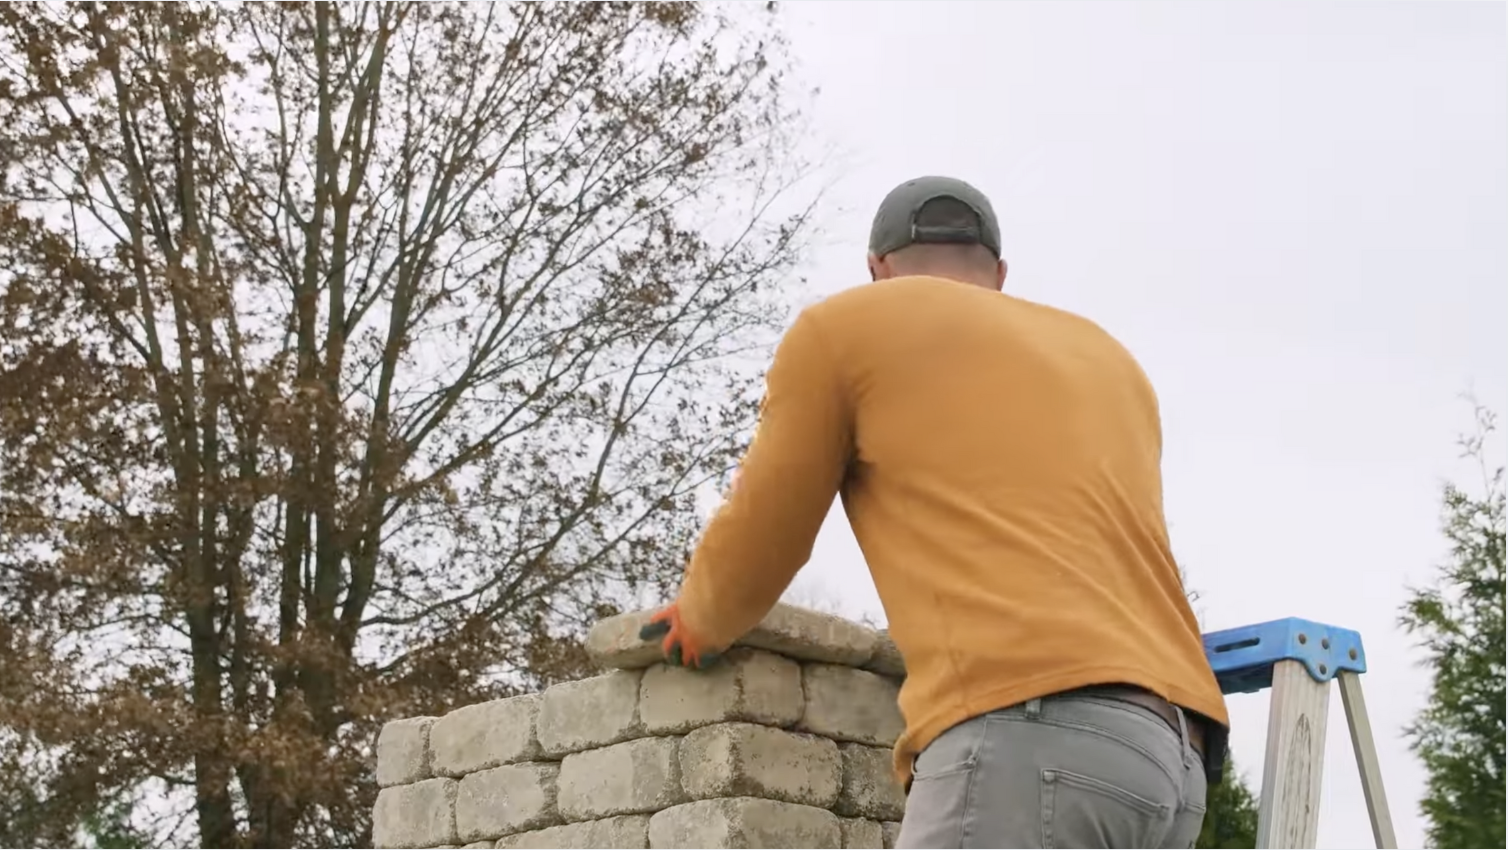
Step 9: Construct the Chimney
Next, you’ll need to construct the chimney. As with the rest of the fireplace, it’s important to keep checking that the chimney is plumb as you add layers of bricks.
The chimney ensures that smoke is properly ventilated and directed out of the fireplace. Take your time with this part of the build, as a crooked chimney will affect both the function and appearance of your fireplace.
Keep using the level to ensure everything stays aligned as you build up the chimney to the desired height.
Step 10: Add the Chimney Cap
The final step is adding the chimney cap. This piece serves both functional and aesthetic purposes; it helps protect the fireplace from the elements and complements the look of your fireplace.
Carefully place the chimney cap on top of the chimney, making sure it is properly aligned. If the cap has any chips or imperfections, flip it so the damaged side faces inward.
Once you are happy with the placement, secure the cap in place to complete the structure.
Step 11: Finishing Touches
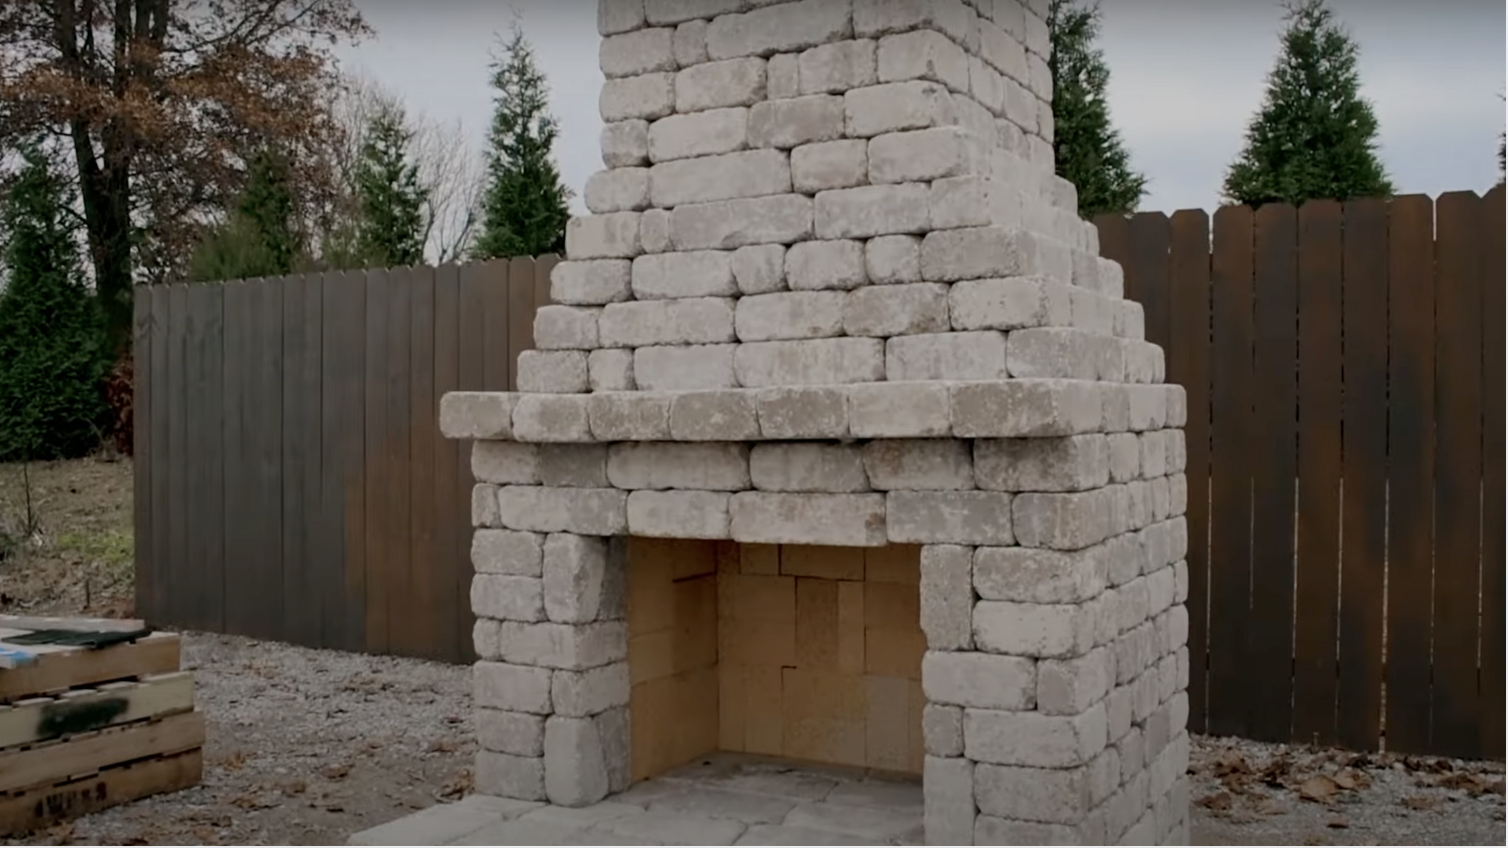
Now that your fireplace is fully built, take a moment to inspect the entire structure. Check for any gaps, misalignments, or areas that need extra attention.
If you find any imperfections, take the time to fix them before moving on. You can add decorative stones, a hearth, or even paint the exterior to give it a personalized touch.
With everything in place, your outdoor fireplace is ready for use, providing a beautiful and functional addition to your backyard.
For a visual guide, refer to this step-by-step guide on how to build an outdoor fireplace by @CornerstoneRocksKits on YouTube.
The Cost of Building an Outdoor Fireplace
The cost of building an outdoor fireplace can vary widely depending on several factors, such as the materials you choose, the complexity of the design, and whether you hire a professional or complete the project yourself.
On average, a basic outdoor fireplace can cost anywhere from $2,000 to $5,000, while more elaborate custom-built fireplaces can range from $5,000 to $10,000 or more.
The materials, such as brick, stone, or cast concrete, can significantly impact the price, as natural stone tends to be more expensive than concrete blocks.
Labor costs are another consideration if you decide to hire a contractor, as this can add to the overall cost.
Additionally, factors such as the size of the fireplace, whether you’re installing a chimney or using a pre-built kit, and any extra features like built-in seating or decorative elements can increase the total cost.
It’s essential to set a realistic budget and plan for any unexpected expenses during the construction process.
Should You Build an Outdoor Fireplace?
Building an outdoor fireplace offers numerous benefits, from creating a cozy outdoor space to increasing the value of your home, making it a worthwhile investment.
- Increases Outdoor Living Space: An outdoor fireplace adds functionality to your backyard, making it a year-round living space.
- Creates a Cozy Atmosphere: The warmth and glow of a fire create a cozy and inviting environment for gatherings or relaxation.
- Enhances Property Value: A well-built outdoor fireplace can increase your home’s curb appeal and overall property value.
- Extends Outdoor Enjoyment: It allows you to enjoy your outdoor space even during cooler weather, perfect for fall and winter months.
- Great for Social Gatherings: An outdoor fireplace provides a natural gathering spot for family and friends, enhancing your outdoor entertainment area.
- Low Maintenance: Once built, outdoor fireplaces require minimal upkeep and can withstand the elements, making them a lasting addition.
Conclusion
Building an outdoor fireplace is a rewarding project that can transform your backyard into a cozy and functional space.
From providing warmth during chilly evenings to enhancing the overall ambiance of your outdoor area, the benefits are clear.
I’ve walked you through each step, from preparing the foundation to adding the finishing touches, and with the right tools and materials, this project can be completed successfully.
It’s essential to plan ahead and budget for the materials, labor, and any extras you might want to add to your fireplace. With the right investment, you can create an outdoor space that becomes the heart of your home.
If you’re ready to get started, I encourage you to begin by gathering your materials and following the steps laid out in this guide. Build your dream outdoor fireplace and enjoy countless memorable moments with family and friends.