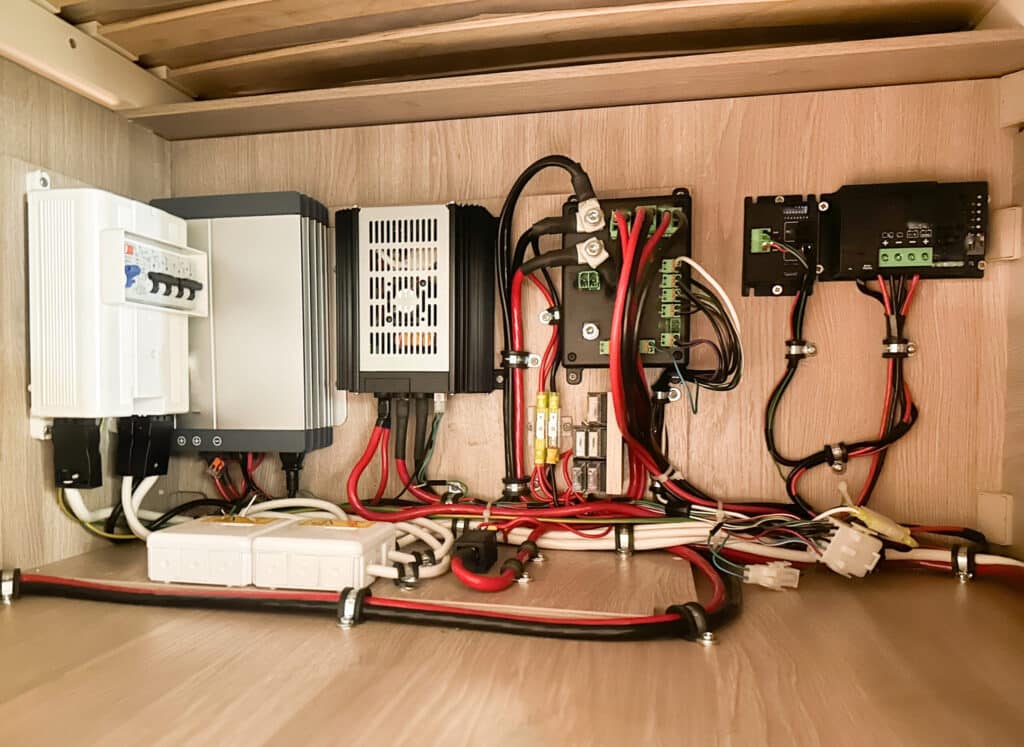
The 12-volt house battery powers everything in a recreational vehicle’s (RV) living quarters on the road or off the grid. Although some motor homes may have two 6-volt batteries, a single 12-volt one is standard. Don’t confuse it with a 12-volt starter battery — a separate unit that supplies electricity to the engine.
A house battery is a primary source of electricity when the vehicle isn’t connected to an external power source. Be sensitive to red flags to address issues with it or the rest of the 12-volt system early to stay safe and comfortable while traveling or camping in the middle of nowhere.
Common Problems With 12-Volt Systems in RVs
An RV’s 12-volt system consists of multiple components. In addition to the battery, a typical setup includes a converter, a network of cables and wires, circuit breakers, fuses, an inverter, and a transfer switch.
One malfunctioning component can cause the rest of the system to fail. The most common problems most RV owners face include:
- Low voltage: When at rest, a fully charged lead-acid battery should be between 12.6 and 12.9 volts. A battery must be charged when its voltage drops below 12 volts, which can permanently damage the unit if it stays that way for too long.
- Short circuits: These faults lead to an excessive flow of electrical current, which can compromise other components or start a fire.
- Overloaded circuits: These issues happen when the system doesn’t distribute power usage across multiple circuits enough.
- Damaged wiring: Old or outdated wiring can’t handle the electrical demands of modern appliances and electronic devices.
- Blown fuses: These problems break the circuit and stop the flow of excessive electric current arising from a short circuit, an overloaded circuit or some other abnormal current flow.
- Tripped circuit breakers: These occur to protect the system from abnormal flows of electric current.
- Loose or corroded connections: These introduce resistance to the flow of electrical current, which can result in low voltage.
- Faulty converter: This issue prevents the battery from charging properly and can start a fire due to overheating caused by voltage irregularities.
- Failing inverter: This problem can disrupt the supply of sufficient power to some appliances, as it impedes the conversion of 12-volt direct current (DC) to 120-volt alternating current (AC).
Red Flags to Watch Out For
Some signs of RV’s electrical system problems can be challenging to spot. You know something’s wrong when:
- The lights are dim or flickering.
- The appliances run more slowly.
- The battery experiences difficulties charging or holding a charge.
- There’s physical damage to the battery.
- Unusual sounds are coming from the converter.
- The converter overheats.
- The fuses blow frequently.
4 Tips for Troubleshooting Your RV’s 12-Volt System Problems
Troubleshooting electrical problems with RVs involves risks like shock, electrocution and fires. Although you should leave most jobs to credentialed RV technicians and electricians, you can safely diagnose and fix minor problems independently. Follow these X tips.
Determine Battery Voltage
When diagnosing 12-volt components and systems, any technician aiming to rule out all possible causes of a system or device issue would test the most important component — in this case, the battery. Many RV electrical problems happen when it malfunctions.
To verify its voltage, use a multimeter. This multipurpose diagnostic tool can be intimidating at first. Still, it’s easy to use when you focus on the dial setting for DC voltage and ignore those for AC voltage, current, and resistance.
Generally, the DC setting is labeled with the capital letter V and a horizontal line. Check the product manual to locate it accurately. Set the dial to 20 volts, which is enough to measure your battery’s voltage.
Then, connect the black and red probes. The black one goes to the port labeled “com,” and the red one goes to the port labeled V, along with other symbols and letters. Review the product manual to determine which probe should go to which port. Turn on the multimeter if it has a power switch.
Locate the battery terminals, and wear gloves to protect yourself. Connect the red probe to the terminal with a plus sign for positive and the black probe to the one with a minus sign for negative.
Check the reading in the multimeter, which shouldn’t fluctuate if your hands are steady. If the voltage is below the ideal range, you need to charge it. If it’s within the ideal range, it’s something else.
Test If the Battery Can Hold a Charge
Charging a good battery should bring its voltage to an optimal level. However, a battery that charges improperly, drains too quickly or doesn’t charge at all may be shot.
Inspect Connections
Loose connections can cause electrical issues in RVs. When the wiring is up to date and cables are in good repair, tightening them should solve the problem.
Before you inspect the connections, you must switch your RV’s electrical supply. Unplugging from the wall outlet — when connected to an external power source — turn off the generator and inverter, and disconnect the battery.
Locate the battery’s disconnect switch, and turn it off or put the switch in the red position. If your battery doesn’t have this switch, the cables require manual disconnection — a task you must leave to a qualified professional.
Consult a Qualified Professional
Most electrical problems merit the services of a certified RV technician or electrician. Fixing them without adequate knowledge, proper skills and correct tools is unsafe.
Be Vigilant to Identify RV Electrical Issues Early
Paying attention to causes for concern is key to keeping your RV’s 12-volt system in good shape. While personally fixing most issues may not be an option, identifying red flags early is key to getting it professionally repaired immediately.

