
When I first started working with wood, I didn’t know the difference between dye and stain. They both change the color of wood, so I thought they were the same.
But after a few projects, I learned they’re not. Wood dye and wood stain work in different ways. They each have their own look, benefits, and uses.
If you’re like me and want your wood project to turn out just right, it helps to know what each one does. Some people prefer the deep, even color of dye.
Others like the way stain shows off the wood grain. The right choice depends on what you’re working on and the look you want.
In this blog, I’ll break down the real differences between wood dye and stain. It’s simple, clear, and easy to understand; no fancy words needed.
What Is Wood Dye?
Wood dye is a type of coloring that soaks deep into the wood. It comes in liquid or powder form.
Depending on the type you choose, you can mix it with water, alcohol, or oil. When applied, it goes deep into the wood fibers and changes the color from the inside out.
Dye works best on fine-grain woods like maple or birch. These woods don’t absorb stain very well, but they take dye nicely.
You can also use dye on any other wood to give it a bold, even look.
Unlike stain, dye doesn’t sit on the surface. It sinks in fast and dries quickly. That means you have to work fast. But it also means you get a rich color with very little waiting.
Types of Wood Dye
There are three main types of wood dye:
- Water-based dye: Easy to clean and gives bright colors. It raises the wood grain, so you may need to sand after.
- Alcohol-based dye: Dries fast and gives even color. Good for projects that need speed.
- Oil-based dye: Slower to dry but easy to work with. It gives a soft, rich tone.
Dye gives the wood a clear, deep color. Since it soaks in, the wood still looks natural. You can still see the grain, but the color is very even.
There are no blotchy spots or heavy lines. It’s great if you want a bold color without hiding the wood pattern.
Where Wood Dye Works Best
Wood dye is great for:
- Fine furniture
- Guitars and instruments
- Cabinets and shelves
- Projects where color evenness matters
- Woods that don’t take stain well (like maple)
What Is Wood Stain?
Wood stain is a coloring that sits more on the surface of the wood. It’s made of color pigments, a binder, and a solvent.
The pigment gives color. The binder holds it together. The solvent makes it liquid and helps it soak into the wood.
Stain does not go as deep as dye. It colors the top layers and can sometimes build up a little on the surface.
That’s why it often looks thicker and darker in some areas. This can make the grain pop more, but it can also lead to blotchy spots if you’re not careful.
Stain takes longer to dry than dye. That gives you more time to fix mistakes or wipe away extra stain. It’s easier for beginners to use.
Types of Wood Stain
The most common types of stain are:
- Oil-based stain: Most common. Easy to apply, slow to dry. Great for outdoor and indoor use.
- Water-based stain: Dries faster, low odor. Better for indoor use. Easier to clean up.
- Gel stain: Thick and doesn’t run. Good for vertical surfaces or hard-to-stain woods.
- Lacquer-based stain: Dries super fast. Used mostly by pros.
Stain gives a soft color that can be light or dark. You can see the wood grain clearly, but some types of stain may hide parts of the pattern if too much is used.
Stains add more body and texture to the finish. It’s easier to control how light or dark you want the finish. Just wipe off more or less before it dries.
Where Wood Stain Works Best
Wood stain is great for:
- Outdoor decks and fences
- Tables and chairs
- DIY wood projects
- Larger surfaces
- Beginners who want more time to work
Key Differences Between Wood Dye and Stain
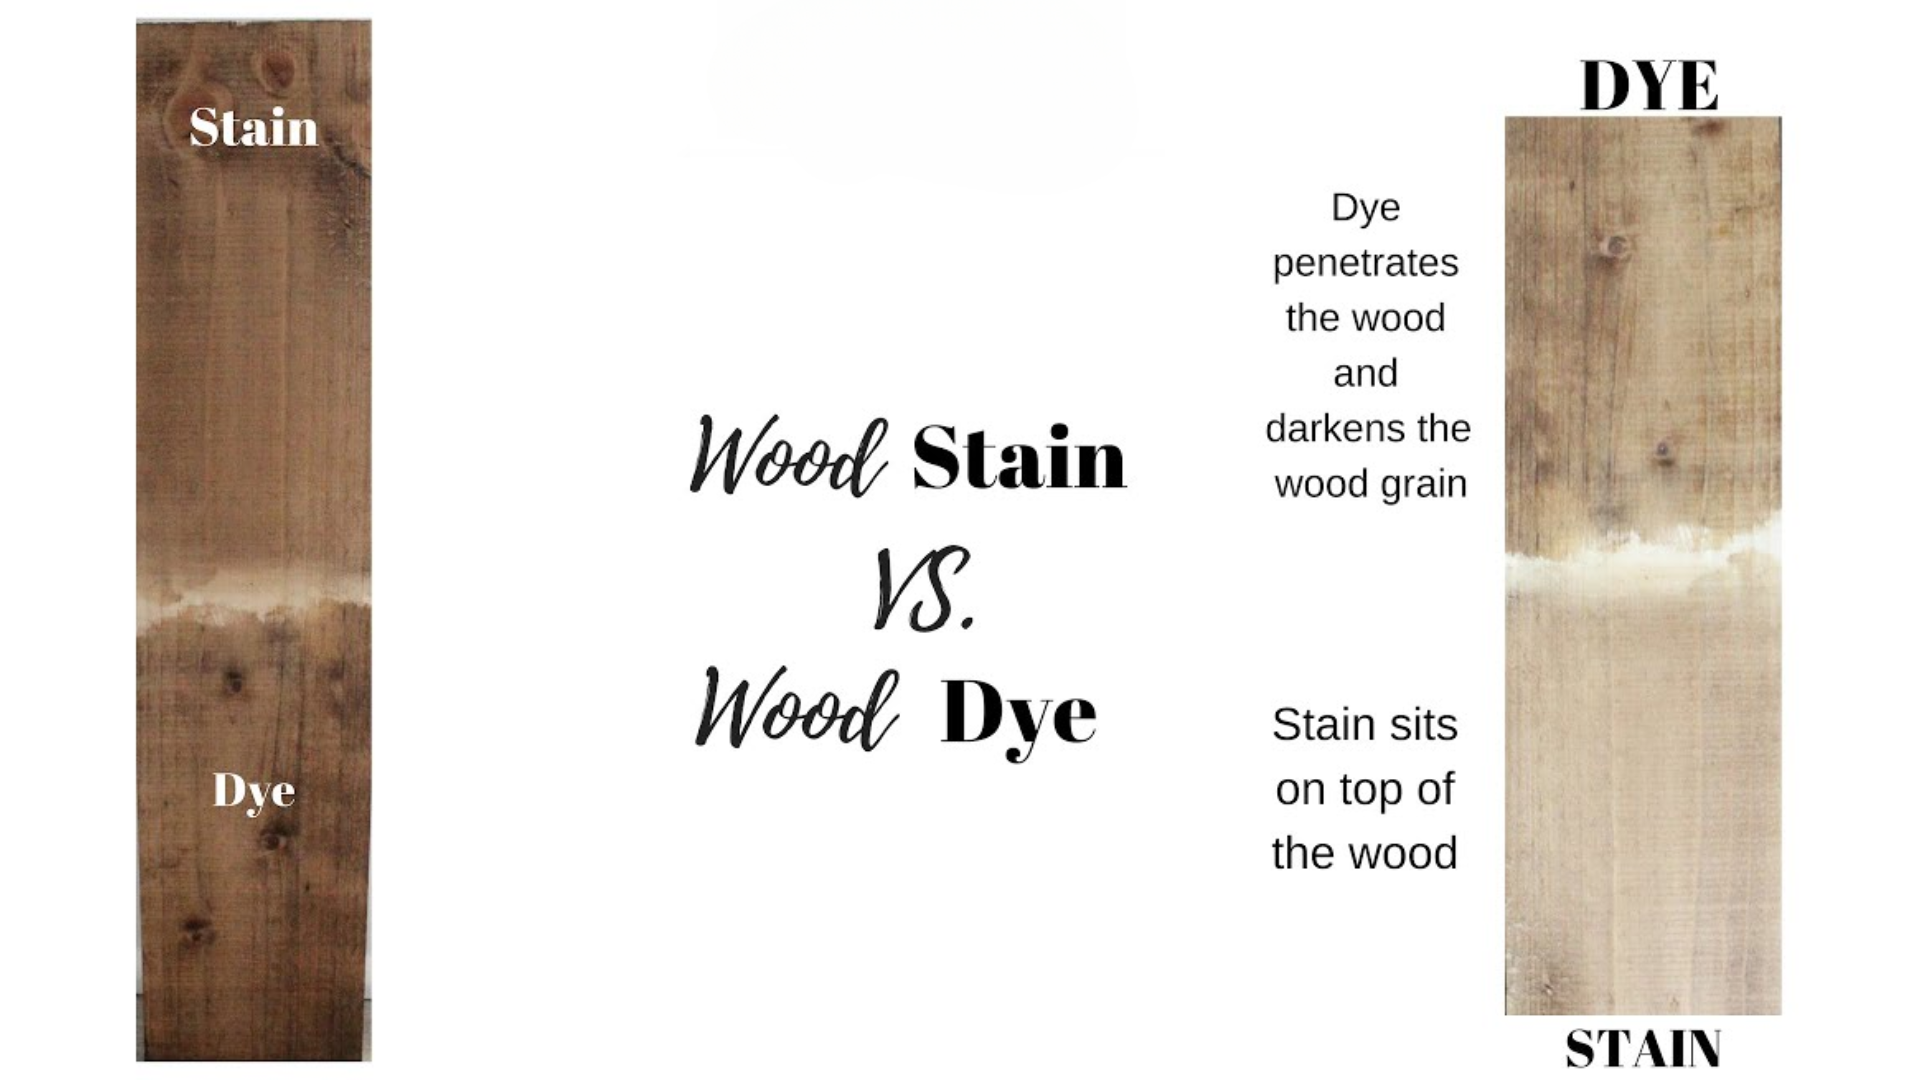
I used to think wood dye and stain were the same. They both color wood, so it felt like they should work the same way.
But after trying them out, I found out they give very different results. One soaks in deep, and the other stays more on top.
I made a quick table to show the main differences and help you decide which one is right for your project:
| Feature | Wood Dye | Wood Stain |
|---|---|---|
| How it works | Soaks deep into the wood fibers | Stays closer to the surface |
| Drying time | Dries very fast | Takes longer to dry |
| Color appearance | Gives bold, even color | Adds soft, natural tones |
| Grain visibility | Keeps grain visible, no blotches | Grain stands out, but can look blotchy |
| Best use | Fine furniture, musical instruments | Decks, tables, and general DIY projects |
| Ease of use | Needs experience to apply well | Beginner-friendly, easy to adjust |
| Fixing mistakes | Harder to fix once dry | Easier to wipe or correct before it sets |
| Types available | Water, alcohol, or oil-based | Oil, water, gel, and lacquer-based |
| Fade resistance | May fade in sunlight without a topcoat | Holds color longer, especially with topcoat |
| Need for topcoat | Yes, to protect the color and wood | Yes, to seal and protect the finish |
This side-by-side view can help you compare them quickly.
While both options have their strengths, the best choice depends on your skill level, the wood you’re using, and the final look you want.
Pros and Cons of Wood Dye vs Wood Stain
When I first started learning about wood finishing, I didn’t know which product to pick. I had to figure out what worked best for each project.
Over time, I found out that both wood dye and wood stain have their good and bad sides. Some jobs need bold, even color.
Others need a softer, more natural finish. This table lays out the pros and cons for each one. It helped me a lot, and I think it’ll help you too.
| Feature | Wood Dye – Pros | Wood Dye – Cons |
|---|---|---|
| Color depth | Gives rich, even color | May fade in sunlight without protection |
| Grain clarity | Keeps wood grain sharp and clear | Doesn’t add texture or contrast |
| Absorption | Soaks deep into wood | Hard to control on soft woods |
| Drying speed | Dries very quickly | Can be tricky for beginners |
| Use case | Great for smooth woods like maple | Not as easy to fix mistakes once applied |
| Feature | Wood Stain – Pros | Wood Stain – Cons |
|---|---|---|
| Ease of use | Easier for beginners to handle | Can look blotchy if not applied right |
| Work time | Dries slowly, giving time to adjust | May hide wood grain if applied too thick |
| Grain look | Highlights the natural grain pattern | Doesn’t soak in as deep as dye |
| Versatility | Works well on many wood types | Needs a topcoat for durability |
| Application | Good for large or outdoor projects | Some stains have strong smells or VOCs |
I always look at what I want the wood to look like when it’s done. If I need a deep, even color that soaks into the wood, I go with dye.
If I want to make the grain stand out and have more time to apply, I reach for stain. This list helps me make the right choice every time.
Which Works Best: Dye or Stain?
Knowing when to use wood dye or stain can make a big difference in how your project turns out. They both color wood, but they don’t work the same way.
One soaks in deep and gives bold color. The other adds a softer finish and gives you more time to work.
This is how I decide which one to use, based on the project, the type of wood, and the look I want.
When to Use Wood Dye
Wood dye is a great choice when rich, even color is the goal. It soaks deep into the wood, which helps avoid blotchy spots, especially on tight-grain woods like maple, cherry, or birch.
This makes it ideal for fine furniture, musical instruments, or any project where a smooth and polished look matters.
Dye is also helpful when working with wood that doesn’t absorb stain well. It brings out color without covering up the natural grain.
Since it dries fast, it’s a good option for quick jobs, but that also means it’s important to plan and work carefully.
I use wood dye when I want deep color that feels like part of the wood, not something just sitting on the surface. It gives a clean, sharp finish that’s hard to get with stain alone.
When to Use Wood Stain
Wood stain works best when the goal is a warm, natural look that highlights the grain. It’s a good choice for large surfaces like decks, tables, doors, or shelves.
Stain is easier to apply, and it gives you more time to fix mistakes or wipe off extra color. It’s especially useful for soft or open-grain woods like pine, oak, or cedar.
If the wood already has a nice pattern and just needs a touch of color, stain is the way to go. It also pairs well with outdoor projects when used with a topcoat, helping protect the wood from the weather.
For beginners, stain is a good starting point because it’s easier to control and adjust while working. Using the right one at the right time helps the wood look its best and saves time in the long run.
Once I learned the strengths of each, my projects turned out smoother, and I didn’t have to redo anything. A little planning goes a long way.
Can You Use Both Dye and Stain?
Yes, you can use both, but in the right order. First, use a wood dye to give deep color. Let it dry fully.
Then, apply a stain on top to add warmth or contrast. This is called a “dye and glaze” technique.
It’s used by pros to get rich color depth. But you need to test it on a sample first. Not all woods react the same. And not all finishes work well together.
Do You Need a Topcoat?
Yes. Both dye and stain need a topcoat to protect the wood. Without it, color can fade or wear off. Use something like:
- Polyurethane
- Shellac
- Lacquer
- Water-based clear coat
The topcoat seals the color, adds shine, and helps the wood last longer.
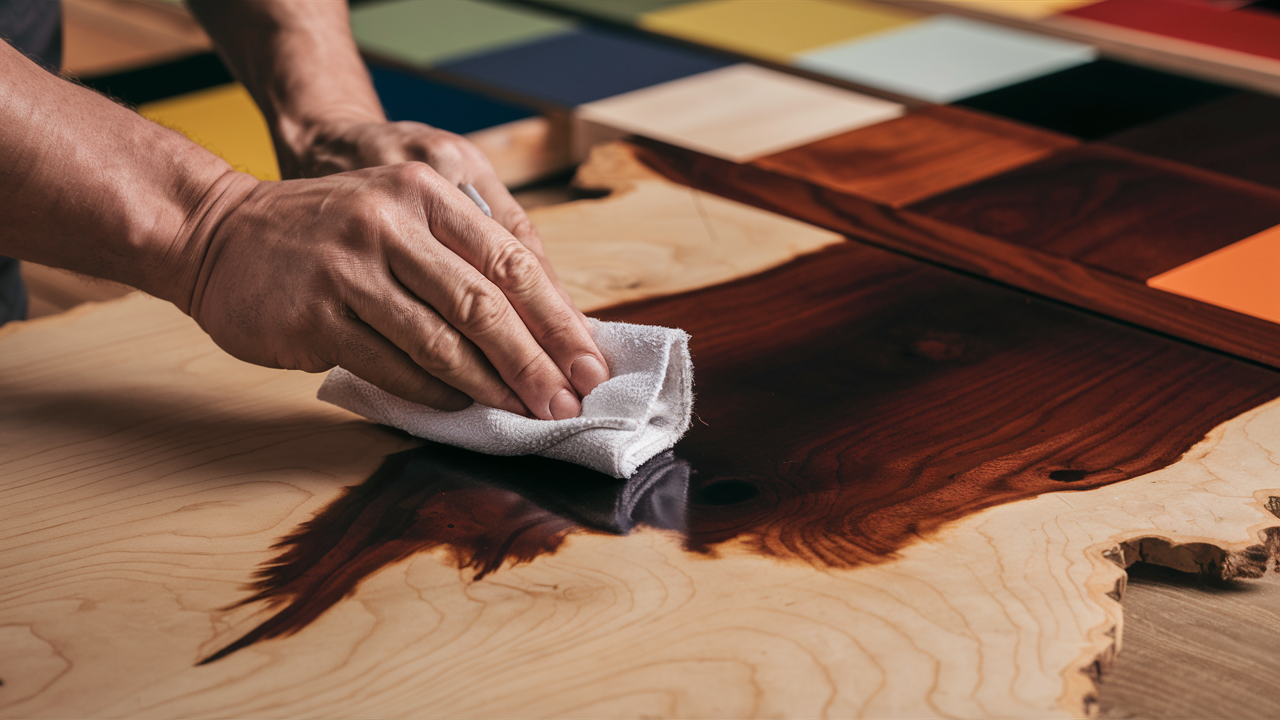
How to Test Before You Start
Before you begin your project, it’s smart to test the wood dye or stain first. Wood can take color in different ways, even if the boards look the same.
Testing helps you avoid surprises and gives you more control over the final look.
- Use a scrap or hidden spot: Try the product on a leftover piece of the same wood or on a hidden part of your project, like the back or bottom.
- Sand and clean the surface: Make sure the test piece is prepped just like your main project, smooth, dust-free, and ready to take color.
- Apply the product the same way: Use the same brush, sponge, or cloth you’ll be using for the real job. Follow the same steps and timing.
- Let it dry all the way: Colors often look different when wet. Wait until the test is fully dry before making a decision.
- Check the color in different lights: Look at the dried test in daylight and indoor light. This helps you see the true color in your space.
- Watch for blotchy spots: Some woods soak up color unevenly. If the test looks splotchy, you might need to pre-treat the wood or switch to dye.
- Adjust as needed: You can apply a second coat, wipe it sooner, or dilute the stain or dye to lighten the color. Testing lets you find the best method.
- Test your topcoat too: Clear coats can darken or change the final color. Try the topcoat on your test piece so there are no surprises later.
Doing a quick test takes only a few minutes, but it can save hours of frustration. Once I started testing first, my projects turned out cleaner, smoother, and more like what I had in mind.
Tips for Best Results
Over time, I’ve learned that a few small steps can make a big difference when using wood dye or stain.
These simple tips have helped me get smoother color, better grain detail, and fewer mistakes. If you want your project to turn out clean and even, here’s what works best for me:
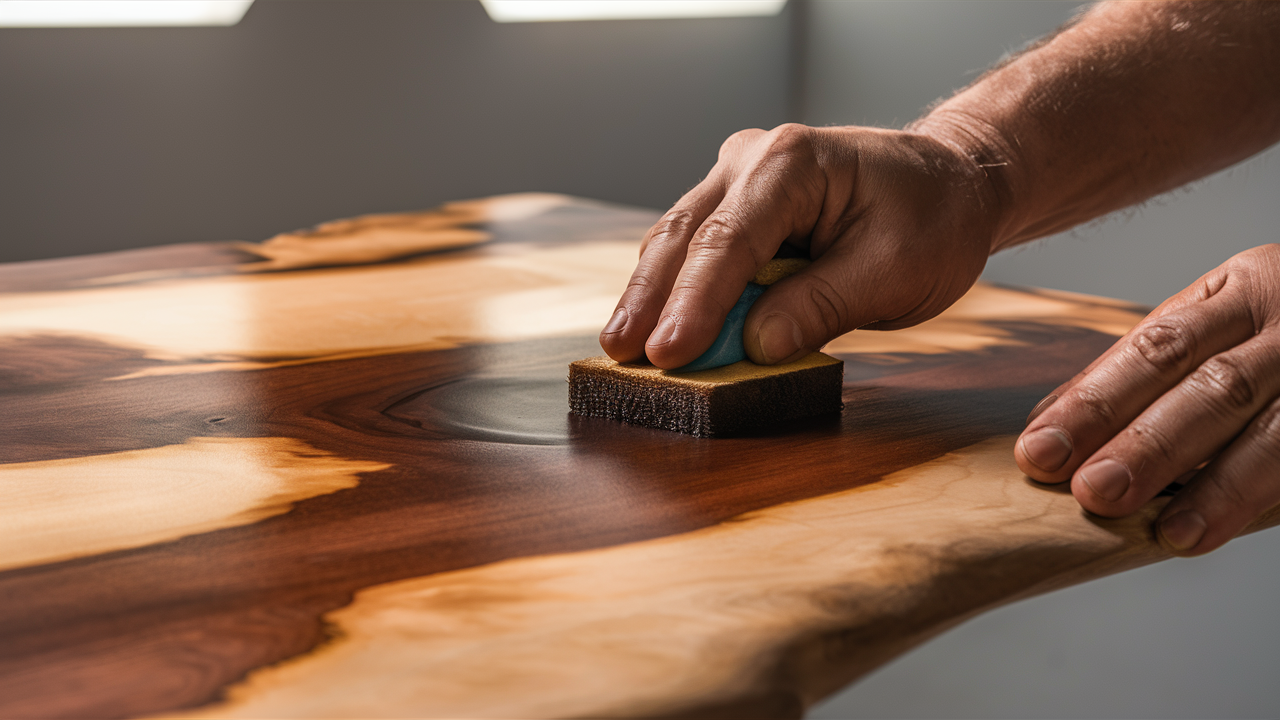
- Sand the surface well: Use fine-grit sandpaper and go with the grain. This helps the color go on smoothly.
- Wipe off all dust: After sanding, clean the surface with a tack cloth or a damp rag to remove dust.
- Test before starting: Always try the dye or stain on a scrap or hidden area first. It shows you how the color will look when dry.
- Apply in light coats: Start with a thin layer. You can always add more if needed, but you can’t take it off easily.
- Let it dry fully: Always give it time to dry before adding another coat or sealing it.
- Seal with a topcoat: After staining or dyeing, a clear topcoat protects the finish and adds shine or softness.
These steps don’t take much time, but they make your project look more polished and professional. I follow them every time, and it always helps me get better, more even results.
Common Mistakes to Avoid
It’s easy to run into problems when working with wood dye or stain, especially early on. These small mistakes can lead to blotchy finishes, uneven color, or extra work.
Most of them are easy to avoid with a little care and planning. Some common issues to watch for and how to fix them before they happen:
- Skipping the sanding step: Rough or uneven surfaces can cause the color to soak in poorly or look patchy.
- Not wiping off extra stain: Leaving too much on the surface makes it sticky, blotchy, and sometimes too dark.
- Applying dye too slowly: Dye dries fast. Working too slowly can lead to uneven spots or harsh lines.
- Using too much product: Heavy coats can hide the wood grain and cause buildup.
- Forgetting to test first: Skipping a test run often leads to surprise colors or poor coverage.
- Staining dirty or oily wood: Dirt and oils stop the color from soaking in evenly and can cause peeling.
- Working in poor lighting: Dim light makes it hard to see missed spots or streaks.
After making a few of these mistakes early on, I started checking my steps more carefully, and the results improved right away.
Just keeping these points in mind can save time and make the final finish look much better.
Conclusion
Wood dye and wood stain both help bring out the beauty in wood, but they work in different ways.
Dye soaks deep into the wood and gives a bold, even color. Stain stays closer to the surface and adds a soft, natural finish.
Knowing how they work can help you choose the right one for your project. Each has its own pros and cons. Dye dries fast and gives rich color, but it can be harder to use.
Stain is easier for beginners and gives more time to work, but it may not be as smooth or even.
Testing before you start, using the right tools, and working with care can make a big difference in how your project turns out.
Take your time and think about the look you want. The more you practice, the better your results will be. Every project is a chance to learn and improve.