
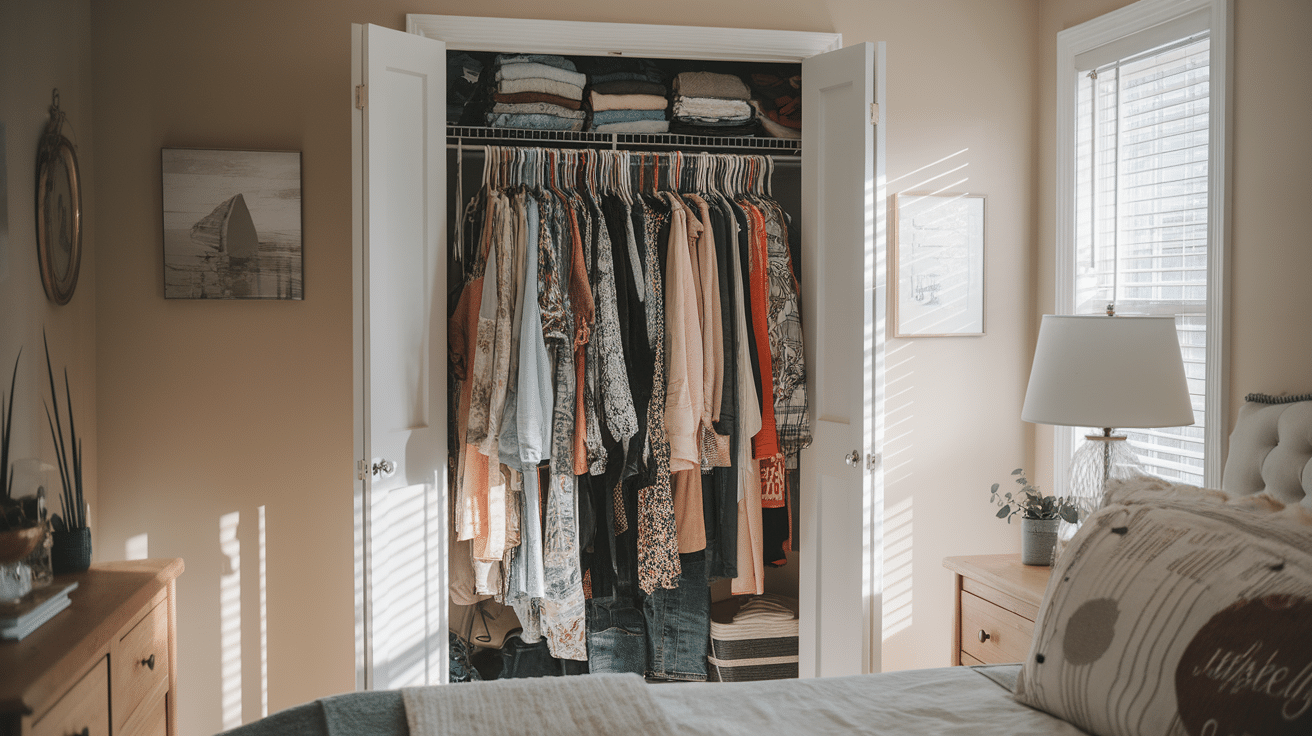
Dream of having a beautiful walk-in closet but worried about the cost? I’ve been there too.
In this guide, I’ll show you exactly how to transform that spare bedroom into your perfect closet space—without breaking the bank. I’ve tested these methods myself in my own home and helped friends do the same.
You’ll learn:
- How to plan your space efficiently
- Where to find affordable storage solutions
- Simple ways to organize clothes and accessories
- Budget-friendly styling tips
With these steps, you can create a functional and stylish closet under your budget. No contractor is needed, no wall damage is required, and everything can move with you to a new home.
Let’s turn that unused room into the closet of your dreams!
Before You Start: What You’ll Need for Success
Creating your dream closet doesn’t require expensive contractors or custom built-ins. With some planning and creativity, you can transform any bedroom into a beautiful, functional closet space that meets your needs.
The key is to work with what you have and focus on practical solutions rather than costly renovations.
Step-By-Step Guide to Creating Your Dream Closet
Turn Any Room Into a Closet – One Step at a Time. Follow these easy steps to build a closet space that works for your needs and fits your style.
Materials You’ll Need
- Measuring tape
- Pencil and paper for planning
- Screwdriver and basic tools
- Command strips and hooks
- Labels for bins and shelves
- Level for hanging shelves straight
Estimated Costs
- Clothing racks: $20-60
- Shelving units: $40-100
- Storage bins: $15-30
- Seating: $30-50
- Lighting: $20-40
- Accessories: $25-50
- Total range: $150-330
Step 1: Make a Simple Plan
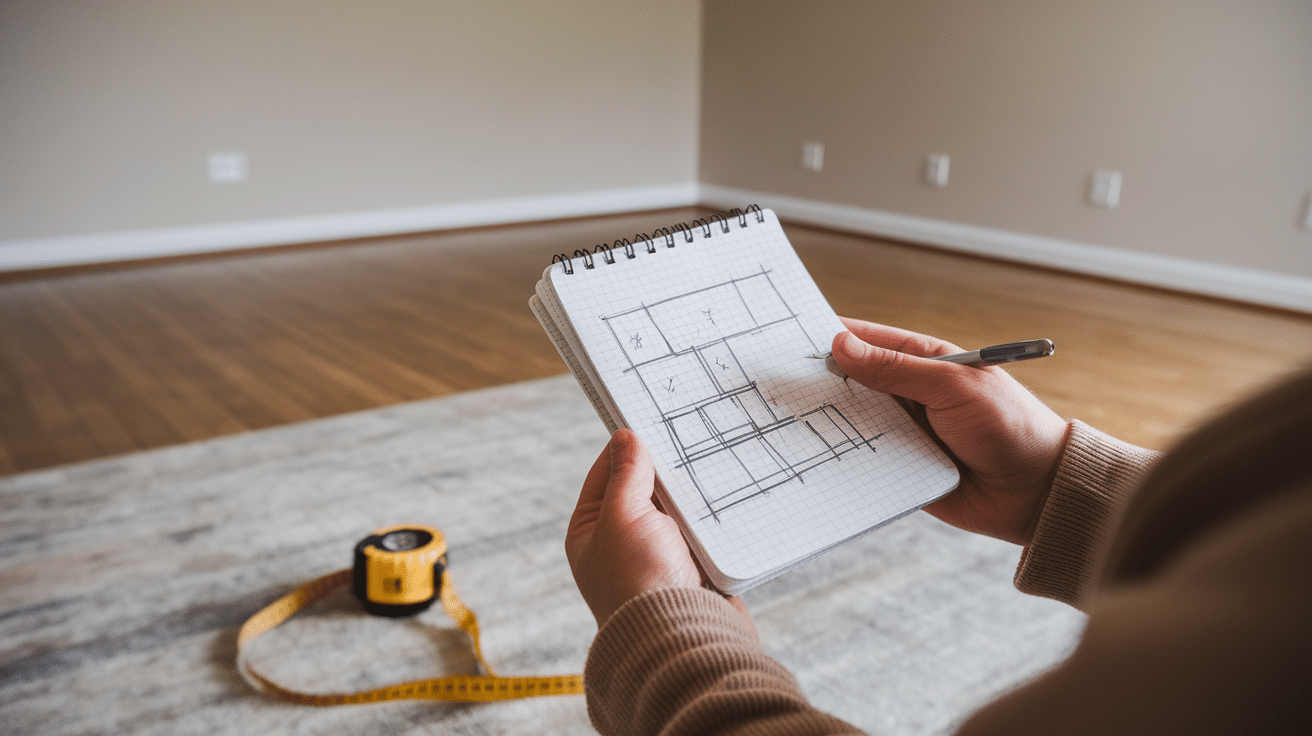
Before buying anything, I measured the room and made a basic sketch. This helped me see what could fit where without wasting money on items that wouldn’t work.
What I did:
- Measured all walls, windows, doors, and outlets
- Listed what clothes and accessories I needed to store
- Decided what zones I wanted (hanging clothes, folded items, shoes)
- Set a clear budget with wiggle room for unexpected costs
Planning first saved me from costly mistakes. I recommend taking photos of the empty room from different angles to help you visualize your ideas better.
Step 2: Choose Furniture that Fits
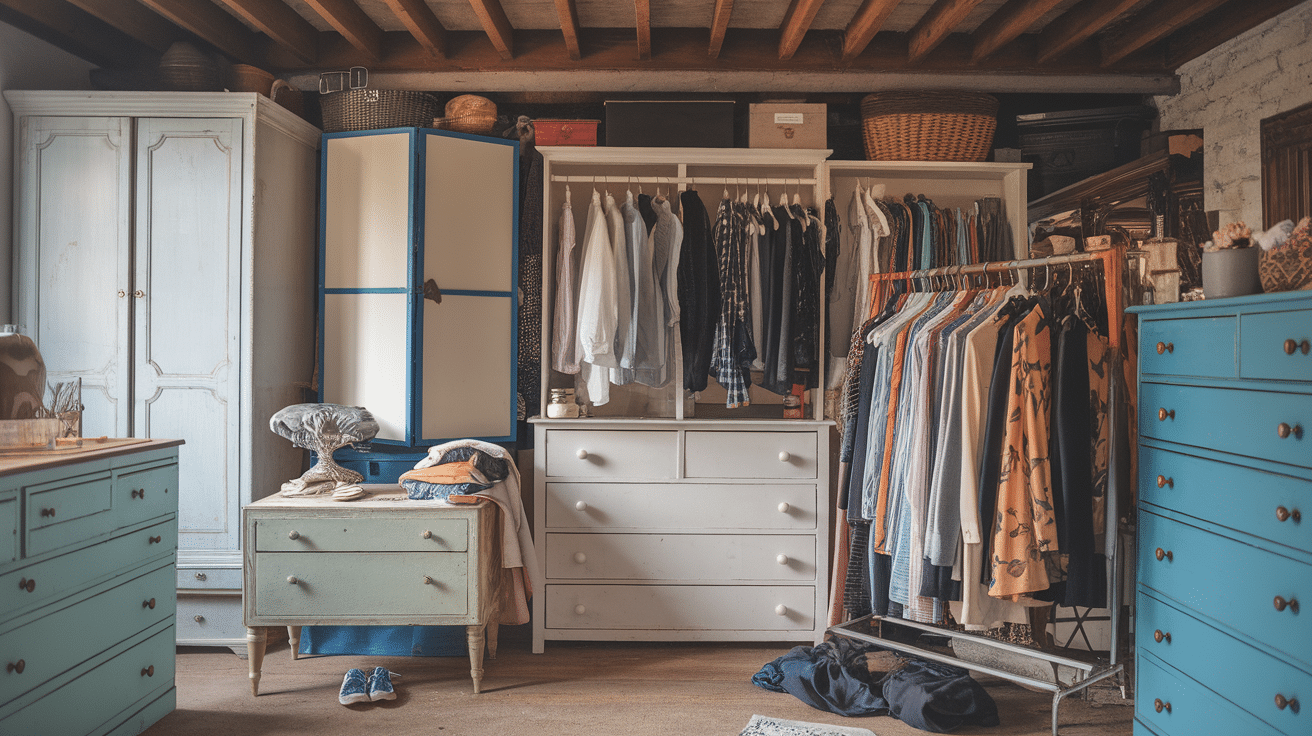
You don’t need custom cabinetry for a great closet. I found budget options that worked perfectly.
My top picks:
- Freestanding clothing racks ($20-40 each) instead of built-ins
- Bookshelves repurposed for folded clothes and shoes
- Cube organizers for smaller items
- Secondhand dressers painted to match my style
Look for items that can serve multiple purposes. My favorite find was a used IKEA Kallax shelf that holds both shoes and sweaters while supporting one end of my clothing rack.
Step 3: Use the Light You Have

Good lighting is crucial but doesn’t have to be expensive. I worked with what was already in the room.
I kept the main ceiling light but added:
- A small lamp on my vanity area
- Battery-operated stick-on lights under shelves ($10-15)
- A floor lamp in dark corners
Money-saving tip: Light-colored paint on the walls makes the whole room brighter without adding fixtures. I chose a soft white that helps me see clothing colors accurately.
Step 4: Use the Window the Right Way
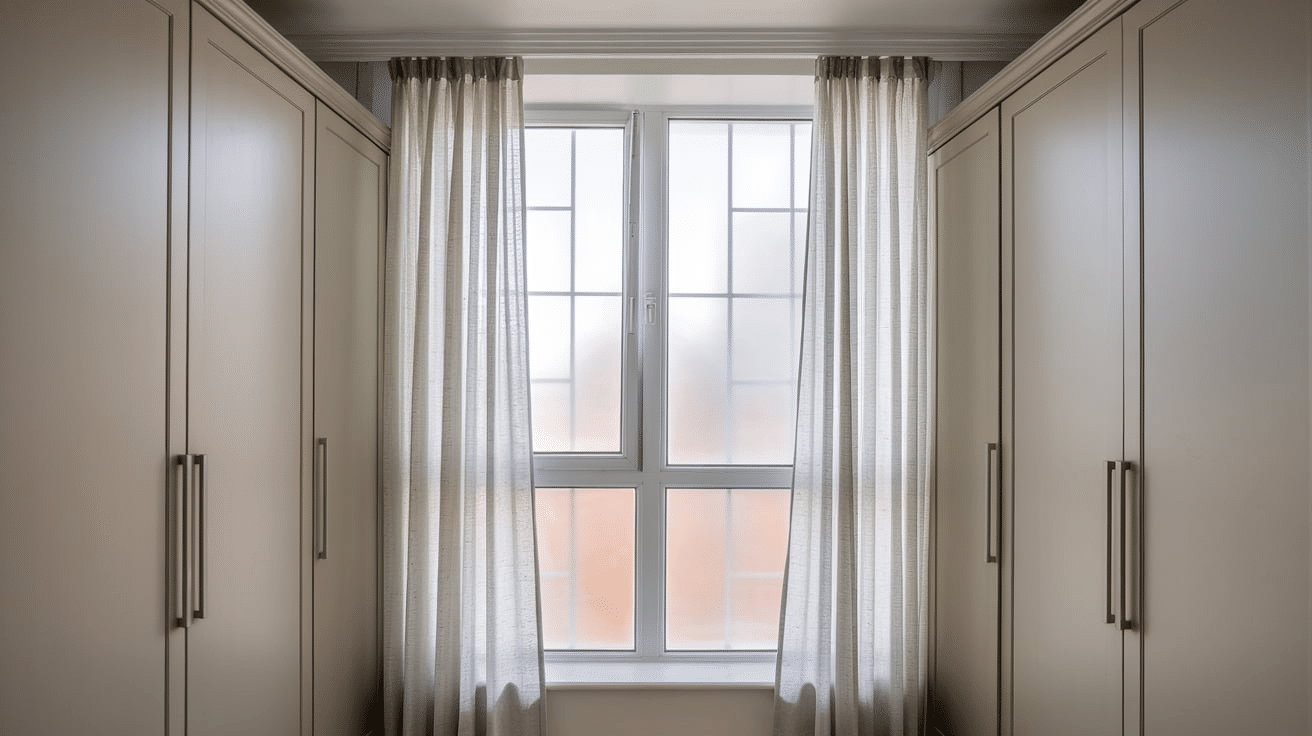
Windows bring natural light but can fade clothes over time. This is my solution to avoid this issue:
- Positioned clothing racks perpendicular to windows, not in front
- Used sheer curtains to filter harsh sunlight
- Added a mirror opposite the window to bounce light around
- Kept heat-sensitive items away from direct sunlight
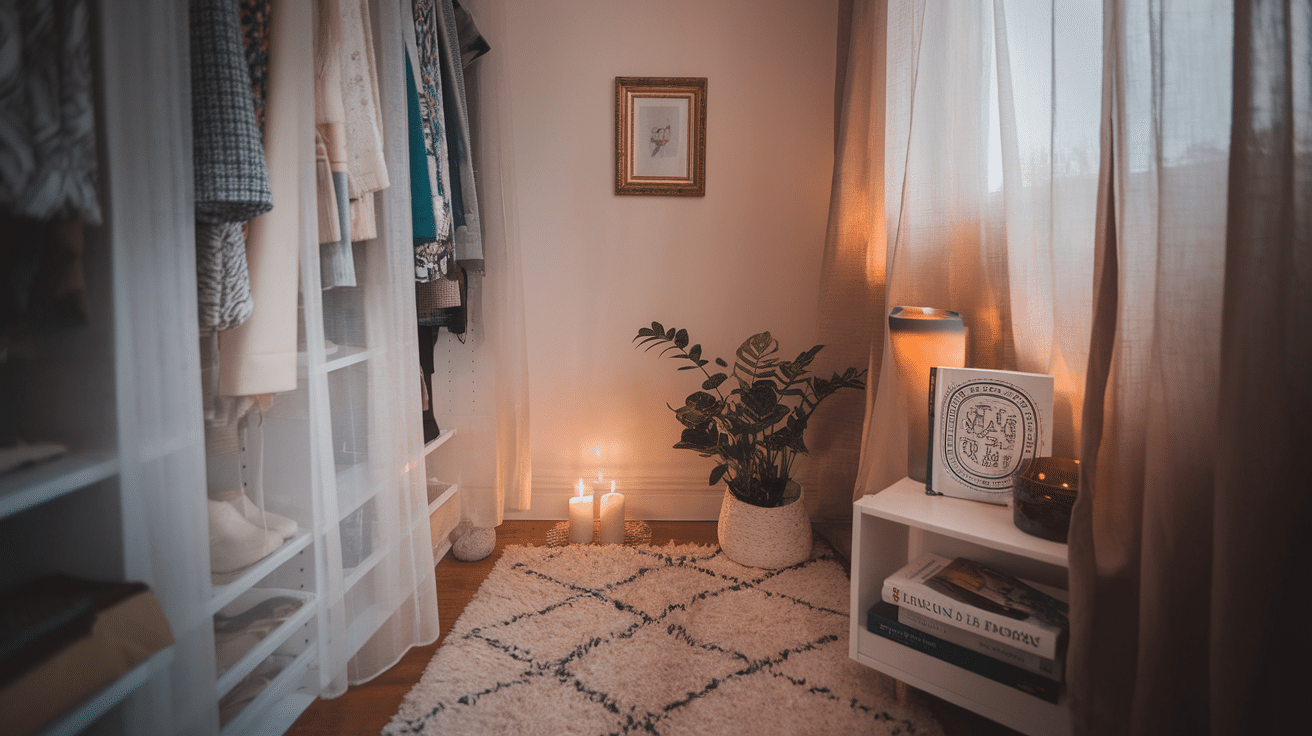
The window became a feature in my closet instead of a problem to work around.
Step 5: Add a Seat or Bench

Having somewhere to sit makes the space more usable. I found an affordable bench that doubles as storage.
What to look for:
- Storage inside for seasonal items
- Height that works for putting on shoes
- Width that fits your space without blocking movement
- Sturdy enough to sit on while getting dressed
My $40 storage ottoman holds all my winter sweaters in summer and gives me a place to sit when trying on shoes.
Step 6: Get Organized with Small Storage
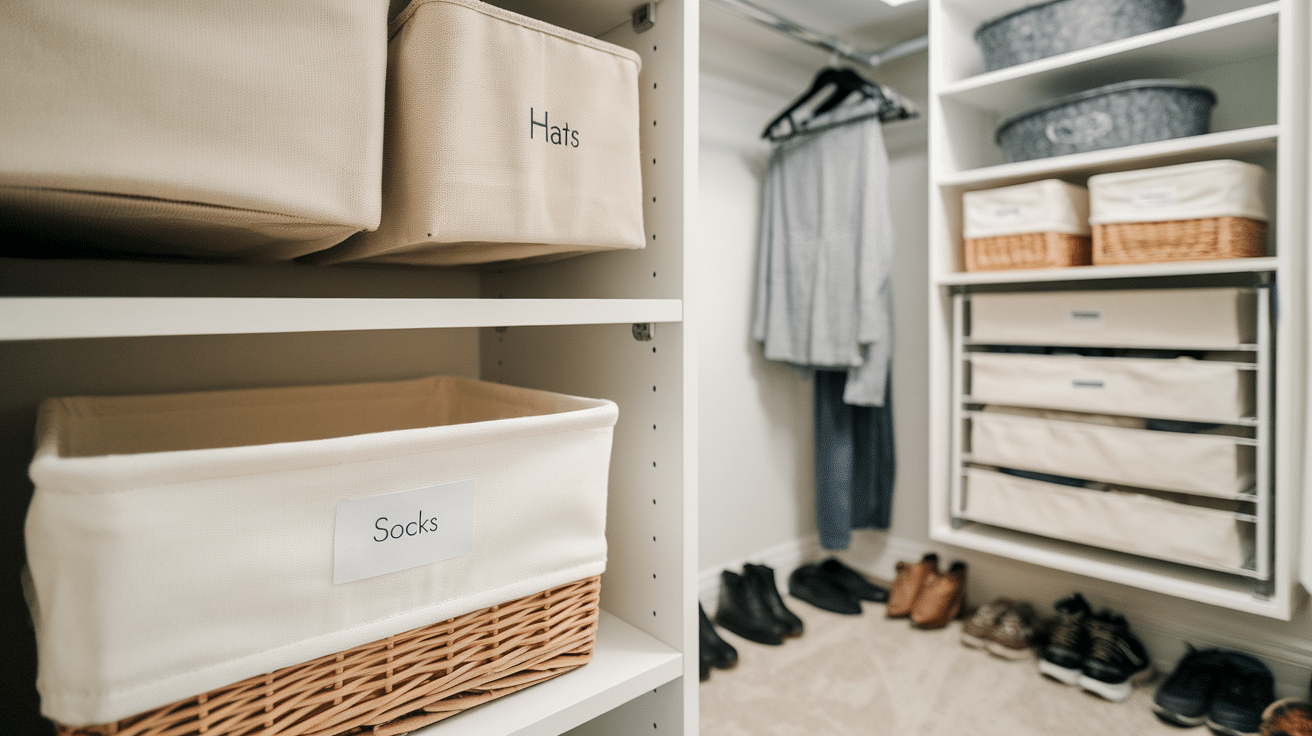
Small items can create big messes without proper storage. These budget solutions keep everything in place:
- Clear plastic bins with labels
- Shoe boxes covered in contact paper
- Drawer dividers made from cardboard
- Belt and scarf hangers
Pro tip: Group similar items together. All my work clothes stay in one section, making morning routines faster.
Step 7: Set up A Vanity Spot
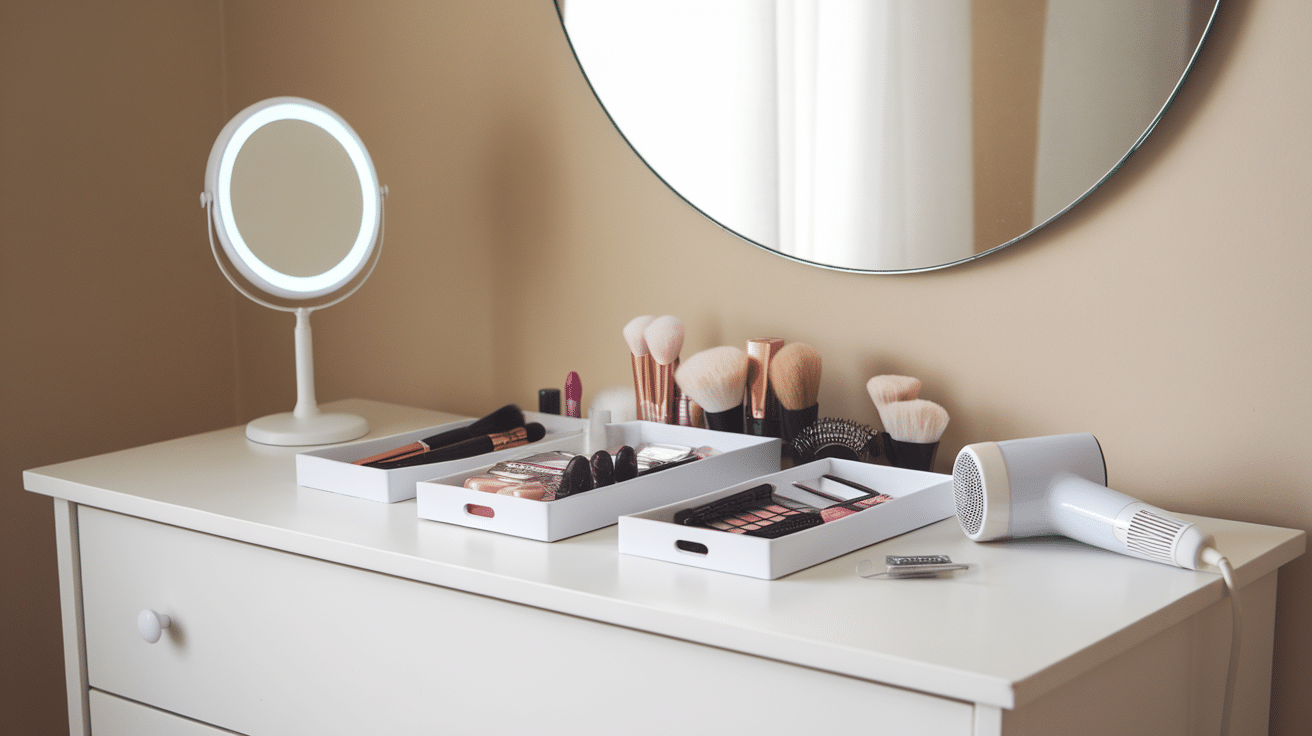
I created a makeup and accessory area without buying an expensive vanity table.
My vanity setup:
- Small desk from a thrift store ($25)
- Wall-mounted mirror with good lighting
- Clear acrylic organizers for makeup
- Small trash can for cotton pads and tissues
This spot makes getting ready each morning so much easier and keeps makeup from cluttering the bathroom.
Step 8: Store Jewelry the Smart Way
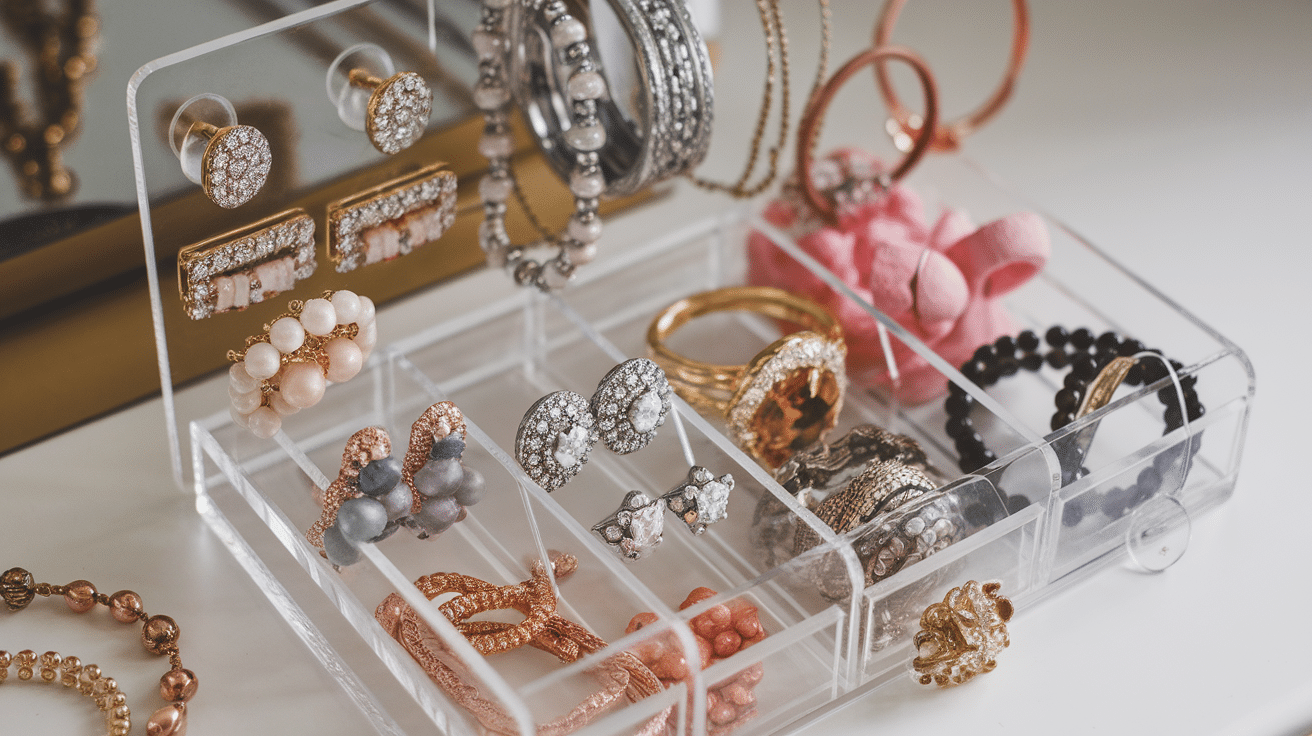
Tangled necklaces and missing earrings were my biggest frustrations. These solutions fixed that problem:
- Corkboard in a frame for earrings and pins
- Mug holder repurposed for necklaces
- Ice cube trays in drawers for rings
- Pill organizers for earring pairs
All these options cost under $15 each and keep everything visible and untangled.
Step 9: Use the Walls and Corners
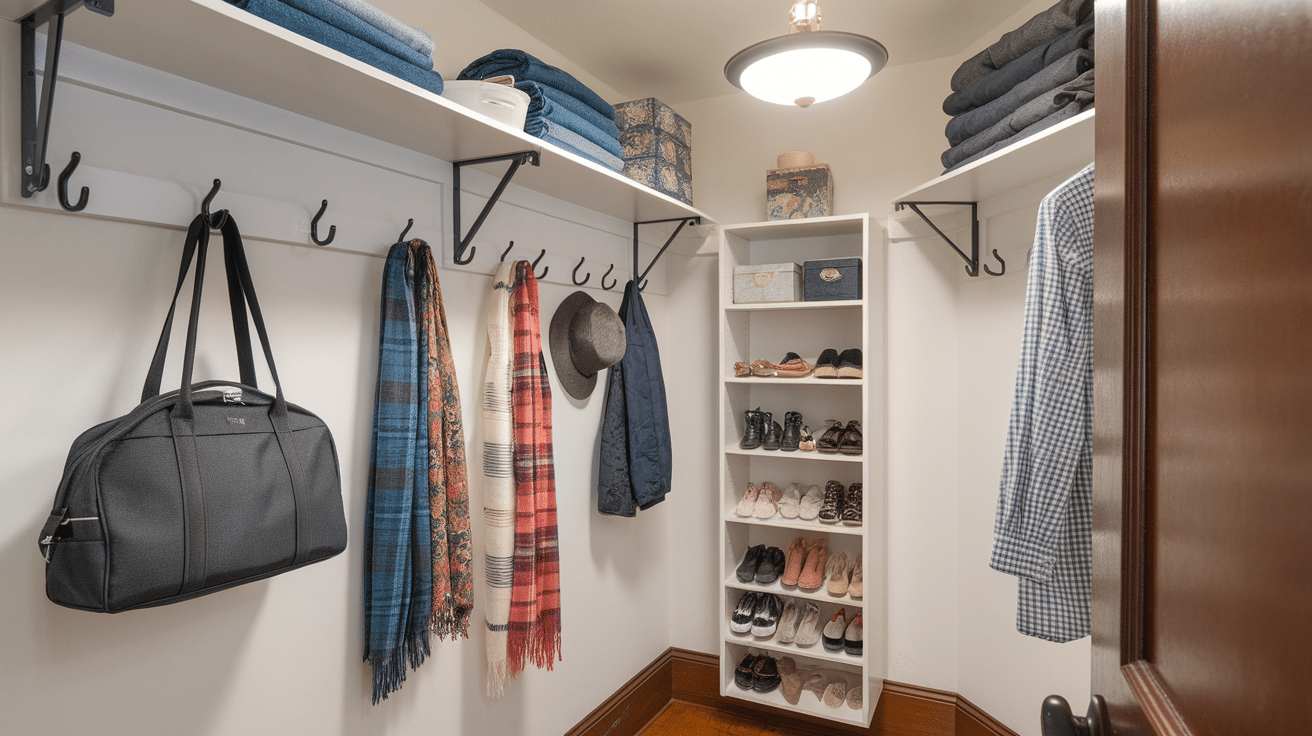
Empty wall space is wasted space in a closet. I used these tricks:
- Command hooks for bags and scarves
- Pegboard for accessories (costs about $20)
- Corner shelves for shoes and handbags
- Over-door organizers for small items
The corners that seemed useless now hold my most-used items where I can easily grab them.
Step 10: Make It Yours
Adding personal touches makes the space feel special without costing much. I included:
- Photos in simple frames
- A small plant on the window sill
- A rug I already owned to warm up the floor
- A Bluetooth speaker for music while getting dressed
These details transform the room from a storage space to a place I actually enjoy spending time in.
Beyond the Basics: Custom Solutions for Every Space
When turning a bedroom into a closet on a budget, you need smart ideas that work for your specific room. Let’s look at some ways to customize your closet space without spending too much.
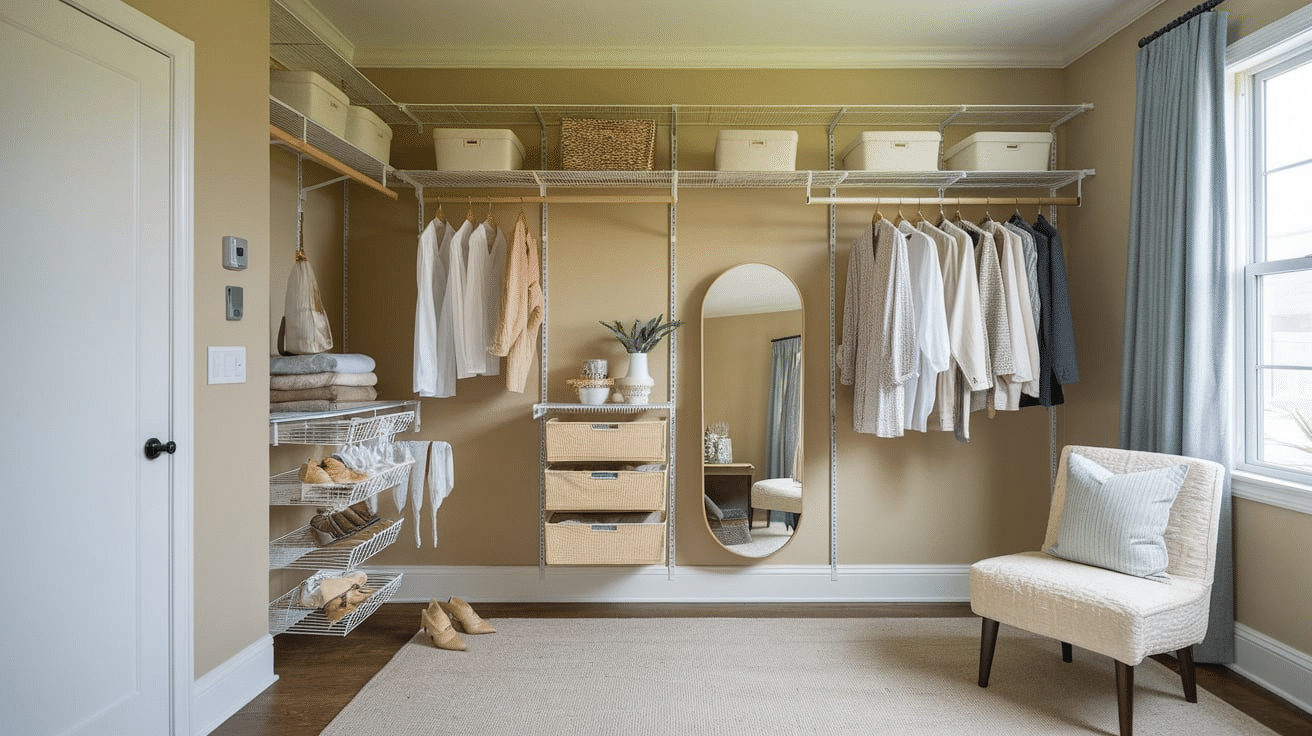
Turning a Small Room Into a Closet
Working with a small room? Focus on maximizing vertical space:
- Use slim clothing racks that fit against walls
- Install shelving up to the ceiling
- Choose furniture with multiple functions (like a bench with storage)
- Use the back of the door for hanging items
- Keep only what you wear regularly—be selective
Small spaces can actually make fantastic closets because everything stays within easy reach!
Turning a Storage Room Into a Closet
Storage rooms often need extra attention before becoming closets:
- Clean thoroughly and fix any moisture issues
- Add proper lighting (essential in former storage spaces)
- Consider portable flooring options if the floor is unfinished
- Use dehumidifiers if needed to protect clothes
- Add mirrors to make the space feel larger and more functional
The transformation from cluttered storage to organized closet can be dramatic with minimal investment.
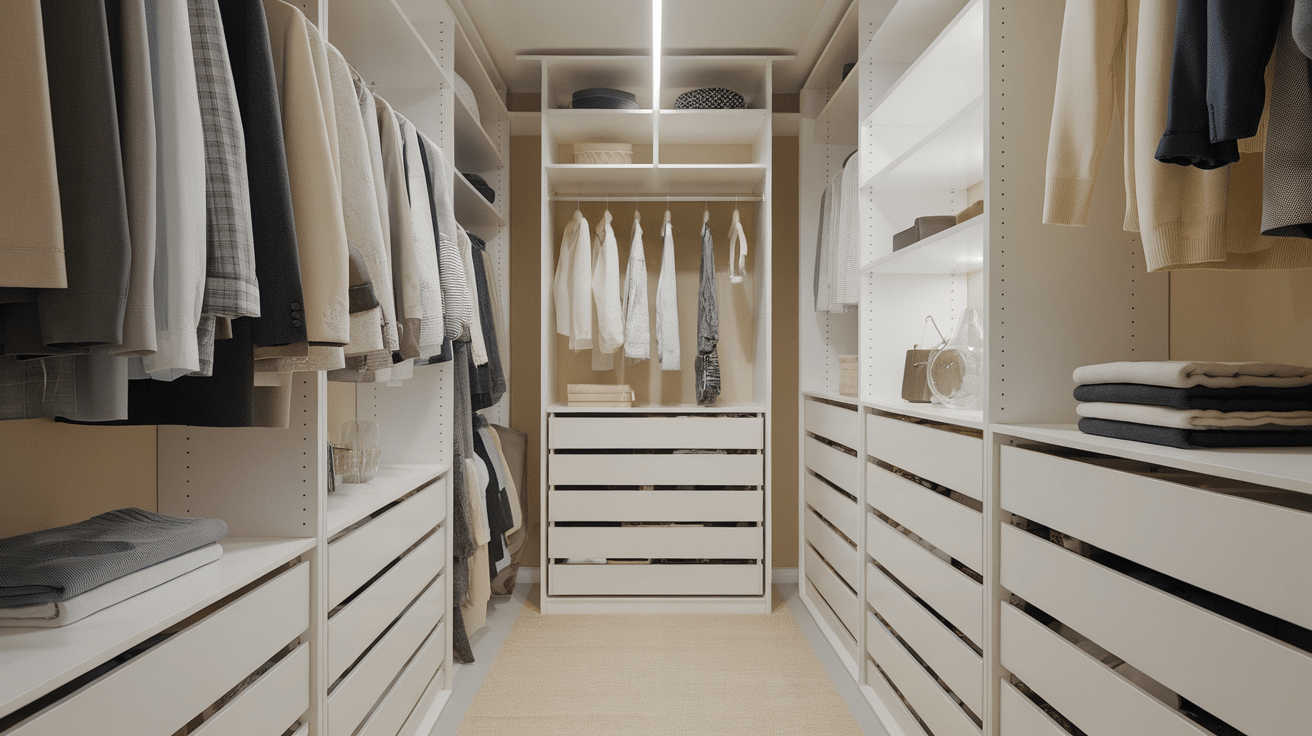
Turning a Room Into a Walk-In Closet
To create a true walk-in experience:
- Create a clear pathway through the middle of the room
- Position hanging clothes along the walls
- Install a center island if space allows (even a small table works)
- Add a full-length mirror at the end of the walking path
- Consider using shower curtain rods between walls for extra hanging space
The key is maintaining enough open space to move around while maximizing storage comfortably.
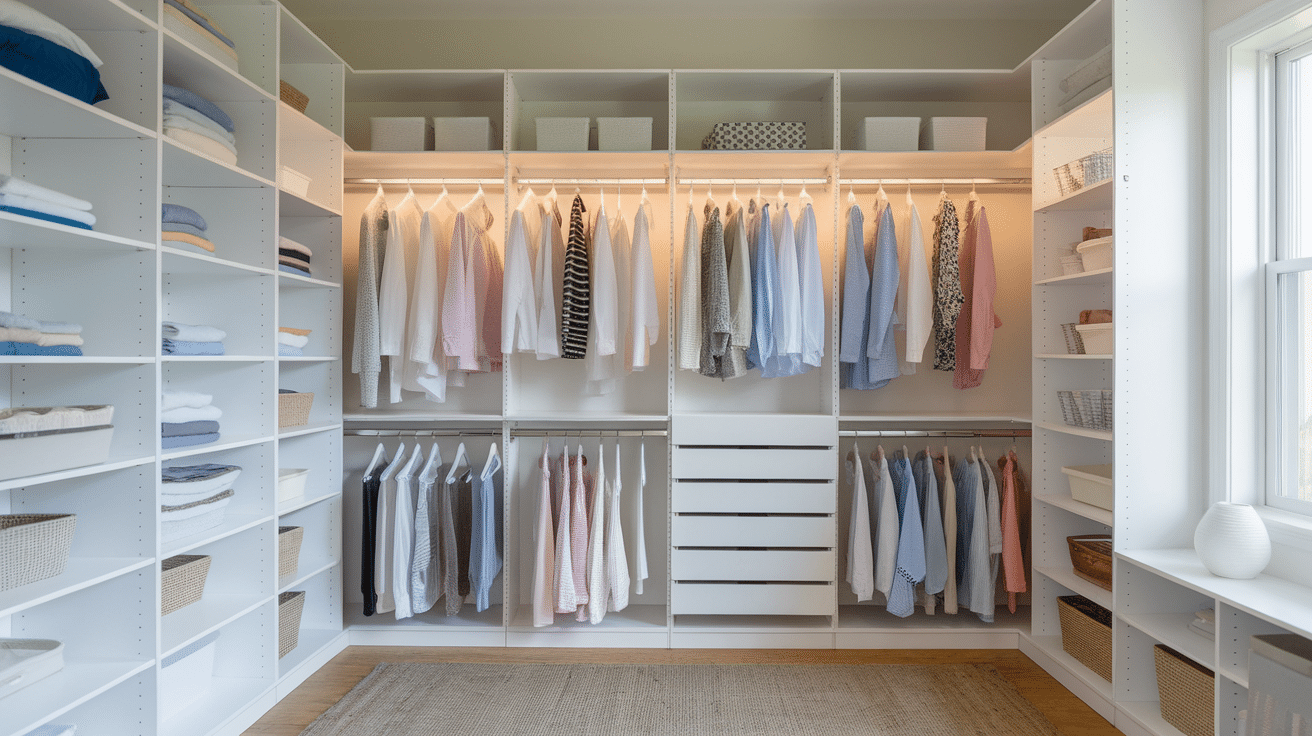
Add Zones for Shoes, Clothes, and Dressing
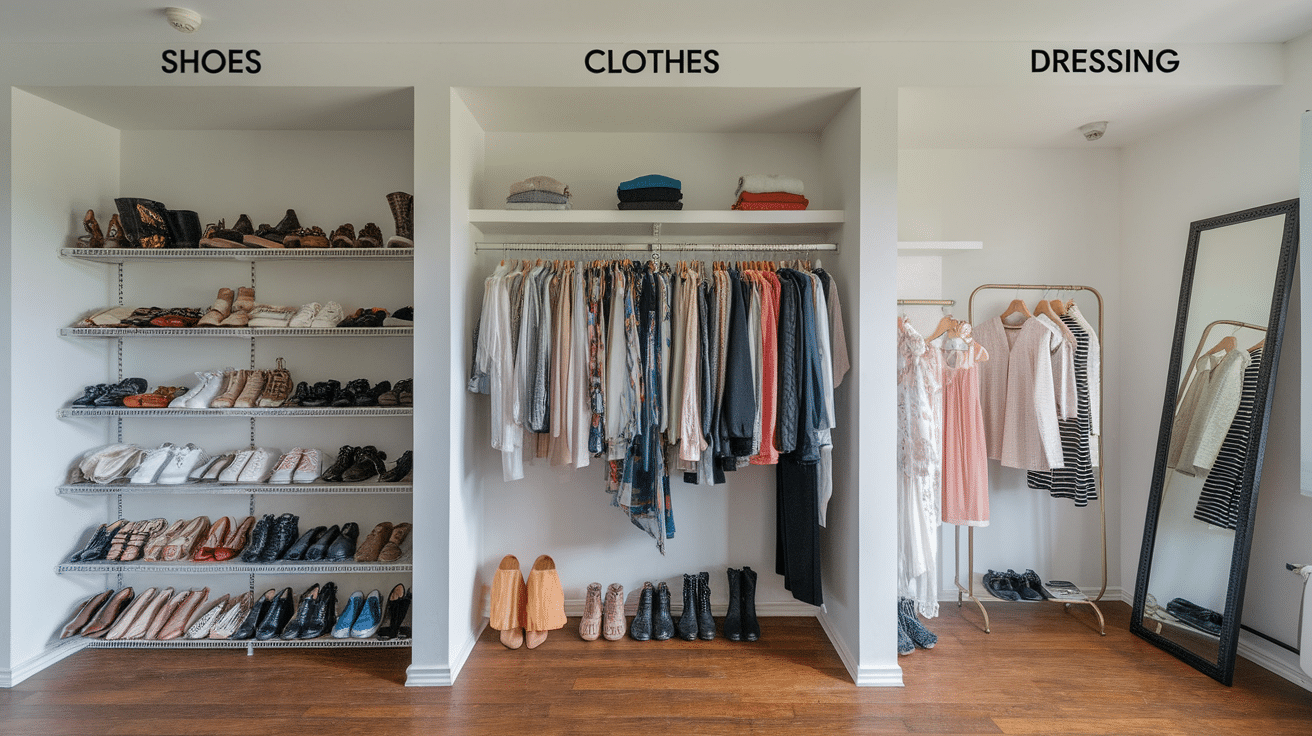
Creating dedicated zones makes your closet more functional:
- Clothing zone: Separate by season, occasion, or clothing type
- Shoe zone: Use shelving or under-bed storage boxes
- Dressing zone: Include a mirror and good lighting
- Accessories zone: Keep small items visible but organized
- Planning zone: Add a small calendar or outfit planning board
Label each zone clearly and maintain boundaries between them to prevent clutter from spreading.
Conclusion
I’m thrilled with how my bedroom-turned-closet turned out! The whole project cost under $300 and took just a weekend to complete. The best part? Everything can move with me if I change homes later.
What I love most about this solution is how practical it is. By using freestanding furniture and removable organizers, I created a space that works perfectly for my needs without making permanent changes.
Don’t feel pressured to copy expensive closets from design magazines. Focus on what works for your clothes, your style, and your budget.
Creating this closet has actually made my mornings easier and more enjoyable. I can see all my options at once, and getting dressed is now stress-free.
With these simple steps, you, too, can transform an unused bedroom into your dream closet space—without breaking the bank.
Frequently Asked Questions
Can I Do This in A Very Small Bedroom?
Yes! Smaller rooms actually work well as closets. Focus on vertical storage and be selective about what you keep.
Will This Damage My Walls or Floors?
No. I used freestanding furniture and removable hooks to avoid damage, and area rugs protect the floor from furniture marks.
How Long Does This Project Take?
With planning, you can finish in a weekend. I spent one day planning and shopping and one day setting everything up.
What if I Rent and Can’t Paint?
No problem! You can add color to the walls without painting them by using colorful storage bins, artwork, and textiles.
Can I Still Use This as A Guest Room Sometimes?
Absolutely. If you include a daybed or futon instead of a bench, you’ll have a multi-purpose space for guests.