
Are your vinyl windows starting to look faded or outdated? You might be considering an upgrade, but replacing them can be costly. A more budget-friendly option is giving them a fresh coat of paint.
In this guide, we’ll take you through everything you need to know about painting vinyl windows—step by step. You’ll find practical advice on how to change their color, extend their lifespan, and maintain a neat appearance for years to come. Whether you’re confident with DIY projects or just trying it out for the first time, this walkthrough is designed to help.
By the end of this article, you’ll know exactly how to prepare, prime, and paint your windows the right way. We’ll also share tips to help you avoid common mistakes and ensure a smooth, lasting finish.
This is a straightforward home improvement task that can make a real difference—let’s get started!
What are Vinyl Windows?

Vinyl windows are windows made from polyvinyl chloride (PVC), a type of plastic. They’re a popular choice for homeowners due to their affordable price, low maintenance, and energy efficiency. Vinyl windows come in a variety of styles, including single-hung, double-hung, sliding, and casement, making them a versatile option for many types of homes.
One of the primary advantages of vinyl windows is their ability to provide insulation. They help keep your home comfortable year-round by preventing drafts in the winter and blocking heat in the summer. Since vinyl doesn’t warp, crack, or peel like wood, these windows are also durable and resistant to moisture. This makes them an excellent choice for places with varying weather conditions.
Another benefit is that vinyl windows require little upkeep. They don’t need to be painted or stained, and a simple cleaning will usually suffice.
Assessing the Condition of Your Vinyl Windows
Before you grab your paintbrush, it’s important to check the condition of your windows.
First, look for damage. Are there any cracks, warping, or discoloration? These are signs that your windows might need more than just a fresh coat of paint. If the damage is too severe, painting over it may not be effective.
Next, evaluate the surface. Is the vinyl clean? You want to ensure there is no mildew, mold, or dirt on the surface. If the surface is dirty, the paint won’t stick properly.
Finally, check your warranty. Some manufacturers don’t recommend painting their windows, and doing so could void your warranty. It’s worth investigating this before you begin.
By assessing these three factors, you’ll know if your windows are ready for painting or if they require additional attention.
Essential Tools and Materials
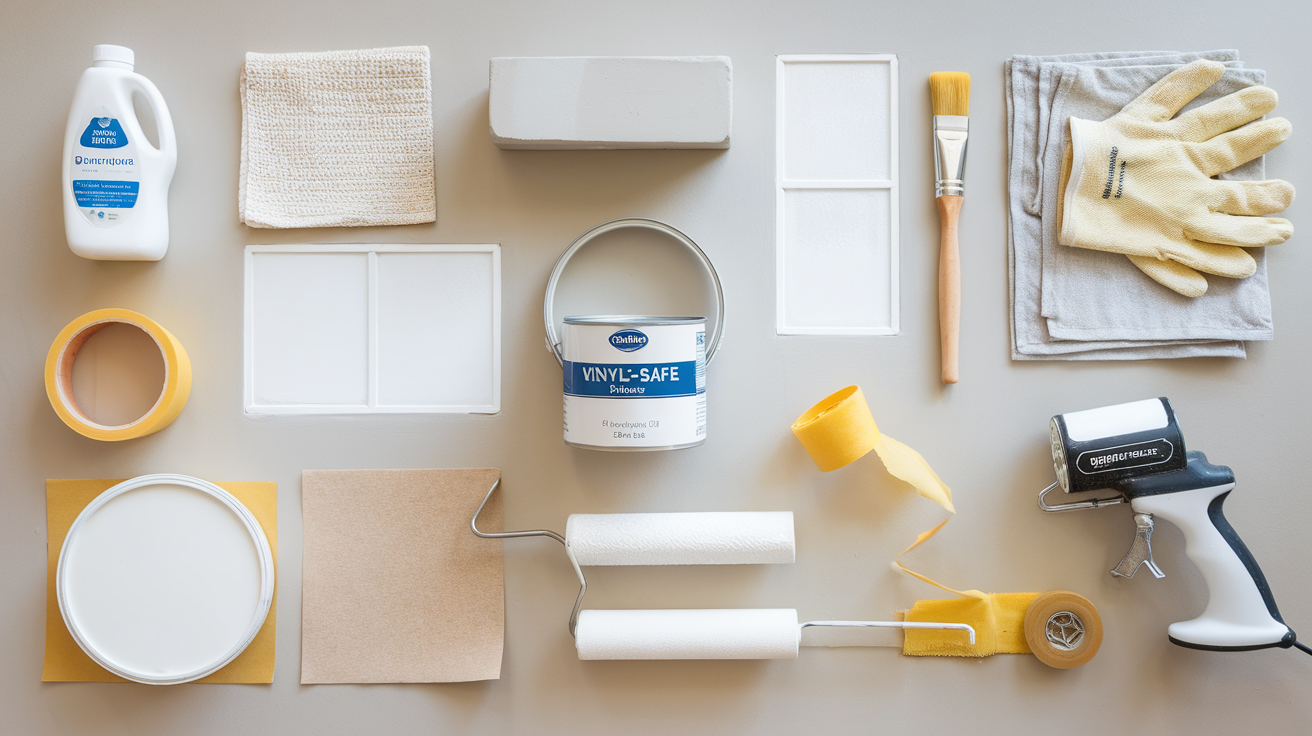
Before we get into the steps, you’ll need a few tools. I’ll break them down for you so you know exactly what to grab.
Cleaning Supplies: You can’t paint over dirt. Grab mild detergent, water, and a soft cloth to clean the surface. Clean windows are essential for good paint adhesion.
Sanding Tools: You’ll need fine-grit sandpaper or a sanding block. This helps to roughen up the surface slightly, allowing the paint to adhere more effectively.
Primers and Paints: Make sure you use a vinyl-safe bonding primer and exterior-grade paint. Vinyl requires special paint to ensure it lasts and doesn’t peel off quickly.
Application Tools: Choose between a paintbrush, roller, or sprayer. I recommend a brush or roller for beginners. A sprayer can be trickier, but it’s faster.
Protective Gear: Don’t forget the painter’s tape, drop cloths, and protective gloves. These will help keep things neat and protect your hands.
With these tools ready, you’ll be set to start the job right. Let’s move on!
Step-by-Step for Painting Vinyl Windows
Ready to change your vinyl windows? Here’s a simple, step-by-step process to help you complete the job correctly. With a little patience and the right tools, you’ll achieve a professional-looking finish in no time!
Step 1: Clean the Surface

Start by cleaning the windows thoroughly. Use mild detergent and water with a soft cloth to remove dirt, grime, and mildew. A clean surface is crucial for good paint adhesion. Don’t skip this step!
Once you’ve wiped down the windows, rinse them with clean water to remove any soap residue. Dry the windows thoroughly before proceeding to the next step. This ensures that the primer and paint will adhere properly without interference from moisture.
Step 2: Sand the Vinyl
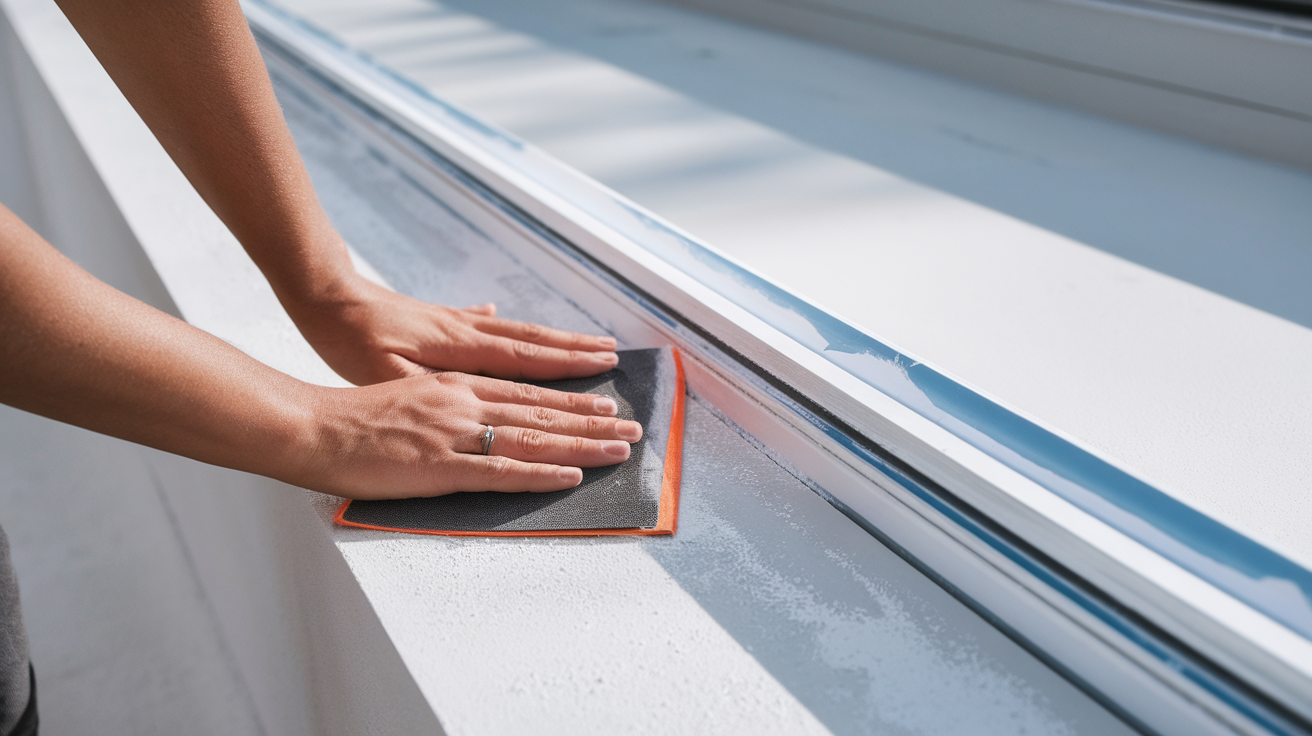
Lightly sand the vinyl using fine-grit sandpaper or a sanding block. This helps the primer and paint stick better. Be gentle, though. You don’t need to sand too much—just enough to roughen up the surface a bit.
After sanding, wipe away the dust with a clean cloth. This ensures that no dust will get in the way of a smooth, even coat of primer and paint. Sanding creates a better surface for the paint to bond with, which is key for a long-lasting finish.
Step 3: Tape Off the Area
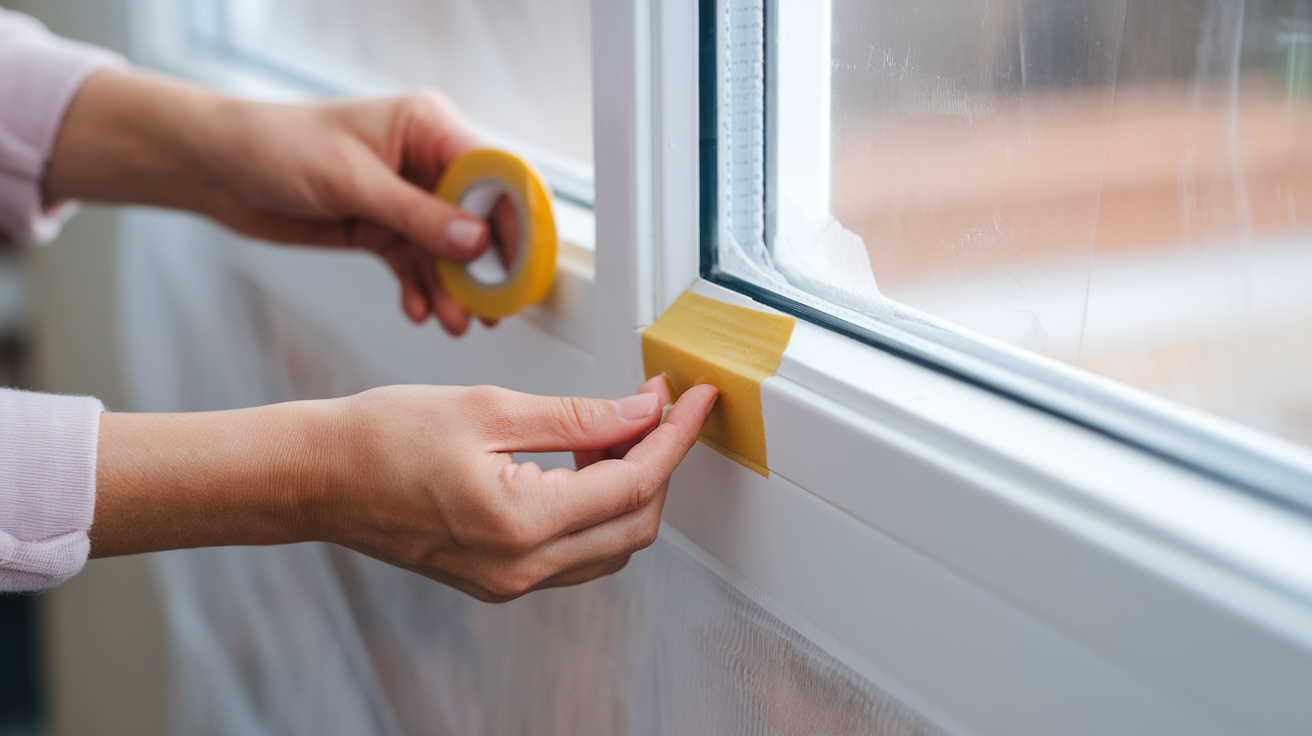
Use painter’s tape to protect areas you don’t want to paint, like the glass. Apply the tape neatly around the window frame, ensuring there are no gaps where paint could leak through. Drop cloths are also a good idea to protect the floor and surrounding areas.
Take extra care around corners or edges where the tape might peel. This will help you achieve a clean line once the painting is done. Double-check the tape application before you start painting to avoid any mess.
Step 4: Apply Primer

Now, grab your vinyl-safe bonding primer. Apply a thin, even coat of primer to the window frame. Ensure that you cover all areas, particularly those that were sanded. Let it dry completely before moving on. Drying time may vary, so refer to the instructions on the primer can for specific details.
Don’t rush the drying process—if you apply paint before the primer is fully dry, it might cause peeling or uneven coverage. A well-primed surface ensures the paint sticks well and lasts longer.
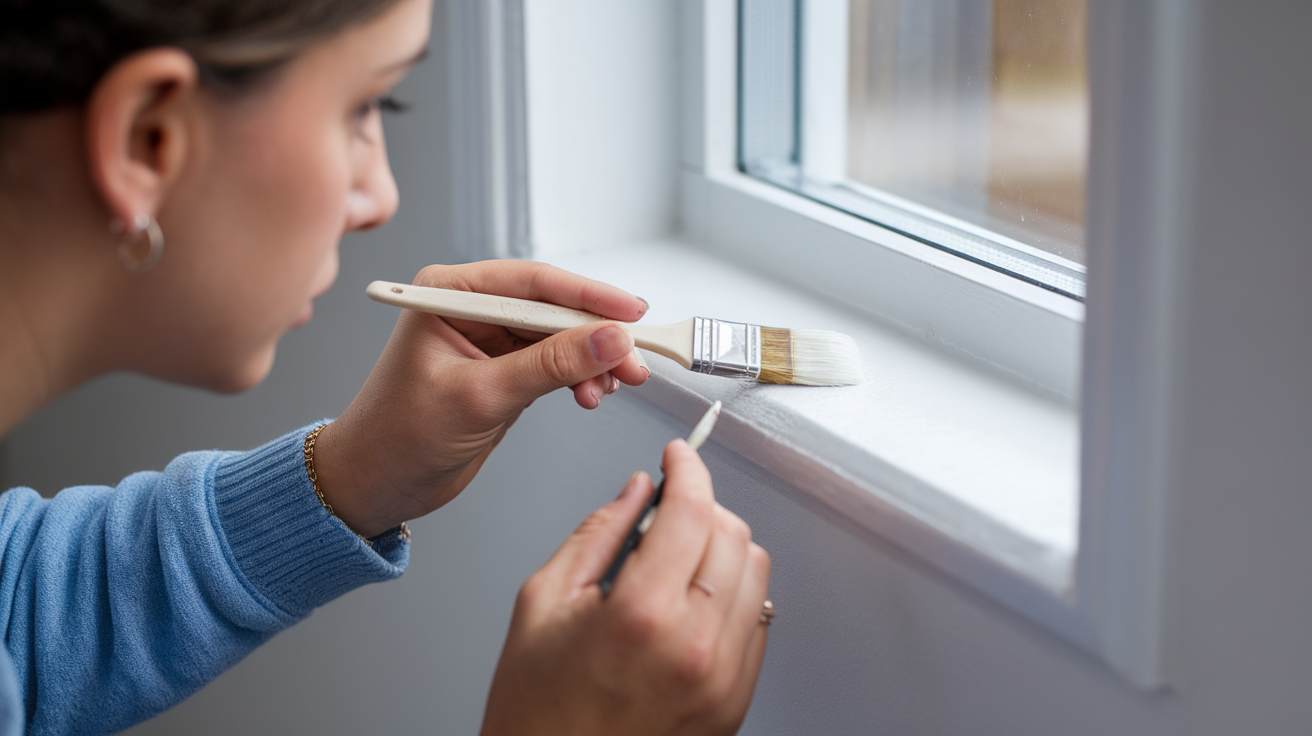
Step 5: Paint the Vinyl Windows
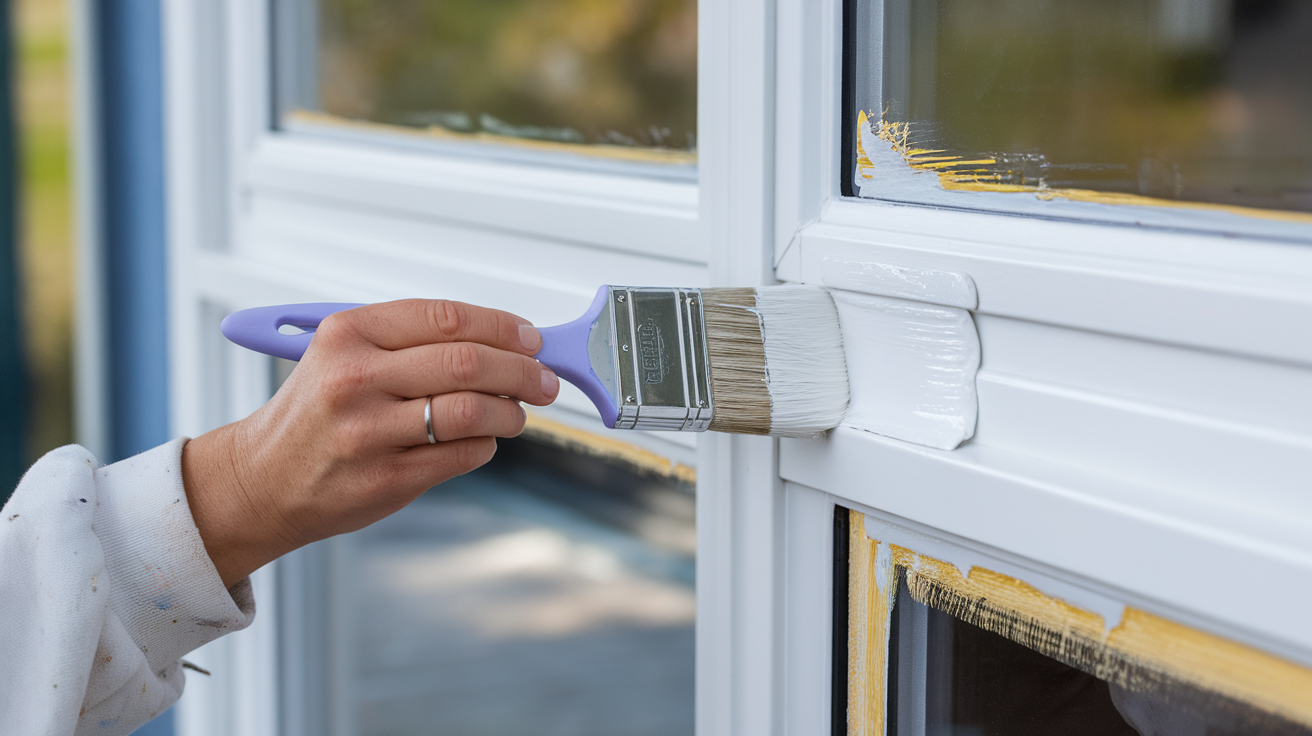
Once the primer is dry, it’s time to paint. Use exterior-grade paint that’s designed for vinyl. You can apply it with a paintbrush, roller, or sprayer. I recommend a brush or roller if you’re new to painting. Apply thin, even coats, and let each coat dry before adding another.
Be mindful of the paint’s direction as you apply it. Painting with the grain of the vinyl will give you the best results and a smoother finish. Multiple light coats are better than one thick coat—this helps avoid drips and streaks.
Step 6: Remove the Tape

When the final coat of paint is still slightly wet, carefully remove the painter’s tape. Doing it while the paint is a little wet helps prevent peeling or rough edges.
Take your time with this step to ensure you don’t accidentally smudge or pull up any paint. A steady hand will give you those clean lines you’re aiming for. If you wait too long to remove the tape, it can cause the paint to peel off with it.
Step 7: Let It Dry and Cure
Allow the paint to dry and cure fully. This can take several hours or even a day. Be patient—rushing can mess up your hard work.
Check the weather forecast and make sure it’s a dry day for painting. Humidity or rain can slow down the curing process, so choose a dry, calm day to complete the job. Proper drying time is essential to ensure the paint dries thoroughly and lasts longer.
Step 8: Inspect and Touch Up
After everything is dry, inspect your work. If you notice any spots that need extra coverage, touch them up with a small brush. Then, let it dry again.
Give the windows a final look from different angles to ensure you didn’t miss any spots. Once satisfied, step back and enjoy your freshly painted vinyl windows! If you notice any imperfections, gently touch them up for a flawless finish.
And that’s it! Your vinyl windows should now have a fresh, new look. With a little time and effort, you’ve added style and protection to your home.
Maintenance and Longevity
After painting your vinyl windows, it’s essential to maintain their fresh appearance. Regular maintenance will help your hard work last longer.
Regular Cleaning: Wash your windows periodically to maintain their clean appearance. Use mild detergent and water with a soft cloth. This simple step will help keep the appearance of your paint and prevent buildup.
Touch-Ups: If you notice any chips or scratches, address them right away. It’s better to touch up on them early than to wait. This prevents the damage from spreading and keeps your windows looking smooth.
Inspection: Check your windows regularly for signs of peeling or fading. Early detection allows you to address small issues before they escalate. Be cautious, especially after severe weather or extreme temperatures.
By staying on top of these simple tasks, your painted vinyl windows will continue to look great and protect your home for years to come.
Common Mistakes to Avoid
When painting vinyl windows, it’s easy to make mistakes. I’ve learned from experience, and I want to help you avoid these common pitfalls.
Skipping Primer: One of the biggest mistakes is skipping the primer. A bonding primer is essential for good paint adhesion. Without it, the paint won’t stick properly, and you’ll end up with peeling or uneven coverage. Don’t skip this step!
Using Incorrect Paint: Make sure you use paint that’s specifically formulated for vinyl. Regular paint won’t last as long and can peel off. Exterior-grade paint designed for vinyl is the right choice. It will help your paint job last longer and look better.
Inadequate Drying Time: If you rush the drying process, the paint won’t set properly. Drying time is important between coats. If you apply the next coat before the first one is fully dry, you could get smudging or peeling. Be patient, and let each layer dry completely.
Avoid these mistakes, and your painted windows will remain looking great for a long time.
Conclusion
Before you start painting your vinyl windows, take a moment to evaluate your needs. Consider the condition of your windows and the aesthetic you want to achieve. If your windows are in good condition and you’re looking for a fresh look, this can be a great DIY project.
Now, think about whether you want to take on the project yourself or hire a professional. If you’re confident in your skills and have the time, DIY can be a rewarding way to save money. But if the job feels overwhelming, don’t hesitate to call in a pro.
Ultimately, painting vinyl windows can be a rewarding DIY project. With the right preparation, materials, and patience, you’ll enjoy a fresh, updated look for your home. Happy painting!