
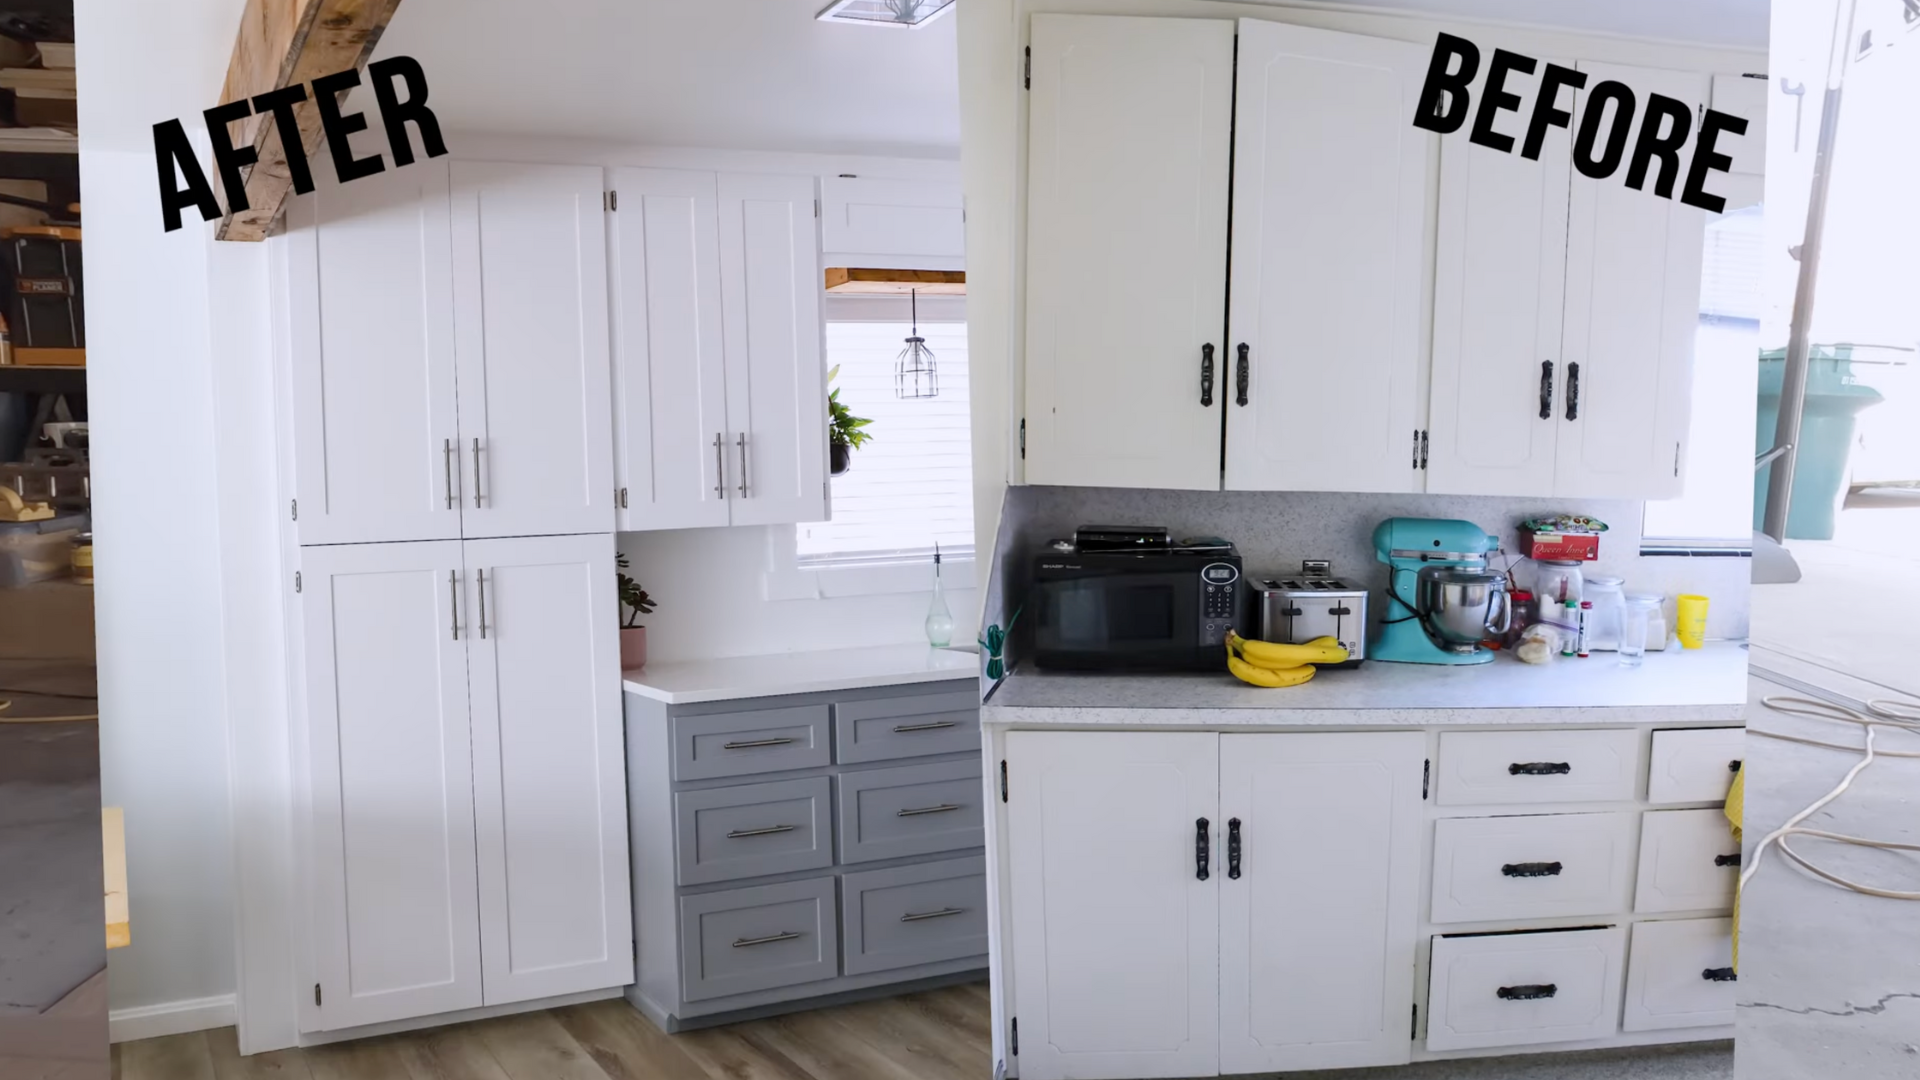
Want to give your kitchen or bathroom a fresh new look without spending a lot of money?
I’ve been there too, staring at plain flat cabinet doors and wishing they had more style.
One of the easiest and most affordable ways to upgrade them is by adding trim. It’s a simple DIY project that can make a huge difference.
I was surprised at how quickly the transformation happened and how much better the cabinets looked afterward.
In this guide, I’ll show you how to add trim step-by-step, what tools you’ll need, and tips to make it all go smoothly.
If you’re updating your home for yourself or getting it ready to sell, this project is a great way to boost style on a budget. Let’s turn those boring doors into something special.
Why Add Trim to Flat Cabinet Doors?
Adding trim to flat cabinet doors is one of the easiest ways to give your cabinets a fresh, stylish look. Flat doors can look plain and boring, but trim adds depth and character.
It’s like giving your cabinets a makeover without replacing them. You don’t need fancy tools or a big budget, just some trim pieces, glue, and paint.
Trim can turn a flat door into a shaker-style door or something totally custom. It also gives your kitchen or bathroom a more finished and high-end feel.
I love how it makes old cabinets look brand new. Plus, it’s a fun DIY project you can do in a weekend.
If you’re looking to upgrade your space without spending a lot, adding trim is a smart and simple choice.
Step-by-Step Guide to Adding Trim to Kitchen Cabinet Doors
Here’s how to give flat-panel cabinet doors a fresh, new look without replacing them!
Tools and Materials
- Flat-paneled cabinet doors
- 1/4 inch MDF (Medium-Density Fiberboard) – cut into strips (2 inches wide for small doors, 3 inches for bigger ones)
- Sandpaper
- Rag
- Wood glue
- Nail gun
- 5/8 inch nails
- Pin punch
- Wood filler
- Caulk
- Saw (e.g., miter saw)
- Pencil or marker
Step 1: Prepare the MDF Trim Strips
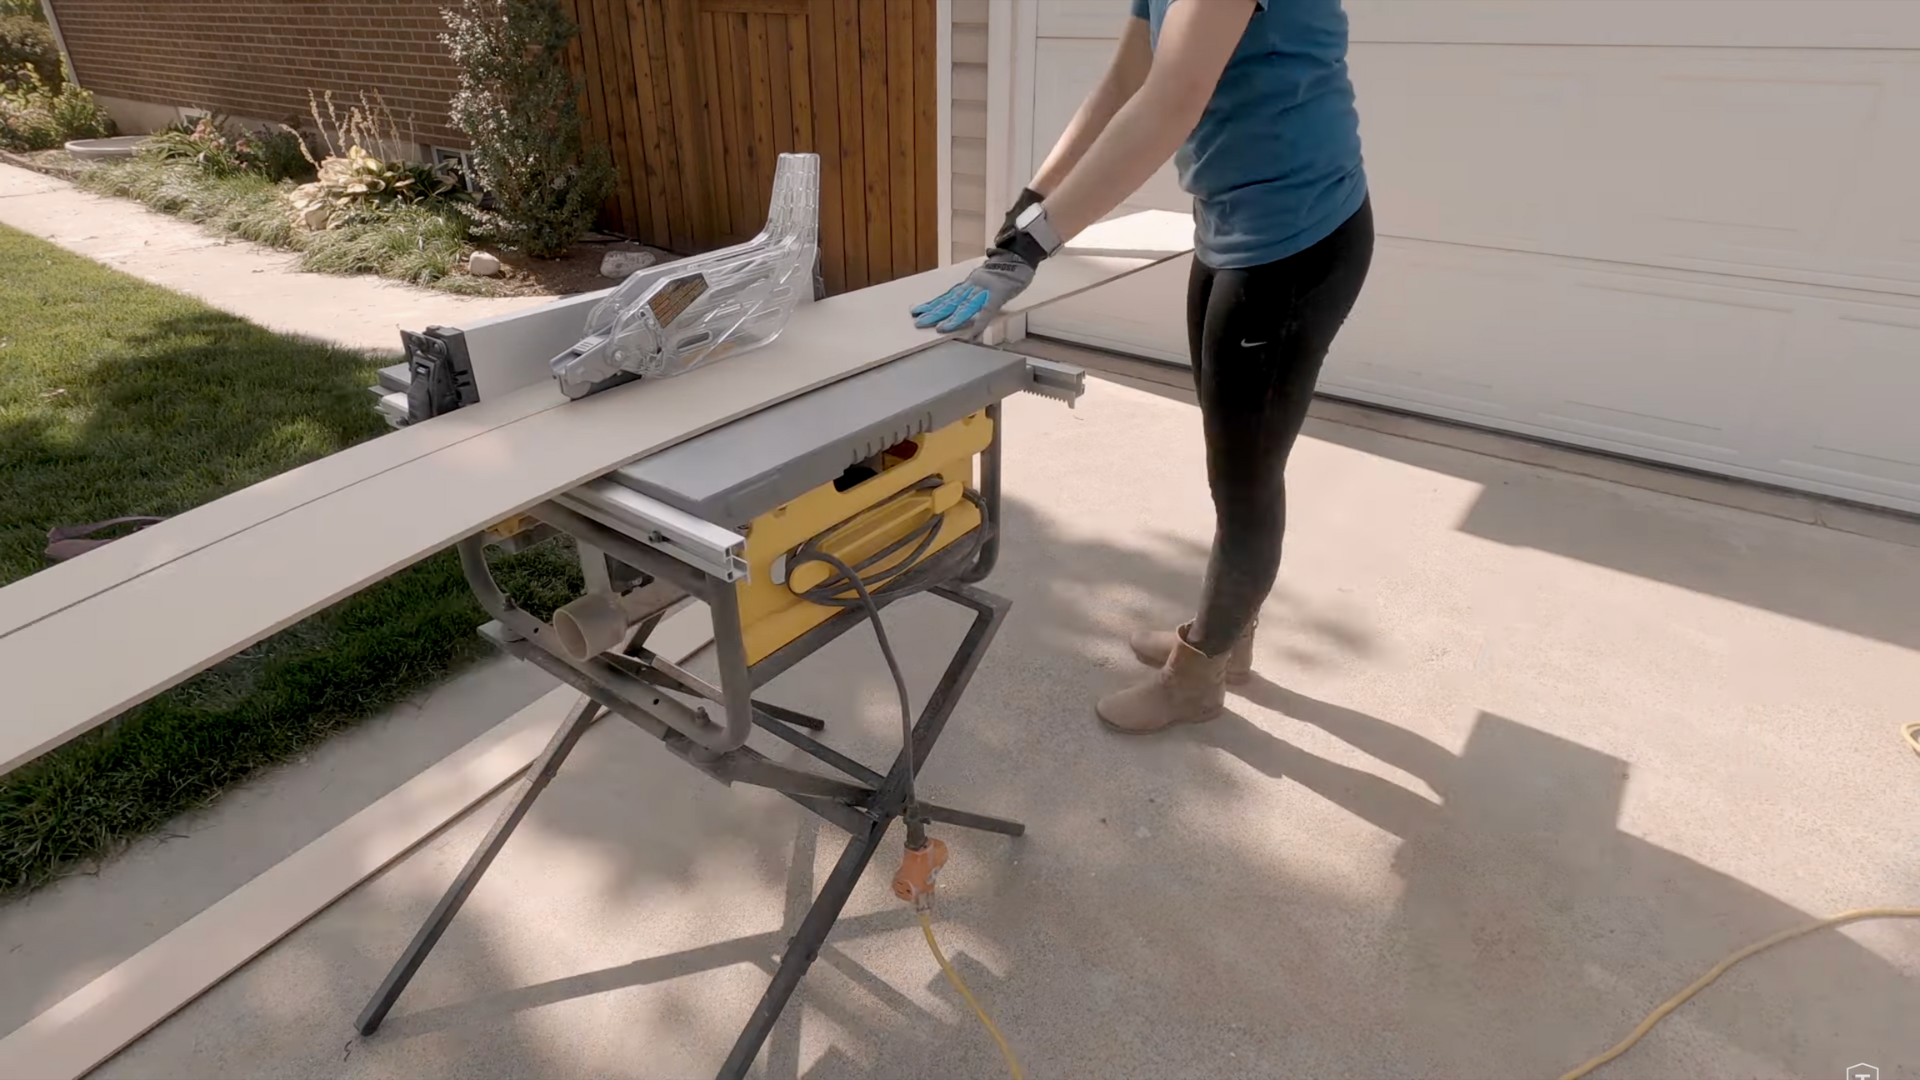
Start by cutting your MDF into strips. For smaller cabinet doors, 2-inch-wide strips are ideal.
For larger doors, go with 3-inch-wide strips. Make sure the strips are straight and even.
Once you’ve cut your strips, sand all the edges thoroughly. This smooths out any rough areas and makes your final finish look clean and professional.
MDF is easy to sand and great for painting, which makes it perfect for this kind of project.
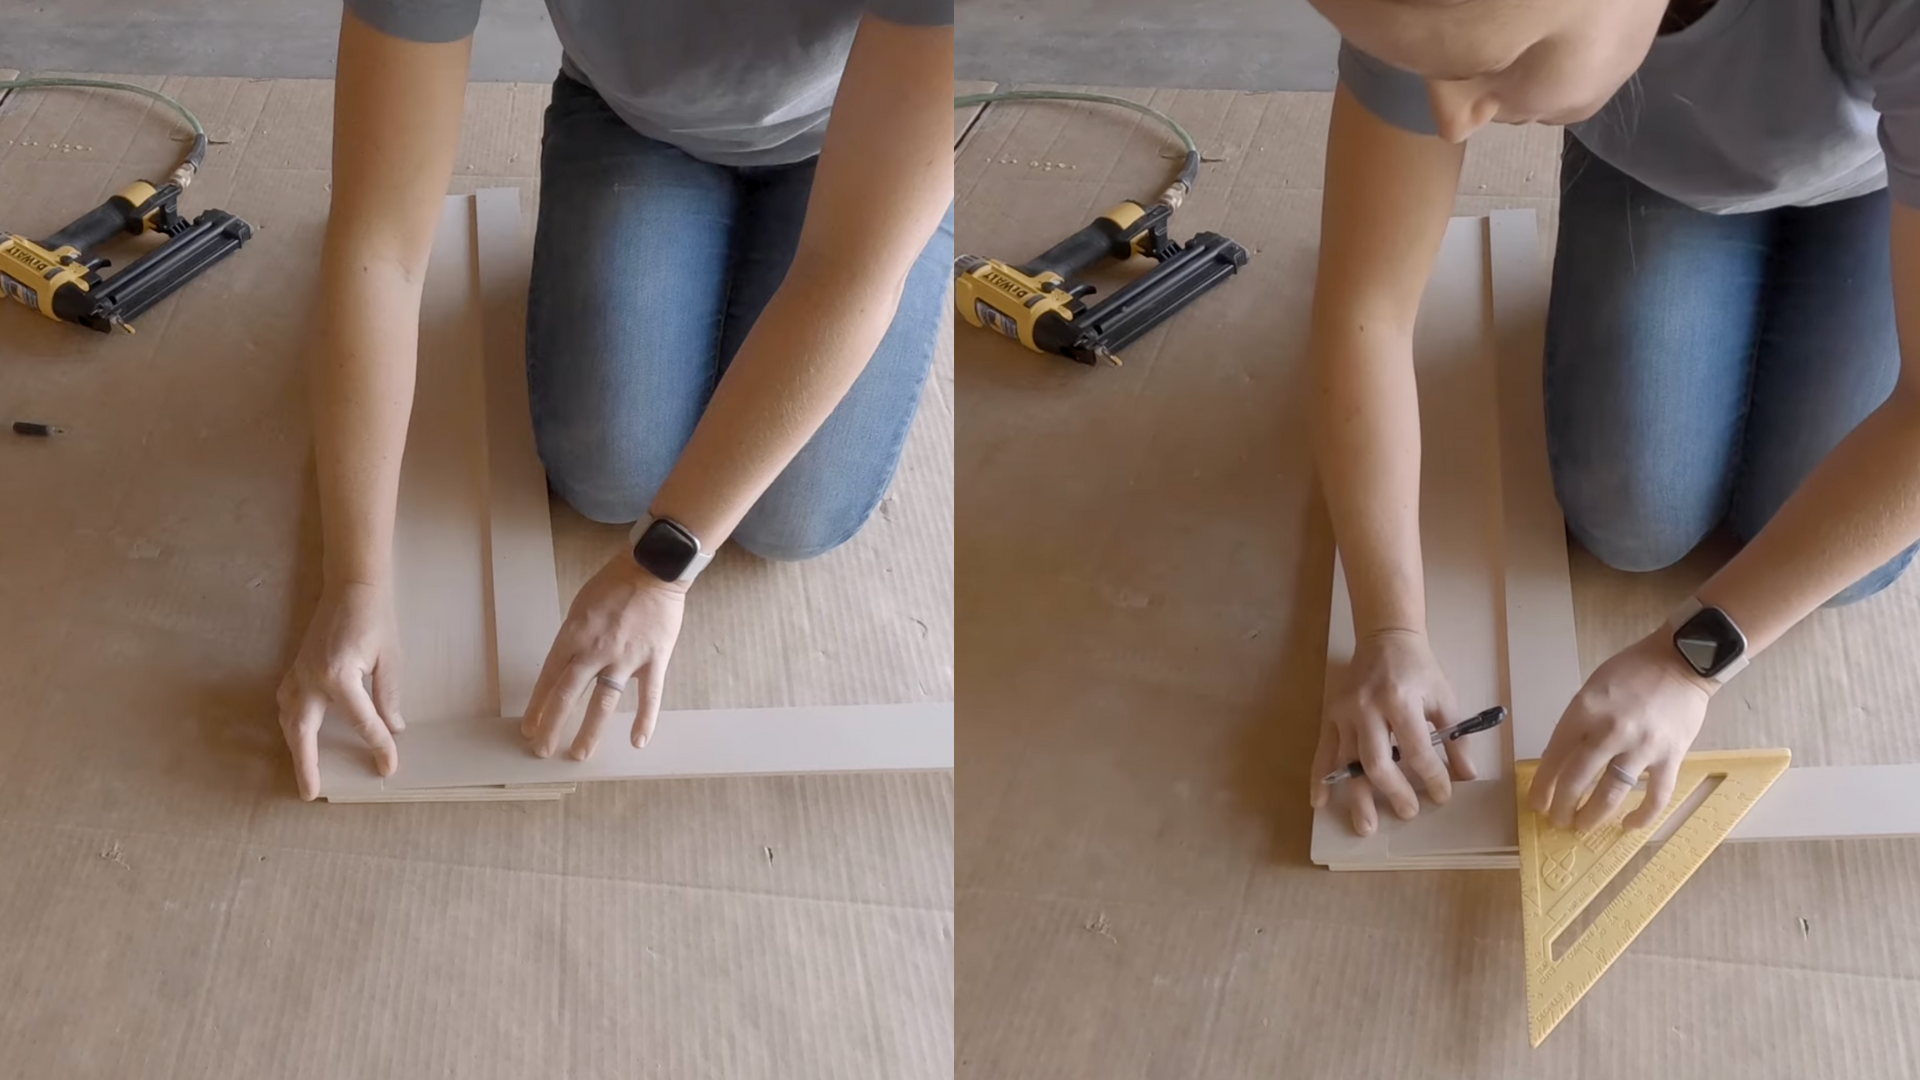
Step 2: Plan and Mark the Vertical Trim
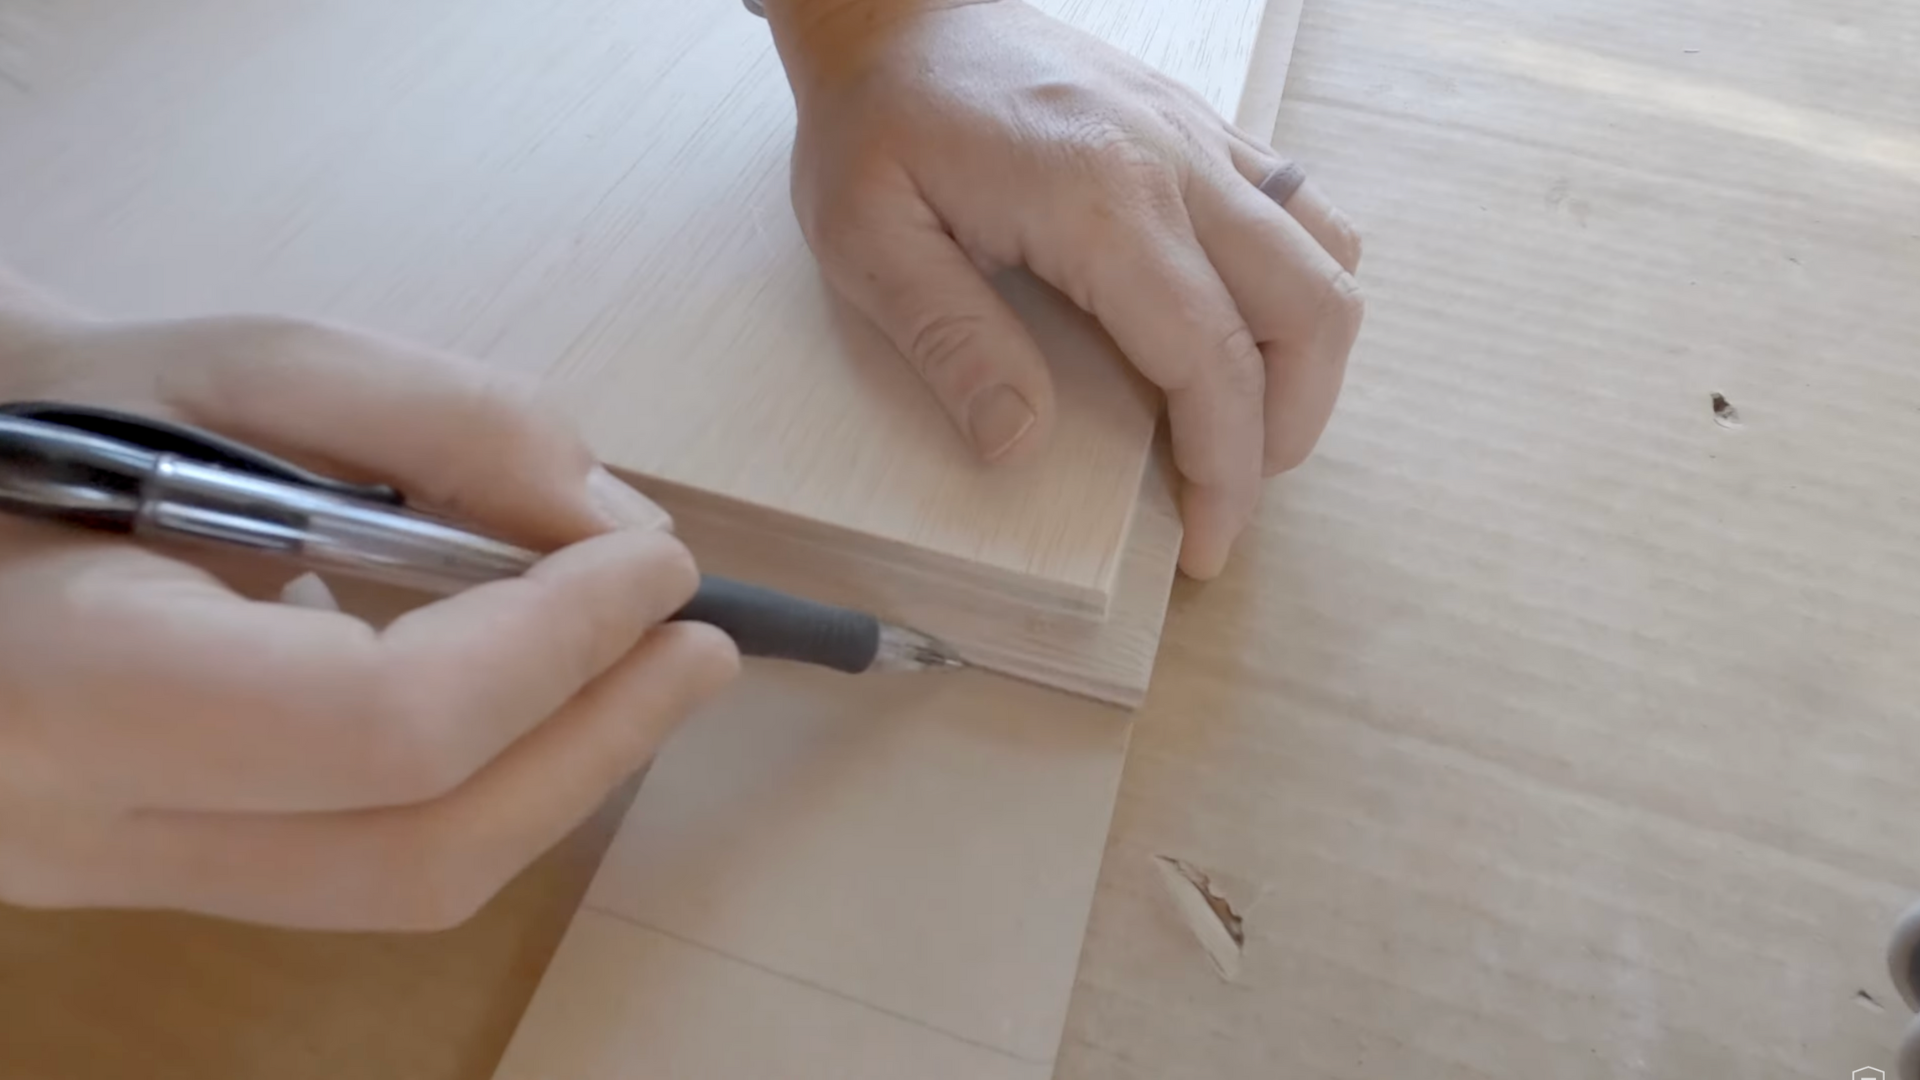
Decide how you want your trim to look. A simple frame style is easiest, with two vertical strips on the sides and two horizontal strips at the top and bottom.
Lay one of the vertical strips on the face of the cabinet door. Don’t place it flush with the edge; leave a small gap between the trim and the edge of the door for a cleaner look.
Use a pencil to mark where the strip should be cut to match the height of the door.
Step 3: Cut the Vertical Trim Pieces
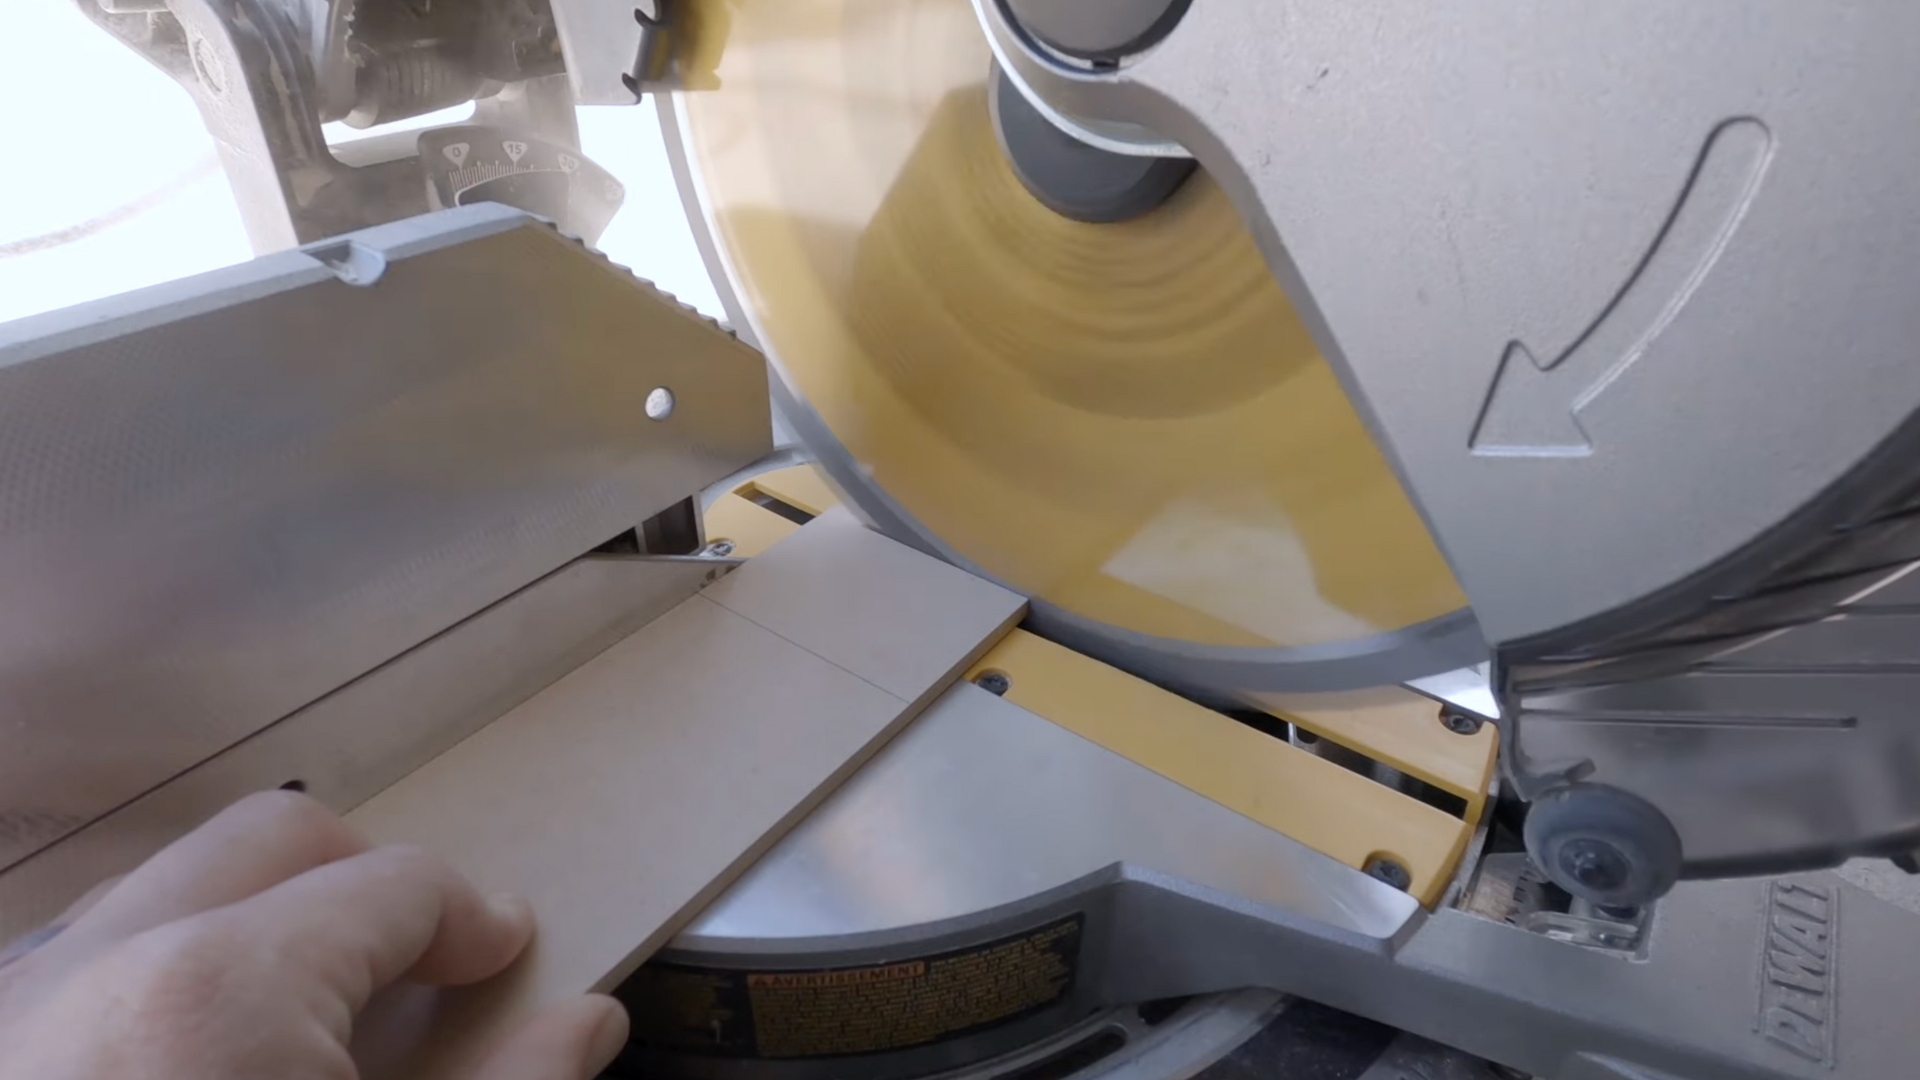
Take the marked MDF strips to your saw and cut them carefully to length. At this point, being perfectly exact isn’t necessary.
You can always sand the ends slightly later if they’re a little too long. It’s better to cut slightly longer than too short.
Step 4: Clean the Trim Pieces

After cutting, use a clean rag to meticulously wipe off any dust resulting from the sanding process on both the MDF trim pieces and the cabinet door.
This step is crucial for ensuring optimal adhesion of the wood glue, as dust can significantly weaken the bond.
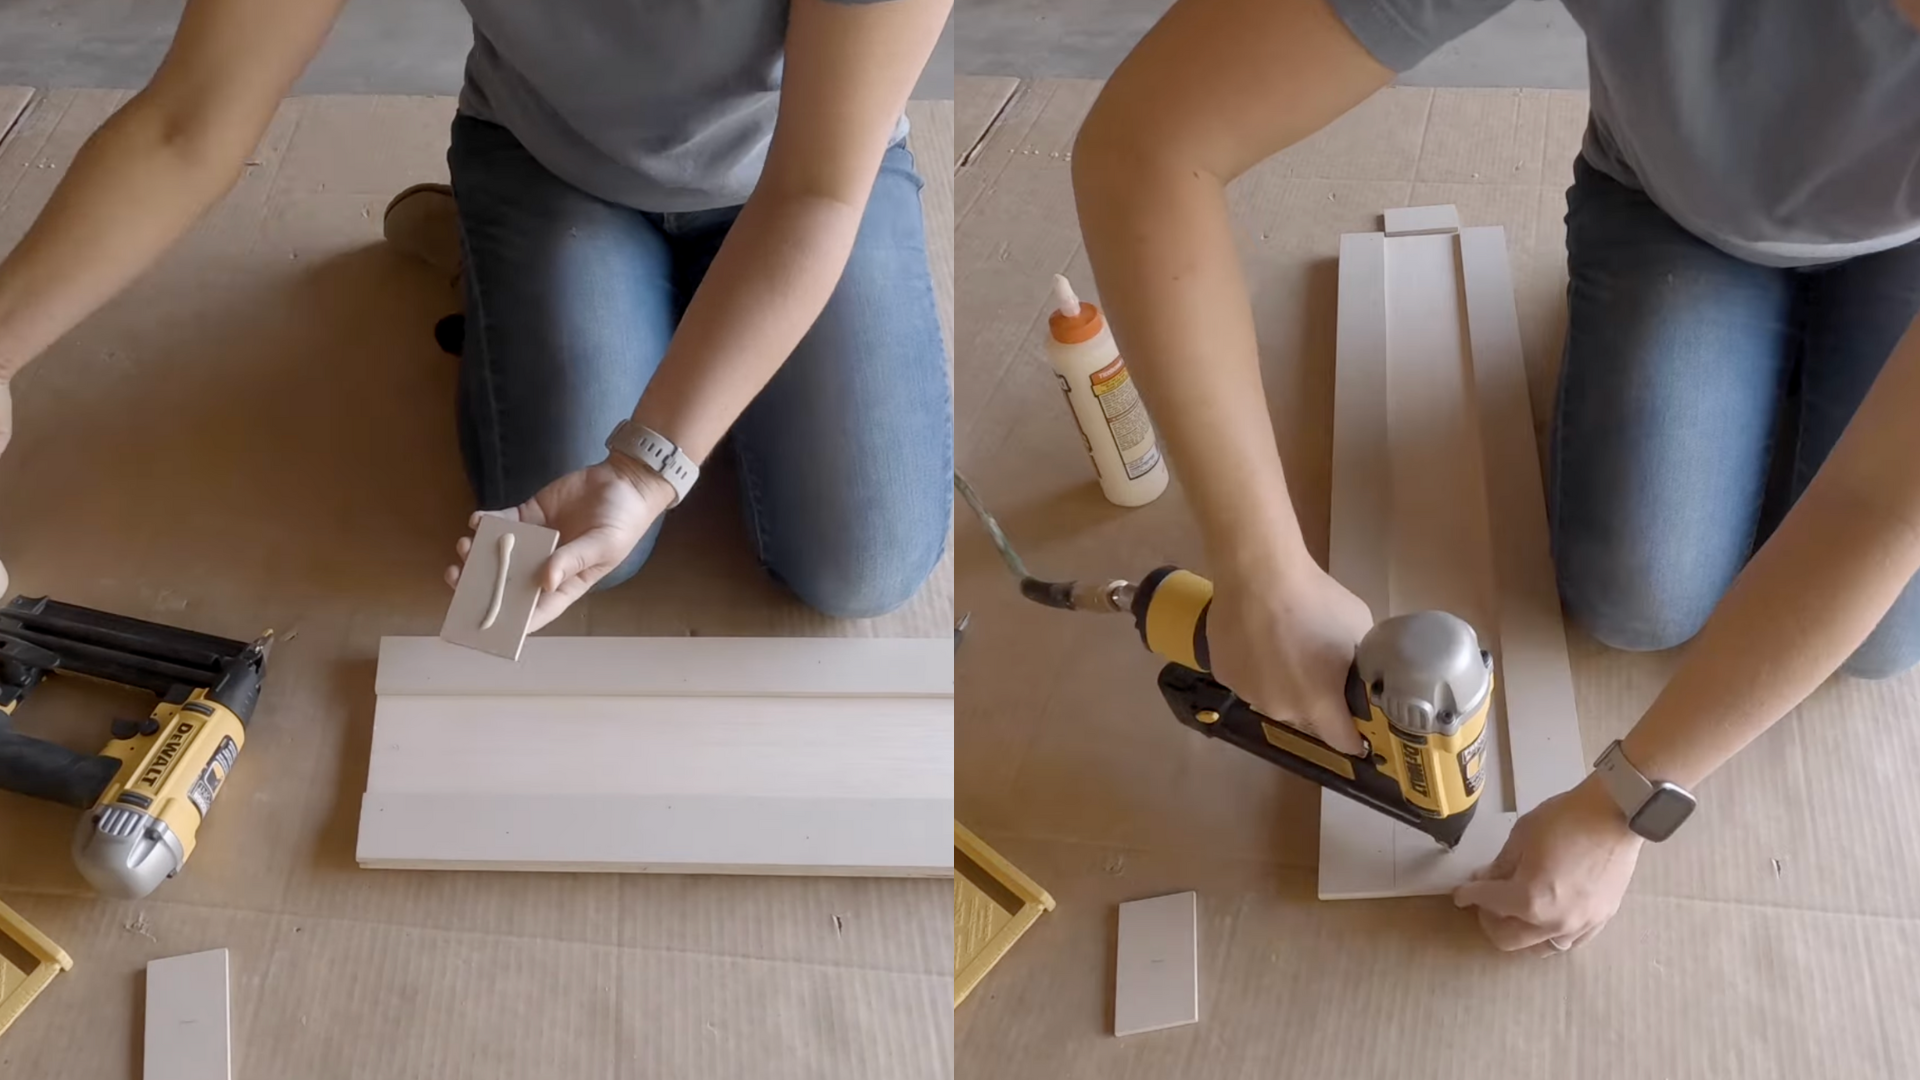
Step 5: Attach the Vertical Trim

Be careful if your cabinet doors have any carved or routered edges; make sure you’re nailing only into the flat parts of the door.
Apply a line of wood glue to the back of one vertical strip. You can spread it out with your finger to make sure it’s even.
Carefully place the trim onto the door in your marked position and press it down firmly. Double-check that it’s straight.
Use a nail gun (or hammer and nails) to secure the strip in place. Nail every few inches to prevent bowing. Repeat this process for the vertical strip on the other side.
Step 6: Measure and Mark the Horizontal Trim
Now measure the space between the two vertical strips. This is where the top and bottom horizontal pieces will go.
Place a new MDF strip across the gap and mark where it overlaps the vertical trim. It’s okay to mark it slightly long; you can trim it down little by little to get a perfect fit.
Step 7: Cut and Test Fit the Horizontal Pieces

Cut the horizontal trim pieces according to your marks. Test fit them between the vertical strips. They should fit snugly, without forcing them into place.
If the piece is too long, go back to the saw and trim off a small amount at a time. This might take a few tries, but it’s worth it to get clean, tight corners.
Step 8: Attach the Horizontal Trim
Once your horizontal trim pieces fit perfectly, apply wood glue to the back of each one.
Spread the glue evenly across the surface to ensure a strong bond. Then press the pieces firmly into place, fitting them snugly between the vertical strips.
Use your level to make sure each piece is straight before securing it. Once aligned, fasten the trim using a nail gun or hammer and nails, just like you did with the vertical pieces.
Add nails at even intervals to keep the trim flat and tight. Repeat for the top and bottom horizontal pieces.
Step 9: Sink Nails and Fill Holes
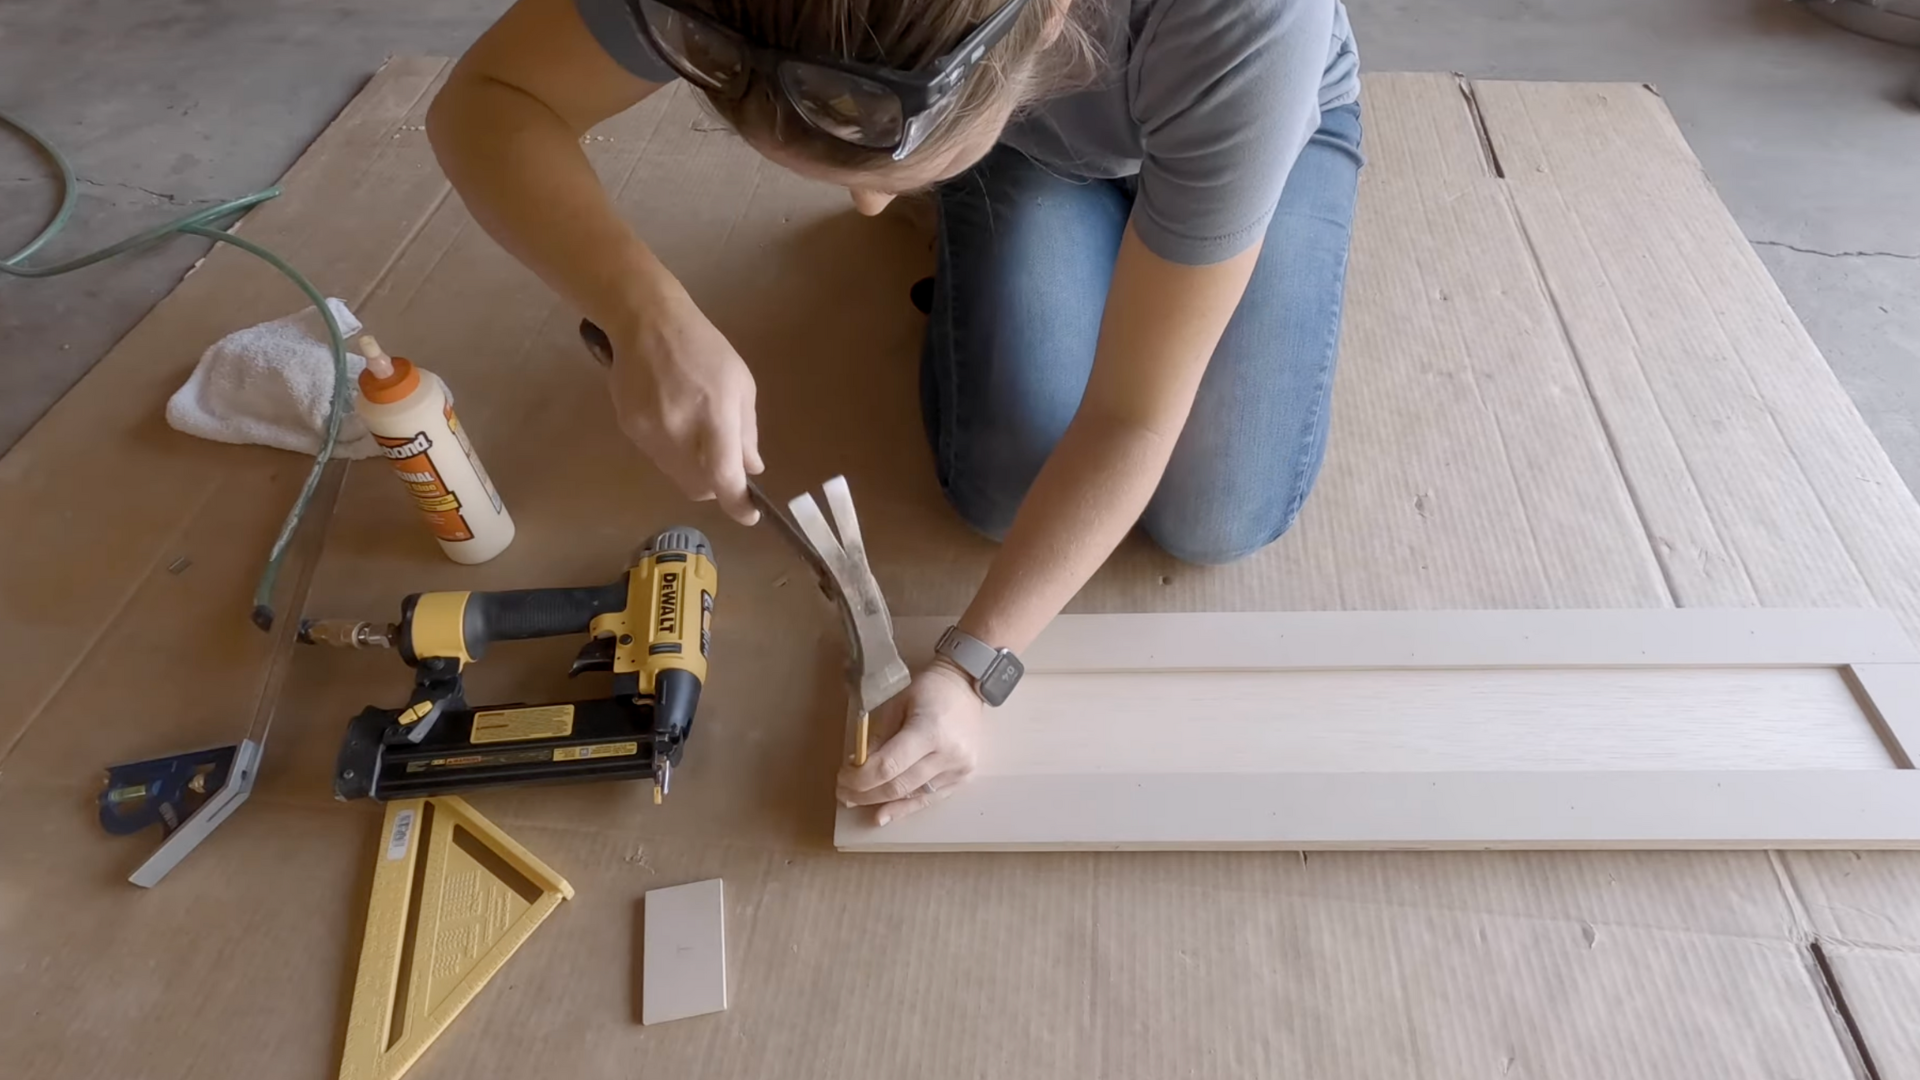
After attaching all four trim pieces, use a pin punch to gently tap the nail heads just below the surface of the wood. This makes them easier to hide later.
Next, apply wood filler to all the nail holes and any small gaps where the trim meets the cabinet door. Smooth the filler with a putty knife and let it dry completely.
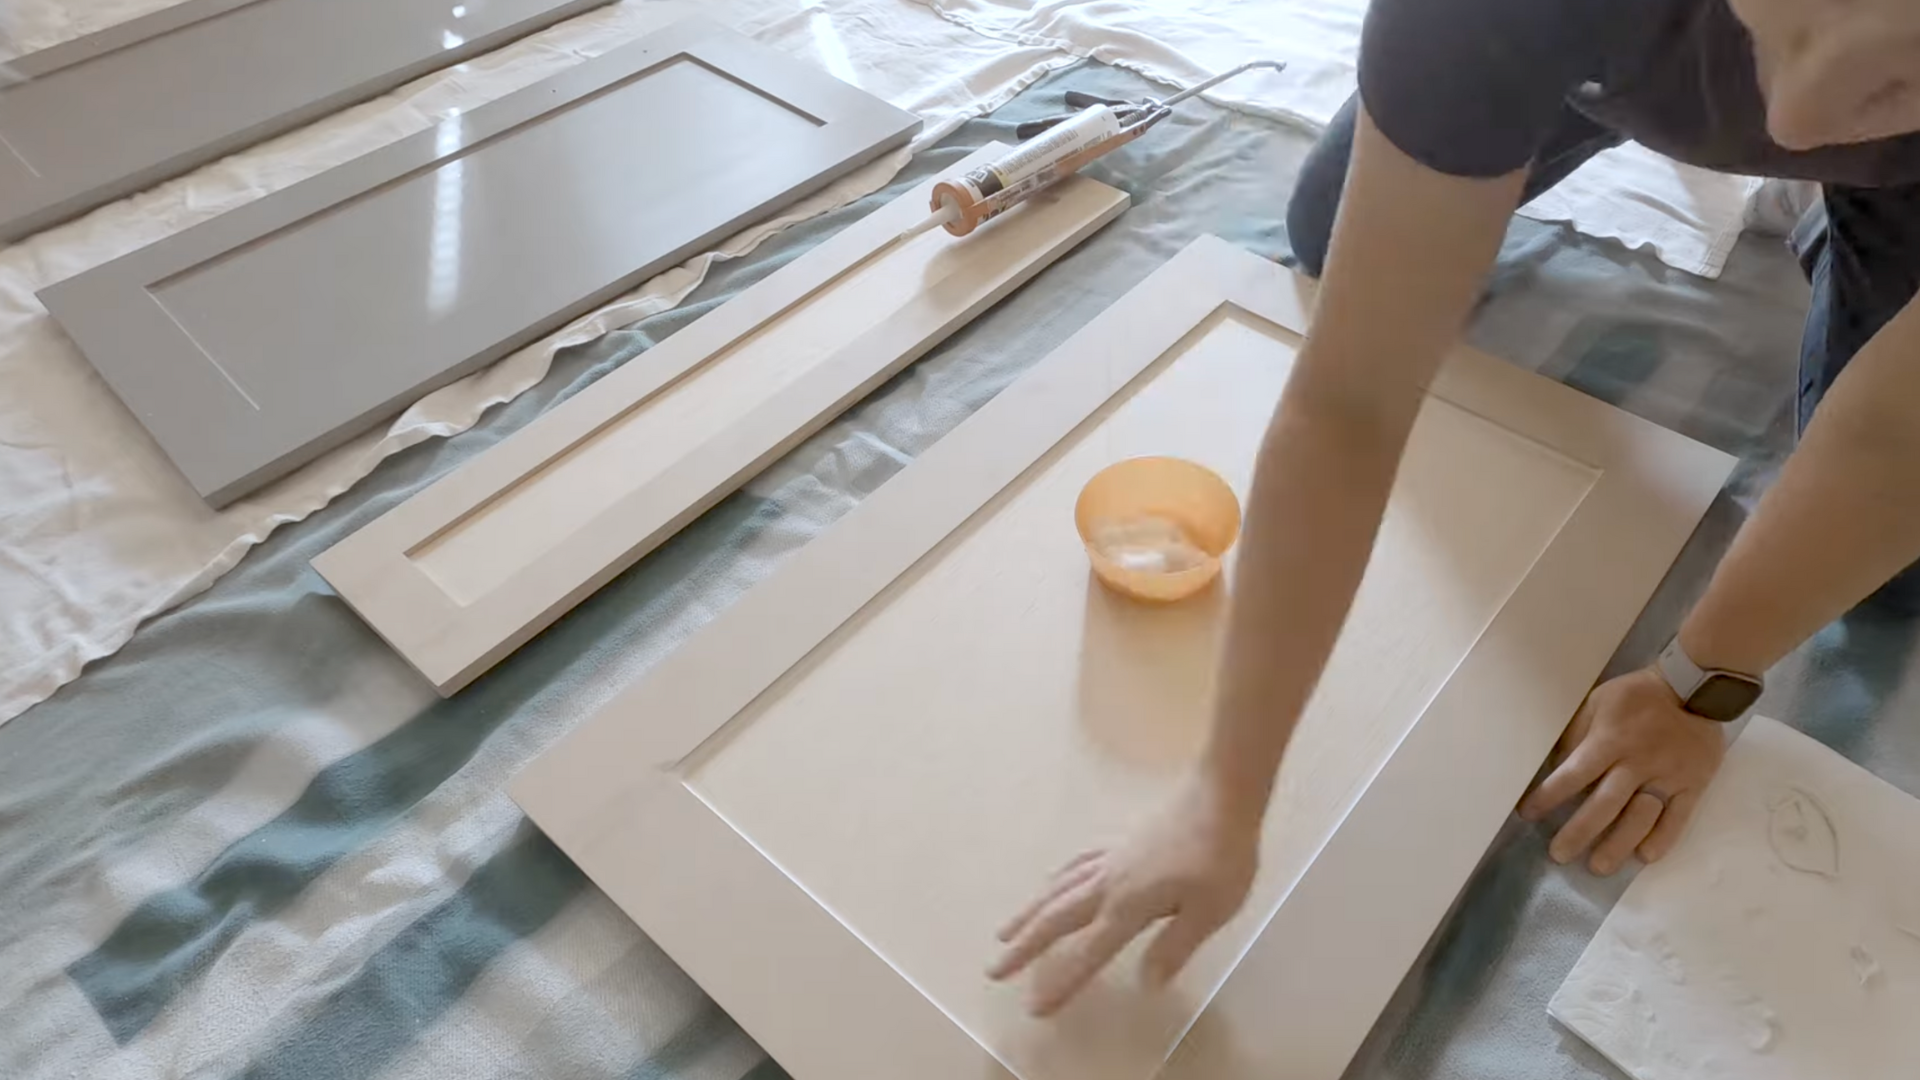
Step 10: Sand, Clean, and Caulk
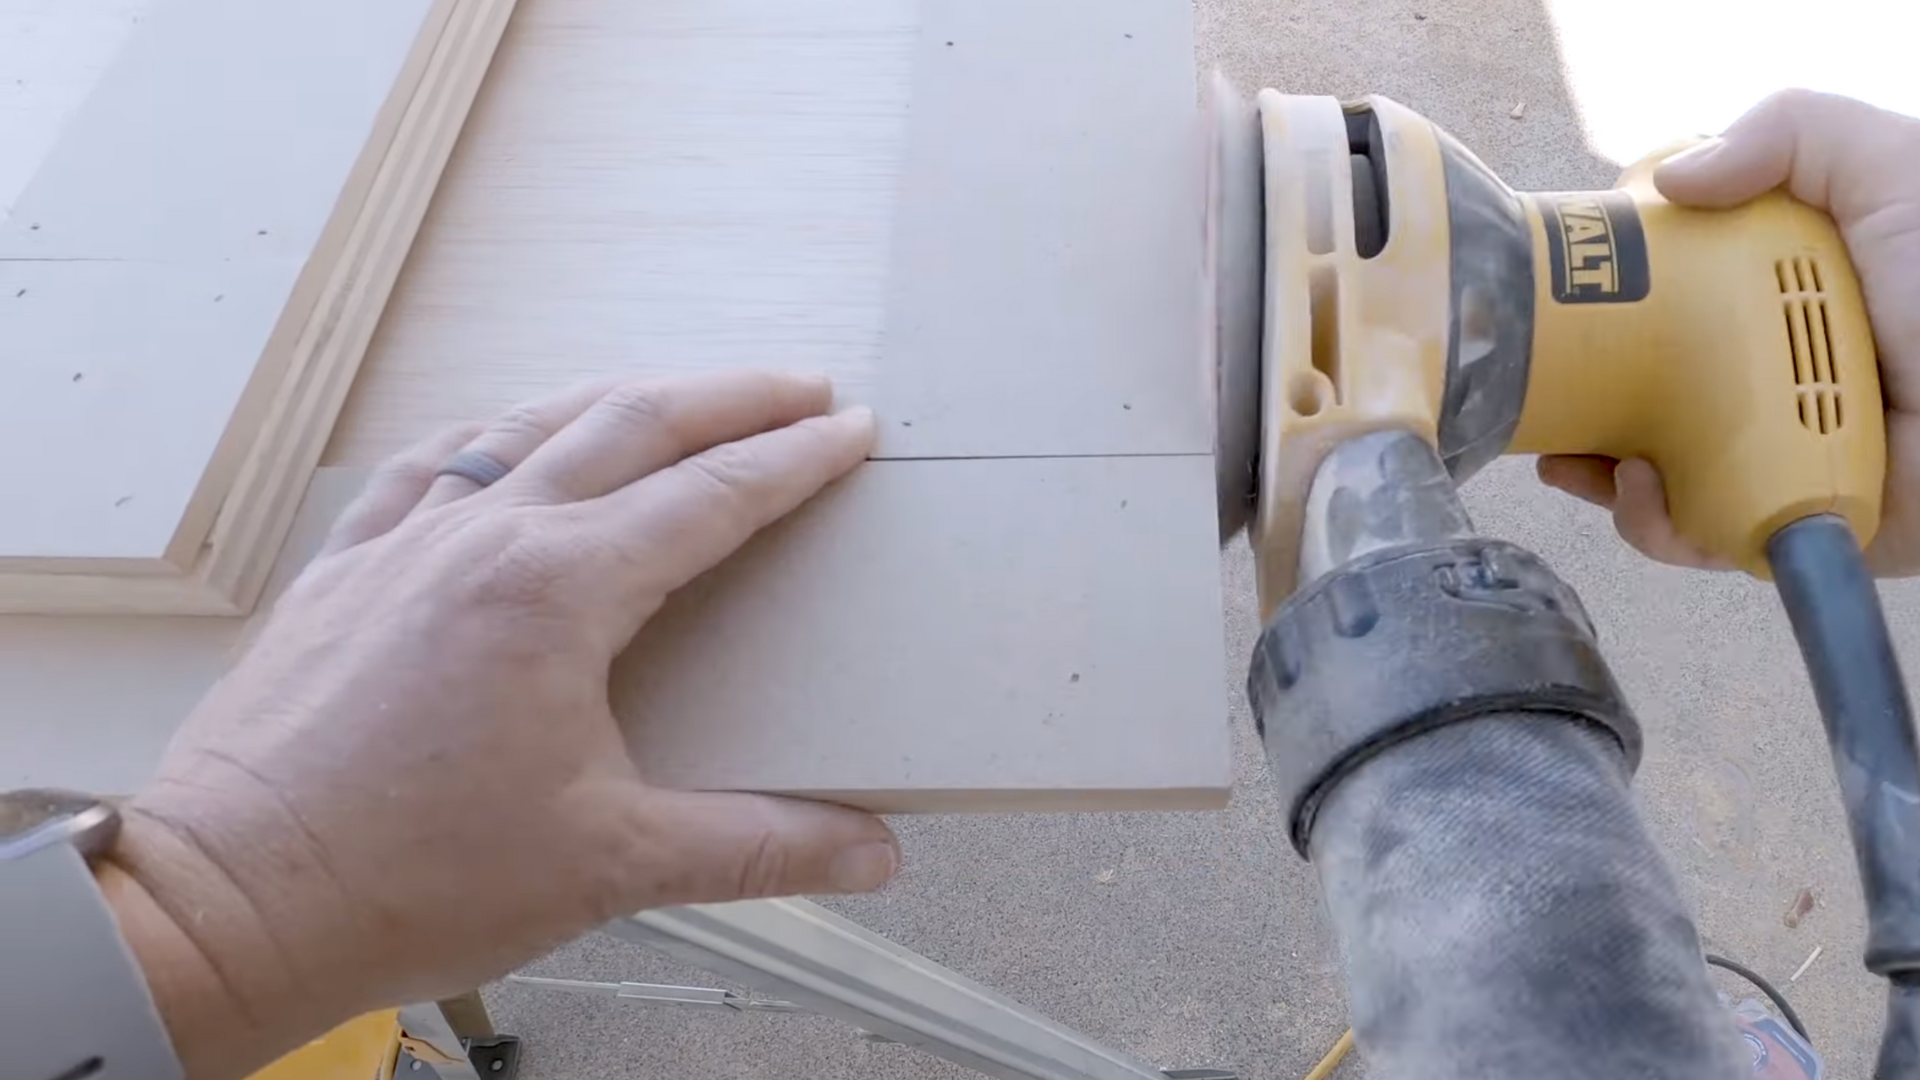
Once the wood filler is completely dry, sand all the filled areas and edges until everything is smooth and even.
This step is important for making sure your paint goes on cleanly and evenly.
After sanding, use a clean rag to wipe away all the dust from the door and trim. Then, apply a thin line of caulk along the inner edges where the trim meets the cabinet door.
This helps seal any small gaps and gives your project a polished, professional look. Let the caulk dry fully before painting.
Step 11: Time to Paint
Once the caulk is completely dry, your cabinet doors are ready for their transformation with paint.
You can use a brush or roller to apply a primer first, which helps the topcoat adhere better and provides a smoother finish.
After the primer dries, apply your favorite cabinet paint.
Remember, multiple thin coats generally work best for achieving a professional, smooth finish, avoiding drips or uneven textures.
Your cabinet doors are now ready to showcase their refreshed and updated look!
Creative Ideas to Style Flat Cabinet Doors with Trim
When I first started adding trim to flat cabinet doors, I had no idea how many fun ways there were to get creative. You don’t have to stick with the same look for every door.
I love trying out different trim styles to match the vibe of each room; some look classic, while others feel totally modern.
| Trim Style | Look and Feel | Best For |
|---|---|---|
| Shaker Frame | Clean and simple | Kitchens, laundry rooms |
| X or Cross Pattern | Rustic and farmhouse | Mudrooms, barn-style bathrooms |
| Picture Frame Style | Classic and elegant | Bathrooms, home offices |
| Double Border Trim | Bold and custom | Accent cabinets or islands |
| Geometric Shapes | Modern and playful | Kids’ spaces, craft rooms |
There are no rules, just pick what you like! I always say, if it makes you smile every time you open the cabinet, it’s the right choice.
Tips and Tricks for Success When Adding Trim to Flat Cabinet Doors
Want your cabinet makeover to go smoothly? Here are some easy tips and tricks to help you out when adding trim to flat cabinet doors:
- Measure twice, cut once. It sounds simple, but it saves time and stops mistakes.
- Use painter’s tape to lay out your trim before gluing. This helps you see how it will look.
- Work on a flat surface. Take the doors off and lay them on a table or floor so the trim stays even.
- Let the glue dry fully. Rushing can make the trim slide out of place.
- Use a level to make sure each piece is straight.
- Sand the edges for a smooth finish before painting.
- Don’t skip primer. It helps the paint stick and last longer.
These little steps make a big difference!
Conclusion
Adding trim to flat cabinet doors is such a simple way to give your space a whole new look.
With just a few tools and a little time, you can turn plain doors into something stylish and eye-catching.
No matter if you go for a classic shaker style or something more creative, the result feels fresh and custom.
I’ve seen how this small change can completely transform a kitchen or bathroom without the need for a full remodel.
It’s also a fun DIY project that’s great for beginners. Don’t be afraid to try different styles and paint colors to match your home’s vibe.
So grab some trim, roll up your sleeves, and give your flat cabinet doors the upgrade they deserve. You’ll love the results!