
Using painter’s tape seems easy-until it’s time to pull it off. That’s where the real questions start. Should you remove it right after painting? Or wait until the paint is dry?
You’ll find a multitude of opinions out there, which can make it challenging to determine what works.
In this article, I’ll break down both sides. I’ll explain when to remove the tape, why timing matters, and what affects the outcome. You’ll also learn how to avoid peeling paint and jagged lines.
I’ve been through the same questions. I’ve seen what works and what doesn’t. So I’m not here to guess – I’m here to help you figure it out clearly.
If you came here looking for a straight answer to a common painting problem, you’re in the right place. Let’s walk through it together.
Why Painter’s Tape Timing Matters?
Painter’s tape is designed to provide clean, sharp lines, but timing is everything. If you pull the tape too early, the paint may still be wet, which can lead to drips, smudges, or uneven edges.
But if you wait too long, the paint can dry and bond to the tape. When you finally remove it, it might pull up chunks of paint or leave behind a jagged edge.
This is why getting the timing right matters. The tape doesn’t just protect – it also interacts with the paint as it dries.
Factors such as paint type, wall texture, humidity, and temperature all impact the result. One small change in any of these can make the difference between a smooth edge and a peeling mess.
Understanding these factors will help you decide the right time to pull the tape for your specific project.
Factors That Affect When to Remove Painter’s Tape
There is no single rule for when to remove painter’s tape, because the right timing depends on several factors.
The type of paint, the surface being painted, and the room’s conditions all affect how the tape behaves. Understanding these factors can help you avoid peeling, smudging, or a rough line.
- Type of Paint: Latex paint dries fast – remove tape while it’s still slightly wet. Oil-based paint dries slowly – wait until it’s dry to the touch. Fast-drying paints need quick removal. Slow-drying ones give more time but may bond to the tape.
- Type of Surface: Smooth walls give cleaner tape lines. Textured surfaces may cause paint to bleed or crack. Wood and metal react to temperature, so test a small area first.
- Room Conditions: Warm, dry rooms speed up drying – remove tape sooner. Cool or humid rooms slow drying – more time to work. High humidity can cause paint to become tacky and develop smears.
When to Remove Painter’s Tape: Wet vs. Dry
One of the most common painting questions is when to take off the tape. Some people say you should remove it while the paint is still wet.
Others wait until the paint dries completely. Both methods have their reasons – and their risks. If you pull too early, the paint might smear. If you wait too long, the tape might peel the paint off with it.
| Factor | Remove While Paint Is Wet | Remove After Paint Dries |
|---|---|---|
| Peeling Risk | Low–paint hasn’t bonded to the tape yet | Higher paint may lift with tape |
| Smudging Risk | Medium – wet paint can smear if touched | Low–paint is dry and stable |
| Edge Cleanliness | Sharp lines, if pulled carefully | Sharp lines if scored first |
| Ease of Removal | Easy – tape pulls off smoothly | Needs a knife to score the edge |
| Best For | Latex or water-based paint | When you need more time to clean up |
| Caution | Don’t rush – paint is still wet | Don’t wait too long – tape can tear or stick |
Recommended Time Frame for Tape Removal
The best time to remove painter’s tape is usually 1 to 2 hours after painting, while the paint is still slightly tacky. This helps prevent peeling and gives a cleaner edge.
For some projects – especially those involving thicker or slower-drying paints – it’s best to wait until the paint is dry to the touch, but not fully hardened.
Always check the label on your paint can for drying time. Different brands and finishes dry at various speeds. Following those instructions helps you time the tape removal just right.
How to Remove Painter’s Tape Without Damage?
Removing painter’s tape seems simple, but if you rush or pull it the wrong way, you can ruin your clean lines.
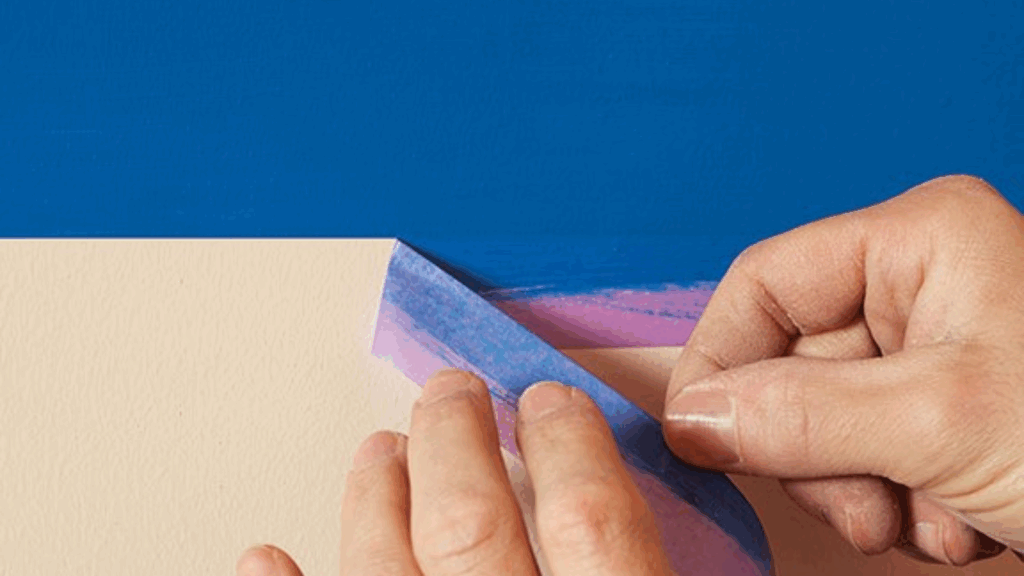
1. Pull at a 45-Degree Angle

Hold the tape close to the wall and pull it back slowly at a 45-degree angle. This helps keep the paint line sharp and reduces the chance of tearing.
This technique also helps maintain a crisp paint line without jagged edges. Work slowly and stay close to the wall or trim as you move along.
2. Score the Edge with a Knife (if paint is dry)
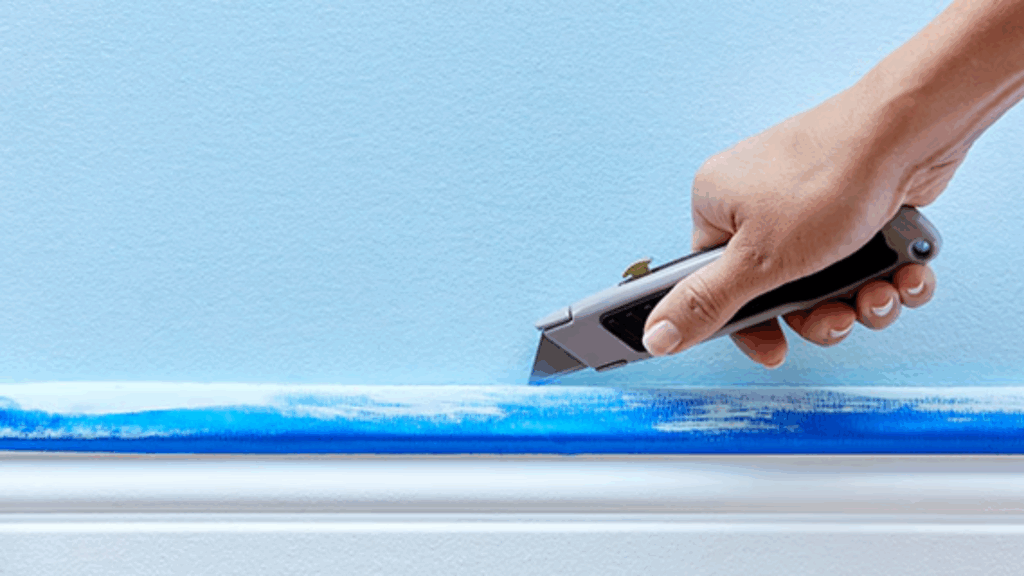
If the paint has dried, use a utility knife or razor blade to lightly cut along the edge of the tape before removing it.
This stops the dried paint from cracking or peeling away with the tape. It’s beneficial on corners, textured walls, or when the tape has been on for more than a few hours.
3. Remove Slowly and Gently
Take your time. Pull the tape slowly and steadily, watching the edge as you go. If you notice any paint starting to lift, stop and use a knife to help release it.
Rushing increases the chance of jagged edges or peeling paint. Even if the tape was applied and removed at the right time, gentle handling still matters.
Common Mistakes to Avoid
Even if you prep well and paint carefully, simple tape mistakes can ruin your finish. These are some of the most common errors people make with painter’s tape – and how to avoid them.
- Leaving the tape on for too long: The longer the tape remains in place, the more likely it is to bond with the paint. This makes it more difficult to remove and increases the likelihood of peeling or tearing.
- Pulling too fast or at the wrong angle: Ripping the tape off quickly or pulling straight back can damage the edge. A slow pull at a 45-degree angle gives cleaner lines with less risk.
- Using the wrong tape for the surface: Not all painters’ tape is the same. Some are designed for delicate surfaces, such as wallpaper or fresh paint, while others are stronger and better suited for trim or textured walls.
- Not pressing the tape down firmly: If the tape isn’t sealed well, paint can leak underneath. Always run your finger or a flat tool along the edge before you paint to press it down tightly.
What Do Painters and DIYers Say?
When it comes to removing painter’s tape, there’s no single answer – and plenty of debate.
Some painters suggest that the best time to remove tape is immediately after the final coat, while the paint is still wet. They believe this gives the cleanest line and avoids pulling dried paint.
Others prefer to wait a full 24 hours, allowing the paint to dry completely before touching the tape.
But most agree on one thing: don’t rely only on the clock. Instead, pay attention to how your paint behaves. Is it still tacky? Is it fully set? Dry to the touch? These are better signs than a timer.
Ultimately, the best choice emerges from a combination of practice, experience, and understanding your paint and the surface it is applied to.
Conclusion
There’s no single rule for when to remove painter’s tape, but there is a right approach for your setup. Timing depends on the type of paint, surface texture, and room conditions.
Some people get great results removing tape while the paint is still tacky. Others prefer waiting until the paint is dry to the touch. Both can work, but only if you’re paying attention to the details.
Don’t just go by the clock. Go by the paint. Look at how it’s setting. Feel the surface if needed. Follow what the paint is telling you. That’s how you avoid peeling, smudging, or uneven lines.
The key is to stay flexible and be patient. Painter’s tape is a helpful tool, but only when used with care.