
If you want to build a fun sandbox for your kids but don’t know where to start, you’re in the right place.
I’ll walk you through each step so you can make one that’s safe, strong, and easy to put together.
A DIY sandbox is a great way to give your kids a special place to play outdoors without spending a lot.
You don’t need to be a builder or have fancy tools-just some basic supplies, a little time, and a plan that works. I’ve taken the guesswork out of it, so you won’t waste time or mess things up.
You’ll learn how to pick the best spot, what materials to get, and how to put everything together, even if you’ve never done a project like this before.
If you’ve been searching for a clear guide to help you build a sandbox that lasts, I’ve got you covered from start to finish.
Why Build a Sandbox in Your Backyard?
A sandbox is more than just a place to play; it gives kids a space to dig, build, and use their imagination outside.
It’s also a simple way to make your yard more fun without spending much money. I like how it brings the whole family outdoors and doesn’t need a lot of upkeep.
If you’re thinking about ways to keep kids busy, building a sandbox is a smart and easy choice. It can grow with your child’s interests and is great for both solo and group play.
Plus, it’s something you can build yourself without needing special skills.
This is why a backyard sandbox is worth building:
- Gives kids a safe place to play
- Helps improve creativity and motor skills
- Keeps outdoor toys in one spot
- Easy to clean and maintain
- Can be made with budget-friendly materials
Materials and Tools You’ll Need
Before you start building, make sure you have everything ready. These tools and supplies will help you build a strong and safe sandbox that lasts.
- Pressure-treated lumber (4×6 feet recommended)
- Timber screws
- Nail gun or power drill
- Weed barrier fabric
- Washed play sand
- Rake
- Measuring tape
- Level
How to Build a Sandbox: Step-by-Step Process
Building your own sandbox is easier than you might think. Just follow these simple steps, and you’ll have a fun play space ready in no time.
Step 1: Choose the Right Wood
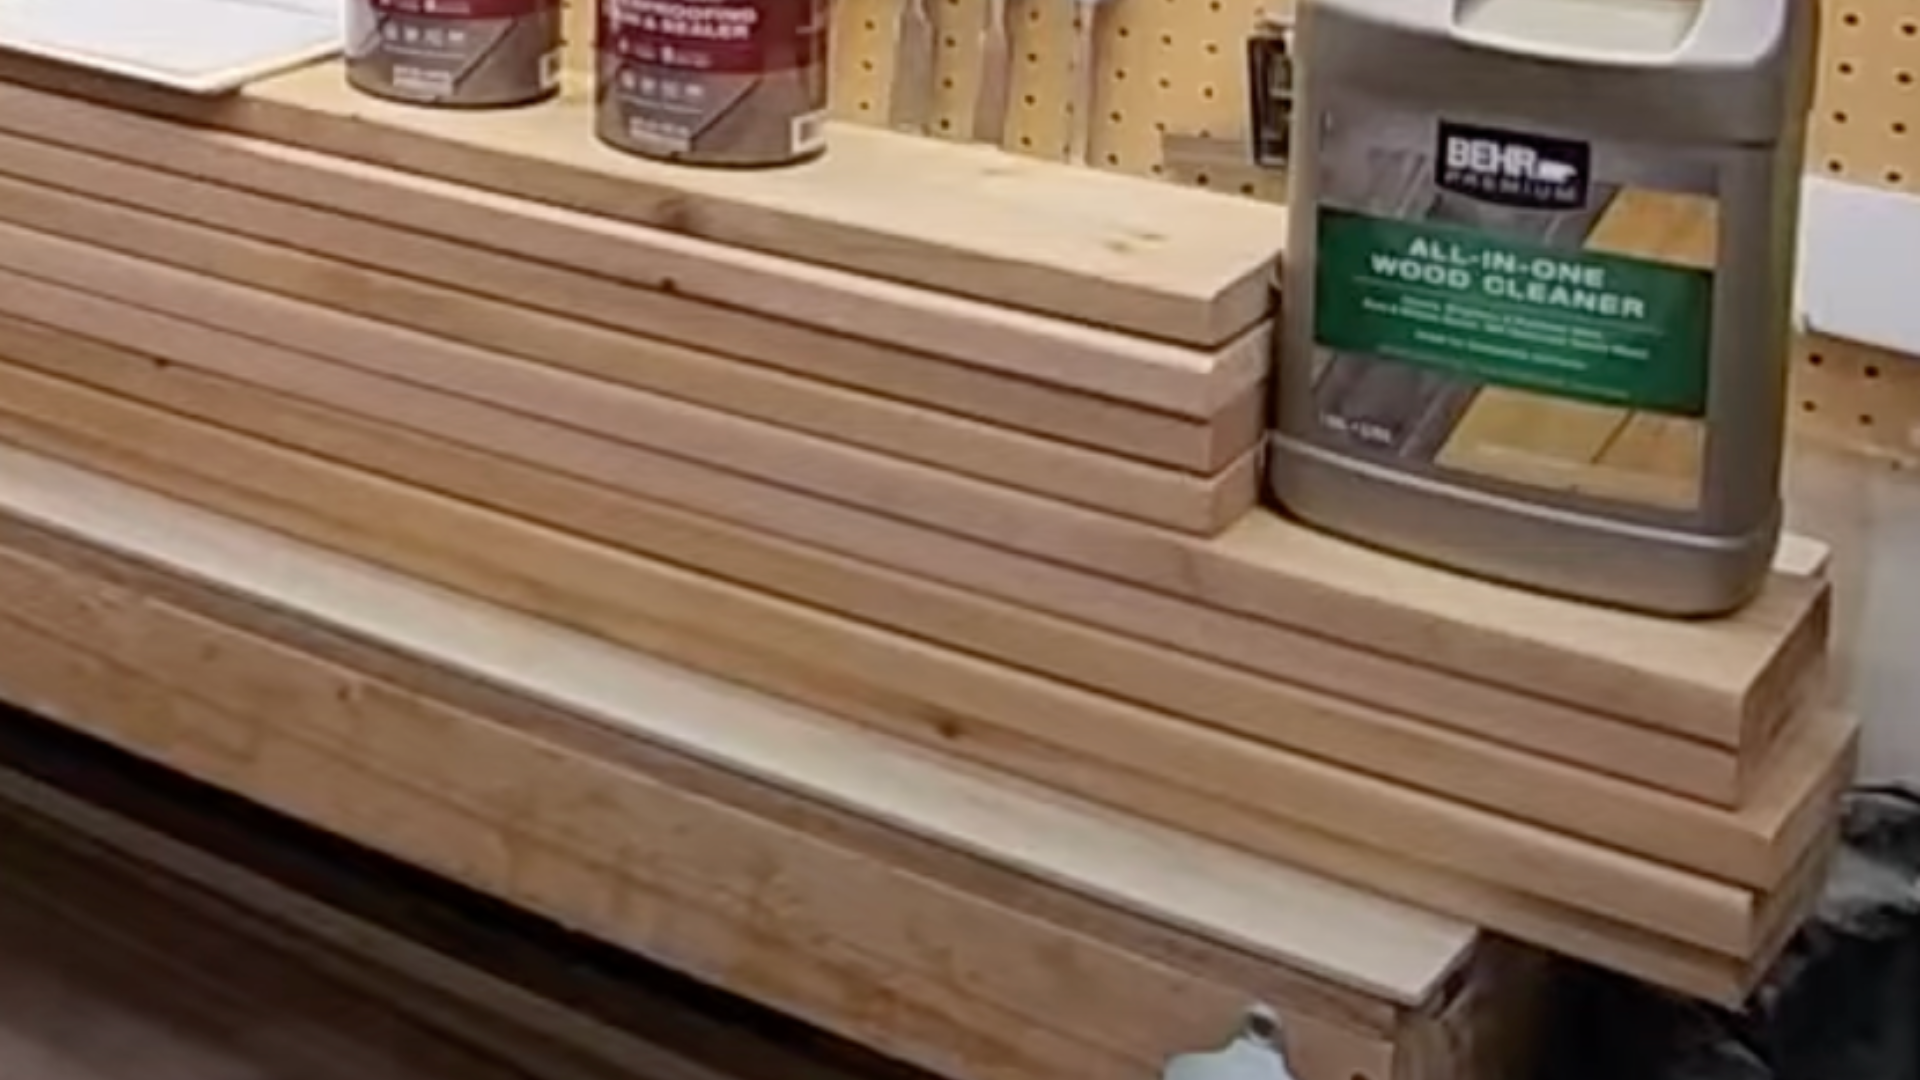
Start by picking cedar decking boards for your sandbox. Cedar is a strong wood that can handle rain, sun, and dirt without getting damaged quickly.
It looks nice and lasts a long time outside. The boards are usually 1 inch thick and 5.5 inches wide.
They’re better than regular 2x4s or 1x6s for outdoor use. Plus, they’re not too expensive, which makes them a smart choice.
These boards will form the walls, cover, and benches of your sandbox. Make sure you get enough wood based on the size of your sandbox, about 5 feet by 6 feet.
Step 2: Cut and Make the Side Panels
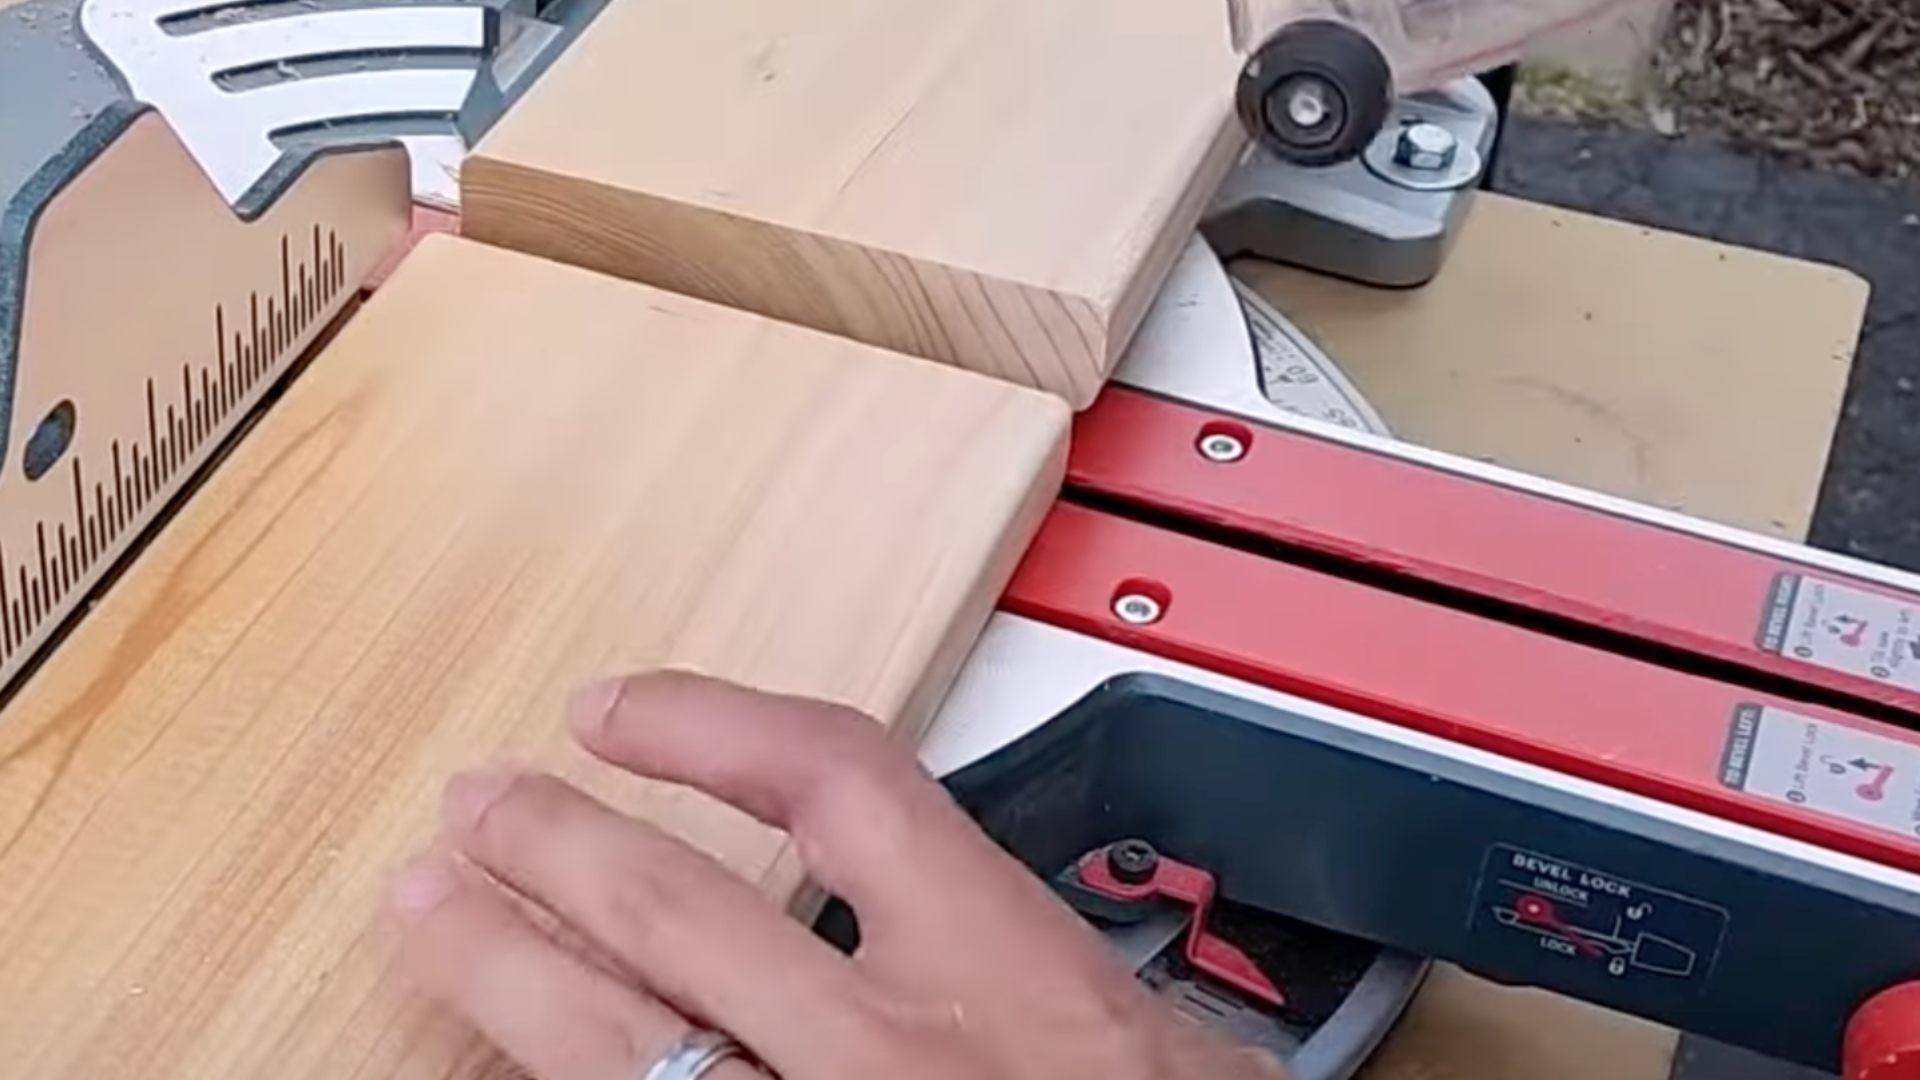
To build tall side panels for the sandbox, you’ll need to glue two decking boards together. First, cut the 10-foot boards in half.
Then trim them to exactly 5 feet long. Apply strong wood glue to the edges of two boards, press them together, and use clamps to hold them tight.
Wait for the glue to dry fully. Don’t worry if the edges aren’t perfect-you’ll clean them up later. These glued boards will make the tall sides of the sandbox, which are about 11 inches high.
Repeat this process for all four sides to complete the base frame.
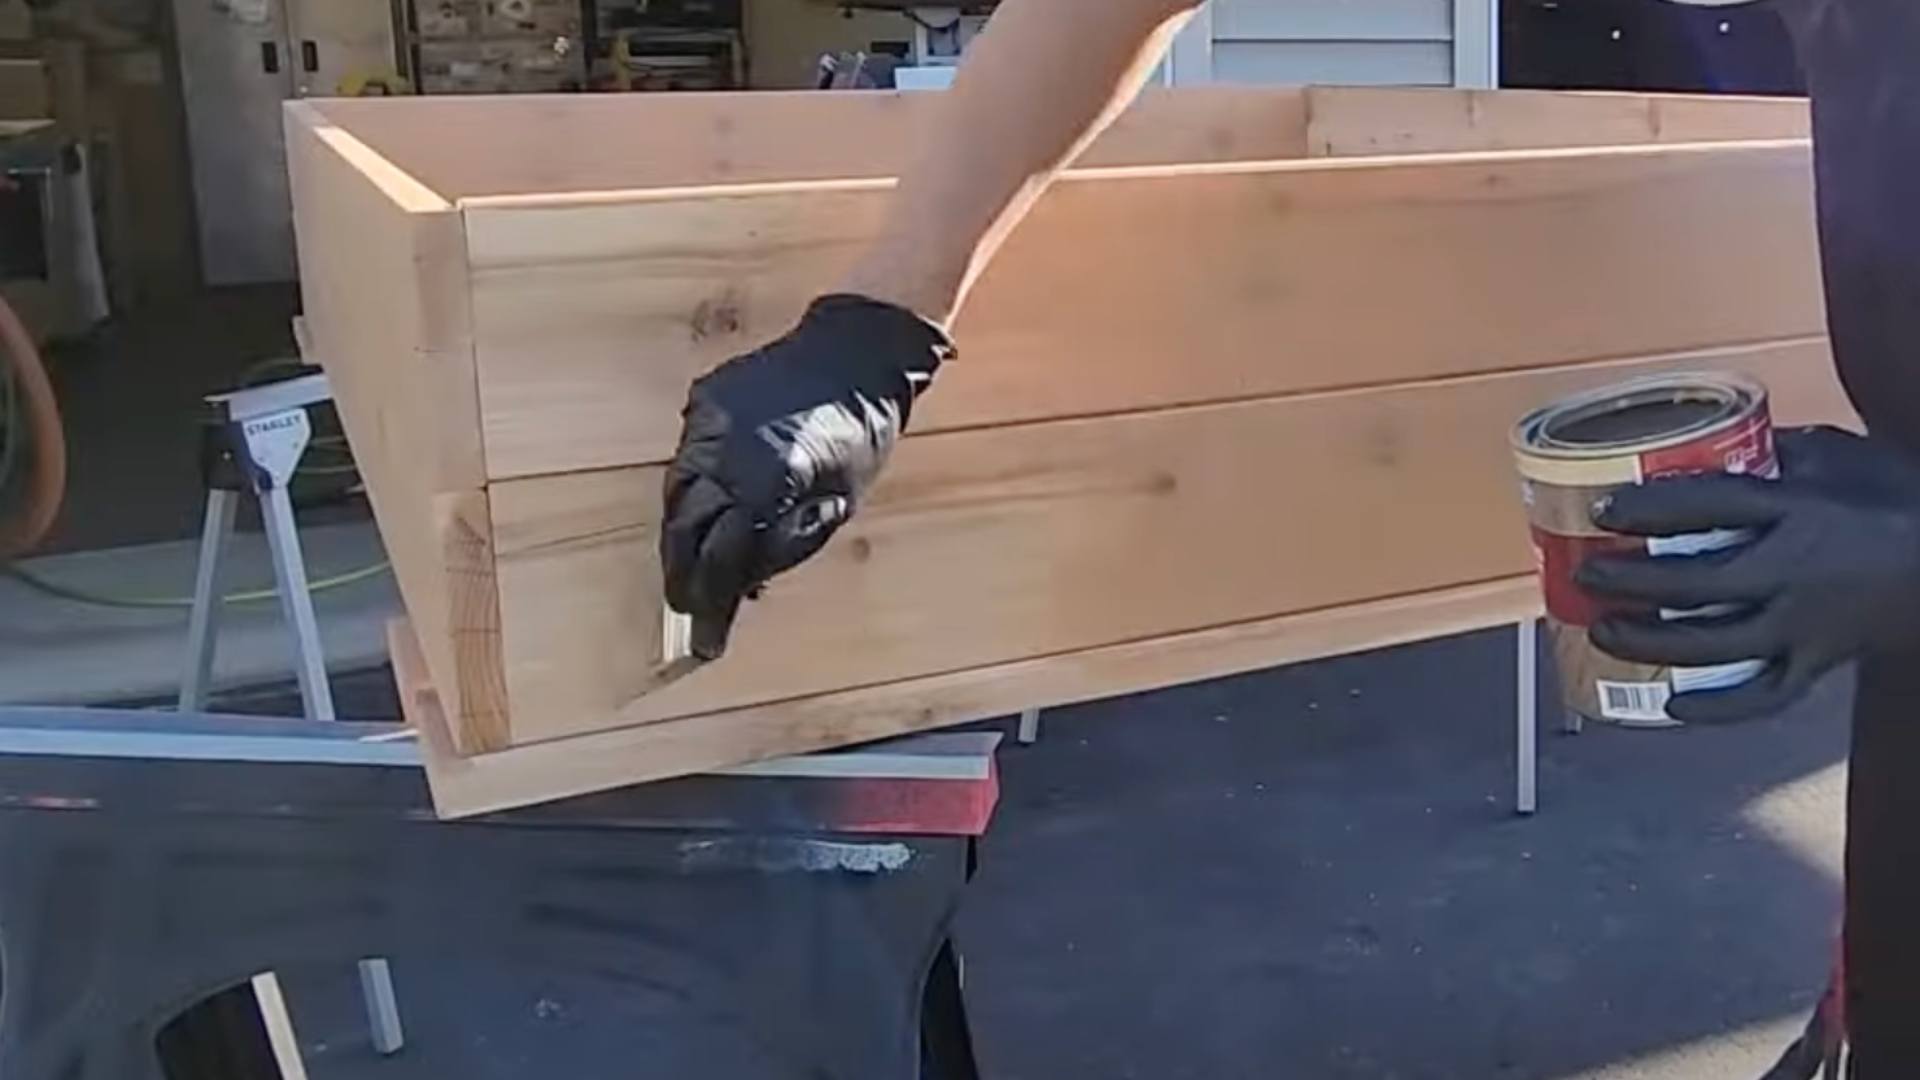
Step 3: Sand and Smooth
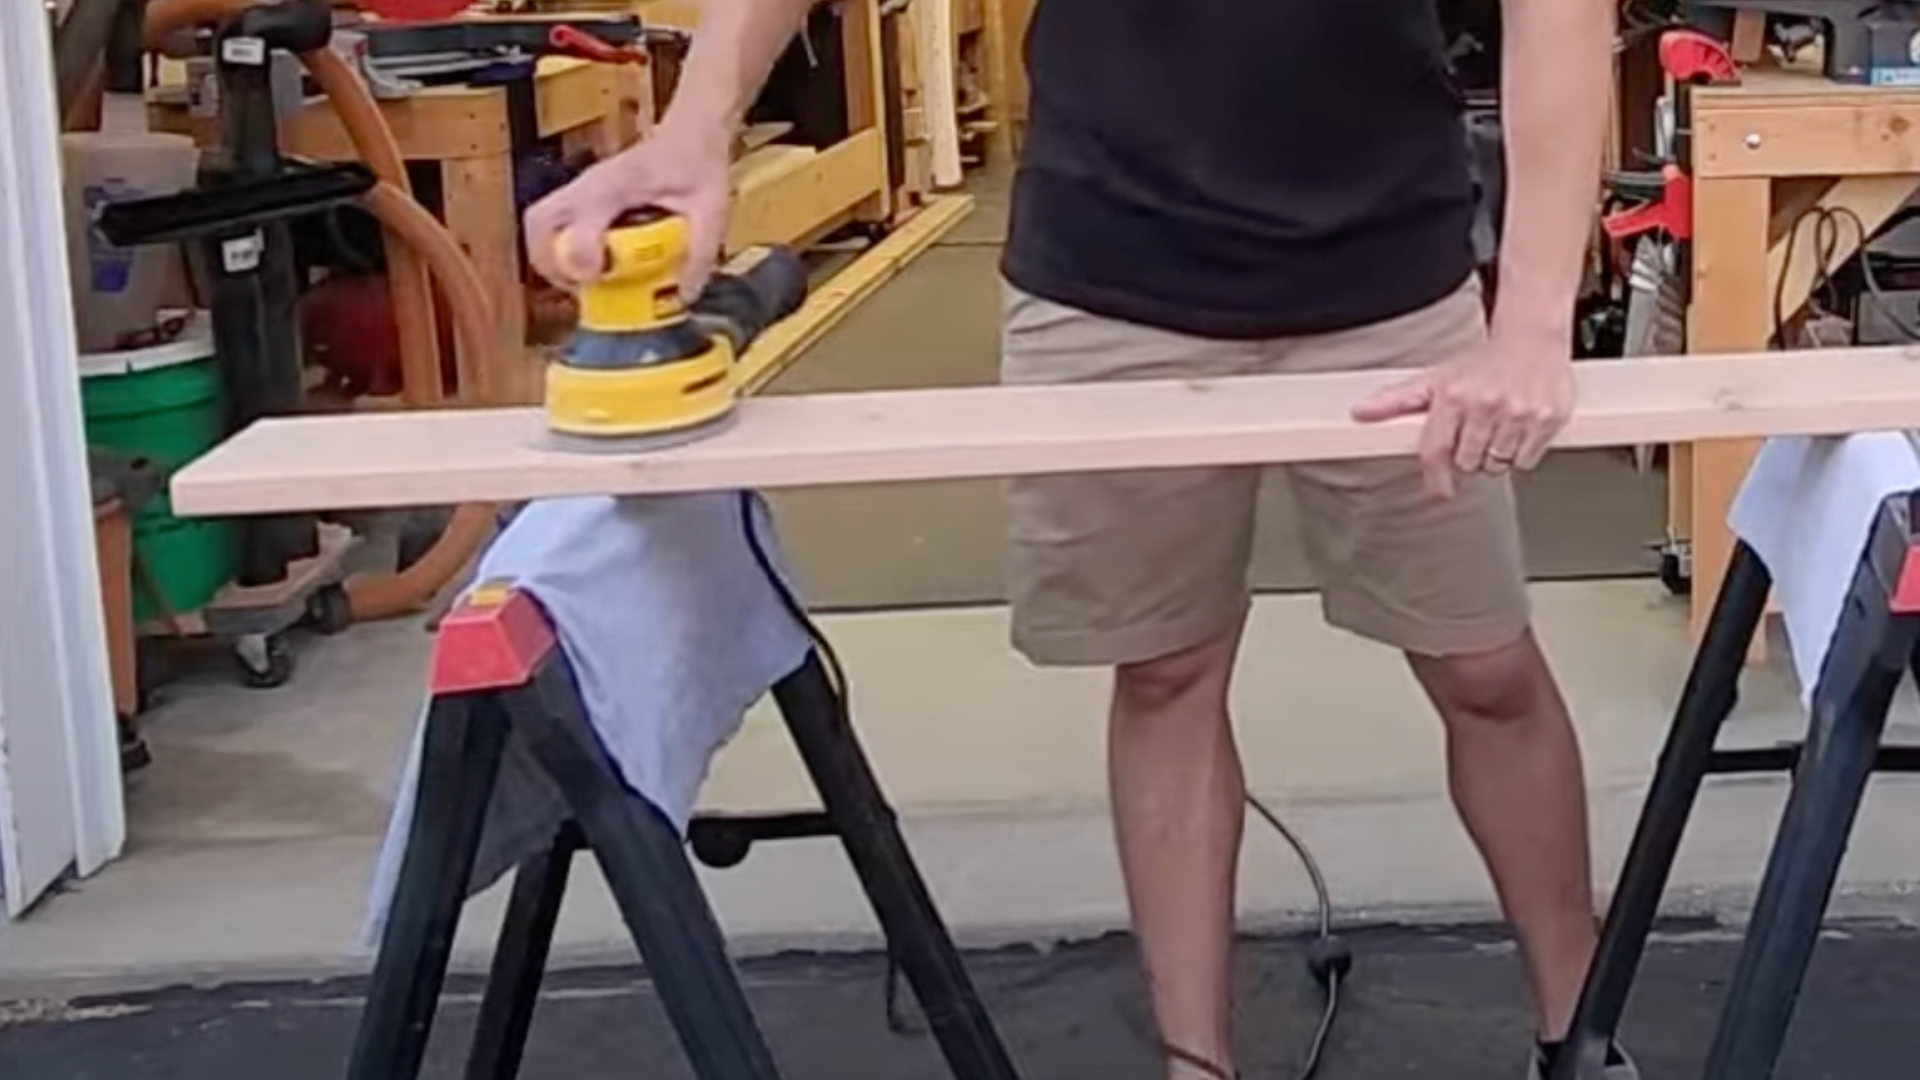
After the boards are dry and trimmed, it’s time to sand them. Sanding removes rough spots and tiny splinters that could hurt small hands.
Use 120-grit sandpaper for this job. You can also round the sharp edges to make the sandbox safer and more comfortable.
This step is important because kids will be sitting and playing on it. Use a sander, a sanding block, or even a router to smooth the edges.
If you don’t have fancy tools, trace a paint can curve and cut it with a handsaw. Just be sure every edge feels smooth to touch.
Step 4: Build the Cover Panels
Now you’ll make the panels that cover the sandbox, and later turn them into benches. First, lay out your boards with half-inch gaps between them. Use spacers to keep these gaps even.
Attach support braces underneath to hold the boards together. These braces keep the panel from falling apart.
Next, create overhang spacers to leave a half-inch border around the edge. This allows the cover to sit neatly on top of the sandbox.
You’ll be making two of these panels, one for each side of the sandbox. Take your time here so the panels are even, strong, and line up well.
Step 5: Cut Angles for the Seats
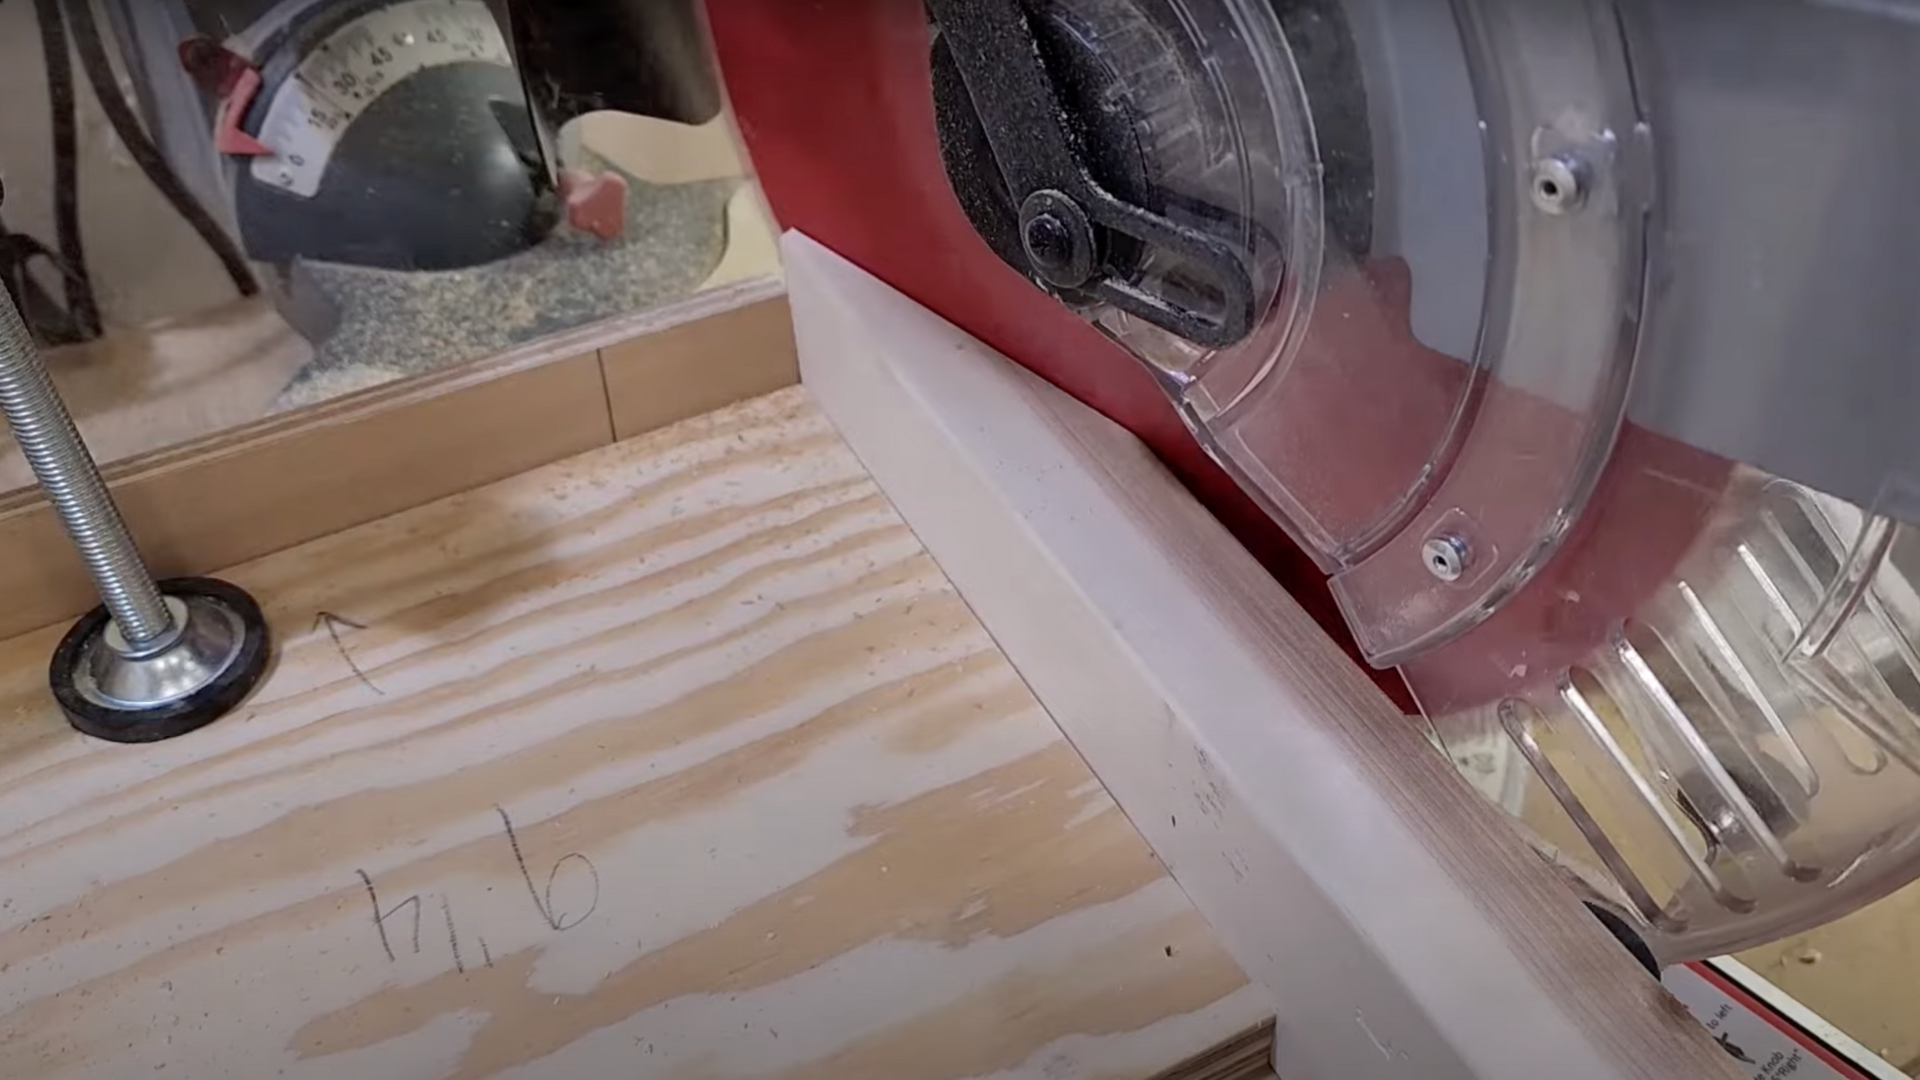
To make the bench part of the cover, you’ll need to cut angled pieces for the seat rests. A 15-degree angle is just right, but it’s too steep for most miter saws.
The easy fix is to make a jig. A jig is a helper tool that holds your wood steady and safely in the right position.
Clamp a backer board to your saw fence to make this jig. Then, place your seat board against it and cut.
This gives you a clean angle that feels comfortable to sit on. Repeat this process for all the angled seat pieces.
Step 6: Attach the Hinges
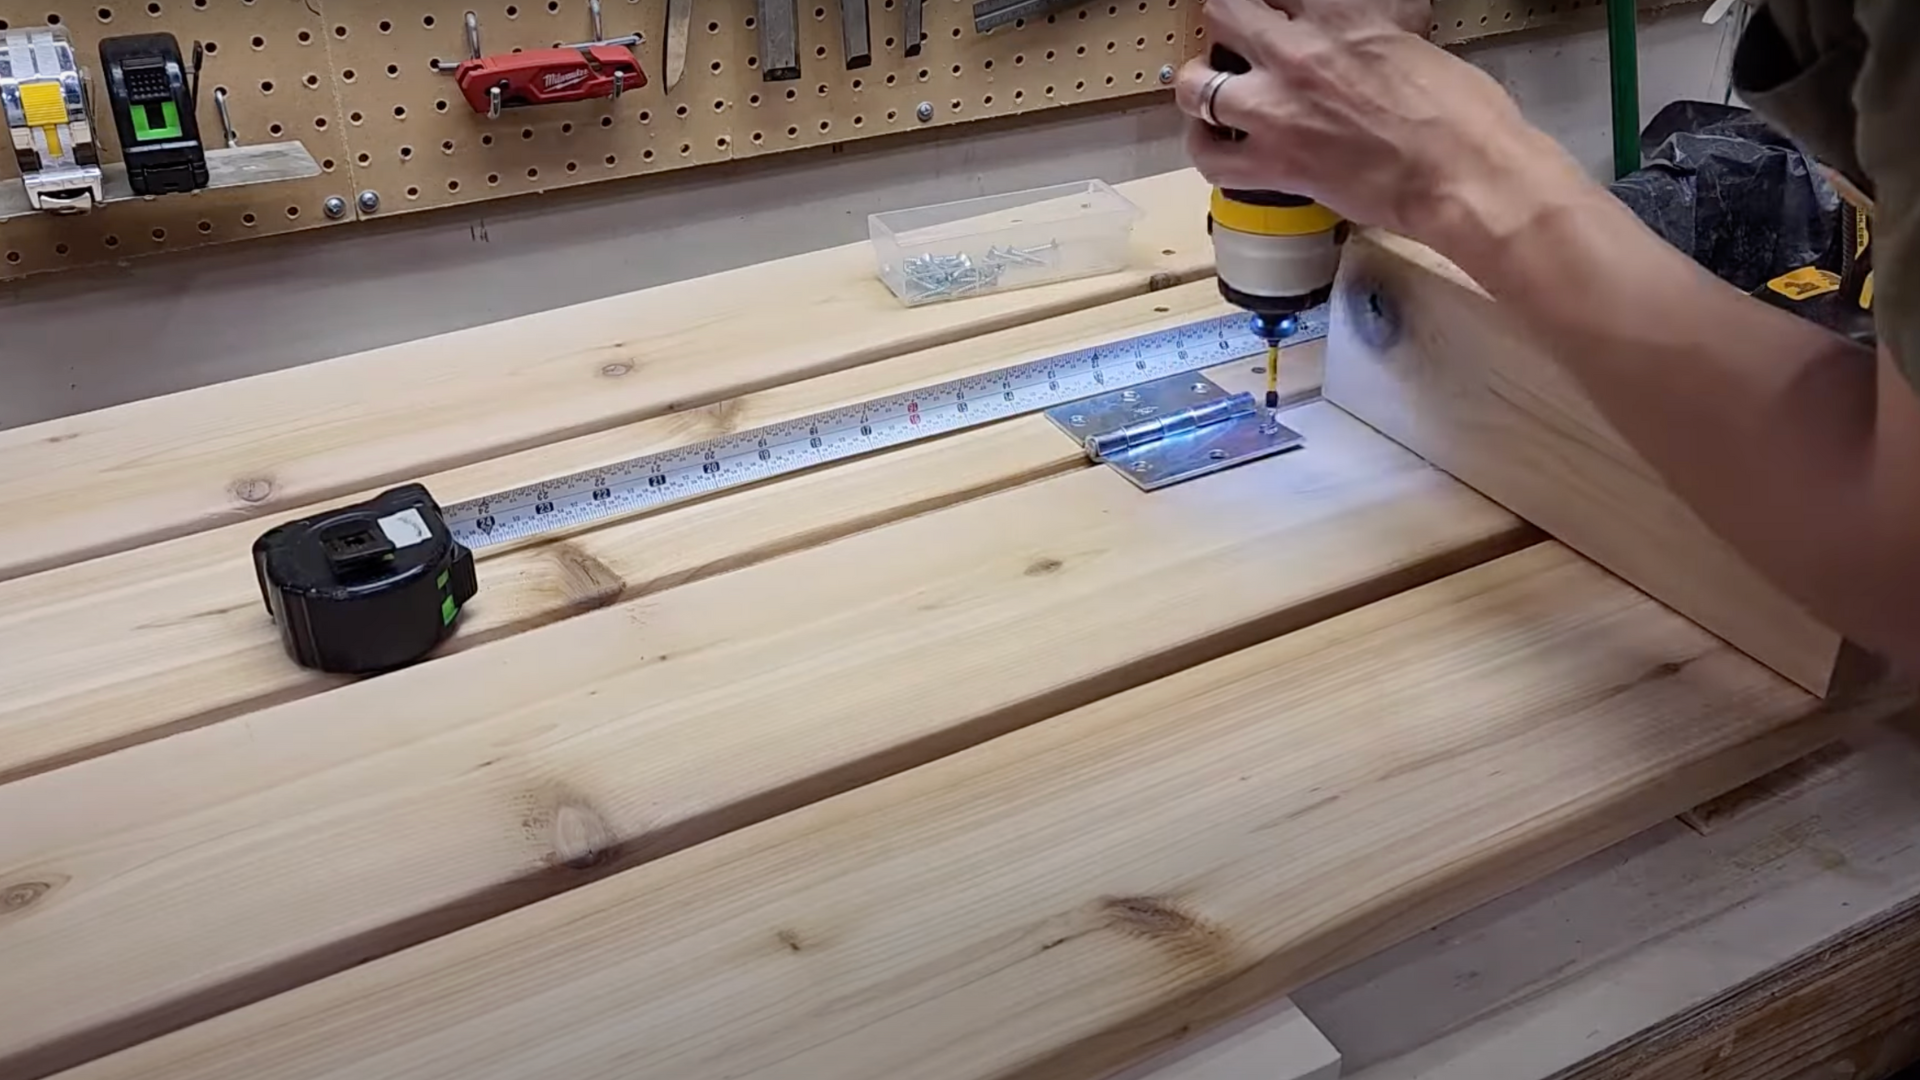
The hinges are what let the sandbox cover fold out into benches. First, flip over the board that holds the seat rest.
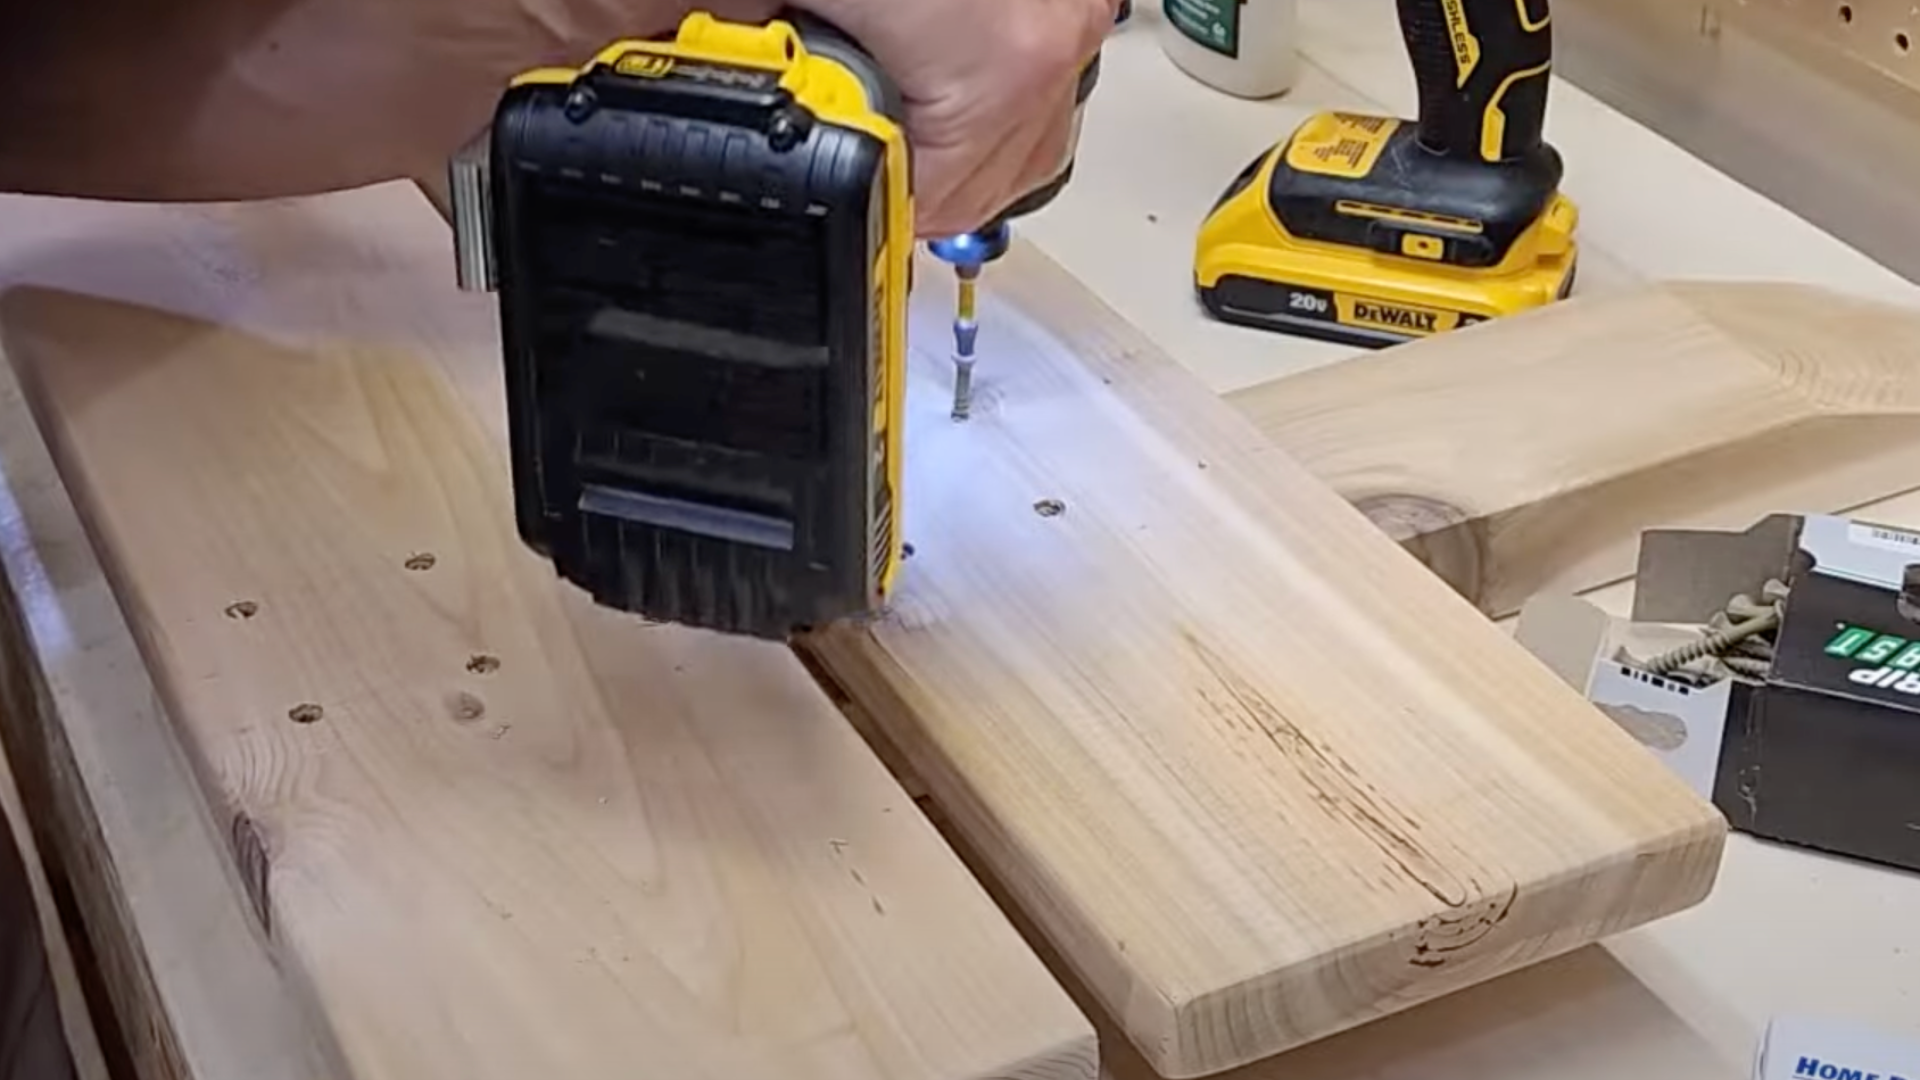
This is the center of one side of your cover. Use a measuring tape to mark where the hinges will go, about 10 inches from the edge.
Drill small pilot holes before putting in screws. Wrap a piece of tape around the drill bit to stop it from going in too deep.
Then, screw in the hinges carefully. Repeat for both sides. The hinges need to line up so the cover opens smoothly and turns into sturdy benches.
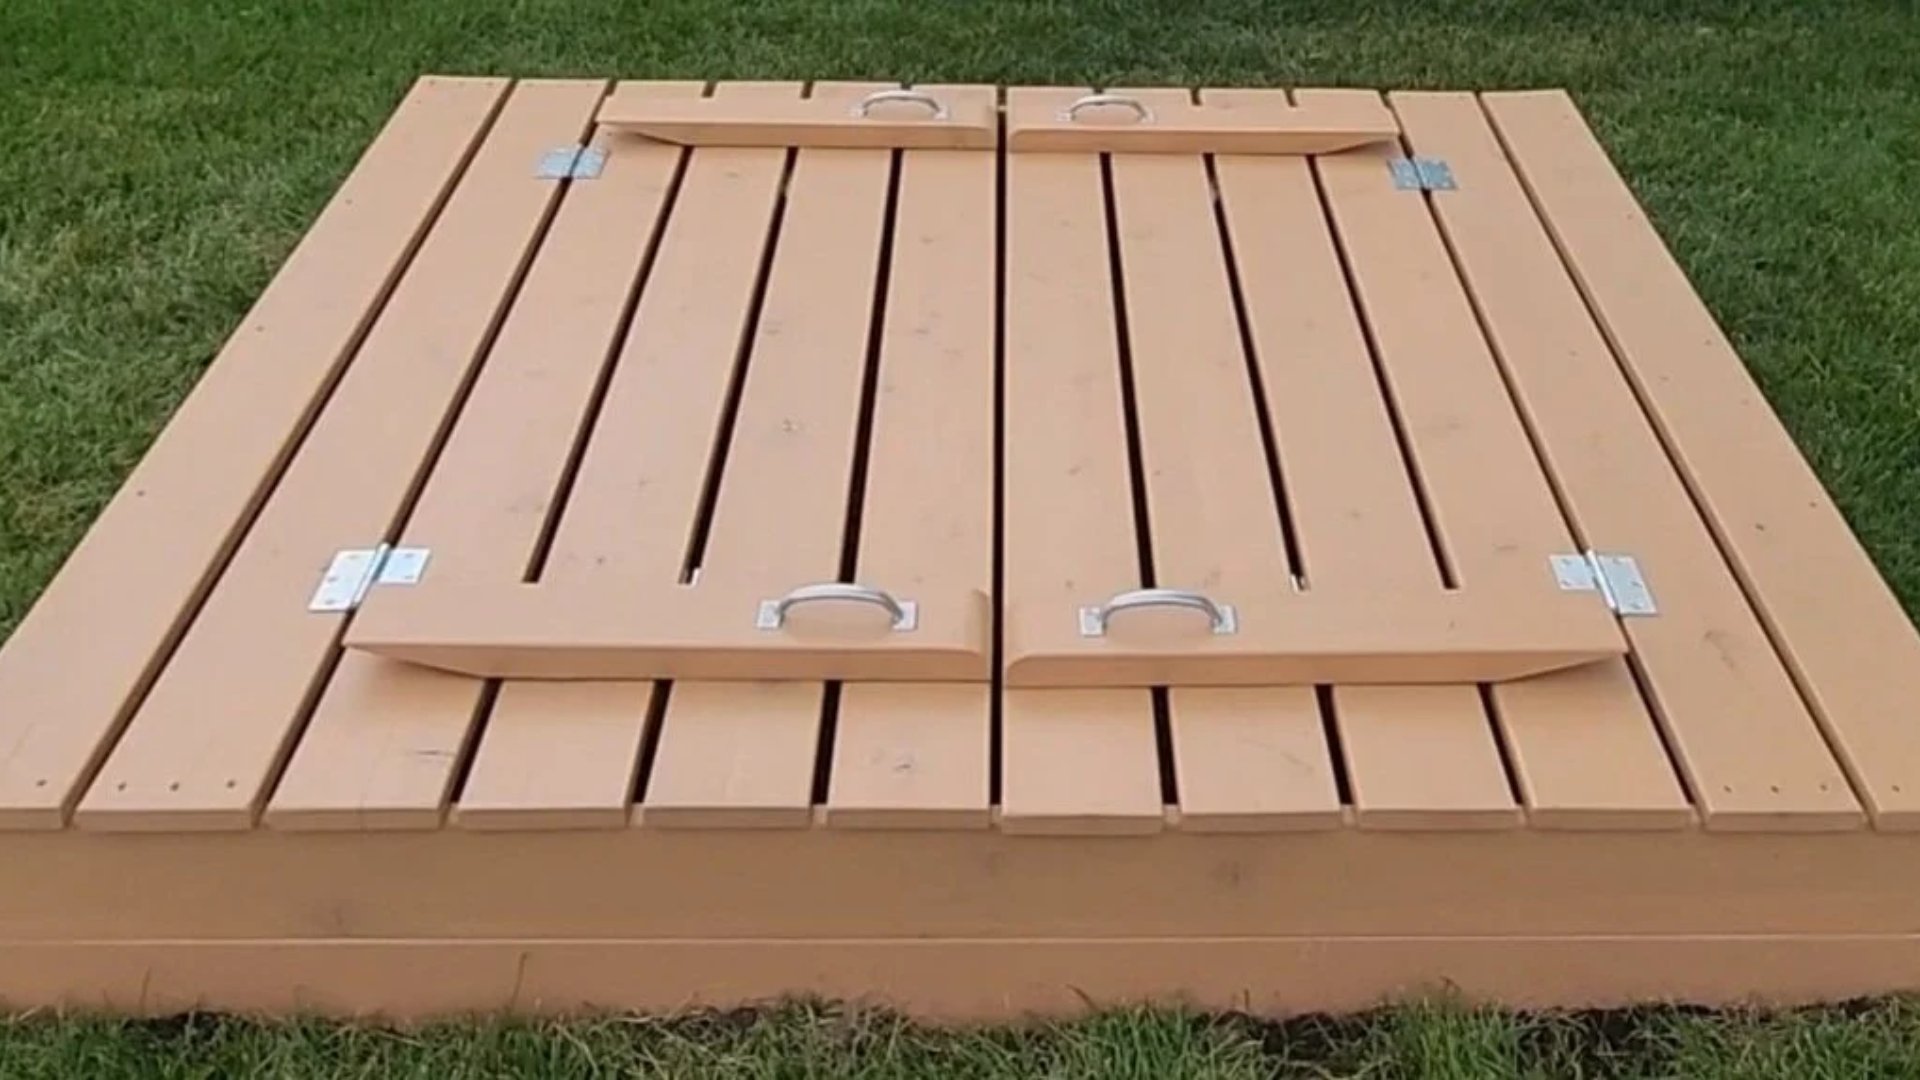
Step 7: Test the Bench Conversion
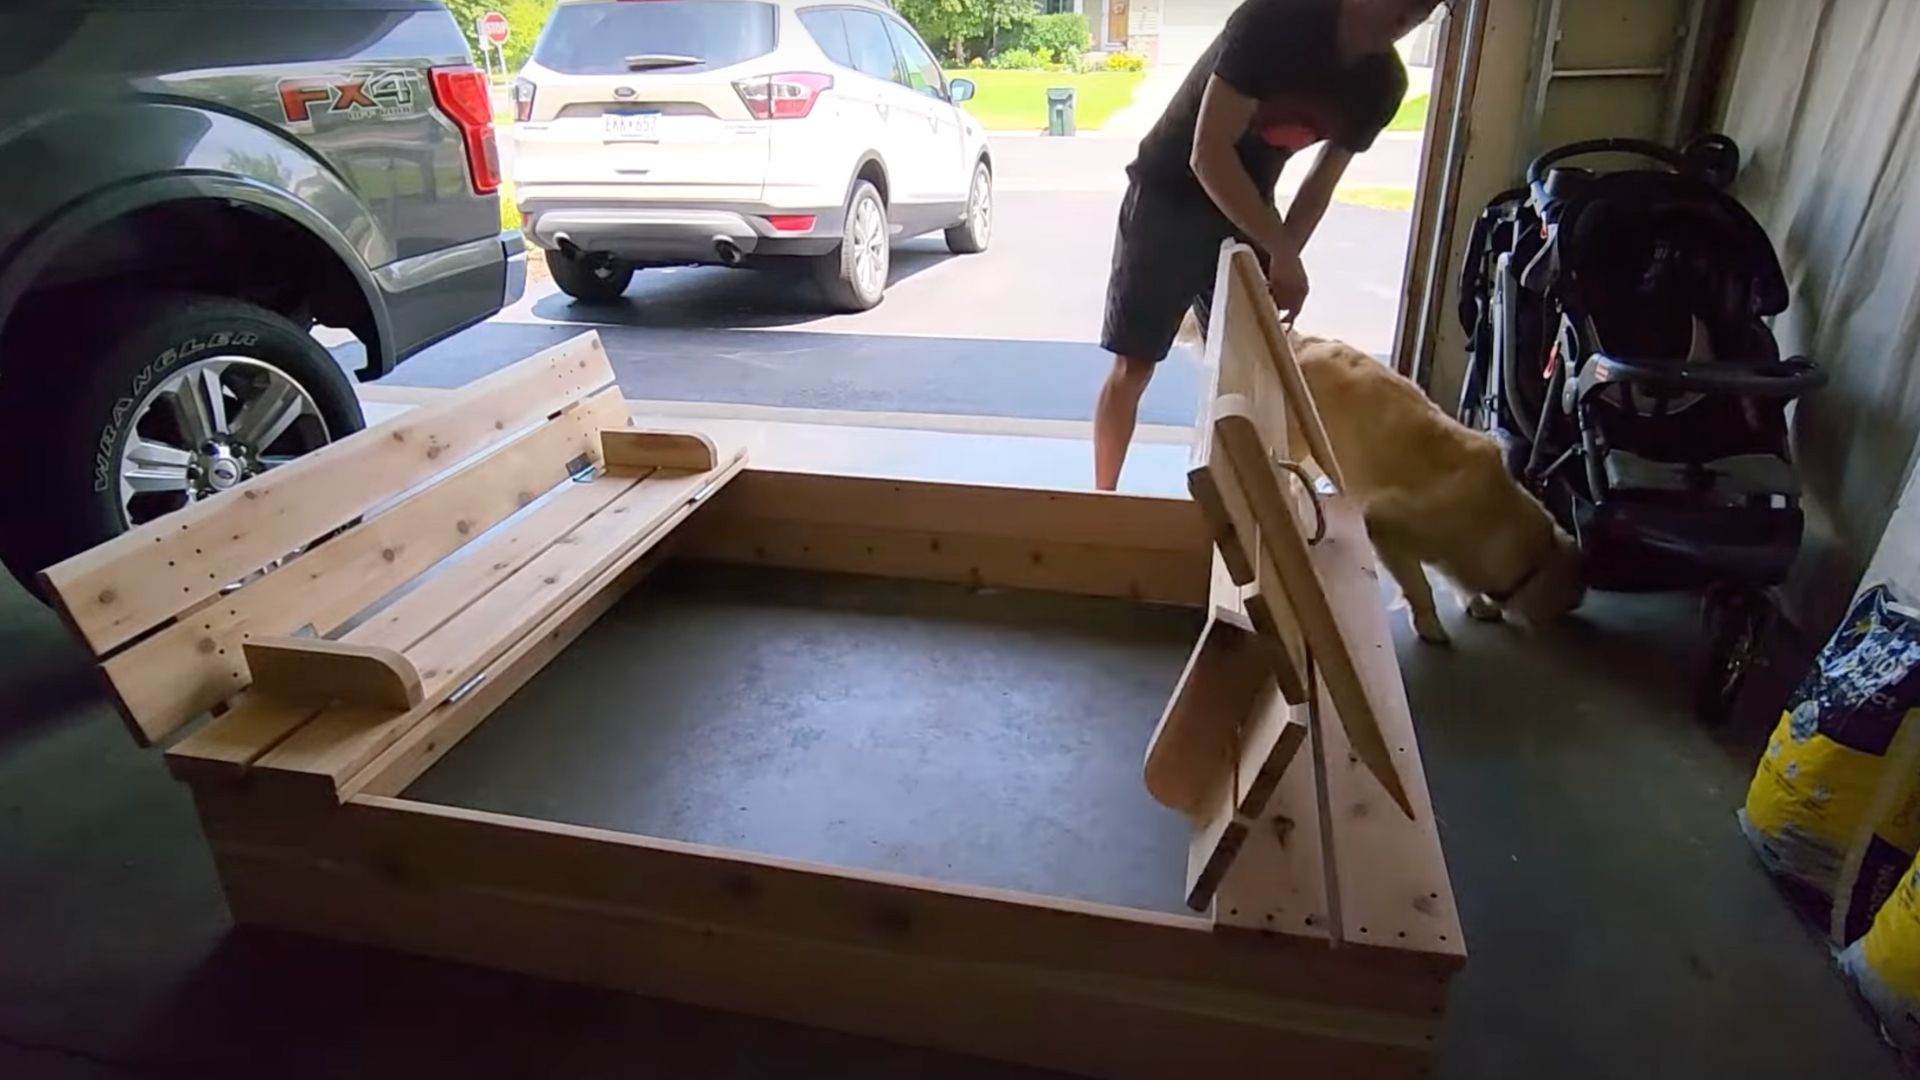
Now it’s time to see if everything works! Add handles to each panel so you can lift them easily. Then slowly lift and pivot the cover.
It should swing open and rest in place as two benches. The seat backs and angled supports should feel solid and hold weight without wobbling.
Sit down and test the height and comfort. If anything feels off, adjust your screws or hinges. This step shows how all your hard work comes together.
It’s exciting to see the sandbox transform into something useful for both kids and adults. Take your time and enjoy it.
Step 8: Stain and Seal the Wood
To make your sandbox last longer, protect the wood with stain and sealer. First, remove all the screws, hinges, and metal parts.
Then, clean the wood with outdoor wood cleaner. This helps get rid of mill dust, oils, and dirt. Use a stiff brush and rinse with a garden hose.
Let the wood dry fully-this may take a day or two. Once dry, apply your stain and sealer evenly. This step protects your sandbox from rain, snow, and sun damage. It also makes the wood look richer.
Don’t skip this part if you want your sandbox to last for years.
Step 9: Prep the Ground
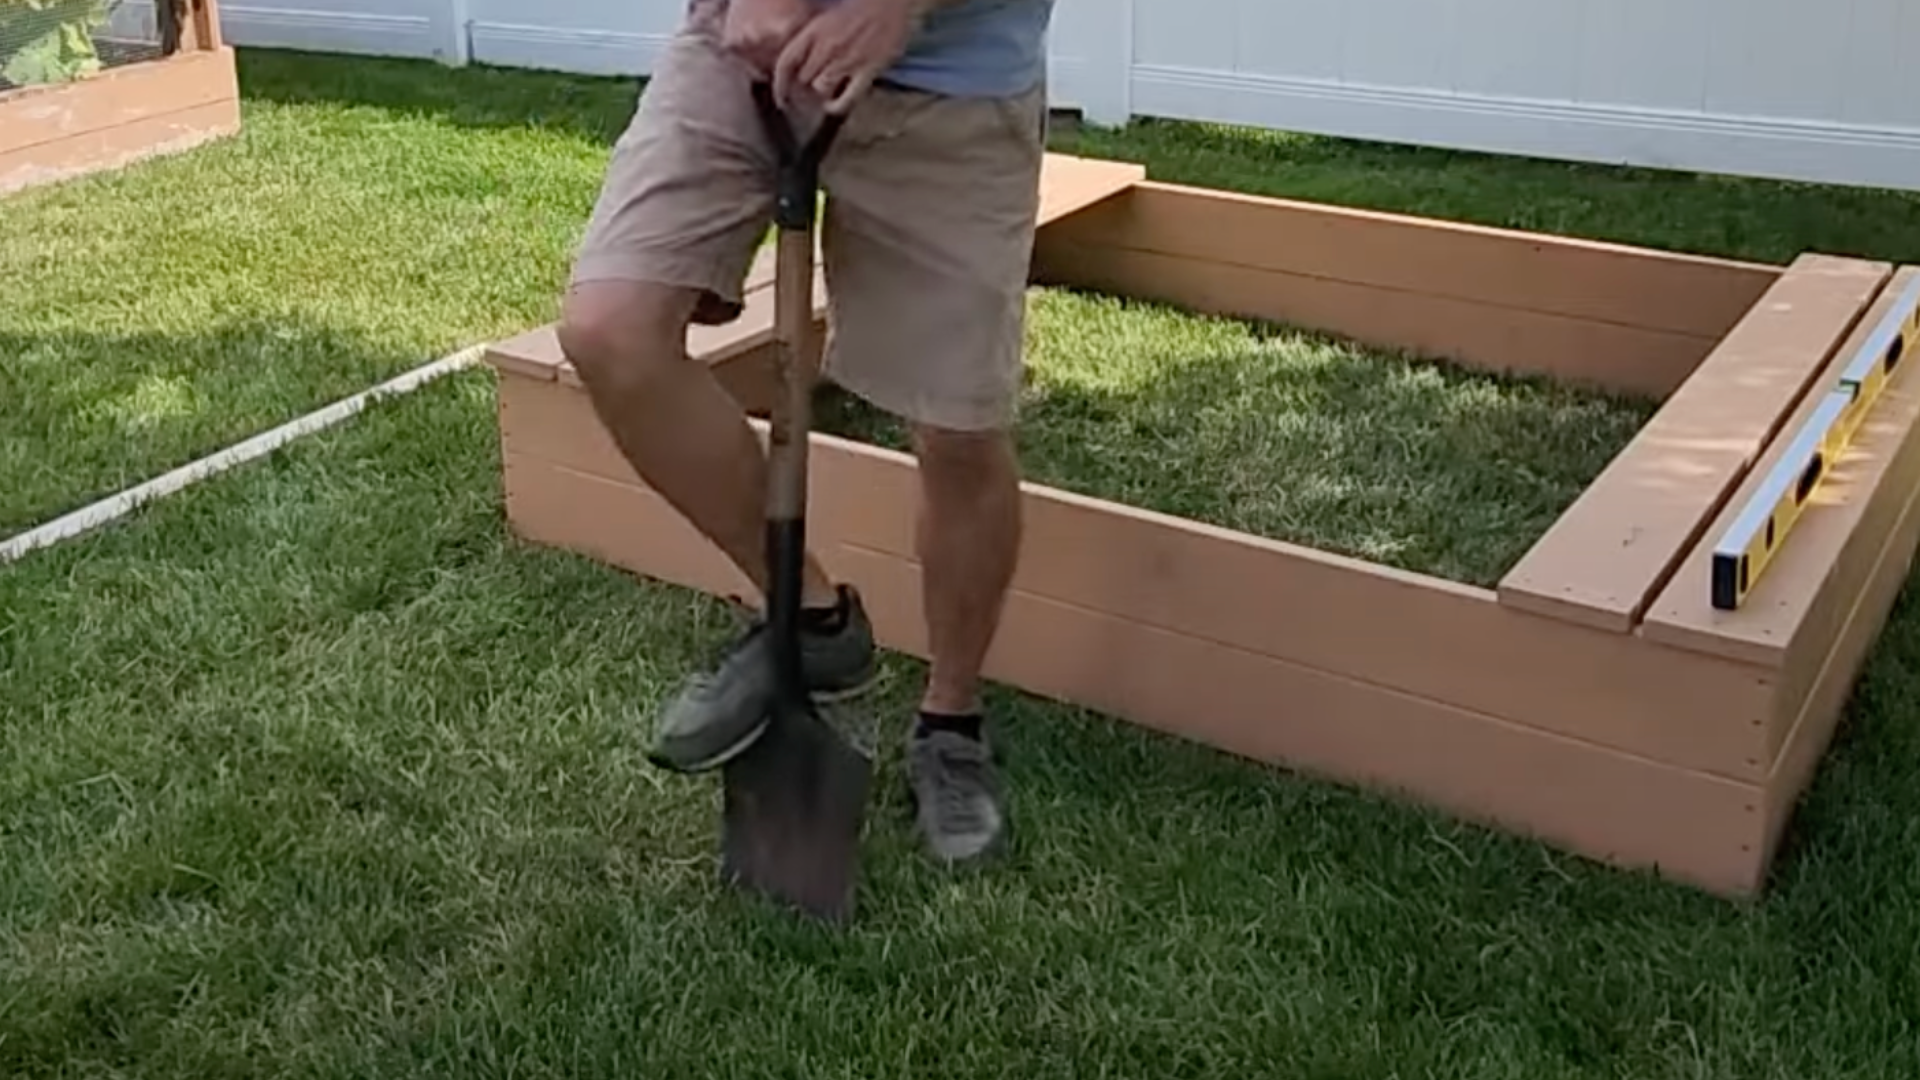
Before placing your sandbox, find a flat spot in your yard. Use a level to check the ground.
If it’s uneven, mark the high spots and cut or dig them down until the sandbox sits flat.
You don’t want a tilted sandbox-it can affect how the benches sit and how the sand settles. After leveling, roll out landscape fabric underneath.
This keeps grass and weeds from growing through and keeps your sand clean. Use a staple gun to hold the fabric in place.
Once the ground is prepped, gently place your sandbox on top and make sure everything is level.
Step 10: Add the Sand and Final Touches
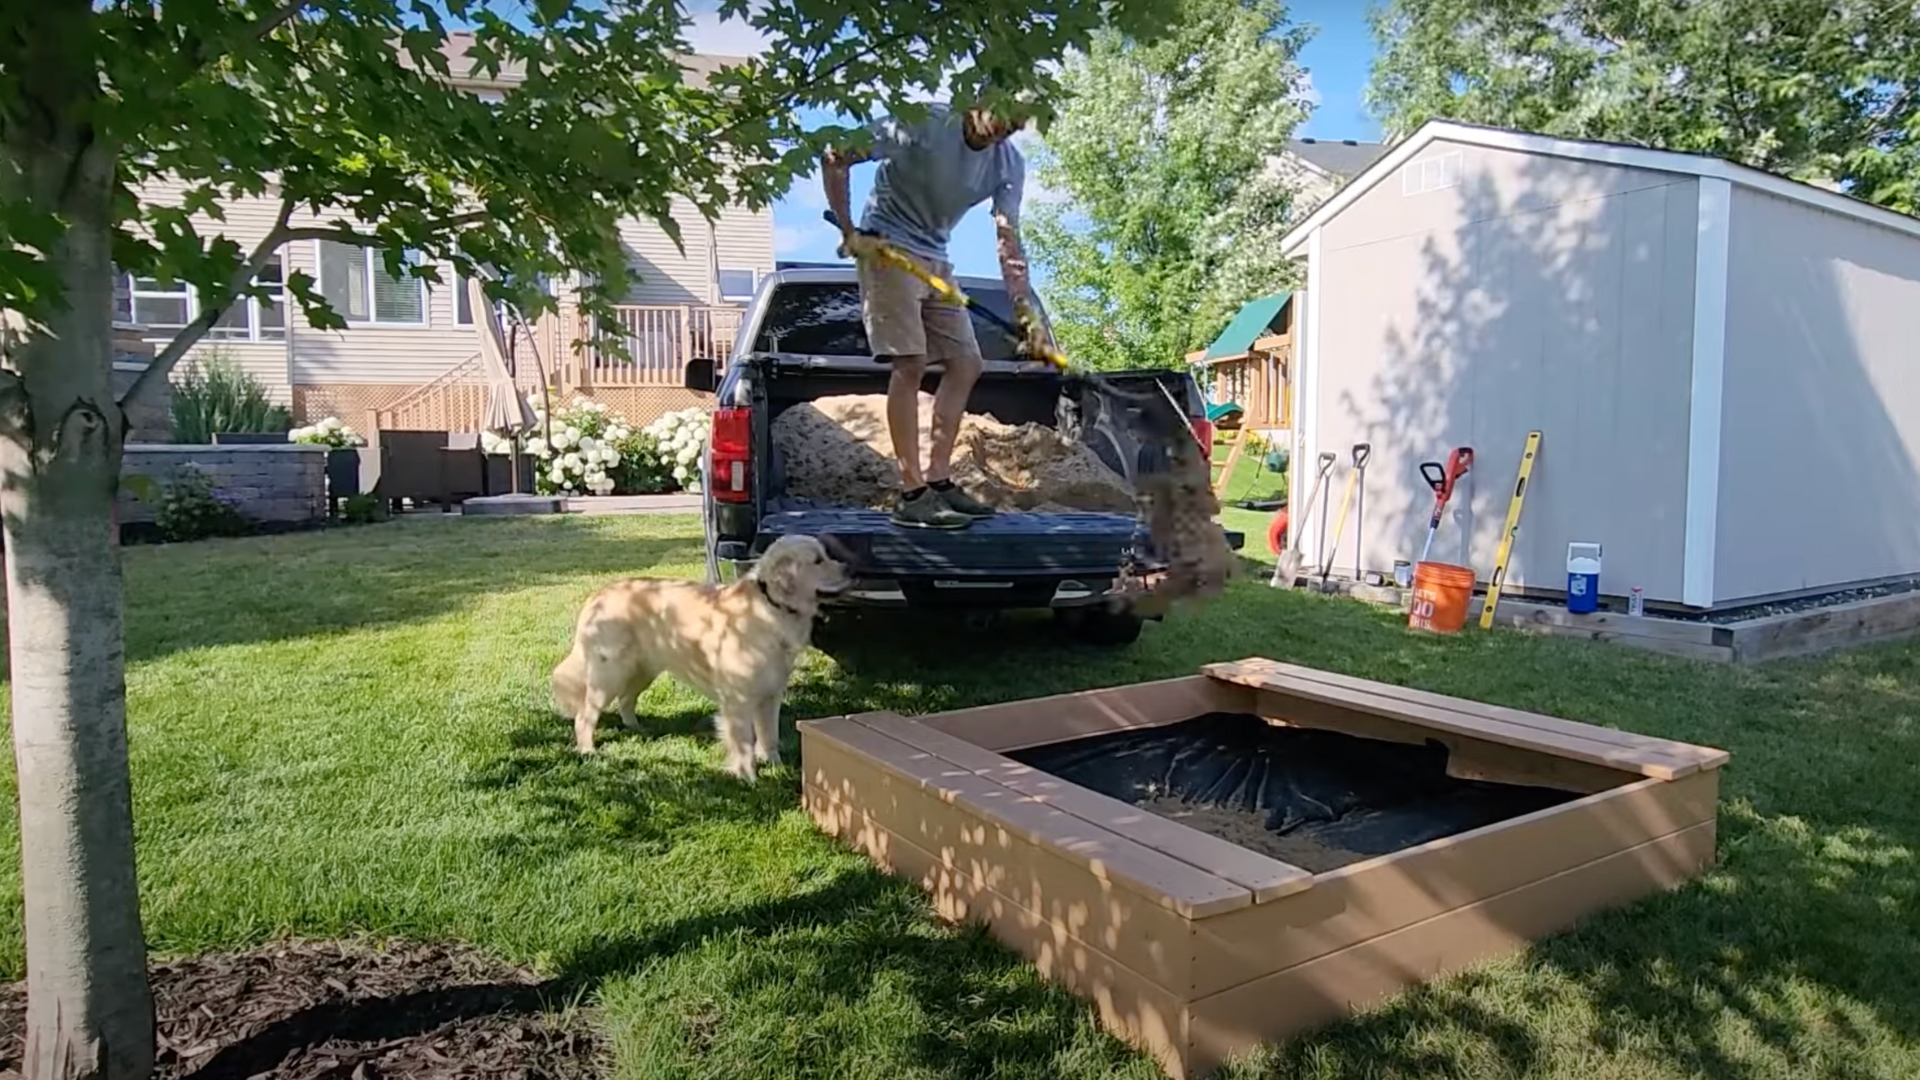
This is the fun part-pouring in the sand! Use clean, high-quality sandbox sand that’s safe for kids.
It’s soft, drains well, and is perfect for building. If bulk sand isn’t available, you can buy bagged play sand from a home store.
Fill the sandbox almost to the top, but leave a little space so sand doesn’t spill over. Replace any standard screws with stainless steel ones to prevent rust.
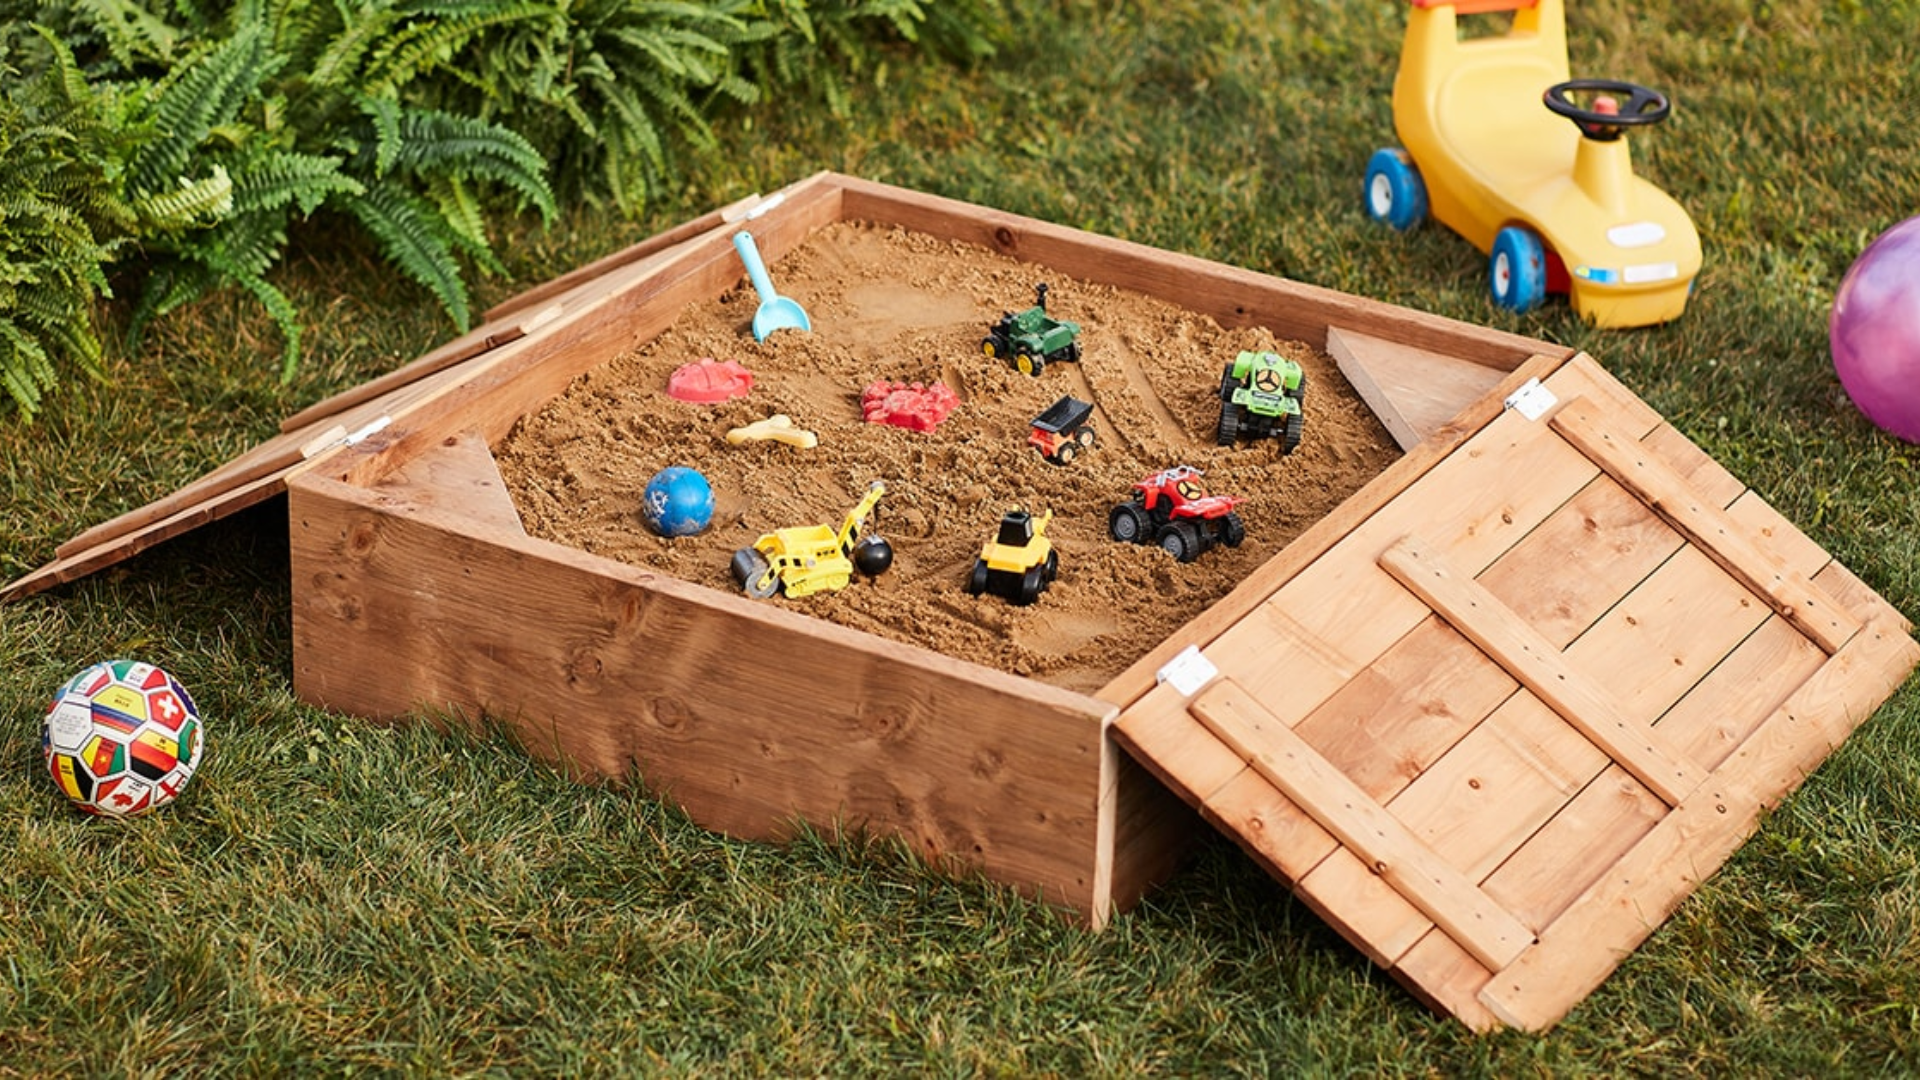
When you’re done, close the cover to keep bugs and animals out. Now you have a beautiful, useful sandbox that’s ready for years of safe, outdoor play!
For a closer look at each step and how it all comes together, check out the full video by @Third Stall Woodworking- it’s clear, easy to follow, and really helps bring the project to life.
Why Choose a DIY Sandbox with a Cover?
A sandbox cover helps protect the sand and makes outdoor play cleaner and safer. It keeps out unwanted mess and reduces the time spent on cleanup. Adding a cover is a smart way to make any sandbox last longer.
- Blocks Debris: Keeps out animals, bugs, and falling leaves
- Stays Dry: Helps the sand stay clean and dry after rain
- Less Cleaning: Reduces daily maintenance
- Weather Shield: Protects the sandbox from sun and moisture damage
- Added Safety: Prevents accidents when the sandbox is not in use
Tips for Building and Maintaining Your Sandbox
A few simple tips can make your DIY sandbox project smoother and help it last longer. These small steps can save time and avoid problems later.
- Measure Carefully: Double-check all sides and corners to keep the sandbox square and even.
- Use Weather-Resistant Wood: Pressure-treated lumber helps prevent rot and lasts longer outdoors.
- Pre-Drill Screw Holes: This keeps the wood from splitting and makes assembly easier.
- Rake the Sand Weekly: It keeps the surface smooth and removes leaves or debris.
- Cover When Not in Use: A lid or tarp helps protect the sand from rain, animals, and bugs.
Conclusion
Building a sandbox might seem like a big project at first, but once you get started, it’s really not that hard.
I like how it brings the family outside and gives kids a fun place to play every day. With just a few tools, some wood, and clean sand, you can create something they’ll use for years.
Adding a cover and taking care of the sandbox helps keep it safe and clean without a lot of extra work.
I’ve shared all the steps to make the job simple, even if it’s your first time building something like this.
If you follow the guide, you’ll save time and avoid common mistakes. Just take your time and enjoy the process.
Watching kids play in something you made yourself is a great feeling. I hope these tips help you build a sandbox that fits your yard, your needs, and brings lots of smiles.