
If you’ve got a shed that’s difficult to access – especially when you’re rolling in a lawn mower or carrying heavy tools – you’re not alone.
Many sheds are raised a few inches, or even a foot, off the ground. That height difference can make what should be a simple task feel like a real challenge.
In this article, I’ll guide you through the process of building a sturdy ramp for your shed.
You’ll learn what tools and materials to use, how to plan and measure, and follow clear, step-by-step instructions.
If you’re looking for a straightforward solution that saves time and effort, you’ve come to the right place.
Different Types of Shed Ramps
Choosing the right ramp for your shed depends on several factors, like your budget, how often you use it, the type of equipment you’ll move, and whether you need a permanent or temporary solution.
- Wooden ramps are a popular choice because they’re affordable, easy to build, and customizable. With proper sealing or treatment, they can handle outdoor weather and support common tools and equipment.
- Metal ramps, on the other hand, are more durable and require less upkeep. They’re better for heavier loads and frequent use, though they usually cost more.
- Modular ramps offer a flexible option. They’re lightweight, adjustable, and easy to move or store, making them ideal for short-term needs or rental properties.
Each type has its strengths, so think about your specific needs before deciding.
What to Know Before Building a Shed Ramp
Before you start building a ramp for your shed, there are a few important things to think about. A good ramp makes it easy to roll in lawnmowers, wheelbarrows, or bikes – but only if it’s safe and built right.
- Height of the Shed Floor: Measure how high the shed sits off the ground. The taller it is, the longer your ramp needs to be to stay at a safe angle. A ramp that’s too steep can be unsafe and hard to use.
- Ramp Slope or Angle: A gentle slope is best. A good rule is 1 inch of rise for every 12 inches of ramp length (1:12 slope). This helps with safety, especially if you’ll be using heavy equipment or walking up with tools.
- What You’ll Be Rolling In: Think about what you plan to use the ramp for. A mower may need a wider, stronger ramp than a wheelbarrow. If you’re rolling in something heavy, use strong materials and supports.
- Ground Conditions: Make sure the ground where the ramp touches is level and firm. Soft or uneven soil can cause the ramp to sink or shift. You might need to lay down gravel, concrete, or pavers for stability.
- Ramp Width: Make your ramp wide enough for what you’re using it for. Add a few extra inches on each side of your widest item. This gives you room to move safely without falling off the edge.
- Material Choice: Pressure-treated wood is a popular choice because it holds up well outdoors. Add grip strips or textured boards to prevent slipping, especially in wet weather.
Step-by-Step Instructions for Building a Shed Ramp
Installing a ramp for your shed significantly improves access, especially if you regularly use wheeled equipment, such as lawn mowers or utility carts.
Materials Needed
- 2×4 lumber
- Ledger board
- Deck boards
- Deck screws
- Joist hangers
- Joist tape
- Deck clips (for spacing)
- Shims
- Strap
- Miter saw
- Drill
- Tape measure
- Shovel
Step 1: Measure and Plan Your Ramp
Start by determining the length of your ramp. The recommended slope is a 6:1 ratio – meaning for every 1 inch of vertical rise, you need 6 inches of ramp length.
For instance, a shed that sits 12 inches off the ground would require a ramp at least 72 inches long.
Assess the design of your shed door to ensure there’s enough clearance to install a ledger board.
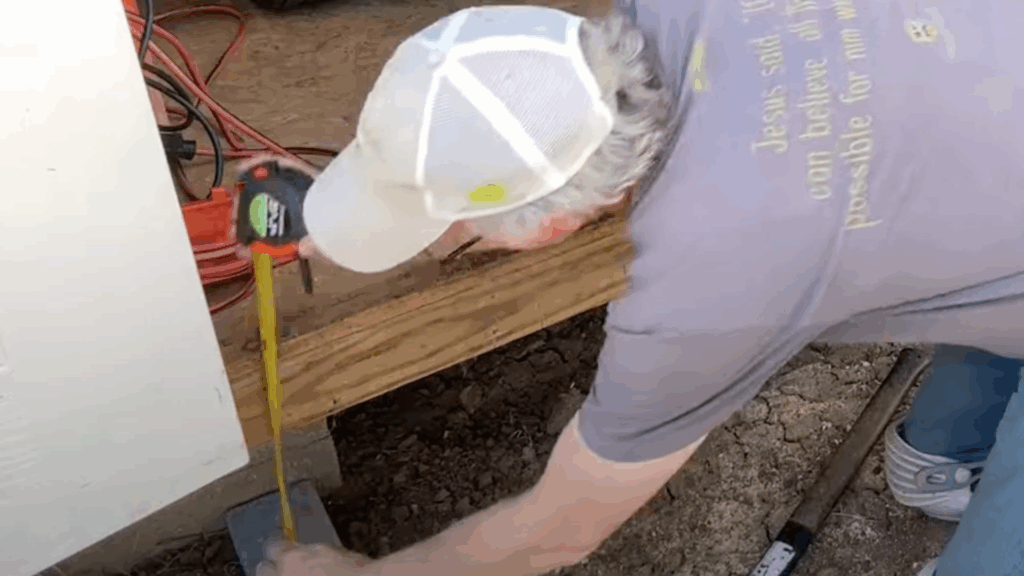
Step 2: Check Door Clearance and Mount the Ledger
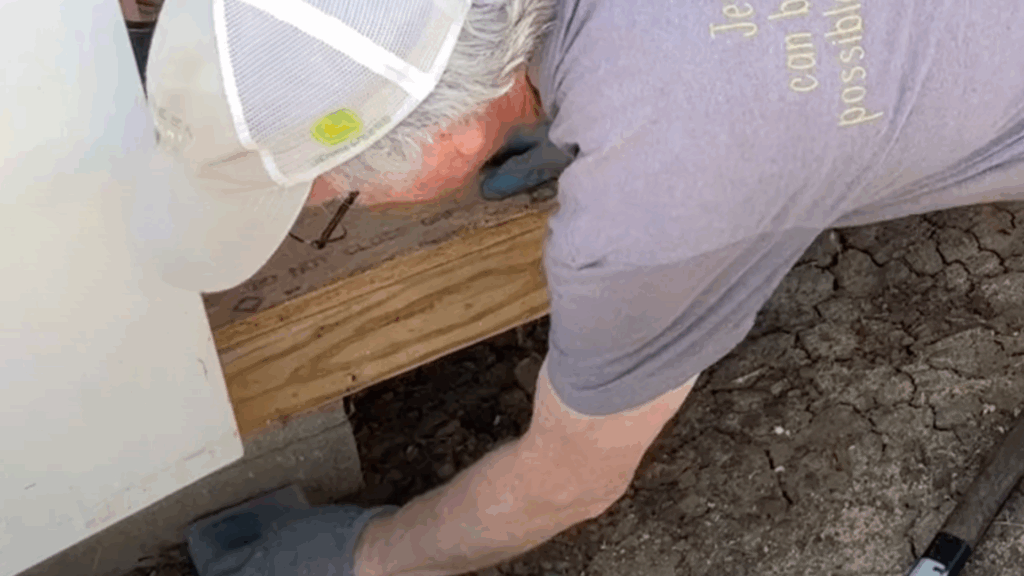
Next, examine how the shed’s doors interact with the base. If the doors cover part of the wall where you’d typically attach a ledger board, you’ll need to adapt.
One approach is to temporarily attach the ledger with a screw and shim it to match the height of the shed’s floor.
It allows for precise placement and a smooth transition from the shed onto the ramp.
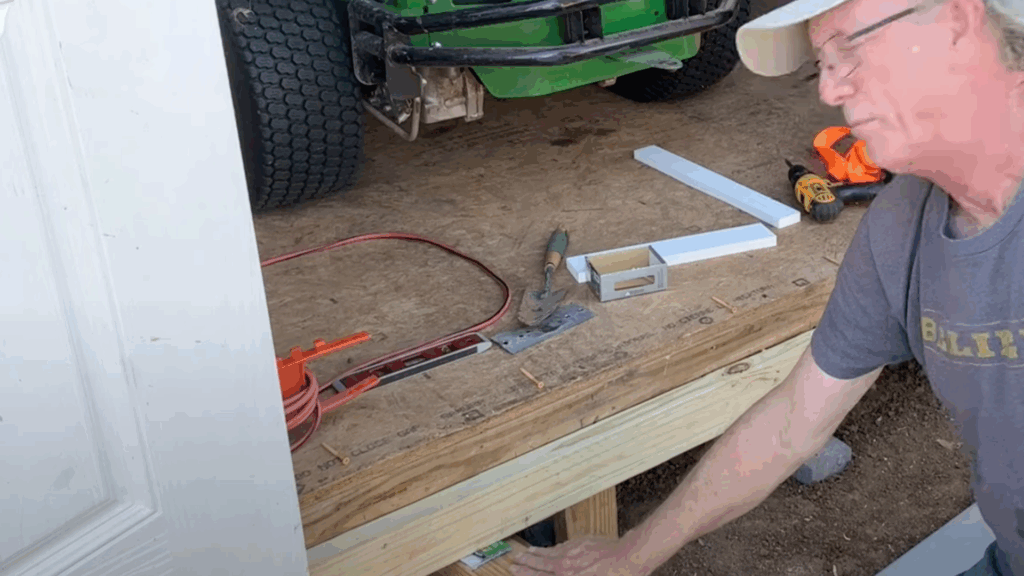
Step 3: Cut the Ramp Runners to Fit

Now you can begin preparing the ramp runners – the angled boards that support the ramp’s slope.
Measure from the ledger down to where the ramp will meet the ground.
Use a miter saw to cut the first board at the correct angle, then use it as a pattern for the rest. This ensures all runners are the same, which helps keep the deck surface even and visually clean.
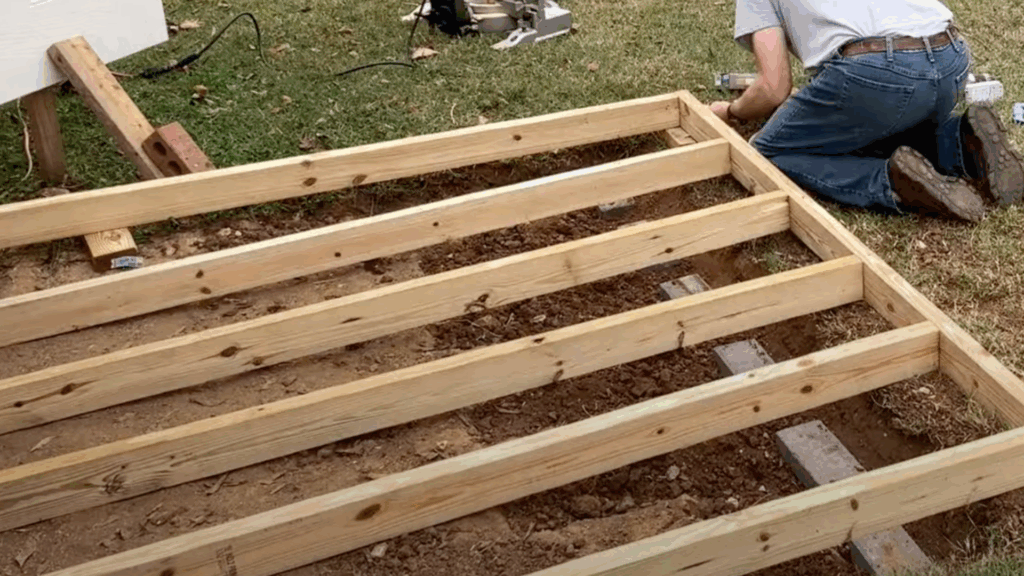
Step 4: Space and Install the Joists
Lay out your joists perpendicular to the runners, spacing them about 14 to 16 inches apart. These boards provide strength and support to the ramp.
If the ground underneath is uneven, you may need to dig shallow trenches to help the joists sit level.
Attach each joist to the ledger using metal joist hangers.
Step 5: Strengthen the Frame with Full-Length Runners
Although it might seem easier to trim the joists at the end to match the slope of the ground, this can weaken the ramp’s frame. Instead, use full-length 2×4 runners and dig into the ground.
This method offers better long-term durability and helps prevent movement or sagging, especially on ramps that are 6 feet or longer in length.
Step 6: Apply Joist Tape to Protect Against Moisture
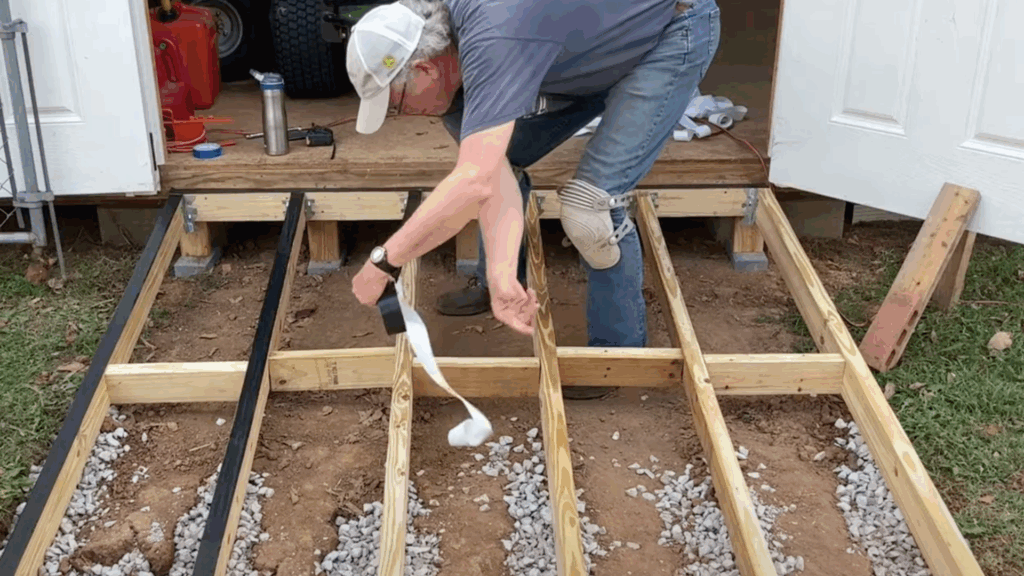
Before you attach the deck boards, apply waterproof joist tape along the tops of the joists and runners.
This tape seals the wood and helps protect it from water damage, especially in areas where screws are likely to penetrate.
Though it can be sticky and slightly tricky to work with, this added layer significantly reduces the risk of rot or decay over time.
Step 7: Install the Deck Boards
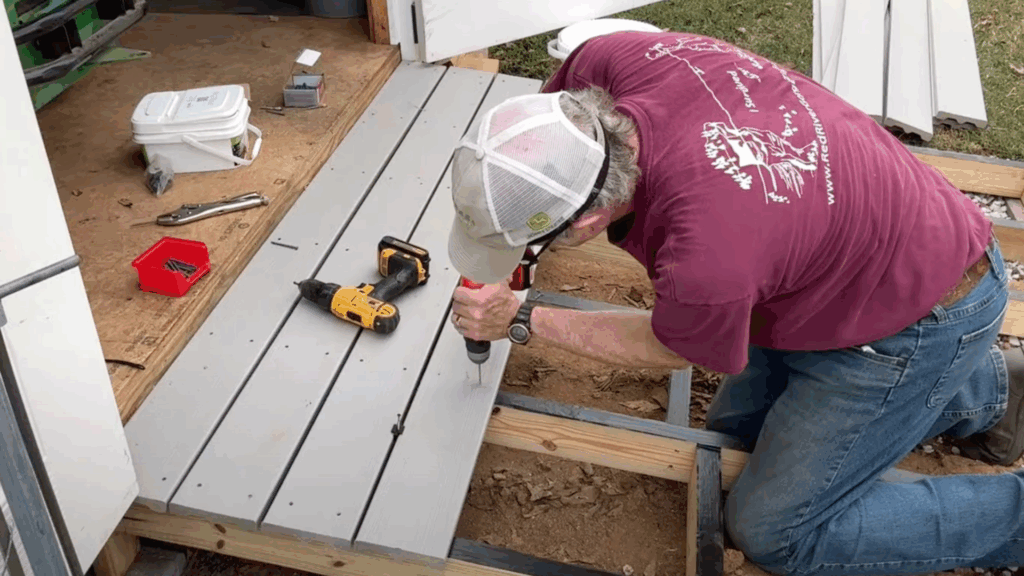
Begin placing your deck boards from one end of the ramp to the other. Use deck clips or spacers to maintain a uniform ¼-inch gap between boards for proper water drainage.
Secure each board with heavy-duty deck screws, which offer greater holding power than nails.
Trim the edges as needed to keep everything aligned.
Step 8: Secure Everything and Perform a Final Check
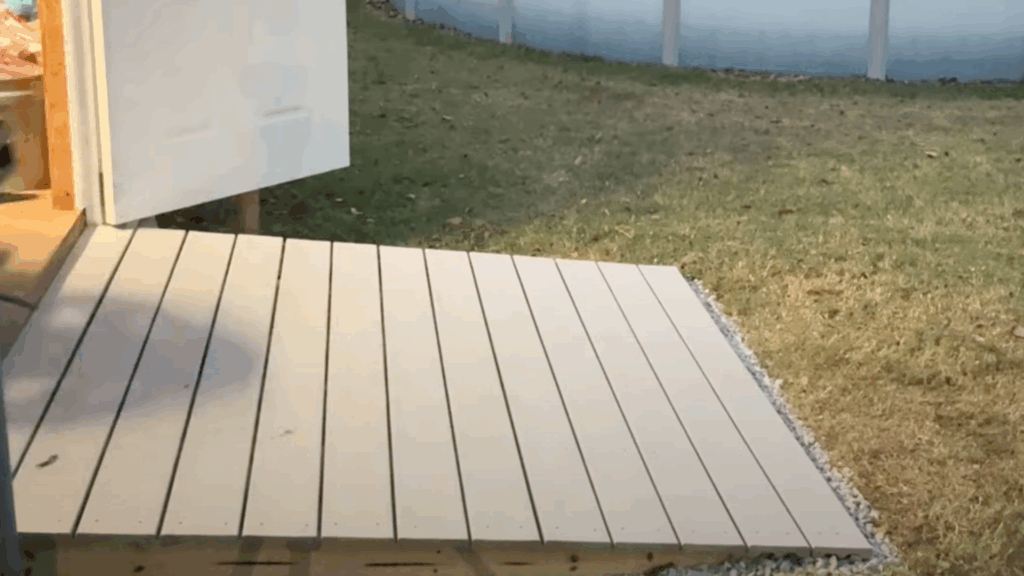
Once all deck boards are installed, add any remaining screws to ensure the ramp is fully fastened. For this build, around 156 screws were used.
Carefully inspect the structure for any loose sections, raised screw heads, or uneven surfaces.
Once everything is secure and smooth, the ramp is ready for regular use.
Want to see the full process in action? Watch the video on @RoBeaird-it makes every step easier to follow and more fun to learn.
fi
Alternate Types of Shed Ramps
If you’re not sure a built-in wood ramp is right for you, there are other styles to consider.
I’ve used and tested a few of these myself based on budget, storage needs, and how often I use my shed.
| Ramp Type | Permanent or Temporary | Best For | Pros | Cons |
|---|---|---|---|---|
| Fixed Wood Ramp | Permanent | Frequent use, heavy equipment | Strong, fully customizable, cost-effective | Requires build time, needs weatherproofing |
| Removable Ramp | Temporary | Seasonal access, small equipment | Easy to store, flexible use | Less stable, not for heavy loads |
| Concrete Ramp | Permanent | Wheelbarrows, accessibility | Strongest, zero maintenance | High cost, not movable |
| Plastic Ramp Panel | Temporary | Light carts or wheelbarrows | Lightweight, easy to move | Not suitable for heavy equipment |
I’ve found that choosing the right ramp type depends mostly on how permanent you want the solution to be and what you’ll roll over it.
Pick one that matches your daily use and the kind of gear you’re hauling.
Tips for a Strong and Safe Ramp
To ensure your ramp remains durable and secure over time, it’s essential to follow a few key maintenance and safety practices.
- Use treated wood: It resists rot and moisture, making your ramp last longer.
- Add gravel or blocks: A solid base prevents sinking and helps with drainage.
- Movement test: Check for any wobble and tighten or reinforce where needed.
- Seal every 1–2 years: A fresh coat protects against weather damage.
- Improve traction: Use grip strips or textured paint to reduce the risk of slipping.
Conclusion
A well-built shed ramp adds convenience and function to your outdoor setup, making it easier to move equipment in and out without strain.
With the right materials and a clear plan, it’s a project you can complete in a weekend – even with basic tools.
Take your time with each step, double-check your measurements, and prioritize stability.
Remember the essentials: proper slope, secure framing, and moisture protection. These small details make a big difference in the ramp’s performance and durability.
If using it daily or occasionally, a sturdy ramp will save effort and protect your gear from damage during loading.
Now that you’ve got the know-how and all the steps laid out, you’re ready to build a reliable, long-lasting shed ramp that meets your needs.