
I remember feeling unsure when I first looked up how to build an outdoor fireplace as a beginner and questioned if I could really do it myself.
Outdoor fireplaces are popular for a good reason. They turn an empty backyard into a place people want to spend time.
They add warmth, bring people together, and can raise your home’s value by up to 12 percent. Studies also show that sitting by a fire can help lower stress and improve both physical and emotional health.
If you are new to DIY projects, this guide shares each step in a clear and easy way, with helpful tips along the way.
In this article, I will share everything from planning and picking the right spot to gathering tools, building safely, and lighting your first fire with confidence.
Choosing the Right Location in Your Backyard
Choosing the right location is one of the most important steps when building an outdoor fireplace. Start by keeping a safe distance from your house, fences, and nearby trees to reduce fire risk.
The fireplace should sit far enough away so that heat and sparks do not cause damage.
Next, check wind direction so smoke flows away from seating areas and the home. The ground also matters more than many beginners expect.
Choose stable, well-drained ground to prevent shifting, and avoid low spots where water collects.
Before you start building, always check local building codes and permit rules.
Some areas require approval or have limits on fireplace size and placement. Taking time to plan the location helps avoid safety issues and costly mistakes later.
Tools and Materials Needed to Build an Outdoor Fireplace
Having the right tools and materials ready before starting helps the build move faster and safer. This list covers the basics needed for a beginner-friendly outdoor fireplace project.
- Miter saw with a general-purpose blade
- Tape measure and level
- Drill with cement board screws
- Utility knife and chalk line
- Angle grinder with masonry blade
- Notched trowel and mixing bucket
- Safety mask or respirator and knee pads
- Framing lumber (2x4s and 2x6s)
- Cement board and mesh tape
- Firebox insert, mortar, stone panels, and spacers
How to Build an Outdoor Fireplace as a Beginner?
These steps guide you through the full build process in a simple, practical order. Following them one at a time helps keep the project organized and easier to manage.
Step 1: Set up Tools and Safety Gear
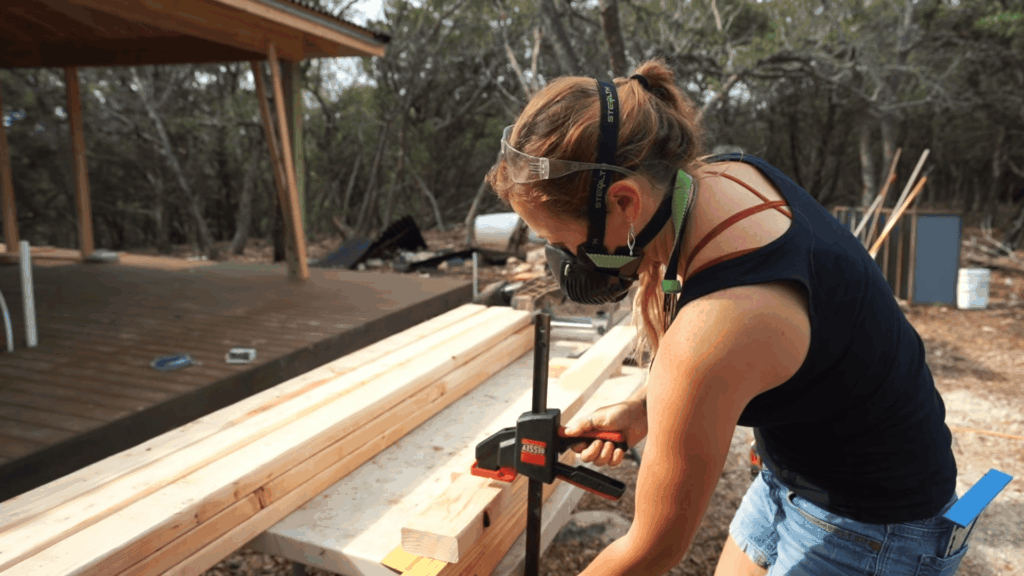
Before building begins, set up a clear work area with all tools ready to use. A miter saw station makes cutting lumber faster and more accurate.
Safety gear is just as important, even when working outdoors.
Wearing a respirator helps protect lungs from dust created while cutting wood and stone. Knee pads reduce strain when working close to the ground for long periods.
Taking time to prepare tools and safety gear early helps the project move smoothly and reduces the risk of injury.
Step 2: Frame the Fireplace Structure
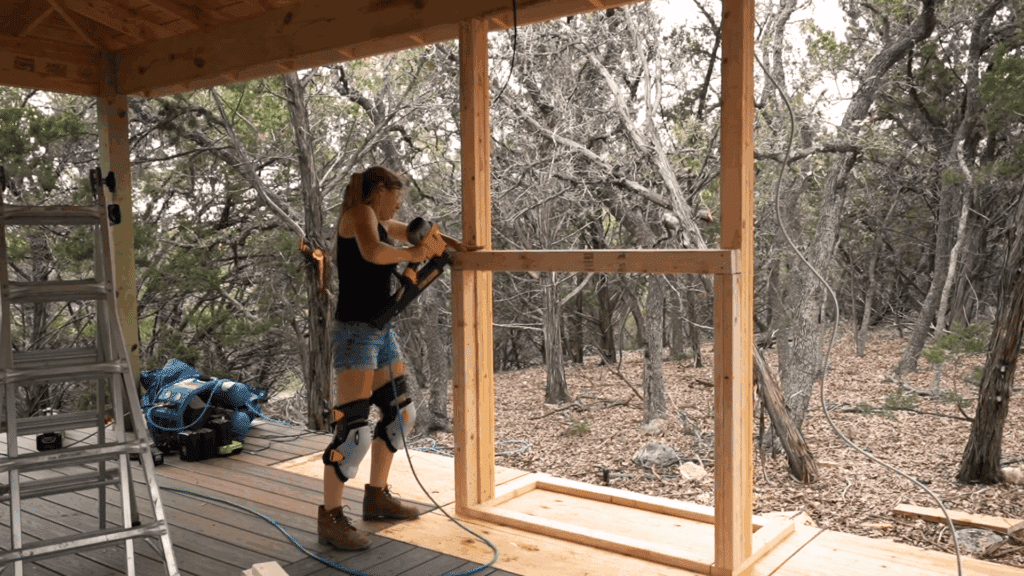
Begin framing the main fireplace structure using measured lumber pieces. The opening for the firebox is framed based on the listed dimensions, so it can slide into place later.
This framing creates the core shape of the fireplace and supports everything added next.
Extra attention is given to framing the back wall, which helps stiffen the structure and improve overall strength.
Accurate cuts and tight connections at this stage help prevent movement and keep the fireplace solid once heavier materials are added.
Step 3: Build the Log Storage Boxes
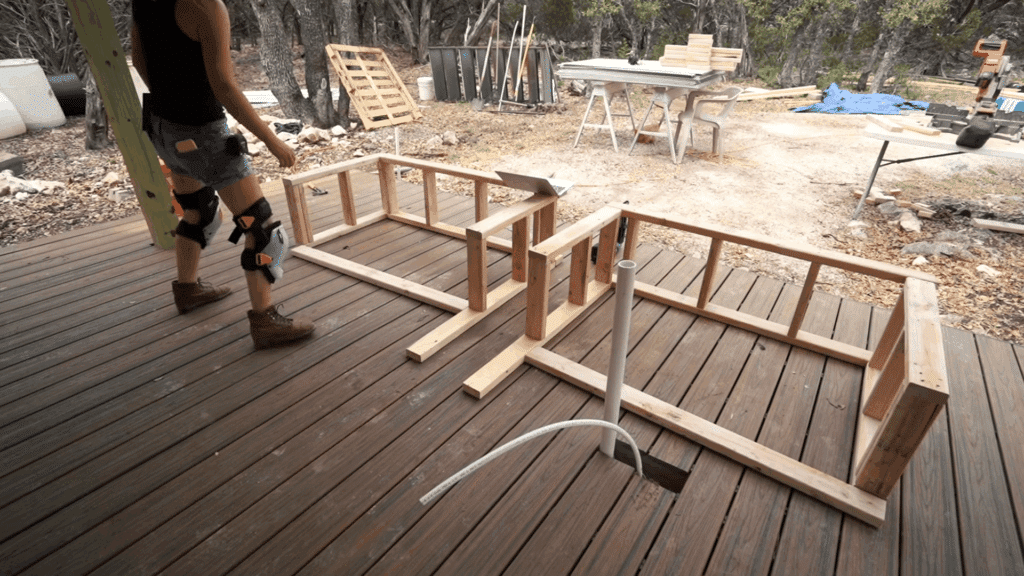
Next, frame the log storage boxes that sit on both sides of the fireplace. Each box is built separately and test-fitted before being secured in place.
These boxes are designed to store firewood while also supporting seating and future countertop weight.
The framing is done with strength in mind, using thicker boards to handle pressure.
Building these boxes carefully helps tie the full structure together and adds both function and support to the overall design.
Step 4: Add the Hearth Platform
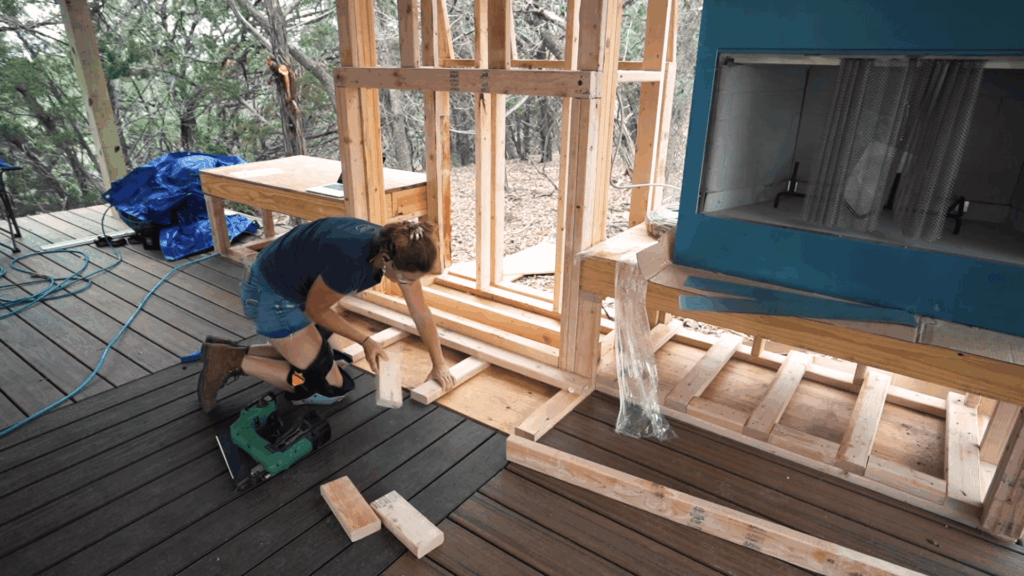
Create a small hearth platform at the base of the fireplace to protect the deck from heat and sparks.
This platform acts as a safety barrier and will later be covered with a non-combustible surface. It should be level, firmly secured, and sized to extend slightly beyond the firebox opening.
Taking time to build a solid hearth helps reduce fire risk and adds an important protective layer to the finished fireplace structure.
Step 5: Install Cement Board Backing
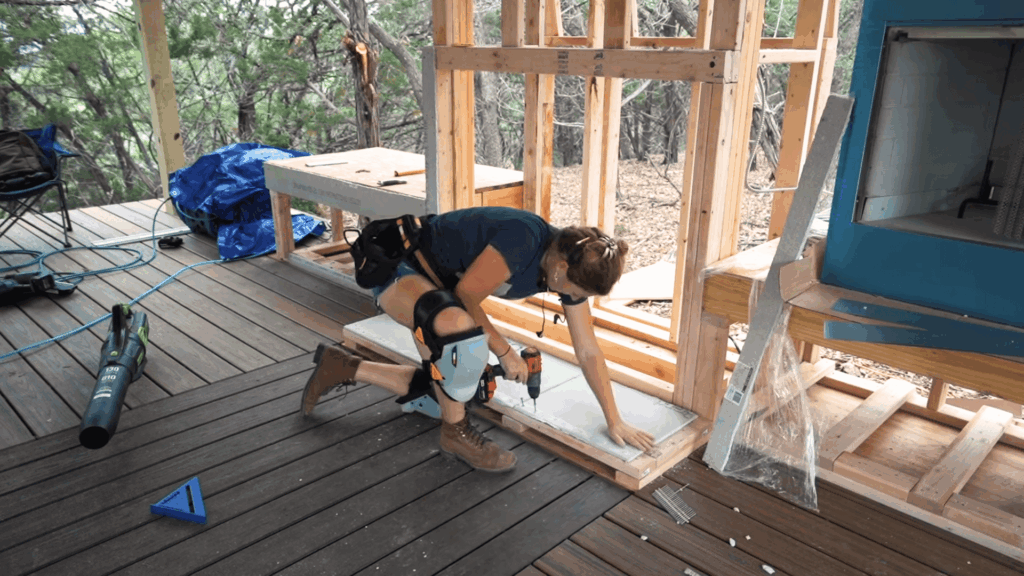
Cover all areas that will receive stone with cement board. The boards are cut by scoring and snapping, making it easier to shape pieces as needed.
Each panel is secured tightly using cement board screws placed close together to support heavy stone.
Proper spacing and secure fastening help prevent movement later.
This backing layer is critical, as it provides a strong surface for stone installation and supports the weight of the finished exterior.
Step 6: Set the Firebox in Place
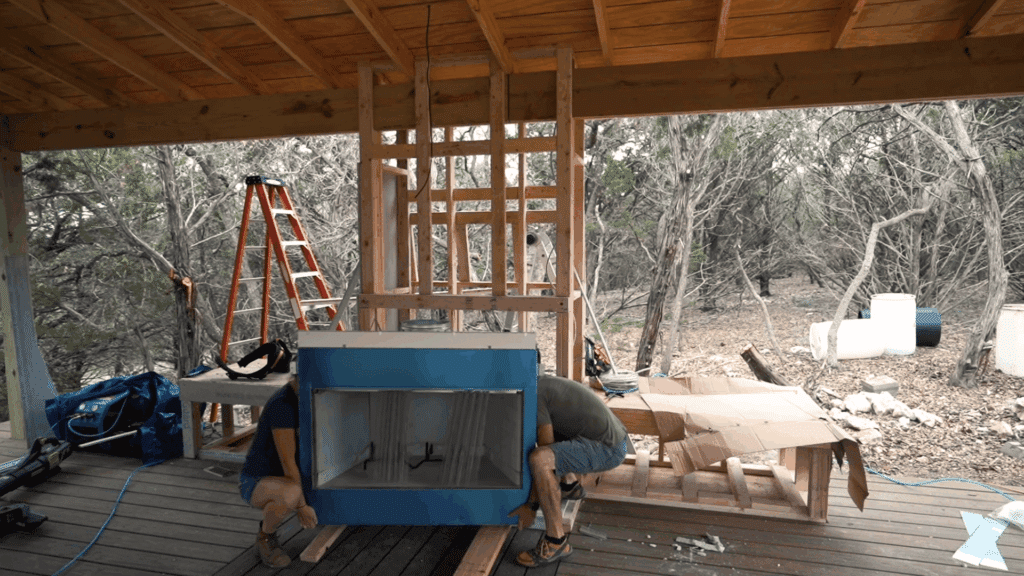
Once the firebox is ready, carefully move it into position from the front opening.
Because fireboxes are heavy, steady support and controlled movement are important during placement. Ramps made from lumber help guide it into place without damage.
After positioning, the firebox is secured to the surrounding frame so it stays stable.
Proper placement at this stage ensures the fireplace functions safely and fits correctly within the framed opening.
Step 7: Tape Seams and Begin Stone Installation
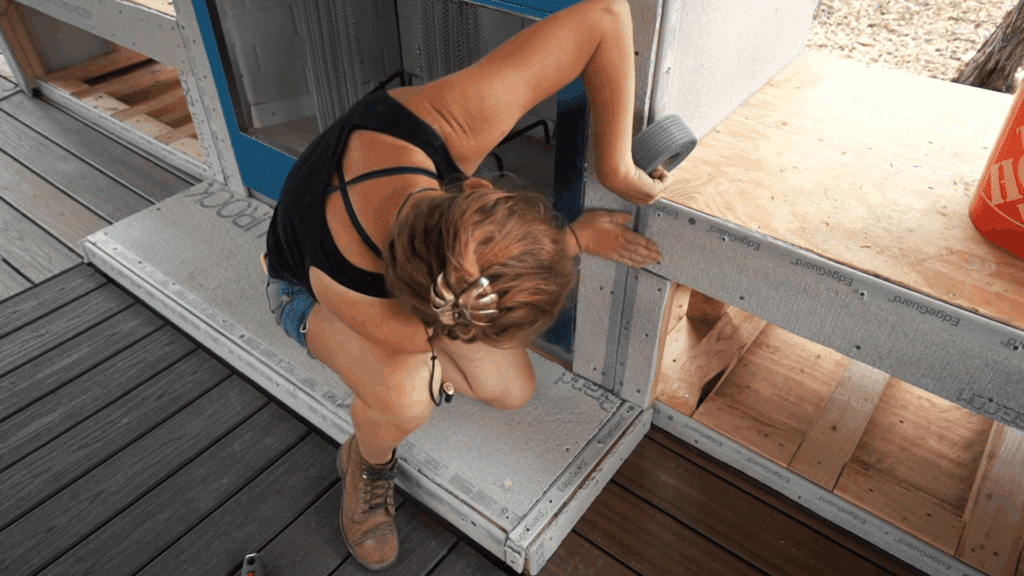
After the cement board is installed, tape all seams to strengthen the joints and create a solid surface for the stone.
This step helps prevent cracks and supports the weight of the stone finish. Instead of waiting for seams to dry, filling them as stonework begins saves time without reducing strength.
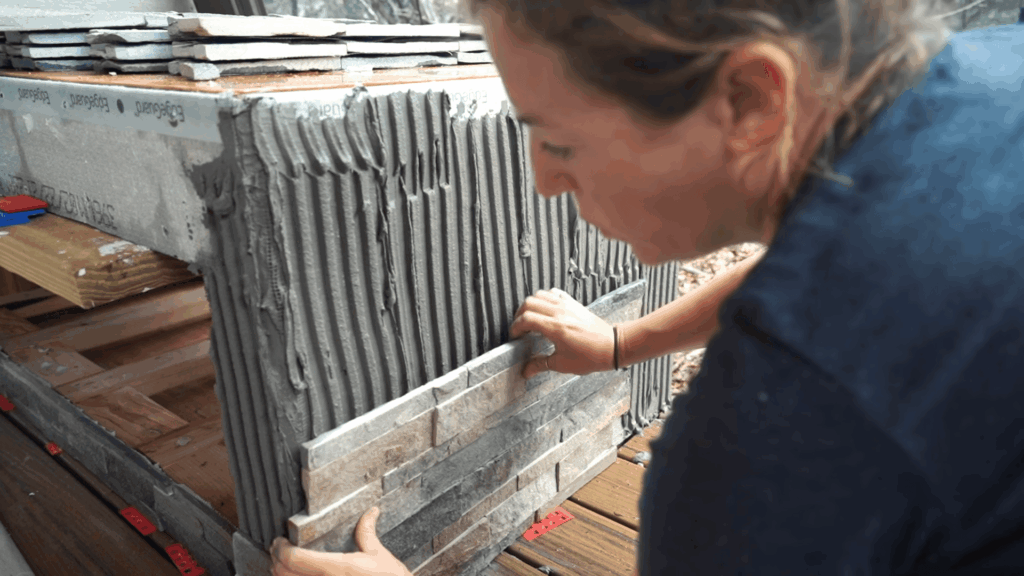
Stone installation starts at the bottom of the fireplace, so each row supports the next. Spacers are used to keep gaps even and allow room for mortar.
Stones are dry-fitted to check alignment, then set with mortar to keep each row flat and secure.
Step 8: Cut and Level the Stone Panels
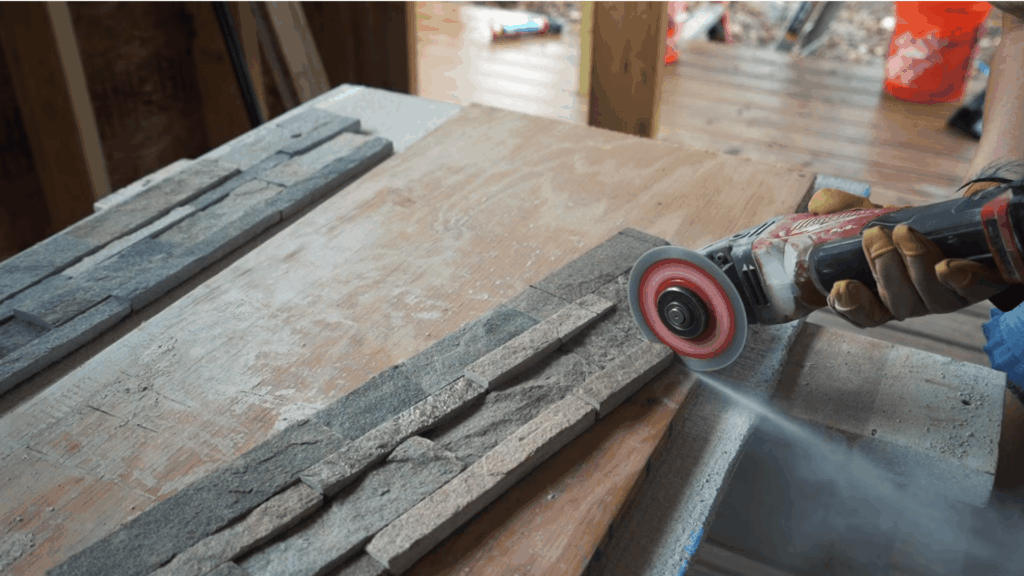
Stone panels are cut to size using a grinder with a masonry blade, which allows for clean and controlled cuts. Mortar is spread using a notched trowel to create grooves that help the stone bond firmly.
Each stone is pressed into place with steady pressure to ensure a strong hold.
Levels are checked often, usually every few rows, to keep the surface straight. Small shims are used when needed to adjust spacing and alignment.
Careful placement during this step helps the finished fireplace look clean and even.
Step 9: Support Stone Above Openings
Stone placed above open areas, like log boxes and the fireplace opening, needs extra support until the mortar dries.
Temporary ledger boards made from scrap lumber are installed under these sections to hold the weight of the stone. Spacers and shims are used to keep everything level and properly aligned.
These supports stay in place until the mortar fully sets.
Adding this temporary bracing prevents sagging and helps maintain clean lines around openings.
Step 10: Finish Edges and Clean up
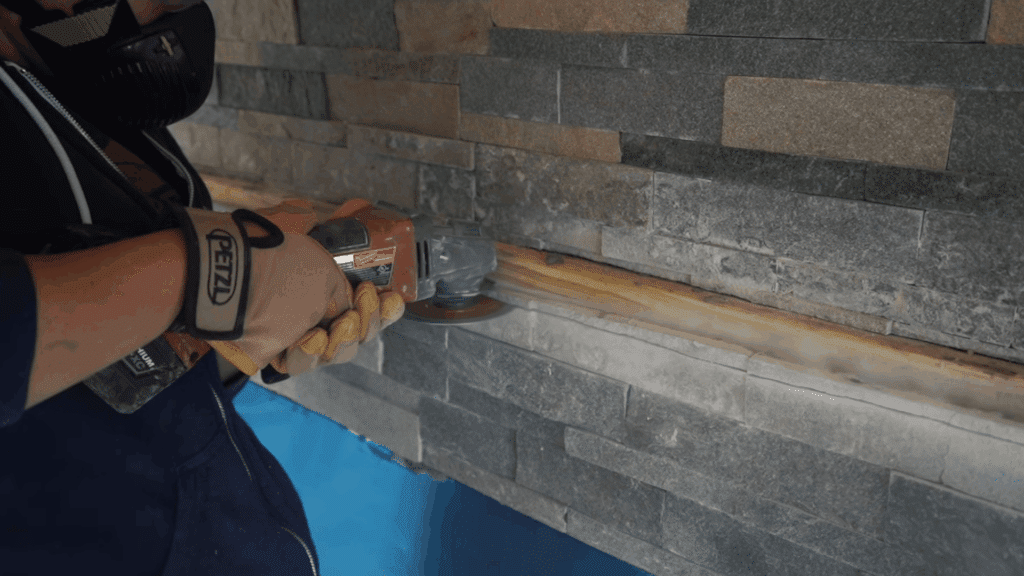
After the mortar has dried overnight, all spacers, shims, and temporary supports are removed. Some stone edges may extend past the framing or appear uneven.
These areas are marked with a chalk line and trimmed using a grinder to create clean, straight edges.
This step helps the fireplace look finished and polished.
Final cleanup removes dust and leftover mortar, preparing the surface for mantels, countertops, or other finishing details.
This tutorial is based on a helpful video by April Wilkerson. You can check out the original video on their YouTube channel here or watch it below.
Cost Breakdown for a DIY Outdoor Fireplace
Planning your budget early helps avoid surprises later. Costs can vary based on design, materials, and how much work you do yourself.
| Cost Area | What to Expect | Estimated Cost |
| Beginner Build Budget | Simple DIY builds using basic materials | $500–$2,000 |
| Prefab Fireplace | Ready-made kits that are faster to install | $300–$1,500 |
| Masonry Fireplace | Built from brick or stone, more labor is involved | $1,500–$5,000+ |
| Tools and Supplies | Basic tools, safety gear, and small extras | $100–$400 |
| Ways to Save | Use prefab kits, shop sales, and reuse tools | Varies |
| Long-Term Costs | Firewood, cleaning, and minor repairs | $50–$200 per year |
Choosing the right option depends on your budget, time, and comfort level. Spending wisely upfront helps keep the project safe and easy to maintain over time.
Maintenance Tips for Long-Lasting Use
Regular care helps prevent damage and keeps everything working as expected. A few simple habits can save time and money later.
- Remove ash after each use once the fireplace is fully cool
- Check bricks or stone for cracks and repair them early
- Clean soot buildup to keep airflow clear
- Use a weather cover when the fireplace is not in use
- Keep water out of the firebox to avoid damage
- Inspect the chimney or vent for debris or blockages
- Store firewood in a dry, covered area
- Do a full check before seasons with heavy use
Conclusion
Building an outdoor fireplace can feel like a big project, but clear steps make it easier to follow.
The process starts with planning the layout, choosing a safe location, and gathering the right tools and materials. From there, each part is built carefully, one step at a time.
When the work is broken down, the build feels manageable, even for beginners.
If starting has felt uncertain, now is a good time to move forward. Focus on safety. Take your time.
Double-check clearances and follow permit rules if they apply. In the end, you gain more than a finished fireplace. You create something built by your own hands.
If you have built one or plan to start soon, share your experience in the comments below.