
Polished exposed aggregate concrete is a flooring technique where the top layer of concrete is ground away to reveal the natural aggregates embedded in the mix, such as stones, pebbles, or glass.
The process exposes these materials and then polishes the surface to a smooth, glossy finish.
This creates a beautiful contrast between the shiny, polished concrete and the embedded aggregates, adding a modern, textured look.
Not only does it enhance the visual appeal of a space, but it also provides a durable and slip-resistant surface, making it perfect for high-traffic areas like driveways, patios, and commercial floors.
What Is Polished Exposed Aggregate Concrete?
Polished exposed aggregate concrete is a stunning and durable flooring option that brings both beauty and strength to any space.
By showcasing the natural stones embedded in the concrete, it offers a modern, textured appearance suitable for both indoor and outdoor applications.
This type of flooring is not only visually appealing but also provides a durable and slip-resistant surface, making it ideal for high-traffic areas.
With a smooth, glossy finish, polished exposed aggregate concrete combines aesthetic charm with practicality, making it a perfect choice for driveways, patios, walkways, and even commercial spaces that require heavy use.
Methods for Exposing Aggregate
When it comes to exposing aggregate, there are several methods you can choose from. Each method affects the final appearance and the time it takes to complete the project. The most commonly used methods are:
1. Wet Method (Traditional)
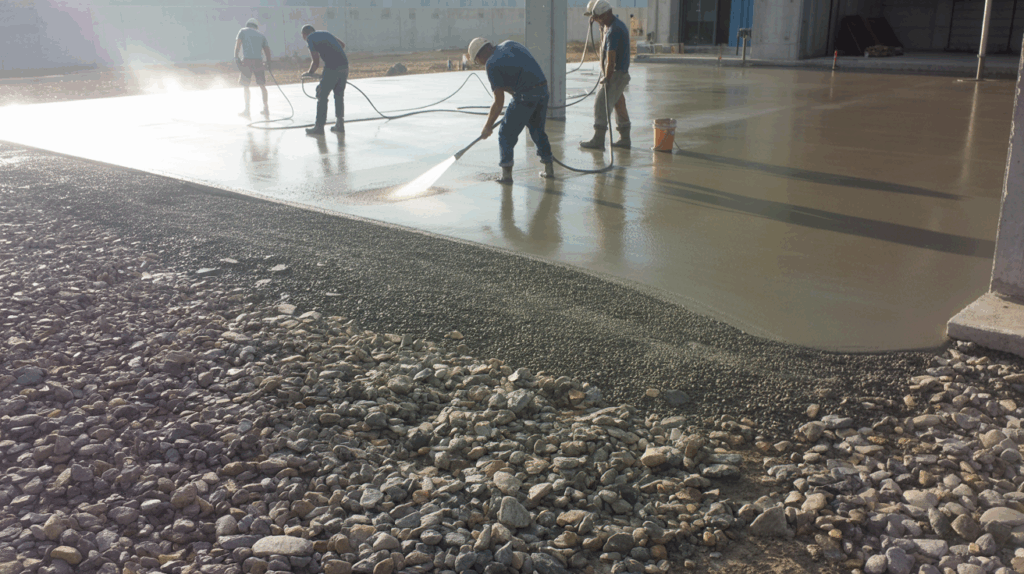
The wet method is the traditional approach to exposing aggregate. It involves pouring the concrete, waiting for it to set, and then using a chemical retardant to prevent the top layer of cement from hardening.
Once the concrete is set, you wash off the top layer using water, which exposes the aggregate underneath.
The wet method gives a more consistent exposure and is widely used for large areas like sidewalks, driveways, and parking lots.
2. Dry Method
The dry method involves mixing aggregate into the concrete during the pouring process, but instead of applying a retardant, you use a dry shake to expose the aggregate.
After the concrete sets, the surface is scrubbed with water and a polishing tool.
This method provides a more textured look, perfect for decorative applications, and can be a little more labor-intensive compared to the wet method.
However, it’s ideal for smaller projects or areas where a more consistent look isn’t necessary.
3. Combination Method
As the name suggests, the combination method merges elements of both the wet and dry methods.
Initially, a dry shake is applied, and then a chemical retardant is used to prevent the cement from setting on top of the aggregate.
The exposed surface is washed off with water to reveal the aggregate.
This method offers versatility, allowing for both large and small applications, while providing the benefits of both the wet and dry techniques.
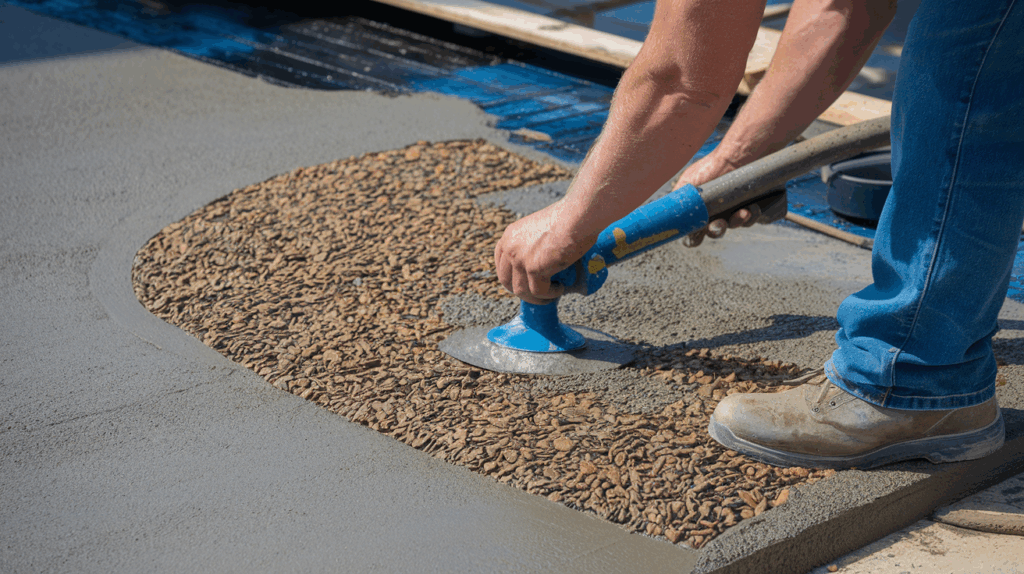
Polishing Techniques for Exposed Aggregate Concrete
Once the aggregate is exposed, polishing it to a high sheen is the next step. Polishing makes the floor smooth and glossy, highlighting the beauty of the natural stones while increasing the durability of the surface.
- Grinding: The first stage of polishing involves grinding the surface to smooth out any imperfections and expose the aggregate. This can be done with a floor grinder, using progressively finer diamond-impregnated pads.
- Honing: After the grinding phase, honing removes scratches and small imperfections, further refining the surface. During this stage, finer diamond pads are used to create a smoother finish.
- Polishing: Finally, polishing uses finer pads to create a high-gloss, shiny surface. The polishing process can be repeated until the desired level of shine is achieved.
Step-by-Step Guide for Creating Polished Exposed Aggregate Concrete
Below is a detailed step-by-step guide that will help you understand the procedure involved in creating a polished exposed aggregate floor.
1. Mixing the Concrete
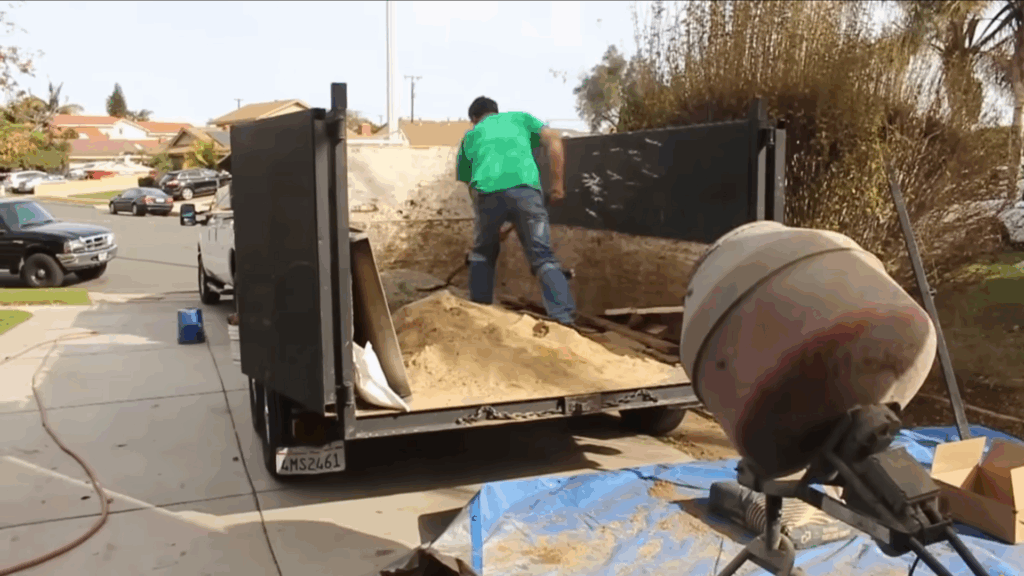
To create a rich, strong mix, use a ratio of 3 parts aggregate, 2 parts sand, and 3 parts cement.
It’s crucial to ensure the mixture is clean and well-balanced to allow the aggregate to bond properly with the cement.
This helps create a durable and strong concrete floor.
A clean mixture prevents weak spots and ensures a long-lasting, solid surface once set.
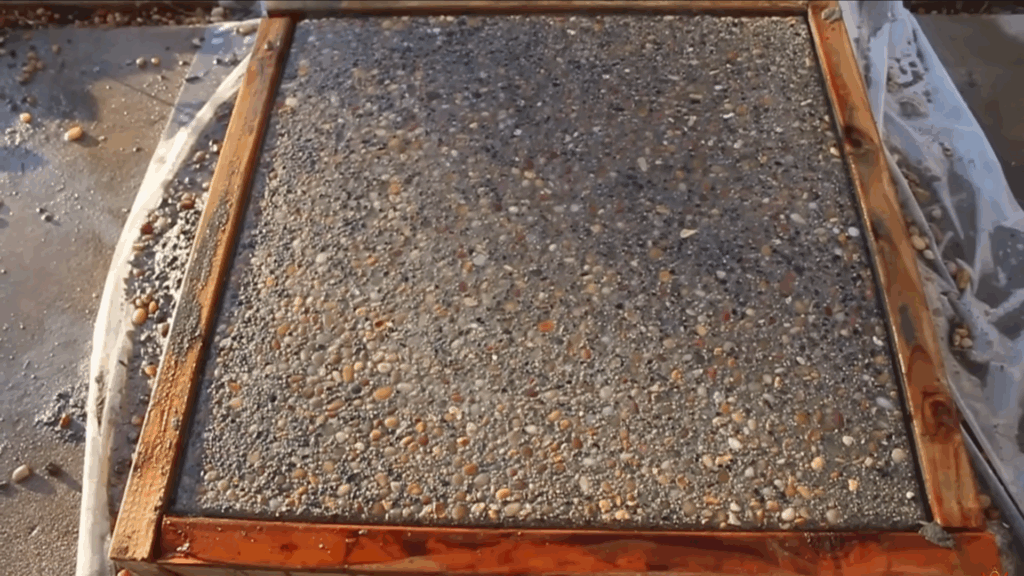
2. Seeding the Aggregate
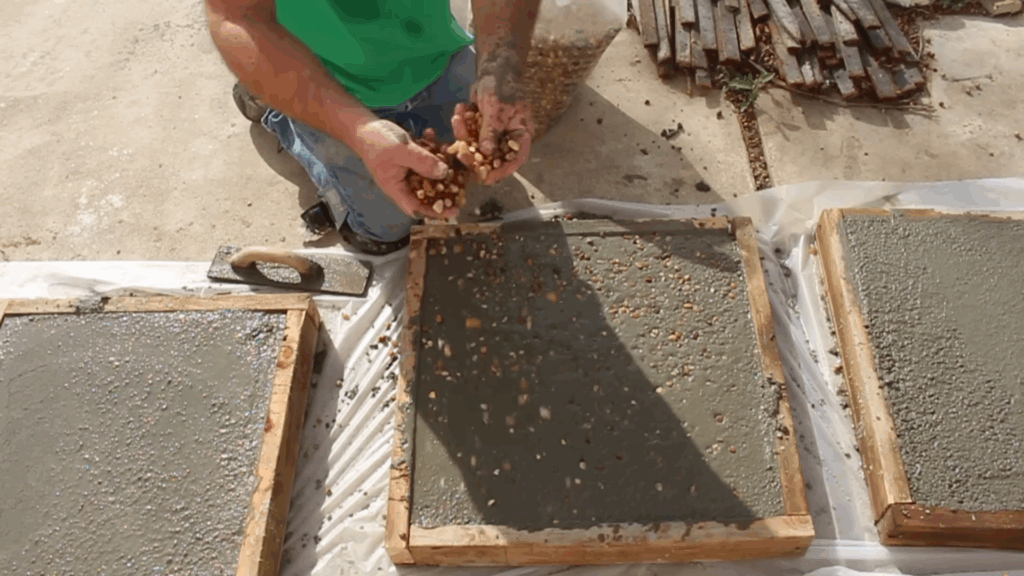
Once the concrete is poured and before it sets, begin seeding the surface with your chosen aggregate.
Half-inch river rock is a commonly used material due to its size and appearance.
Spread the aggregate evenly over the concrete surface within the first 20 minutes of pouring to ensure good bonding.
The key is to cover the surface completely, so the stones are securely embedded in the cement as it cures.
3. Tamping the Aggregate
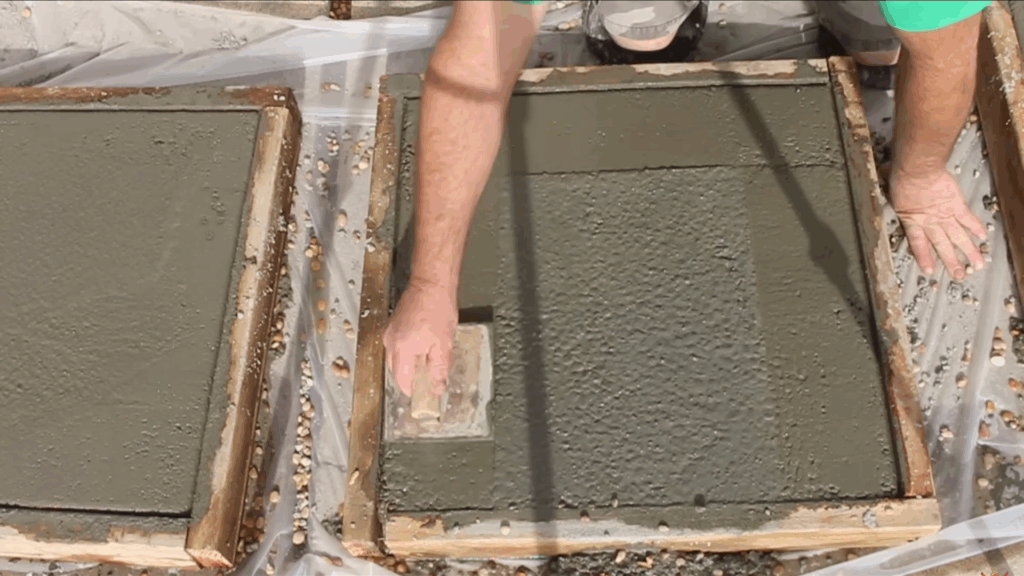
Use a tamping tool, such as a jitterbug or roller, to press the aggregate into the wet concrete.
This process is important because it helps bring the fine layer of cement paste (the cream) to the surface while embedding the stones deeply into the concrete.
Proper tamping ensures the stones stay in place and are evenly distributed, creating a uniform exposure of the aggregate once the surface is polished.
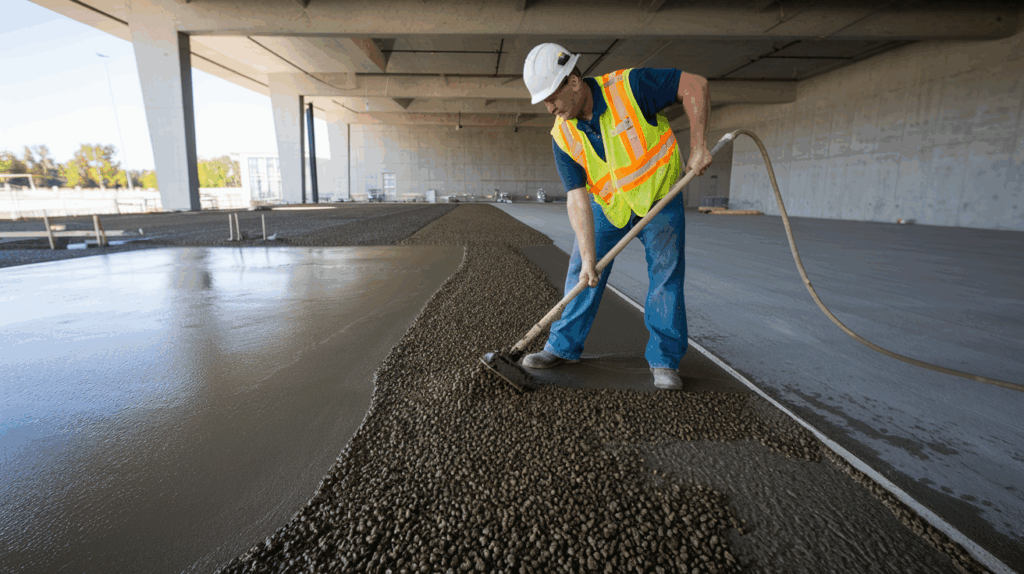
4. Surface Preparation
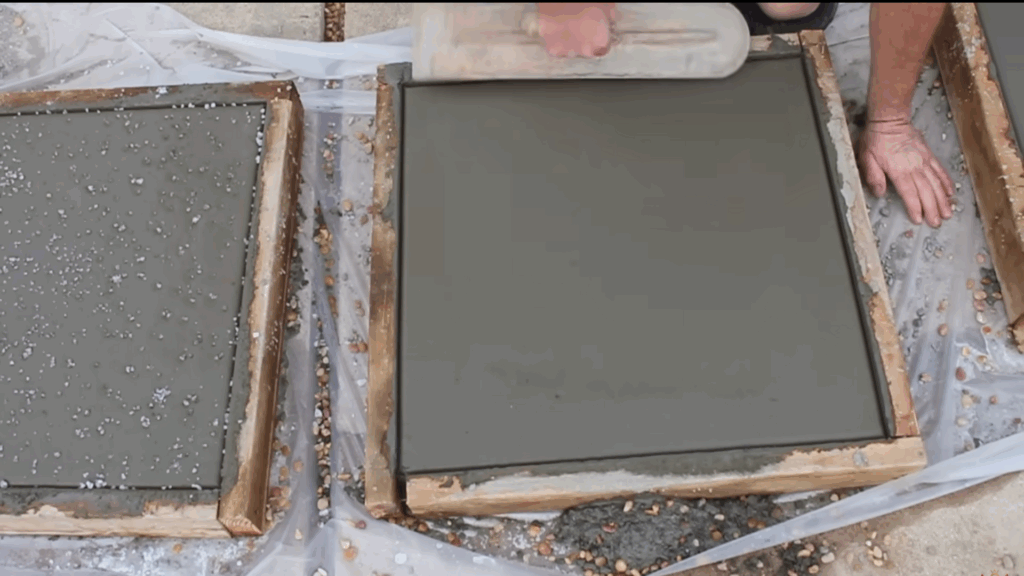
After allowing the concrete to set for a period, the next step is to expose the aggregate.
To do this, use a horsehair broom (half nylon, half horsehair) to gently scrub the surface with water.
This step loosens the top layer of cement, revealing the aggregate underneath.
It’s essential to perform this process while the concrete is still soft enough to expose the stones but set enough to prevent them from shifting.
5. Rinsing and Polishing
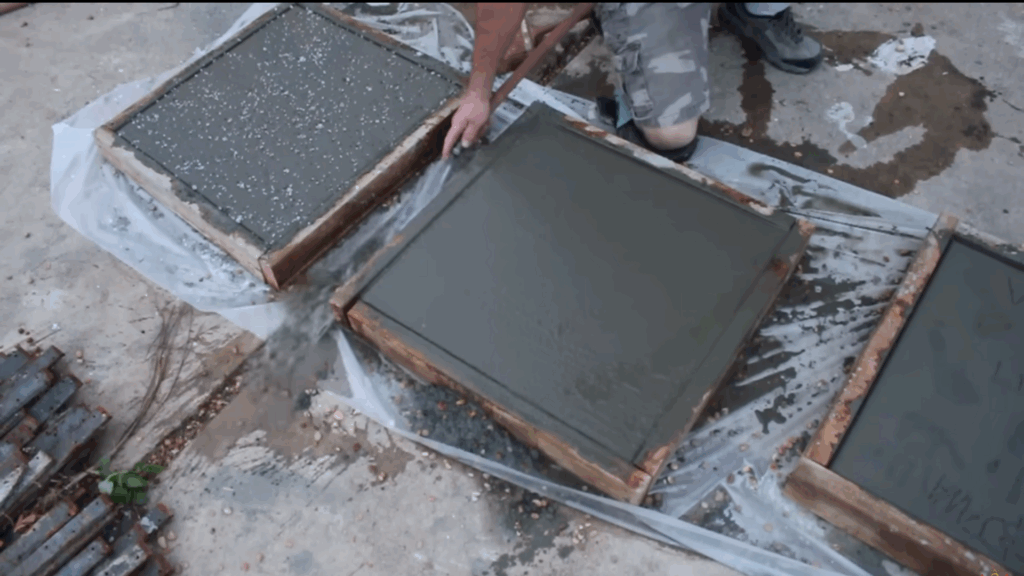
Once the top layer is scrubbed away, rinse the surface thoroughly with water to remove the loosened cement.
After rinsing, use a floor grinder with finer diamond pads to polish the exposed aggregate.
Polishing is done in multiple stages, starting with coarse pads and gradually moving to finer ones.
This process smooths out the surface, enhances the shine, and highlights the exposed aggregate, giving the floor a sleek, polished appearance.
6. Sealing the Floor
After achieving the desired gloss, apply a protective sealer to the surface.
A wet-look sealer is commonly used for polished exposed aggregate concrete as it enhances the natural color of the stones and adds a glossy finish.
This sealer not only improves the aesthetic appeal but also protects the floor from stains and wear, ensuring the surface remains vibrant and durable for years.
This technique has been inspired by ‘How to Get an Exposed Aggregate Finish on Concrete’ by @Odell Complete Concrete. For a more detailed understanding, watch the video:
Factors to Consider Before Choosing Your Method
Before deciding on your preferred method for exposing the aggregate in your concrete floor, there are several factors you should consider:
- Project Size: Larger projects might benefit from the wet or combination methods for more consistent results, while smaller projects may be fine with the dry method.
- Design Preference: The wet method tends to offer a smoother, more uniform finish, while the dry and combination methods can provide more texture and variety in appearance.
- Maintenance Needs: Polished exposed aggregate floors are low-maintenance but may need periodic resealing, especially in high-traffic areas. Make sure you’re comfortable with the long-term upkeep.
- Budget: The wet method is often more affordable compared to the dry and combination methods, which can require more labor and special equipment. Always factor in labor costs, materials, and potential for additional customization.
Conclusion
Polished exposed aggregate concrete is an attractive, durable, and low-maintenance flooring option that can transform any space.
By understanding the different methods for exposing aggregate, along with the polishing techniques, you can choose the best approach for your project.
No matter if you opt for the traditional wet method or the more advanced dry or combination methods, you’ll achieve a stunning and long-lasting result.
Remember to consider the size of your project, design preferences, and budget to make the right choice.
With proper care and attention, polished exposed aggregate floors can offer both beauty and functionality for years to come.