
My bedroom was constantly cluttered, and I was running out of space to store everything, from books and shoes to electronics and random bits I use daily.
I browsed stores for a storage solution, but everything either didn’t fit my space or was way over budget. That’s when I decided to build my own cube storage unit, something simple, affordable, and tailored to my exact needs.
I used precut timber, a few basic tools, and added caster wheels to make it easy to move around.
The best part? It turned out way easier than I expected, and looked great too. Now I have tons of organized space, and the unit even complements my room’s decor.
If you’re struggling with limited storage and don’t want to break the bank, this DIY guide will walk you through building your own custom cube storage that actually works.
Why Cube Storage Is a Game-Changer?
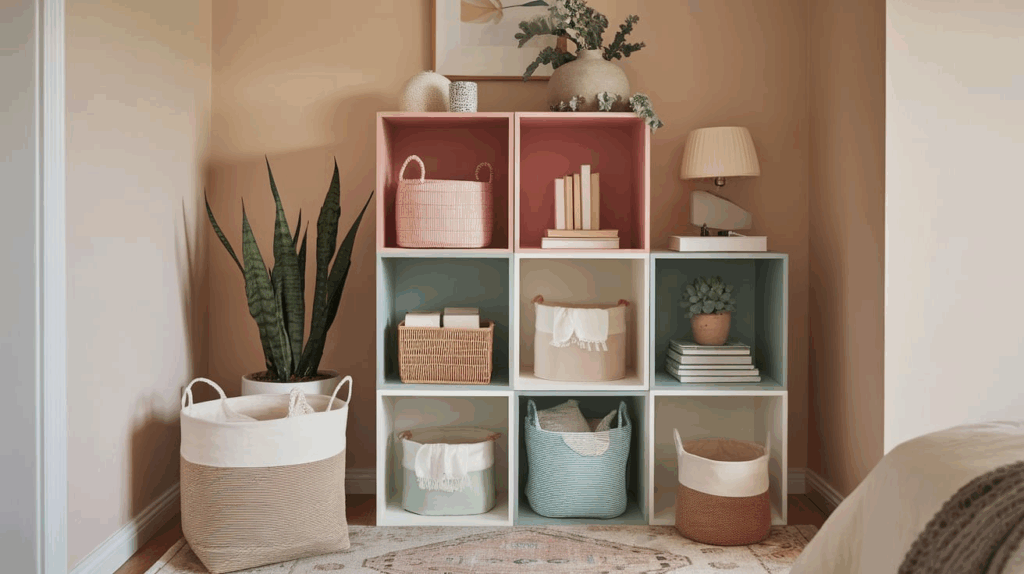
Cube storage isn’t just a trendy design choice; it’s a smart, adaptable solution for almost any space. Its modular, open-grid structure makes it incredibly versatile, allowing you to store, display, or conceal items with ease.
Whether you use fabric bins, open shelves, or decorative pieces, each cube can serve a unique purpose.
Need a place for books? A home for shoes? A tidy zone for electronics or kids’ toys? Cube storage handles it all. It works especially well in small spaces, where maximizing every inch counts.
And because the design is clean and symmetrical, it fits effortlessly with any style, from minimal to boho.
You can even use it as a makeshift room divider or media console. In short, cube storage doesn’t just hold your stuff; it makes your space feel more intentional, organized, and personal.
Step-By-Step Guide: DIY Cube Storage
Build a functional and stylish cube storage unit with this easy step-by-step guide. From framing and shelving to painting and adding wheels, each step helps you create the perfect movable organizer for any room.
Materials Used
This DIY cube storage project uses simple, accessible materials that make building easy and affordable.
- Precut timber panels : Main structural components for building the cube frame and shelves.
- Screws: Used to securely join all timber pieces together.
- Drill with countersink bit: For creating clean, flush screw holes during assembly.
- Measuring tape: Ensures accurate spacing and layout for dividers and shelves.
- Set square: Helps keep edges, shelves, and dividers perfectly straight and aligned.
- Caster wheels: Add mobility to the finished storage unit for flexible use.
- Paint (optional): Adds color, personality, and a decorative finish to the cubes.
- Paintbrush or roller: Used to apply paint smoothly to surfaces.
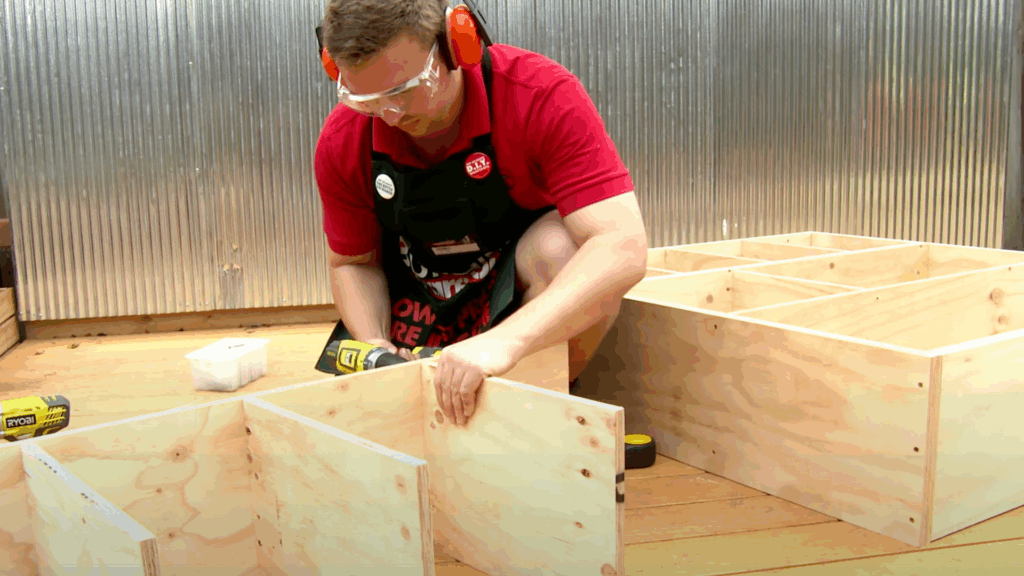
Step 1: Build the Outer Frame
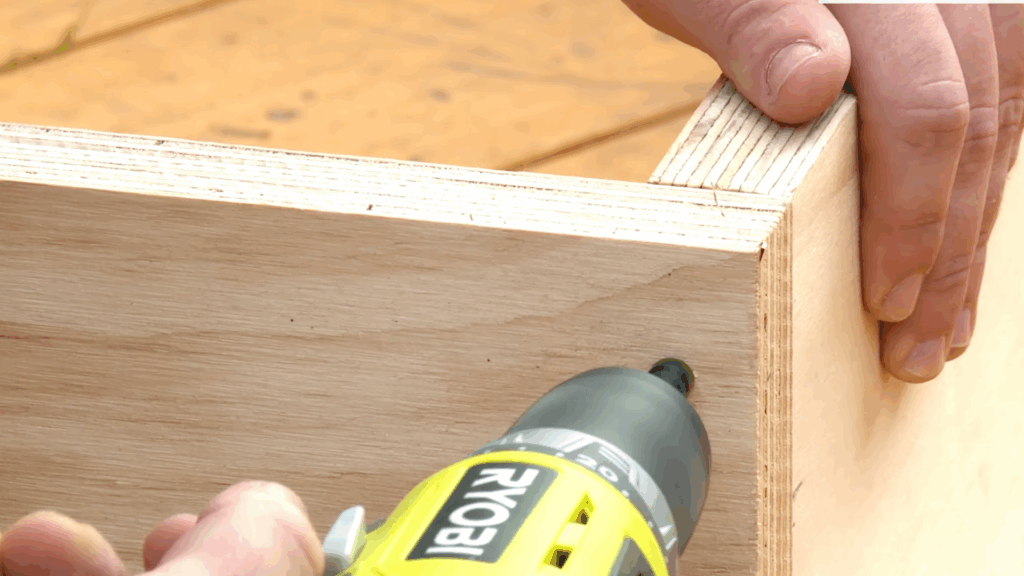
Start by laying out the precut timber pieces on the ground, which makes assembly easier. Use a set square to ensure the frame is perfectly aligned.
Drill pilot holes, countersink them, and screw the outer frame together.
This step builds the solid foundation of your cube storage unit and ensures everything stays square and secure during later assembly.
Step 2: Plan and Mark Divider Layout
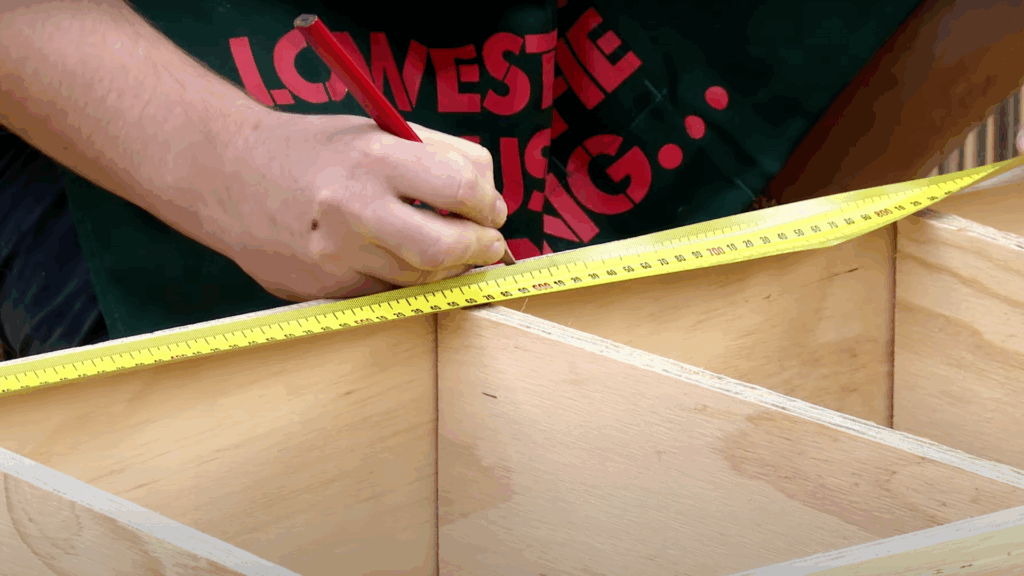
Before attaching anything, plan your divider and shelf configuration. Decide how many cubes you want and their placement.
Use a measuring tape to space them evenly and transfer the marks to the wood.
Use a set square to draw straight lines for shelf positioning, ensuring precise alignment and a professional look when you begin installing dividers and shelves.
Step 3: Attach Shelves and Dividers
Screw the shelves into the dividers using pilot holes and side entry. Start with the bottom level and work your way up.
Ensure each divider is securely fastened and squared. This forms the cube layout. For the second level, slide it into place and screw it in from the bottom to hide the screws, giving a cleaner appearance.
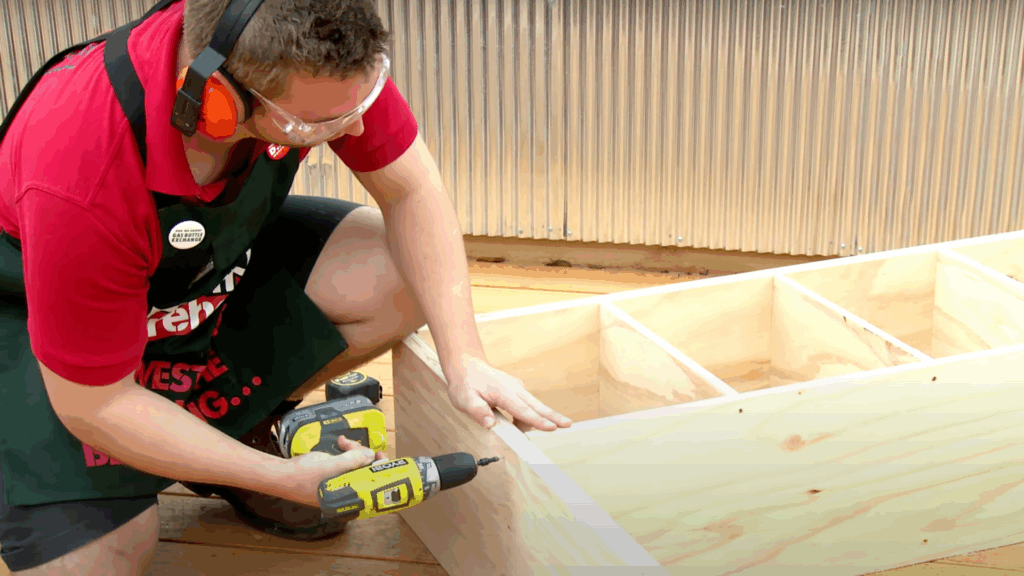
Step 4: Add Third Level and Base Support
Repeat the process for the third and final shelf level, following the same steps to maintain even spacing and alignment.
After installing the last set of dividers and shelves, attach cross-support wood pieces to the bottom of the unit. These add strength and provide a secure base for caster wheels, enhancing both durability and mobility.
Step 5: Paint and Personalize
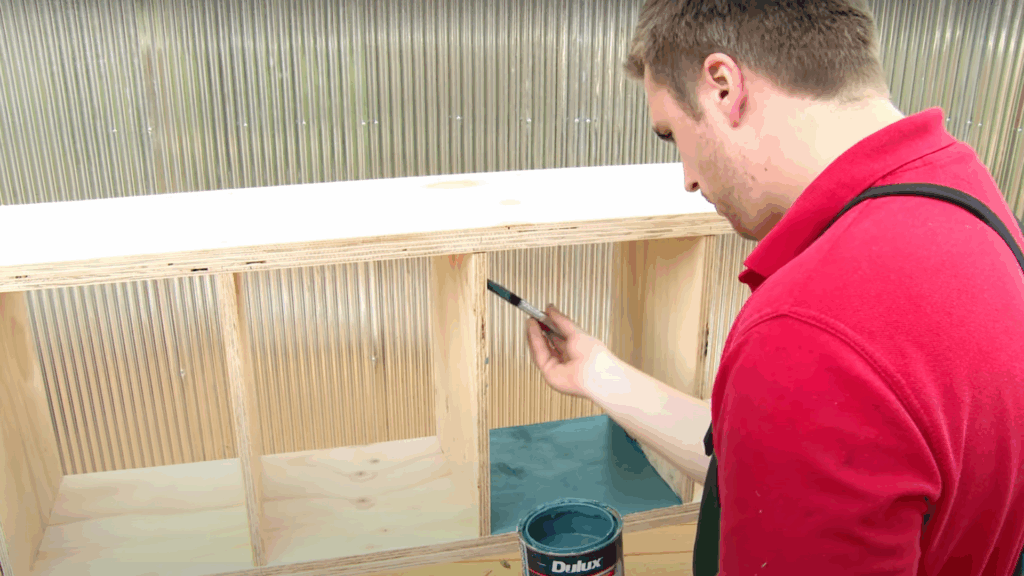
Add a creative touch by painting some or all of the cubes. Use bold colors, soft tones, or accents that match your room decor.
You can paint just a few inner cube spaces for contrast or go all out.
This step adds personality and style, making your storage unit not just practical but also visually appealing in any space.
Step 6: Attach Caster Wheels
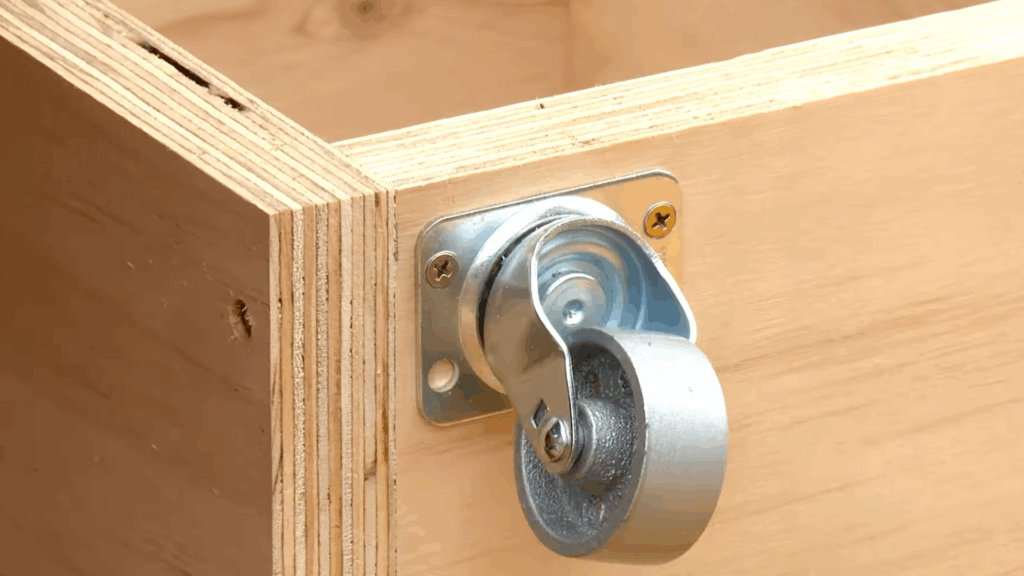
Once the paint is dry, flip the unit over and attach caster wheels to each corner of the base. This turns your cube storage into a mobile organizer, perfect for flexible room arrangements.
The wheels make it easy to reposition the unit wherever needed, adding convenience and functionality, especially in small bedrooms or multi-use areas.
Recommended: Want to see how it’s done? Watch the full build in the video by @bunningswarehousebelow for step-by-step visuals, tips, and inspiration, then try it yourself!
Personalizing Storage to Fit Your Style
Cube storage gives you the flexibility to match your organizational system with your style. It’s highly customizable, making it easy to mix function with personality in any room.
- Choose your color scheme: Paint the cubes in bold tones for impact or stick to soft neutrals for a calm, modern vibe.
- Mix open and closed storage: Use fabric bins or baskets in some cubes to hide clutter while displaying decor in others.
- Add decorative accents: Incorporate plants, books, candles, or framed prints to give it a lived-in, stylish look.
- Style with seasonal changes: Swap out accessories and decor with the seasons to keep the unit feeling fresh and updated.
- Back it with wallpaper or contact paper: Line the inside backs of cubes with patterns or textures to add depth and personality.
With a few thoughtful touches, your cube storage can become a standout feature that’s totally unique to you.
Maintenance and Flexibility Tips
Keep your cube storage unit looking fresh and functional with easy updates like repainting, rearranging, or repurposing. Its adaptable design makes it perfect for changing spaces and storage needs.
- Repaint for a fresh look: Change the color anytime to match new decor or seasons.
- Rearrange cube contents: Swap baskets, bins, or items to keep it functional and tidy.
- Use as a room divider: Turn the unit sideways to create a stylish partition in open spaces.
- Add or remove dividers: Adjust the layout for different storage needs over time.
- Wheel it to another room: The caster wheels make it easy to move as your space changes.
- Upgrade with labels or tags: Label cubes for better organization, especially in shared or kids’ spaces.
- Clean regularly: Wipe surfaces down with a damp cloth to keep dust and dirt at bay.
Common Mistakes when Making a DIY Cube Storage Unit
Avoid frustration and wasted materials by learning from common cube storage DIY pitfalls. This section highlights easy-to-miss mistakes and how to prevent them for a smooth build.
- Not Measuring Accurately: Skipping exact measurements can lead to misaligned shelves, uneven cubes, and a shaky frame.
- Forgetting to Check for Square: If your frame isn’t perfectly square, shelves won’t sit right. Use a set square at every corner during assembly.
- Using the Wrong Screws or Drill Bits: Screws that are too short or too long can weaken joints or pierce through visible surfaces.
- Skipping Pilot Holes: Not drilling pilot holes may cause the wood to split, especially near edges or on thinner boards.
- Overlooking Support for Heavier Loads: Without cross braces or secure dividers, your unit may sag over time if loaded with books or heavy items.
- Skipping Wheel Reinforcement: If adding caster wheels, reinforce the base so the unit doesn’t wobble or crack under movement.
Taking your time and planning carefully helps prevent these issues and ensures your cube storage is both beautiful and built to last.
Conclusion
This cube storage unit solved so many problems in my room: clutter, disorganization, and even design.
It gave me a clean, structured place for all my stuff and added a stylish, personal touch to the space. The best part? It was genuinely fun to build, easy to adjust to my needs, and far more budget-friendly than anything I found in stores.
If you’re dealing with a small bedroom, shared space, or just want something custom, this project is totally doable. You don’t need fancy tools or a workshop, just a little time, a plan, and some creativity.
If you’re thinking about building your own cube storage, go for it. You won’t regret it! Ready to reclaim your space and add some DIY flair to your room?
Grab your supplies and get started today. And don’t forget to share your build, I’d love to see it!