
If you’re in the middle of planning a tile installation project—whether it’s for a bathroom, shower niche, or kitchen backsplash—there’s one detail that can make or break the final look: tile edge trim. You might be wondering, “Do I really need tile trim?” Short answer? Absolutely! Not only does tile trim finish off the edges neatly, but it also protects your tiles from chipping and gives your space that clean, high-end look.
In this guide, I’m going to walk you through everything you need to know about tile edge trim. We’ll look at different types of trims, including metal, PVC, and natural stone options. I’ll also cover some handy installation tips, how to pick the correct trim depth, and give you ideas for creating a seamless look, even around tricky areas like shower niches and pony walls. I’ll even share a real-life example from one of my recent tile jobs so you can see how it all comes together.
So, if you’re ready to take your tile game to the next level, let’s dive in!
Types of Tile Edge Trim
There are several types of tile edge trim you can use to finish your tiling project. Each type has its own unique look and benefits.
Metal trims are the most popular option these days, especially for modern bathrooms. They offer clean lines and come in finishes like brushed nickel and stainless steel.
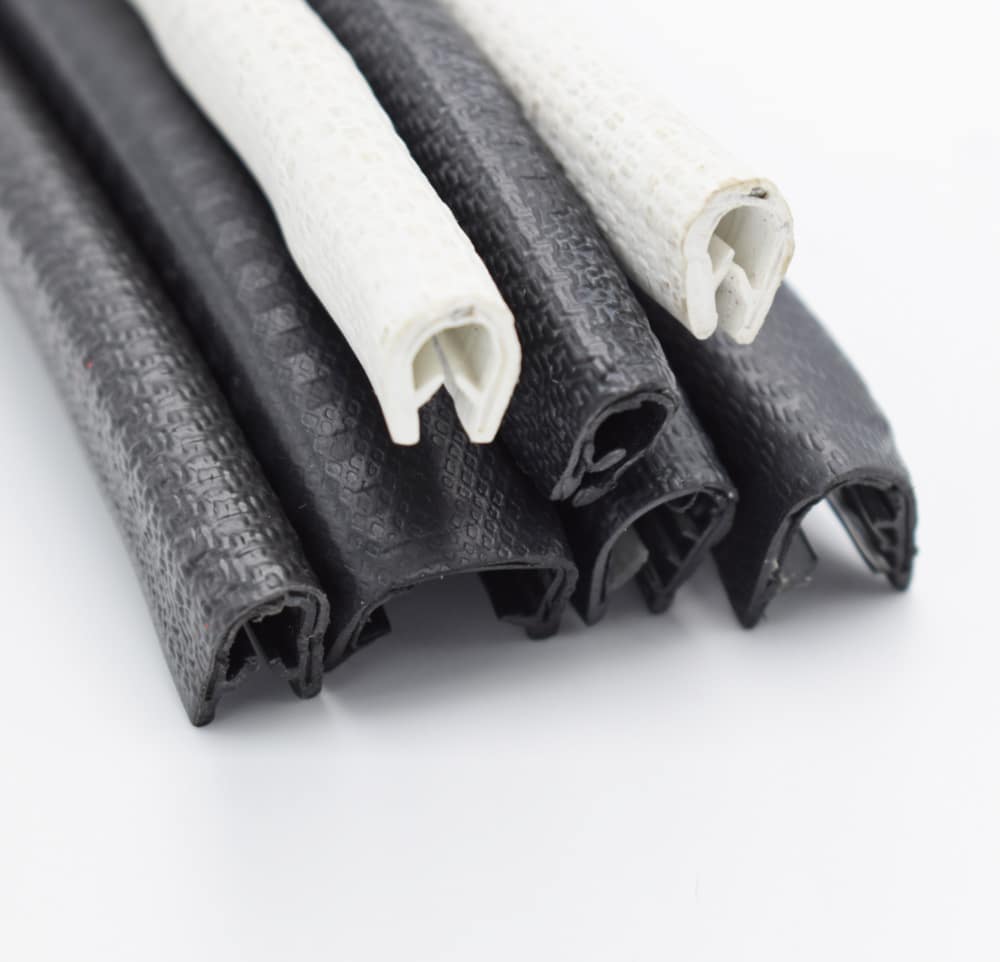
PVC trims are the budget-friendly option. They’re easy to work with but not as durable, which makes them better suited for low-traffic areas.
Natural stone trims, like marble or granite, create a luxurious look. These are great for shower niches, pony walls, and areas where you want a seamless design.
Porcelain and ceramic trims, often bullnose, are traditional options. They work well in classic designs but are less common in modern spaces.
Alternatives to Bullnose Tile
If you’re not feeling the traditional bullnose tile look, don’t worry—you’ve got options!
One of the fastest-growing trends is using stone slabs as edge trim. A polished marble piece on a shower niche or pony wall can elevate your entire space. It’s a great alternative to bullnose tiles and can give your project a more customized, high-end appearance.
Even better, many stone fabricators have leftover pieces from countertop projects. These smaller scraps can be repurposed as tile trim, often at little or no cost. It’s a win-win: you get a custom look, and they clear out their scrap pile!
Ceramic (Bullnose) Edge Profiles
Bullnose tile trims have been around for ages, and they’re still a solid choice for certain projects.
Bullnose tiles typically feature a rounded edge that softens the transition between your tile and the wall. You’ll often see them in traditional bathroom designs. While they’re not as popular in today’s modern spaces, they still offer a clean, finished look.
There are also modern ceramic trims with square edges, though these are usually special order and come at a higher price point. If your project calls for a classic vibe, bullnose tiles might be just what you need.
PVC & Metal Edge Trim
When it comes to durability and style, metal edge trims lead the pack. They’re ideal for high-traffic areas and wet zones like showers and floors.
You’ll find metal trims in various finishes—brushed nickel, stainless steel, aluminum—and they’re available in several profiles. Schluter’s Jolly trim is a popular example, thanks to its minimalist design and versatility.
PVC trims are an affordable alternative. They come in different colors but aren’t as durable as metal. They’re best used in areas that won’t see a lot of wear and tear.
Schluter Profiles – Finishes
Once you’ve picked the type of metal trim you like, you’ll need to choose a finish. This choice can make a big difference in your project’s final look.
Polished and brushed stainless steel finishes are among the most popular. They’re neutral, work with most color schemes, and complement many bathroom fixtures. Brushed aluminum and nickel are also commonly used for a sleek, understated vibe.
Gold or bronze finishes can be trickier to pull off. If you’re thinking about using them, make sure they match your bathroom fixtures closely—otherwise, they can stick out like a sore thumb.
Selecting the Correct Trim Depth
Choosing the right depth for your tile edge trim might seem tricky, but here’s a simple rule of thumb: always go slightly deeper.
Most pros recommend selecting a trim that’s 1/16” to 1/8” deeper than the tile itself. This extra space gives you a little wiggle room during installation. If you go too shallow, the tile can end up sticking out beyond the trim—and trust me, that’s not a look you want!
And don’t forget to factor in any waterproofing membranes you’re using. They add thickness, which you’ll need to accommodate when picking your trim depth.
Outside Corner Trim or Niche Trim
When tiling areas like shower niches, pony walls, or shower benches, you’ll often need an outside corner trim. These trims protect the exposed tile edges and help create crisp, clean corners.
Metal trims are the go-to choice for these situations. They provide durability and a streamlined look. However, if you prefer a more luxurious finish, natural or engineered stone can be an excellent alternative. A stone fabricator can cut and polish pieces to fit perfectly, saving you time and hassle—although at a higher cost.
Square Joint or Mitre Joint on Trim
When two pieces of tile edge trim meet at a corner, you have two choices: square joint or mitre joint.
A square joint is easier to do, especially if you’re working with flat-edged profiles like Schluter Jolly. It’s a simple butt joint where the trims meet at 90 degrees. It’s practical but can look less refined.
A mitre joint, on the other hand, involves cutting each trim at a 45-degree angle so they meet seamlessly. This creates a cleaner, more professional finish but requires precise cuts and experience. If you’re going for mitre joints and aren’t confident in your skills, it’s worth hiring a pro.
An Easier Alternative for Niche Trim
If you want to avoid trimming the edges of a shower niche altogether, consider using a prefabricated finished niche.
These niches often come with integrated metal edges, giving a clean, finished look without the hassle of cutting and installing tile edge trim yourself. While the style might not appeal to everyone, it’s an easier installation and reduces the risk of leaks or mistakes.
They’re especially helpful for DIYers who want a simple solution that still looks polished.
Straight or Square Edge Trim?
Straight edge trims (also known as Jolly profiles) have a thin, minimal top edge. They’ve been the most popular option for years because they create a subtle, refined finish.
Square edge trims, often referred to as box trims, are bolder. They feature a thicker, box-like profile that’s more noticeable. Square edge trims are gaining popularity as modern and industrial design trends grow.
One thing to keep in mind: square trims require precise mitre cuts at corners for a clean look. If you like the bold, structured appearance they offer, they’re a great choice for baseboards, niches, and pony walls.
Inside Tile Corner Trim
Finishing inside corners can be tricky. Most people run their tiles right up to each other and seal the joint with silicone. It’s simple and works fine, but it doesn’t always look polished.
A more high-end solution is to use an inside corner tile edge trim, sometimes called a cove trim. These trims cover the inside corner, create a smooth radius, and make cleaning easier. They’re uncommon and a little pricier, but they add a sleek, professional finish that really elevates the project.
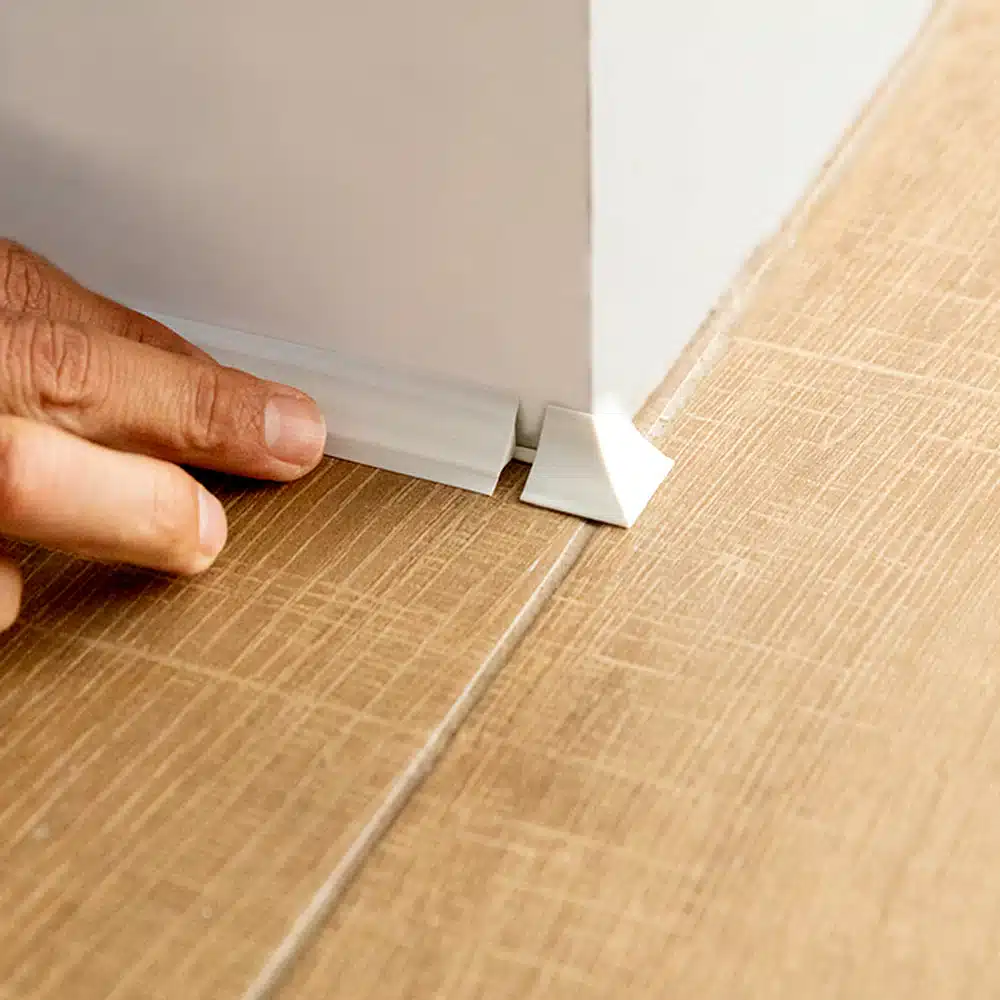
Square Baseboard Trim
If you’re running tile from floor to wall, consider using a square baseboard trim to finish the transition.
These trims work like baseboards and are available in a variety of finishes and sizes. They’re a clean, modern alternative to traditional wood baseboards, and they pair beautifully with tile floors and walls.
They’re also easy to maintain and clean, which is why many designers recommend them for bathrooms and kitchens where moisture is a concern.
Other Interesting Trims
There are many specialty tile edge trims that can add flair and functionality to your project.
For example, you can find border trims that break up large expanses of tile or transition between different materials. Some trims even include channels for decorative mosaic tile inserts—great for adding a little wow factor to your backsplash or shower.
Another option is cove trims, which give inside corners a smooth, sanitary finish, ideal for areas where cleanliness is important, like kitchens and bathrooms.
Installing Tile Edge Trim
Now that you’ve picked the perfect tile edge trim, it’s time to install it! If you’re doing a shower or tub surround, I recommend installing the trim before you start tiling. This way, you’ll have a solid guide to keep your tile rows straight and plumb.
First, measure and mark where you want your trim to go. A good starting point is about two inches outside your tub or shower pan edge. Once marked, apply a small bead of polyurethane adhesive along the trim—just enough to hold it in place.
After positioning the trim, secure it with wafer head screws every six to eight inches. Don’t worry about the screws being visible—they’re temporary and can be removed once the adhesive cures. Afterward, you can tile right up against the trim, using it as your guide to keep things straight.
Securing Trim After Tiling
If you forgot to install your trim before tiling—don’t panic. There’s still a way to add it afterward, although it’s a bit tricky.
You’ll need to cut down the anchor leg of the trim to about a quarter inch using an angle grinder. Then, carefully carve out a channel under the tiles along the edge where the trim will go. Once you’ve created a gap, you can apply polyurethane adhesive and push the trim in place.
It’s tedious work and not ideal, but with patience and attention to detail, you can get a clean result.
Real-Life Installation Example
Let’s talk about a real example. I recently worked on a bathroom where we installed two different types of tile. The main shower walls were porcelain, while the accent tiles around the niche were ceramic.
We used a ½-inch metal tile edge trim to finish off the edges. The porcelain tile was ⅜-inch thick, so the trim depth was a perfect fit with a little room for thinset. The ceramic tile, however, was thinner—only ¼-inch. We needed to build up the thinset behind it by ⅛-inch to match the surface height of the porcelain.
Taking the time to adjust the thinset thickness ensured a flush finish across all the tiles and the edge trim. This kind of attention to detail makes a huge difference in the final result.
Common Mistakes to Avoid
A few common mistakes can trip up even experienced DIYers. First, choosing a trim depth that’s too shallow. Always go a little deeper than your tile thickness to allow for thinset and any membranes you’re using.
Second, not securing the trim firmly before tiling. If your trim isn’t anchored properly, it can shift as you work, throwing your whole tile layout off.
Third, rushing through corners. Whether you go with a square joint or mitre joint, take your time to make sure the cuts are precise and the fit is seamless. Sloppy corners are the first thing people notice!
Choosing Trim Finishes Early
Don’t leave picking your tile edge trim finish until the last minute. Some finishes, like brushed gold or certain bronze tones, may require special orders and take weeks to arrive.
Pick your trim finish as early as possible and coordinate it with your fixtures—faucets, handles, and showerheads. Matching these finishes gives your bathroom a cohesive, designer feel without extra effort later.
Keeping Tile Trim Clean
Once installed, your tile trim will need minimal maintenance. For metal trims, a simple wipe with a damp cloth is enough to keep them looking sharp. If you use stone trims, you may need to reseal them periodically, especially in wet areas like showers.
Avoid abrasive cleaners that can scratch metal finishes. A gentle soap solution works just fine for routine cleaning.
Conclusion
Choosing and installing tile edge trim doesn’t have to be complicated. Whether you go with metal, PVC, or stone, the right trim can completely transform the look of your tile installation. From selecting the right type and depth to making clean cuts on your corners, a little planning and care go a long way.