
As someone who loves decorating, I’ve found Black Pumpkin Painting to be one of the easiest and most stylish ways to make Halloween decor stand out.
Black pumpkins are modern and simple and can fit any look you’re going for—whether it’s spooky and fun or classy and elegant.
The best part? You don’t need to be a pro or spend much money. With a little paint and some easy ideas, you can turn plain pumpkins into amazing decorations that fit perfectly in your home.
In this blog, I’ll share some fun, budget-friendly black pumpkin painting ideas you can try. Whether you’re decorating for a party or want to add a unique touch to your space, these ideas will inspire you.
Let’s get started!
Why Black Pumpkins?
As a home decorator, I’m excited to tell you why black pumpkins have become such a favorite choice for seasonal decorating.
Let me share why these striking decorative pieces stand out from the usual orange ones.
Black pumpkins bring a fresh look to any space and fit perfectly into different decorating styles.
When I work with clients who want something different from traditional fall decor, I often suggest black pumpkins because they work well with modern home designs.
Their dark color creates a bold statement that catches everyone’s attention.
Simple Black Pumpkin Painting Ideas
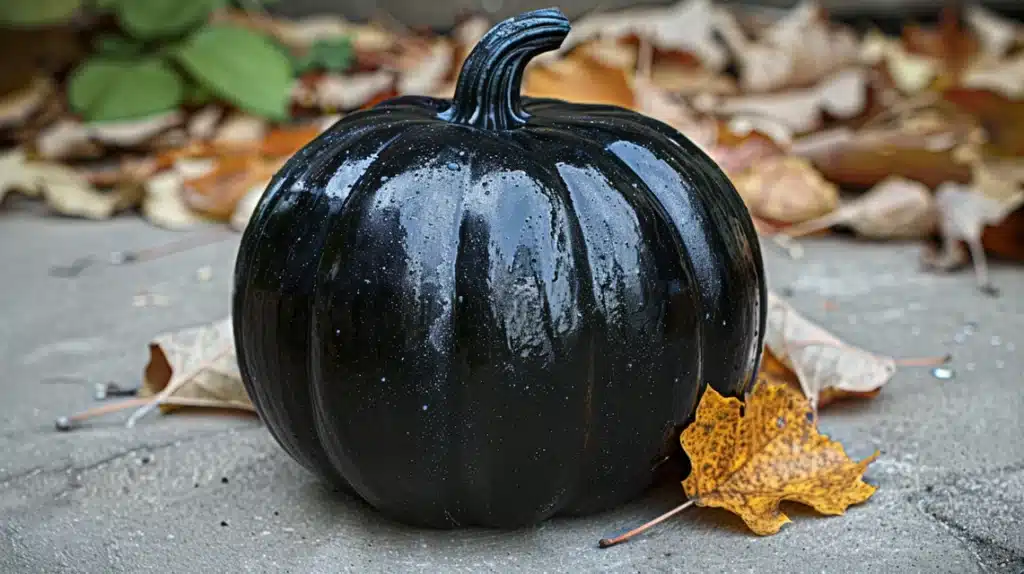
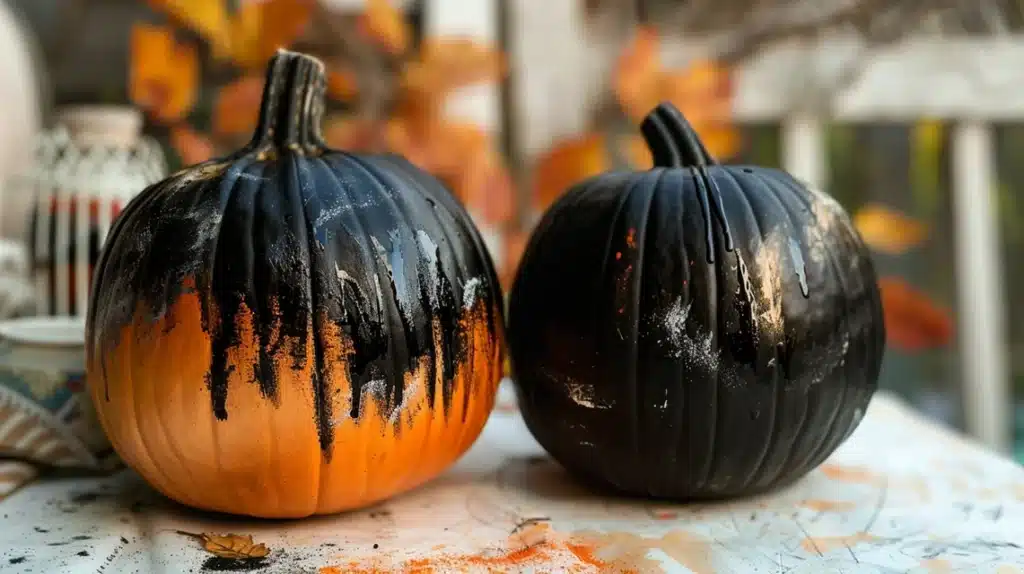
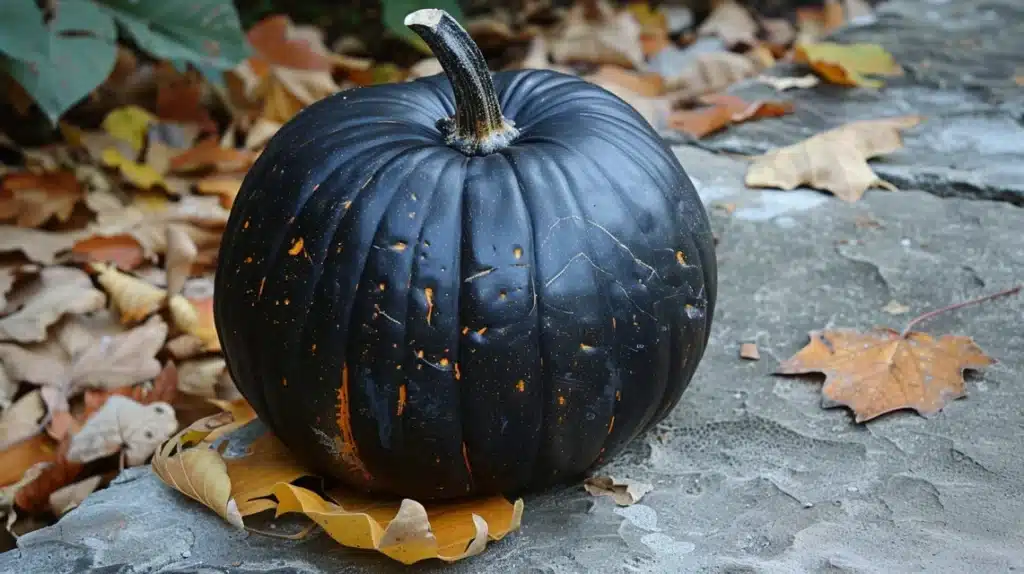
1. Matte Black Classic
A solid matte black pumpkin brings a modern style to fall decor.
As a home decorator, I love how this simple design fits any interior style.
You can paint your entire pumpkin in matte black acrylic paint for a sophisticated look that works as a standalone piece or in groupings.
What You’ll Need:
- Matte black acrylic paint
- Wide paintbrush
- Paper towels
- Primer (optional)
DIY Steps:
- Clean the pumpkin surface thoroughly
- Apply 2-3 thin coats of paint
- Let each layer dry completely
- Add a final coat for perfect coverage
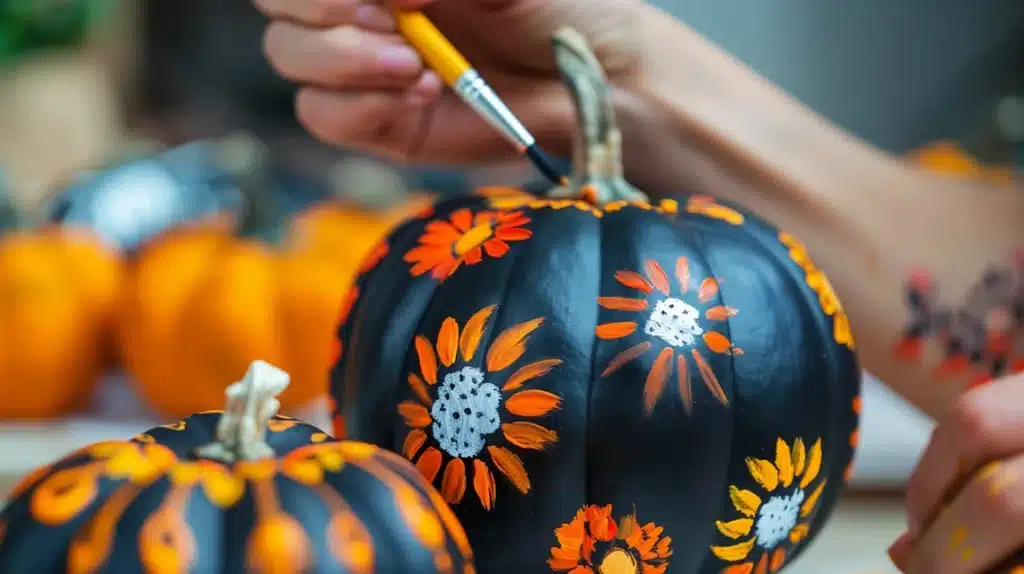
2. White Pattern Play
Create striking designs using white paint on a black base.
This combination makes patterns pop and adds visual interest to your fall display.
I often use this technique to create custom designs that match my clients’ decor.
What You’ll Need:
- Black acrylic paint
- White acrylic paint
- Fine-tip paintbrush
- Stencils (optional)
- Clear sealant
DIY Steps:
- Paint the entire pumpkin black
- Let it dry completely
- Add white patterns using a fine brush
- Seal to protect the design
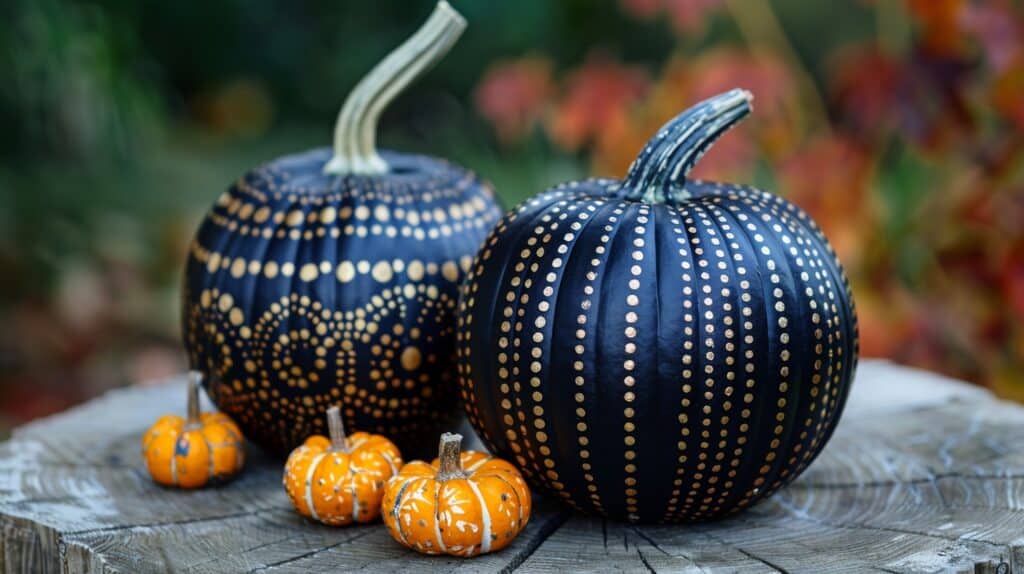
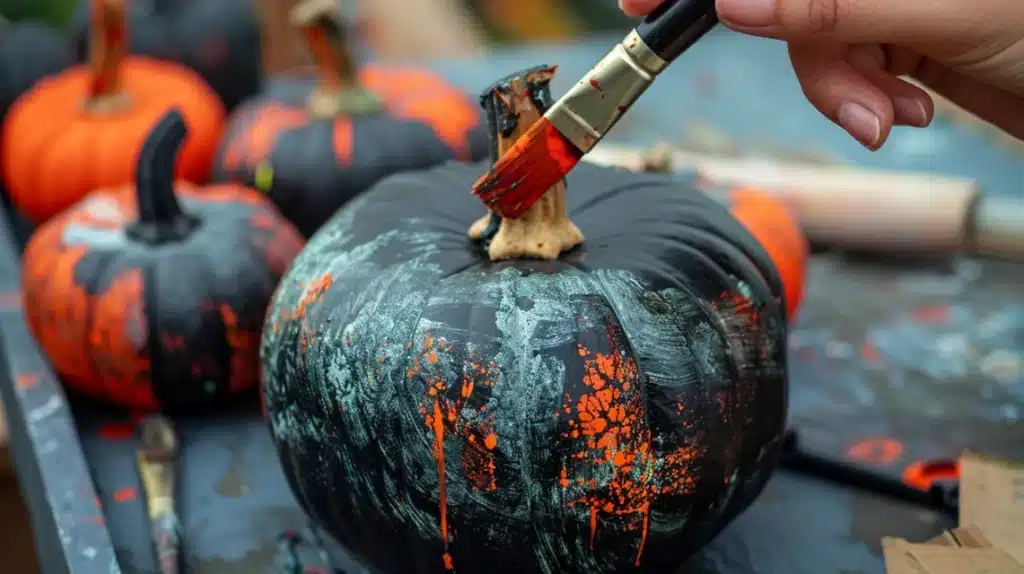
3. Polka Dot Perfection
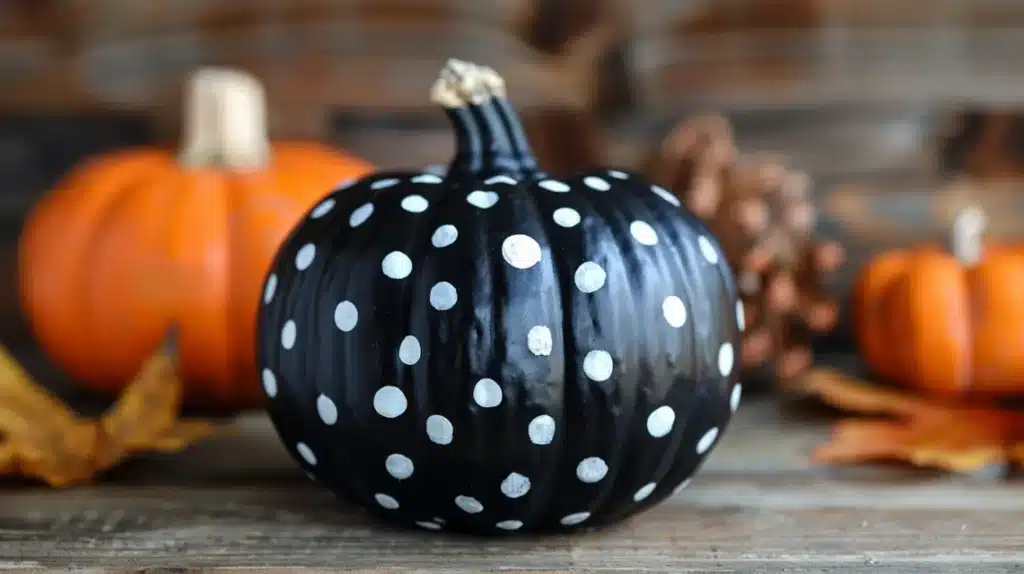
As a home decorator, I love creating these playful yet sophisticated black pumpkins with white dots.
Whenever I make this design for my clients, I suggest varying dot sizes for visual interest.
From my experience, starting with larger dots around the bottom and gradually decreasing their size toward the top creates a stunning gradient effect.
I’ve found this design particularly effective when placed in groups of three on a mantel or as a centerpiece.
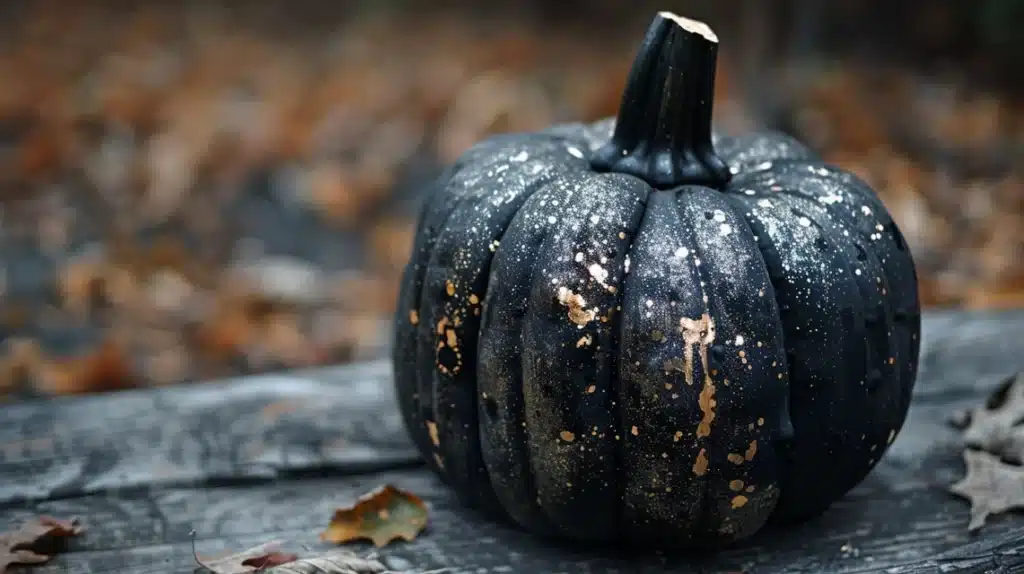
For my own home, I sometimes add tiny gold dots between the white ones for extra sparkle during evening gatherings.
My clients often tell me this design looks much more complex than it is to create.
What You’ll Need:
- Black acrylic paint
- White acrylic paint
- Cotton swabs or dotting tools (I prefer makeup sponges)
- Gold paint (optional)
- Clear sealant
- Various-sized dotting tools
DIY Steps:
- Always start with two coats of black paint
- Once dry, create the largest dots at the base
- Work my way up with smaller dots
- Then add optional gold accents last
- Seal for protection
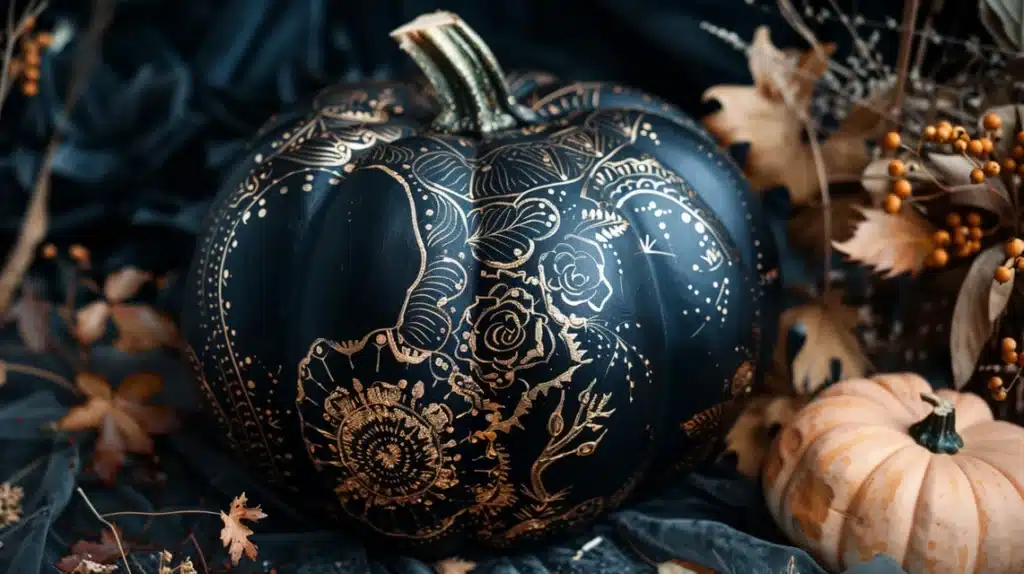
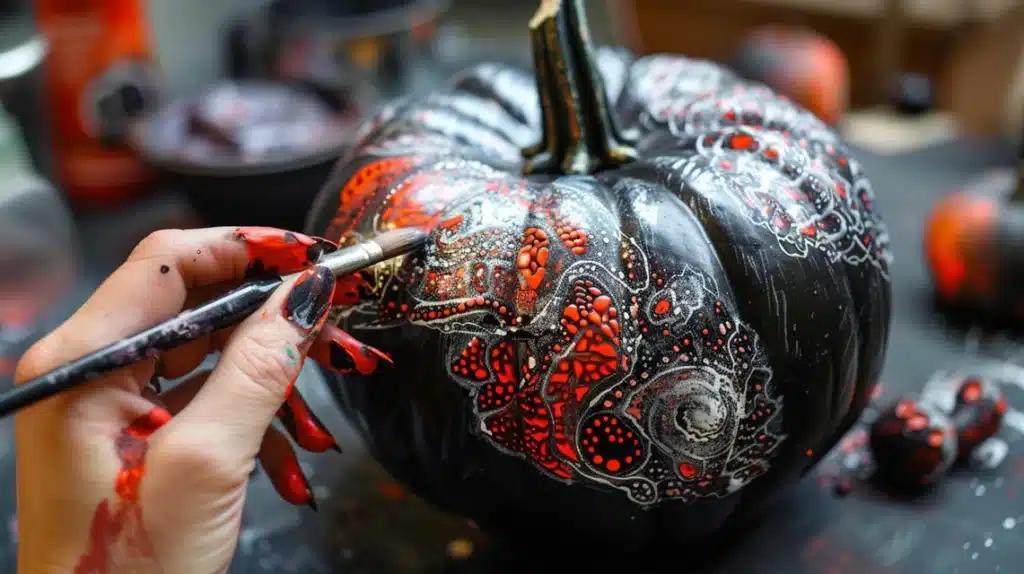
4. Gothic Lace Design
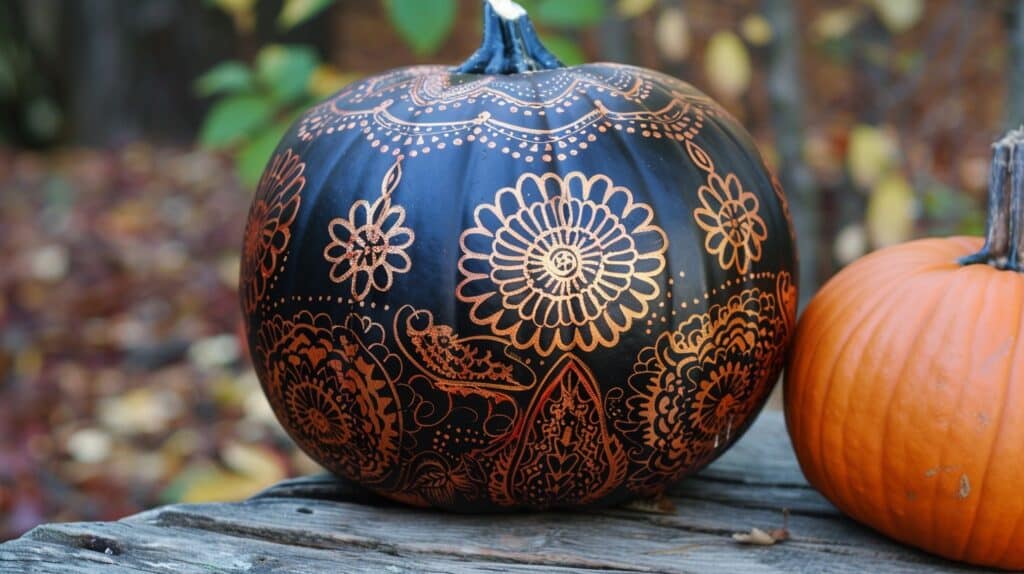
In my years of decorating homes, I’ve found that this Gothic-inspired design truly captures attention.
I love creating intricate white lace patterns on black pumpkins—they remind me of vintage Victorian wallpaper patterns.
When I make these for my dining room displays, I often start with a simple scroll pattern and build from there.
My favorite technique involves painting small sections at a time, allowing me to perfect each detail.
I recommend practicing the pattern on paper first. I suggest using a stencil as a starting point for my clients who want a more structured look.
What You’ll Need:
- Black base paint
- White acrylic paint
- Very fine detail brush (my preference is size 0)
- Lace pattern reference
- Practice paper
- Sealant
- Light pencil for sketching
DIY Steps:
- Apply two black base coats
- Sketch my basic pattern lightly
- Paint the main design elements
- Add smaller details
- Seal when completely dry
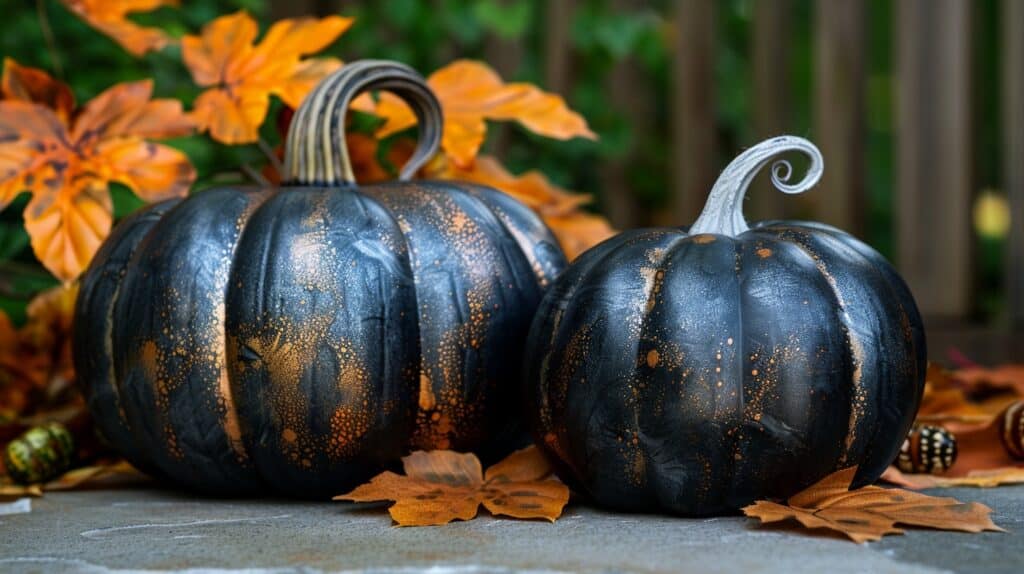
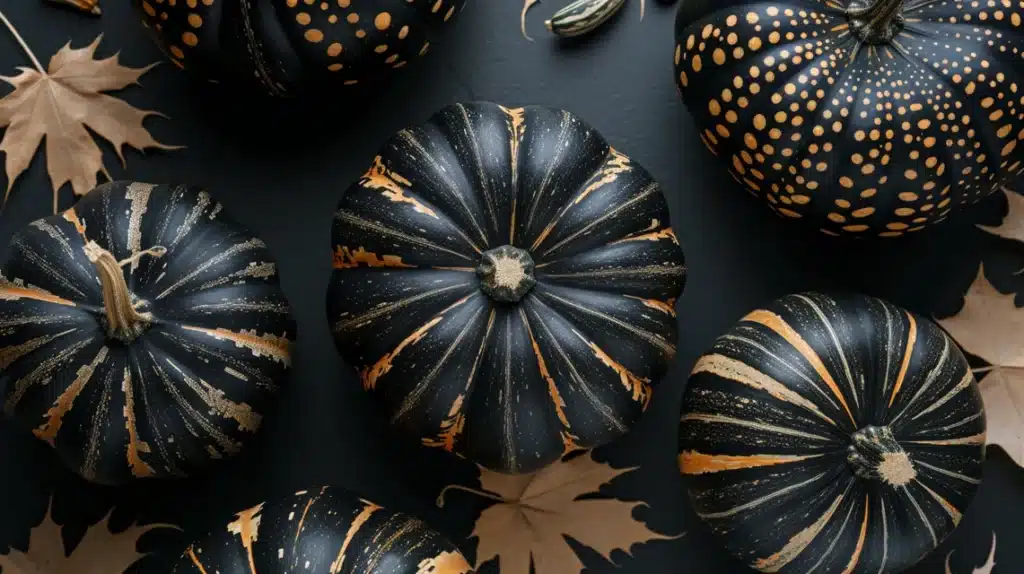
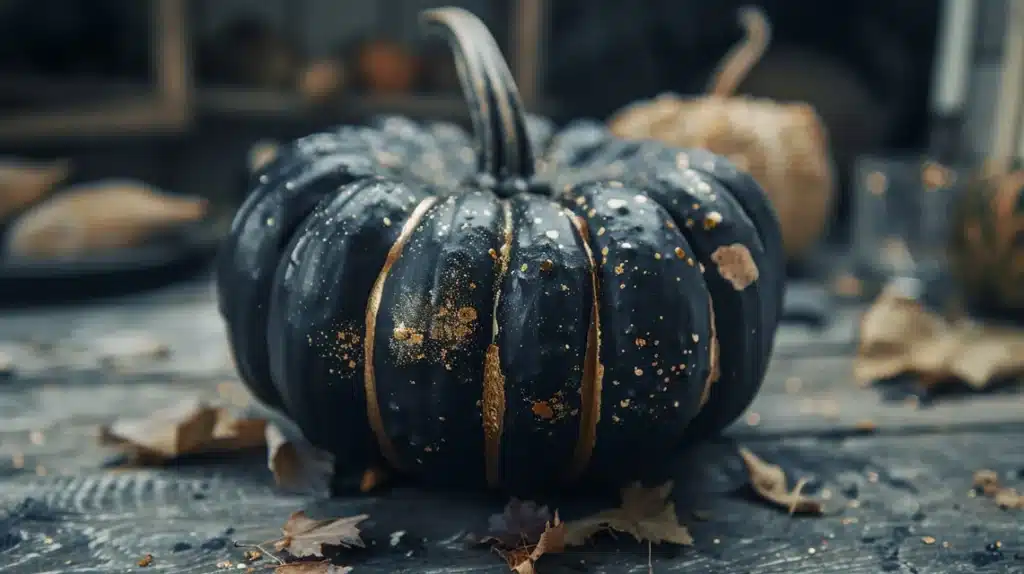
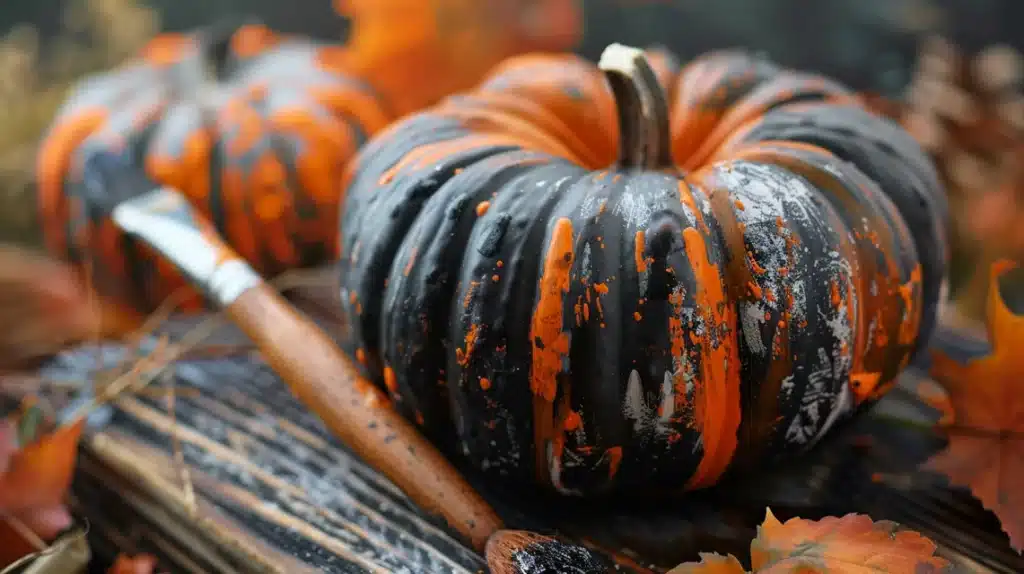
5. Metallic Stripe Accent
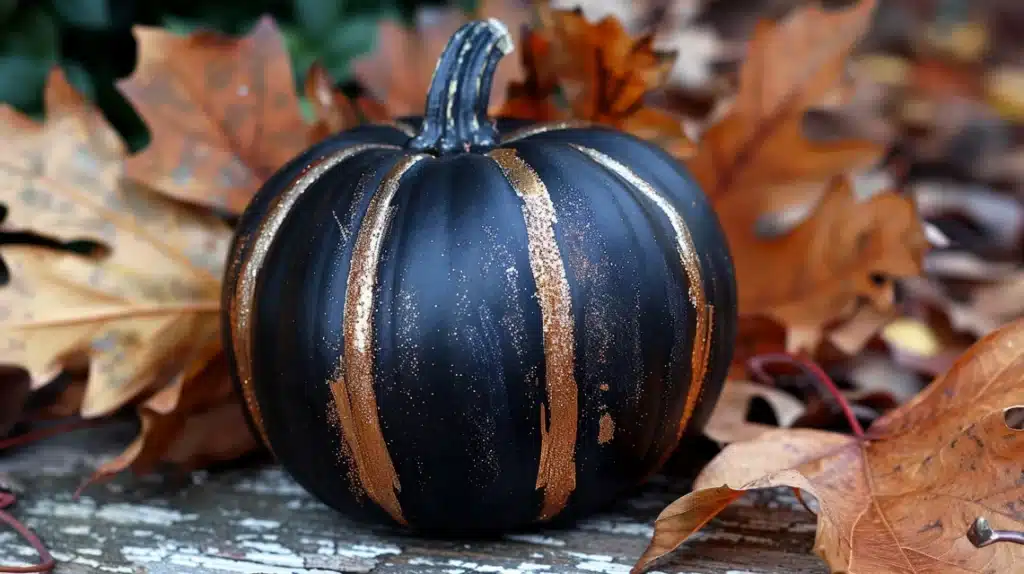
In my decorating practice, I’ve noticed that metallic accents on black pumpkins create stunning focal points.
When I make these for my entryway displays, I prefer using varying stripe widths—I find they add more visual interest than uniform lines.
In my experience, gold stripes work beautifully in warm-toned rooms, while silver complements cooler color schemes.
I often recommend this design to my clients who want modern interiors.
For maximum impact, I position these pumpkins where natural light hits them—how the metallic paint catches the light creates beautiful effects throughout the day.
What You’ll Need:
- Black matte paint (I prefer Rust-Oleum)
- Gold or silver metallic paint
- Various widths of painter’s tape
- Foam brushes (my go-to for smooth finishes)
- Clear sealant
- Measuring tape for precise stripes
DIY Steps:
- Apply a black base coat evenly
- Measure and mark stripe positions
- Secure tape at varying widths
- Apply metallic paint carefully
- Remove the tape while the paint is slightly wet
6. Constellation Map
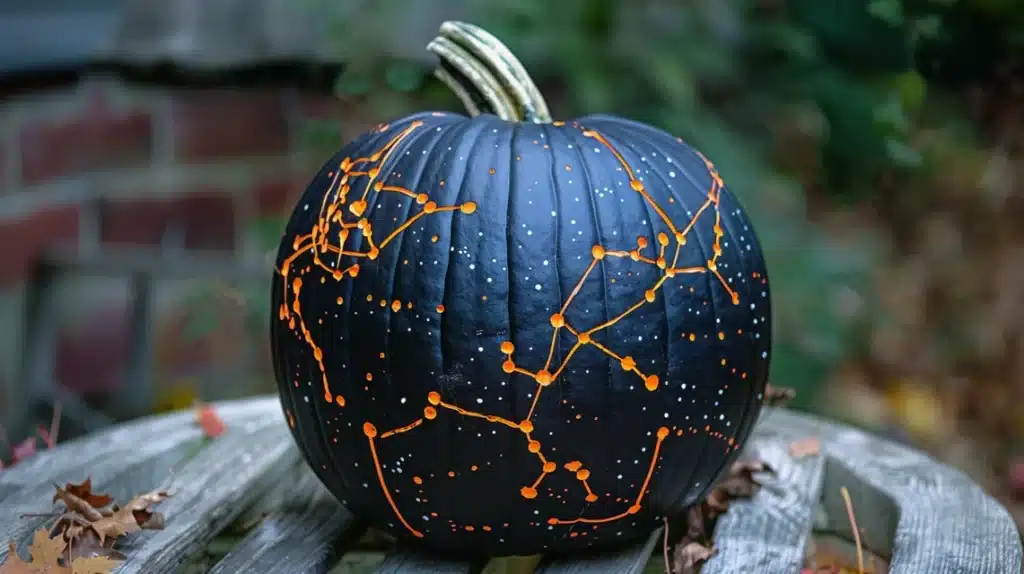
As someone who decorates indoor and outdoor spaces, I find this celestial design particularly magical.
I love creating star maps on black pumpkins because they look stunning day and night.
I often add glow-in-the-dark paint to key stars in my displays, creating an enchanting evening effect.
For my clients who enjoy astronomy, I recreate actual constellations and design custom patterns.
Grouping these with solid black pumpkins creates a beautiful night sky vignette.
What You’ll Need:
- Black matte paint
- White acrylic paint
- Glow-in-the-dark paint (my secret ingredient)
- Fine-tip paint pen
- Star template (I make my own)
- Reference constellation map
- Clear sealant
DIY Steps:
- Create a perfect black base
- Map out major stars
- Connect constellation lines
- Add glowing elements
- Seal it with a matte finish
7. Script and Quotes
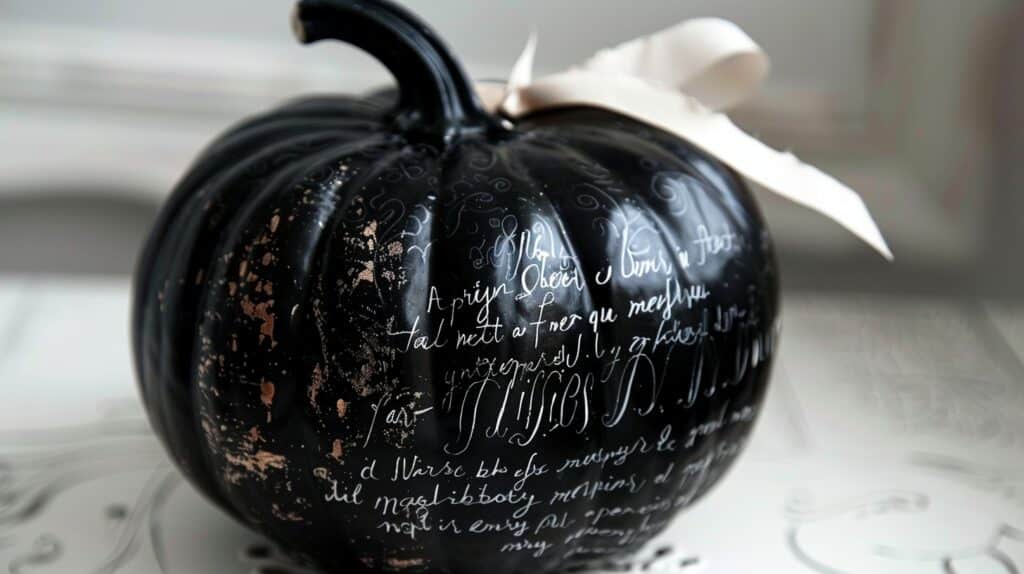
When I decorate pumpkins with text, I love choosing meaningful quotes or single words that resonate with the season.
From my experience, white calligraphy on black pumpkins creates striking statement pieces.
I often recommend this design for my clients’ front porches or dining table centerpieces.
I’ve found that the key to success is choosing shorter phrases and practicing the lettering beforehand.
For special occasions, I sometimes add small floral designs around the text to frame it beautifully.
What You’ll Need:
- Black base paint
- White paint pen (I prefer Posca)
- Pencil for sketching
- Practice paper
- Letter templates (optional)
- Clear protective spray
- Thin paintbrush for details
DIY Steps:
- Paint the base completely black
- Sketch text placement lightly
- Apply lettering carefully
- Add decorative elements
- Seal for longevity
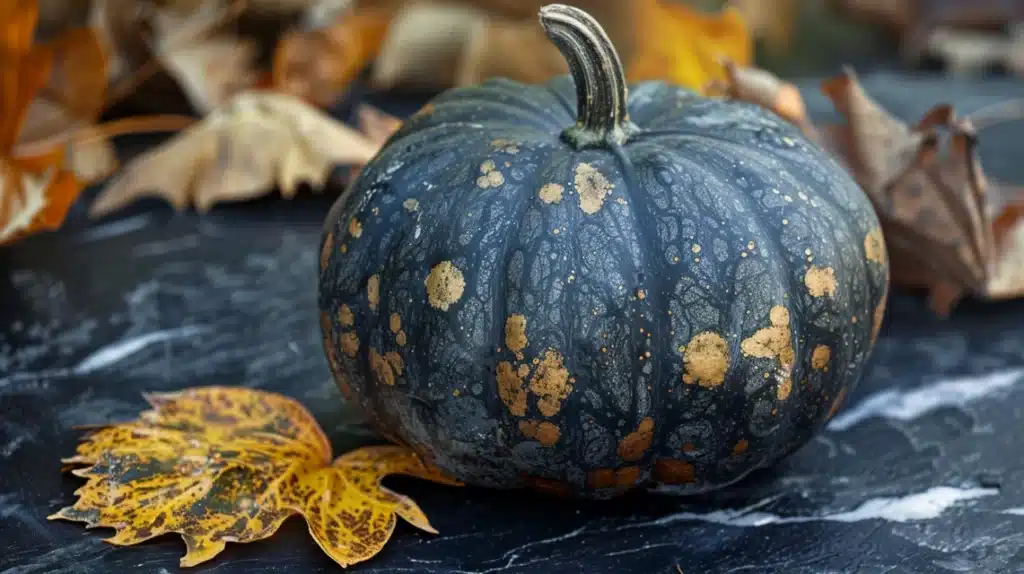
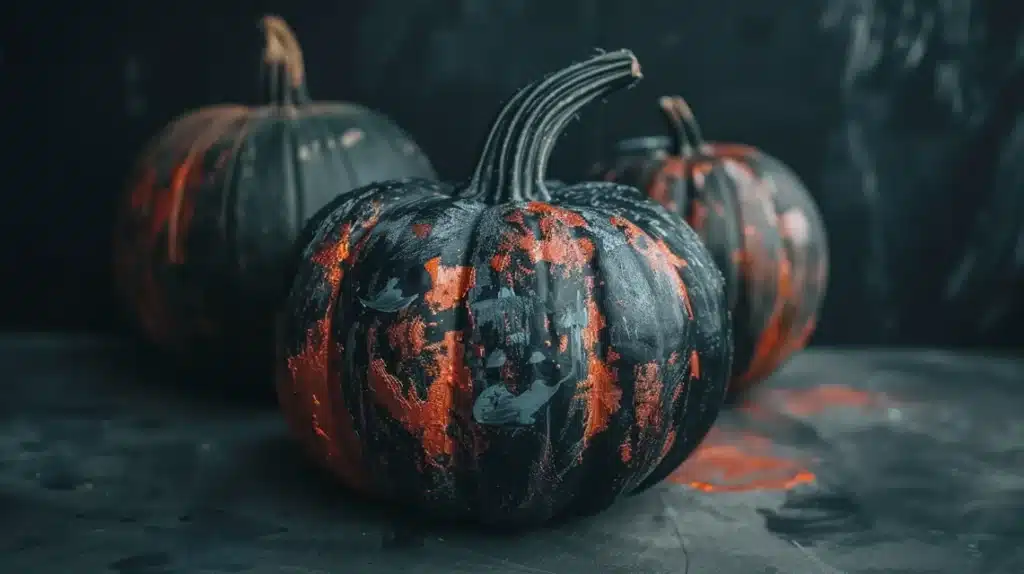
8. Modern Marble Effect
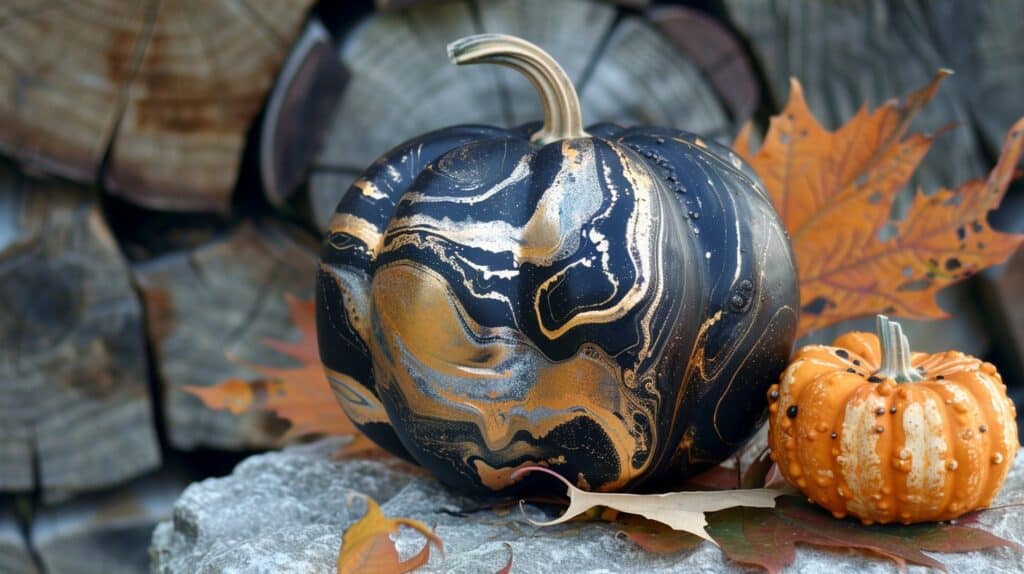
In my design work, I’ve found that creating a marble effect on black pumpkins brings sophisticated luxury to fall decor.
I achieve this by swirling white and gray paint over a black base.
From my experience, each pumpkin turns out uniquely beautiful, which my clients love.
I often place these in bathrooms or coffee tables where the marbling catches light beautifully.
When I create these for high-end homes, I sometimes add tiny veins of metallic paint to enhance the luxurious look.
What You’ll Need:
- Black base paint
- White and gray acrylic paints
- Fine-tip brushes (I prefer synthetic)
- Plastic wrap
- Gold or silver paint (optional)
- Sealant
- Small water spritzer
DIY Steps:
- Apply a black base thoroughly
- Create white and gray swirls
- Use plastic wrap for texture
- Put optional metallic veins
- Seal it with a high-gloss finish
9. Minimalist Line Art
Creating simple line art on black pumpkins has become one of my signature designs.
I love drawing continuous line faces or abstract patterns in white paint. From my decorating experience, these pieces work perfectly in contemporary spaces.
When I display these at home, I group them with solid black pumpkins for maximum impact.
My clients particularly enjoy how these designs look both playful and sophisticated.
What You’ll Need:
- Black matte paint
- White paint pen (extra fine)
- Practice paper
- Reference designs
- Clear sealant
- Light pencil
- Eraser
DIY Steps:
- Paint the base perfectly black
- Sketch design very lightly
- Trace with a paint pen
- Refine lines as needed
- Seal it with a matte finish
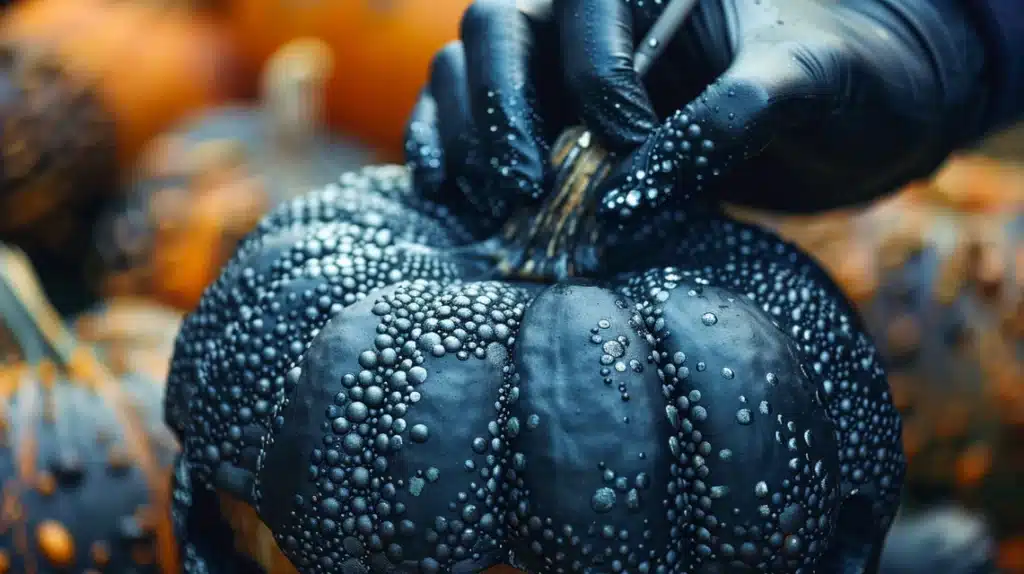
10. Black-on-Black Texture

Throughout my decorating career, I’ve learned that subtle texture creates incredible depth.
I make patterns using different paint finishes – matte and glossy black – for a sophisticated, tone-on-tone effect.
My clients often touch these pumpkins, surprised by the visual interest. I recommend this design for upscale Halloween parties or elegant fall gatherings.
What You’ll Need:
- Matte black paint
- Glossy black paint
- Stencils (I create custom ones)
- Foam brushes
- Pattern templates
- Clear matte sealant
- Painter’s tape
DIY Steps:
- Apply a matte black base
- Place stencils carefully
- Draw glossy patterns
- Remove stencils immediately
- Let it dry completely
11. Shadow Box Silhouettes
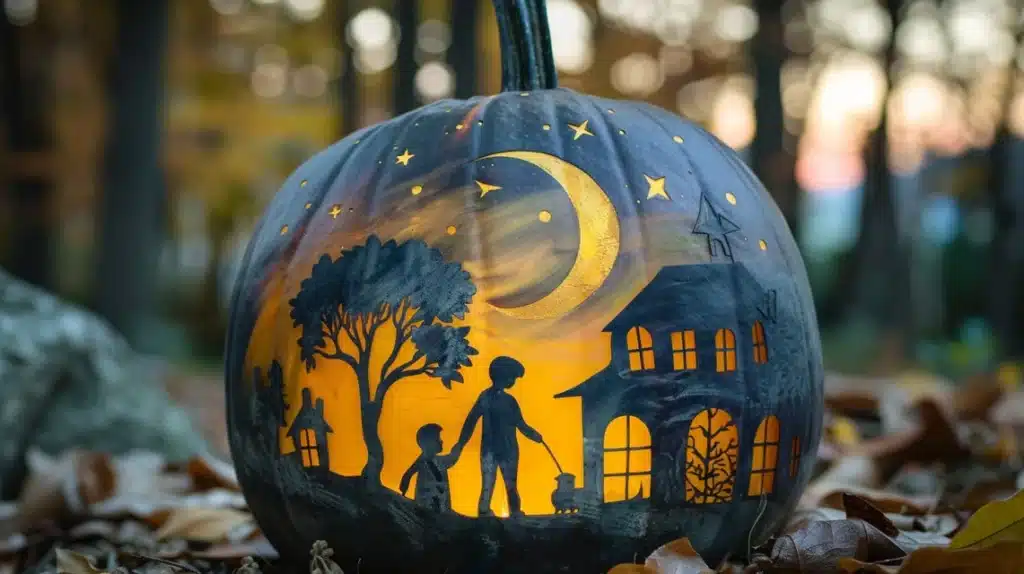
In my home decorating projects, I love creating depth through layered silhouettes.
I paint the base black, then add layers of gray and white to create a shadow box effect. From my experience, scenes with trees, haunted houses, or flying bats work beautifully.
When I display these in my clients, I position them where soft lighting can enhance the dimensional effect. I’ve added tiny white dots in the background, creating a starry night effect that my clients adore.
What You’ll You’ll
- Black base paint
- White and gray acrylic paint
- Detail brushes (my preferred set)
- Silhouette templates
- Clear sealant
- Small sponges
- Reference images
DIY Steps:
- Create a perfect black base
- Layer background elements
- Put middle-ground details
- Finish with foreground silhouettes
- Seal carefully
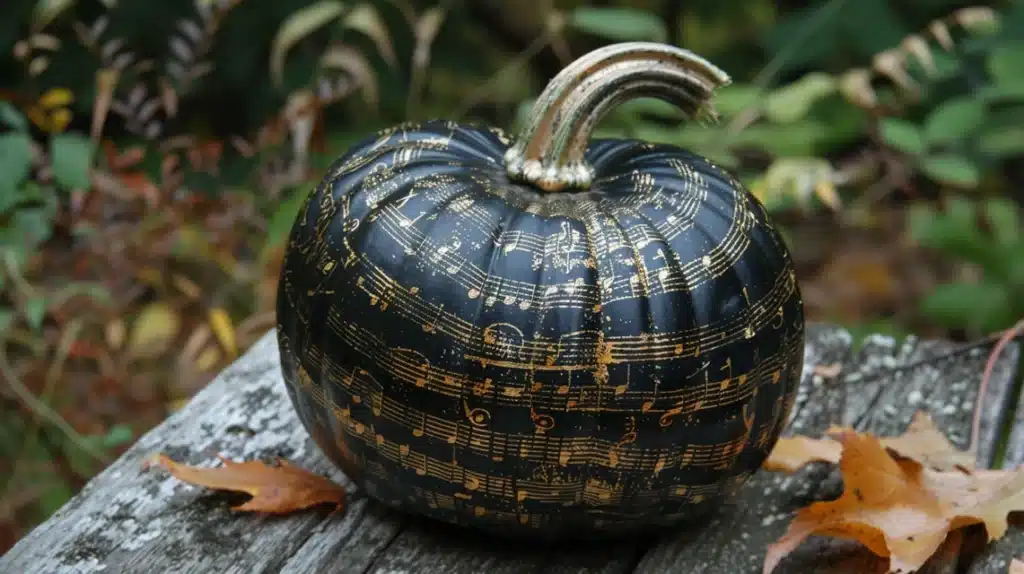
12. Music Notes Design

As a decorator who loves incorporating personal touches, I enjoy painting musical scores on black pumpkins.
I start with staff lines in white, then add notes flowing around the pumpkin. From my experience, actual sheet music makes the best reference.
I often use their favorite pieces when I create these for music’ The curved surface of the pumpkin makes the music appear to dance.
What You’ll You’ll
- Black matte paint
- White paint pen
- Sheet music reference
- Ruler for straight lines
- Clear protective spray
- Light pencil
- Eraser
DIY Steps:
- Paint solid black base
- Draw straight staff lines
- Draw musical notes carefully
- Include any special symbols
- Protect it with sealant
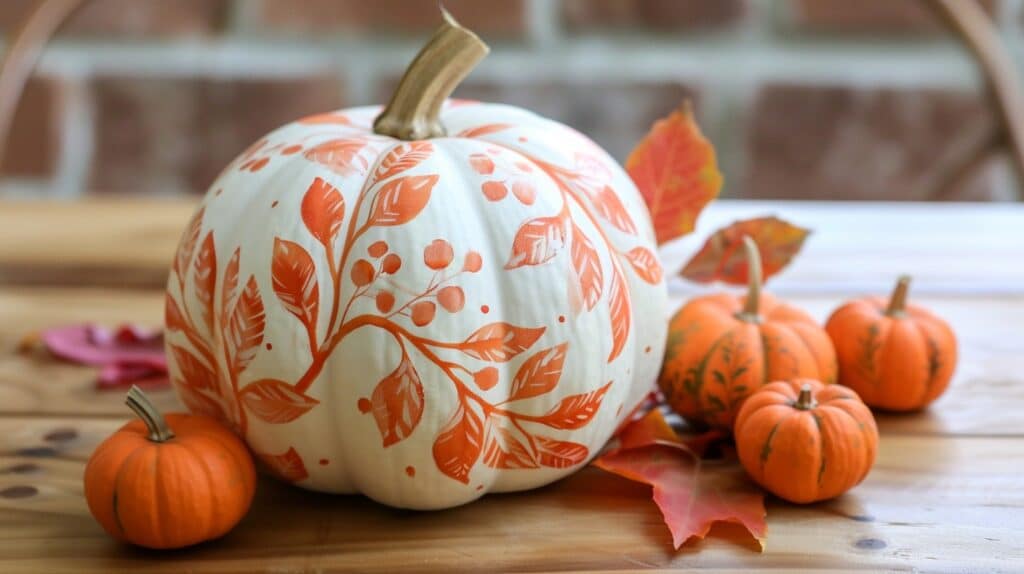
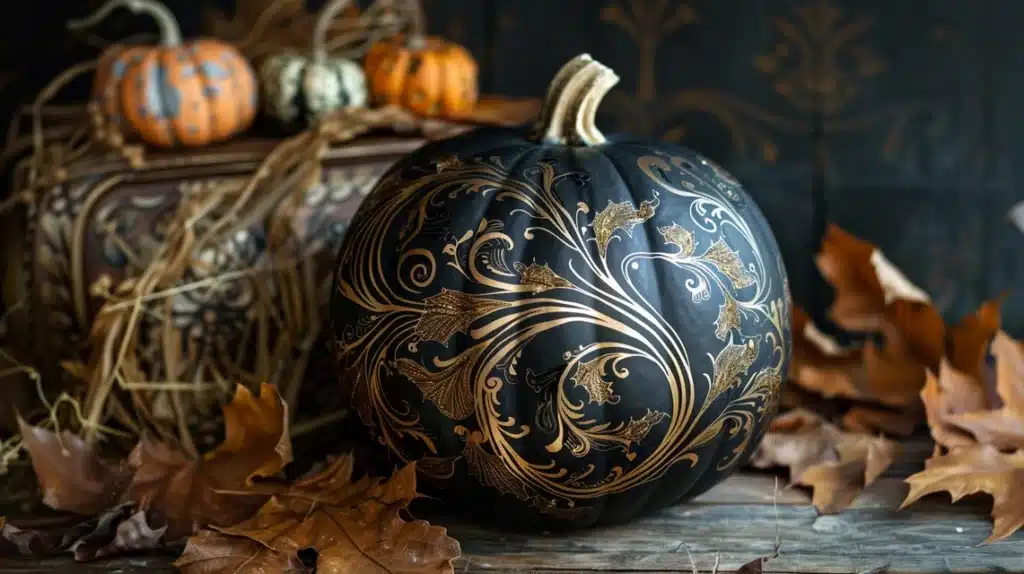
13. Botanical Black
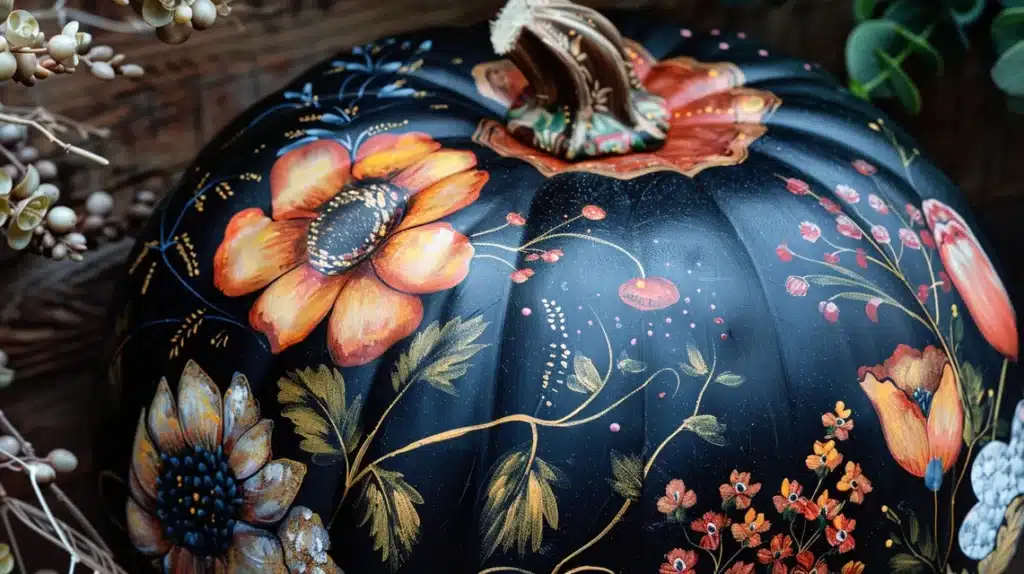
Through my years of decorating, I’ve developed this technique of painting black leaves and vines on black pumpkins using different finishes. I love how subtle yet sophisticated it looks.
My clients often request this design for their formal dining rooms. When I create these, I use glossy paint on matte black for a stunning contrast that changes with the viewing angle.
What You’ll You’ll
- Matte black base paint
- Glossy black paint
- Fine detail brushes
- Leaf templates
- Clear sealant
- Practice paper
- Reference botanicals
DIY Steps:
- Apply matte black thoroughly
- Sketch leaf patterns
- Paint glossy details
- Draw stem elements
- Finish with clear coat
14. Vintage Window Frames
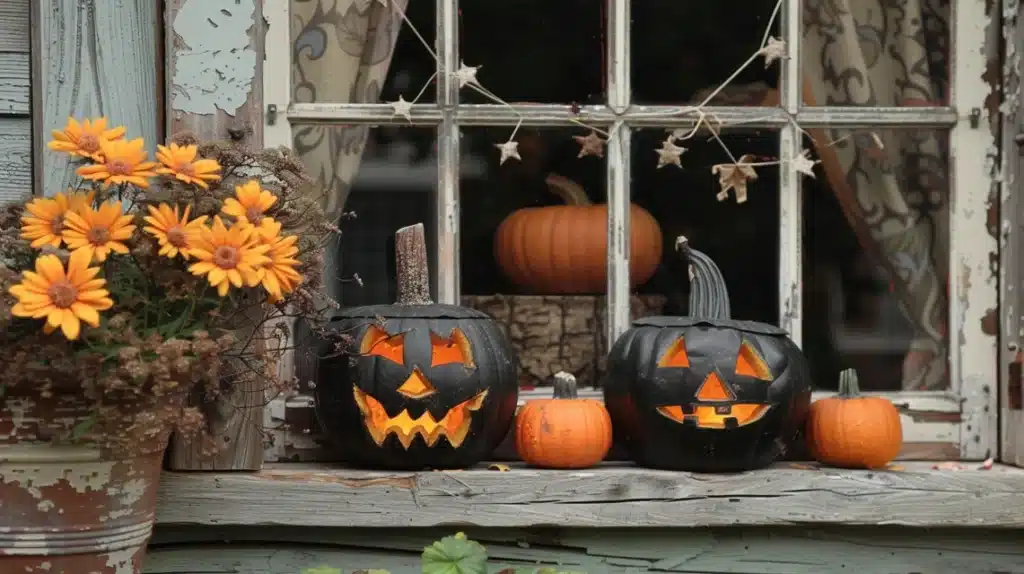
In my design practice, I’ve found that creating window-like sections on black pumpkins offers endless creative possibilities.
I paint white frames to create multiple panels, then add different scenes in each section.
From my experience, this works wonderfully to tell a story around the pumpkin.
When I place these in my clients’ offices, I often position them so they can be viewed from multiple angles. I love adding tiny details like curtains or window boxes.
What You’ll You’ll
- Black base paint
- White acrylic paint
- Thin paintbrush
- Ruler for straight lines
- Measuring tape
- Detail brushes
- Clear sealant
DIY Steps:
- Create a solid black base
- Measure window sections
- Paint white frames
- Draw window details
- Seal completely
15. Art Deco Pattern
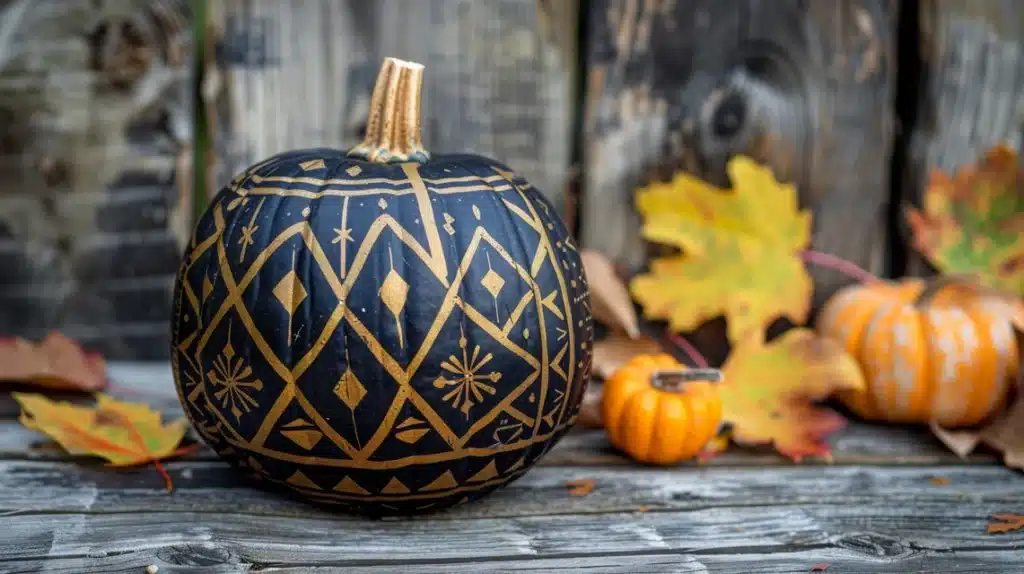
Drawing from my interior design background, I love recreating Art Deco patterns on black pumpkins.
I use metallic paint to create geometric shapes and fan patterns that remind me of 1920s architecture.
My clients particularly appreciate how these designs catch the light at evening parties. For maximum impact, I recommend grouping three different patterns.
What You’ll You’ll
- Black matte paint
- Gold or silver paint
- Geometric stencils
- Fine brushes
- Clear protective coat
- Measuring tools
- Transfer paper
DIY Steps:
- Paint black foundation
- Lay out pattern design
- Draw metallic details
- Connect pattern elements
- Seal with a gloss finish
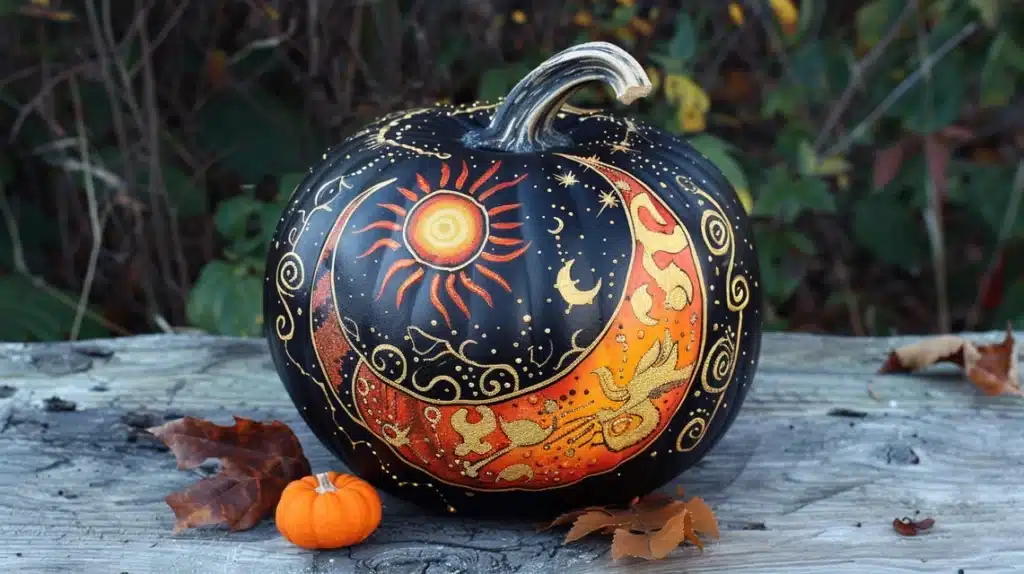
16. Celestial Design
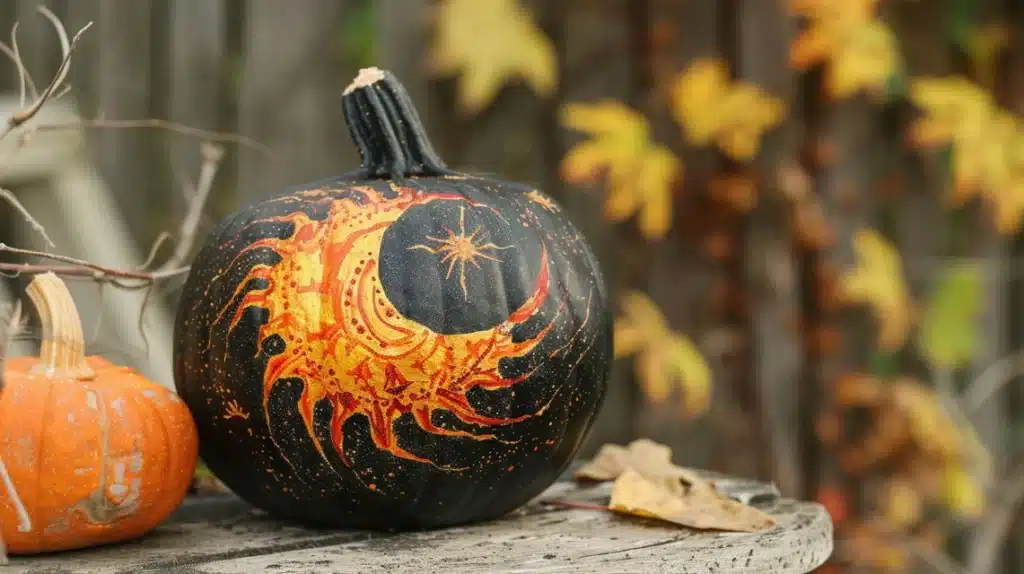
Creating moons, stars, and planets on black pumpkins has become one of my signature styles. I love using shades of white and metallic paints to give depth to each celestial body.
From my experience, adding small crystal rhinestones as stars creates a magical evening sparkle. When I design these for outdoor spaces, I incorporate glow-in-the-dark elements.
What You’ll You’ll
- Black base paint
- White paint
- Metallic silver paint
- Crystal rhinestones
- Strong adhesive
- Detail brushes
- Glow paint
DIY Steps:
- Create night sky base
- Paint major elements
- Draw cosmic details
- Attach crystals
- Finish with glow accents
17. Cityscape Silhouette
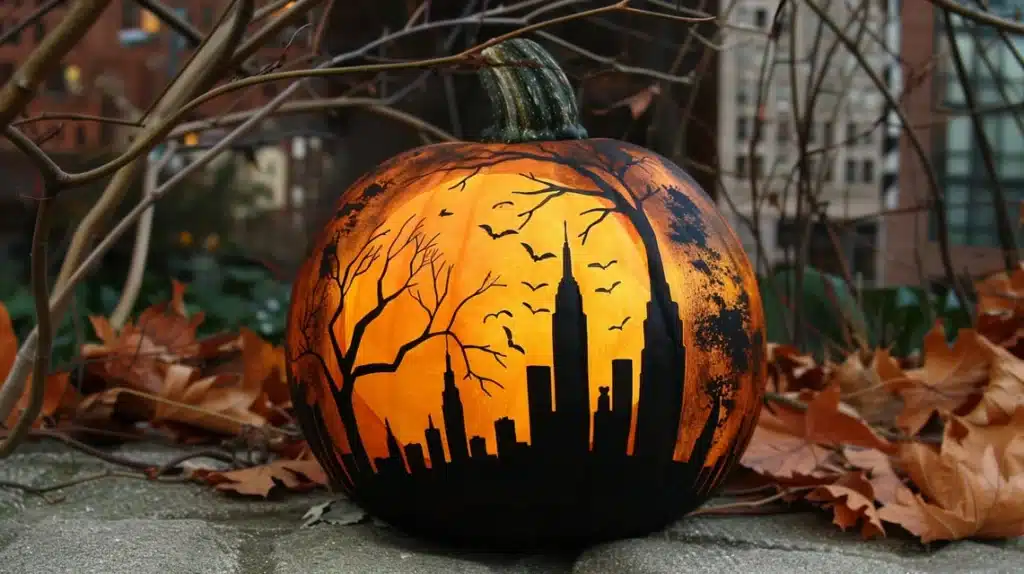
In my decorating projects, I’ve found that Painted landscapes on black pumpkins create striking displays. I paint buildings of varying heights around the pumpkin’s, creating a 360-degree city view.
In my experience, adding tiny white windows brings the scene to life. When I display these in my clients’ homes, they add small yellow dots for lit windows, creating a nighttime city effect that looks magical with candlelight.
What You’ll Need:
- BlaYou’lle paint
- White acrylic paint
- Yellow paint
- Fine detail brushes
- Building templates
- Straight edge
- Dotting tools
DIY Steps:
- Establish a black background
- Outline building shapes
- Draw architectural details
- Paint tiny windows
- Finish with light effects
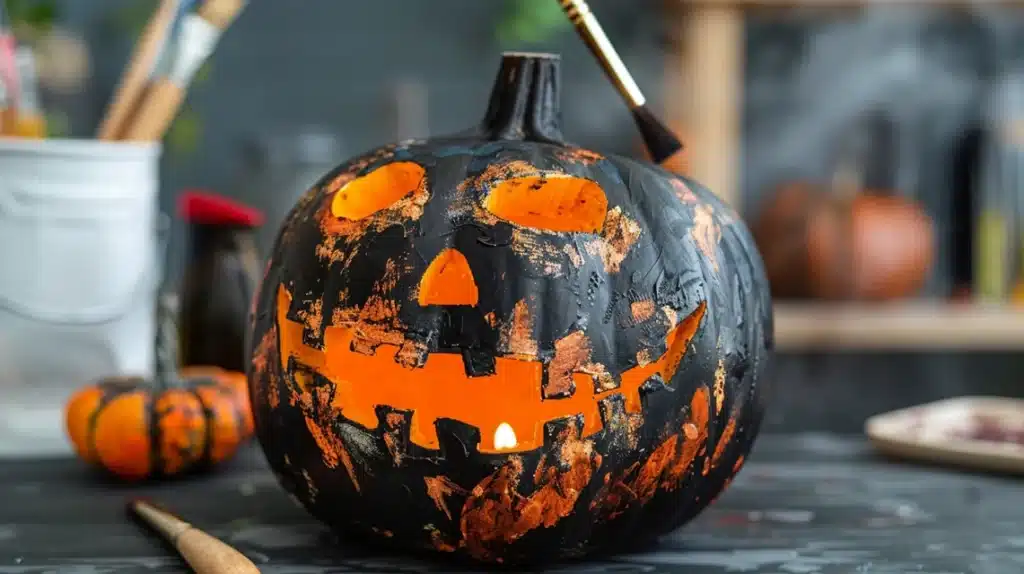
18. Clock Face Design
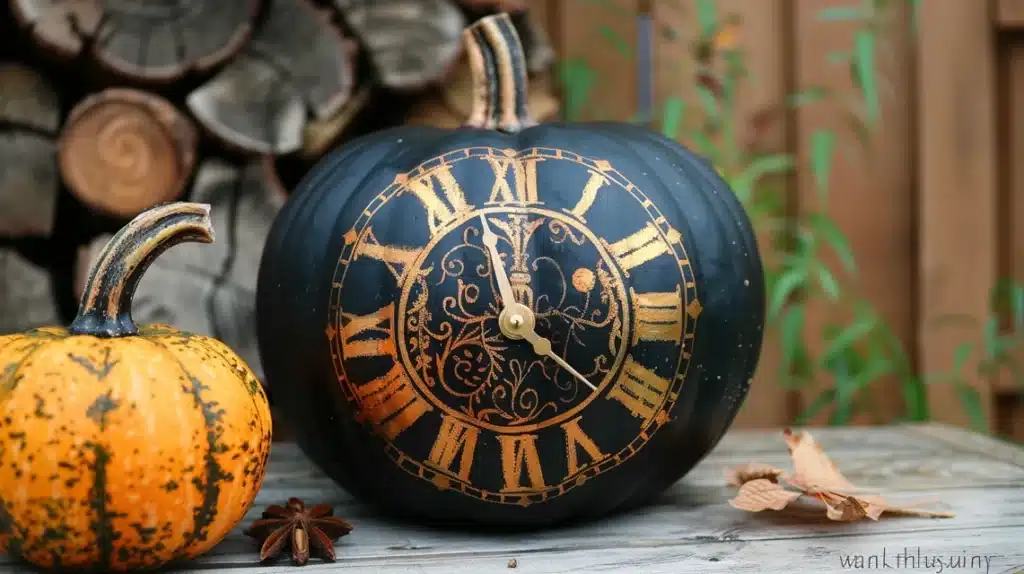
I’ve perfected this spookI’vet sophisticated clock design throughout my decorating career.
I painted Roman numerals in white on the black surface and added ornate clock hands for drama.
From my client’s work, I’ve learned that the client’s lighting in the numbers creates an eerie effect perfect for Halloween.
I often recommend positioning these where they catch the evening light.
What You’ll Need:
- Black matte You’llWhite acrylic paint
- Metallic paint
- Number templates
- Fine brushes
- Compass tool
- Reference images
DIY Steps:
- Paint black base coat
- Mark clock positions
- Draw Roman numerals
- Create ornate hands
- Seal carefully
19. Spider Web Pattern
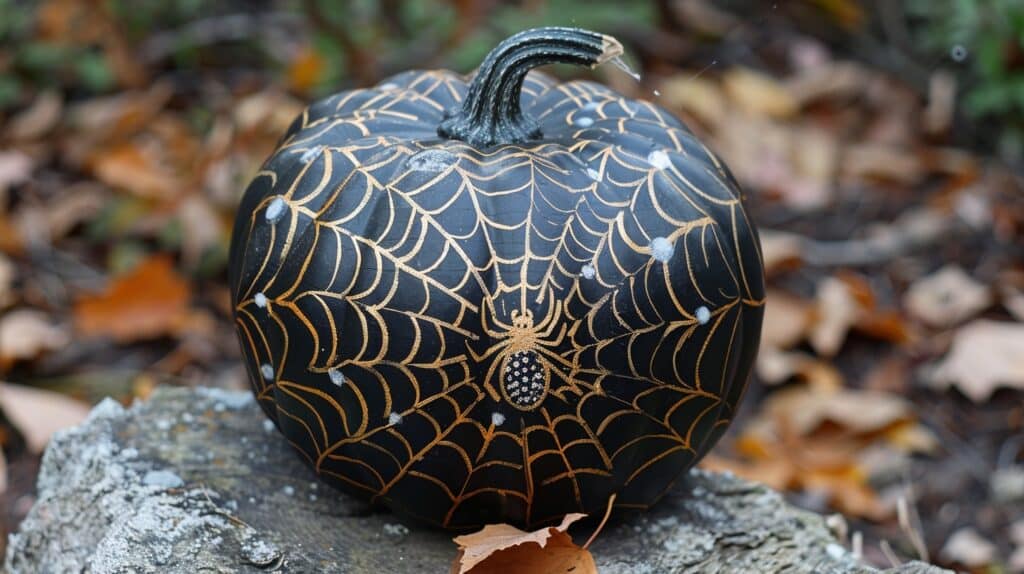
Creating intricate spider webs on black pumpkins has become one of my favorite techniques.
I start with thin white lines and gradually build complexity. My clients love how these catch the light and create shadows.
When I make these for entryways, I sometimes add small silver spiders for extra detail.
What You’ll Need:
- Black base paint
- WhitYou’llt pen
- Silver paint
- Thin brushes
- Small spider decorations
- Clear sealant
- Practice paper
DIY Steps:
- Create a perfect black surface
- Sketch web structure
- Draw connecting threads
- Paint detailed elements
- Attach decorations
20. Mosaic Effect
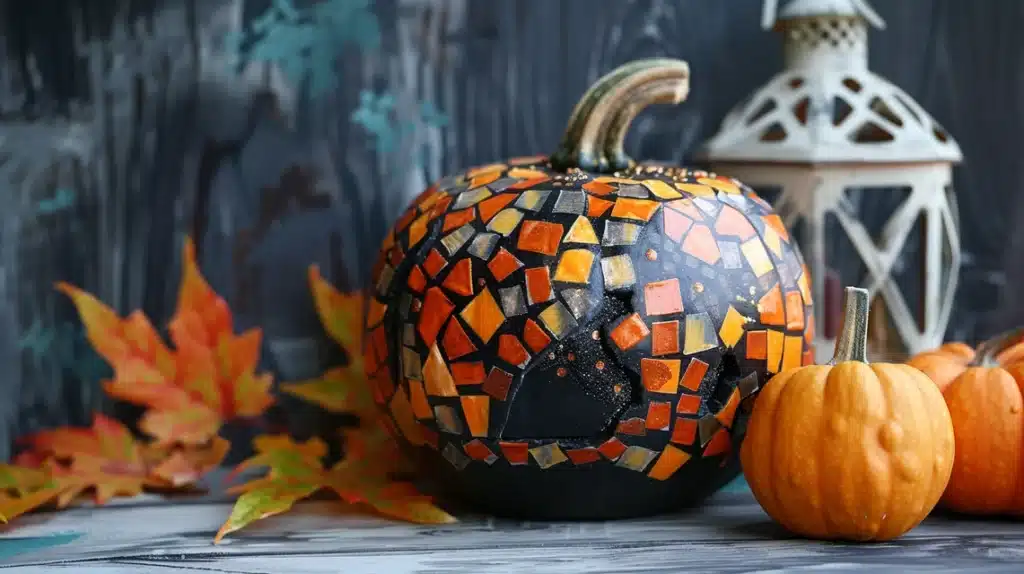
I create a stunning mosaic effect for my final signature design using different black finishes and metallic accents.
I section the pumpkin into geometric shapes, filling each with varying textures. From my experience, this design looks particularly striking under spotlights.
My clients often request this for formal fall gatherings.
What You’ll Need:
- Matte black paint
- Glossy blackYou’ll
- Metallic paints
- Painter’s tape
- Geometric templates
- Various Painter’sealant
DIY Steps:
- Create a base pattern
- Section off areas
- Fill it with textures
- Draw metallic highlights
- Seal with a gloss finish
Creative Designs for Black Pumpkins
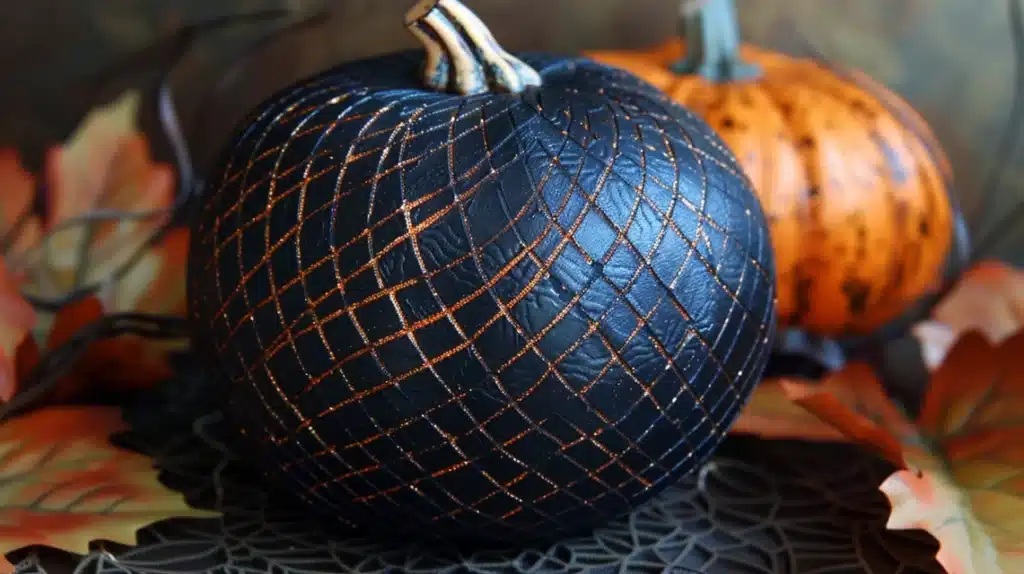
21. Black Lace Overlay

In my design practice, I create this effect by painting the pumpkin black and then temporarily applying actual lace while spraying a light dusting of metallic paint.
From my experience, using real vintage lace creates the most authentic patterns.
When I display these in my clients’ homes, I love positioning them near tables where the metallic details catch the light.
My favorite technique involves layering different lace patterns for added depth.
These pumpkins become conversation pieces at every gathering.
What You’ll Need:
- Black matte paint
- Metallic spray paint
- You’lle lace pieces
- Temporary adhesive
- Clear sealant
- Painter’s tape
- Drop cloth
DIY Steps:
- Paint the blackPainter’sroughly
- Position the lace carefully
- Spray metallic paint lightly
- Remove the lace immediately
- Seal when dry
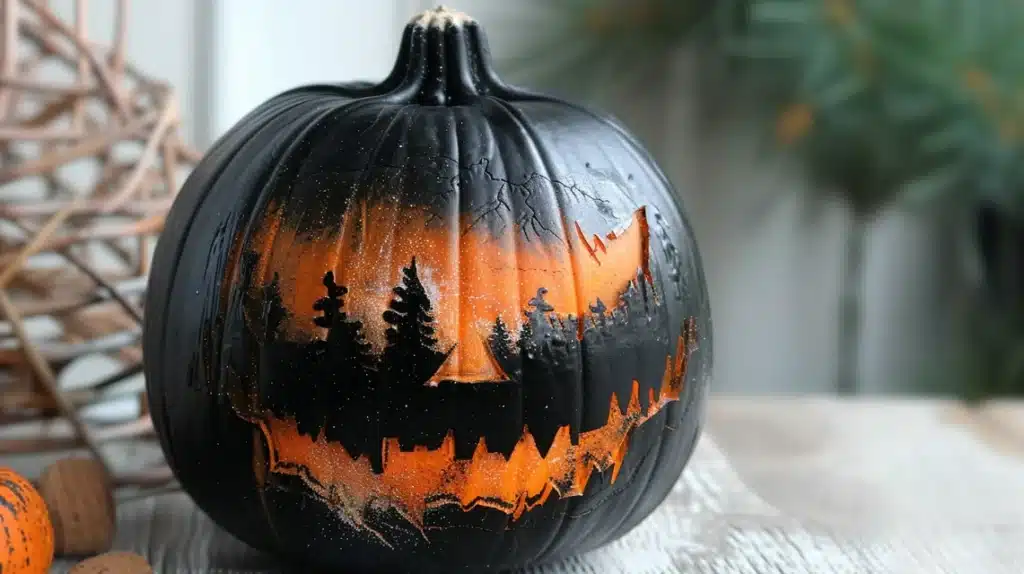
22. Night Forest Scene
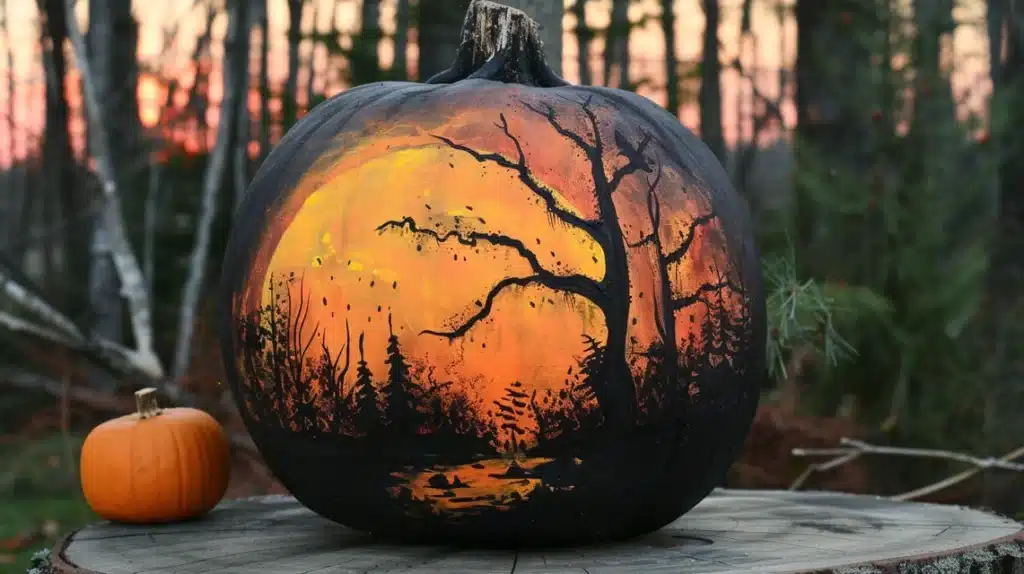
From my design experience, painting a layered forest scene with different black finishes creates stunning depth.
I start with a matte black base, then add glossy black trees in various sizes.
When I create these for my home displays, I often incorporate tiny silver stars between branches. My clients particularly love how the scene changes as they walk around the pumpkin, revealing new details from every angle.
What You’ll Need:
- Matte black paint
- Glossy black paint
- Silver paintYou’lltemplates
- Various brushes
- Pencil
- Clear sealant
DIY Steps:
- Create a matte background
- Layer foreground trees
- Draw middle-ground elements
- Paint silver stars
- Seal with satin finish
23. Black Damask Pattern
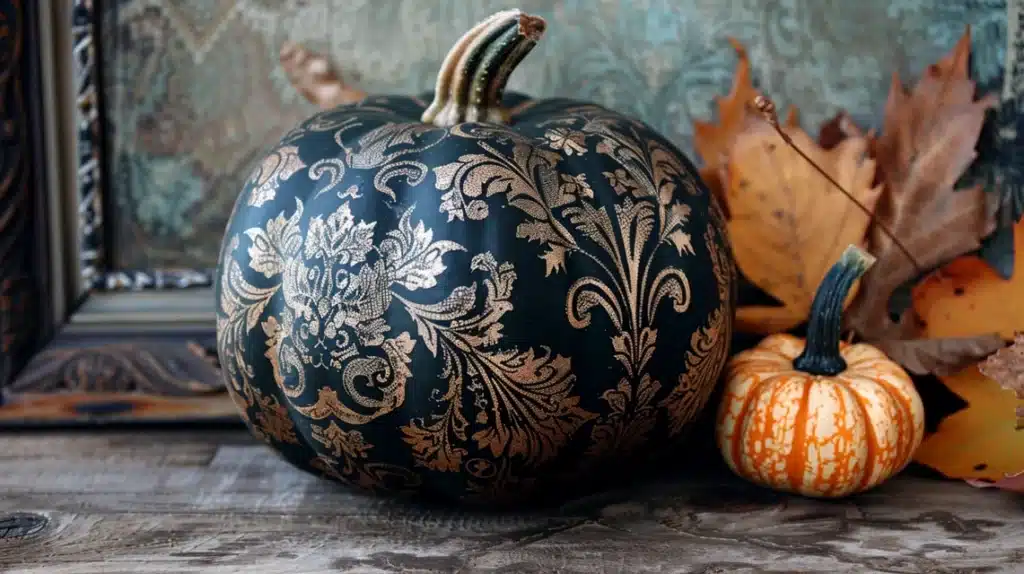
As a decorator, I love creating Victorian-inspired damask patterns using different black finishes. I paint intricate repeating patterns in glossy black over a matte base.
From my experience, this subtle contrast creates elegant depth that works beautifully for formal settings. My clients often request these for dining room displays.
What You’ll Need:
- Matte black base paint
- Glossy black paint
- Damask stencils
- Detail bYou’ll
- Transfer paper
- Painter’s tape
- Protective finish
DIY Steps:
- Apply a matte foundation
- Position stePainter’sefully
- Paint glossy pattern
- Draw connecting elements
- Seal completely
24. Zodiac Design
In my decorating work, I’ve developed the technique of painting zodiac symbols in metallic paint on black pumpkins.
I’ve a spiral pattern of constellations around the pumpkin, connecting them with subtle dots.
When I display these at client events, they become wonderful conversation starters.
What You’ll Need:
- Black base paint
- Gold or silver paint
- Zodiac templates
- Fine brushes
- Dotting tools
- You’llce paper
- Clear coat
DIY Steps:
- Paint a perfect black base
- Sketch a constellation layout
- Draw zodiac symbols
- Connect with star patterns
- Finish with sealant
25. Vintage Film Reel
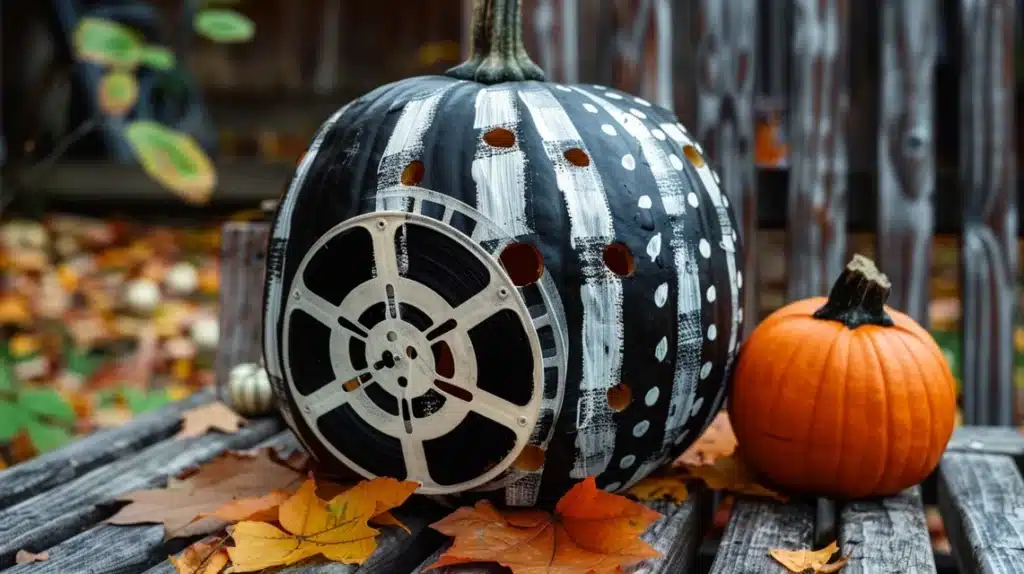
Creating a film strip effect on black pumpkins has become a unique specialty in my years of decorating. I paint horizontal stripes of glossy black on matte black, then add tiny white frame numbers and sprocket holes.
When I place these in entertainment rooms, I sometimes include famous movie scene silhouettes within the frames. My clients who love cinema particularly appreciate this design’s nostalgic appeal.
What You’ll Need:
- Matte black paint
- Glossy black paint
- White paint pen
- Detail brusheYou’llr sealant
DIY Steps:
- Create a matte base
- Draw glossy stripes
- Paint frame details
- Put the number of each section
- Seal carefully
26. Black Cherry Blossom
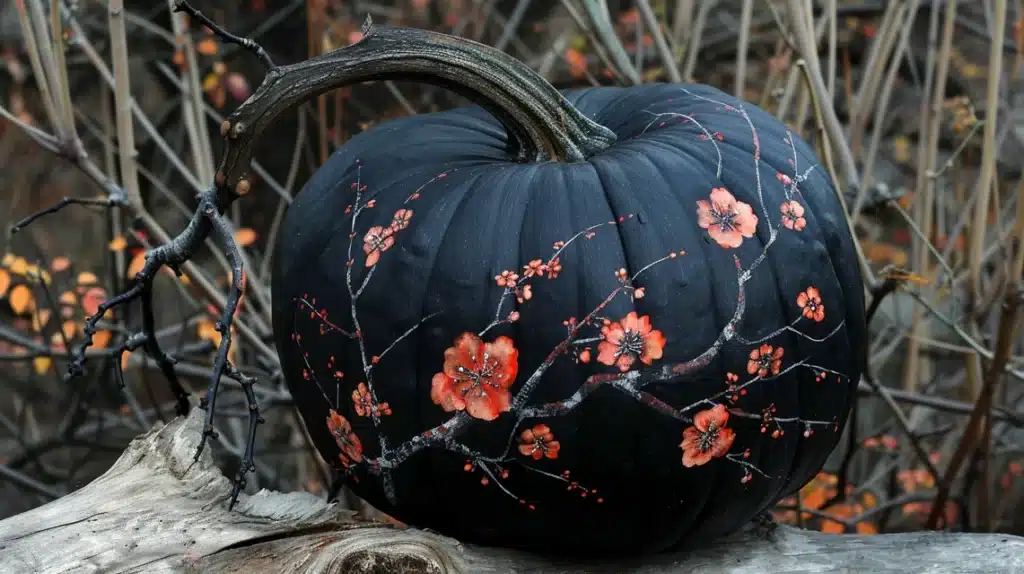
As a decorator, I love painting delicate cherry blossom branches in glossy black over a matte black base. I add tiny metallic centers to each flower for a subtle sparkle.
From my experience, this design brings Asian-inspired elegance to fall decor. When I create these for clients, I often position them where evening light catches the glossy details.
What You’ll Need:
- Matte black paint
- Glossy black paint
- Metallic paint
- Branch templates
- Fine brushes
- Dotting tools
- PrYou’llve finish
DIY Steps:
- Paint matte foundation
- Create a branch structure
- Sketch blossom details
- Draw dot metallic centers
- Seal it with a gloss coat
27. Musical Soundwave
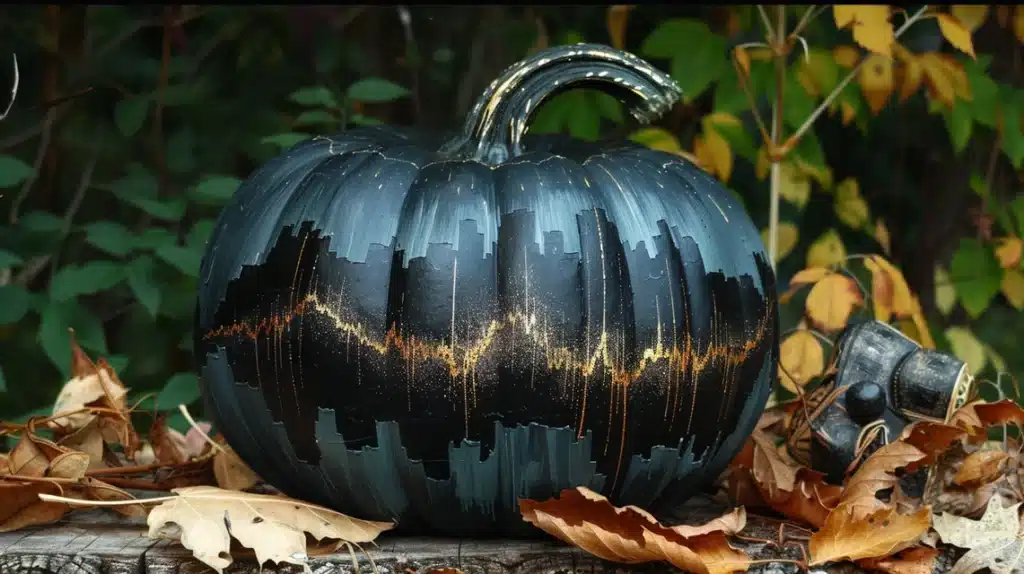
Creating a soundwave pattern around black pumpkins has become one of my signature designs.
I paint an abstract representation of sound frequencies in metallic silver, making each line unique.
My clients often request their favorite song’s actual soundwave pattern, making it personally meaningful.
What You’ll Need:
- Black matte paint
- Soundwave reference
- Fine brushes
- Measuring tape
DIY Steps:
- Create a black background
- Mark wave pattern
- Paint silver lines
- Painter’sency details
- Protect it with a finish
28. Optical Illusion
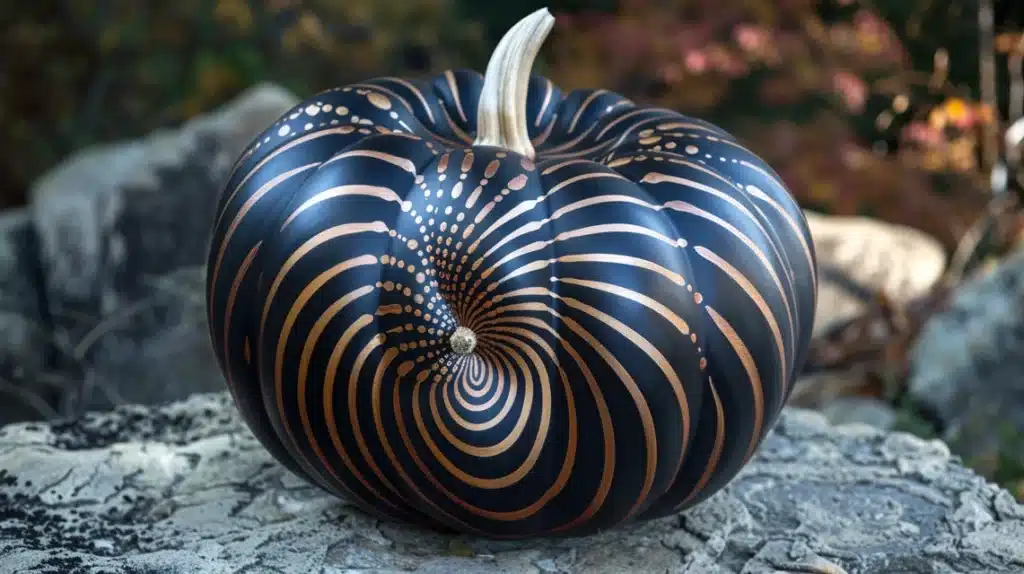
I love creating mesmerizing optical illusions on black pumpkins in my decorating practice.
I paint intricate patterns using different black finishes, creating a design that seems to move as you walk around it.
From my experience, concentric circles or spiral patterns work best. When I display these in my clients’ homes, I position them where natural light shifts throughout the day, creating changing effects.
What clients’eed:
- Matte black paint
- Glossy black paint
- Geometric templates
- Fine brushes
- Compass tool
- Ruler
- Clear coaYou’llSteps:
- Paint matte foundation
- Draw pattern guidelines
- Put on glossy elements
- Create depth effects
- Seal completely
29. Vintage Book Cover

Drawing from my design background, I transform black pumpkins into antique book spines.
I paint ornate frames and lettering in metallic gold, adding small flourishes typical of Victorian-era books.
My clients, who love literature, particularly appreciate these pieces. I often include actual book titles or create spooky original ones.
What You’ll Need:
- Black base paint
- Gold metallic paint
- Letter stencils
- Detail brushes
- Transfer paper
- Reference imageYou’lling spray
DIY Steps:
- Create a black base
- Design frame elements
- Put on lettering carefully
- Paint decorative details
- Seal it with a matte finish
30. Clock Gear Pattern
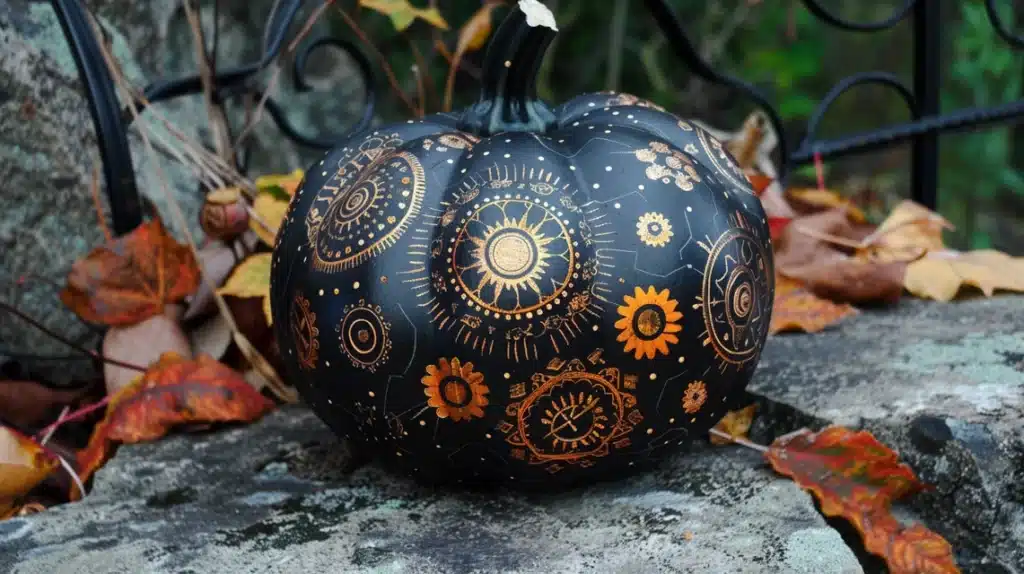
Throughout my decorating career, I’ve perfected this steampunk-inspired design. I paint various gears of different sizes using black finishes and metallic accents.
The mechanical elements add industrial charm when I create these for home offices or libraries.
My technique involves layering gears for a three-dimensional effect.
What You’ll Need:
- Matte black paint
- Glossy black paint
- Copper/bronze paint
- Gear templates
- Various brushes
- Measuring You’llProtective spray
DIY Steps:
- Paint a black background
- position large gears
- Put on smaller elements
- Create metallic highlights
- Seal thoroughly
31. Black Architectural Detail
I love recreating famous building details on black pumpkins in my design work.
I paint Gothic arches, flying buttresses, and ornate windows using varying black finishes.
From my experience working with historic homes, adding tiny metallic highlights to mimic aged stone creates authenticity.
My clients enjoy it when I incorporate elements from their favorite landmarks into the design.
What You’ll Need:
- Matte black paint
- Glossy black paint
- Silver/gold paint
- Architecture templates
- Fine detail brushes
- You’llht edge
- Clear sealant
DIY Steps:
- Establish base layer
- Sketch architectural elements
- Put on structural details
- Highlight key features
- Seal it with protection
32. Circuit Board Design

Creating electronic circuit patterns on black pumpkins brings a modern tech style to fall decor.
I paint thin metallic lines connecting various geometric shapes, mimicking computer circuitry.
When I display these in contemporary spaces, they fit perfectly with modern décor.
My clients in the tech industry especially appreciate this design.
What You’ll Need:
- Black matte paint
- Silver metallic paint
- Circuit references
- Fine line brushes
- Ruler
- Geometric stencYou’llotective finish
DIY Steps:
- Paint black foundation
- Map circuit paths
- Draw connection points
- create metallic lines
- Seal carefully
33. Moon Phases
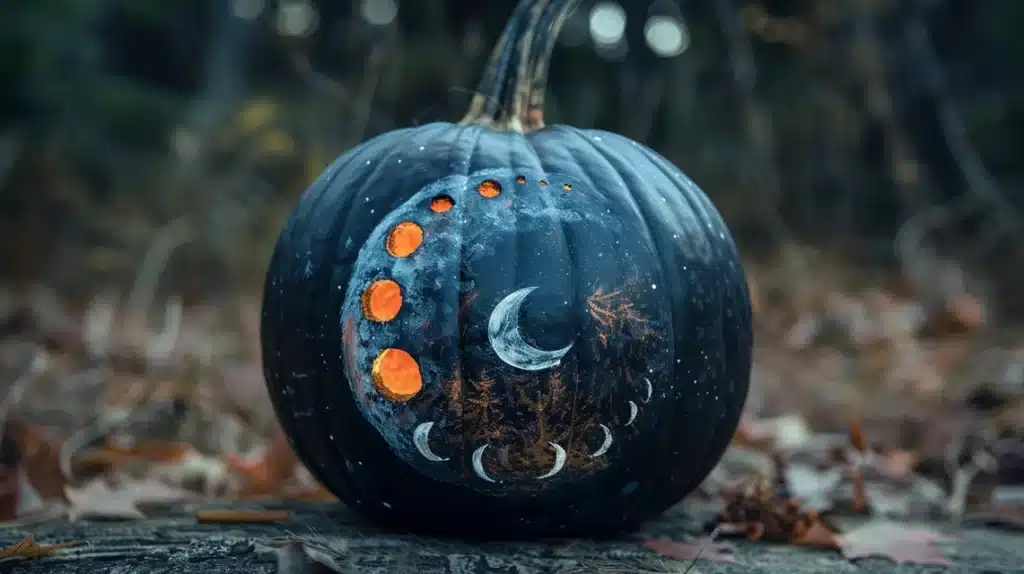
Throughout my decorating experience, painting moon phases around black pumpkins creates stunning results.
I use different silvery whites to show each phase, connecting them with tiny stars.
From my practice, adding subtle gray shadows enhances the dimensional effect.
When I create these for outdoor displays, they look magical in the evening light.
What You’ll Need:
- Black base paint
- White/silver paint
- Gray shading paint
- Moon templates
- Various brushes
- Star stencilYou’llr coat
DIY Steps:
- Create a perfect black base
- Position moon phases
- Put on shadowing details
- Paint connecting stars
- Finish with sealant
34. Morse Code Message
As a decorator, I love creating mysterious patterns using Morse code dots and dashes in metallic paint on black pumpkins.
I wrap secret messages around the entire surface, making them decorative and interactive.
From my experience, using copper paint creates a vintage telegraph look. When I make these for clients, I often incorporate their family names or favorite quotes.
What You’ll Need:
- Black matte paint
- Copper metallic paint
- Morse code chart
- Fine brush
- Ruler
- Measuring tape
- Clear sealant
DIY Steps:
- Paint black background
- Plan message layout
- Put on dots and dashes
- Space elements properly
- Seal with protection
35. Black Persian Rug Pattern
Drawing from my interior design background, I recreate intricate Persian carpet patterns using different black finishes.
I paint elaborate geometric and floral motifs, building layers of detail.
My clients love how these sophisticated designs complement their fall decor. When I display them, I often group three different patterns.
What You’ll Need:
- Matte black paint
- Glossy black paint
- Pattern references
- Detail brushes
- Transfer paper
- Template tooYou’lltective finish
DIY Steps:
- Create a matte base
- Outline the main pattern
- Fill detailed sections
- Draw border elements
- Seal thoroughly
36. Black Microphone Pattern
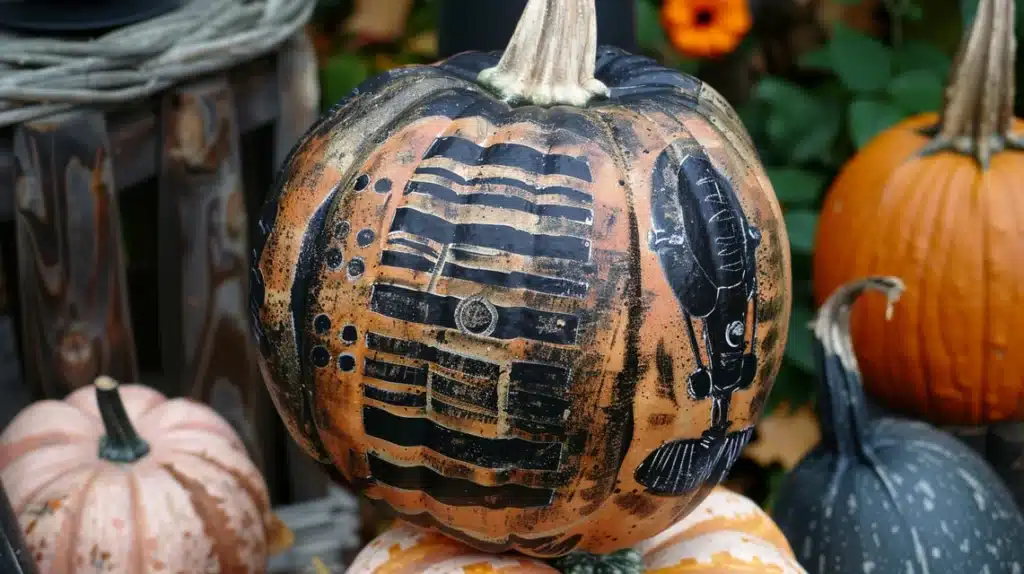
In my decorating practice, I’ve developed this unique design featuring vintage microphone silhouettes in varying sizes.
I paint them in diI’veent black finishes with metallic accents for the grills.
When I create these for music rooms or entertainment spaces, they become perfect conversation pieces.
My technique involves layering the designs for depth.
What You’ll Need:
- Matte black paint
- Glossy black paint
- Silver metallic paint
- Microphone templates
- Various brushes
- DeYou’llools
- Clear coat
DIY Steps:
- Paint base layer
- Position microphones
- Draw metallic details
- Create depth effects
- Seal completely
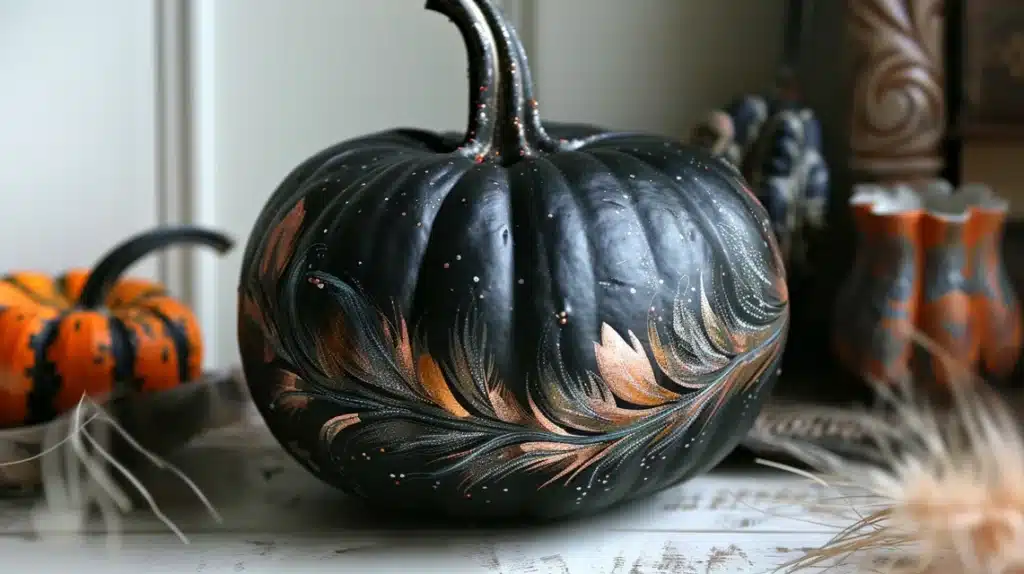
37. Black Feather Design
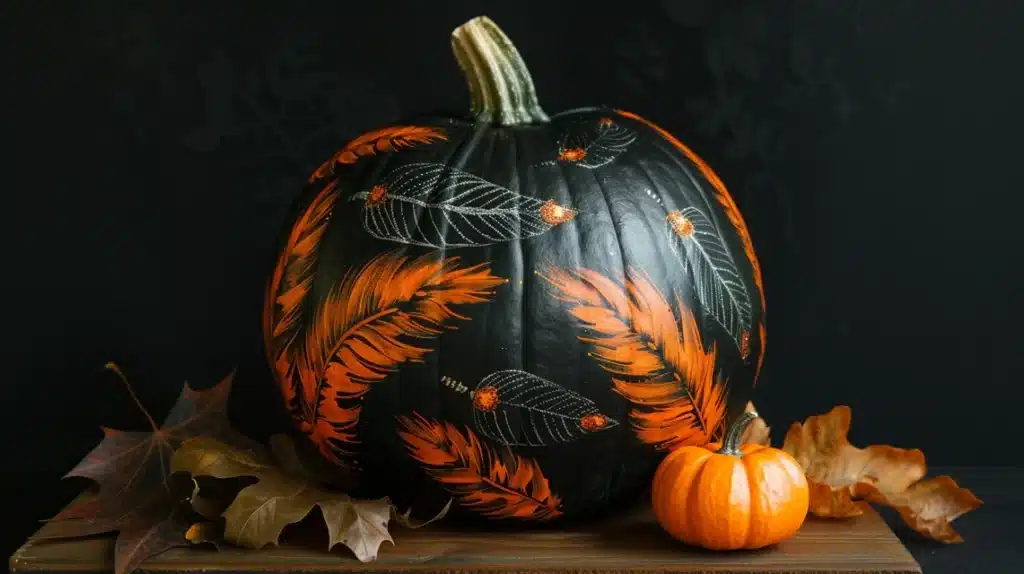
Throughout my decorating career, I’ve perfected painting delicate feather patterns using different black finishes.
I create overlapping feathers.
I’ve spiraled around the pumpkin, adding tiny metallic highlights for dimension.
From my experience, varying the feather sizes creates a natural flow. When I display these in my client’s homes, I often position them where the light catches the glossy details.
What You’ll Need:
- Matte black paint
- Silver metallic paint
- Feather templates
- Fine brushes
- PracticeYou’ll
- Clear sealant
DIY Steps:
- Create a matte foundation
- Sketch a feather layout
- Paint layered details
- Draw metallic accents
- Seal it with protection
38. Black Sheet Music Swirl
As a decorator who loves musical themes, I paint musical notes and staff lines that swirl around the pumpkin in a spiral pattern.
I use different black finishes to create depth, adding tiny metallic accents to keynotes.
When I make these for musicians’ homes, they often request specific musical pieces.
What You’ll Need:
- Matte black paint
- Glossy black musicians’ metallic paint
- Music references
- Detail brushes
- Curved ruYou’llotective spray
DIY Steps:
- Paint black base
- Create staff lines
- Draw musical notes
- Highlight key elements
- Seal carefully
39. Black Art Nouveau
Drawing from classic design, I create flowing Art Nouveau patterns using different black finishes.
I paint curves and natural forms characteristic of the style, adding subtle metallic highlights.
From my experience, this design works beautifully for formal settings.
My clients appreciate how these blend historic and modern elements.
What You’ll Need:
- Matte black paint
- Glossy black paint
- Gold paint
- Art Nouveau templates
- Fine brushes
- Transfer paper
- You’llfinish
DIY Steps:
- Establish a base coat
- Outline main design
- Draw flowing details
- Create highlights
- Seal thoroughly
40. Black Stone Texture
In my final signature design, I create a marble or granite effect using various black finishes and metallic veining.
I layer different techniques to mimic natural stone patterns.
When I display these in contemporary spaces, they add sophisticated texture.
My method involves building multiple layers for authentic depth.
What You’ll Need:
- Matte black paint
- Satin black paint
- Metallic paints
- Natural sponges
- Various brushes
- Plastic wrap
- SYou’ll
DIY Steps:
- Create a textured base
- Layer black finishes
- Draw veining details
- Create natural effects
- Seal it with gloss
Basic Painting Black Pumpkin Techniques
41. Solid Black Base Coating
As a home decorator, I’ve found that mastering the perfect black base is essential for any design.
I always start with a clean pumpkin and apply thin, even layers. Rushing this fundamental step ruins the final result.
When I teach this technique to clients, I emphasize patience between coats.
Proper preparation and drying time create the smoothest finish throughout the season.
What You’ll Need:
- Black matte acrylic paint
- Wide foam brushes
- Paper towels
- Primer (optional)
- Cleaning cloth
- Drop cloYou’llar sealant
DIY Steps:
- Clean surface thoroughly
- Apply a first thin coat
- Let it dry completely
- Paint a second coat
- Seal when dry
42. Spray Paint Method
In my years of decorating, I’ve refined the spray painting technique for smooth, even coverage.
I always set up a properly ventilated workI’vee and rotate the pumpkin while spraying.
From my experience, multiple light coats prevent drips and ensure complete coverage. When I teach this method to clients, I emphasize the importance of distance and movement for professional results.
What You’ll Need:
- Black spray paint
- Drop cloths
- Disposable gloves
- Protective mask
- Turntable base
- Cleaning wipes
- CleaYou’lly sealer
DIY Steps:
- Prepare ventilated space
- Clean the pumpkin surface
- Apply the light first coat
- Rotate and repeat
- Seal when dry
43. Sponge Application
Through my decorating practice, I’ve found that natural sponge application creates interesting texture.
I dab rather than stroke the paint build up layers gradually.
My clients love how this technique adds subtle depth to solid black pumpkins.
When I create these, I vary the pressure for different effects.
What You’ll Need:
- Black matte paint
- Natural sponges
- Paint tray
- Protective gloves
- Base primer
- Paper towels
- Sealant
DIYou’lls:
- Prime the surface
- Dampen the sponge slightly
- Apply paint in layers
- Build texture gradually
- Seal to protect
44. Dry Brush Technique
As a decorator, I use dry brushing to create subtle texture variations in black.
I load minimal paint on a stiff brush and apply it with light strokes.
This method works particularly well for rustic or vintage looks. My technique involves building layers slowly for depth.
What You’ll Need:
- Black acrylic paint
- Stiff bristle brushes
- Paper plate
- Paper towels
- Base coat
- Clear finish
- PracticeYou’llce
DIY Steps:
- Apply a base coat
- Remove excess paint
- Brush lightly
- Layer gradually
- Seal finish
45. Chalk Paint Application
In my decorating experience, chalk paint creates a perfect matte black finish.
I apply it with smooth, even strokes, and it adheres beautifully to pumpkin surfaces. From my practice, this painting requires minimal prep work.
When I demonstrate this technique to clients, they’re always impressed by how the velvety finish catches light differently than regular paint.
What You’ll Need:
- Chalk paint
- Wide flat brushes
- Cleaning cloth
- Wax sealant
- Paint stirrer
- Drop cloth
- ProtectiveYou’lls
DIY Steps:
- Clean the surface lightly
- Stir the paint thoroughly
- Apply even strokes
- Check coverage
- Seal it with wax
46. Paint Pen Method
As a decorator, I use black paint pens for precise coverage. I work in small sections, ensuring that applications are even.
From my experience, these pens work perfectly for reaching stem areas and creases.
My clients appreciate how this technique allows for detailed control.
What You’ll Need:
- Black paint pens
- Cleaning wipes
- Paper towels
- Fine tip pens
- Broad tip pens
- Clear sealant
DIY Steps:
- Clean thoroughly
- Test pen flow
- Work systematically
- Build coverage
- Seal completely
47. Rolling Technique
I’ve found that small foam rollers create perfectly smooth finishes throughout my career.
I roll in different directions for completeness. When I teach this method, I emphasize gentle pressure for the best results.
My technique ensures no brush marks or streaks.
What You’ll Need:
- Black acrylic paint
- Small foam rollers
- Paint tray
- Extra roller covers
- Base primer
- Drop cloth
- SealiYou’llay
DIY Steps:
- Prime surface
- Load the roller evenly
- Apply systematically
- Check for gaps
- Seal finish
48. Stippling Method
From my decorating practice, I’ve discovered that stippling creates a unique texture on black pumpkins.
I use a stiff brush to tap paint onto the face, building layers gradually. When I demonstrate this to clients, they love how it creates subtle depth.
My technique involves varying the pressure and paint amount for different effects.
What You’ll Need:
- Black acrylic paint
- Stippling brushes
- Paint palette
- Paper towels
- Base coat
- Protective cloth
DIY Steps:
- Apply a base coat
- Load the brush properly
- Tap the paint evenly
- Build texture layers
- Seal when dry
49. Dip Method
As a decorator, I sometimes use the dipping technique for small pumpkins.
I mix the paint to the right consistency and carefully submerge it. Proper paint dilution is crucial, and when I demonstrate this method, I emphasize the importance of the drainage technique.
What You’ll Need:
- Black acrylic paint
- Large container
- Water for mixing
- Drying rack
- Plastic gloves
- Drop cloth
DIY Steps:
- Mix paint properly
- Prepare workspace
- Dip carefully
- Drain excess
- Allow full drying
50. Layered Base Method
Throughout my years of decorating, I’ve perfected this foundational technique.
I apply alternating dark gray and black layers for depth.
When I create this effect, the final black coat reveals subtle undertones. My clients appreciate how this adds sophistication to simple black pumpkins.
What You’ll Need:
- Black paint
- Dark gray paint
- Various brushes
- Sandpaper
- Clean cloths
- Paint palette
- Clear finish
DIY You’ll
- Start with a gray
- Layer carefully
- Blend edges
- Finish with black
- Seal thoroughly
51. Gradient Technique
In my decorating practice, I love creating subtle black gradients. I mix varying amounts of black with dark gray to create different tones.
From my experience, blending while the paint is wet creates the smoothest transitions.
When I teach this method, my clients learn to work quickly but systematically. The key is maintaining wet edges throughout the process.
What You’ll Need:
- Black paint
- Gray paint
- Blending brushes
- Spray bottle
- Paint palette
- Mixing tools
- Sealant
DIY Steps:
- Dam pen the surface slightly
- Apply the lightest tone
- Blend progressively darker
- Seal when dry
52. Two-Brush Method
As a decorator, I often use two brushes simultaneously—one for applying and one for smoothing.
This technique ensures even coverage without streaks.
From my years of experience, this method provides excellent control over the finish. My clients find this especially useful for larger pumpkins.
What You’ll Need:
- Black paint
- Two flat brushes
- Paint tray
- Clean cloths
- Water mister
- Drop cloth
- Clear coat
DIY Steps:
- Apply with the first brush
- Smooth with the second
- Blend edges
- Seal surface
53. Crosshatch Base
I’ve developed this technique for creating subtle texture throughout my decorating career.
I apply paint in patterns, gradually building depth. When I demonstrate this method, I emphasize consistent pressure.
My approach ensures complete coverage while adding visual interest.
What You’ll Need:
- Black matte paint
- Angled brushes
- Paint palette
- Guidelines
- Practice surface
- Clean cloths
- Sealant
DIY Steps:
- Mark guidelines
- Paint horizontal strokes
- Draw vertical layers
- Blend intersections
- Seal completely
54. Dabbing Method

From my years as a decorator, I’ve mastered this technique using wadded cloth to create unique textures.
I dab paint in circular motions but cover slowly. When I teach this method, I show how varying pressure creates different effects.
My clients love how this technique adds subtle dimension to solid black pumpkins.
What You’ll Need:
- Black paint
- Clean cotton cloths
- Paint palette
- Protective gloves
- Base coat
- Extra rags
- Sealant
DIY Steps:
- Apply a base coat
- Prepare dabbing cloth
- Work in sections
- Build texture patterns
- Seal carefully
55. Blending Method
This technique creates smooth transitions between black finishes throughout my decorating practice.
I work with wet paint, using soft brushes to blend edges. Maintaining wet edges is crucial; my approach ensures no harsh lines or transitions.
What You’ll Need:
- Different black finishes
- Soft blending brushes
- Spray bottle
- Paint palette
- Clean cloths
- Practice suYou’llClear finish
DIY Steps:
- Prepare paint mixtures
- Apply first finish
- Blend edges quickly
- Smooth transitions
- Seal when dry
56. Fan Brush Technique
As a decorator, I love using fan brushes for unique texture effects. I flick the brush gently, creating subtle patterns in black.
When I demonstrate this method, clients appreciate how it adds visual interest.
My technique involves building layers gradually for depth.
What You’ll Need:
- Black paint
- Fan brushes
- Paint palette
- Practice board
- Base coat
- Drop cloth
- Protective finish
DIY Steps:
- Apply a base layer
- Load the fan brush
- Create texture patterns
- Build depth gradually
- Seal surface
57. Feathering Technique
I use feathering to create soft, smooth transitions in my decorating work.
I draw the brush lightly across wet paint, creating subtle streaks. This method requires quick work but produces beautiful results.
When I teach this to clients, I emphasize gentle pressure and consistent direction.
What You’ll Need:
- Black paint
- Feathering brush
- Regular brushes
- Paint palette
- Misting bottle
- Clean cloths
- Clear coat
DIY Steps:
- Apply base paint
- Maintain the wet edge
- Feather carefully
- Blend transitions
- Seal thoroughly
58. Padding Method
I’ve refined this technique throughout my career using makeup sponges for ultra-smooth finishes.
I pat the pain gently, building thin layers.
From my practice, this creates a flawless surface. My clients appreciate how this method eliminates brush marks.
What You’ll Need:
- Black paint
- Makeup sponges
- Paint tray
- Base coat
- Extra sponges
- Paper towels
- Sealant
DIY Steps:
- Prepare surface
- Load the sponge lightly
- Pat systematically
- Build coverage
- Seal finish
59. Circular Motion
As a decorator, I’ve developed this technique using circular motions for even coverage.
I work in small sections, maintaining constant pressure. When I demonstrate this method, I focus on overlapping circles, ensuring no spots are missed.
What You’ll Need:
- Black paint
- Round brushes
- Paint palette
- Guide marks
- Clean cloths
- Practice surface
- Clear finish
DIY Steps:
- Section pumpkin
- Work in circles
- Overlap edges
- Check coverage
- Seal completely
60. Layered Finish
In my final basic technique, I combine thin layers of different black sheens.
I build depth gradually, allowing proper drying time. From my experience, this creates rich, lasting color.
When I make this finish, the result has a beautiful dimension.
What You’ll Need:
- Matte black paint
- Satin black paint
- Various brushes
- Drying rack
- Timer
- Clean cloths
- Final sealer
DIY Steps:
- Start with a matte
- Put on satin layers
- Allow proper drying
- Build depth
- Seal carefully
Tips for Long-Lasting Painted Pumpkins
In my fifteen years as a home decorator, I’ve mastered the art of making painted pumpkins last through the entire fall season.
During my journey exploring various preservation methods, I’ve perfected techniques that extend a painted pumpkin’s life from the typical two weeks to over two months.
Through my work with clients ranging from Halloween enthusiasts to high-end interior designers, I’ve learned that success comes down to proper preparation and maintenance.
My method combines traditional preservation with modern paint techniques, resulting in pumpkins that maintain their beauty from early fall through Thanksgiving.
1. Initial Preparation
- Clean with vinegar solution
- Dry for 24 hours minimum
- Check stem condition
- Store in cool place before painting
2. Paint Application Method
- Apply thin, multiple layers
- Let each coat dry completely
- Use exterior-grade paint
- Avoid water-based options
3. Sealing Process
- Seal bottom first
- Apply three protective coats
- Focus on stem area
- Reapply every two weeks
4. Display Location Care
- Rotate position weekly
- Keep from direct sunlight
- Protect from rain exposure
- Place on dry surface
5. Maintenance Schedule
- Check surface weekly
- Clean dust gently
- Touch up paint as needed
- Monitor for soft spots
Conclusion
I love how versatile and stylish black pumpkin painting can be.
It’s a simple and affordable way to add a unique touch to your Halloween decor, whether you’re aiming for spooky, chic, or playful vibes.
Whether you’re going for spooky vibes, elegant designs, or playful patterns, there’s an idea here for everyone to enjoy.
With just a few tools and imagination, you can turn plain pumpkins into eye-catching pieces that elevate your home this season.
I hope these ideas inspire you to try your hand at black pumpkin painting and add a personal touch to your holiday decor.