
If you’re looking to add a personal touch to your kitchen or bathroom, DIY cabinet curtains might be just the solution. In this article, I’ll show you how easy and affordable it is to transform your cabinets with custom curtains that match your style.
DIY cabinet curtains are a great way to hide clutter or give your space a fresh, cozy feel. Whether you’re new to home projects or a seasoned pro, I’ll guide you through the steps to create something beautiful and functional.
This article will help you solve the problem of plain, uninviting cabinets and give you the tools to make them shine. Trust that I’m here to share simple, practical tips that will work for anyone. Ready to get started? Let’s go in!
Why DIY Cabinet Curtains?
When it comes to cabinets, DIY cabinet curtains offer some great advantages over traditional doors. Here’s why you should consider them:
- Simplicity: They’re easy to install. You don’t need to deal with complicated hinges or handles.
- Cost-Effective: Curtains are often cheaper than replacing cabinet doors. Plus, you can find fabric that fits your budget.
- Flexibility: You can choose any fabric that matches your style. From bold prints to soft neutrals, the options are endless.
What’s even better? You can customize your curtains to fit your space. Whether you want a sleek, modern look or something more rustic, the choice is yours.
With DIY cabinet curtains, you’re in control. They’re simple, affordable, and personalized—it doesn’t get much better than that.
Materials You’ll Need
Before we start, let’s discuss what you’ll need. Don’t worry—it’s simple. I’ll walk you through it.
1. Fabric
Choose a fabric that matches your style. Consider durability – will it hold up over time? Cotton, linen, and canvas are great options. You can go for bold prints or neutral shades.
2. Curtain Rods, Tension Rods, or Hardware
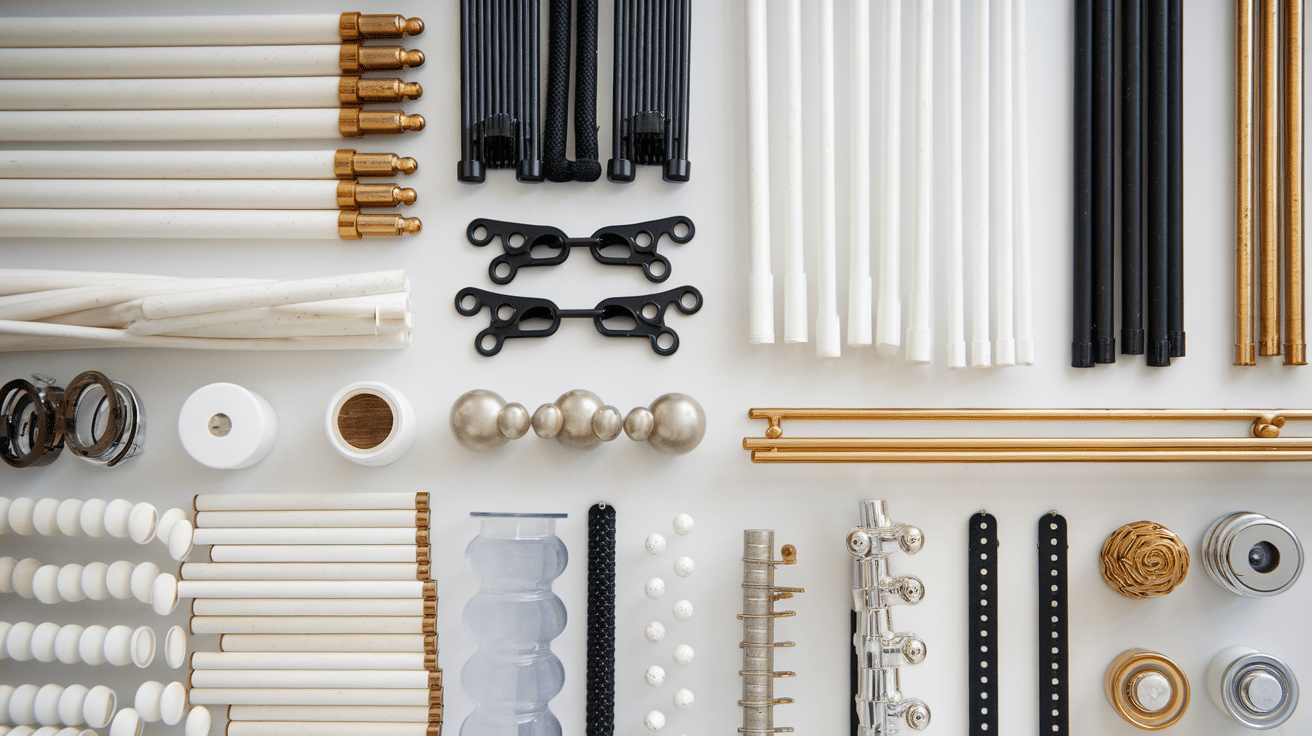
You’ll need a way to hang your curtains. For a more traditional look, you can use a curtain rod, or you can use a tension rod if you want something easy to install without drilling. Different types of hardware are also available if you want a more custom setup.
3. Sewing Essentials

If you’re sewing, you’ll need some basic tools:
- Needle
- Thread
- Scissors
- Measuring tape But hey, if you’re not into sewing, no problem! You can use no-sew options like fabric glue or iron-on tape.
4. Optional Embellishments
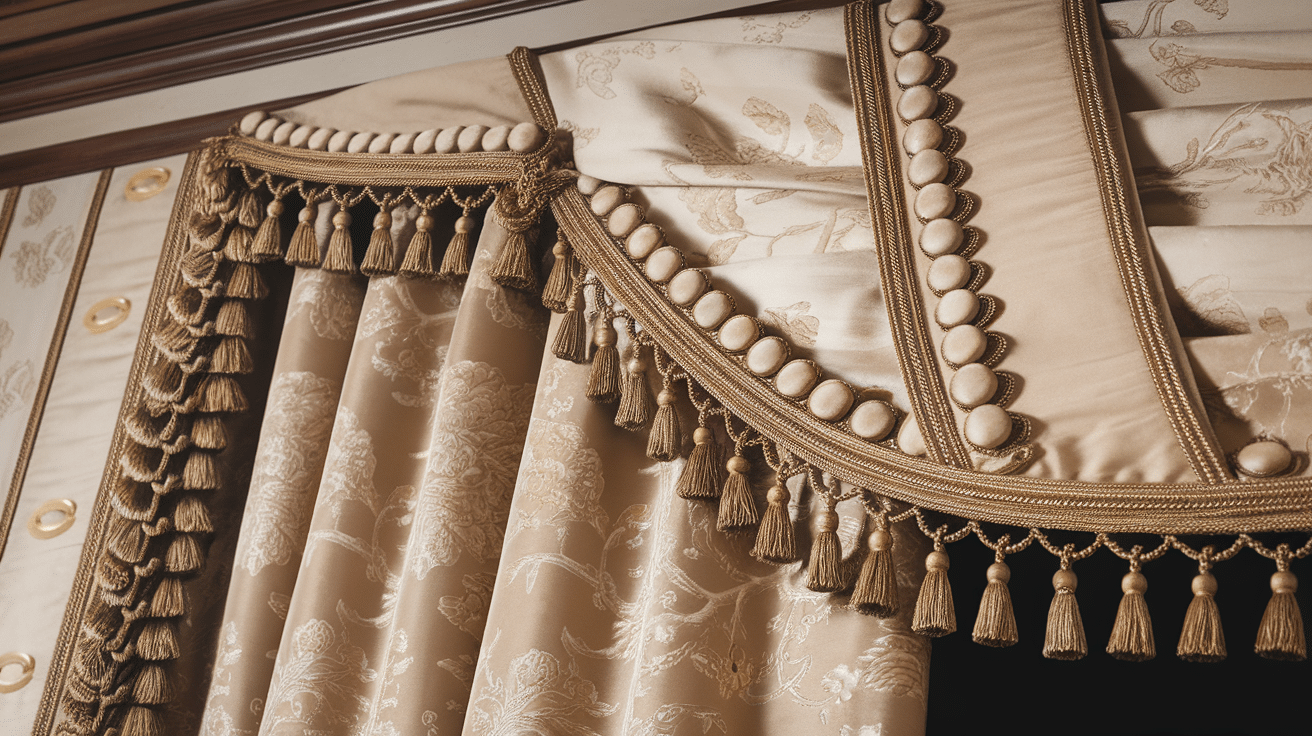
Want to add a little flair? Consider trim, tassels, or buttons to give your curtains extra style.
Now you’ve got everything you need. Let’s move on to the fun part – making your curtains!
How to Measure and Plan Your Cabinet Curtains
Now, let’s get to the important part: measuring. Don’t worry, it’s easy. I’ll guide you through it.
Measure the Width of Your Cabinet
Start by measuring the width of your cabinet. Use a tape measure to get an accurate number. It’s best to measure in a few places just to be sure it’s even across the top and bottom. If your cabinet is wide, you might need to adjust by adding more fabric to ensure full coverage. Write down the width measurement.
Measure the Height of Your Cabinet
Next, measure the height of your cabinet from the top to the bottom. Make sure the tape measure is straight so you get an accurate measurement. This will tell you how long your fabric should be. If you want a little extra fabric hanging down, add a few more inches to your measurement.
Add Extra for Hemming
Always add a little extra fabric to each side – about 2-3 inches. This gives you room to hem the edges neatly without worrying about them fraying. If you’re doing a bottom hem, you might need to add a little more. A good rule of thumb is to add an extra 2-3 inches on each side. Please keep it simple. The extra fabric will make it easier to make the curtain look polished.
Determine Fabric Amount
To figure out how much fabric you’ll need, follow this simple formula:
- Take the width of your cabinet and multiply it by 2 (for full coverage).
- Then, add the height of your cabinet.
- This will give you a rough idea of how much fabric to buy.
- Keep in mind the type of fabric, too, as some materials might need extra length for the desired effect.
For example, if your cabinet is 30 inches wide and 24 inches high, you’ll need a piece of fabric around 60 inches by 27 inches. Write down your fabric measurements before heading to the store.
Step-by-Step DIY Cabinet Curtain Instructions
Let’s get to the fun part! Whether you want to sew or use a no-sew method, I’ll show you how to make your cabinet curtains step by step.
1. Basic Sewing Method
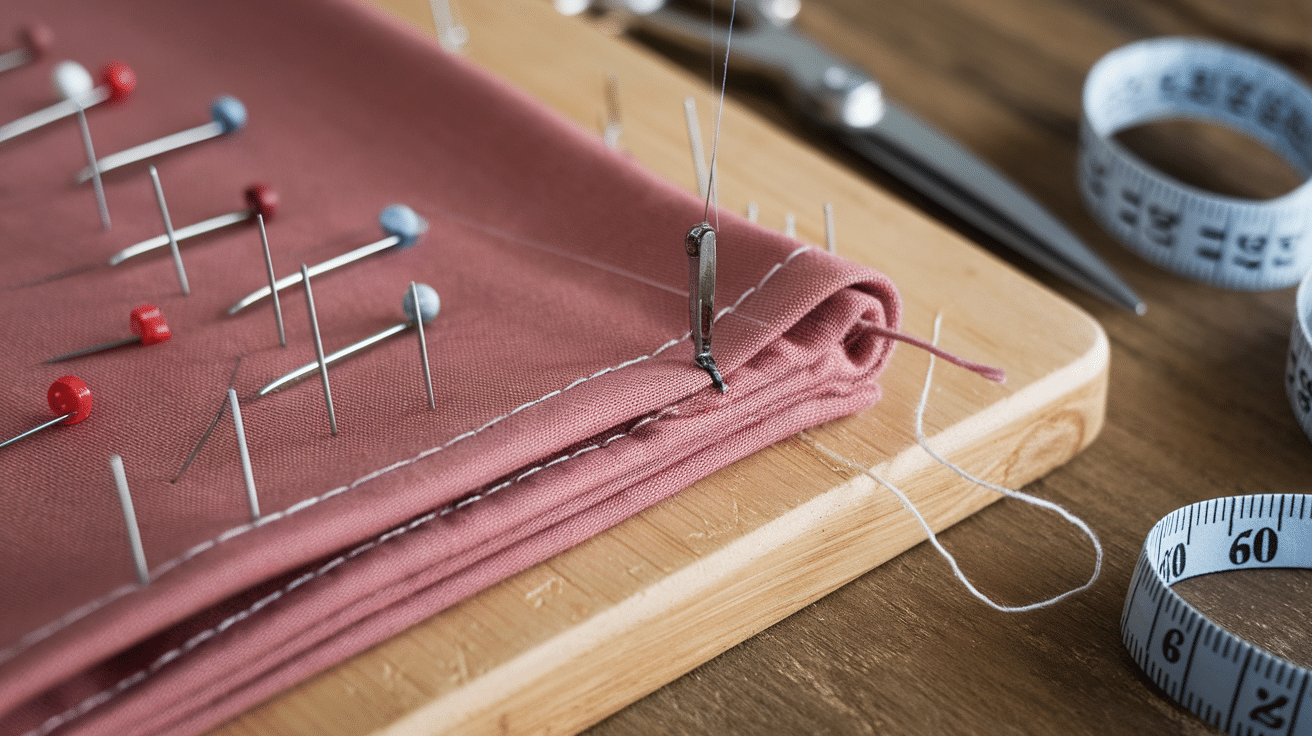
If you’re sewing your curtains, start by folding the edges of your fabric.
- Fold over about 1 inch on each side.
- Pin the folds in place.
- Sew along the edges to create a clean, neat hem.
Once you’re done, you’ll have your basic curtain shape.
2. No-Sew Method
Don’t want to sew? No problem! You can use fabric glue or iron-on hem tape.
- Fold the fabric edges over by 1 inch.
- Apply glue or hem tape along the fold.
- Press down firmly. It’s that easy!
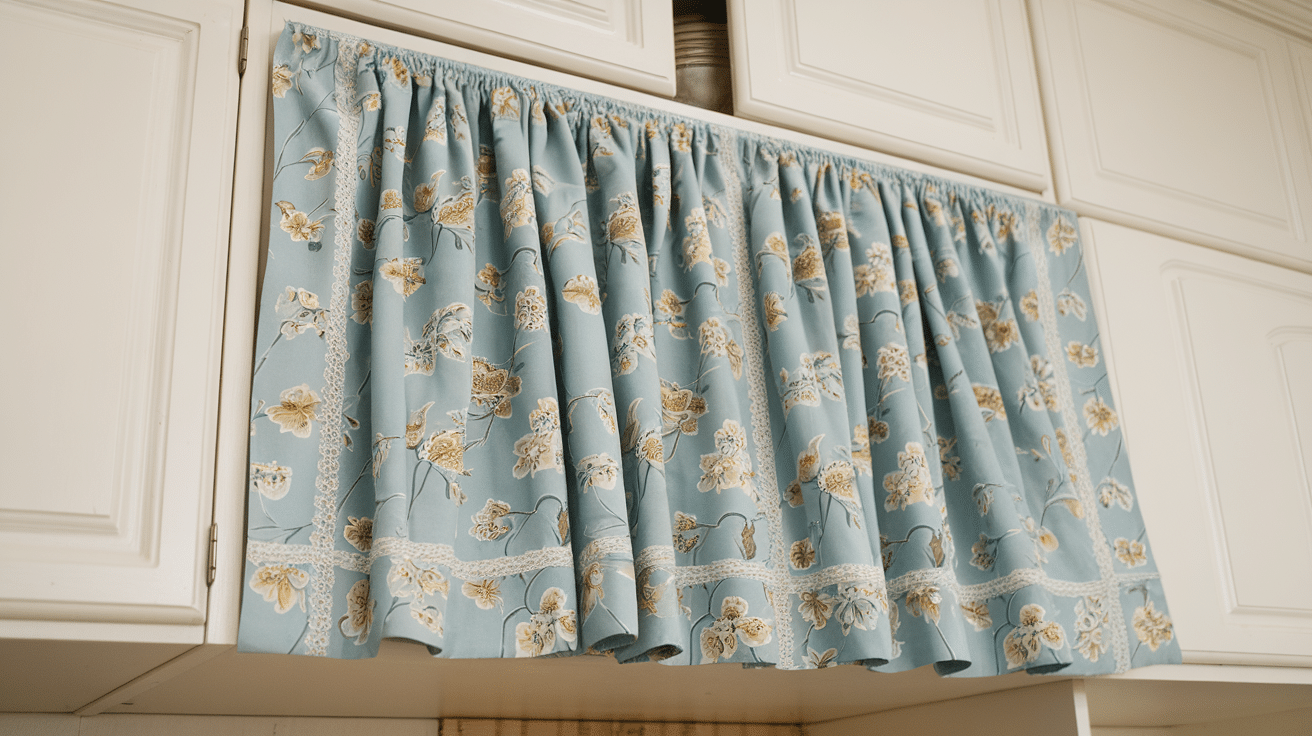
3. Adding a Pocket or Pleats
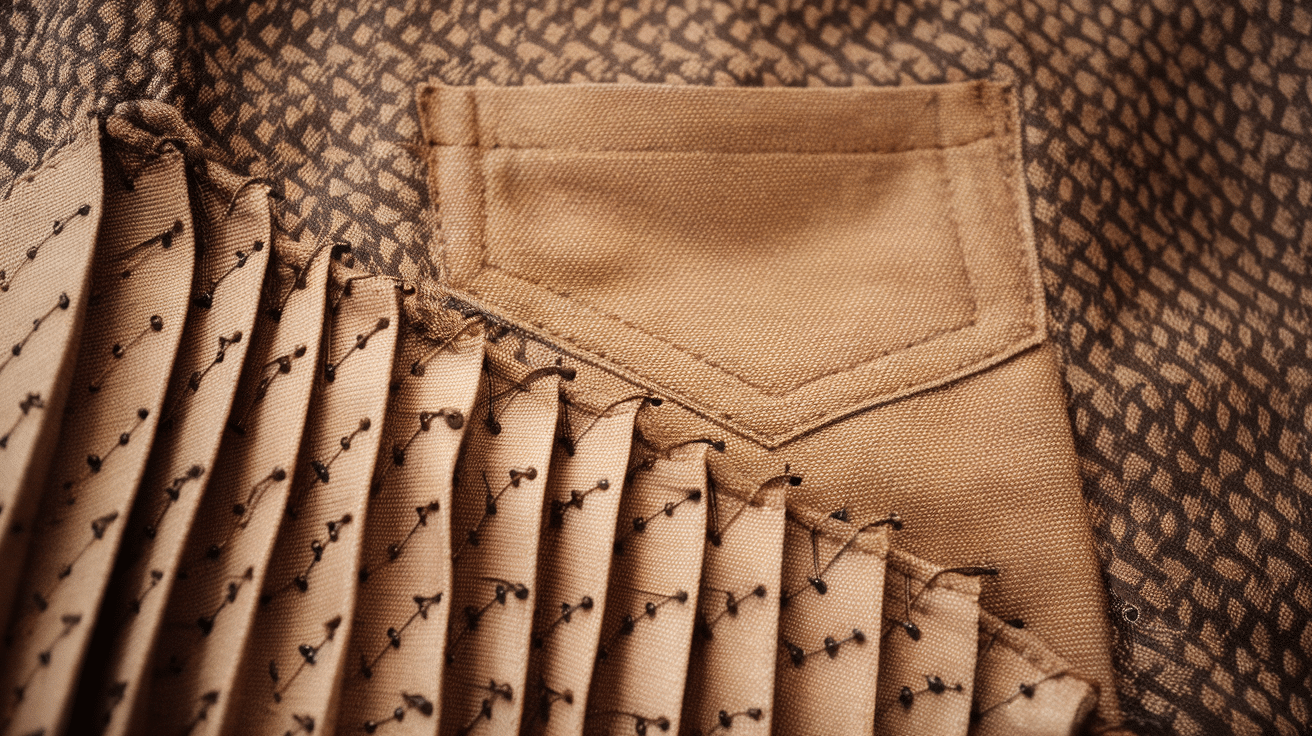
Want a more tailored look? Here’s a trick:
- Pocket: To create a pocket for the rod, fold the top edge of the fabric over by 3-4 inches.
Sew or glue it in place. - Pleats: For a pleated look, fold the fabric in small sections. Pin each fold in place before sewing or gluing.
These little details can make your curtains look extra special.
4. Attaching the Curtains
Now it’s time to hang your curtains!
- If you’re using a curtain rod, slide the fabric over the rod.
- If you prefer a tension rod, place it inside the cabinet and rest the fabric on it.
- For a more custom look, attach the fabric at the top with hardware and hang it from the rod.
Whatever method you choose, it should be quick and easy.
And just like that, you’re ready to enjoy your new DIY cabinet curtains! Simple, right?
Creative Design Ideas
Now, let’s get creative. This is where you can make your cabinet curtains truly your own.
Styles to Consider
There are many ways to go when it comes to style. Here are a few ideas:
- Modern – Clean lines, minimal patterns, solid colors. Think of sleek, simple fabrics.
- Rustic – Natural, earthy tones. Fabrics like burlap or linen add texture and warmth.
- Vintage Floral prints, soft pastels, and maybe a touch of lace are perfect for a cozy, nostalgic vibe.
Don’t be afraid to mix styles. It’s your space.
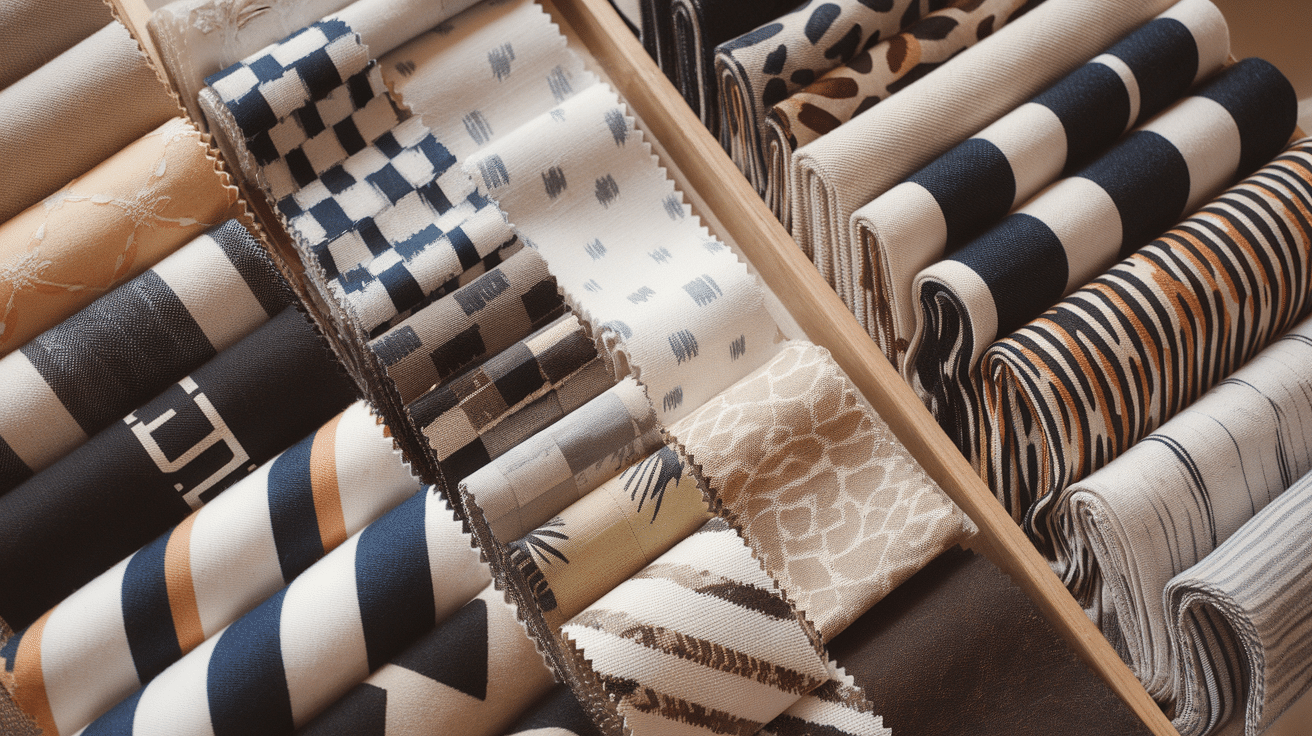
Fabric Choices
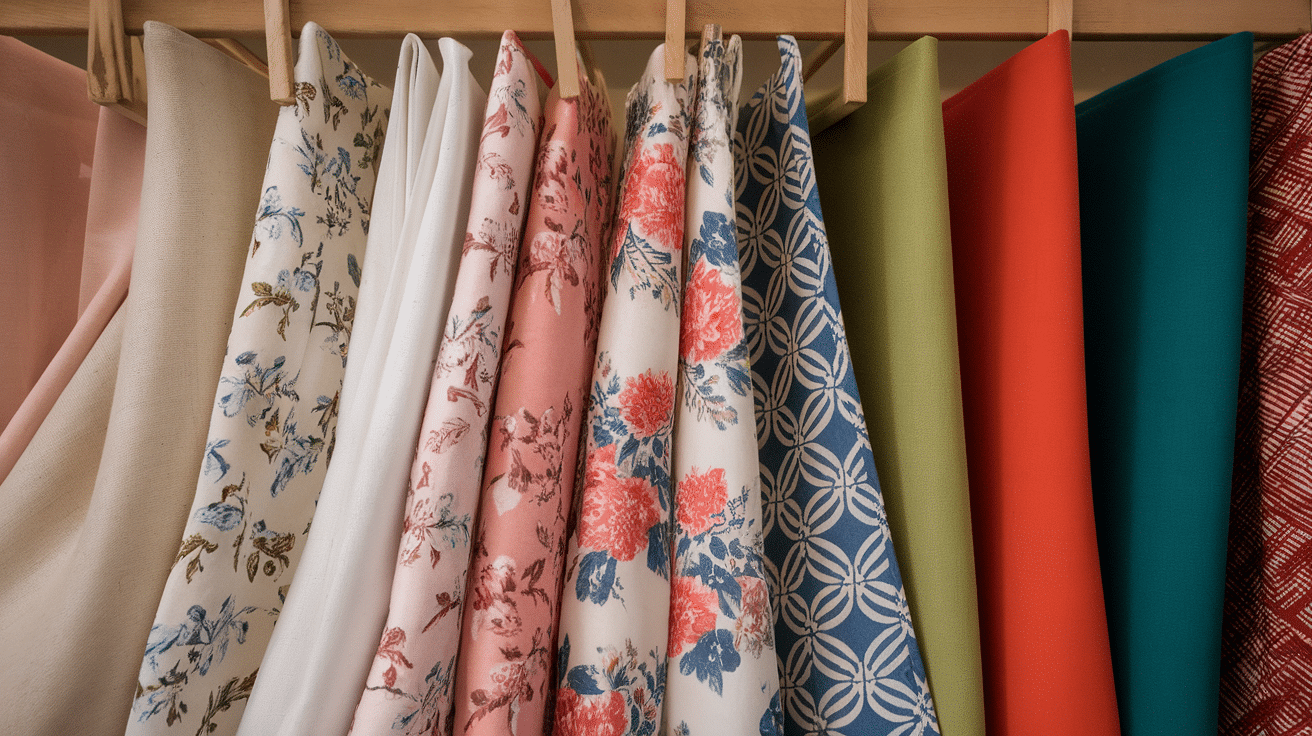
The fabric you choose will change the whole look of your curtains. Here are some great options:
- Linen – Soft, natural, and breathable. Great for a fresh, relaxed look.
- Patterned Prints – Floral, geometric, or abstract prints can add personality and charm.
- Bold Solids – Sometimes, a simple, solid color is all you need to make a statement.
You can choose based on your style or room vibe.
Color Ideas
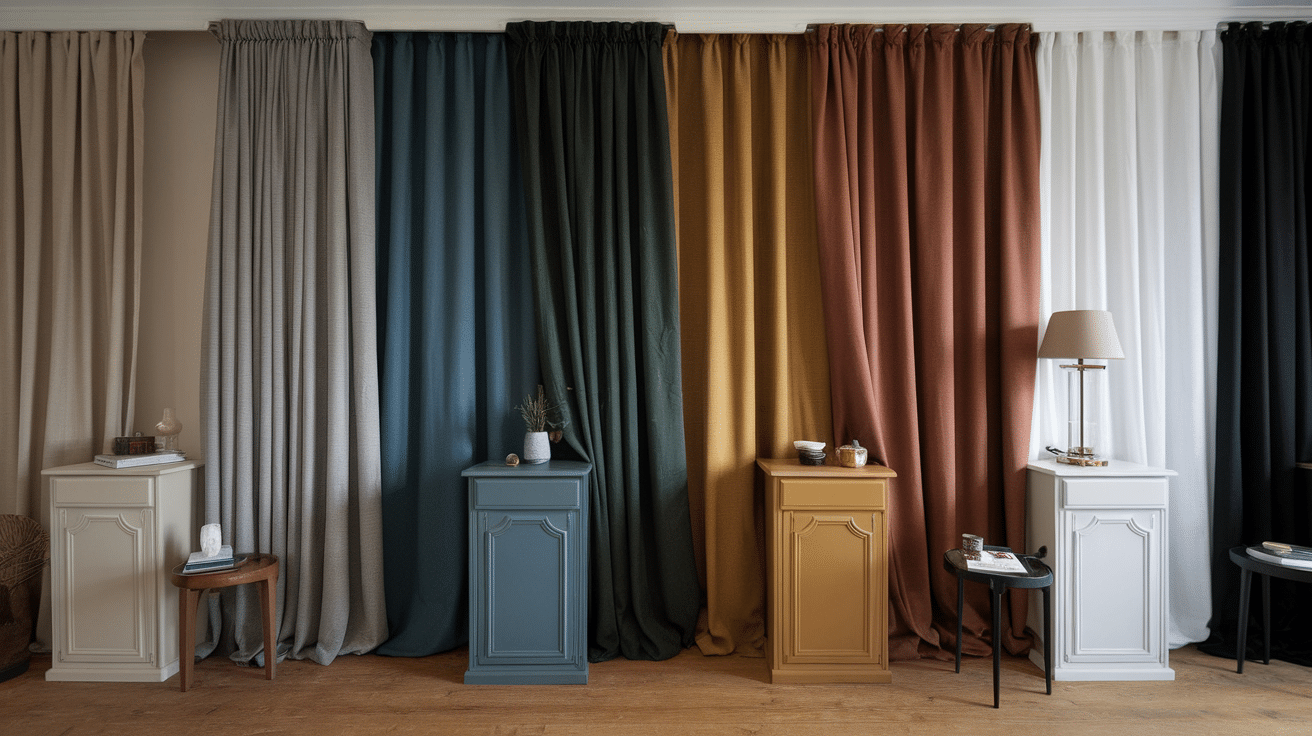
The color scheme should fit the feel of your space. Here are some ideas:
- Neutral tones (like beige or gray) for a calming, timeless look.
- Bold blues or greens for a pop of color that feels fresh.
- Earthy tones (like rust or mustard) for a warm, cozy atmosphere.
- Black and white for a clean, modern contrast.
Pick a color that makes you feel good. It should tie your room together.
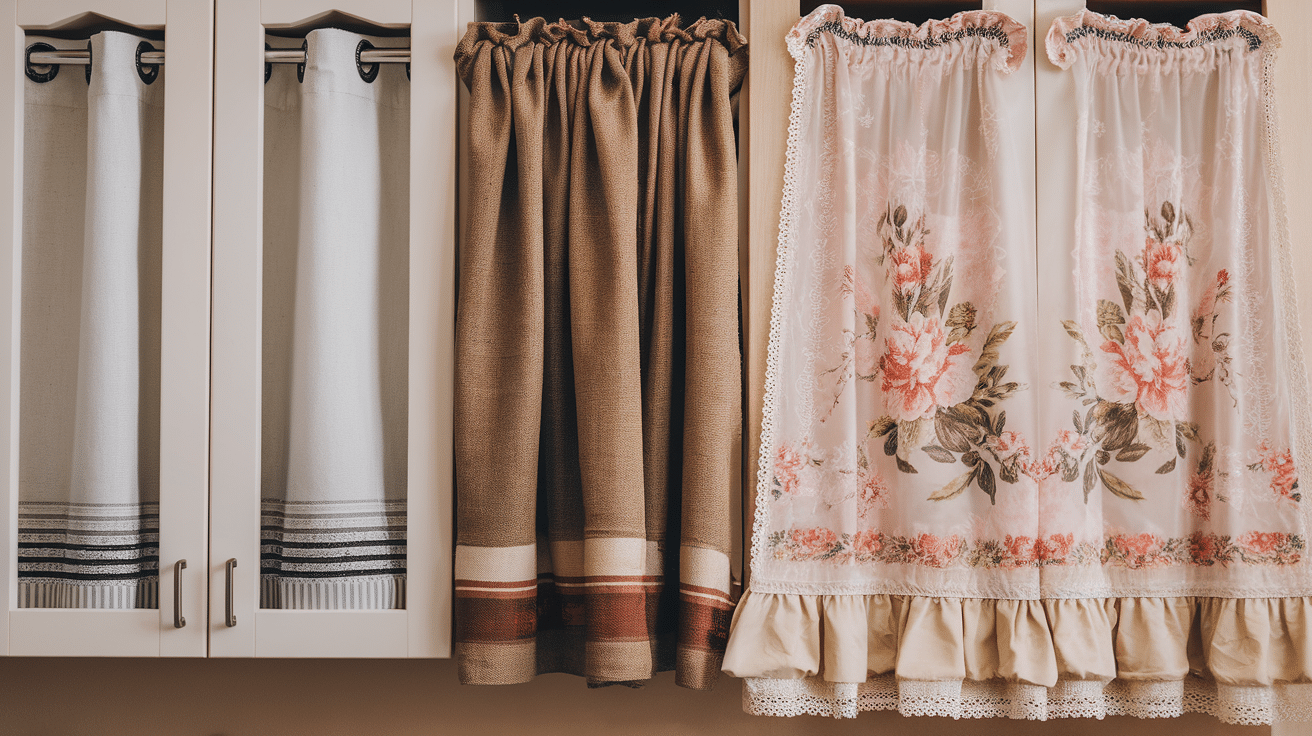
Where to Use DIY Cabinet Curtains in Your Home
So, where can you use your new DIY cabinet curtains? The possibilities are endless. Let’s explore a few ideas.
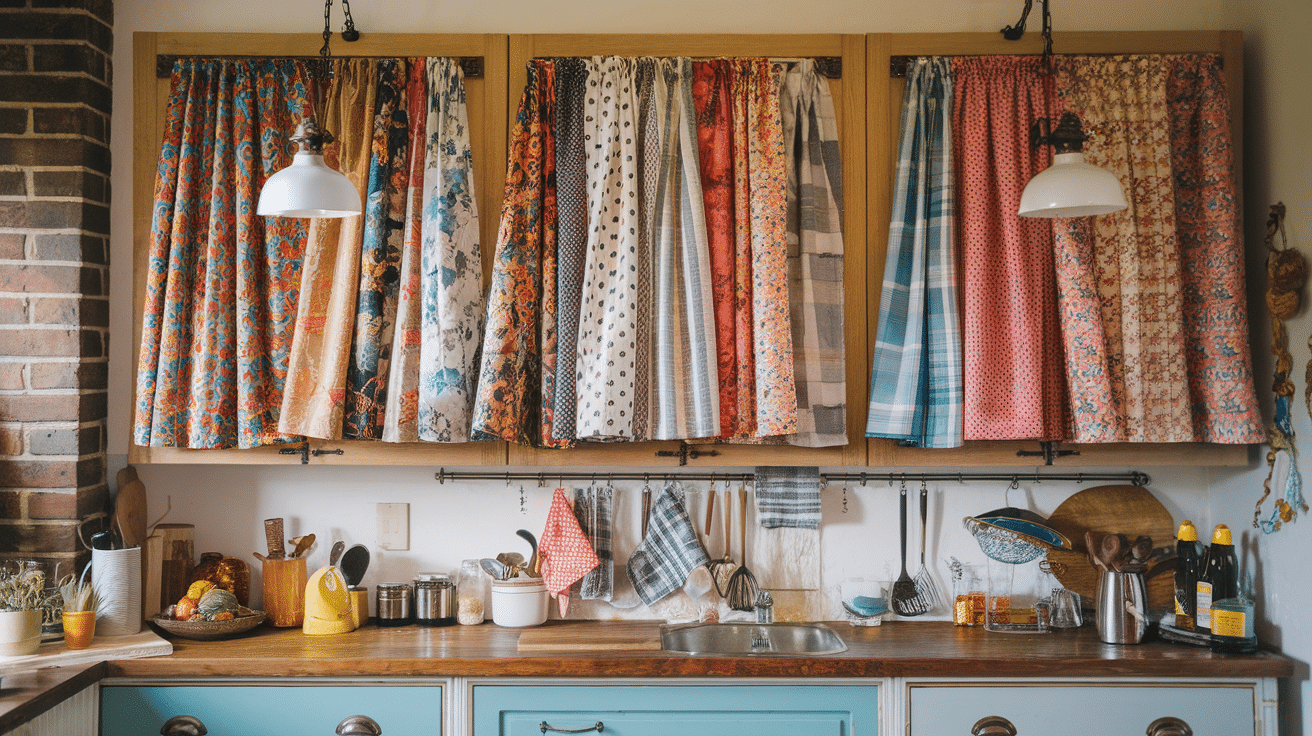
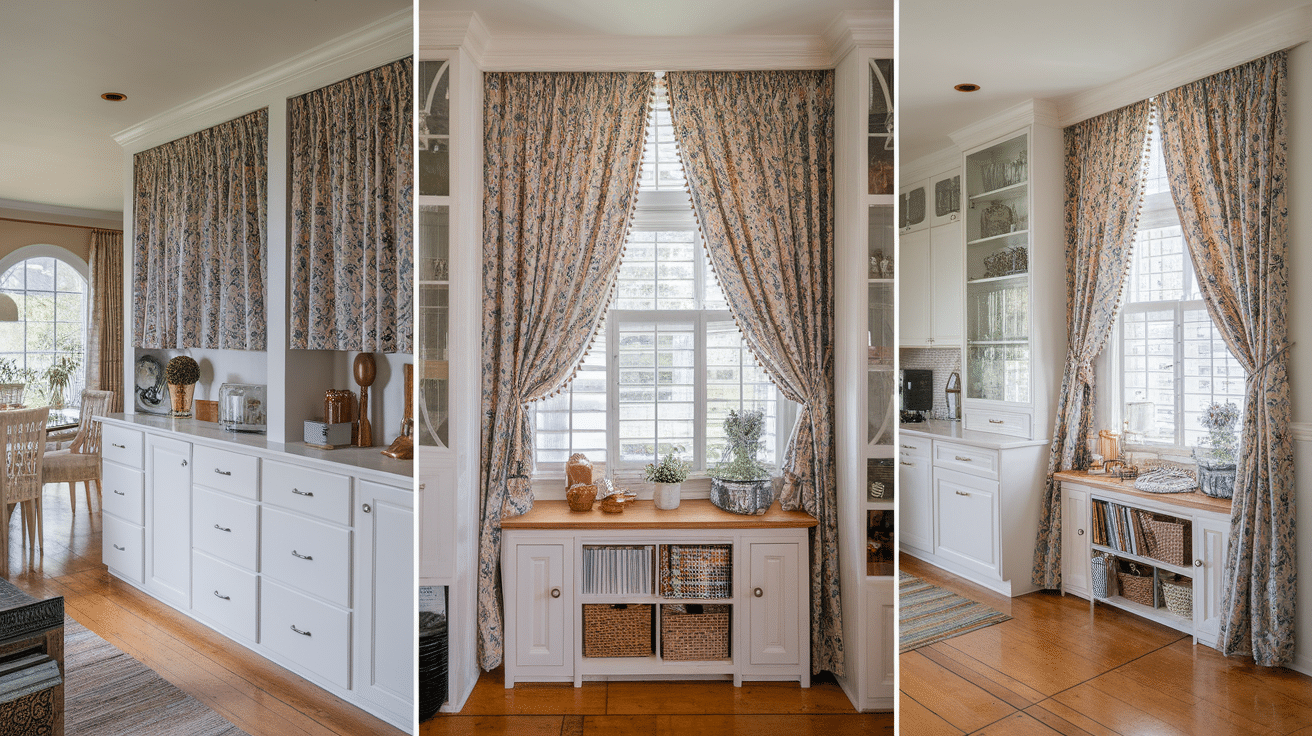
Kitchen Cabinets
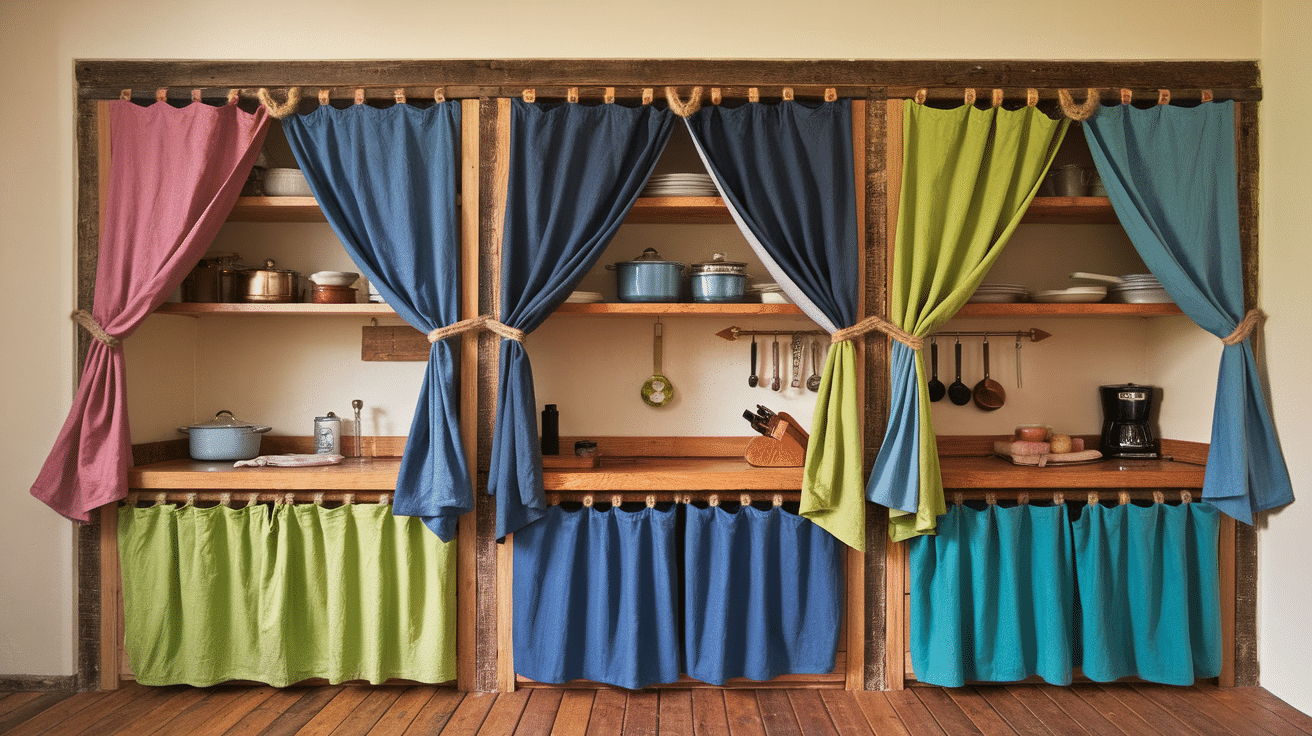
Cabinets in the kitchen are a great place for curtains. You can hide clutter or create a more welcoming feel. Add a pop of color or a fun pattern. It’ll make your kitchen look fresh and cozy.
Bathroom Vanities
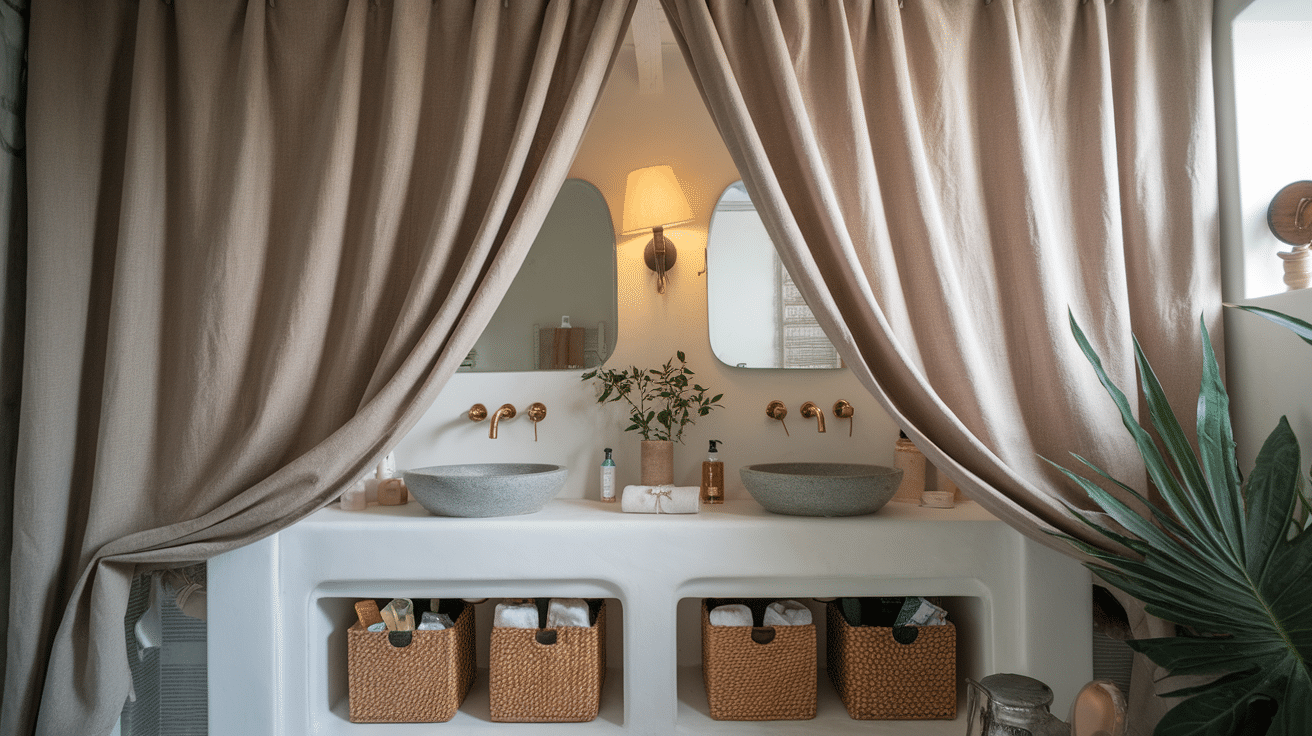
Bathroom vanities are another perfect spot. Instead of traditional doors, use a curtain to hide cleaning supplies, towels, or toiletries. It’s a simple way to give your bathroom a softer, more relaxed vibe.
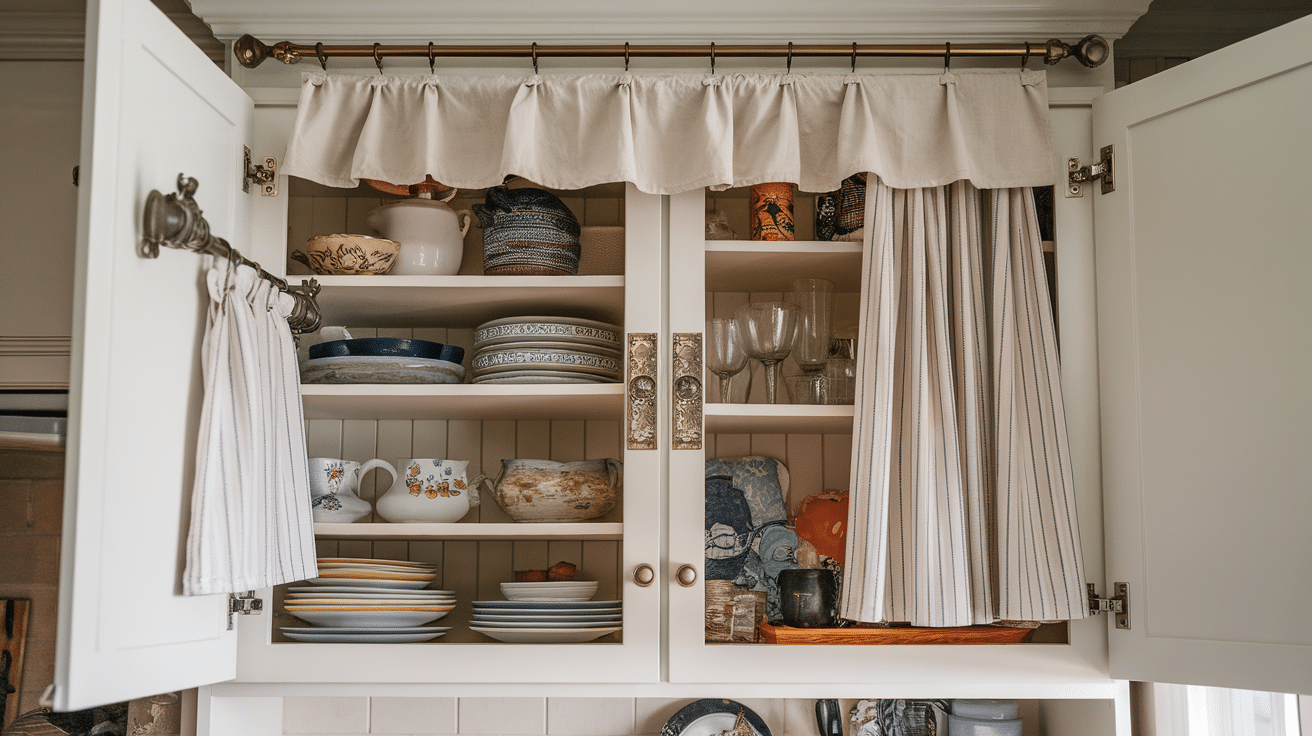
Storage Cabinets in Other Rooms
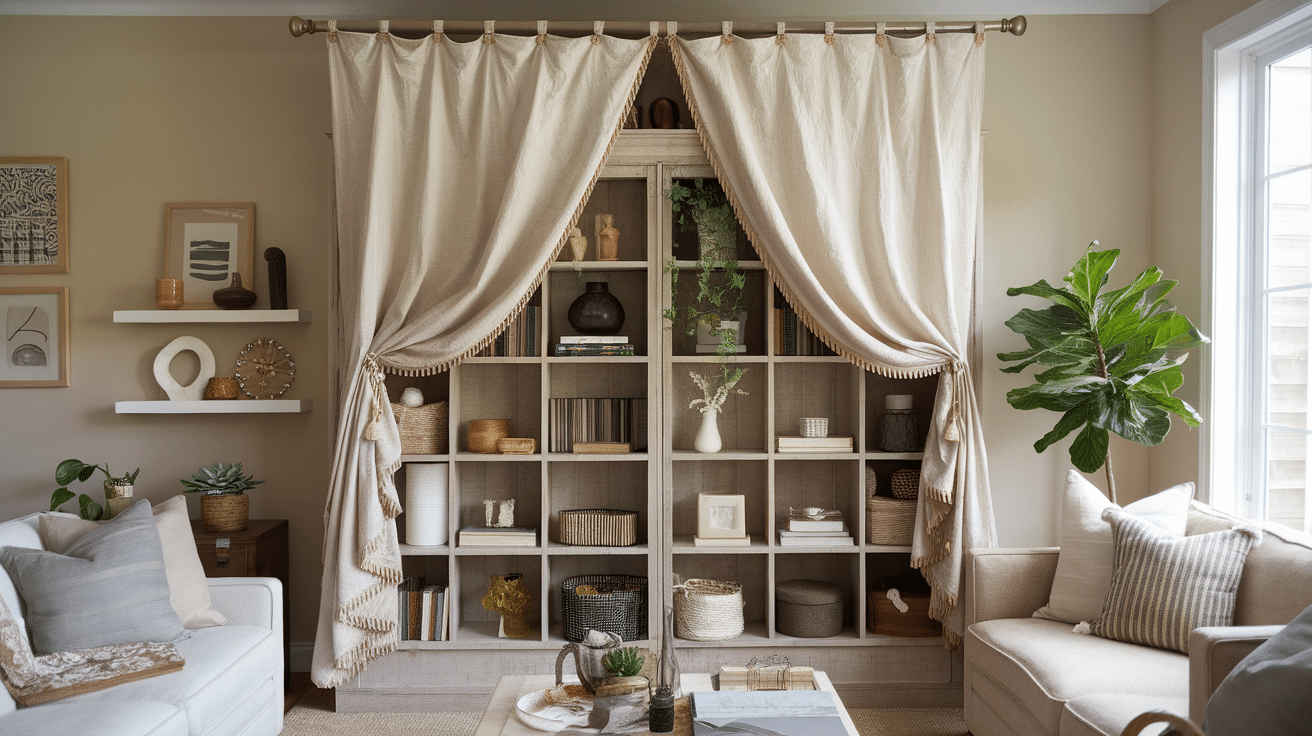
Think about storage cabinets in living rooms or bedrooms. DIY cabinet curtains are a great way to keep things organized and out of sight. You’ll keep everything neat and still add style to your space.
Practical Uses
These curtains look great and are also practical. They can hide clutter in kitchens and bathrooms and make your space feel cozy and inviting. And if you want to change things up, it’s an easy update. Try adding cabinet curtains in places where you want a bit of style and function. It’s that simple!
Tips for Maintaining Your DIY Cabinet Curtains
Once your DIY cabinet curtains are up, you’ll want to keep them looking fresh. Here are a few easy tips to maintain them over time.
Washing and Care
It’s important to take care of the fabric so it lasts.
- Read the fabric label first to see if it’s machine washable.
- For most fabrics, wash in cold water to avoid shrinkage.
- Line dry or use a low-heat setting on the dryer. This helps prevent the fabric from fading or getting damaged.
If your fabric is delicate, you may want to hand-wash it or use a gentle cycle.
Adjusting the Curtains
Over time, your curtains may need a little adjustment. Here’s what you can do:
- Check the length – If the fabric shrinks a bit after washing, you may need to re-hem the bottom.
- Adjust the fit – If the curtain starts to sag, tighten the tension rod or move the curtain rod up.
- Smooth out wrinkles – If the fabric gets wrinkled, a quick iron or steamer can help.
These small adjustments will keep your curtains looking neat and functional.
Conclusion
In this article, I’ve covered everything you need to know about making DIY cabinet curtains. From measuring your cabinets to choosing fabric and hanging your curtains, I’ve made it easy for you to get started.
By following these steps, you can solve the problem of plain, outdated cabinets and add a personal touch to your space. I’ve shared simple tips that you can trust to make your DIY project a success.
Remember, small changes like this can have a big impact on your home decor. So, get creative and try your own DIY cabinet curtain project. You’ll love the transformation it brings to your space!
Frequently Asked Questions
How Do I Choose the Right Fabric for My Cabinet Curtains?
Choose a durable fabric that fits your style. Linen, cotton, and polyester are good options, depending on your room’s look and the curtain’s purpose.
Can I Use a Tension Rod for Larger Cabinets?
Yes, you can. Just make sure the tension rod is strong enough to hold the fabric and fits securely inside the cabinet frame.
How Long Will My Diy Cabinet Curtains Last?
With proper care, your DIY cabinet curtains can last for years. Wash them gently and adjust them as needed to keep them looking fresh.